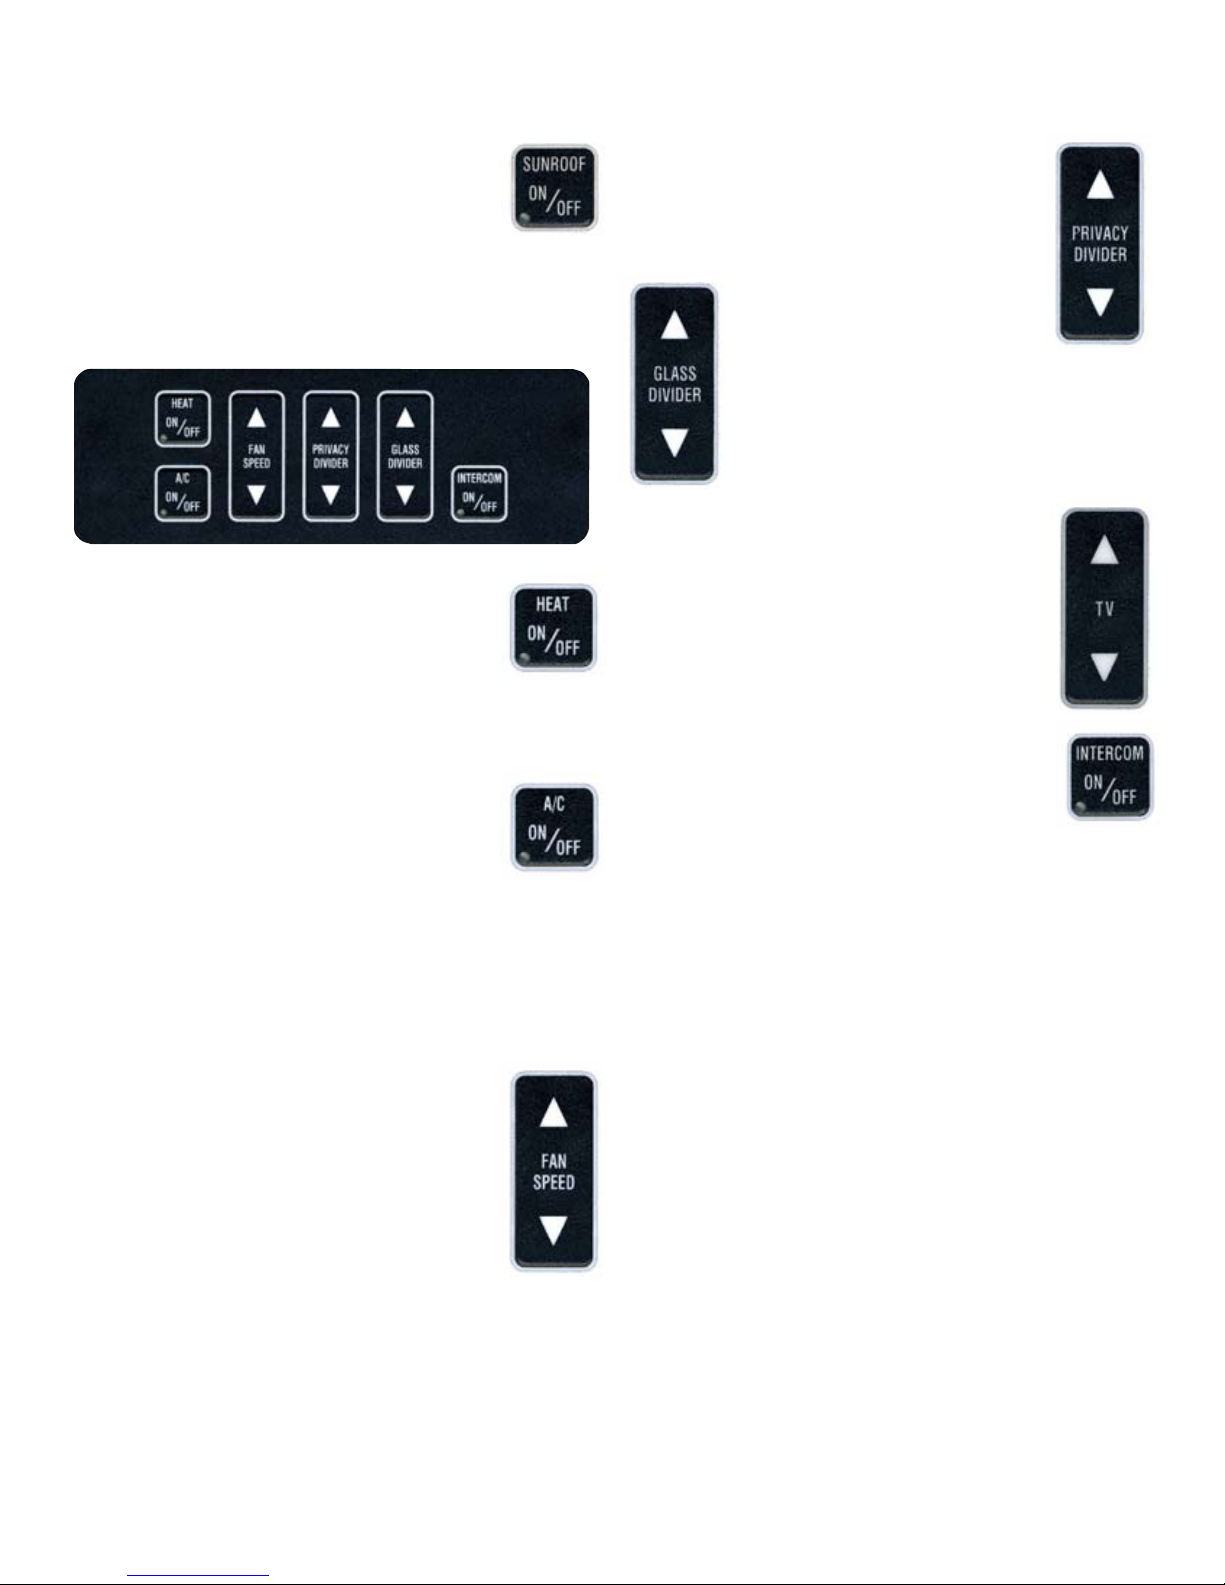
Privacy Divider*
This button adjusts the privacy divider,
pressing up will raise the divider and
pressing down will lower the divider.
Glass Divider*
This button adjusts the glass
divider, pressing up will
raise the divider and pressing down will
lower the divider. Glass dividers are not
available in some models.
TV *
This button is an optional button that
replaces the glass divider button when the
limousine is equipped with the retractable
TV. Pressing the up button will raise the at
panel TV and pressing the down button
conceals the TV.
Intercom On/Off*
This button turns on the rear to front hands
free intercom. Pressing the button will
activate the intercom and will illuminate
the green indicator light. With the light on speak
freely toward the button to communicate with the
driver. Press the button again to shut off the two-
way intercom.
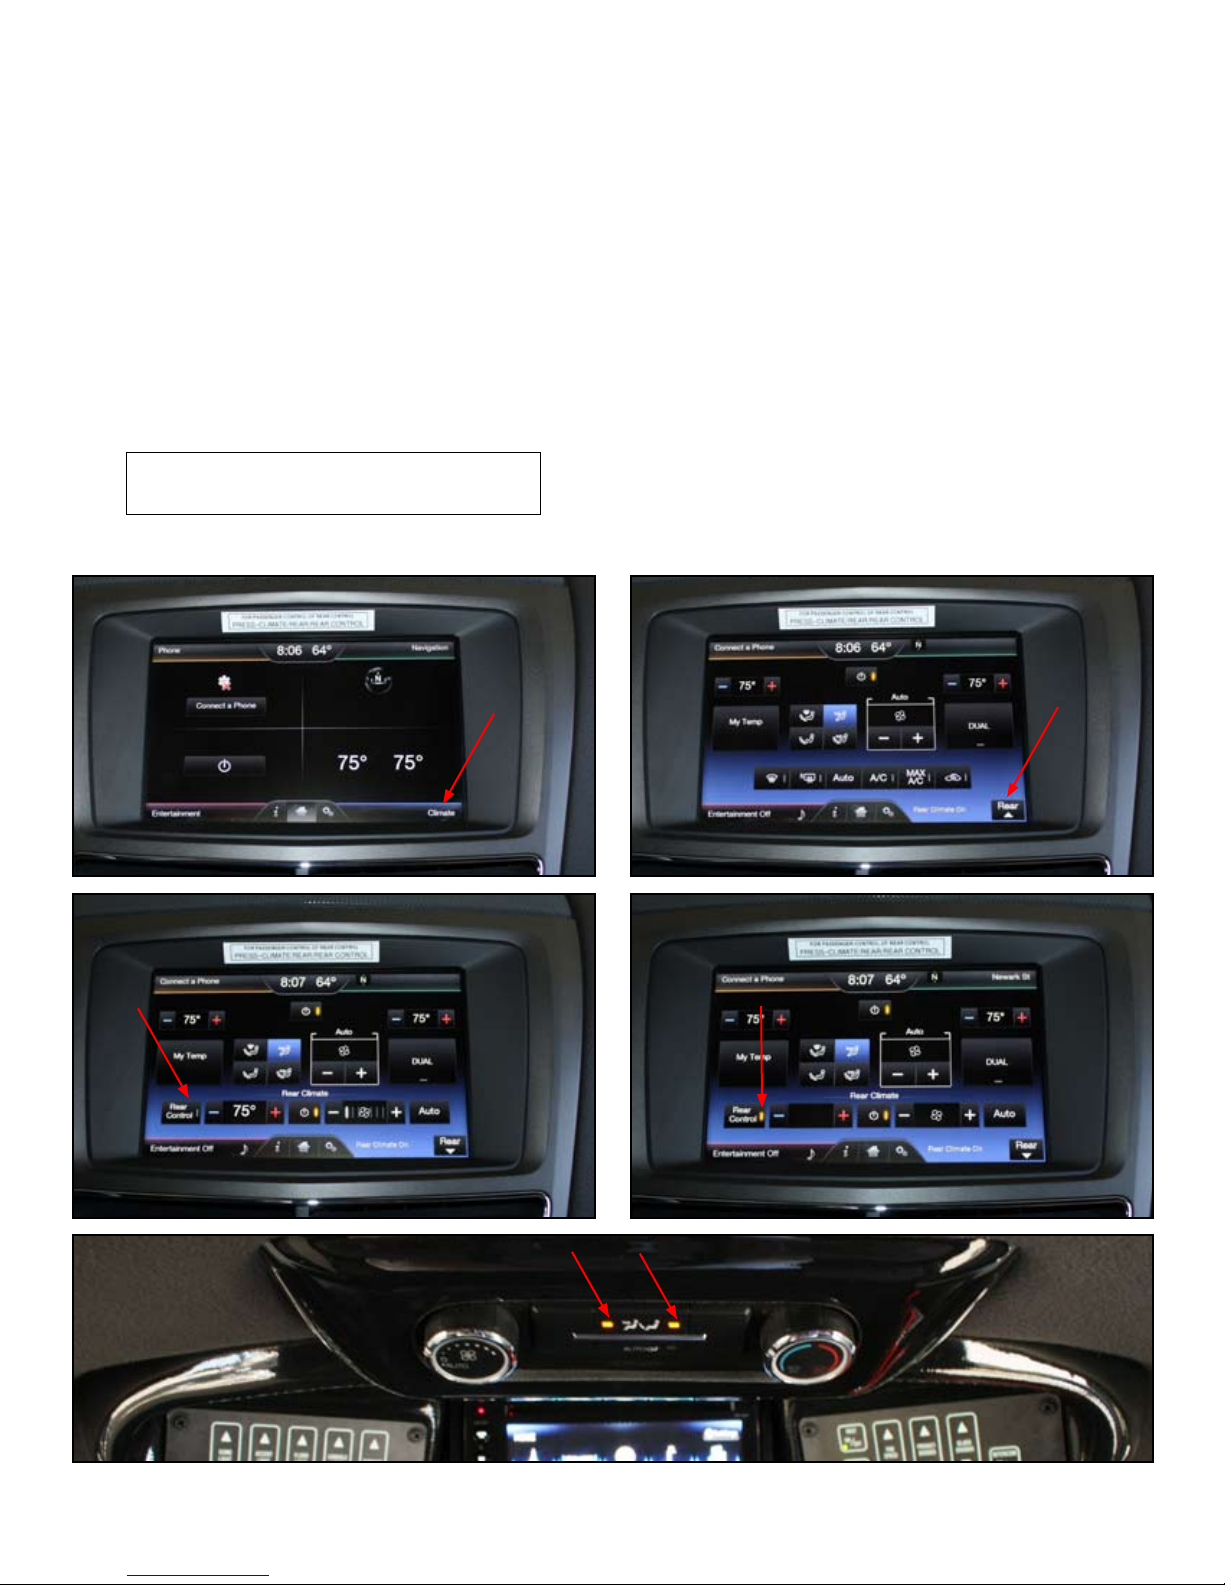
Factory Rear Heat/AC Control
This panel controls the original equipment rear Heat
and AC. The driver must allow the rear panel to
control the rear heat by pressing CLIMATE/REAR/
REAR CONTROL on the drivers display. This
will light up the rear panel and the rear passenger
will have full control. There is a oor and ceiling
setting as well as high low fan speed and automatic
temperature control. (see detailed instructions next page)
NOTE: The manual heater control valve (optional)
must be in the open or on position and the Royale
heat must be on for the Factory Rear Heat to
function.
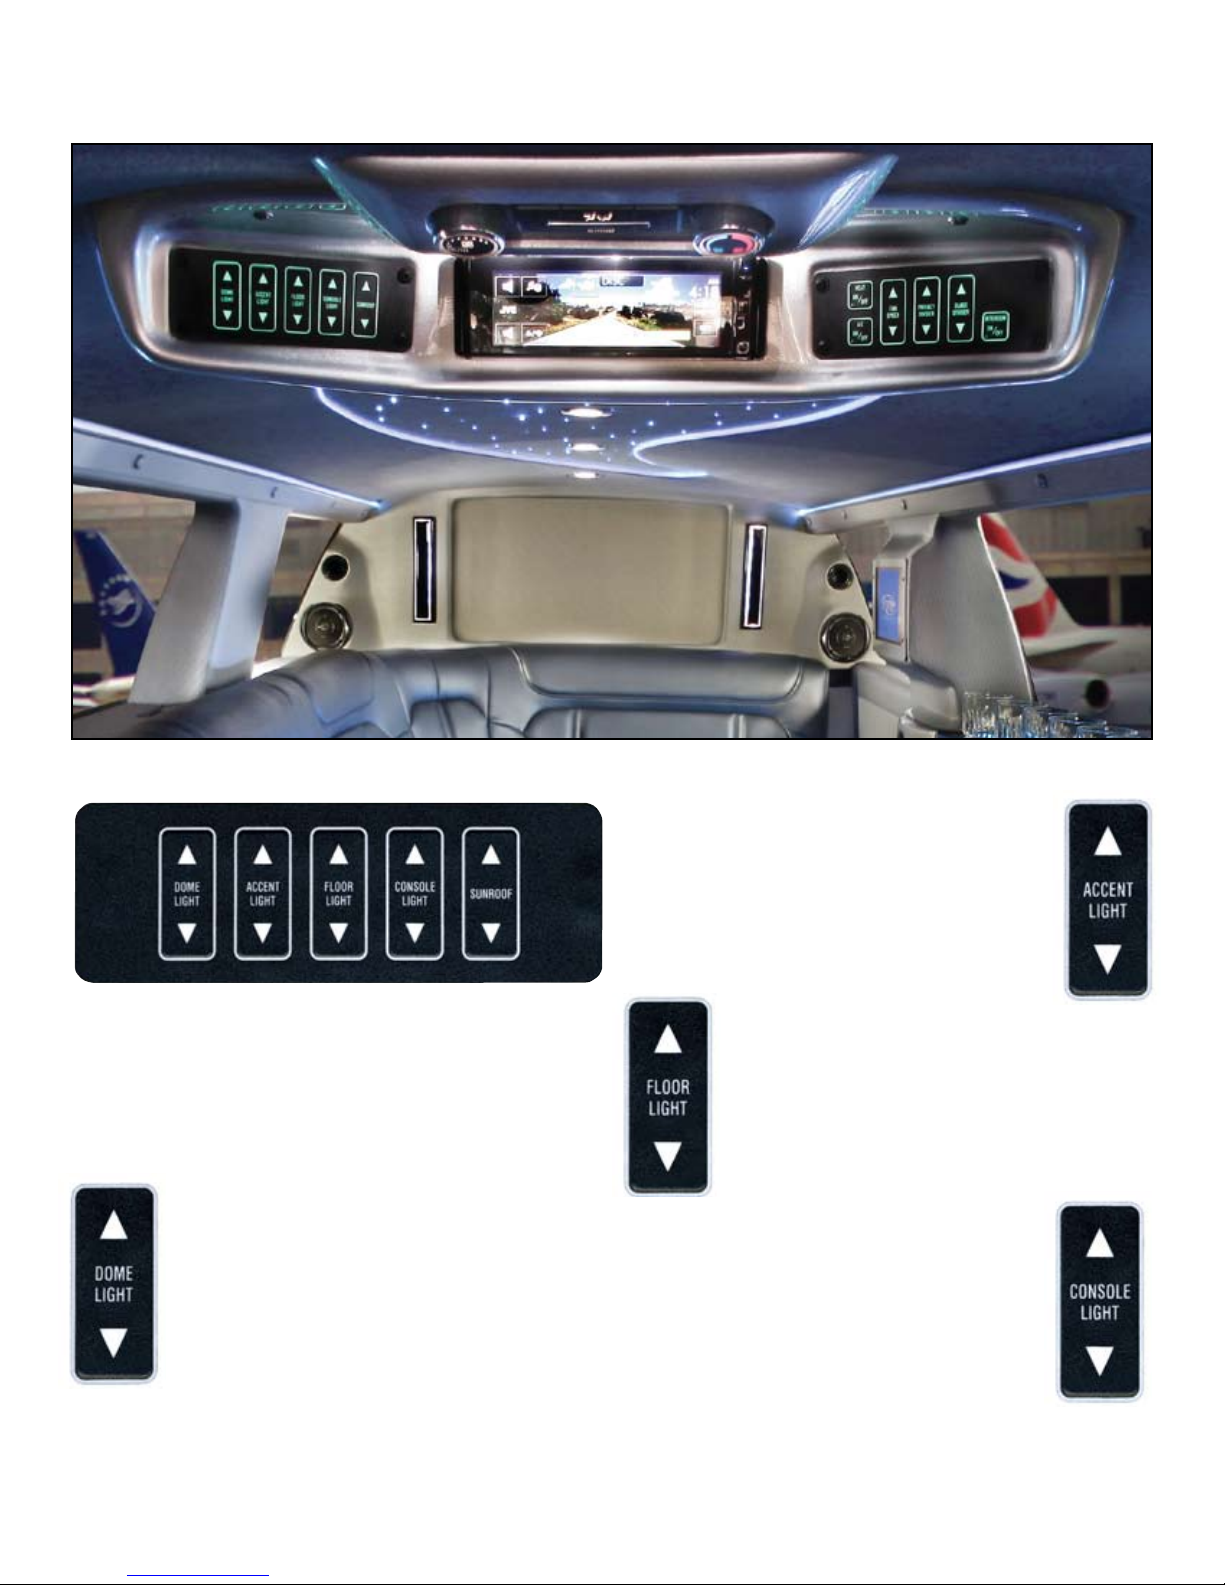
Sunroof*
This button controls the sunroof, pressing
the up arrow will open the sunroof and
pressing the down arrow will close the
sunroof. Be sure to completely close the sunroof for a
tight seal to avoid water leaking in to the limousine.
Heat On/Off
This button activates the rear heat. Press
this button to activate the rear heat, press
it again to turn the heat off. You may also
switch directly to A/C by pressing the A/C button
and the heat will automatically turn off.
A/C On/Off
This button activates the rear air
conditioning. Press this button to activate
the rear air conditioning, press it again to
turn the air conditioning off. You may also switch
directly to heat by pressing the heat button without
turning off the heat. It may take the system a few
minutes to completely circulate the heat out of the
system when switching from heat to A/C.
Fan Speed*
This button adjusts the rear fan speed.
Pressing the up button adjusts the fan
speed faster for more passenger cooling
or heat and pressing the down button
adjusts the fan speed lower for less
cooling or heat.
* Rear control panel features can be overridden by the driver's master control panel.
7
Passenger’s Cimate Control Panel