RV Media RV Blu-ray Player Features
·Full high-definition video playback at up to 1080p resolution for true High Definition quality.
·Upscaling of standard definition DVDs for enhanced picture quality at up to 1080p via HDMI
(better quality than playing a DVD on an inbuilt TV DVD player).
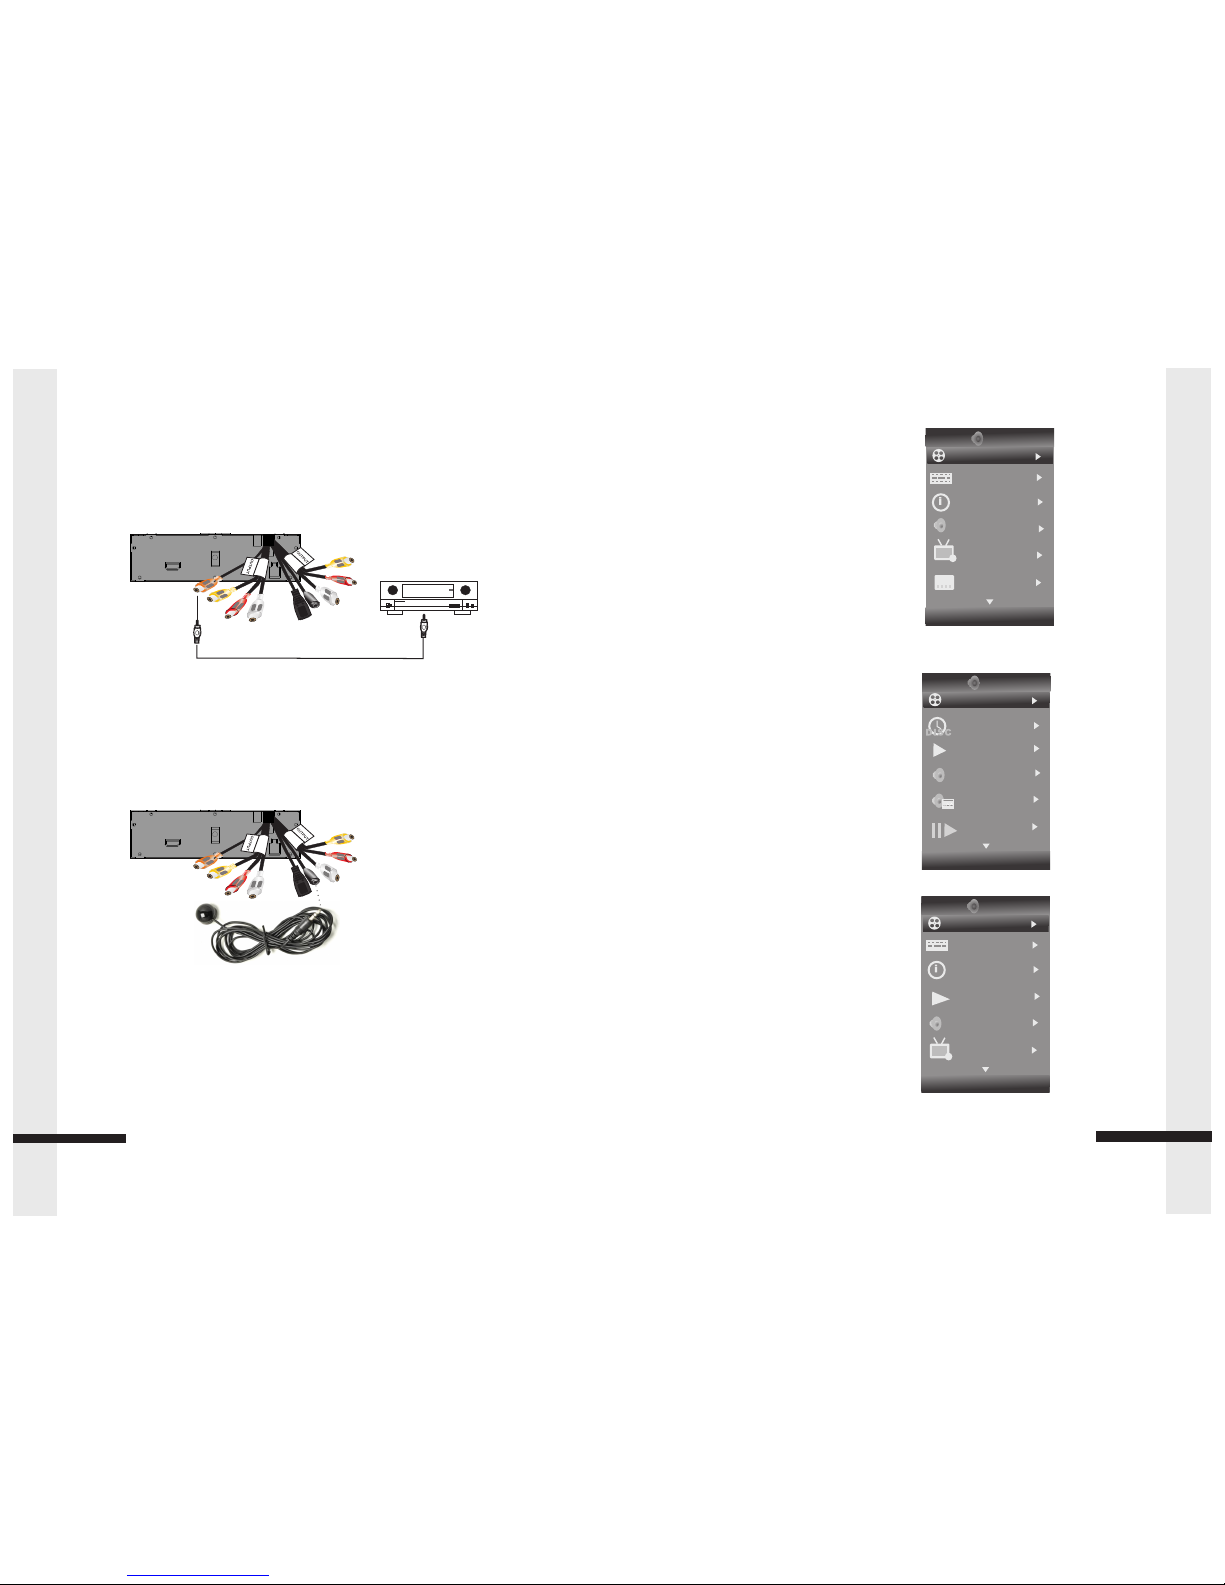
·Digital Audio output allows for optional Surround Sound audio systems.
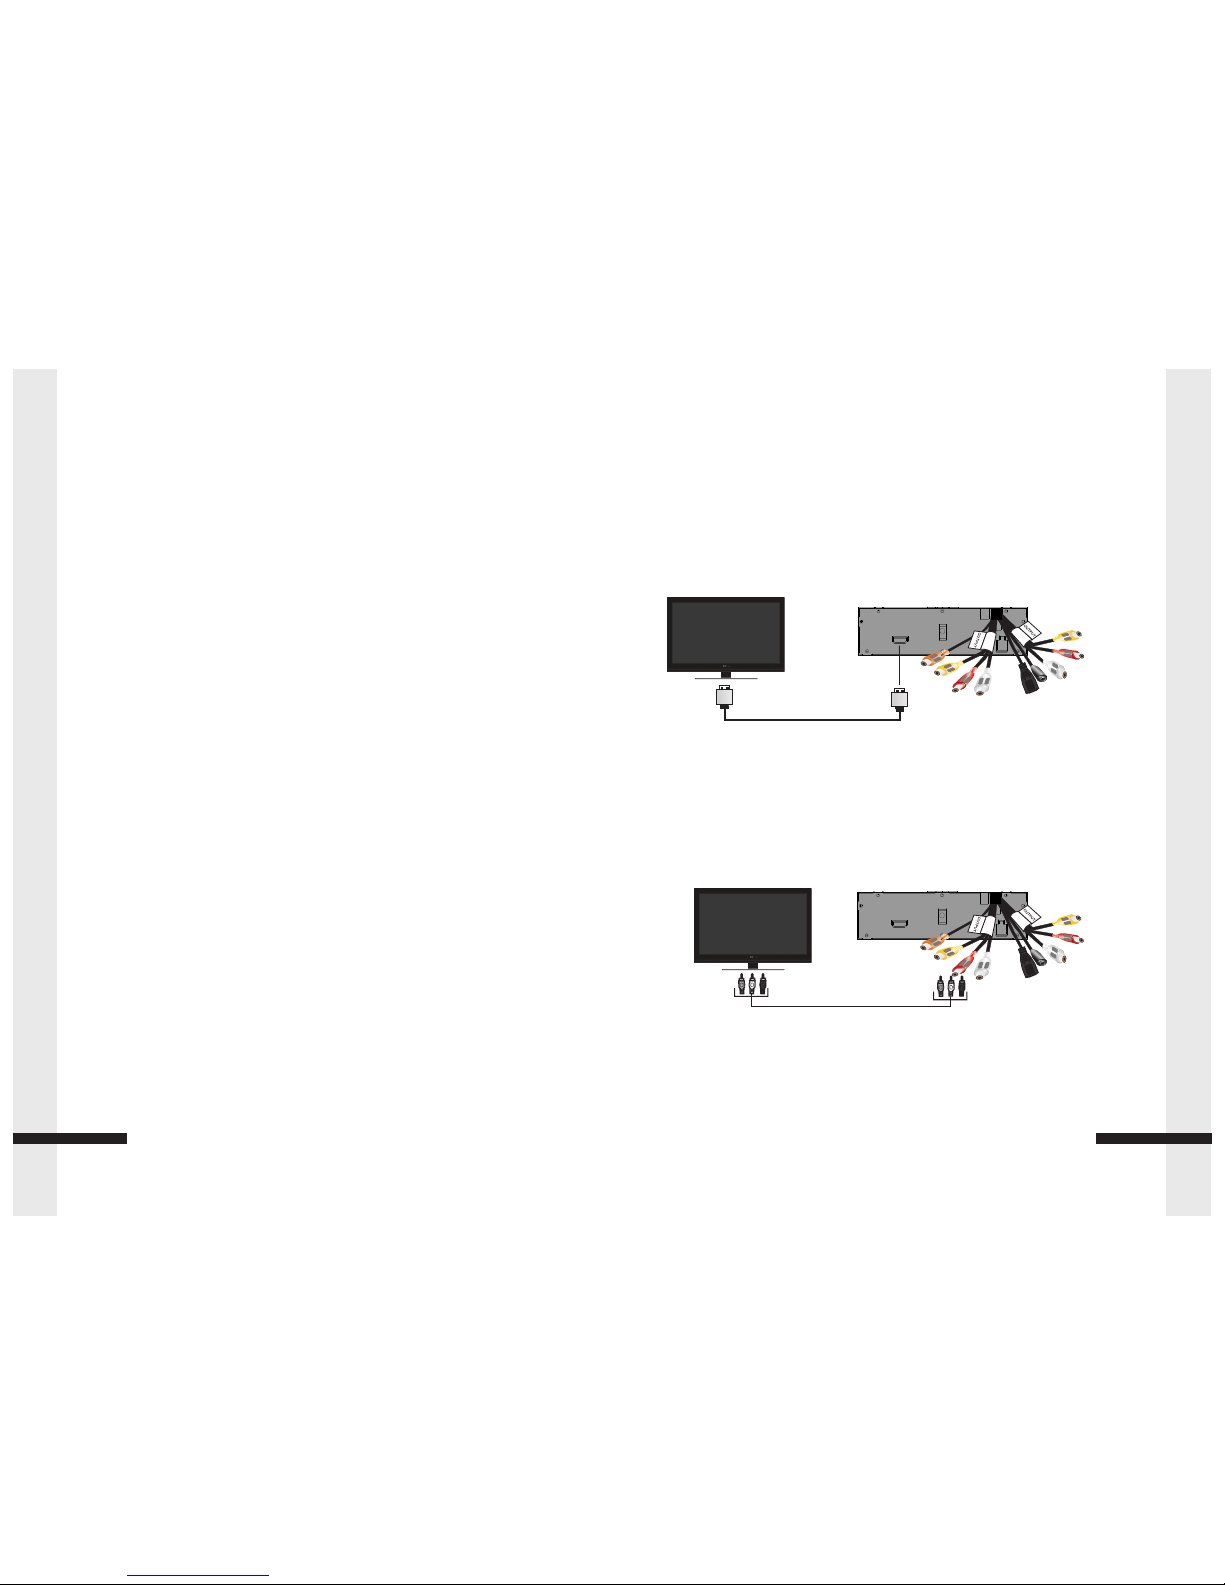
·Easy TV connection using a single HDMI cable (cable not included).
·Multiple outputs for connection to HD TV’s & standard composite monitors.
·On-screen menu display without interrupting playback (When supported by the
·Blu-ray Disc)
·HDMI 1080p/60Hz output (Blu-ray Discs only) that provides smooth playback of video with a
frame rate of up to 60 frames per second (TV must be connected with a HDMI cable and be
compatible with 1080p 60Hz)
Package Contents
This RV Media Blu-ray player is supplied with the following package contents
·Blu-ray Player
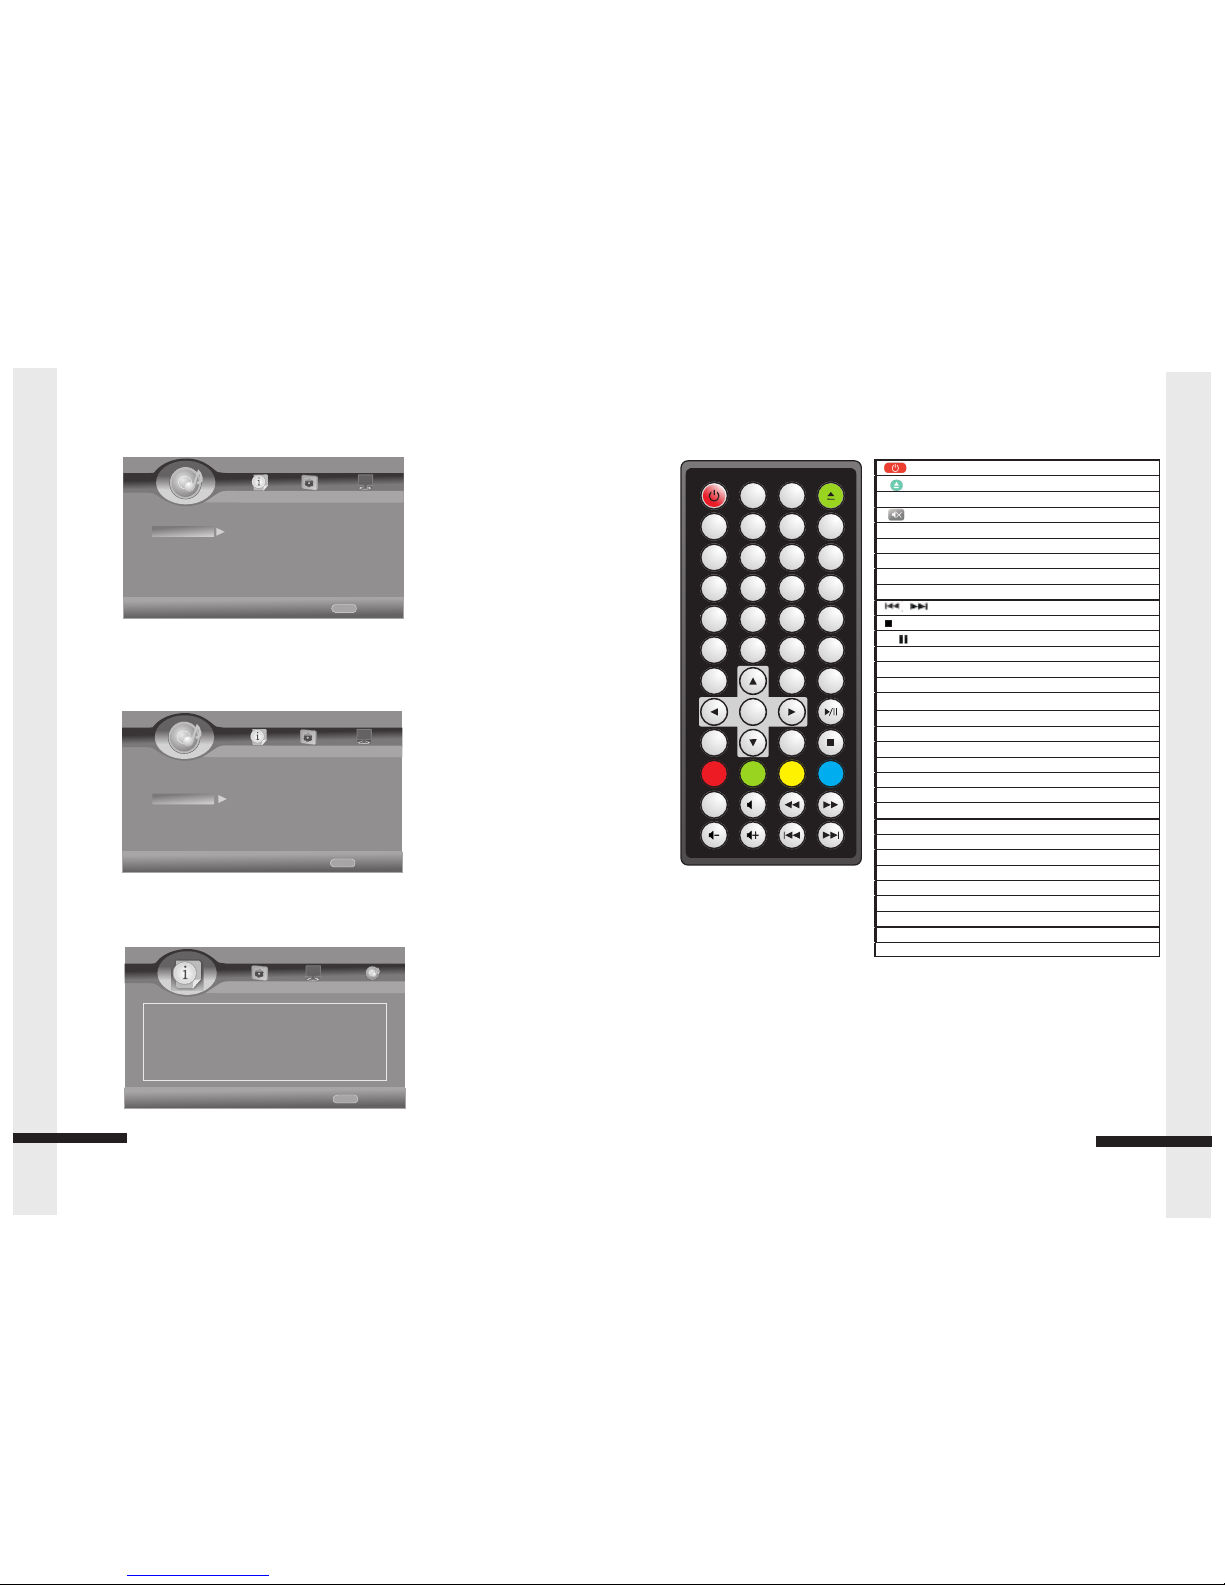
·Remote Control
·A/V cable
Quick-Start guide
Before using the Blu-ray Player please ensure it is mounted securely using the supplied
cradle or brackets. To connect your Blu-Ray Player please follow the steps below:
1. Connect the Blu-ray Player to your TV as per the instructions on P6. HDMI is the
recommended connection method for RV applications but other options are available
depending on your TV and intended use (product is also suitable for car, home etc)
3. Turn on the Blu-ray player.
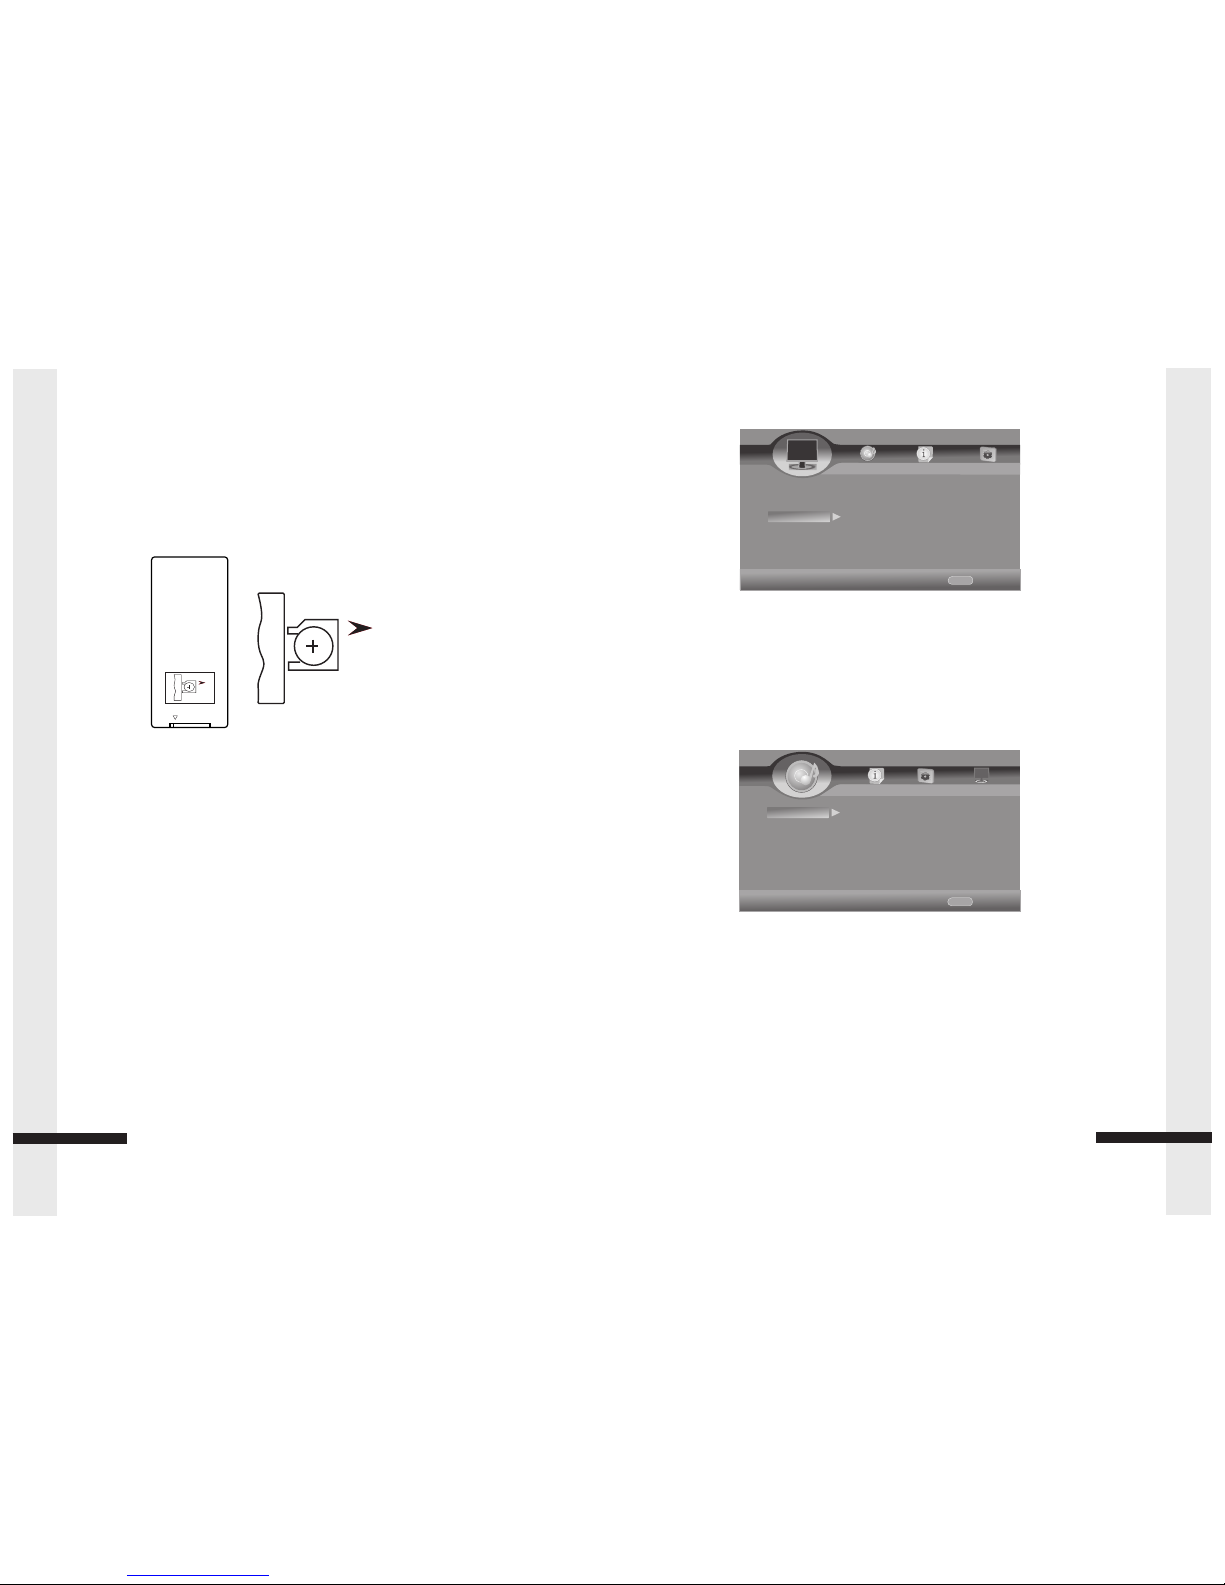
2. Insert the battery in to the remote.
4. Change the input on your TV to the corresponding input you used in step 1.
e.g. AV1 or HDMI1.
3
Contents & Quick Start Quide
Problem: While in the process of reading a disc, the disc ejects.
Solution: Make sure that the disc is not dirty.
The disc may be incompatible with your player. Try another disc.
Reset your player (Button 17 - see P5) with a fine point like a pencil or paper clip.
Problem: Audio or video pauses during playback.
Solution: Make sure that the disc is not dirty.
Reset your player as per the instructions above.
Problem: The player is turned on and the Blu-ray logo and/or menu appears, but there
is no playback from the disc.
Solution: Make sure that the disc is not dirty.
Reset your player. Try another disc.
Problem: The player freezes when reading a disc.
Solution: Reset your player. When you see the loading screen, press (eject) to remove
the disc. Clean the disc and try the disc again.
If your player freezes again, the disc may contain some content that is not compatible
with your player. Do no try playing the disc with your player.
TV Screen and Video:
Problem: Video does not appear on the TV screen or the picture is distorted.
Solution: Make sure that the TV is connected to the correct output (HDMI or composite)
of the player.
Make sure that the TV is set to the correct video input source.
The TV may be in screen saver or power saving mode. Check the documentation that came
with the TV for instructions on waking your TV.
Reset your player.
Problem: Video is not output in high definition.
Solution: High definition video cannot be output through the COMPOSITE (yellow) jack.
You must connect the TV to your player using the HDMI jack. Make sure that the correct
HDMI resolution has been selected in the Setup menu. Depending on the Blu-ray disc,
the output may be restricted to 480p.
Problem: The 4:3 aspect ratio picture expands left and right or the picture size is incorrect.
Solution: Use the TV to change the aspect ratio. See the documentation that came with the TV.
Problem: There is no apparent change in the picture quality when the picture settings are
20
Trouble Shooting
changed in the Setup menu.
Solution: Depending on the video type (disc quality or TV connection), changes may not
·Mounting cradle/brackets & hardware
·Remote IR Sensor
·Power loom.
·User Manual
5. Load the disc by gently pushing it in to the disc slot until you feel the mechanism
pull the disc in to the player. Do not force the disc in to the player. If it does not load
properly, press eject and try loading the disc again.
6. Use the remote control to navigate through the disc menu to select your desired
playback option(s).
7. Ejecting the disc. Press eject on the remote or on the unit. Sometimes, depending
on specific disc content, you may need to press eject a second time if the disc does.
not eject within approximately 10 seconds.
Trouble shooting - continued
be apparent.