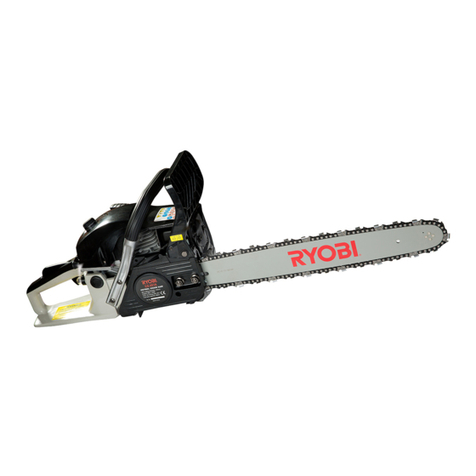
Ryobi RCS3835T User manual

ORIGINAL INSTRUCTIONS
TRADUCTION DES INSTRUCTIONS ORIGINALES
ÜBERSETZUNG DER ORIGINALANLEITUNG
TRADUCCIÓN DE LAS INSTRUCCIONES ORIGINALES
TRADUZIONE DELLE ISTRUZIONI ORIGINALI
VERTALING VAN DE ORIGINELE INSTRUCTIES
TRADUÇÃO DAS INSTRUÇÕES ORIGINAIS
OVERSÆTTELSE AF DE ORIGINALE INSTRUKTIONER
ÖVERSÄTTNING AV DE URSPRUNGLIGA INSTRUKTIONERNA
ALKUPERÄISTEN OHJEIDEN SUOMENNOS
OVERSETTELSE AV DE ORIGINALE INSTRUKSJONENE
ПЕРЕВОД ОРИГИНАЛЬНЫХ ИНСТРУКЦИЙ
TŁUMACZENIE INSTRUKCJI ORYGINALNEJ
PŘEKLAD ORIGINÁLNÍCH POKYNŮ
AZ EREDETI ÚTMUTATÓ FORDÍTÁSA
TRADUCEREA INSTRUCŢIUNILOR ORIGINALE
TULKOTS NO ORIĢINĀLĀS INSTRUKCIJAS
ORIGINALIŲ INSTRUKCIJŲ VERTIMAS
ORIGINAALJUHENDI TÕLGE
PRIJEVOD ORIGINALNIH UPUTA
PREVOD ORIGINALNIH NAVODIL
PREKLAD ORIGINÁLNYCH POKYNOV
ПРЕВОД ОТ ОРИГИНАЛНИТЕ ИНСТРУКЦИИ
ПЕРЕКЛАД ОРИГІНАЛЬНИХ ІНСТРУКЦІЙ
ORIJINAL TALIMATLARIN ÇEVIRILERI
EN
FR
DE
ES
IT
NL
PT
DA
SV
FI
NO
RU
PL
CS
HU
RO
LV
LT
ET
HR
SL
SK
BG
UK
TR
RCS3835T
RCS3840T

Important! It is essential that you read the instructions in this manual before assembling, maintaining and
operating the product.
Attention! Il est essentiel que vous lisiez les instructions contenues dans ce manuel avant d’assembler,
d’entretenir et d’utiliser le produit.
Achtung! Es ist wichtig, dass Sie vor Zusammenbau, Wartung und Benutzung des Produktes die Anweisungen
in dieser Anleitung lesen.
¡Atención! Resulta fundamental que lea este manual de instrucciones antes de realizar el montaje, el
mantenimiento y de utilizar este producto
Attenzione! E’ importante leggere le istruzioni contenute nel presente manuale prima di montare il prodotto,
svolgere le operazioni di manutenzione sullo stesso e metterlo in funzione.
Let op! Het is van essentieel belang dat u de instructies in deze gebruiksaanwijzing leest voor u het product
monteert, onderhoudt en gebruikt.
Atenção! É fundamental que leia as instruções deste manual antes da montagem, manutenção e operação
do aparelho.
OBS! Det er vigtigt, at man læser instrukserne i denne brugsanvisning, inden man samler, vedligeholder
og betjener produktet.
Observera! Det är viktigt att du läser instruktionerna i manualen före montering, användning och underhåll av
produkten.
Huomio! On tärkeää, että luet tämän käsikirjan ohjeet ennen tuotteen kokoamista, huoltoa ja käyttöä.
Advarsel! Det er viktig at du leser instruksjonene i denne manualen før sammensetning, vedlikehold og bruk
av produktet
Внимание! Необходимо прочитать инструкции в данном руководстве перед сборкой, обслуживанием и
эксплуатацией этого изделия.
Uwaga! Koniecznie należy przeczytać instrukcje zawarte w tym podręczniku przed montażem, obsługą oraz
konserwacją produktu.
Důležité
upozornění! Neinstalujte, neprovádějte údržbu ani nepoužívejte tento výrobek dříve, než si přečtete pokyny
uvedené v tomto návodu.
Figyelem! Fontos, hogy a termék összeszerelése, karbantartása és használata előtt elolvassa a kézikönyvben
található utasításokat.
Atenţie! Este esențial să citiți instrucțiunile din acest manual înainte de asamblare, efectuarea întreținerii și
operarea produsului.
Uzmanību! Ir svarīgi izlasīt šīs rokasgrāmatas instrukcijas pirms uzstādīšanas, apkopes un preces
darbināšanas.
Dėmesio! Prieš surenkant, prižiūrint ir naudojant gaminį, būtina perskaityti šiame vadove pateiktus nurodymus.
Tähtis! Enne masina kokkupanekut, hooldamist ja kasutama hakkamist tuleb käesolevas juhendis esitatud
juhised kindlasti läbi lugeda.
Upozorenje! Vrlo je važno da ste prije sklapanja, održavanja i rada s ovim proizvodom pročitali upute u ovom
priručniku.
Pomembno! Pomembno je da pred montažo vzdrževanjem in uporabo tega izdelka preberete navodila v tem
priročniku.
Upzornenie! Je dôležité, aby ste si pred montážou, údržbou a obsluhou produktu prečítali pokyny v tomto
návode.
Важно! Изключително важно е да прочетете инструкциите в настоящото ръководство, преди да
преминете към сглобяване, поддръжка или работа с продукта.
Важливо! Дуже важливо, щоб ви прочитали інструкції в цьому керівництві перед складанням,
обслуговуванням та експлуатацією цієї машини.
Önemli! Ürünü monte etmeden, kullanmadan ve bakımını yapmadan önce bu kılavuzdaki talimatları
okumanız önemlidir.
Subject to technical modication | Sous réserve de modications techniques | Technische Änderungen vorbehalten | Bajo
reserva de modicaciones técnicas | Con riserva di eventuali modiche tecniche | Technische wijzigingen voorbehouden
| Com reserva de modicações técnicas | Med forbehold for tekniske ændringer | Med förbehåll för tekniska ändringar |
Tekniset muutokset varataan | Med forbehold om tekniske endringer | могут быть внесены технические изменения | Z
zastrzeżeniem modykacji technicznych | Změny technických údajů vyhrazeny | A műszaki módosítás jogát fenntartjuk |
Sub rezerva modicaţiilor tehnice | Paturam tiesības mainīt tehniskos raksturlielumus | Pasiliekant teisę daryti techninius
pakeitimus | Tehnilised muudatused võimalikud | Podloæno tehniëkim promjenama | Tehnične spremembe dopuščene
| Právo na technické zmeny je vyhradené | Подлежи на технически модификации | Є об’єктом для технічних змін |
Teknik değişikliğe tabidir.
For Outdoor

1English |
EN
FR
DE
ES
IT
NL
PT
DA
SV
FI
NO
RU
PL
CS
HU
RO
LV
LT
ET
HR
SL
SK
BG
UK
TR
Safety, performance, and dependability have been given
top priority in the design of your petrol chainsaw.
INTENDED USE
The petrol chainsaw is only intended for use outdoors in a
well-ventilated area. For safety reasons, the product must
be adequately controlled by using two-handed operation at
all times.
The product is designed for cutting branches, trunks, logs,
and beams of a diameter determined by the cutting length
of the guide bar. It is only designed to cut wood. It is only
to be used in domestic application by adults who have
received adequate training on the hazards and preventative
measures/actions to be taken while using the product.
The product is not to be used by children or by persons
not wearing adequate personal protective equipment and
clothing. It is also not to be used for professional tree
services.
Do not use the product for any other purpose.
WARNING
When using the product, the safety rules must be
followed. For your own safety and that of bystanders,
you must read and fully understand these instructions
before operating the product. You should attend
a professionally organised course on the use and
maintenance of chainsaws, preventative actions, and
first aid. Please keep these instructions safe for later
use.
WARNING
Chainsaws are potentially dangerous tools. Accidents
involving the use of chainsaws often result in loss of
limbs or death. It is not just the product that is the hazard.
Falling branches, toppling trees, rolling logs can all kill.
Diseased or rotting timber poses additional hazards.
You should assess your capability of completing the task
safely. If there is any doubt, leave it to a professional
tree surgeon.
GENERAL SAFETY WARNINGS
■Some regions have regulations that restrict the use of
the product. Check with your local authority for advice.
■Never allow children or people unfamiliar with the
instructions to use the product. Local regulations may
restrict the age of the operator.
■Ensure before each use that all controls and safety
devices function correctly. Do not use the product if the
“off” switch does not stop the engine.
■Never start or run the engine in a closed or poorly
ventilated area, breathing exhaust fumes can kill.
■Clear the work area before each use, a cluttered and
untidy work area leads to accidents.
■Wear full eye and hearing protection, strong sturdy
gloves, safety boots with non-slip soles as well as head
protection while using the product. Use a face mask if
operation is dusty.
■Do not wear loose fitting clothing, short trousers, or
jewellery of any kind.
■Secure long hair so it is above shoulder level to prevent
entanglement in moving parts.
■Beware of thrown, flying or falling objects. Keep all
bystanders, children, and animals at least 15 m away
from the work area.
■Never use the product in an explosive or flammable
atmosphere.
■Maintain a firm grip on both handles while using the
product.
■Stay alert, watch what you are doing, and use common
sense when using the product. Do not use the product
while tired, ill, or under the influence of drugs, alcohol,
or medication. A lapse in concentration while using the
product may result in severe personal injury.
■Do not use in poor lighting. The operator requires a
clear view of the work area to identify potential hazards.
■Use of hearing protection reduces the ability to hear
warnings (shouts or alarms). The operator must pay
extra attention to what is going on in the working area.
■Operating similar tools nearby increases both the risk
of hearing injury and the potential for other persons to
enter your working area.
■Keep firm footing and balance. Do not overreach.
Overreaching can result in loss of balance or exposure
to hot surfaces and can increase the risk of kickback.
■Keep all parts of your body away from any moving part.
■Do not touch the area around the silencer or engine of
the product; these parts get very hot during operation.
■Inspect the product before each use. Check for correct
operation of all controls, including the chain brake.
Check for loose fasteners and fuel leaks. Make sure all
guards and handles are properly and securely attached.
Replace any damaged parts before use.
■Do not modify the product in any way or use parts
and accessories that are not recommended by the
manufacturer.
WARNING
If the product is dropped, suffers heavy impact, or begins
to vibrate abnormally, immediately stop the product and
inspect for damage or identify the cause of the vibration.
Any damage should be properly repaired or replaced by
an authorised service centre.
■When mixing fuel or filling fuel tank, do not smoke and
keep 10 m away from any source of ignition.
■Mix and store fuel only in a container approved for fuel.
■Mix fuel outdoors where there are no sparks or flames.
Wipe up any fuel spillage. Move 10 m away from
refueling site before starting engine.
■Stop the engine and allow it to cool down before
refuelling, storing, or transporting the product.
■Remember to properly close all fuel tank/container caps
after refuelling or mixing.

2| English
CHAINSAW SAFETY WARNINGS
■Always fit the guide bar cover when the product is not in
use or being carried or transported. This will help reduce
the risk of accidental contact with the sharp blades on
the chain. Carry the product by the top handle with the
guide bar facing away from your body.
■You should get used to your new product by making
simple cuts on securely supported wood. Do this
whenever you have not operated the product for some
time.
■Cut logs on a saw-horse or cradle when operating the
product for the first time.
■Ensure all the guards, handles, and spiked bumper are
properly fitted and are in good condition.
■Persons using the product should be in good health.
The product is heavy, so the operator must be
physically fit. The operator should be alert, have good
vision, mobility, balance, and manual dexterity. If there
is any doubt, do not operate the product.
■Do not stand on any unstable surface while using
the product. This could include, but is not limited, to
ladders, scaffolds, and trees. Keep both hands on the
handles of the product at all times.
■Do not start using the product until you have a clear
work area, secure footing, and a planned retreat path
away from the falling tree.
■Use extreme caution when cutting small-size branches
and sapling because slender material may catch the
saw chain and be whipped toward you or pull you off
balance.
■When cutting a limb under tension, be alert for spring
back so that you will not be struck when the tension in
the wood fibres is released.
■Beware of the emission of exhaust gases, lubricant
mist, and saw dust. Wear a mask or respirator, if
required.
■Do not cut vines and/or small undergrowth (less than
75 mm in diameter).
■Always hold the product with both hands during
operation. Use a firm grip with thumbs and fingers
encircling the handles of the product. Right hand must
be on the rear handle and left hand on the front handle.
■Before starting the engine, make sure the saw chain is
not contacting any object. Always start the product with
the chain brake applied (pushed fully forward).
■Do not modify the product in any way or use it to power
any attachments or devices not recommended by the
manufacturer of the product.
■There should be a first-aid kit containing large wound
dressings and a means to summon attention (e.g.,
whistle) close to the operator. A larger and more
comprehensive kit should be reasonably nearby.
■The operator may be tempted to remove the helmet if
there is no danger of falling objects in the work area, but
the helmet, particularly with the mesh visor, can help
reduce the potential for injury to the face and head if
kickback occurs.
■Wear a helmet at all times when operating the product.
A helmet, equipped with mesh visor, can help reduce
the risk of injury to the face and the head if kickback
occurs.
■An incorrectly tensioned chain can jump off the guide
bar and could result in serious injury or fatality. The
length of the chain depends on the temperature of the
chain and chain wear. Check the tension frequently.
■Keep handles dry, clean, and free from oil and grease.
Greasy and oily handles are slippery, causing loss of
control.
■To reduce the risk of injury associated with contacting
moving parts, always stop the engine, apply chain
brake, and remove the spark plug wire. Make sure all
moving parts have come to a complete stop:
●before leaving the product unattended
●before cleaning or clearing a blockage
●before installing or removing attachments
●before checking, conducting maintenance, or
working on the product
■The size of the work area depends on the job being
performed as well as the size of the tree or work piece
involved. For example, felling a tree requires a larger
work area than making other cuts, i.e., bucking cuts.
The operator needs to be aware and in control of
everything happening in the work area.
■Do not cut with your body in line with the guide bar and
chain. If you experience kickback, this will help prevent
the chain from coming into contact with your head or
body.
■Do not use a back-and-forward sawing motion; let the
chain do the work. Keep the chain sharp and do not try
to push the chain through the cut.
■Do not put pressure on the saw at the end of the cut.
Be ready to take on the weight of the saw as it cuts free
from the wood. Failure to do so could result in possible
serious personal injury.
■Do not stop the saw in the middle of a cutting operation.
Keep the saw running until it is already removed from
the cut.
Personal protective equipment
Good quality personal protective equipment, as used
by professionals, will help reduce the risk of injury to
the operator. The following items should be used when
operating the product:
Safety helmet
–should comply with EN 397 and be CE marked
Hearing protection
–should comply with EN 352-1 and be CE marked
Eye and face protection
–should be CE marked and comply with EN 166 (for
safety glasses) or EN 1731 (for mesh visors)
Gloves
–should comply with EN381-7 and be CE marked
Leg protection (chaps)
–should comply with EN381-5, be CE marked and
provide all-round protection.
Chainsaw safety boots
–should comply with EN ISO 20345:2004 and be
3English |
EN
FR
DE
ES
IT
NL
PT
DA
SV
FI
NO
RU
PL
CS
HU
RO
LV
LT
ET
HR
SL
SK
BG
UK
TR
marked with a shield depicting a chainsaw to show
compliance with EN 381-3. (Occasional users
may use steel toe-cap safety boots with protective
gaiters which conform to EN 381-9 if the ground is
even and there is little risk of tripping or catching on
undergrowth)
Chainsaw jackets for upper body protection
–should comply with EN 381-11 and be CE marked
ASSEMBLY
WARNING
If any parts are damaged or missing do not operate the
product until the parts are replaced. Failure to heed this
warning could result in serious personal injury.
ASSEMBLING SAW CHAIN AND GUIDE BAR
See page 343, Fig. 5 - 8.
1. Stop the product. Wear protective gloves.
2. Disengage the chain brake.
3. Unscrew the guide bar locking knob and remove the
sprocket cover.
4. Attach the guide bar and chain tension assembly to the
chain saw. Lower the guide bar so that the bolt goes
through the hole in the bar and chain tension assembly.
5. The saw chain should face in the direction of chain
rotation. If they face backwards, turn the loop over.
6. Place the loop around the drive sprocket. Then place
the chain drive links into the bar groove. If needed,
rotate the chain tension assembly to apply some
tension to the chain which will help keep it in place.
7. Replace the sprocket cover.
8. Adjust the chain tension. Refer to the “Adjusting the
chain tension” section.
ADJUSTING THE CHAIN TENSION
See page 356
1. Loosen the guide bar locking knob slightly by turning it
counterclockwise.
2. To increase the chain tension, turn the chain tensioner
adjustment ring clockwise and check the chain tension
frequently. To reduce the chain tension, turn the chain
tensioner adjustment ring counterclockwise and check
the chain tension frequently.
3. The chain tension is correct when the gap between the
cutter in the chain and the bar is between 3 mm - 4
mm. Pull the chain in the middle of the lower side of the
bar downwards (away from the bar) and measure the
distance between the bar and the chain cutters.
4. Tighten the guide bar locking knob by turning it
clockwise.
NOTE: The temperature of the chain increases during
normal operation causing the chain to stretch. Check the
chain tension frequently and adjust as required. A chain
tensioned while warm may be too tight upon cooling. Make
sure that the chain tension is correctly adjusted as specified
in these instructions.
OPERATING THE PRODUCT
FUEL AND REFUELLING
Handling the fuel safely
WARNING
Always shut off engine before fuelling. Never add fuel to
a machine with a running or hot engine. Move at least
10 metres from refuelling site before starting the engine.
Do not smoke! Failure to heed this warning can result in
possible personal injury.
WARNING
Check for fuel leaks. If any are found, correct them
before using the product to prevent fire or burn injury.
■Always handle fuel with care; it is highly flammable.
■Always refuel outdoors away from potential sources of
ignition, do not inhale fuel vapours.
■Do not let petrol or lubricant come in contact with skin.
If contact does occur wash immediately with soap and
plenty of water.
■Keep petrol and lubricant away from the eyes. If petrol
or lubricant comes in contact with the eyes, wash them
immediately with clean water. If irritation is still present,
see a physician immediately.
Mixing the fuel
■The product is powered by a 2-cycle engine and
requires pre-mixing petrol and 2-cycle lubricant. Pre-
mix unleaded petrol and 2-cycle engine lubricant in a
clean container approved for petrol.
■This engine is certified to operate on unleaded petrol
intended for automotive use with an octane rating of 91
or higher.
■Do not use any type of pre-mixed petrol/lubricant from
fuel service stations; this includes the pre-mixed petrol/
lubricant intended for use in mopeds and motorcycles.
■Use a high quality 2-cycle self-mixing lubricant for air-
cooled engines. Do not use automotive lubricant or
2-cycle outboard lubricant.
■Mix 2% lubricant into the petrol. This is a 50:1 ratio.
■Mix the fuel thoroughly and each time before fuelling.
■Mix in small quantities. Do not mix quantities larger
than usable in a 30-day period. A 2-cycle lubricant
containing a fuel stabiliser is recommended.
NOTE: Fuel system damage or performance problems
resulting from the use of an oxygenated fuel containing
more than the percentages of oxygenates stated previously
are not covered under warranty.
Filling the fuel tank
See page 343.
■Clean the surface around the fuel cap to prevent
contamination.

4| English
■Loosen the fuel cap slowly.
■Carefully pour the fuel mixture into the tank. Avoid
spillage.
■Prior to replacing the fuel cap, clean and inspect the
gasket.
■Immediately replace the fuel cap and hand tighten it.
Wipe away any fuel spillage.
NOTE: It is normal for the engine to emit smoke during and
after the first use.
ADDING CHAIN LUBRICATING OIL
See page 343.
WARNING
Never work without chain lubricant. If the saw chain is
running without lubricant, guide bar and saw chain can
be damaged. It is therefore essential to check the oil
level frequently and every time before starting to use the
product.
1. Clear surface around the oil cap to prevent
contamination.
2. Unscrew and remove the cap from the oil tank.
3. Pour the oil into the oil tank and monitor the oil level
gauge. Ensure that no dirt enters the oil tank while
filling.
4. Put the oil cap back on and tighten. Wipe away any
spillage.
5. One full oil tank will enable you to use the product for
20- 40 min.
NOTE: A properly functioning chain and bar lubricating
system will normally discharge oil from the chain during use.
To check the functionality of the chain and bar lubricating
system, point the tip of the chain at a light coloured surface,
such as a newspaper. A distinct line of oil splatter should be
observed after a short time.
Recommended chain lubricating oil
■The manufacturer recommends you use only Ryobi
chainsaw lubricating oil. (Available from your authorised
service centre)
STARTING THE PRODUCT
Starting the product differs depending on whether the
engine is cold or warm.
WARNING
Keep your body to the left of the chain line. Never
straddle the saw or chain, or lean over past the chain
line.
■Place the product on level ground and ensure that no
objects or obstructions are in the immediate vicinity that
could come in contact with the bar and chain.
■Hold the front handle firmly with your left hand and put
your right foot onto the base of the rear handle.
NOTE: In the following starting instruction, when the choke
lever is pulled all the way out to the “start “ position, the
throttle is set for starting. To reset the throttle to the “run“
position, squeeze and then release the throttle trigger.
To start a cold engine:
See page 342 - 343.
1. Turn ignition switch to the “on“ position.
2. Make sure the chain brake is in the brake position by
pushing forward on the lever/hand guard.
3. Fully press and release the primer bulb at least 10
times.
4. Pull choke lever all the way out to the “start“ position.
5. When the temperature is above 10°C, pull the starter
grip until the engine attempts to start, but no more than
3 times. When the temperature is below 10°C, pull the
starter grip until the engine attempts to start, but no
more than 5 times.
6. Push choke lever to the “half“ position. Pull starter grip
until engine starts.
7. Depress the trigger release and squeeze the throttle
trigger, then release the throttle trigger to return the
engine to idle.
8. Allow the product to run idle for 15 - 30 seconds.
9. Before accelerating the engine or cutting wood, make
sure the chain brake is in the “run“ position by pulling
back on the brake lever/hand guard.
CAUTION
Failure to fully release the throttle when chain brake lever
is in the brake position will result in serious damage to
the product. Never squeeze and hold the throttle trigger
while the chain brake is in the brake position.
To start a warm engine:
See page 351.
1. Turn ignition switch to the “on“ position.
2. Make sure the chain brake is in the brake position by
pushing forward on the lever/hand guard.
3. Press the primer bulb 10 times.
4. Pull choke lever all the way out to the “start“ position
and then push it back in the “run“ position.
5. Pull starter grip until engine runs, but no more than 5
times. Depress the trigger release and squeeze the
throttle trigger, then release the throttle trigger to return
the engine to idle. If engine does not start after 5 pulls,
use cold engine starting procedure.
6. Before accelerating the engine or cutting wood, make
sure the chain brake is in the “run“ position by pulling
back on the brake lever/hand guard.
SWITCHING BETWEEN OPERATING MODES
See page 357.
The product features an anti-freeze mode that prevents
ice from forming inside the carburettor during operation in
temperatures of ≤5 °C.
A ventilation hatch on the right side of the air cleaner cover
can be re-positioned to allow warm air to be supplied to the
engine and prevents ice from forming inside the carburettor.

5English |
EN
FR
DE
ES
IT
NL
PT
DA
SV
FI
NO
RU
PL
CS
HU
RO
LV
LT
ET
HR
SL
SK
BG
UK
TR
WARNING
Failure to switch from normal mode to anti-freeze mode
in temperatures of ≤5 °C will reduce the output power of
the engine or lead to engine failure.
Always remember to return the product to the normal
operating mode when there is no risk of ice forming
inside the carburettor. Failure to switch from anti-freeze
mode to normal mode at normal temperatures may
result in engine failure.
STOPPING THE ENGINE
Release the throttle trigger and let the engine return to idle.
To stop the engine, move the ignition switch to the stop
(0) position. Do not put the product on the ground when
the chain is still moving. For additional safety, set the chain
brake when the product is not in use.
In the event that the ignition switch will not stop the product,
pull the choke lever out to the fully extended position (Full
Choke) and engage the chain brake to stop the engine.
If the ignition switch will not stop the product when set to
the stop position, have the ignition switch repaired before
using the product again to prevent unsafe conditions or
serious injury.
NOTE: When you are finished using the product, always
relieve tank pressure by loosening, then retightening, the
chain lubricant and fuel caps. Allow the engine to cool down
before storing.
HOLDING THE PRODUCT
See page 343.
Always hold the product with your right hand at the rear
handle and your left hand at the front handle. Grip both
handles with the thumbs and fingers encircling the handles.
Ensure that your left hand is holding the front handle so that
your thumb is underneath.
CHECKING AND OPERATING CHAIN BRAKE
1. Engage the chain brake by rotating your left hand
around the front handle. Allow the back of your hand to
push the chain brake lever/hand guard toward the bar
while the chain is rotating rapidly. Be sure to maintain
both hands on the handles of the product at all times.
2. Reset the chain brake back into the Run position by
grasping the top of the chain brake lever/hand guard
and pulling toward the front handle until you hear a
click.
WARNING
If the chain brake does not stop the chain immediately,
or if the chain brake will not stay in the run position
without assistance, take the product to an authorised
service centre for repair prior to use.
WARNING
When the throttle trigger is released and the engine is
running at idle speed, the saw chain must not move. If
it does continue to move there is risk of severe injury
to the operator. Do not use the product, return it to an
authorised service centre for professional adjustment.
CHECKING THE CLUTCH
1. Disengage the chain brake by pulling the chain brake
lever/hand guard towards the front handle until a click
is heard.
2. Allow the engine to run idle. Ensure that the saw chain
is not rotating. If the saw chain rotates while running at
idle speed, the clutch may be damaged. Do not use the
product. Return it to an authorised service centre for
professional adjustment.
3. Depress the throttle trigger half-way and run the product
at mid speed. The saw chain should rotate smoothly if
the clutch is in good working condition.
RESTARTING AFTER EXTENDED PERIODS OF HEAVY
USE
After using the chain saw for extended periods of time,
please let the unit run in idle, with the chain brake engaged
for 3 to 5 minutes, allowing accumulated heat of the engine
to dissipate through the forced-air cooling system.
This helps prevent a potential heat soak and thus potential
high stress of certain engine components (i.e. ignition
system and carburettor).
After complete shut-off of the engine, you may experience
difficulties restarting the chain saw due to this condition,
which is completely normal. Thus, please allow the unit to
cool down before restarting.
Causes and operator prevention of kickback:
Kickback may occur when the nose or tip of the guide bar
touches an object, or when the wood closes in and pinches
the saw chain in the cut.
Tip contact in some cases may cause a sudden reverse
reaction, kicking the guide bar up and back towards the
operator.
Pinching the saw chain along the top of the guide bar may
push the guide bar rapidly back towards the operator.
Either of these reactions may cause you to lose control of
the saw which could result in serious personal injury. Do
not rely exclusively upon the safety devices built into your
saw. As a chainsaw user, you should take several steps to
keep your cutting jobs free from accident or injury.
Kickback is the result of tool misuse and/or incorrect
operating procedures or conditions and can be avoided by
taking proper precautions as given below:
■Maintain a firm grip, with thumbs and fingers
encircling the chainsaw handles, with both hands
on the saw and position your body and arm to allow
you to resist kickback forces. Kickback forces can
be controlled by the operator, if proper precautions are
taken. Do not let go of the chainsaw.
■Do not overreach and do not cut above shoulder
height. This helps prevent unintended tip contact and

6| English
enables better control of the chainsaw in unexpected
situations.
■Only use replacement bars and chains specified
by the manufacturer. Incorrect replacement bars and
chains may cause chain breakage and/or kickback.
■Follow the manufacturer’s maintenance
instructions for the saw chain. Decreasing the depth
gauge height can lead to increased kickback.
INSTRUCTIONS CONCERNING THE PROPER TECH-
NIQUES FOR BASIC FELLING, LIMBING, AND CROSS-
CUTTING
Understanding the forces within the wood
When you understand the directional pressures and
stresses inside the wood, you can reduce the “pinches”
or at least expect them during your cutting. Tension in the
wood means the fibers are being pulled apart and if you cut
in this area the “kerf” or cut will tend to open as the product
goes through. If a log is being supported on a saw horse
and the end is hanging unsupported over the end, then
tension is created on the upper surface due to the weight
of the overhanging log stretching the fibers. Likewise, the
underside of the log will be in compression and the fibers
are being pushed together. If a cut is made in this area, the
kerf will have the tendency to close up during the cut. This
would pinch the blade.
Felling a tree
See page 347 - 348.
When bucking and felling operations are being performed
by two or more persons at the same time, the felling
operations should be separated from the bucking operation
by a distance of at least twice the height of the tree being
felled. Trees should not be felled in a manner that would
endanger any person, strike any utility line, or cause any
property damage. If the tree does make contact with any
utility line, the company should be notified immediately.
The chainsaw operator should keep on the uphill side of
the terrain as the tree is likely to roll or slide downhill after
it is felled.
An escape path should be planned and cleared as
necessary before cuts are started. The escape path should
extend back and diagonally to the rear of the expected line
of fall.
Before felling is started, consider the natural lean of the
tree, the location of larger branches and the wind direction
to judge which way the tree will fall.
Remove dirt, stones, loose bark, nails, staples and wire
from the tree.
Do not attempt to fell trees which are rotten or have been
damaged by wind, fire, lightning, etc. This is extremely
dangerous and should only be completed by professional
tree surgeons.
■Notching undercut
See page 347 - 348.
Make the notch 1/3 the diameter of the tree,
perpendicular to the direction of falls. Make the lower
horizontal notching cut first. This will help to avoid
pinching either the saw chain or the guide bar when the
second notch is being made.
■Felling back cut
See page 347 - 348.
Make the felling back cut at least 50 mm/2 in higher
than the horizontal notching cut. Keep the felling back
cut parallel to the horizontal notching cut. Make the
felling back cut so enough wood is left to act as a hinge.
The hinge wood keeps the tree from twisting and falling
in the wrong direction. Do not cut through the hinge.
As the felling gets close to the hinge, the tree should
begin to fall. If there is any chance that the tree may
not fall in the desired direction or it may rock back and
bind the saw chain, stop cutting before the felling back
cut is complete and use wedges of wood, plastic or
aluminium to open the cut and drop the tree along the
desired line of fall.
When the tree begins to fall remove the product from
the cut, stop the engine, put the product down, then use
the retreat path planned. Be alert for overhead limbs
falling and watch your footing.
Removing buttress roots
See page 348.
A buttress root is a large root extending from the trunk of
the tree above the ground. Remove large buttress roots
prior to felling. Make the horizontal cut into the buttress
first, followed by the vertical cut. Remove the resulting
loose section from the work area. Follow the correct tree
felling procedure after you have removed the large buttress
roots.
Push and pull
See page 349.
The reaction force is always opposite to the direction the
chain is moving. Thus, the operator must be ready to control
the tendency for the product to pull away (forward motion)
when cutting on the bottom edge of the bar. Engage always
firmly the bumper spike to avoid such movement. The
product can be pushed backwards (towards the operator)
when cutting along the top edge. To avoid this make sure
the chain is not jammed when cutting along the top edge.
Saw jammed in the cut
Stop the product and make it safe. Do not try to force the
chain and bar out of the cut as this is likely to break the
chain which may swing back and strike the operator. This
situation normally occurs because the wood is incorrectly
supported and forcing the cut to close under compression,
thereby pinching the blade. If adjusting the support does
not release the bar and chain, use wooden wedges or a
lever to open the cut and release the product. Never try
to start the product when the guide bar is already in a cut
or kerf.
Skating / Bouncing
When the chainsaw fails to dig in during a cut, the guide
bar can begin hopping or dangerously skidding along the
surface of the log or branch, possibly resulting in the loss
of control of the chainsaw. To prevent or reduce skating or
bouncing, always use the saw with both hands. Make sure
the saw chain establishes a groove for cutting.
Never cut small, flexible branches or brushes with your

7English |
EN
FR
DE
ES
IT
NL
PT
DA
SV
FI
NO
RU
PL
CS
HU
RO
LV
LT
ET
HR
SL
SK
BG
UK
TR
chainsaw. Their size and flexibility can easily cause the
saw to bounce towards you or bind up with enough force
to cause a kickback. The best tool for that kind of work is
a hand saw, pruning shears, an axe or other hand tools.
Bucking a log
See page 349.
Bucking is cutting a log into lengths. It is important to
make sure your footing is firm and your weight is evenly
distributed on both feet. When possible, the log should be
raised and supported by the use of limbs, logs or chocks.
Follow the simple directions for easy cutting. When the log
is supported along its entire length, it is cut from the top
(overbuck).
When the log is supported on one end, cut 1/3 the diameter
from the underside (underbuck). Then make the finished
cut by overbucking to meet the first cut.
When the log is supported on both ends, cut 1/3 the
diameter from the top (overbuck). Then make the finished
cut by underbucking the lower 2/3 to meet the first cut.
When bucking on a slope, always stand on the uphill side
of the log. When “cutting through”, to maintain complete
control release the cutting pressure near the end of the cut
without relaxing your grip on the handles of the product.
Don’t let the chain contact the ground. After completing the
cut, wait for the saw chain to stop before you move the
product. Always stop the engine before moving from tree
to tree.
Limbing a tree
See page 350.
Limbing is removing the branches from a fallen tree. When
limbing, leave larger lower limbs to support the log off the
ground. Remove the small limbs in one cut. Branches
under tension should be cut from the bottom up to avoid
binding the product.
Springpoles
See page 350.
A springpole is any log, branch, rooted stump, or sapling
which is bent under tension by other wood so that it springs
back if the wood holding it is cut or removed.
On a fallen tree, a rooted stump has a high potential of
springing back to the upright position during the bucking
cut to separate the log from the stump. Watch out for
springpoles—they are dangerous. Do not attempt to cut
bent branches or stumps which are under tension unless
you are professionally trained and competent to do so.
TRANSPORTATION AND STORAGE
■Stop the engine, engage the chain brake, and
disconnect the spark plug wire from the spark plug.
Allow the product to cool down before storing or
transporting.
■Clean all foreign material from the product.
■Drain all fuel from tank into a container approved for
petrol. Remember to properly replace and tighten the
fuel mix cap.
■Run the engine until it stops. This will remove all fuel-
lubricant mix that could become stale and leave varnish
and gum in the fuel system.
■Drain all bar and chain lubricant from tank into a
container approved for lubricant. Remember to properly
replace and tighten the chain lubricant cap.
■Always fit guide bar cover before storing the product, or
during transportation.
■Store the product in a cool, dry, and well-ventilated
place that is inaccessible to children. Keep away from
corrosive agents such as garden chemicals and de-
icing salts. Do not store outdoors.
■When carrying the product for short distance (from one
working area to the next), always apply the chain brake
so that the saw chain is restricted from movement.
■When transporting the product, secure it against
movement or falling to prevent injury to persons or
damage to the product.
■Never carry or transport the product while the engine
is running.
■Abide by all government and local regulations for the
safe storage and handling of petrol. Excess fuel should
be used in other 2-cycle engine powered equipment.
MAINTENANCE
Always keep the product in good working condition.
WARNING
Use only original manufacturer’s replacement parts,
accessories, and attachments. Failure to do so can cause
possible injury, can contribute to poor performance, and
may void your warranty.
WARNING
Servicing requires extreme care and knowledge
and should be performed only by a qualified service
technician. For servicing and repairs, have the product
serviced by an authorised service centre only. When
servicing, use only original replacement parts.
WARNING
Before inspecting, cleaning, or servicing the product,
stop the engine, engage the chain brake, and disconnect
the spark plug wire from the spark plug. Failure to follow
these instructions can result in serious personal injury or
property damage.
■You may only make adjustments or repairs described
in this manual. For other repairs, contact the authorised
service centre.
■Consequences of improper maintenance, removal, or
modification of safety features like the chain brake,
ignition switch, hand guard (front and back), spiked
bumper, chain catcher, guide bar, low-kickback saw
chain may cause the safety features to not function
correctly, thus increasing the potential for serious injury.
Keep the product professionally maintained and safe.
■Sharpening the chain safely is a skilled task. Therefore,
the manufacturer strongly recommends that a worn or

8| English
dull chain is replaced with a new one, available at your
authorised service centre. The part number is available
in the product specification table in this manual.
■Follow instructions for lubricating and chain tension
checking and adjustment.
■After each use, clean the product with a soft dry cloth.
■Check all nuts, bolts, and screws at frequent intervals
for security to ensure the product is in safe working
condition. Any part that is damaged should be properly
repaired or replaced by an authorised service centre.
REPLACING GUIDE BAR AND SAW CHAIN
See page 352 - 355.
1. Stop the product. Wear protective gloves.
2. Disengage the chain brake.
3. Unscrew the guide bar locking knob and remove the
sprocket cover.
4. Remove the bar and saw chain from the product.
5. Clean the underside of the sprocket.
6. To replace the bar with a new one, loosen the screw of
the chain tension assembly. Mount the chain tension
assembly on to the new bar and tighten the screw.
7. Attach the guide bar and chain tension assembly to the
chain saw. Lower the guide bar so that the bolt goes
through the hole in the bar and chain tension assembly.
8. The saw chain should face in the direction of chain
rotation. If they face backwards, turn the loop over.
9. Place the loop around the drive sprocket. Then place
the chain drive links into the bar groove. If needed,
rotate the chain tension assembly to apply some
tension to the chain which will help keep it in place.
10. Replace the sprocket cover.
11. Adjust the chain tension. Refer to the “Adjusting the
chain tension” section.
CLEANING THE AIR FILTER
See page 360.
1. Stop the product. Make sure the chain brake is in the
brake position.
2. Unscrew the locking knob on the air filter cover and
remove it from the product.
3. Remove the air filter.
4. Remove the dust and dirt on the air filter with a brush.
If necessary, split the air filter with a flat blade screw
driver and clean the inside.
5. Replace the air filter cover and tighten the locking knob.
INSPECTING AND CLEANING THE CHAIN BRAKE
See page 363.
■Always keep the chain brake mechanism clean by
lightly brushing the linkage free from dirt.
■Always test the chain brake performance after cleaning.
■Refer to “Operation - Checking and Operating Chain
Brake” earlier in this manual for additional information.
ENGINE SPEED AND CARBURETTOR ADJUSTMENT
WARNING
Incorrect carburettor adjustment may increase the
risk of injuries, fatal accidents, or product damage.
For carburettor adjustment, bring the product to an
authorised service centre.
MAINTENANCE SCHEDULE
Daily check
Fuel mixture Before each use
Bar lubrication Before each use
Chain tension Before each use and
frequently
Clutch engagement
(no chain movement at idling
speed)
Before each use
Chain sharpness Before each use, visual
check
For damaged parts Before each use
For loose fasteners Before each use
For loose parts Before each use
Chain brake function Before each use
For fuel leaks Before each use
INSPECT AND CLEAN:
Bar Before each use
Complete saw After each use
Air filter Every 5 hours*
Chain brake Every 5 hours*
Replace spark plug Yearly
Replace fuel filter Yearly
* Hours of Operation
RESIDUAL RISKS
Even when the product is used as prescribed, it is still
impossible to completely eliminate certain residual risk
factors. The following hazards may arise during use, and
the operator should pay special attention to avoid the
following:
■Injury caused by vibration
–Always use the right tool for the job. Use designated
handles. Restrict working time and exposure.
■Exposure to noise can cause hearing injury.
–Wear hearing protection and limit exposure.
■Contact with exposed saw teeth of the chain (cutting
hazards).
■Unforeseen, abrupt movement or kickback of the guide
bar (cutting hazards).

9English |
EN
FR
DE
ES
IT
NL
PT
DA
SV
FI
NO
RU
PL
CS
HU
RO
LV
LT
ET
HR
SL
SK
BG
UK
TR
■Parts ejected from the saw chain (cutting/injection
hazards).
■Thrown out pieces of the work piece (wood chips,
splinters).
■Inhalation of saw dust and particles or emission from
the petrol engine.
■Skin contact with petrol/oil.
RISK REDUCTION
It has been reported that vibrations from handheld tools
may contribute to a condition called Raynaud’s Syndrome
in certain individuals. Symptoms may include tingling,
numbness, and blanching of the fingers, usually apparent
upon exposure to cold. Hereditary factors, exposure to
cold and dampness, diet, smoking and work practices
are all thought to contribute to the development of these
symptoms. There are measures that can be taken by the
operator to possibly reduce the effects of vibration:
■Keep your body warm in cold weather. When operating
the product, wear gloves to keep the hands and wrists
warm. It is reported that cold weather is a major factor
contributing to Raynaud’s Syndrome.
■After each period of operation, exercise to increase
blood circulation.
■Take frequent work breaks. Limit the amount of
exposure per day.
■Protective gloves available from professional chainsaw
retailers are designed specifically for chainsaw use and
give protection and good grip. Gloves also reduce the
effect of handle vibration. These gloves should comply
with EN381-7 and must be CE marked.
If you experience any of the symptoms of this condition,
immediately discontinue use and see your physician.
WARNING
Injuries may be caused, or aggravated, by prolonged
use of a tool. When using any tool for prolonged periods,
ensure you take regular breaks.
KNOW YOUR PRODUCT
See page 341.
PARTS
1. Chain
2. Guide bar
3. Front hand guard/Chain brake
4. Front handle
5. Air cleaner cover
6. Starter grip
7. Rear handle
8. Spiked bumper
9. Silencer cover
10. Fuel mix cap
11. Chain lubricant cap
12. Ignition switch
13. Trigger release
14. Throttle trigger
15. Primer bulb
16. Choke lever
17. Combination wrench
18. Sprocket cover
19. Chain catcher
20. Chain tensioner adjustment ring
21. Guide bar locking knob
22. Guide bar cover
SAFETY DEVICES
LOW-KICKBACK SAW CHAIN
A low-kickback saw chain helps to reduce the possibility of
a kickback event.
The rakers (depth gauges) ahead of each cutter can
minimize the force of a kickback reaction by preventing the
cutters from digging in too deeply. Only use replacement
guide bar and chain combinations recommended by the
manufacturer.
As saw chains are sharpened, they lose some of the low
kickback qualities and extra caution is required. For your
safety, replace saw chains when cutting performance
decreases.
SPIKED BUMPER
The integral bumper spike may be used as a pivot when
making a cut. It helps to keep the body of the chainsaw
steady while cutting. When cutting, push the product
forward until the spikes dig into the edge of the wood, then
by moving the rear handle up or down in the direction of the
cutting line, it can help ease the physical strain of cutting.
GUIDE BARS
Generally, guide bars with small radius tips have somewhat
lower potential for kickback. You should use a guide bar
and matching chain, which is just long enough for the
job. Longer bars increase the risk of loss of control during
sawing. Regularly check the chain tension. When cutting
smaller branches (less than the full length of the guide bar)
the chain is more likely to be thrown off if the tension is
not correct.
CHAIN BRAKE
Chain brakes are designed to quickly stop the chain from
rotating. When the chain brake lever/hand guard is pushed
towards the bar, the chain should stop immediately. A
chain brake does not prevent kickback. It only lowers the
risk of injury should the chain bar contact the operator’s
body during a kickback event. The chain brake should be
tested before each use for correct operation in both the run
and brake positions.
CHAIN CATCHER
A chain catcher prevents the saw chain from being thrown
back towards the operator if the saw chain comes loose
or breaks.
SYMBOLS ON THE PRODUCT
Safety alert

10 | English
Read and understand all instructions
before operating the product, follow all
warnings and safety instructions.
Wear eye, ear and head protection.
Wear non-slip safety footwear when
using the product.
Wear non-slip, heavy duty gloves.
Beware of chain saw kickback and
avoid contact with bar tip.
Hold and operate the product properly
with both hands.
Do not operate the product using only
one hand.
Ukrainian mark of conformity
Conforms to all regulatory standards
in the country in the EU where the
product is purchased.
Use unleaded petrol intended for
motor vehicle use with an octane
rating of 91 ([R+M]/2) or higher.
Use 2-stroke oil for air cooled engines.
Mix the fuel mix thoroughly and also
each time before refueling.
Add bar and chain oil every time you
add fuel to the product.
Set the chain brake to the RUN
position.
Set the chain brake to the BRAKE
position.
Turn ignition switch to the ON
position.
Fully press and release the primer
bulb at least 10 times.
Set the choke lever to the full choke
position.
Pull the starter rope until the first firing
of the engine is heard (no more than
five pulls).
Set the choke lever to the half
position.
Pull starter grip until the engine starts.
Depress the trigger release and
throttle trigger.
EurAsian Conformity Mark
The guaranteed sound power level is
112 dB
Bar and chain lubricant
Unleaded petrol and 2 stroke oil.
Run position
Half choke position
Full choke position
Lock
Unlock
Rotate to adjust chain tension
+ = Tighten the chain
- = Loosen the chain
Moving direction of the chain.
(Marked under the sprocket cover)
Normal mode

11English |
EN
FR
DE
ES
IT
NL
PT
DA
SV
FI
NO
RU
PL
CS
HU
RO
LV
LT
ET
HR
SL
SK
BG
UK
TR
Anti-freeze mode
T Idle speed adjustment
H High Speed adjustment needle
L Low Speed adjustment needle
SYMBOLS IN THIS MANUAL
Mix fuel outdoors where there are no
sparks or flames.
Do not smoke when mixing fuel or filling
fuel tank.
Parts or accessories sold separately
Note
Warning
Wear eye and face protection.
Wear upper body protection.
Wear leg protection.
Stop the product.
Lock the filter access cover.
Unlock the filter access cover.
The following signal words and meanings are intended to
explain the levels of risk associated with the product.
DANGER
Indicates an imminently hazardous situation, which, if
not avoided, will result in death or serious injury.
WARNING
Indicates a potentially hazardous situation, which, if not
avoided, could result in death or serious injury.
CAUTION
Indicates a potentially hazardous situation, which, if not
avoided, may result in minor or moderate injury.
CAUTION
Without safety alert symbol
Indicates a situation that may result in property damage.

12 | English
TROUBLESHOOTING
Problem Possible cause Solution
Engine will not start (Make
sure ignition switch is in
start position “I”).
No spark. The spark plug could be cracked or damaged.
Replace the old spark plug with a new one and
try to start again. If engine will still not start, return
the product to an authorised service centre for
further checking.
Flooded engine. With the ignition switch off, remove spark plug.
Move choke lever to run position (pushed in
completely) and pull starter grip 15 to 20 times.
This will clear excess fuel from engine. Clean
and reinstall spark plug. Set ignition switch to
run (I) position. Push and fully release primer
bulb 10 times. Pull starter grip three times with
choke lever at run. If engine does not start, move
choke lever to choke and repeat normal starting
procedure. If engine still fails to start, repeat
procedure with a new spark plug.
Engine starts but will not
accelerate properly.
Carburettor requires “L” (Low jet)
adjustment.
Contact an authorised service centre for
carburettor adjustment.
Engine starts but will not run
roperly at high speed.
Carburettor requires “H” (High jet)
adjustment.
Contact an authorised service centre for
carburettor adjustment.
Engine does not reach
full speed and/or emits
excessive smoke.
Check lubricant fuel mixture. Use fresh fuel and the correct 2-stroke lubricant
mix ratio.
Air filter dirty. Clean the air filter.
Spark arrester screen dirty. Contact an authorised service centre for service
or replacement.
Carburettor requires “H” (High jet)
adjustment.
Contact an authorised service centre for
carburettor adjustment.
Engine starts, runs, and
accelerates but will not idle.
Carburettor requires adjustment. Contact an authorised service centre for
carburettor adjustment.
Engine starts and runs, but
chain is not rotating.
Chain lubricant tank empty. Lubricant tank should be filled every time.
Check chain tension for overtight
condition.
Tension the chain.
Check for lubricating function. Run at half throttle 30 to 45 seconds. Stop saw
and check for lubricant dripping from guide bar. If
lubricant is present, the chain may be dull or bar
may be damaged. If no lubricant is on the guide
bar, contact an authorised service centre.
Bar and chain running hot
and smoking.
Chain brake engaged. Release the chain brake.
Chain tension too tight. Tension the chain.
Check guide bar and chain for
damage.
Inspect the guide bar and chain for damage.
Engine dies during normal
operation and will not
restart.
Product set to anti-freeze mode
at normal temperatures.
Set the product to normal operating mode. Allow
the engine to cool down before restarting.
Engine will not start or does
not reach full speed.
Product set to anti-freeze mode
at normal temperatures.
Set the product to normal operating mode.
Engine does not reach full
speed at low temperatures.
Product set to normal mode at
low temperatures.
Set the product to anti-freeze mode.

13
Français |
EN
FR
DE
ES
IT
NL
PT
DA
SV
FI
NO
RU
PL
CS
HU
RO
LV
LT
ET
HR
SL
SK
BG
UK
TR
La plus grande priorité a été donnée à la sécurité, aux
performances et à la abilité de votre tronçonneuse
thermique lors de sa conception.
UTILISATION PRÉVUE
La tronçonneuse à chaine thermique est uniquement
conçue pour une utilisation en extérieur dans des endroits
bien ventilés. Pour des raisons de sécurité, le produit doit
être en permanence contrôlé des deux mains.
Le produit est destiné à la coupe des branches, troncs,
bûches, et poutres d'un diamètre déterminé par la longueur
de coupe du guide-chaîne. Il n'est autorisé de l'utiliser
que pour couper du bois. Il ne doit être utilisé que de
façon privée par des adultes ayant reçu un entraînement
approprié couvrant les risques et mesures préventives liés
à son utilisation.
Le produit ne doit pas être utilisé par des enfants ou par des
personnes ne portant pas des équipements et vêtements
de sécurité.
Il ne doit pas être utilisé de façon professionnelle pour
l'abattage et l'élagage des arbres.
Ne l'utilisez pour aucun autre travail.
AVERTISSEMENT
Suivez les règles de sécurité lorsque vous utilisez le
produit. Pour votre sécurité et celle des passants, vous
devez lire et totalement comprendre ces instructions
avant d'utiliser le produit. Vous devriez suivre un stage
professionnel de sécurité ayant trait à l'utilisation et à
l'entretien des tronçonneuses, ainsi qu'aux mesures
préventives et aux premiers soins. Veuillez conserver ce
manuel pour vous-y reporter dans le futur.
AVERTISSEMENT
Les tronçonneuses sont des outils potentiellement
dangereux. Les accidents impliquant l'utilisation de
tronçonneuses causent souvent la perte d'un membre
ou la mort. La tronçonneuse en elle-même n'est pas
le seul risque. La chute de branches et d'arbres et la
rotation des bûches peuvent tuer. Le bois malade ou
pourri crée des risques supplémentaires. Vous devez
jauger votre capacité à effectuer une tâche de façon
sure. En cas de doute quel qu'il soit, conez le travail à
un spécialiste du bois.
AVERTISSEMENTS GÉNÉRAUX DE SÉCURITÉ
■La législation de certaines régions restreint l'utilisation
du produit. Contactez les autorités locales pour obtenir
des conseils.
■Ne laissez jamais les enfants ou les personnes non
familiarisées avec le mode d'emploi utiliser le produit.
Les lois locales peuvent imposer un âge minimum à
l’opérateur.
■Avant chaque utilisation assurez-vous que toutes
les commandes et tous les organes de sécurité
fonctionnent correctement. N'utilisez pas le produit si
son interrupteur “arrêt” est inopérant à arrêter le moteur.
■Ne jamais démarrer ou faire tourner le moteur en un lieu
fermé ou mal ventilé; l'inhalation de gaz d'échappement
pouvant être mortelle.
■Nettoyez la zone de travail avant chaque utilisation, une
zone de travail encombrée et en désordre est propice
aux accidents.
■Portez une protection oculaire et auditive complète,
des gants épais et solides, des chaussures de
sécurité antidérapantes ainsi qu'un casque de chantier
lorsque vous utilisez le produit. Portez un masque anti
poussières si l’opération est poussiéreuse.
■Ne portez pas de vêtements amples, de pantalons
courts ou de bijoux d'aucune sorte.
■Attachez les cheveux longs au-dessus du niveau des
épaules afin d'éviter qu'ils ne se prennent dans les
parties en mouvement.
■Prenez garde aux objets volants, projetés ou tombant.
Gardez tous les passants (en particulier les enfants et
les animaux) éloignés d'au moins 15m de distance de
la zone de travail.
■N'utilisez jamais le produit dans une atmosphère
explosive ou inflammable.
■Serrez fermement les deux poignées des deux mains
lorsque vous utilisez le produit.
■Restez vigilant, regardez ce que vous faites et faites
preuve de bon sens lorsque vous utilisez l'appareil.
N'utilisez pas ce produit lorsque vous êtes fatigué,
malade, ou sous l'influence de l'alcool, de drogues
ou de médicaments. Un moment d'inattention lors de
l'utilisation de la machine suffit à provoquer de graves
blessures.
■N’utilisez pas cet outil dans une zone mal éclairée.
L'opérateur doit avoir une bonne vue d'ensemble de
la zone de travail pour identifier les dangers éventuels.
■L'utilisation d'une protection auditive réduit la capacité
à entendre les avertissements (cris ou alarmes).
L'utilisateur doit redoubler d'attention par rapport aux
événements survenant dans la zone de travail.
■L'utilisation d'outils similaires alentour augmente le
risque d'atteinte à l'audition ainsi que le risque que
d'autres personnes entrent dans la zone de travail.
■Gardez un bon appui et un bon équilibre. Ne pas se
précipiter. Un travail en extension peut entraîner une
perte d'équilibre ou une mise en contact avec les
surfaces chaudes et augmenter le risque de rebond.
■Maintenez toutes les parties de votre corps éloignées
des parties en mouvement.
■Ne touchez pas les surfaces proches du silencieux
et du moteur de l'appareil, car elles deviennent très
chaudes pendant le fonctionnement.
■Vérifiez la machine avant chaque utilisation. Vérifiez
le fonctionnement correct de toutes les commandes,
frein de chaîne compris. Vérifiez le bon serrage des
attaches, assurez-vous que toutes les protections
et poignées sont bien en place et bien verrouillées.
Remplacez toute pièce endommagée avant utilisation.
■Ne modifiez la machine d'aucune façon et n'utilisez
pas de pièces ou accessoires non recommandés par
le fabricant.

14
| Français
AVERTISSEMENT
Si le produit est tombé, a subi un choc important ou se met
à vibrer de façon anormale, arrêtez-le immédiatement
et recherchez les dommages éventuels ou identiez
la cause des vibrations Toute pièce endommagée doit
être correctement remplacée ou réparée par un service
après-vente agréé.
■Pour refaire le plein d'essence ou procéder à son
mélange, choisissez un endroit bien ventilé, et éloigné
de toute source d'embrassement (étincelles, flammes,
etc.) et de matériaux inflammables.
■Mélangez et conservez le carburant dans un récipient
homologué pour contenir de l'essence.
■Mélangez le carburant à l'air libre, loin de toute étincelle
ou flamme. Essuyez le carburant répandu. Eloignez-
vous de 10 m de la zone de remplissage avant de
démarrer le moteur.
■Arrêtez le moteur et laissez-le refroidir avant de
refaire le plein et avant de ranger la machine ou de la
transporter.
■Rappelez-vous de bien fermer tous les bouchons de
réservoir/bidon d'essence après avoir fait le plein ou
préparé du mélange.
AVERTISSEMENTS DE SÉCURITÉ RELATIFS À LA
TRONÇONNEUSE
■Mettez toujours la protection du guide-chaîne en place
lorsque vous n'utilisez pas le produit ou lorsque vous le
portez ou que vous le transportez. Vous aiderez ainsi
à réduire les risques de mise en contact accidentelle
avec les dents affûtées de la chaîne. Transportez
le produit par sa poignée avant, le guide-chaîne en
direction opposée de votre corps.
■Vous devriez vous familiariser avec votre nouvelle
tronçonneuse en effectuant des coupes simples dans
du bois bien calé. Faites-le si vous n'avez pas utilisé la
tronçonneuse depuis longtemps.
■Coupez les bûches sur un chevalet ou sur un berceau
lors de la première utilisation du produit.
■Assurez-vous que toutes les protections et poignées
ainsi que l'arrêtoir à griffes sont bien en place et en bon
état.
■Les utilisateurs du produit doivent être en bonne santé.
Ce produit pesant un certain poids, l'utilisateur doit être
en bonne forme physique. L'utilisateur doit être vigilant,
avoir une bonne vue, une bonne mobilité, un bon sens
de l'équilibre, et être adroit de ses mains. En cas de
doute quel qu'il soit, n'utilisez pas la tronçonneuse.
■Ne vous tenez pas sur une surface instable lorsque
vous utilisez le produit. Ceci peut comprendre, de façon
non exhaustive, les échelles, les échafaudages, et les
arbres. Gardez en permanence vos deux mains sur les
poignées du produit.
■Ne commencez pas à utiliser le produit avant de
disposer d'une zone de travail dégagée, d'avoir un bon
appui au sol, ainsi qu'un chemin de repli éloigné de la
zone de chute de l'arbre.
■Soyez extrêmement prudent lorsque vous coupez des
billes et des branches de petite taille car les éléments
fins peuvent s'accrocher à la chaîne coupante et être
projetés dans votre direction ou vous déséquilibrer.
■Lorsque vous coupez une branche sous contrainte,
soyez prêt à vous éloigner rapidement de façon à ne
pas être frappé lorsque la tension dans les fibres du
bois se relâche.
■Prenez garde aux émissions de gaz d'échappement,
aux vapeurs d'huile et à la sciure. Portez un masque ou
un respirateur au besoin.
■Ne coupez pas de vigne et/ou de petites broussailles
(de moins de 75 mm de diamètre).
■Tenez toujours la tronçonneuse des deux mains lorsque
vous l'utilisez. Tenez la tronçonneuse fermement, vos
doigts entourant les poignées. La main droite doit tenir
la poignée arrière et la main gauche la poignée avant.
■Avant de mettre l'outil en marche, assurez-vous que rien
n'est en en contact avec la chaîne de la tronçonneuse.
Démarrez toujours le produit avec le frein de chaîne
actionné (complètement poussé en avant).
■Ne modifiez votre produit d'aucune façon, et ne l'utilisez
pas pour faire fonctionner des accessoires ou appareils
non recommandés par le fabricant de votre produit.
■Il devrait toujours y avoir une trousse de premiers
soins contenant de grands pansements et un dispositif
permettant d'attirer l'attention (par ex. un sifflet) à
proximité de l'utilisateur. Une trousse de premiers
soins mieux fournie doit aussi se trouver à distance
raisonnablement proche.
■L'opérateur pourrait être tenté de retirer son casque
si aucun risque de chute d'objets n'est présent, mais
rappelez-vous que le casque, en particulier s'il est
équipé d'une visière à grille, peut aider à réduire les
risques de blessures infligées au visage et à la tête en
cas de rebond.
■Porter un casque en permanence lors de l'utilisation du
produit. Un casque, équipé d'une visière en mesh, peut
permettre de réduire le risque de blessure du visage et
de la tête en cas de recul.
■Une chaîne mal tendue peut dérailler du guide-chaîne
et provoquer de graves blessures potentiellement
mortelles. La longueur de la chaîne dépend de
sa température et de son degré d'usure. Vérifiez
fréquemment sa tension.
■Gardez les poignées propres, sèches, et exemptes
d'huile et de graisse. Des poignées grasses ou
huileuses sont glissantes et peuvent entraîner une
perte de contrôle.
■Pour réduire les risques de blessure associés au contact
avec les pièces en rotation, toujours arrêter le moteur,
appliquer le frein de la chaîne et retirer le fil de la bougie.
Assurez-vous que tous les éléments en mouvement se sont
bien arrêtés:
●avant de laisser le produit sans surveillance
●avant de nettoyer ou de dégager la cause d'un
blocage
●avant de mettre en place ou de retirer des
accessoires
●avant de travailler sur le produit, de le vérifier ou
de l'entretenir

15
Français |
EN
FR
DE
ES
IT
NL
PT
DA
SV
FI
NO
RU
PL
CS
HU
RO
LV
LT
ET
HR
SL
SK
BG
UK
TR
■La superficie de la zone de travail dépend du travail
à effectuer tout autant que de la taille de l'arbre ou de
la pièce à usiner. Par exemple, l'abattage d'un arbre
demande une zone de travail plus importante que
les autres coupes, telles que le tronçonnage, etc.
L'opérateur doit être conscient de son environnement
de travail et opérer un contrôle total sur tout événement
pouvant s'y produire.
■Ne coupez pas en ayant votre corps aligné avec le
guide-chaîne et avec la chaîne. En cas de rebond, vous
aiderez ainsi à éviter que la chaîne n'entre en contact
avec votre tête ou votre corps.
■N'effectuez pas de mouvement de sciage d'avant en
arrière, laissez la chaîne effectuer le travail. Gardez
la chaîne bien affûtée, et ne tentez pas de la pousser
dans la coupe.
■N'exercez pas de pression sur la tronçonneuse en
fin de coupe. Tenez-vous prêt à supporter le poids
de la tronçonneuse une fois celle-ci libérée en fin de
la coupe. Le non respect de cet avertissement peut
entraîner de graves blessures.
■N'arrêtez pas la tronçonneuse en pleine opération de
coupe. Gardez la tronçonneuse en fonctionnement
jusqu'à ce qu'elle soit sortie de la coupe.
Équipement de protection individuel
Un équipement de protection individuel de bonne qualité
utilisé par des professionnels aide à réduire le risque
de blessures inigées à l'opérateur. Les éléments
suivants doivent être utilisés lorsque vous utilisez votre
tronçonneuse :
Casque de sécurité
–doit être conforme à EN 397 et porter l'inscription
CE
Protection auditive
–doit être conforme à EN 352-1 et porter l'inscription
CE
Protection oculaire et faciale
–doit porter l'inscription CE et être conforme à EN
166 (pour les lunettes de sécurité) ou EN 1731
(pour les visières à grille)
Gants
–doit être conforme à EN 381-7 et porter l'inscription
CE
Protèges-jambes (jambières)
–doivent être conformes à EN381-5, porter
l'inscription CE et protéger tout le tour des jambes.
Bottes de protection pour tronçonneuse
–doivent être conformes à EN ISO 20345:2004 et
porter un pictogramme de tronçonneuse indiquant
la conformité à EN 381-3. (Les utilisateurs
occasionnels peuvent porter des chaussures de
sécurité à embouts acier et des guêtres de sécurité
conformes à EN 381-9 si le sol est régulier et que
le risque de trébucher ou de s'emmêler dans des
broussailles est faible)
Vestes de protection du haut du corps pour
tronçonneuse
–doit être conforme à EN 381-11 et porter l'inscription
CE
MONTAGE
AVERTISSEMENT
Si une quelconque pièce ou partie de cette tronçonneuse
est manquante ou endommagée, ne l’utilisez pas
avant d’avoir changé la pièce. Le non-respect de cet
avertissement pourrait entraîner de graves blessures.
MONTAGE DE LA CHAÎNE ET DU GUIDE-CHAÎNE
Voir page 343, Fig. 5 - 8.
1. Arrêtez le produit. Portez des gants de protection.
2. Dégagez le frein de chaîne.
3. Dévissez le bouton de verrouillage du guide-chaîne
puis retirez le carter de pignon.
4. Mettez en place le guide-chaîne et l'ensemble
tensionneur de chaîne sur la tronçonneuse. Abaissez le
guide-chaîne de façon que le boulon traverse le trou du
guide et de l'ensemble tensionneur de chaîne.
5. La chaîne doit être orientée vers son sens de rotation.
Si elles sont orientées dans le sens inverse, retournez
la boucle que vous avez formée.
6. Placez la boucle autour du pignon d'entraînement.
Placez les maillons d'entraînement dans le rail du
guide. Au besoin, faites pivoter l'ensemble tensionneur
de chaîne pour appliquer une certaine tension à la
chaîne, ce qui aidera à la maintenir en place.
7. Remettez le carter de pignon en place.
8. Réglez la tension de la chaîne. Reportez-vous au
chapitre “ Réglage de la tension de la chaîne”.
RÉGLAGE DE LA TENSION DE LA CHAÎNE
Voir page 356.
1. Desserrez légèrement le bouton de verrouillage du
guide-chaîne en le tournant dans le sens inverse des
aiguilles d'une montre.
2. Pour augmenter la tension de la chaîne, tournez la
bague de réglage de tension dans le sens des aiguilles
d'une montre et vérifiez régulièrement la tension de la
chaîne. Pour diminuer la tension de la chaîne, tournez
la bague de réglage de tension dans le sens inverse
des aiguilles d'une montre et vérifiez régulièrement la
tension de la chaîne.
3. La tension est correcte lorsque le jeu entre la dent de
la chaîne et le guide-chaîne est de 3 mm à 4 mm. Tirez
la chaîne vers le bas au niveau du milieu de la partie
inférieure du guide-chaîne (de façon à l'éloigner du
guide-chaîne) et mesurez la distance entre le guide-
chaîne et les dents de coupe.
4. Serrez le bouton de verrouillage du guide-chaîne en le
tournant dans le sens des aiguilles d'une montre.
REMARQUE: La température de la chaîne augmente
en cours d'utilisation normale, ce qui augmente son
élongation. Contrôlez régulièrement la tension de la
chaîne et retendez-la chaque fois que c'est nécessaire.
Une chaîne tendue à chaud peut s'avérer trop serrée une
fois refroidie. Assurez-vous que la tension de la chaîne est
correcte en vous référant à ces instructions.

16
| Français
UTILISATION DU PRODUIT
CARBURANT ET REMPLISSAGE DU RÉSERVOIR
Manipulation du carburant en toute sécurité
AVERTISSEMENT
Arrêtez toujours le moteur avant de faire le plein. Ne
remplissez jamais le réservoir d'un outil dont le moteur
est en marche ou encore chaud. Éloignez-vous de 10 m
au moins de l'endroit où vous avez rempli le réservoir
avant de faire démarrer le moteur. Ne fumez pas! Le
non-respect de cet avertissement peut entraîner des
blessures corporelles graves.
AVERTISSEMENT
Assurez-vous que l'outil ne présente pas de fuite de
carburant. Réparez toute fuite éventuelle avant d'utiliser
l'appareil pour éviter tout incendie et toute blessure par
brûlure.
■Manipulez toujours l'essence avec précaution, elle est
hautement inflammable.
■Refaites toujours le plein d'essence à l'extérieur, à
l'écart de toute source d'embrassement ; n'inhalez pas
les vapeurs d'essence.
■Évitez que de l'essence ou de l'huile n'entre en
contact avec votre peau. En cas de contact, lavez
immédiatement à grande eau et avec du savon.
■Évitez surtout toute projection d’essence ou d’huile
dans vos yeux. Si de l'essence ou de l'huile est projetée
dans vos yeux, rincez-les immédiatement à l'eau
claire. S’ils restent irrités, consultez immédiatement un
médecin.
Mélange du carburant
■Votre outil fonctionne avec un moteur à 2 temps
nécessitant un mélange d’essence et d’huile de
synthèse 2 temps (ratio 2%). Mélangez de l'essence
sans plomb et de l'huile 2 temps dans un récipient
propre homologué pour contenir de l'essence.
■Le moteur fonctionne avec de l'essence sans plomb
pour véhicules avec un indice d'octane de 91 ([R + M]
/ 2) ou plus.
■N'utilisez pas les mélanges essence / huile préparés
dans les stations services. Notamment ceux destinés
aux cyclomoteurs, aux mobylettes, etc.
■Utilisez une huile de synthèse deux temps pour les
moteurs à refroidissement à air. N’utilisez pas d’huile
pour voiture ou d’huile pour moteurs hors-bord.
■Mélangez 2 % d'huile à l'essence. Soit un rapport de
50 :1.
■Mélangez bien le carburant avant chaque remplissage.
■Mélangez du carburant en petites quantités. Ne
préparez pas plus de l'équivalent d'un mois d'utilisation.
Nous vous recommandons d'utiliser une huile de
synthèse 2 temps contenant un stabilisateur de
carburant.
REMARQUE: Les dommages et problèmes de
performance consécutifs à l’utilisation d’une essence
oxygénée contenant un pourcentage d’additifs oxygénant
supérieur à ceux mentionnés ci-dessus ne sont pas
couverts par la garantie.
Remplissage du réservoir d'essence
Voir page 343.
■Nettoyez le réservoir autour du bouchon afin d'éviter
toute contamination du carburant.
■Desserrez lentement le bouchon d'essence.
■Versez avec précaution le mélange de carburant dans
le réservoir. En évitant d'en répandre.
■Avant de revisser le bouchon, nettoyez le joint et
assurez-vous qu'il est en bon état.
■Replacez immédiatement le bouchon du réservoir et
serrez-le fermement. Essuyez le carburant répandu.
REMARQUE: Il est normal que le moteur émette de la
fumée pendant et après la première utilisation.
AJOUT D'HUILE DE LUBRIFICATION DE CHAÎNE
Voir page 343.
AVERTISSEMENT
Ne travaillez jamais sans huile de chaîne. Si la chaîne
tourne sans lubriant, cela peut endommager la chaîne
et le guide-chaîne. Il est donc essentiel de vérier
fréquemment le niveau d'huile à l'aide de la jauge, ainsi
qu'à chaque démarrage.
1. Nettoyez la surface autour du bouchon d'huile pour
éviter toute contamination.
2. Dévissez et retirez le bouchon du réservoir d'huile.
3. Versez l'huile dans le réservoir d'huile et vérifiez la
jauge de niveau d'huile. Prenez garde de ne pas faire
pénétrer de saletés dans le réservoir d'huile lors de son
remplissage.
4. Remettez le bouchon d'huile en place et serrez-le.
Essuyez toute huile renversée.
5. Un réservoir d'huile plein vous permet d'utiliser la
tronçonneuse pendant 20 - -40 minutes.
REMARQUE: Un système de lubrication de la chaîne
et du guide-chaîne qui fonctionne correctement
délivrera normalement de l'huile à la chaîne en cours de
fonctionnement. Pour vérier le bon fonctionnement du
système de lubrication de la chaîne et du guide-chaîne,
dirigez l'extrémité de la chaîne vers une surface lumineuse
colorée, telle qu'un journal. Une nette giclée d'huile doit
être visible après un bref instant.
Huile lubriante pour chaîne recommandée
■Le fabricant vous recommande de n'utiliser que de
l'huile pour chaîne de marque Ryobi. (Disponible
auprès de votre service après-vente agréé)
DÉMARRAGE DU PRODUIT
La méthode de démarrage varie selon que le moteur est
froid ou chaud.

17
Français |
EN
FR
DE
ES
IT
NL
PT
DA
SV
FI
NO
RU
PL
CS
HU
RO
LV
LT
ET
HR
SL
SK
BG
UK
TR
AVERTISSEMENT
Tenez-vous à gauche du guide-chaîne. N'enjambez
jamais la tronçonneuse ou la chaîne; ne vous penchez
jamais au-delà de la trajectoire de la chaîne.
■Posez le produit sur un sol plat et assurez-vous
qu'aucun objet ni obstacle alentour n'est susceptible
d'entrer en contact avec la chaîne ou avec le guide-
chaîne.
■Tenez fermement la poignée avant avec votre main
gauche et posez votre pied droit sur la base de la
poignée arrière.
REMARQUE: Dans les instructions de démarrage qui
suivent, lorsque le levier de starter est tiré à fond en
position START, l'accélérateur est prêt au démarrage.
Pour remettre l'accélérateur en position RUN, enfoncez et
relâchez la gâchette des gaz.
Démarrage d'un moteur froid :
Voir page 342 - 343.
1. Mettez le contacteur d'allumage en position ON
(marche).
2. Assurez-vous que le frein de chaîne est en position
BRAKE en poussant le levier/protège-main vers l'avant.
3. Pompez la pompe d'amorçage 10 fois .
4. Tirez complètement le levier de starter pour le mettre
en position START.
5. Si la température ambiante est supérieure à 10°C, tirez
sur la poignée du lanceur jusqu’à ce que le moteur
fasse mine de démarrer, mais pas plus de 3 fois.
Lorsque la température ambiante est inférieure à 10°C,
tirez sur la poignée du lanceur jusqu’à ce que le moteur
fasse mine de démarrer, mais pas plus de 5 fois.
6. Mettez le levier de starter en position "HALF". Tirez
sur la poignée du lanceur jusqu'à ce que le moteur
démarre.
7. Enfoncez le déverrouillage de la gâchette et pressez
la gâchette des gaz, puis relâchez la gâchette des gaz
pour remettre le moteur au ralenti.
8. Laissez le produit tourner au ralenti pendant 15 - 30
secondes.
9. Avant d'accélérer le moteur ou de couper du bois,
assurez-vous que le frein de chaîne est enclenché en
tirant le levier de frein/protège-mains vers l'arrière.
MISE EN GARDE
Si vous ne relâchez pas la gâchette pour ralentir le
moteur lorsque le frein de chaîne est enclenché, vous
risquez d'endommager le moteur. Ne maintenez jamais
la gâchette enfoncée alors que le frein est enclenché.
Démarrage d'un moteur chaud :
Voir page 351.
1. Mettez le contacteur d'allumage en position ON
(marche).
2. Assurez-vous que le frein de chaîne est en position
BRAKE en poussant le levier/protège-main vers l'avant.
3. Pressez la poire d'amorçage à 10 reprises.
4. Tirez complètement le levier de starter pour le mettre
en position "START" (démarrage) puis repoussez-le en
position "RUN" (fonctionnement).
5. Tirez sur le lanceur jusqu'à ce que le moteur tourne,
mais pas plus de 5 fois. Enfoncez le déverrouillage de la
gâchette et pressez la gâchette des gaz, puis relâchez
la gâchette des gaz pour remettre le moteur au ralenti.
Si le moteur ne démarre pas après 5 tractions, suivez
la procédure de démarrage à froid.
6. Assurez-vous que le frein de chaîne est en position
RUN en tirant le levier/protège-main vers l'arrière.
PASSAGE D'UN MODE DE FONCTIONNEMENT À UN
AUTRE
Voir page 357.
Le produit comporte un mode antigel qui empêche le
givre de se former à l'intérieur du carburateur lorsque la
température ambiante est inférieure ou égale à 5°C.
Un volet de ventilation sur le côté droit du couvercle de ltre
à air peut être repositionné de façon à permettre au moteur
d'être alimenté en air chaud an d'empêcher la formation
de givre dans le carburateur.
AVERTISSEMENT
Si vous ne passez pas du mode normal au mode antigel
lorsque la température ambiante est inférieure ou égale
à 5°C, la puissance de sortie sera réduite et des pannes
pourront se produire.
Rappelez-vous toujours de remettre le produit en mode
de fonctionnement normal lorsqu'il n'y a aucun risque
que du givre ne se forme à l'intérieur du carburateur. Si
vous ne passez pas du mode antigel au mode normal
lorsque la température ambiante est normale, des
pannes pourront se produire.
ARRÊT DU MOTEUR
Relâchez la gâchette d'accélérateur et laissez le moteur
ralentir. Pour arrêter le moteur, placez l'interrupteur sur
“O”, en position ARRÊT . Ne posez pas votre tronçonneuse
sur le sol tant que la chaîne est en rotation. Pour plus
de sécurité, enclenchez le frein de chaîne lorsque vous
n'utilisez pas votre tronçonneuse.
Si l'interrupteur n'arrête pas la tronçonneuse, tirez le
levier de starter jusqu'à ce qu'il soit complètement sorti
(étranglement maximum) et enclenchez le frein de
chaîne pour arrêter le moteur. Si l'interrupteur ne permet
pas d'arrêter la tronçonneuse lorsqu'il est placé sur arrêt
"O", faites-le réparer avant d'utiliser de nouveau votre
tronçonneuse pour éviter de travailler dans des conditions
dangereuses et de vous blesser gravement.
REMARQUE: Quand vous avez ni d'utiliser la
tronçonneuse, laissez la pression s'évacuer en dévissant
les bouchons des réservoirs d'huile et de carburant.
Laissez le moteur refroidir avant de ranger l'appareil.
MAINTIEN DU PRODUIT
Voir page 343.
Tenez toujours la tronçonneuse avec votre main droite
sur la poignée arrière et votre main gauche sur la poignée
avant. Agrippez les deux poignées de façon que vos
pouces et vos doigts les encerclent. Assurez-vous que

18
| Français
votre main gauche tient la poignée avant de telle façon que
votre pouce se trouve en dessous.
VÉRIFICATION ET UTILISATION DU FREIN DE CHAÎNE
1. Actionnez le frein de chaîne en faisant tourner votre
main gauche autour de la poignée avant. À l'aide du
dos de votre main, poussez le levier du frein de chaîne/
sur le protège-mains en direction du guide-chaîne alors
que la chaîne est en rotation rapide. Assurez-vous de
maintenir les poignées de la tronçonneuse des deux
mains en permanence.
2. Remettez le frein de chaîne en position Run
(fonctionnement) en saisissant la partie supérieure
du levier de frein/protège-mains et en le tirant vers la
poignée avant jusqu'à entendre un clic.
AVERTISSEMENT
Si le frein de chaîne ne stoppe pas immédiatement la
chaîne, ou s’il ne reste pas en position de fonctionnement
sans y être aidé, apportez la tronçonneuse à un service
après vente agréé pour la faire réparer avant de
continuer à l’utiliser.
AVERTISSEMENT
Lorsque la gâchette-accélérateur est relâchée et que le
moteur tourne au ralenti, la chaîne ne doit pas tourner.
Dans le cas contraire, l'opérateur risque de subir des
blessures graves. N'utilisez pas le produit, rapportez-
le à un réparateur agréé pour le faire régler par un
professionnel.
VÉRIFICATION DE L'EMBRAYAGE
1. Dégagez le frein de chaîne en poussant le levier/
protège-mains vers l'avant en direction de la poignée
avant jusqu'à entendre un clic.
2. Laissez le moteur tourner au ralenti. Assurez-vous que
le frein de chaîne n'est pas enclenché. Si la chaîne
de la tronçonneuse tourne tout tourne au ralenti,
l'embrayage peut être endommagé. N'utilisez pas la
machine. Rapportez-la à un réparateur agréé pour la
faire régler par un professionnel.
3. Enfoncez la gâchette-accélérateur à mi-chemin et
faites tourner le moteur à mi-régime. La chaîne de
la tronçonneuse doit tourner de façon régulière si
l'embrayage est en bon état de fonctionnement.
REDÉMARRER VOTRE OUTIL APRÈS UN USAGE IN-
TENSIF PROLONGÉ
Après une utilisations prolongée de votre tronçonneuse,
engager le frein de chaine et laisser tourner votre outil de 3
à 5 minutes au ralenti avant de l’arrêter.
Cette opération ayant pour but de refroidir la machine et de
prévenir toute surchauffe de certains composants ( bobine
d’allumage ; volant magnétique et carburateur).
Après l’arrêt complet de la machine, il peut arriver que
celle-ci soit dif cile à redémarrer, En effet les conditions
climatiques peuvent affecter l’outil.
Dans ce cas laisser l’outil refroidir avant de le redémarrer.
Causes et prévention du rebond :
Il peut se produire un rebond si l'extrémité du guide-chaîne
entre en contact avec un objet ou si la chaîne coupante se
pince et se bloque dans le bois pendant la coupe.
Dans certains cas, le contact avec le nez du guide-chaîne
peut provoquer une réaction inverse soudaine, faisant
rebondir le guide-chaîne vers le haut et en direction de
l'opérateur.
Le pincement de la chaîne au niveau du haut du guide-
chaîne est susceptible de le repousser rapidement le
guide-chaîne en direction de l'opérateur.
Chacune de ces réactions est susceptible de vous faire
perdre le contrôle de la machine et d'entraîner de graves
blessures. Ne vous ez pas exclusivement aux éléments
de protection de votre tronçonneuse. Vous devez
également prendre différentes mesures pour éviter les
risques d'accidents ou de blessures.
Le rebond est le résultat d'une utilisation incorrecte de l'outil
et/ou de mauvaises procédures ou conditions d'utilisation,
et il peut être évité en prenant les précautions adéquates
indiquées ci-dessous :
■Maintenez fermement la tronçonneuse des deux
mains, vos pouces et vos doigts enserrant ses
poignées, et positionnez votre corps et vos bras
de façon à pouvoir résister aux forces de rebond.
Les forces de rebond peuvent être maîtrisées par
l'opérateur si des précautions adaptées sont prises. Ne
lâchez pas la tronçonneuse.
■Ne travaillez pas en extension et ne tronçonnez
pas au dessus du niveau des épaules. Vous aiderez
ainsi à éviter le contact accidentel avec le nez du guide-
chaîne et à améliorer la contrôle de la tronçonneuse en
cas de situation inattendue.
■N'utilisez que les chaînes et guides-chaînes
indiqués par le fabricant. Des chaînes et guides-
chaînes de rechange de type incorrect pourraient
entraîner une rupture de la chaîne et/ou un rebond.
■Suivez les instructions du fabricant pour entretenir
la chaîne. La diminution de la hauteur du limiteur de
profondeur est susceptible d'augmenter le risque de
rebond.
INSTRUCTIONS CONCERNANT LES TECHNIQUES DE
BASE ADÉQUATE POUR L'ABATTAGE, LE TRONÇON-
NAGE, ET L'ÉBRANCHAGE
Compréhension des forces présentes dans le bois
Une fois comprises les pressions directionnelles et les
tensions présentes dans le bois, vous pouvez réduire les
“pincement” ou au moins les prévoir en cours de coupe.
Une tension dans le bois signie que les bres subissent
une force de traction et que si vous coupez dans cette zone,
le “trait de coupe” ou la coupe auront tendance à s'ouvrir
à mesure que la tronçonneuse progressera. Si une bûche
est soutenue par un chevalet et que son extrémité pend
sans être soutenue à son extrémité, une tension se crée
alors sur son dessus due au poids de la partie qui dépasse
et qui étire les bres. De la même façon, le dessous de la
bûche sera comprimé et les bres seront compressées. Si
une coupe est effectuée dans cette zone, le trait de coupe
aura tendance à se refermer en cours de coupe. La chaîne
Other manuals for RCS3835T
2
This manual suits for next models
1
Table of contents
Languages:
Other Ryobi Chainsaw manuals

Ryobi
Ryobi RCS36X3550HI User manual

Ryobi
Ryobi RCS3835T User manual

Ryobi
Ryobi OCS1830BL User manual

Ryobi
Ryobi R18CHS20 User manual

Ryobi
Ryobi RCS2340B User manual

Ryobi
Ryobi P541 User manual

Ryobi
Ryobi p546 User manual

Ryobi
Ryobi RY74003D User manual

Ryobi
Ryobi RCS3835T User manual

Ryobi
Ryobi RCS2040G User manual

Ryobi
Ryobi RCS5133CB User manual

Ryobi
Ryobi RY40505 User manual

Ryobi
Ryobi RCS1835 User manual

Ryobi
Ryobi CS1800 User manual

Ryobi
Ryobi P545 User manual

Ryobi
Ryobi RY40509 User manual

Ryobi
Ryobi RCS5145N User manual

Ryobi
Ryobi P2502 User manual

Ryobi
Ryobi RY3818 User manual

Ryobi
Ryobi PCN 4040 Instructions for use