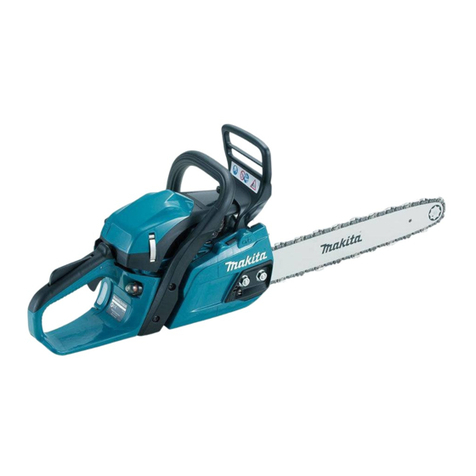
Ryobi HLCS01 User manual

HLCS01 40V
Brushless Chain Saw
Scie à chaîne sans balai
Motosierra de sin escobillas
OPERATOR’S MANUAL
General Power Tool Safety Rules 2
Chain Saw Safety Warnings 4-7
Symbols 8-9
Glossary of Terms 9-10
Features 10
Assembly 11-12
Operation 12-20
Maintenance 21-27
Bar and Chain Combinations 27
Troubleshooting 27
Parts/Service
Backpage
MANUEL D’UTILISATION
Avertissementsrèglesdesécurité 2-3
relativesauxoutilsélectriques
Avertissementsdesécuritérelatifsauscieàchaîne 3-8
Symboles 8-9
Glossaire 9-10
Caractéristiques 10-12
Assemblage 12
Utilisation 13-21
Entretien 22-29
Combinaisonsdeguideetchaîne 29
Dépannage 29
Commandedepiècesetdépannage
Pagearrière
MANUAL DEL OPERADOR
Advertenciasdeseguridadpara 2-4
herramientaseléctricas
Advertenciasdeseguridaddelamotosierra 3-8
Símbolos 8-9
Glosariodetérminos 10-11
Características 11-13
Armado 13
Funcionamiento 14-22
Mantenimiento 23-30
Combinaciones de barra y cadena 30
Correccióndeproblemas 30
Pedidosdepiezasyservicio
Pág.posterior
THIS INSTRUCTION BOOKLET CONTAINS
IMPORTANT SAFETY INFORMATION. PLEASE
READ AND KEEP FOR FUTURE REFERENCE.
WARNING: To reduce the risk of
injury, the user must read and understand the
operator’s manual before using this product.
CE LIVRET D’INSTRUCTIONS CONTIENT DES
CONSIGNES DE SÉCURITÉ IMPORTANTES.
VEUILLEZ LE LIRE ET LE CONSERVER POUR
TOUTE RÉFÉRENCE FUTURE.
AVERTISSEMENT :
Pour
réduire les risques de blessures, l’utilisateur
doit lire et veiller à bien comprendre le manuel
d’utilisation avant d’employer ce produit.
ESTE FOLLETO DE INSTRUCCIONES CONTIENE
INFORMACIÓN DE SEGURIDAD IMPORTANTE.
LÉALO Y CONSÉRVELO PARA REFERENCIA
FUTURA.
ADVERTENCIA: Para reducir
el riesgo de lesiones, el usuario debe leer y
comprender el manual del operador antes de
usar este producto.

2 – English
WARNING!
Read all safety warnings and all instructions.
Failure to follow the warnings and instructions
mayresultinelectricshock,fireand/orserious
injury.
Save all warnings and instructions for future
reference.Theterm“powertool”inthewarnings
referstoyourmains-operated(corded)powertool
orbattery-operated(cordless)powertool.
WORK AREA SAFETY
Keep work area clean and well lit. Cluttered
ordarkareasinviteaccidents.
Do not operate power tools in explosive
atmospheres, such as in the presence of
flammable liquids, gases or dust. Power
toolscreatesparkswhichmayignitethedust
or fumes.
Keep children and bystanders away while
operating a power tool. Distractions can
cause you to lose control.
ELECTRICAL SAFETY
Power tool plugs must match the outlet.
Never modify the plug in any way. Do not use
any adapter plugs with earthed (grounded)
power tools. Unmodifiedplugsandmatching
outlets will reduce risk of electric shock.
Avoid body contact with earthed or ground-
ed surfaces such as pipes, radiators, ranges
and refrigerators. There is an increased risk
of electric shock if your body is earthed or
grounded.
Do not expose power tools to rain or wet
conditions. Waterenteringapowertoolwill
increase the risk of electric shock.
Do not abuse the cord. Never use the cord
for carrying, pulling or unplugging the power
tool. Keep cord away from heat, oil, sharp
edges or moving parts. Damaged or entangled
cords increase the risk of electric shock.
When operating a power tool outdoors, use
an extension cord suitable for outdoor use.
Use of a cord suitable for outdoor use reduces
the risk of electric shock.
If operating a power tool in a damp location
is unavoidable, use a ground fault circuit
interrupter (GFCI) protected supply. Use of
a GFCI reduces the risk of electric shock.
PERSONAL SAFETY
Stay alert, watch what you are doing and
use common sense when operating a power
tool. Do not use a power tool while you are
tired or under the influence of drugs, alcohol
or medication.Amomentofinattentionwhile
operatingpowertoolsmayresultinserious
personalinjury.
Use personal protective equipment. Always
wear eye protection.Protectiveequipment
such as dust mask, non-skid safety shoes, hard
hat,orhearingprotectionusedforappropriate
conditionswillreducepersonalinjuries.
Prevent unintentional starting. Ensure the
switch is in the off-position before connect-
ing to power source and/or battery pack,
picking up or carrying the tool. Carrying
powertoolswithyourfingerontheswitchor
energisingpowertoolsthathavetheswitchon
invitesaccidents.
Remove any adjusting key or wrench before
turning the power tool on. Awrenchorakey
leftattachedtoarotatingpartofthepowertool
mayresultinpersonalinjury.
Do not overreach. Keep proper footing and
balance at all times. This enables better con-
trolofthepowertoolinunexpectedsituations.
Dress properly. Do not wear loose cloth-
ing or jewellery. Keep your hair, clothing
and gloves away from moving parts. Loose
clothes, jewellery or long hair can be caught in
movingparts.
If devices are provided for the connection of
dust extraction and collection facilities, en-
sure these are connected and properly used.
Use of dust collection can reduce dust-related
hazards.
POWER TOOL USE AND CARE
Do not force the power tool. Use the correct
power tool for your application. The correct
powertoolwilldothejobbetterandsaferat
the rate for which it was designed.
GENERAL POWER TOOL SAFETY RULES

3 – English
GENERAL POWER TOOL SAFETY RULES
Do not use the power tool if the switch does
not turn it on and off. Anypowertoolthatcan-
not be controlled with the switch is dangerous
andmustberepaired.
Disconnect the plug from the power source
and/or the battery pack from the power tool
before making any adjustments, changing
accessories, or storing power tools. Such
preventivesafetymeasuresreducetheriskof
startingthepowertoolaccidentally.
Store idle power tools out of the reach of
children and do not allow persons unfamiliar
with the power tool or these instructions to
operate the power tool. Power tools are dan-
gerous in the hands of untrained users.
Maintain power tools. Check for misalign-
ment or binding of moving parts, breakage of
parts and any other condition that may affect
the power tool’s operation. If damaged, have
the power tool repaired before use. Many
accidents are caused by poorly maintained
powertools.
Keep cutting tools sharp and clean. Proper-
lymaintainedcuttingtoolswithsharpcutting
edges are less likely to bind and are easier to
control.
Use the power tool, accessories and tool bits
etc. in accordance with these instructions,
taking into account the working conditions
and the work to be performed. Use of the
powertoolforoperationsdifferentfromthose
intendedcouldresultinahazardoussituation.
BATTERY TOOL USE AND CARE
Recharge only with the charger specified by
the manufacturer. Achargerthatissuitable
foronetypeofbatterypackmaycreatearisk
offirewhenusedwithanotherbatterypack.
Use power tools only with specifically desig-
nated battery packs. Use of any other battery
packsmaycreateariskofinjuryandfire.
When battery pack is not in use, keep it away
from other metal objects, like paper clips,
coins, keys, nails, screws or other small
metal objects, that can make a connection
from one terminal to another. Shorting the
battery terminals together may cause burns or
a fire.
Under abusive conditions, liquid may be
ejected from the battery; avoid contact. If
contact accidentally occurs, flush with wa-
ter. If liquid contacts eyes, additionally seek
medical help. Liquidejectedfromthebattery
may cause irritation or burns.
Stopthemotor,waituntilallmovingpartscome
toacompletestop,and remove the battery
packbeforecleaningorperforminganymain-
tenance.
Never use water or any liquids to clean or
rinse off your product and do not expose
the product to rain or wet conditions. Store
indoors in a dry area. Corrosiveliquids,wa-
ter,and chemicals can enter the product’s
electroniccomponents and/or battery com-
partmentanddamageelectroniccomponents
and/orthebatterypack,whichcanresultina
short circuit, increased risk of fire, and serious
personalinjury.Removeanybuildupofdirtand
debrisbywipingtheproductcleanwithadry
cloth occasionally.
SERVICE
Have your power tool serviced by a qualified
repair person using only identical replace-
ment parts. This will ensure that the safety of
thepowertoolismaintained.
When servicing a power tool, use only iden-
tical replacement parts. Follow instructions
in the Maintenance section of this manual.
Useofunauthorizedpartsorfailuretofollow
Maintenance instructions may create a risk of
shock or injury.

4 – English
CHAIN SAW SAFETY WARNINGS
Keep all parts of the body away from the
saw chain when the chain saw is operating.
Before you start the chain saw, make sure
the saw chain is not contacting anything. A
momentofinattentionwhileoperatingchain
saws may cause entanglement of your clothing
or body with the saw chain.
Always hold the chain saw with your right
hand on the rear handle and your left hand
on the front handle. Holding the chain saw
withareversedhandconfigurationincreases
theriskofpersonalinjuryandshouldneverbe
done.
Hold the power tool by insulated gripping
surfaces only, because the saw chain may
contact hidden wiring. Saw chains contacting
a“live”wiremaymakeexposedmetalpartsof
thepowertool“live”andcouldgivetheoperator
an electric shock.
Wear safety glasses and hearing protec-
tion. Further protective equipment for
head, hands, legs and feet is recommend-
ed. Adequateprotectiveclothing will reduce
personalinjury by flying debris or accidental
contact with the saw chain.
Do not operate a chain saw in a tree. Opera-
tionofachainsawwhileupinatreemayresult
inpersonalinjury.
Always keep proper footing and operate
the chain saw only when standing on fixed,
secure and level surface. Slipperyorunstable
surfaces such as ladders may cause a loss of
balance or control of the chain saw.
When cutting a limb that is under tension be
alert for spring back. When the tension in the
woodfibresisreleasedthespringloadedlimb
maystriketheoperatorand/orthrowthechain
saw out of control.
Use extreme caution when cutting brush and
saplings. The slender material may catch the
sawchainandbewhippedtowardyouorpull
you off balance.
Carry the chain saw by the front handle
with the chain saw switched off and away
from your body. Whentransportingorstoring
thechainsawalwaysfittheguidebarcover.
Properhandlingofthechainsawwillreducethe
likelihoodofaccidentalcontactwiththemoving
saw chain.
Follow instructions for lubricating, chain ten-
sioning and changing accessories. Improp-
erly tensioned or lubricated chain may either
break or increase the chance for kickback.
Keep handles dry, clean, and free from oil
and grease. Greasy,oilyhandlesareslippery
causing loss of control.
Cut wood only. Do not use chain saw for
purposes not intended. For example: do not
use chain saw for cutting plastic, masonry
or non-wood building materials. Use of the
chainsawforoperationsdifferentthanintended
couldresultinahazardoussituation.
CAUSES AND OPERATOR PREVENTION OF
KICKBACK
Kickbackmayoccurwhenthenoseortipofthe
guide bar touches an object, or when the wood
closesinandpinchesthesawchaininthecut.
Tipcontactinsomecasesmaycauseasudden
reverse reaction, kicking the guide bar up and
backtowardstheoperator.
Pinchingthesawchainalongthetopoftheguide
barmaypushtheguidebarrapidlybacktowards
theoperator.
Either of these reactions may cause you to lose
control of the saw which could result in serious
personalinjury.Donotrelyexclusivelyuponthe
safetydevicesbuiltintoyoursaw.Asachainsaw
user,youshouldtakeseveralstepstokeepyour
cutting jobs free from accident or injury.
Kickbackistheresultoftoolmisuseand/orincor-
rectoperatingproceduresorconditionsandcan
beavoidedbytakingproperprecautionsasgiven
below:
Maintain a firm grip, with thumbs and fingers
encircling the chain saw handles, with both
hands on the saw and position your body and
arm to allow you to resist kickback forces.
Kickbackforcescanbecontrolledbytheop-
erator,ifproperprecautionsaretaken.Donot
let go of the chain saw.
Do not overreach and do not cut above
shoulder height. Thishelpspreventunintend-
edtipcontactandenablesbettercontrolofthe
chainsawinunexpectedsituations.
Only use replacement bars and chains
specified by the manufacturer. Incorrect re-

5 – English
placementbarsandchainsmaycausechain
breakageand/orkickback.
Follow the manufacturer’s sharpening and
maintenance instructions for the saw chain.
Decreasingthedepthgaugeheightcanleadto
increased kickback.
Donotstartcuttinguntilyouhaveaclearwork
area,securefooting,andaplannedretreatpath
fromthefallingtree.Clutteredareasinviteac-
cidents.
Keep ALL children, bystanders, visitors, and
animals out of the work area while starting or
cuttingwiththechainsaw.Donotletvisitors
contactchainsaworextensioncord.
Donotoperatechainsawinexplosiveatmo-
spheres,suchasinthepresenceofflamma-
bleliquids,gases,ordust.Chainsawscreate
sparkswhichmayignitethedustorfumes.
DressProperly- Wear snug fitting clothing.
Alwayswearheavy,longpants,longsleeves,
overalls,jeansorchapsmadeofcutresistant
material or ones that contain cut resistant
inserts.Wearnon-slipsafety footwear. Wear
non-slipheavyduty gloves to improve your
gripandtoprotectyourhands.Donotwear
jewelry,shortpants,sandals,orgobarefoot.
Do not wear loose fitting clothing, which could
be drawn into the motor or catch the chain or
underbrush.Securehairsoitisaboveshoulder
level.Wearhearingandheadprotection.
Heavyprotectiveclothingmayincreaseoper-
ator fatigue, which could lead to heat stroke.
Duringweatherthatishotandhumid,heavy
work should be scheduled for early morning
orlateafternoonhourswhentemperaturesare
cooler.
Alwaysweareyeprotectionwithsideshields
markedtocomplywithANSIZ87.1aswellas
headandhearingprotectionwhenoperating
thisequipment.
Alwaysbeawareofwhatyouaredoingwhen
using the chain saw. Use common sense. Do
notoperatethechainsawwhenyouaretired,
ill, or under the influence of alcohol, drugs, or
medication.
Donotexposethechainsawtorain.
Donotusethechainsawindamporwetloca-
tions.
CHAIN SAW SAFETY WARNINGS
Stayalertandpayattentiontowhatyouare
doing. Use common sense when using this unit.
Keepallpartsofyourbodyawayfromthesaw
chain when the unit is running.
Neverletanyoneuseyourchainsawwhohas
notreceivedadequateinstructionsinitsproper
use.Thisappliestorentalsaswellasprivately
owned saws.
Before you start the unit, make sure the saw
chain is not contacting any object.
Stopthechainsawbeforesettingitdown.
Toavoidaccidentalstarting,nevercarrythe
unit with your finger on the switch trigger.
Maintaintheunitwithcare.Keepthecutting
edgesharpandcleanforbestperformanceand
to reduce the risk of injury. Follow instructions
for lubricating and changing accessories.
Donot operate a chain saw with one hand!
Use a firm grip with thumbs and fingers en-
circling the chain saw handles. Serious injury
to the operator, helpers, bystanders, or any
combinationofthesepersonsmayresultfrom
one-handedoperation.Achainsawisintended
for two-handed use.
Guard against electric shock - Avoid body
contact with grounded surfaces such as metal
pipesandwirefences.Thereisanincreased
risk of electric shock if your body is grounded.
Donotoperateachainsawthatisdamaged,
improperly adjusted, or not completely and
securely assembled. Chain should slow to a
stopwhentheswitchtriggerisreleased.Ifthe
chain continues to turn after the switch trigger
hasbeenreleased,havetheunitservicedby
anauthorizedservicecenter.
Checkfordamagedparts.Checkforalignment
ofmovingparts,bindingofmovingparts,break-
ageofparts,mounting,andanyothercondi-
tionsthatmayaffectitsoperation.Aguardor
otherpartthatisdamagedshouldbeproperly
repairedorreplacedbyanauthorizedservice
center unless otherwise indicated elsewhere in
this manual.
Allchainsawservice,otherthantheitemslist-
edintheoperationandmaintenancesections,
shouldbeperformedbyanauthorizedservice
center.


6 – English
Alwaysmaintainaproperstance.
Do not use chain saw if switch does not turn it
onandoff.Haveswitchreplacedbyanautho-
rizedservicecenter.
Donotadaptyourpowerheadtoabowguide
oruseittopoweranyattachmentsordevices
not listed for the saw.
Disconnectchainsawfrompowersupplywhen
notinuse,beforeservicing,andwhenmaking
adjustments and changing attachments, such
as saw chain and guard.
Donotcutvinesand/orsmallunderbrush.
Donotoperatea chain saw in a tree, on a
ladder,rooftop,scaffold,or other unstable
support;thisisextremelydangerous.
NOTE: Thesizeoftheworkareadependson
thejobbeingperformedaswellasthesizetree
orworkpieceinvolved.Forexample,fellinga
treerequiresalargerworkareathanmaking
bucking cuts.
Do not force the chain saw. The job can be
performedbetterandsaferattherateforwhich
it was intended.
Alwaysusetherightproductforyourapplica-
tion. The chain saw should be used for cutting
woodonly.Neverusethechainsawtocutplas-
tic, masonry or non-wood building materials.
Store chain saw when not in use. Chain saw
should be stored in a dry and high or locked
area out of the reach of children. When storing
chainsawplacethescabbardonthebarand
chain.
Usethisproductonlywithbatteriesandchar-
gerslistedintool/appliance/batterypack/
chargercorrelationsupplement995000885.
Battery operated units do not have to be
pluggedintoanelectricaloutlet;therefore,they
arealwaysinoperatingcondition.Beawareof
possiblehazardsevenwhenunitisnotoper-
ating.
Removethebatterypackfromthechainsaw
beforecleaning,servicing,storing,removing
material from the unit, changing accessories
such as the bar and chain, or when not in use.
CHAIN SAW SAFETY WARNINGS
KICKBACK
See Figures 1 - 3.
WARNING!
Kickback may occur when the moving chain
contactsanobjectattheupperportionofthe
tipoftheguidebarorwhenthewoodclosesin
andpinchesthesawchaininthecut.Contactat
theupperportionofthetipoftheguidebarcan
causethechaintodigintotheobjectandstop
the chain for an instant. The result is a lightning
fast,reversereactionwhichkickstheguidebar
up and back toward the operator. If the saw
chainispinchedalongthetopoftheguidebar,
theguidebarcanbedrivenrapidlybacktoward
theoperator.Eitherofthesereactionscancause
loss of saw control which can result in serious
injury. Do not relyexclusivelyupon the safety
devicesbuiltintothesaw.Asachainsawuser,
youshouldtakeseveralstepstokeepyourcut-
ting jobs free from accident or injury.
The following precautions should be fol-
lowed to minimize kickback:
•Alwaysgripthesawfirmlywithbothhands.
Hold the saw firmly with both hands when
the unit is running. Place your right hand on
the rear handle and your left hand on the
front handle with your thumbs and fingers
encirclingthechainsawhandles.Afirmgrip
togetherwithastiffleft arm will help you
maintain control of the saw if kickback oc-
curs.
• Make sure that the area in which you are cut-
ting is free from obstructions. Do not let the
nose of the guide bar contact a log, branch,
fence, or any other obstruction that could be
hitwhileyouareoperatingthesaw.
•Alwayscutwiththeunitrunningatfullspeed.
Fullysqueezethethrottletriggerandmaintain
asteadycuttingspeed.
•Usereplacementpartssuchaslowkickback
chainandspecialguidebarsthatreducethe
risks associated with rotational kickback. Use
onlythereplacementguidebarsandlowkick-
backchainsspecifiedbythemanufacturerfor
the saw.
With a basic understanding of kickback, you
canreduceoreliminatetheelementofsurprise.
Suddensurprisecontributestoaccidents.

7 – English
CHAIN SAW SAFETY WARNINGS
Donot overreach. Keep proper footing and
balance at all times.
Do not cut above chest height or overreach
when cutting. Do not let the nose of the guide
bar contact a log, branch, ground, or any other
obstructionwhileyouareoperatingtheunit.
Followthesharpeningandmaintenancein-
structions for the saw chain.
Push and Pull - This reaction force is always
oppositetothedirectionthechainismoving
wherewoodcontactismade.Thus,theoper-
ator must be ready to control the PULL when
cutting on the bottom edge of the bar, and
PUSHwhencutting alongthetopedge.See
Figure 3.
UNDERSTANDING YOUR CHAIN SAW SAFETY
DEVICES
LOW KICKBACK SAW CHAIN
Therakers(depthgauges)aheadofeachcutter
canminimizetheforceofakickbackreactionby
preventingthecuttersfromdiggingintoodeeply
atthekickbackzone.Onlyusereplacementchain
thatisequivalenttooriginalchain or has been
certifiedaslowkickbackchainperANSIB175.1.
Low kickback saw chain is chain that has met
thekickbackperformancerequirementsofANSI
B175.1- 2012 (American National Standard
for Power Tools - Gasoline-Powered Chain
Saws-SafetyRequirements)whentestedonthe
representativesampleofchainsawsbelow3.8
c.i.d.specifiedinANSIB175.1-2012.
Assawchainsaresharpenedduringtheiruseful
life,theylosesomeofthelowkickbackqualities
andextracautionshouldbeused.
GUIDE BARS
Generally,guidebarswithsmallradiustipshave
somewhatlowerkickbackpotentials.
Whenmaking a replacement, be sure to order
one of the HART bars listed for the saw in this
operator’smanual.
Save these instructions. Refer to them fre-
quentlyandusethemtoinstructotherswho
mayusethisproduct.Ifyouloansomeonethis
product,loanthemtheseinstructionsalso.
ROTATIONAL
KICKBACK
KICKBACK
DANGER ZONE
PULL
PUSH
FIG. 1
FIG. 2
FIG. 3

8 – English
SYMBOLS
Some of the following symbols may be used on this product. Please study them and learn their mean-
ing. Proper interpretation of these symbols will allow you to operate the product better and safer.
SYMBOL NAME DESIGNATION/EXPLANATION
Safety Alert Indicatesapotentialpersonalinjuryhazard.
Read
Operator’s
Manual
Toreducetheriskofinjury,usermustreadandunderstandoperator’s
manualbeforeusingthisproduct.
Wear Eye,
Hearing, and
Head
Protection
WeareyeprotectionwithsideshieldsmarkedtocomplywithANSIZ87.1
aswellashearingandheadprotectionwhenoperatingthisequipment.
Wet
Conditions
Alert
Riskoffireandburns.Donotexposebattery,batterycompartment,or
electroniccomponentstorain,water,orliquids.Donotchargebattery
orexposeproducttorainordamplocations.
Operate With
Two Hands Holdandoperatethesawproperlywithbothhands.
One Handed Donotoperatethesawusingonlyonehand.
Kickback DANGER! BEWAREOFKICKBACK.
Bar Nose
Contact Avoidbarnosecontact.
Wear Gloves Wearnon-slip,heavy-dutyprotectivegloveswhenhandlingthechainsaw.
Wear Safety
Footwear Wearnon-slipsafetyfootwearwhenusingthisequipment.
The following signal words and meanings are intended to explain the levels of risk associated
with this product.
SYMBOL SIGNAL MEANING
DANGER: Indicatesahazardoussituation,which,ifnotavoided,willresultindeath
or serious injury.
WARNING: Indicatesahazardoussituation,which,ifnotavoided,couldresultindeath
or serious injury.
CAUTION: Indicatesahazardoussituation,that,ifnotavoided,mayresultinminor
or moderate injury.
NOTICE: (WithoutSafetyAlertSymbol)Indicatesinformationconsideredimportant,
butnotrelatedto apotentialinjury (e.g.messagesrelatingtoproperty
damage).

9 – English
Some of the following symbols may be used on this product. Please study them and learn their mean-
ing. Proper interpretation of these symbols will allow you to operate the product better and safer.
SYMBOL NAME DESIGNATION/EXPLANATION
Keep Tool
Away From
Electrical
Lines/ Keep
Bystanders
Away
DANGER!Riskofelectrocution!Keeptool50feetawayfromelectrical
lines.Keepallbystandersatleast50ft.awayortwicetheheightofthe
largest trees in the felling area when felling.
Oil Indicator Pour bar and chain lubricant into oil tank where indicated. Do not use
any other fluids.
Recycle
Symbol
Thisproductuseslithium-ion(Li-ion)batteries.Local,state,orfederal
lawsmayprohibitdisposalofbatteriesinordinarytrash.Consult your
localwasteauthorityforinformationregardingavailablerecyclingand/
ordisposaloptions.
Direct Current Typeoracharacteristicofcurrent
VVolts Voltage
SYMBOLS
GLOSSARY OF TERMS
BUCKING
Theprocessofcrosscuttingafelledtreeorlog
into lengths.
CHAIN SAW POWER HEAD
Achainsawwithoutthesawchainandguidebar.
DRIVE SPROCKET OR SPROCKET
Thetoothedpartthatdrivesthesawchain.
FELLING
Theprocessofcuttingdownatree.
FELLING BACK CUT
Thefinalcutinatreefellingoperationmadeon
theoppositesideofthetreefromthenotching
undercut.
FRONT HAND GUARD
Astructuralbarrierbetweenthefronthandleof
achainsawandtheguidebar,typicallylocated
closetothehandpositiononthefronthandle.
FRONT HANDLE
Thesupporthandlelocatedatortowardthefront
of the chain saw. This handle is for the left hand.
GUIDE BAR
Asolidrailedstructurethatsupportsandguides
the saw chain.
KICKBACK
Thebackwardorupwardmotion,orboth,ofthe
guide bar occurring when the saw chain near the
noseofthetopareaoftheguidebarcontactsany
object such as a log or branch, or when the wood
closesinandpinchesthesawchaininthecut.
KICKBACK (PINCH)
Therapidpushbackofthesawwhichcanoccur
whenthewoodclosesinandpinchesthemoving
sawchaininthecutalongthetopoftheguidebar.
KICKBACK (ROTATIONAL)
Therapid upwardandbackwardmotionofthe
sawwhichcanoccurwhenthemovingsawchain
neartheupperportionofthetipoftheguidebar
contacts an object, such as a log or branch.
LOCK-OUT BUTTON
Amovable stopthatpreventstheunintentional
operationoftheswitchuntilmanuallyactuated.

10 – English
FEATURES
PRODUCT SPECIFICATIONS
Motor................................................................................................................................... 40 Volt DC
Bar Length....................................................................................................................................14 in.
Chainoiltankcapacity..................................................................................................................6oz.
NOTE: This saw was designed for occasional light duty use and has some limitations as to what it can cut.
GLOSSARY OF TERMS
LOW-KICKBACK CHAIN
A chain that complies with the kickback
performancerequirementsofANSIB175.1when
testedonarepresentativesampleofchainsaws.
NORMAL CUTTING POSITION
Thosepositionsassumedin performingthe
bucking and felling cuts.
NOTCHING UNDERCUT
Anotchcutinatreethatdirectsthetree’sfall.
REAR HANDLE
Thesupporthandlelocatedatortowardtherear
of the saw. It normally contains the switch trigger.
This handle is for the right hand.
REDUCED KICKBACK GUIDE BAR
Aguidebarwhich has been demonstratedto
reduce kickback significantly.
REPLACEMENT SAW CHAIN
A chain that complies with the kickback
performancerequirementsofANSIB175.1when
testedwithspecificchainsaws.Itmaynotmeet
theANSIperformancerequirementswhenused
with other saws.
SAW CHAIN
Aloopofchainhavingcuttingteeththatcutthe
wood,andthatisdrivenbythemotorandissup-
portedbytheguidebar.
SPRINGPOLE
Asmalltree(sapling)orlimbthatisbentortrapped
undertension.Itmay“springback”rapidlywhen
cut, causing a dangerous situation.
SWITCH TRIGGER
Adevice that when operated will complete or
interruptanelectricalpowercircuittothemotor
of the chain saw.
KNOW YOUR CHAIN SAW
See Figure 4.
Thesafeuseofthisproductrequiresanunder-
standing of the information on the tool and in this
operator’smanualaswellasaknowledgeofthe
project you are attempting. Before use of this
product,familiarizeyourselfwithalloperating
features and safety rules.
CHAIN TENSIONING SCREW
This feature allows user to adjust the tension of
the chain.
GUIDE BAR
The factory-equipped guide bar has a small
radiustipthatoffersasomewhatlowerkickback
potential.
LOCK-OUT BUTTON
Acontrolfeaturedesignedtopreventthemotor
from being accidently started.
LOW KICKBACK CHAIN
Thelowkickbackchainhelpsminimizetheforce
ofakickbackreactionbypreventingthecutters
fromdiggingintoodeeplyatthekickbackzone.
QUICK VIEW OIL INDICATOR
Semi-transparentoilreservoirthatallowsuserto
see when to add oil.
SWITCH TRIGGER
Squeezetheswitchtriggertooperatetheunitafter
switchlock-outhasbeenpushedin.Releasethe
switchtriggertostoptheunit.

11 – English
CHAIN OIL
TANK CAP
REAR
HANDLE
FRONT HANDLE
GUIDE
BAR
LOW KICKBACK
CHAIN
CHAIN
TENSIONING
SCREW
FRONT HAND
GUARD
CHAIN
COVER
SWITCH TRIGGER
SCABBARD
BATTERY PORT
WRENCH
STORAGE
LOCK-OUT
BUTTON
QUICK VIEW OIL
INDICATOR
FIG. 4
ASSEMBLY
UNPACKING
Thisproducthas been shipped completely
assembled.
Carefully remove the product and any
accessoriesfromthebox.Makesurethatall
items listed in the Packing List are included.
WARNING:
Do not use this product if any parts in the
Packing List are already assembled to your
product when you unpack it. Parts on this
listarenotassembledtotheproductbythe
manufacturerandrequirecustomerinstallation.
Useofaproductthatmayhavebeenimproperly
assembled could result in serious personal
injury.
FEATURES

12 – English
ASSEMBLY
Inspecttheproductcarefullytomakesureno
breakageordamageoccurredduringshipping.
Donotdiscardthepackingmaterialuntilyou
havecarefully inspected and satisfactorily
operatedtheproduct.
Ifanypartsaredamagedormissing,pleasecall
1-800-776-5191forassistance.
PACKING LIST
Chain Saw with Scabbard
Combination Wrench
Operator’sManual
WARNING:
Ifanypartsaredamagedormissingdonotop-
eratethisproductuntilthepartsarereplaced.
Useofthisproductwithdamagedormissing
partscouldresultinseriouspersonalinjury.
DANGER:
Nevercutnearpowerlines,electriccords,or
other electric sources. If bar and chain jams on
anyelectricalcordorline,DONOTTOUCHTHE
BARORCHAIN!THEYCANBECOMEELEC-
TRICALLY LIVE AND VERY DANGEROUS.
Continue to hold the chain saw by the insulated
rear handle or lay it down and away from you in
asafemanner.Disconnecttheelectricalservice
tothedamagedlineorcordbeforeattempting
to free the bar and chain from the line or cord.
Contactwiththebar,chain,otherconductive
partsofthechainsaw,orliveelectriccordsor
lines will result in death by electrocution, elec-
tricshock,orseriouspersonalinjury.
WARNING:
Do not allow familiarity with this product to
make you careless. Remember that a careless
fraction of a second is sufficient to inflict seri-
ous injury.
WARNING:
Donotattempttomodifythisproductorcreate
accessories not recommended for use with this
product. Any such alteration or modification
is misuse and could result in a hazardous
conditionleadingtopossibleseriouspersonal
injury.
WARNING:
To prevent accidental starting that could
causeseriouspersonalinjury,alwaysremove
the battery pack from the product when
assemblingparts.
OPERATION
WARNING:
Alwaysweareyeprotectionwithsideshields
markedtocomplywithANSIZ87.1aswellas
headandhearing protectionwhenoperating
thisequipment. Failure to do so could result in
objects being thrown into your eyes and other
possibleseriousinjuries.
WARNING:
Do not use any attachments or accessories
not recommended by the manufacturer of this
product.Theuseofattachmentsoraccesso-
ries not recommended can result in serious
personalinjury.
WARNING:
Neverfellatreeorcutalogorlimbthathasa
diameter greater than the length of the guide
bar.Onlyproperlytrainedprofessionalsshould
performthesecuts.Performingthesetypesof
cuts can cause an accident and result in death
orseriouspersonalinjury.

13 – English
OPERATION
NOTICE:
Before each use, inspect the entire product
fordamaged,missing,orloosepartssuchas
screws,nuts,bolts,caps,etc.Tightensecurely
allfastenersandcapsanddonotoperatethis
productuntilallmissingordamagedpartsare
replaced.Pleasecontactcustomerserviceor
anauthorizedservicecenterforassistance.
APPLICATIONS
Youmay use this product for the following
purposes:
Limbingandpruningbranchesfromtrees
Felling small trees
Bucking the fallen tree into shorter lengths
TO INSTALL/REMOVE BATTERY PACK
See Figure 5.
WARNING:
Always remove battery pack from your tool
when you are assembling parts, making
adjustments, cleaning, carrying, transporting
orwhennotinuse.Removingbatterypackwill
prevent accidental starting that could cause
seriouspersonalinjury.
NOTE: Toavoidseriouspersonalinjury,always
removethebatterypackandkeephandsclearof
thelock-outbuttonwhencarryingortransporting
the tool.
To install:
Placethebatterypackinyourchainsaw.Align
raisedribonbatterypackwithgrooveinchain
saw’sbatteryport.
WARNING:
Makesurethelatchonthebatterypacksnaps
inplaceandthebatterypackisfullyseatedand
secureinthepowerheadbatteryportbefore
beginningoperation.Failureto securelyseat
thebatterypackcouldcausethebatterypack
tofallout,resultinginseriouspersonalinjury.
To remove:
Locate latch on bottom of battery pack and
depressto release the battery pack from the
chain saw.
BATTERY
PACK
LATCH
BATTERY
PORT
FIG. 5
FIG. 6
NOTICE:
Whenplacingbatterypackinyourchainsaw,
besureraisedribonbatterypackalignswith
grooveinchainsaw’sbatteryportandlatches
snapinplaceproperly.Improperassemblyof
battery pack can cause damage to internal
components.
Forcompletecharginginstructions,seetheoper-
ator’smanualsforyourbatterypackandcharger.
CHAIN OIL SYSTEM
See Figure 6.
NOTICE:
Removebatterypackfromunit.Filloiltankwith
barandchainlubricant(notprovided)before
starting the chain saw. Failure to lubricate the
chain will cause damage to the bar and chain.
Use bar and chain lubricant (not provided).
Thatisformulatedtoperformoverawide
temperaturerangewithnodilutionrequired.

14 – English
OPERATION
NOTE: Do not use dirty, used or otherwise
contaminated oils. Damage may occur to the
bar or chain.
Carefully pour the bar and chain oil into the
tank.
Check and fill the oil tank when battery is
recharged, or as needed.
NOTE:Itisnormalforlubricanttoseepfromthe
sawwhennotinuse.Topreventseepage,empty
the oil tank after each use. When storing the unit
foralongperiodoftime(threemonthsorlonger)
besure the chain is lightly lubricated; this will
preventrustonthechainandbarsprocket.
NOTICE:
Before each use, check to make sure that the
chainisproperly tensioned.Acoldchain is
correctly tensioned when there is no slack on
the underside of the guide bar, the chain is
snug, and it can be turned by hand without
binding.Duringnormalsawoperation,thetem-
peratureofthechainincreases.Thedrivelinks
of a correctly tensioned warm chain will hang
approximately.050in.outofthebargroove.
See the Adjusting the Chain Tension instruc-
tions in the Maintenance section of this manual
toproperlyadjustthechaintension.
STARTING AND STOPPING THE CHAIN SAW
See Figure 7.
WARNING:
Keepbodytotheleftofthechainline.Never
straddlethesaworchain,orleanoverpastthe
chainline.Improperoperationofthechainsaw
couldresultinseriouspersonalinjury.
Starting the chain saw:
Slide and hold the lock-out button. This makes
theswitchtriggeroperational.
Press and hold the switch trigger, release the
lock-outbuttonandcontinuetosqueezethe
switchtriggerforcontinuedoperation.
Stopping the chain saw:
Release the switch trigger to stop the chain
saw.
Uponreleaseoftheswitchtrigger,thelock-out
button will be automatically reset to the lock
position.
LOCK-OUT
BUTTON
SWITCH
TRIGGER
FIG. 7
FIG. 8
This cordless chain saw is designed for limbing
andpruningtypecutting,aswellascuttingsmall
trees.
PREPARATION FOR CUTTING
PROPER GRIP ON HANDLES
See Figures 8 - 10.
Refer to General Power Tool Safety Rules earlier
inthismanualforappropriatesafetyequipment.
Wear non-slip glovesfor maximum grip and
protection.
Holdthesawfirmlywithbothhands.Always
keepyourlefthandonthefronthandleandyour
right hand on the rear handle so that your body
is to the left of the chain line.

15 – English
WARNING:
Neverusealeft-handed(cross-handed)grip,
oranystancewhichwouldplaceyourbodyor
armacrossthechainline.Improperoperation
ofthechainsawcouldresultinseriouspersonal
injury.
Maintainapropergriponthesawwhenever
the unit is running. The fingers should encircle
thehandleandthethumb is wrappedunder
thehandlebar.Thisgripis least likely to be
broken(byakickbackorothersuddenreaction
ofthesaw).Anygripinwhichthethumband
fingers are on the same side of the handle, is
dangerous because a slight kick of the saw can
cause loss of control.
WARNING:
Donotoperatetheswitchtriggerwithyourleft
hand and hold the front handle with your right
hand.Neverallowanypartofyourbodytobe
inthechainlinewhileoperatingasaw.Improper
operationofthechainsawcouldresultinseri-
ouspersonalinjury.
PROPER CUTTING STANCE
See Figures 11 - 12.
WARNING:
Alwaysusethepropercuttingstancedescribed
in this section. Never kneel when using the
chainsaw,exceptwhenfellingatreeasillus-
trated in Figure 16. Kneeling could result in
loss of stability and control of the chain saw,
resultinginseriouspersonalinjury.
Weight should be balanced with both feet on
solid ground.
Keepleftarmwithelbowlockedina“straight
arm”positiontowithstandanykickbackforce.
Yourbodyshouldalwaysbetotheleftofthe
chain line.
Thumb should be on underside of handlebar.
BASIC CUTTING PROCEDURE
Practice cutting a few small logs using the follow-
ingtechniquetogetthe“feel”ofusingthesaw
beforeyoubeginamajorsawingoperation.
OPERATION
STRAIGHT ARM
POSITION
CHAIN LINE
CHAIN LINE
FIG. 9
FIG. 11
FIG. 10
FIG. 12

16 – English
OPERATION
Taketheproperstanceinfrontofthewoodwith
the saw off.
Squeezetheswitchtriggerand letthechain
acceleratetofullspeedbeforeenteringthecut.
Begin cutting with the saw against the log.
Keeptheunitrunningtheentiretimeyouare
cutting,maintainasteadyspeed.
Allowthechaintocutforyou;exertonlylight
downwardpressure.Ifyouforcethecut,dam-
age to the bar, chain, or unit can result.
Release the switch trigger as soon as the cut
iscompleted,allowingthechaintostop.Ifyou
run the saw without a cutting load, unnecessary
wear can occur to the chain, bar, and unit.
Donotputpressureonthesawattheendofcut.
WORK AREA PRECAUTIONS
See Figure 13.
Cut only wood or materials made from wood,
nosheetmetal,noplastics,nomasonry,no
non-wood building materials.
Neverallowchildrentooperatethesaw.Allow
nopersontousethischainsawwhohasnot
readthisOperator’sManualorreceivedade-
quateinstructionsforthesafeandproperuse
of this chain saw.
45°
45°
PLANNED LINE
OF FALL
RETREAT PATH
RETREAT PATH
FIG. 13
Keepeveryone-helpers,bystanders,children,
and animals - a safe distance from the cutting
area.During felling operations, the safe dis-
tance should be a least twice the height of the
largest trees in the felling area. During bucking
operations,keepaminimumdistanceof15feet
between workers.
Alwayscutwithbothfeetonsolidgroundto
preventbeingpulledoffbalance.
Donotcutabovechestheight,asasawheld
higher is difficult to control against kickback
forces.
Do not fell trees near electrical wires or build-
ings.Leavethisoperationforprofessionals.
Cutonlywhenvisibilityandlightareadequate
for you to see clearly.
FELLING TREES
See Figures 13 - 16.
HAZARDOUS CONDITIONS
WARNING:
Donotfelltreesduringperiodsofhighwindor
heavyprecipitation.Wait untilthehazardous
weather has ended.
WARNING:
Closely check for broken or dead branches,
which could fall while cutting and do not cut
near buildings or electrical wires if you do not
know the direction of tree fall. Do not cut at
night or during bad weather conditions, such as
rain, snow, or strong winds, which can reduce
visibilityandcontrolofthechainsaw.Ifthetree
you are felling makes contact with any utility
line, you should discontinue use of the chain
sawandimmediatelynotifytheutilitycompany.
Failure to follow these instructions could result
indeathorseriouspersonalinjury.
Whenfellingatree,itisveryimportantthatyou
closely follow these warnings and instructions to
preventpossibledeathorseriouspersonalinjury.
Donotcutdowntreeshavinganextremelean
or large trees with rotten limbs, loose bark,
orhollowtrunks.Havethesetreespushedor
draggeddownwithheavyequipment,thencut
themup.
Do not cut trees near electrical wires or buildings.

17 – English
HINGE
2 in. OR 1/10 DIA
NOTCH -
APPROX. 1/3
DIAMETER OF
TRUNK
BACK CUT
2 in.
NOTCH
BACK CUT
HINGE
FIG. 14
FIG. 15
Check the tree for damaged or dead branches
that could fall and hit you during felling.
Periodicallyglanceatthetopofthetreeduring
the backcut to assure the tree is going to fall in
the desired direction.
If the tree starts to fall in the wrong direction,
orifthesawgetscaughtorhungupduringthe
fall,leavethesawandsaveyourself!
Fellingatree— When bucking and felling op-
erationsare being performed by two or more
persons,atthesametime,thefellingoperation
shouldbeseparatedfromthebuckingoperation
by a distance of at least twice the height of the
tree being felled. Trees should not be felled in a
mannerthatwouldendangeranyperson,strike
anyutilitylineorcauseanypropertydamage.If
the tree does make contact with any utility line, the
utilitycompanyshouldbenotifiedimmediately.
Beforeanycutsarestarted,pickyourescape
route(orroutesincasetheintendedrouteis
blocked);cleartheimmediateareaaroundthe
tree and make sure there are no obstructions
inyourplannedpathofretreat.Clearpathsof
saferetreatshouldextendbackanddiagonally
(45°)totherearoftheplannedlineoffall.When
the tree begins to fall, you should retreat away
fromthedirectionoffallalongaretreatpathand
at least 20 feet away from the trunk in case it
kicksbackoverthestump.See Figure 13.
Before felling is started, consider the force and
direction of the wind, the lean and balance of
the tree, and the location of large limbs. These
things influence the direction in which the tree
will fall. Do not try to fell a tree along a line dif-
ferent from its natural line of fall.
The chain saw operator should keep on the
uphillsideoftheterrainasthetreeislikelyto
roll or slide downhill after it is felled.
Removedirt,stones,loosebark,nails,staples,
and wire from the tree where felling cuts are to
be made.
Notched Undercut.Cuta notch about 1/3
thediameterofthetree,perpendiculartothe
direction of fall. Make the cuts of the notch so
they intersect at a right angle to the line of fall.
Thisnotchshould becleanedouttoleavea
straightline.Tokeeptheweightofthewood
off the saw, always make the lower cut of the
notchbeforetheuppercut.See Figure 14.
Felling Backcut. The backcut is always made
level and horizontal, and at a minimum of 2
in.abovethehorizontalcutofthenotch.See
Figures 14 - 15.
Nevercutthroughtothenotch.Alwaysleavea
band of wood between the notch and backcut
(approximately2in.or1/10thediameterofthe
tree).Thisiscalled“hinge”or“hingewood.”It
controlsthefallofthetreeandpreventsslip-
pingortwistingorshoot-backofthetreeoff
thestump.See Figures 14 - 15.
OPERATION
WEDGE
FIG. 16

18 – English
On large diameter trees, stop the back cut
beforeitisdeepenoughforthetreetoeither
fallorsettleback on the stump. Then insert
softwoodenorplasticwedgesintothecutso
they do not touch the chain. The wedges can
bedrivenin,littlebylittle,tohelpjackthetree
over.See Figure 16.
Astreestartstofall,stopthechainsawandput
it down immediately. Retreat along the cleared
path,butwatchtheactionincasesomething
fallsyourway.Bealertforoverheadlimbsor
branches that may fall and watch your footing.
WARNING:
Nevercutthroughtothenotchwhenmakinga
backcut. The hinge controls the fall of the tree,
this is the section of wood between the notch
and backcut.
BUCKING
See Figures 17 - 20.
Bucking is the term used for cutting a fallen tree to
the desired log length.
Alwaysmakesureyourfootingissecureandyour
weightisdistributedevenlyonbothfeet.
Cut only one log at a time.
Supportsmalllogsonasawhorseoranotherlog
while bucking.
OPERATION
Keepaclearcuttingarea.Makesurethatnoob-
jects can contact the guide bar nose and chain
during cutting, this can cause kickback.
Whenbuckingonaslope,alwaysstandonthe
uphillsideofthelog.Tomaintaincompletecontrol
of the chain saw when cutting through the log,
releasethecuttingpressureneartheendofthe
cutwithoutrelaxingyourgriponthechainsaw
handles. Do not let the chain contact the ground.
Aftercompletingthecut,waitforthesawchain
tostopbeforeyoumovethechainsaw.Always
stopthemotorbeforemovingfromtreetotree.
Sometimesitisimpossibletoavoidpinching(with
juststandardcuttingtechniques)or difficult to
predictwhichwayalogwillsettlewhencut.To
avoidpinchingwhilecutting,rotateormovethe
logsothatthepinchiseliminated.
BUCKING LOGS UNDER STRESS
See Figures 19 - 20.
Whenthelogissupportedalongitsentirelength,it
shouldbecutfromthetoporoverbucking.
Whenthelogissupportedononeend,cut1/3the
diameter from the underside or underbucking. Then
makethefinishingcutbyoverbuckingtomeetthe
first cut.
LOAD
1ST CUT
1/3 DIA
LOG SUPPORTED AT ONE END:
LOG SUPPORTED AT BOTH ENDS:
FINISHING CUT
LOAD
1ST CUT 1/3 DIA
FINISHING CUT
FIG. 19
KICKBACK
FIG. 17
FIG. 18

19 – English
CUT LIMBS ONE AT A TIME AND LEAVE SUPPORT LIMBS
UNDER TREE UNTIL LOG IS CUT
4
1
3
2
OVERBUCKING
UNDERBUCKING
FIG. 20
FIG. 21
Asthelogisbeingcut,itwilltendtobend.Thesaw
canbecomepinchedorhunginthelogifyoumake
thefirstcutdeeperthan1/3ofthediameterofthelog.
Givespecialattentiontologsunderstresstoprevent
thebarandchainfrompinching.
TYPES OF CUTTING USED
See Figure 20.
OVERBUCKING
Beginonthetopsideofthelogwiththebottomofthe
sawagainstthelog;exertlightpressuredownward.
Notethatthesawwilltendtopullawayfromyou.
UNDERBUCKING
Beginontheundersideofthelogwiththetop
ofthesawagainstthelog;exertlightpressure
upward.Duringunderbucking,thesawwilltend
topushbackatyou.Bepreparedforthisreaction
and hold the saw firmly to maintain control.
LIMBING
See Figure 21.
WARNING:
Neverclimbintoatreetolimborprune.Donot
standonladders, platforms,alog,or inany
positionwhichcancauseyoutoloseyourbal-
ance or control of the saw, which could result
indeathorotherseriouspersonalinjury.
Limbingisremovingbranchesfromafallentree.
Workslowly,keepingbothhandsonthechain
sawwithafirmgrip.Alwaysmakesureyour
footing is secure and your weight is distributed
evenlyonbothfeet.
Leavethelargersupportlimbsunderthetree
tokeepthetreeoffthegroundwhilecutting.
Limbsshouldbecutoneatatime.Removethe
cutlimbsfromtheworkareaoftentohelpkeep
the work area clean and safe.
Branches under tension should be cut from the
bottomuptoavoidbindingthechainsaw.
Keepthetreebetweenyouandthechainsaw
whilelimbing.Cutfromthesideofthetreeop-
positethebranchyouarecutting.
PRUNING
See Figure 22.
Pruningistrimminglimbsfromalivetree.
Workslowly,keepingbothhandsonthechain
sawwithafirmgrip.Alwaysmakesureyour
footing is secure and your weight is distributed
evenlyonbothfeet.
Donotcutfromaladder,thisisextremelydan-
gerous.Leavethisoperationforprofessionals.
OPERATION
FINISHING CUT
FIRST CUT
1/3 DIAMETER
SECOND CUT
LOAD
FIG. 22

20 – English
Donotcutabovechestheightasasawheld
higher is difficult to control against kickback.
Whenpruningtreesitisimportantnottomake
thefinishingcutnexttothemainlimbortrunk
untilyouhavecutoffthelimbfurtheroutto
reducetheweight.Thispreventsstrippingthe
bark from the main member.
Underbuckthebranch1/3throughforyourfirst
cut.
Yoursecondcutshouldoverbucktodropthe
branch off.
Now make your finishing cut smoothly and
neatly against the main member so the bark
will grow back to seal the wound.
WARNING:
If the limbs to be pruned are above chest
height,hireaprofessionaltoperformtheprun-
ing. Failure to do so could result in death or
seriouspersonalinjury.
SPRINGPOLES
See Figure 23.
Aspringpoleisanylog,branch,rootedstump,or
saplingwhichisbentundertensionbyotherwood
sothatitspringsbackifthewoodholdingitiscut
orremoved.Onafallentree,arootedstumphas
ahighpotentialofspringingbacktotheupright
positionduringthebuckingcuttoseparatethe
logfromthestump.Watchoutforspringpoles,
they are dangerous.
WARNING:
Springpolesaredangerousandcouldstrikethe
operator,causingtheoperatortolosecontrol
ofthechainsaw.Thiscouldresultinsevereor
fatalinjurytotheoperator.
OPERATION
SPRINGPOLE
FIG. 23
Table of contents
Languages:
Other Ryobi Chainsaw manuals

Ryobi
Ryobi RCS1830BLX4 User manual

Ryobi
Ryobi RY40500 User manual

Ryobi
Ryobi RCS36 User manual

Ryobi
Ryobi OCS1830 User manual

Ryobi
Ryobi RCS1935 User manual

Ryobi
Ryobi RCS36X4 User manual

Ryobi
Ryobi RY405011 User manual

Ryobi
Ryobi P548 User manual

Ryobi
Ryobi RCS1835 User manual

Ryobi
Ryobi RY40510 User manual

Ryobi
Ryobi RCS2040G User manual

Ryobi
Ryobi P542 Application guide

Ryobi
Ryobi RY3818 User manual

Ryobi
Ryobi RCS3835T User manual

Ryobi
Ryobi RCS2340 User manual

Ryobi
Ryobi RCS36B35HI User manual

Ryobi
Ryobi P541 User manual

Ryobi
Ryobi RCS36X3550HI User manual

Ryobi
Ryobi RCS-3540C User manual

Ryobi
Ryobi RCS5133CB User manual