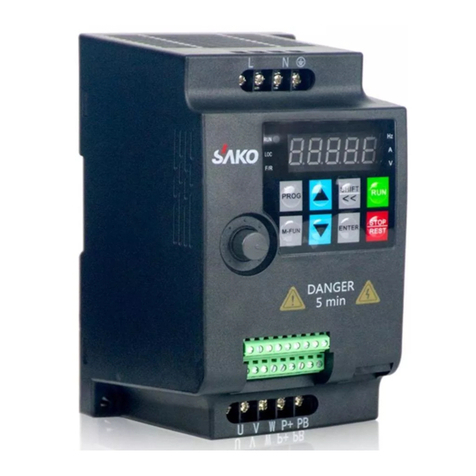
Sako SKI600 User manual

V1.0
SKI600
High-performance
Vector Inverter
Please read this manual carefully before use and keep it for future reference
MANUAL
Add: No. 5, Yaojia Road, Yuhang District, Hangzhou, Zhejiang, China
Tel: 0086-571-88183319
Email: sakobp@sina.com
8FDIBU8FCTJUF

V1.0
SKI600
High-performance
Vector Inverter
Please read this manual carefully before use and keep it for future reference
MANUAL


88888
Operating Instruction Manual
High-performance Vector Inverter

Contents
018
018
019
019
020
020
021
021
022
023
3 Operation Panel and Operation Method
3.1 Operation Panel Keys
3.2 LED and Indicator Light Description
3.3 Monitoring Parameter Display
3.4 Run Status Parameter Display
3.5 Malfunction Alarm Display
3.6 Function Code Editing Display
3.7 Monitoring Parameter
3.8 Function Code Setting
3.9 User Password Setting and Function Code Edit
007
008
008
008
009
011
012
012
014
016
017
017
2 Installation and Wiring
2.1 Operation Environment
2.2 Installing Direction and Space
2.3 Appearance and Dimension of Keypad
2.4 Whole Structure
2.5 Basic Running Wiring
2.6 Main Circuit Terminal Wiring
2.7 Schematic of The Main Circuit Terminal
2.8 Control Loop Terminal Function Table
2.9 Dial Switch
2.10 Wiring Notices
2.11 Spare Circuit
001
002
003
0011 Safety Precautions and Product Model
1.1 Safety Precautions
1.2 VFD Series Type
1.3 Technical Index and Specication

025
025
029
076
115
119
125
131
132
137
138
140
4 Function Parameter Table and Description
4.0 Monitoring Parameter Group and Fault Record
4.1 Function Code
4.2 Detailed Function Description
F8 Process PID Parameter
F9 Programmable Operation Parameter
FA Protection Parameter
FB Communication Parameter
FC Advance Function Parameter and Performance Parameter
FD Pump Use Parameter
FE
Panel Function Setting and Parameter Management (PD group reserved)
FF Factory Parameter
160
160
164
6 Troubleshooting
6.1 Fault information and Troubleshooting
6.2 Abnormal Phenomena Solution
145
145
145
155
156
157
157
158
158
159
5 Communication Protocol
5.1 RTU mode and format
5.2 Register Address and Function Code
5.3 Functions of other Register Address
5.4 Fault Code
5.5 Pre-alarm Code of the Driver
5.6 Control Command Format (see function code 06H example)
5.7 Parameter Attribute
5.8 Error Code from Slave Response of Abnormal Information
5.9 Communication Address of all Parameters
166
166
166
7 Maintenance
7.1 Routine Maintenance
7.2 Periodic Maintenance
168
168
170
171
Appendix
Appendix 1: Parameters for Photovoltaic Pumps Special Use
Appendix 2:
600 Series Guide for Rapid Debugging of Constant-pressure Water Supply
Appendix 3: 610 Series Guide for Rapid Debugging of CNC Machine

001
1 Safety Precautions and Product Model
1.1 Safety Precautions
◇ Do not install this equipment in an explosive gas atmosphere, or there will be explosion
hazards.
◇ Only qualied individuals should proceed with wiring, or there will be electric shock hazards.
Do not conduct any wiring during the system power on to avoid the electric shock.
◇ Do not touch control terminals, internal circuit board and its components, or there will be
electric shock hazard.
◇ Earth terminal must be exactly grounded when using inverter. Grounding must be conrmed
with the national electric safety regulation and other electric code.
◇ After power o, do not touch internal circuit board or any parts inside within 5 minutes after
keypad display went o. Any internal operation must be after making sure of discharge o
with instrument checking to avoid the electric shock.
◇ Do not connect AC power to output terminal (U, V, W) of inverter. The only terminal the AC
power allowed to be connected is R, S, T (or Ll, L2 single-phrase source inverter).
◇ Static electricity on human body can damage MOS device. Do not touch PCB and IGBT
without anti-static measure.
◇ Do not lose screws, spacers and other metallic foreign bodies inside the driver to avoid re
hazard and driver damage.
◇ Do not connect 220V AC power to internal control terminal of the driver, or there will be
serious damage to the driver.
◇ If overcurrent protection occurs aer start the driver, conrm again the external wiring and
then power on and run the driver.
◇ Do not switch off the power to stop the driver. Cut off power source after the motor stops
running.
◇ Do not install the driver in places with direct sunlight.

002
1.2 VFD Series Type
Input Voltage Rated
Power(KW)
Rated Output
Current (A)
Adapted
Motor
Single Phase
230V±15%
0.75 5 0.75
1.5 7 1.5
2.2 10 2.2
Three Phase
380V±15%
0.75 2.5 0.75
1.5 3.7 1.5
2.2 5 2.2
4.0/5.5 9.0/13 4.0/5.5
5.5/7.5 13/17 5.5/7.5
7.5/11.0 17/25 7.5/11.0
11.0/15.0 25/32 11.0/15.0
15.0/18.5 32/37 15.0/18.5
18.5/22.0 37/45 18.5/22.0
22.0/30.0 45/60 22.0/30.0
30.0/37.0 60/75 30.0/37.0
37.0/45.0 75/90 37.0/45.0
45.0/55.0 90/110 45.0/55.0
55.0/75.0 110/150 55.0/75.0
75.0/90.0 150/176 75.0/90.0
90.0/110.0 176/210 90.0/110.0
110.0/132.0 210/250 110.0/132.0
132.0/160.0 250/300 132.0/160.0
160.0/185.0 300/340 160.0/185.0
185.0/200.0 340/380 185.0/200.0

003
1.2 VFD Series Type
Input Voltage Rated
Power(KW)
Rated Output
Current (A)
Adapted
Motor
Three Phase
380V±15%
200.0/220.0 380/415 200.0/220.0
220.0/250.0 415/470 220.0/250.0
250.0/280.0 470/520 250.0/280.0
280.0/315.0 520/600 280.0/315.0
315.0/350.0 600/640 315.0/350.0
350 640 350
400 690 400
500 860 500
1.3 Technical Index and Specication
Input
Rated Voltage,
Frequency
3-phase (4T#series) 380V;50/60HZ
1-phase (2S#series) 220V;50/60HZ
Allowed
Voltage Range
3-phase (4T#series) 320V ~ 460V
1-phase (2S#series) 160V ~ 260V
Output
Voltage 4T#series; 0 ~ 460V
2S#series; 0 ~ 260V
Frequency Low frequency mode: 0 ~ 300HZ ;
High frequency mode: 0 ~ 3000HZ
Overload
Capacity
G type: 110% for long-term, 150% for 1 min, 180% for 5s
P type: 105% for long-term, 120% for 1 min, 150% for 1s
Control Mode V/F control, advanced V/F control, V/F separation control,
electric current vector control
Control
Character
Frequency
Setting
Resolution
Analog Input 0.1% of maximum output frequency
Digital Setting 0.01 Hz

004
1.3 Technical Index and Specication
Control
Character
Frequency
Precision
Analog Input Within 0.2% of maximum output frequency
Digital Setting Within 0.01% of set output frequency
V/F Control
V/F Curve (voltage
frequency character)
Reference frequency setting 5 ~ 600 Hz,
multipoint V/F curve setting, or xed curve
of constant torque, low decreasing torque 1,
low decreasing torque 2, square torque
Torque
Compensation
Manual setting: 0.0 ~ 30% of rated output
Automatic compensation: according to
output current and motor parameter
Automatic
Current-Iimiting
and Voltage-Iimiting
During acceleration, deceleration or steady
running, detect automatically the current
and voltage of motor stator, and control it
within bounds based on unique algorithm,
minimize fault-trip chance
Senseless
Vector
Control
Voltage Frequency
Character
Adjust pressure/frequency ratio according
to motor parameter and unique algorithm
Torque Character
Starting torque:
3.0 Hz 150% rated torque (VF control)
0.5 Hz 180% rated torque (SVC, FVC)
0.05 Hz 180% rated torque (VC)
Operating speed precision in steady state:
≤ +0.5% rated synchronous speed
Torque response:
≤ 50ms VC, SVC, FVC ≤ 20ms
Motor Parameter
Self-measurement
Being able to detect parameter
automatically under static state and
dynamic state of motor, thus guarantee an
optimum control.
Current and Voltage
Restrain
Current closed-loop control, free from
current impact, perfect restrain function of
overcurrent and overvoltage
Undervoltage
Restrain
during
Running
Specially for users with a low or unsteady voltage power grid: even
lower than the allowable voltage range, the system can maintain
the longest possible operating time based on its unique algorithm
and residual energy allocation strategy

005
1.3 Technical Index and Specication
Typical
function
Multi-velocity
and Traverse
Operation
16 segments programmable multi-velocity control, multiple
operation mode. Traverse operation: preset frequency
and center frequency adjustable, parameter memory and
recovery after power cut.
PID Control
R5485
Communication
Built-in PID controller (able to preset frequency). Standard
conguration RS485 communication function, multiple
communication protocol for choice, synchronizing control
function.
Frequency
Setting
Analog Input Direct voltage 0 ~ 10V, direct current 0 ~ 20mA
(optional up limit and lower limit)
Digital Input
Operation panel setting, RS485 port setting,
UP/DW terminal control, or combined with
analog input
Output Signal
Digital Input 2 channel OC output and one channel relay
output (TA, TB, TC), up to 16 choices
Analog Input
2 channel analog signal output, output
ranging within 0 ~ 20mA or 0 ~ 10V with
exibly setting, achievable output of physical
quantities like set frequency, output frequency
Automatic
Steady-voltage
Operation
Dynamic steady state, static steady state, and unsteady
voltage for choices to obtain the steadiest operation
Acceleration
and Deceleration
Time Setting
0.1s ~ 3600min continuous setting, S type and linear type
mode for choice
Brake
Dynamic
Braking
Dynamic braking initial voltage, backlash voltage and
dynamic braking continuous adjustable
DC
Braking
Halt DC braking initial frequency: 0.00 ~ [F0.16] upper limit
frequency
Braking time: 0.0 ~ 100.0s;
Braking current: 0.0% ~ 150.0% of rated current
Flux
Restraint 0 ~ 100 0: invalid

006
1.3 Technical Index and Specication
Typical
function
Low Noise
Running
Carrier frequency 1.0kHz ~ 16.0kHz continuous
adjustable, minimize motor noise
Speed Tracking and
Restart Function
Smooth restart during operation, instantaneous stop
and restart
Counter A built-in counter, facilitate system integration
Operation
Function
Upper limit and lower limit frequency setting, frequency
hopping operation, reversal running restraint, slip
frequency compensation, RS485 communication,
frequency control of progressive increase and decrease,
failure recovery automatically, etc.
Display
Operation
Panel
Display
Running
State
Output frequency, output current, output voltage, motor
speed, set frequency, module temperature, PID setting,
feedback, analog input and output.
Alarm
The latest 6 faults record; running parameters record
when the latest fault tripping happens including output
frequency, set frequency, output current, output
voltage, DC voltage4 and module temperature.
Protective Function
Overcurrent, overvoltage, undervoltage, module fault,
electric thermal relay, overheat, short circuit, default
phase of input and output, motor parameter adjustment
abnormality, internal memory fault, etc.
Environment
Ambient Temperature -10℃~ +40℃ (please run the VFD in derated capacity
when ambient temperature is 40℃~ 50℃ )
Ambient Humidity 5% ~ 95%RH, without condensing drops
Surroundings Indoors (without direct sunlight, corrosive or ammable
gas, oil fog and dust)
Altitude Running in derated capacity above 1000m, derate 10%
for every 1000m rise.
Structure Protection Level IP20
Cooling Method Air cooling with fan control
Installation Method Wall-hanging type, cabinet type

007
2 Installation and wiring
Danger
◇ Ensure the power has been cut o before wiring.
Electric chock and re hazard.
◇ Ask electric engineering professionals to conduct wiring.
Electric chock and re hazard.
◇ Earth terminals must be reliable grounded.
(380V class: especially the third grounding)
Electric shock and re hazard.
◇ Check if its action is eective after emergency brake terminal is connected.
Injury risk (wiring responsibility should be beard by users).
◇ Do not touch output terminals directly. The output terminal is connected directly to
motor. There should be no short circuit between output terminals.
Electric shock and short circuit hazard.
◇ Install the terminal cover before power on, and ensure power o when dismantling the
terminal cover.
Electric shock hazard.
◇ Conduct check and maintenance after 5 ~ 8 minutes after power o when internal
residual electricity is discharged completely.
Hazard of residual voltage in electrolytic capacitor.
Cautlon
◇ Check if the voltage of power inlet wire agrees with rated input voltage of VFD.
Injury and re hazard.
◇ Connect brake resistor or brake unit according to wiring diagram.
Fire hazard.
◇ Choose screw driver and wrench with specied torque to fasten terminals.
Fire hazard.
◇ Do not connect the power input wire to output U, V, W terminals.
It will cause internal damage to VFD if load the voltage on output terminals.
◇ Do not dismantle the front panel cover, only the terminal cover needs to be dismantled
when wiring.
It may cause internal damage to VFD.

008
◇ No corrosive gases, vapors, dust or oily dust, no direct sunlight.
◇ No oating dust and metal particle.
◇ Ambient humidity 20% ~ 90% RH.
◇ Vibration less than 5.9m/s2(0.6g).
◇ No electromagnetic interference.
◇ Ambient temperature -10℃ ~ 40℃ . Ensure good ventilation when ambient temperature
exceeds 40℃ .
◇ Use electric cabinet or remote control method in non-standard operation environment
and ensure good ventilation and heat dissipation. The service life of VFD lies in installing
environment and operation condition. But even in standard environment, a long-term
continuous running can guarantee a life of no more than 5 years for electrolytic capacitor
and about 3 years for cooling fan. An update or a thorough maintenance in advance is
recommended.
2.1 Operation Environment
To ensure a good cooling cycle, the VFD must be installed vertically, and keep enough space from
surroundings.
2.2 Installing Direction and Space
2.3 Appearance and Dimension of Keypad
3&7 '8% "MBSN
"); 7
NN
NN
NN
NN
NN
NN
NN
88888

009
The main technical parameters
2.4 Whole Structure
Power
(kw)
Installation size Outline size Mounting
hole size
(mm)
Note
A(mm) B(mm) H(mm) W(mm) D(mm)
0.75 ~ 2.2 115 175 185 125 160 4 —
4.0 ~ 7.5 136 230 246 150 176 5 —
11 ~ 18.5 201 306 320 218 215 5 —
22 150 404 420 235 210 6.5 —
30 ~ 37 195 433 460 270 220 8 —
45 ~ 55 240 537 565 320 275 8 —
75 ~ 110 274 642 670 380 272 8 —
132 ~ 160 — — — — — — —
185 ~ 220 — — — — — — —
250 ~ 350 — — — — — — —
)
8
%
"
#
Dimensions
Figure A-1 Outline size for 7.5KW and below models(380V)

010
8 %
)
#
)
"
8 %
)
8
%
"
#
2.4 Whole Structure
Figure A-2 Outline size for 11 ~ 110KW model(380V)
Figure A-3 Outline size for 160 ~ 350KW model(with base and without base 380V)
Dimensions

011
The wiring parts of VFD include major loop and control loop. Open the cover of I/O terminals,
users can see the major loop terminal and control loop terminal, and must conduct the wiring
according to the following diagram.
2.5 Basic Running Wiring
#SBLJOH3FTJTUPS
$JSDVJU#SFBLFS$POUBDUPS
5ISFFQIBTF*OEVDUJPO.PUPS
5ISFFQIBTF4VQQMZ.VMUJGVODUJPOBM5FSNJOBM*OQVU
"OBMPH
*OQVU
%$_7
(/%
(/%
(/%
$0.
9
9
9
9
9
93&7
9'8%
"*
$/
%$_7
%$0_N"$POWFSUJCMF
"*
"0
"0
%0
7
5"5"
1SPHSBNNBCMF3FMBZ
0VUQVU33
'BDUPSZ4FUUJOHBT'BVMU
*OEJDBUJPO
0QFODJSDVJU
$PMMFDUPS0VUQVU
"OBMPH0VUQVU
"OBMPH0VUQVU
3
$PNNVOJDBUJPO
&YQBOTJPO$BSE*OUFSGBDF
5#5#
5$5$
::
3
1 1#
.
4
5
6
7
8
"* "0 "0 3
7
7

012
2.6 Main Circuit Terminal Wiring
7'
%7
'%
#SBLF3FTJTUPS #SBLF3FTJTUPS
1 1# 1 1#
6
-
7
8/
3
4
5
..
6
7
8
2.7 Schematic of The Main Circuit Terminal
Single phase 220V:
Single phase 220V:
Three phase 380V:
LX_LX
1 1#
108&3 .0503
-/$/ 678
3#
Terminal Function
L、N Single phase 220V AC power supply input terminal
P+、PB External brake resistor reserved terminal
P- DC negative bus output terminal
U、V、W Three phase AC output terminal
、E Ground terminal

013
Terminal Function
R. S. T Three phase power supply input terminal
( + )、( - ) External brake unit reserved terminal
P+、PB External brake resistor reserved terminal
P、P+ External DC reactor reserved terminal
( - ) DC negative bus output terminal
U、V、W Three phase AC output terminal
、E Ground terminal
2.7 Schematic of The Main Circuit Terminal
Three phase 380V:
(0.75kW ~ 2.2kW)
(3kW ~ 7.5kW)
(11kW ~ 18.5kW)
(30kW ~ 37kW)
(45kW ~ 110kW)
(22kW)
LX_LX
1 1#
108&3 .0503
345678
3#
LX_LX
11 1#
108&3 .0503
345678
3#
LX_LX
1
1
1#
108&3 .0503
3456
78
3#
LX
1 11#
108&3 .0503
345678
LX_LX
1 1#
.0503
678
108&3
345
LX_LX
1
.0503
678
108&3
345

014
2.8 Control Loop Terminal Function Table
Functional Specication of Control Loop Terminal
Category
Terminal
Number
Functions Specication
Multi-
functional
Digital
Input
Terminal
FWD
Eective when short circuit between(FWD、
REV、X3、X4、X5、X6、X7) ~ COM, and the
functions are set by parameters F7.00 ~ F7.06
(common port: COM) INPUT, 0 ~ 24V level
signal, low level eective,
5mA.
REV
X3
X4
X5
X6
X7
X7 can work as one of the multi-functional
terminals, also as high-speed pulse input
terminal with programming, see F7.06.
Digital
Output
Terminal
Y1 Multi-functional programmable collector open
circuit output channel 2, can be programmed
as DO terminal of various functions (common
port: COM)
OUTPUT, maximum load
current ≤ 50mA.
Y2
DO
Can be programmed as impulse output
terminal of various functions as many as 13
kinds (common port: COM). See F6.23.
OUTPUT, output
frequency range
F6.32 ~ F6.35, set
maximum frequency as
high as 50KHz.
Analog
Input/
Output
Terminal
AI1
All receives voltage/current input. Jumper JP3
(for jumper terminal All) can select voltage or
current input mode, and voltage input is the
default one. For current input, just short the
middle and another pin with the jumper cap.
AI 2 only receives voltage input. Measuring
range setting is function code F6.00 ~ F6.11.
(reference ground: GND)
INPUT, input voltage
range: 0 ~ 10V (input
impedance: 100KΩ), input
current range 0 ~ 20mA
(input impedance: 500Ω).
AI2
Table of contents
Other Sako Inverter manuals