manuals.online logo
Brands
  1. Home
  2. •
  3. Brands
  4. •
  5. Samsung
  6. •
  7. Camcorder
  8. •
  9. Samsung SCD 5000 Setup guide

Samsung SCD 5000 Setup guide

[ENGLISH]
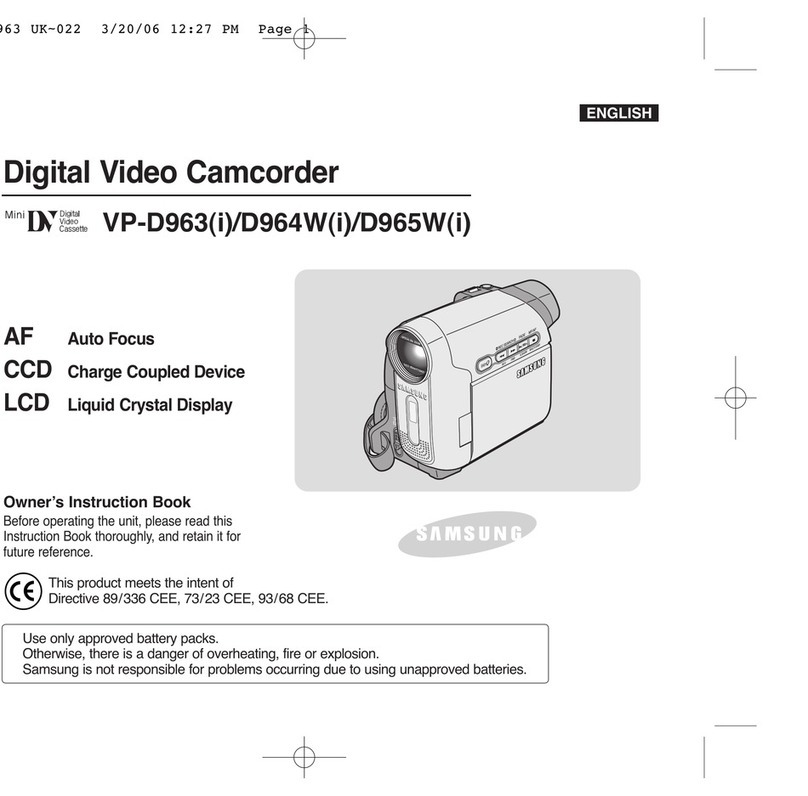
Digital Video Camcorder
Minl[_rD_c_sset_vi_eoSCD5000
AF
CCD
LCD
Auto Focus
Charge Coupled Device
Liquid Crystal Display iiiiiiSiiiiiiiiiiiiiii....
Owner's Instruction Manual
Before operating the unit, please readthis
instruction manual thoroughly, and retain itfor
future reference.
iiiiii;iiiiiiiiii!iii:;_: ;i;:_;!:_::_:::_::¸:¸:::::::::::::::::: ¸¸¸¸¸¸¸:: :::::::::::: :¸:¸:::::::¸::::::::::::::::: :¸:::::::::::::::::::: ¸¸¸ii ¸¸ i:_:_¸i¸¸¸:_i_¸_¸¸¸¸¸:¸¸¸=_: :ii i_;:::
IUS PATENT 4415844 I
[ENGLISH
Notices and Safety Instructions
[_lJi[*]_
RISK OFELECTRIC
SHOCK
DO NOT OPEN
CAUTION:
TO REDUCE THE RISK OF ELECTRIC SHOCK, DO NOT
REMOVE COVER(OR BACK). NO USER SERVICEABLE
PARTS INSEDE, REFER SERVICING TO QUALIFIED
SERVICE PERSONNEL
To prevent electric shock, match wide blade of plug
to wide slot and fully insert,
f_,_,, This symbol is intended to alert the user to the presence of uninsulated
/_"_ dangerous voltage within the product's enclosure that may be of
_' sufficient magnitude to constitute a risk of fire or electdc shock,
This symbol is intended to alert the user to the presence of important
operating and maintenance instructions in the literature accompanying
this product.
1. READ INSTRUCTIONS: 7.
All the safety andoperatinginstructions should be read
before the CAMCORDER is operated,
2. RETAIN INSTRUCTIONS:
The safety and operating instructions should be retained for
fd:ure reference.
3. HEED WARNINGS:
Allwarnings onthe CAMCORDER and inthe operating instructions
should be adhered to.
4. FOLLOW INSTRUCTIONS:
All operating and maintenance instructions should be followed,
5. CLEANING:
Unplug this CAMCORDER from the wallod:let before cleaning.
Do not use liquid or aerosol cleaners,
Use a dry cloth used for dusting cabinets.
WATERAND MOISTURE:
Do not usethis CAMCORDER near water;
for example, neara bathtub, wash bowl, kitchen sink, laundry
tub, in awet basement, near a swimming poolor lake.
ACCESSORIES:
Do not placethis CAMCORDER on an unstable cart, stand, tripod,
bracket or table. The CAMCORDER may fal!, causing serious injury
to a child or adult, and serious damage to the unit.
Use only with a cart, stand, tripod, bracket, or table recommended
by the manufacturer or sold with the CAMCORDER.Any mounting
of the unit should follow the manufacturer's instructions and should
use a mounting accessory recommended by the manufacturer.
AsAn appliance andcart combination should be moved with care.
Quick stops, excessive force and uneven surfaces may cause
the appliance and cart combination to overturn,
PORTABLE CART WARNING
(Symbol provided by RETAC)
6. ATTACHMENTS:
Do not use attachments not recommended by theCAMCORDER
product manufacturer as they may be hazardous.
I ENGLISH 1
Notices and Safety Instructions
9. VENTILATION:
Slotsand openings in the cabinet are provided for ventilation to
ensure reliable operation of the CAMCORDER and to protect it
from overheating, These openings must not be blocked or
covered, Never place your CAMCORDER on a bed, sofa, rug,
or other similar surface: on or near a radiator or heatregister.
This CAMCORDER should not be placed in a built-in installation
such as a bookcase or rack unless properventilation is provided
or the manufacturer's instructionshave been adhered to.
10. POWER SOURCES:
The CAMCORDER should be operatedonly from the type of
power source indicated onthe label.
If you are notsure of the type of power supply at your home,
consult your appliance dealer or local power company,
ACAMCORDER is intended to be operated from battery power,
or other sources, refer to the operating instructions,
11. GROUNDING OR POLARIZATION:
This CAMCORDER may be equipped with either a polarized
2-wireAC lineplug (a plughaving one bladewider than theother)
or a 3-wire grounding type plug,a plug havinga third (grounding)
pin,
Ifyou are unable to insertthe plugfully intothe outlet,try reversing
the plug. Ifthe plug still fails to fit, contact your electrician to
replace your o_:let. Do not defeat the safety purpose of the
polarized plug,
13. OUTDOOR ANTENNA GROUNDING:
Ifan outside antenna or cable system is connected to the
CAMCORDER, besure the antenna or cable system is grounded
to provide some protection against voltage surges and built-up
static charges, Section810 of the Nafional ElectricalCode,
ANSI/NFPA No. 70-1984, provides information with respect to
proper grounding ofthe mast and supporting structure, grounding
of thelead-in wire andsupporting structure, grounding ofthe mast
and supporting structure, grounding ofthe lead-inwire to an
antenna discharge unit, size of grounding to conductors, location
of antenna-discharge unit, connection to grounding electrodes
and requirements for the grounding electrode.
See figure below,
_TmN_
L_ N
2_ rARE
::i:iiiiiii:iiiiiiiiiiiiiiiiiiii/ !i!!ii;
N_ N_ ELETR_ C_E
12. POWER-CORD PROTECTION:
Power-supply cords should be routed so that they are not likely to
be walked on or pinched by itemsplaced upon or against them,
paying particularattention to cords or plugs,convenient
receptacles, and the pointwhere they exit from the unit.
IENGLISH
Notices and Safety Instructions
14. LIGHTNING:
For added protectionof this CAMCORDER during a lightning
storm o when itis left unattended and unused for long periodsof
time, unplug it from the wall outiet and disconnect the antenna or
cable system,
This will prevent damage to the CAMCORDER dueto lightning
and power-line surges.
15. POWER LINES:
An outside antenna system should not be located in the vicinity of
overhead power _inesor ether electric lightor power circuitswhere
it can faUinto such powerlines or circuits. When installingan
outside antenna system, extreme care should be taken to keep
from touching such power lines or circuits as contactwith them
might befatal,
16. OVERLOADING:
Do notoverload wal_o_:lets and extension cords as this can result
in a risk offire or electric shock,
17. OBJECTS AND LIQUIDS:
Never pushobjects of any kind into this CAMCORDER through
openings as they may touch dangerous voltage points or short out
a part that could result in a fire or electdc shock,
Never spil! liquidsof any kindonto the CAMCORDER, Should
spiIIage occur, unplug unit and have it checked by a technician
before use.
18. SERVICING:
Do not attempt to service this CAMCORDER yourself. Opening or
removing covers may expose you to dangerous voltage or other
hazards,
Refer all servicingto qualified service personnel,
19. DAMAGE REQUIRING SERVICE:
Unplug this CAMCORDER from thewall outlet and refer servicing
to qualified service personnel under the following conditions:
a. When the power-supplycord or plug isdamaged,
b. Ifany liquid has been spilled onto,or objects havefallen into
the CAMCORDER.
c, Ifthe CAMCORDER has beenexposed to rain or water.
d. If the CAMCORDER does not operate normally by following the
operating instructions,adjust onlythese controls that are
covered by the operating instructions.Improperadjustment of
other controls may result in damage and wil_
often require extensive work by a qualgied technician to restore
the CAMCORDER to itsnormaI operation,
e. Ifthe CAMCORDER has beendropped or the cabinethas been
damaged,
f, When the CAMCORDER exhibits a distinct change in
performance, this indicates a need for service,
20. REPLACEMENT PARTS:
When replacersent parts are required, besure the service
technician has used replacement parts specifiedby the
manufacturer and having the same charactedstics as the odgina_
part.
Unauthorized substitutions may result in fire,electric shock or
other hazards.
21. SAFETY CHECK:
Upon completion ofany service or repairs to this CAMCORDER,
ask the service technician to performsafety checks to determine
that the CAMCORDER is insafe operating order,
Notices and Safety Instructions
22. To prevent damage which may resaIt in fire or shock hazard,
do not expose this applianca to rain or moisture.
23, Ifthis power supply is used at 240V ac, asuitable plug adapter
should be use.
NOTE TO CATV SYSTEM INSTALLER:
This reminder is provided to call the CATVsystem installer's attention
to Article 820-40 of the NEC that provides guidelines for proper
grounding and, in perticular,specifies that the cable ground shaII be
connected to the grounding system of the building asclose to the point
of cableentry as practical,
USER INSTALLER CAUTION:
Yourauthority to operate this FCC certified equipment could bevoided
if you make changes or modifications not expressly approved by this
partyrespensible for compliance to part 15 FCC rules.
IENGLISH 1
NOTE: This equipment has been tested and found to comply with
the limits for a Class B digital device, pursuant to part 15of the
FCC Rules. These limitsare designed to providereasonable
protectionagainst harmful interferenceina residential installation.
This equipment generates, uses and can radiate radio frequency
energy and, if not installedand used in accordance with the
instructions, may cause harmful interferenceto radio
communications. However, there is no guarantee that interference
will not occur in a particularinstallation,If this equipment does
cause harmful interferenceto radio or television reception, which
can be determined byturning the equipment off and on, the user is
encouraged to try to correct the interference by one or more of the
following measures:
Reorient or relocate the receiving antenna.
Increase the separation betweenthe equipment and receiver.
Connect the equipment intoanoutIet on a circuit different from
that towhich the receiver is connected.
Consult the dealer or an experienced radie/TV technician for help
and for additional suggestions.
The user may find the following booklet preparedby the Federal
Communications Commission helpful : "How to Identifyand
Resolve Radio-TV Interference Problems."
This Bcoktet is available from the U.S, Government Printing
Office, Washington, D.C. 20402, Stock No. 004-000-00345-4.
:CC Warning
The useris cautioned that changes or modifications not expressly
approved by the manufacturer couldvoid the user'sauthority to
operate the equipment.
[ENGLISH
Contents
Precautions on Camcorder Care .................................................................................................................................................................................8
Quick Start ....................................................................................................................................................................................................................9
Features .....................................................................................................................................................................................................................14
Accessories Supplied with the Camcorder ................................................................................................................................................................15
BasicAccessories .................................................................................................................................................................................................15
Front & Left View ........................................................................................................................................................................................................16
Leftside View .............................................................................................................................................................................................................17
Right & TopView ........................................................................................................................................................................................................18
Rear & Bottom View ...................................................................................................................................................................................................19
Remote Control ..........................................................................................................................................................................................................20
OSD (On Screen Displayin CAMERA and PLAYER Modes) ..................................................................................................................................21
OSD (On Screen Displayin CAMERA/M.PLAY Modes) ..........................................................................................................................................
Turning the OSD on/off (On Screen Display) ......................................................................................................................................................23
How to use the Remote Control ................................................................................................................................................................................24
Battery Installation for the Remote Control ..........................................................................................................................................................24
Self Record usingthe Remote Control ................................................................................................................................................................24
Adjusting the HandStrap ..........................................................................................................................................................................................25
Hand strap ............................................................................................................................................................................................................25
Shoulder strap.........................................................................................................................................................................................................25
Connecting a Power Source ......................................................................................................................................................................................26
To use the AC Power adapter and DC Cable .....................................................................................................................................................26
Usingthe Lithium IonBattery Pack ..........................................................................................................................................................................27
Charging the Lithium ton Battery Pack ................................................................................................................................................................27
Table of Continuous Recording Time Based on Model and Battery Type .........................................................................................................28
Battery Level Display ............................................................................................................................................................................................29
A
Contents I ENGLISH 1
Setting to CAMCORDER /CAMERA modes ............................................................................................................................................................30
Setting the Power Switch ..........................................................................................................................................................................................31
Adjusting the LCD .....................................................................................................................................................................................................32
Using the VIEWFINDER ...........................................................................................................................................................................................33
Adjusting the Focus ..............................................................................................................................................................................................33
Adjusting the LCD during PLAY ...........................................................................................................................................................................34
Controlling Sound from the Speaker ........................................................................................................................................................................34
Using MENU .............................................................................................................................................................................................................35
Setting menu items ...................................................................................................................................................................................................37
Settingthe Camcorderto REC, TAPE PLAY,MEMORY PLAYmodes ..............................................................................................................39
Availability of Functions in CAMCORDER Mode................................................................................................................................................ 40
CLOCK SET .........................................................................................................................................................................................................41
WL.REMOTE ........................................................................................................................................................................................................42
DEMONSTRATION ..............................................................................................................................................................................................43
DATE/TIME ...........................................................................................................................................................................................................44
TV DISPLAY .........................................................................................................................................................................................................45
EASY Mode (for Beginners) .....................................................................................................................................................................................46
MF/AF (Manual Focus/Auto Focus) .........................................................................................................................................................................47
Auto Focusing .......................................................................................................................................................................................................47
Manual Focusing ..................................................................................................................................................................................................47
Zooming in and Out with DIGITAL ZOOM ...........................................................................................................................................................48
Zooming in and Out ..............................................................................................................................................................................................48
Inserting and Ejecting a Cassette .............................................................................................................................................................................49
Toselect the CAMCORDER mode .........................................................................................................................................................................49
MakingYour First Recording ....................................................................................................................................................................................51
RecordSearch (REC SEARCH) ..........................................................................................................................................................................52
Hints for Stable Image Recording ............................................................................................................................................................................53
Recordingwith the LCD Monitor ..........................................................................................................................................................................53
Recordingwith the Viewfinder ..............................................................................................................................................................................53
Playing Back aTape You Have Recorded on the LCD ............................................................................................................................................54
A
IENGLISH
Contents
PROGRAMAE ....................................................................................................................................................................................................55
Setting PROGRAM AE ........................................................................................................................................................................................56
WHT. BALANCE (WHITE BALANCE) - CAMCORDER Mode ..........................................................................................................................57
Digital Zoom in CAMCORDER Mode .................................................................................................................................................................58
EIS (Electronic image Stabilizer) ........................................................................................................................................................................59
DSE(Digital Special Effects) SELECT in CAMCORDER Mode .........................................................................................................................60
Selecting a DigitaIeffect in CAMCORDER Mode ..............................................................................................................................................61
REC MODE .........................................................................................................................................................................................................62
AUDIO MODE .....................................................................................................................................................................................................63
WIND CUT ...........................................................................................................................................................................................................64
Using Quick Menu(Navigation Menu) .......................................................................................................................................................................65
Setting the Quick Menu .......................................................................................................................................................................................66
SHUTTER SPEED & EXPOSURE .....................................................................................................................................................................67
SLOW SHUTTER (Low Shutter Speed) ..................................................................................................................................................................68
BLC(Back Light Compensation) ..............................................................................................................................................................................69
Fade In andOut ........................................................................................................................................................................................................70
To Start Recording ...............................................................................................................................................................................................70
To Stop Recording (use FADE IN / FADE OUT) ................................................................................................................................................70
Audio Dubbing ...........................................................................................................................................................................................................71
Dubbing Sound ....................................................................................................................................................................................................71
Dubbed Audio Playback ........................................................................................................................................................................................
PHOTO Image Recording .........................................................................................................................................................................................73
Searching for a PHOTO Picture .........................................................................................................................................................................73
NITE PIX (0 Lux Recording) .....................................................................................................................................................................................74
POWER NITE PtX ....................................................................................................................................................................................................75
Various Recording Techniques .................................................................................................................................................................................76
Tape Playback ............................................................................................................................................................................................................77
PIaybackon the LCD ............................................................................................................................................................................................77
Ptaybackon a TV Monitor ....................................................................................................................................................................................77
Connecting to a TV which has Audio Video input Jacks .....................................................................................................................................77
A
Contents I ENGLISH ]
Connecting to a TV which has NoAudio and Video Input Jacks ........................................................................................................................78
Playback ...............................................................................................................................................................................................................78
VariousFunctions while in PLAYERMode ................................................................................................................................................................79
Playback Pause ....................................................................................................................................................................................................79
Picture Search (Forward/Reverse) .......................................................................................................................................................................79
Slow Playback (Forward) .....................................................................................................................................................................................79
ZERO MEMORY ........................................................................................................................................................................................................80
TransferringusinglEEE1394 (i.LINK)-DV Standard Data Connections ....................................................................................................................81
Connecting to a DV Device ..................................................................................................................................................................................81
Connecting to a PC ..............................................................................................................................................................................................81
System Requirements ..........................................................................................................................................................................................82
Recordingwith a DV Connection Cable ...............................................................................................................................................................82
MEMORY STICK .......................................................................................................................................................................................................83
Memory Stick Functions........................................................................................................................................................................................83
Inserting and Ejecting the Memory Stick ..................................................................................................................................................................84
Insertingthe Memory Stick ..................................................................................................................................................................................84
Ejecting the Memory Stick ...................................................................................................................................................................................84
Structure of the Fotdersand Fiteson the Memory Stick.............................................................................................................................................85
MEMORY FILE NUMBER ........................................................................................................................................................................................86
TakingYour FirstPicture ...........................................................................................................................................................................................87
Viewing Still Images ..................................................................................................................................................................................................88
ToView a Single image ............................................................................................................................................................................................88
ToView a Slide Show ...............................................................................................................................................................................................89
Quick Review ............................................................................................................................................................................................................90
Adjusting the Focus ..................................................................................................................................................................................................91
A
[ENGLISH
FOCUS LOCK .............................................................................................................................................................................................................
DigitaIZoom in CAMERA Mode ...............................................................................................................................................................................93
MACRO Mode ...........................................................................................................................................................................................................94
CONT. SHOT (Continuous Shot) ..............................................................................................................................................................................95
Usingthe FLASH ......................................................................................................................................................................................................96
FLASH SELECT ........................................................................................................................................................................................................97
WriT. BALANCE (WHITE BALANCE) - CAMERA Mode ........................................................................................................................................98
DSE(Digital Special Effects) SELECT in CAMERA Mode .......................................................................................................................................99
Selecting a Digital effect in CAMERA Mode ..........................................................................................................................................................1O0
SPOT-AE .................................................................................................................................................................................................................101
NIGHT SCENE ...........................................................................................................................................................................................................
Selecting the Image Quality ....................................................................................................................................................................................103
Select the Image Quality ...................................................................................................................................................................................103
Number of images on the Memory Stick ..........................................................................................................................................................103
Selecting the image Size ........................................................................................................................................................................................104
Select the tmage Size .......................................................................................................................................................................................104
Memory Stick and Image Resolutions ..............................................................................................................................................................105
MPEG REC .............................................................................................................................................................................................................106
MPEG PB ................................................................................................................................................................................................................107
MPEG StZE .............................................................................................................................................................................................................108
Copying Still Images from a Cassette to the Memory Stick ..................................................................................................................................109
Marking Images for Printing ....................................................................................................................................................................................110
Protection from Accidental Erasure .........................................................................................................................................................................111
Deleting Still images ...................................................................................................................................................................................................
Formatting the Memory Stick ..................................................................................................................................................................................114
Attention .............................................................................................................................................................................................................114
Recording an Image from a Cassette as a StitI Image.......................................................................................................................................... 115
A
IENGLISH 1
Transferringa Digital Image through a USB Connection ........................................................................................................................................116
System Requirements ..............................................................................................................................................................................................116
Installingthe DVCMedia 5,0 Program ......................................................................................................................................................................117
Connecting to a PC ..................................................................................................................................................................................................118
After Finishing a Recording ......................................................................................................................................................................................119
Cleaning and Maintainingthe Camcorder................................................................................................................................................................120
Cleaningthe Video Heads .................................................................................................................................................................................120
Using YourCamcorder Abroad ................................................................................................................................................................................121
Power Sources ...................................................................................................................................................................................................121
Color System ......................................................................................................................................................................................................121
Troubleshooting ........................................................................................................................................................................................................122
Self Diagnosis Display ........................................................................................................................................................................................122
Moisture Condensation ......................................................................................................................................................................................122
Self Diagnosis Display in M,REC, M.PLAY Mode .............................................................................................................................................123
A
IENGLISH
Start
•l. Please note the following precautions for use:
•l. Please keep your device in a safe place. This device contains a lens that can be damaged by shock. Keep away from the reach
of the children.
• Do not place your device in a wet place. Moisture and water may cause the device to malfunction.
• Do net aim the device at the sun while looking through the viewfinder; this may cause permanent damage to your eyes.
• To avoid electric shock, de not touch your device or power cable with wet hands.
• Do not use the flash close to another's eyes. The flash emits a strong light that may cause damage similar to direct sunlight on
one's eyesight.
• Ifthe devica is not working properly, pleeee consult your nearest deater or authodzed Samsung service facility. Disassembling
the device yourself may cause irrecoverable damage which will be difficult to repair.
• Clean the body with a dry, soft cloth. Use a soft cloth moistened with a mild detergent solution for removing stains. Do not use
any type of solvent, especially benzenes, as they may sedously damage the finish.
• Keep your device away from rain and saltwater. After using, clean the device. Saltwater may cause the parts to corrode.
• For better quality, please use CAMERA mode when taking still images. (CAMERA mode image quality is better than
CAMCORDER mode.)
,A,
Start IENGLISH 1
,_ This device provides a variety of functions because it is a Camcorder and Digital Still Camera in one system.
Please read this manual thoroughly.
,_ Before using the device, install the accessories in the following order:
1. Install the battery pack.
2. Insert the Memory Stick into the slot.
3. Charge the battery pack by connecting the power cable to the camcorder. 2
4. Set your device to CAMCORDER mode or CAMERA mode by
flipping the lens body block.
5. Set the Power Switch to proposed position.
6. When finished, set the Power Switch to OFE
A
[ENGLISH ]
Notes and Safety Instructions
Please rotate the LCD screen carefully as illustrated,
Over rotation may cause damage to the inside of the hinge that connects the LCD screen to the Camcorder,
1. LCD screen closed.
2, Standard recording using the LCD screen.
3. Recording when looking at the LCD screen from the left,
4. Recording when looking at the LCD screen from the front,
5. Recording with the LCD screen closed.
180, 1
A
Notes and Safety Instructions
IENGLISH ]
Television programs,video tapes, DVD titles, films, and other program materialsmay be copyrighted.
Unauthorizedcopying of copyrighted material may be against the law.
1. A sudden rise in atmospheric temperature may cause moisture condensation to form insidethe camcorder.
For Examole:
- When you take the camcorder from a cold place toa warm place(e.g. from outside to insideduring winter.)
- When you take the camcorder from a cool place to a hot place (e.g. from inside to outside during the summer.)
2. When the F_](DEW) protectionfeature is activated, leave the camcorder in adry, warm room with the cassette
compartment opened and the batteryremoved,for at least two hours.
1. Do not leave the camcerderexposed to high temperatures (above 60°C or 140°F).
For example, in aparkedcar in the sun or exposed to direct sunlight.
2. Do not let the camcorder get wet.
Keep thecamcorder away from rain, saltwater, and any other form of moisture. Ifthe camcorder gets wet, it may be
damaged.
Amalfunction dueto exposureto liquids cannotalways be repaired.
,,&
IENGLISH
Notes and Safety Instructions
- Make sure that the battery pack is fully charged before starting to record.
- Topreserve battery power,keep your camcorder turned off when you are not
operatingit.
- Ifyour device is in CAMCORDER mode with a tape installed,and it is left in
STBY mode without beingoperated for more than 5 minutes it will automatically
turn itself off to protect against unnecessary battery discharge.
- Make surethat the battery pack fits firmly into place.
Droppingthe battery pack may damage it.
- Abrand new battery pack will not be charged.
Before using the battery pack, you need to charge it completely.
- It is a good idea to use the viewfinder rather than the LCD when recording for
long periods, because the LCD uses up more batterypower.
X
- Toensure normal recording and a clear picture, clean the video heads regularly. If the picture isdistorted, or only a blue
screen is displayed, the video heads may be dirty. If thishappens, clean the video headswith a dry type cleaning cassette.
- Do not use a wet-type cleaning cassette. It may damage the video heads.
Notes and Safety Instructions
JENGLISH ]
- Do not film with the camera lenspointing directly atthe sun,
Direct sunlight can damage the CCD(Charge Coupled Device).
- Over-rotating of the LENS body block may damage it.
1. Do not positionthe camcorder such that the viewfinder is pointingtowards the sun.
Direct sunlightcan damage the insideof the viewfinder. Becareful when placingthe camcorder undersunlightor near a
window exposed to sunlight.
2. Do not pick up the camcorder by the viewfinder.
1. The LCD display has been manufactured using high-precisiontech-
nology. However,there may be tiny dots (red, blue or green in color)
that appear on the LCD display.
These dots are normal and do not affectthe recordedpicture in any
way.
2, When you use the LCD display under direct sunlightor outdoors,
it maybe difficultto see the picture cleady,
If this occurs,we recommend using the viewfinder,
3, Direct sunlight can damage the LCD monitor.
x O
- To ensurea steady picture dunng filming, check that the hand strap is propedy adjusted.
- Do not force your hand into the handstrap as you could damage it.
,,&
[ENGLISH ]
Getting to Know Your Device
• Digitaldata transfer function with IEEE1394
By incorporatingthe IEEE 1394(i.LINKTM : LLINK is a serial data transferprotocoland interconnectivifysystem, used to
transmit DV data) high speed data transport port,both moving and stillimages can be transferred to a PC, makingit possible
to produceor edit various images.
•Unique Style & Free Style Shooting
An integrateddigital imagingdevice that easily converts between aCAMCORDER and a CAMERA by using a revolving
Lens Body Block.
•High Resolution Image Quality (Digital Still Camera)
Employinga 4.13 Mega Pixels CCD, a maximum resolutionof 2272X 1704 ispossible.
•DigitalZoom
Allows you to magnify an image up to 800X (CAMCORDER mode) or 6X (CAMERAmode) its originalsize.
• Color TFT LCD
Ahigh-resolutioncolor TFT LCD givesyou clean, sharp imagesas well as the abilityto review your recordings immediately.
•Electronic Image Stabilizer(EIS)
The EIS compensates for any shaking that occurswhen the camera is handheld, reducing unstable images particularlyat
high magnification.
• Various Digital Effects
The DSE (Digital Special Effects)function allows you to give your films aspecial look by adding various special effects.
•Back LightCompensation (BLC)
The BLC function compensatesfor a bright background behind the subject you'rerecording.
•Program AE
The ProgramAE enables you to alterthe shutter speed and apertureto suit the type of scene/action to be filmed.
• NITE PIX/NIGHT SCENE
The NITE PIXor NIGHT SCENE function enables you to record a subject in adark place.
•USB Interface for Digital Image Data Transfer
,_You can transferstill imagesto a PC using the USB interfacewithout an add-on card.
Getting to Know Your Device
IENGLISH ]
Make surethat the following basicaccessories are supplied with your digital video camera,
1,Lithium Ion Battery Pack
2, AC PowerAdapter
3, AC Cord
4, AUDIONIDEO Cable
5, InstructionManual
6, Lithium Battery for Remote Control,
(TYPE: CR2025)
7, Shoulder Strap
8, USB Cable
9, Software CD
10.Remote Control
11,Memory Stick
12. TripodAdaptor
I. Lithium Ion Battery pack
(AD4340112A_AD434)0113A)
4. AUDIONIDEO cable
(AD39-O0099A)
7. Shoulder strap
10. Remote Control
(AD59-00100A)
2. AC Power Adapter
(AD44-00065A)
5. Instruction Book
(ADaS-0a0655B)
8. USB cable
(AD39-00073A)
11. Memory Stick
(1109-001222)
3. AC cord
(AD39-00076A)
6. Lithium battery
(AD43-10130H)
9. Software CD
(AD46-00063A)
12. Tdpod Adapter
(AD97-06770A)
IENGLISH
Getting to Know Your Device
1.Internal MIC
2. Memory Stick Slot
3. Remote Sensol
4. Lens
-- 8. Nite Pix
-- 7. Slow Shutter
6. Battery release button
-- 5. Battery
1,1nternalMIC
2, MemoryStick Slot
3, Remote Control Sensor
4, Lens
5, Bakery
6, Ba_eryrelease button
7, Slow Shuffer
8, NitePix
A

Other manuals for SCD 5000

5

Other Samsung Camcorder manuals

Samsung HMX-Q20BN User manual

Samsung

Samsung HMX-Q20BN User manual

Samsung SC-D107 Owner's manual

Samsung

Samsung SC-D107 Owner's manual

Samsung VP-D85I Owner's manual

Samsung

Samsung VP-D85I Owner's manual

Samsung VP-M50 User manual

Samsung

Samsung VP-M50 User manual

Samsung SCD180 User manual

Samsung

Samsung SCD180 User manual

Samsung VP-HMX20C User manual

Samsung

Samsung VP-HMX20C User manual

Samsung VP-D6550 Owner's manual

Samsung

Samsung VP-D6550 Owner's manual

Samsung SC-D363 Owner's manual

Samsung

Samsung SC-D363 Owner's manual

Samsung VP-MX10 User manual

Samsung

Samsung VP-MX10 User manual

Samsung SCD24 Setup guide

Samsung

Samsung SCD24 Setup guide

Samsung VP-D80 Owner's manual

Samsung

Samsung VP-D80 Owner's manual

Samsung HMX-W200RN User manual

Samsung

Samsung HMX-W200RN User manual

Samsung VP-D97I Owner's manual

Samsung

Samsung VP-D97I Owner's manual

Samsung VP-D6550 Owner's manual

Samsung

Samsung VP-D6550 Owner's manual

Samsung VP-DX10 User manual

Samsung

Samsung VP-DX10 User manual

Samsung VP-D200 Setup guide

Samsung

Samsung VP-D200 Setup guide

Samsung HMX-T10BP User manual

Samsung

Samsung HMX-T10BP User manual

Samsung HMX-QF30 User manual

Samsung

Samsung HMX-QF30 User manual

Samsung SC-D590 User manual

Samsung

Samsung SC-D590 User manual

Samsung SCB-6003 User manual

Samsung

Samsung SCB-6003 User manual

Samsung Hi 8 VP-L610 Owner's manual

Samsung

Samsung Hi 8 VP-L610 Owner's manual

Samsung VP-X105 Owner's manual

Samsung

Samsung VP-X105 Owner's manual

Samsung HMX H100 - Camcorder - 1080i User guide

Samsung

Samsung HMX H100 - Camcorder - 1080i User guide

Samsung SC-HMX10C User manual

Samsung

Samsung SC-HMX10C User manual

Popular Camcorder manuals by other brands

RCA CC615 user guide

RCA

RCA CC615 user guide

JVC Everio GZ-MG750 quick start guide

JVC

JVC Everio GZ-MG750 quick start guide

Panasonic AVCCAM AG-HMC40ER operating instructions

Panasonic

Panasonic AVCCAM AG-HMC40ER operating instructions

Sakar 32490 owner's manual

Sakar

Sakar 32490 owner's manual

Toshiba CAMILEO Z100 user guide

Toshiba

Toshiba CAMILEO Z100 user guide

Sony DSR-250 operating instructions

Sony

Sony DSR-250 operating instructions

Panasonic AG-CX10P Service manual

Panasonic

Panasonic AG-CX10P Service manual

JVC GR-D750U instructions

JVC

JVC GR-D750U instructions

chinavasion CVFR-I108 user manual

chinavasion

chinavasion CVFR-I108 user manual

Panasonic AJHPX2700G - MEMORY CARD CAMERA-RECORDER operating instructions

Panasonic

Panasonic AJHPX2700G - MEMORY CARD CAMERA-RECORDER operating instructions

DXG DXG Sportster DXG-5B7V Specifications

DXG

DXG DXG Sportster DXG-5B7V Specifications

Sony CCD-TRV11 - Video Camera Recorder 8mm Operation manual

Sony

Sony CCD-TRV11 - Video Camera Recorder 8mm Operation manual

JVC GR-AX958EG instruction manual

JVC

JVC GR-AX958EG instruction manual

Sony DXC-637 Service manual

Sony

Sony DXC-637 Service manual

Pentax PC-K1100A instruction manual

Pentax

Pentax PC-K1100A instruction manual

Sony Handycam CCD-TRV63 user guide

Sony

Sony Handycam CCD-TRV63 user guide

DXG DXG-595V user manual

DXG

DXG DXG-595V user manual

Canon ZR80 instruction manual

Canon

Canon ZR80 instruction manual

manuals.online logo
manuals.online logoBrands
  • About & Mission
  • Contact us
  • Privacy Policy
  • Terms and Conditions

Copyright 2025 Manuals.Online. All Rights Reserved.