manuals.online logo
Brands
  1. Home
  2. •
  3. Brands
  4. •
  5. Samsung
  6. •
  7. LED TV
  8. •
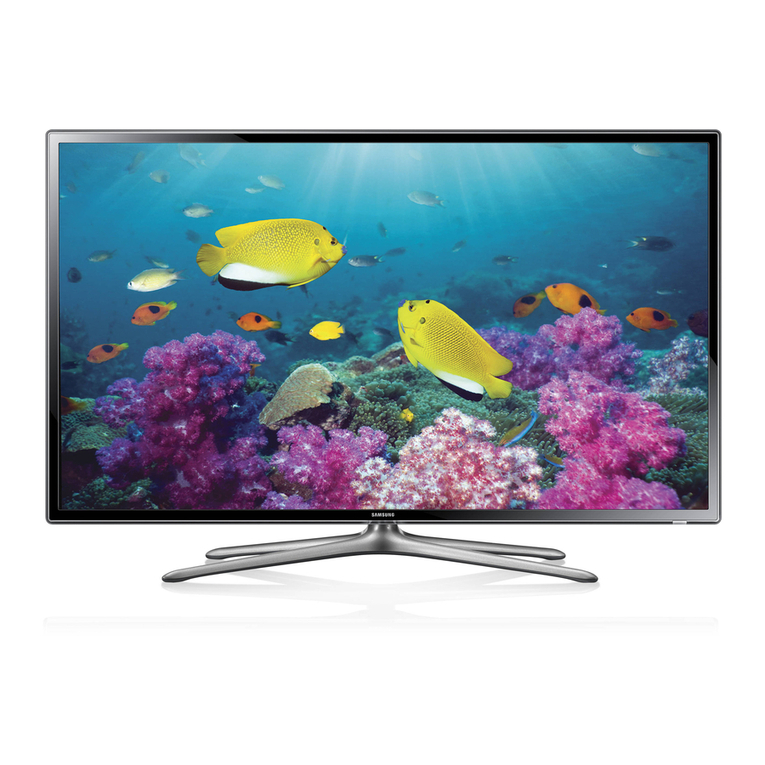
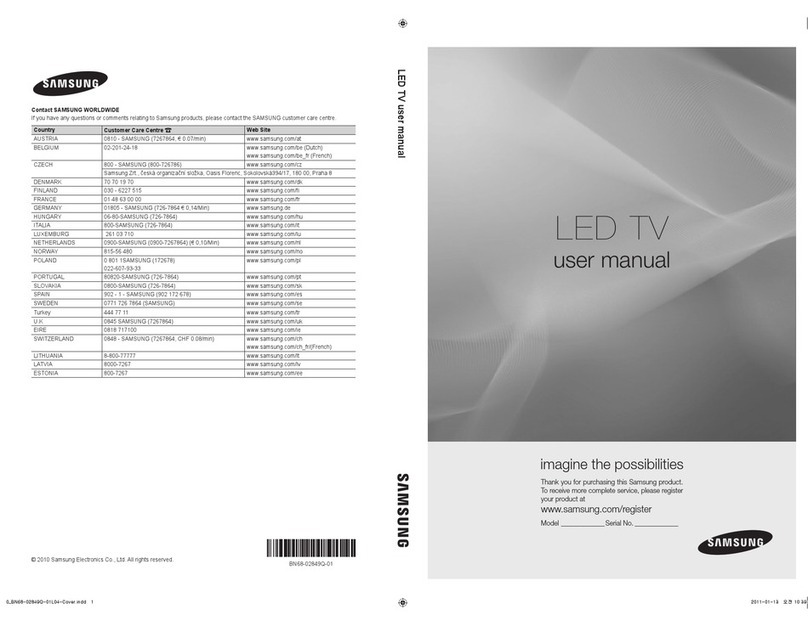
  9. Samsung UN32F5500 E- User manual

Samsung UN32F5500 E- User manual

LED TV
user
manual
Thank
you
for
purchasing
thi
s
Samsu
ng
produ
c
t.
To
rec
e
ive
more
complete
servi
c
e,
please
regi
ster
your
product
at
www.samsung
.com/register
Model
__
_ _ _
Serial
No
.
__
_ _ _
SERIES[§
5500
"%
If you havea
ny
qu
est
ion
s,
pl
ease
ca
ll
us at 1-800-SAMS
UN
G
(1
-800-
726
-7
864)
fo
r
ass
istan
ce
.
Important
Safety
Instructions
CAUTION
TO
RE
DUCE
T
HE
R
ISK
OF
ELECTRI
C
SHOCK
,
DO
NOT
REMOVE
COVER
(OR
BACK).
THERE
ARE
NO
US
ER
SERVICEAB
LE
PARTS
IN
SI
DE.
R
EFER
ALL
SERV
ICI
NG
TO
QUALIFIED
PERSONNEL.
This
symbol
in
di
cates
tha
t
high
vo
l
tag
e
is
present
ins
i
de.
It
is
dangerous
to
make
any
k
in
d
of
contact
with
any
i
nternal
part
of
this
prod
uct
This
symbol
ind
i
cates
t
ha
t i
mportant
li
te
r
at
u
re
co
ncern
i
ng
operati
on
an
d
main
tena
nc
e
ha
s
been
inclu
ded
wi
th
this
produc
t
•
The
slo
ts
and
open
ing
sin
the
cabinet
and
in
the
back
or
bot
t
om
are
provided
for
necessary
vent
ila
ti
on.
To
ensure
reliable
operat
io
nof
th
is
apparatus,
and
to
pr
otect
it
fr
om
overhea
t
ing,
t
hese
slots
and
openings
mus
t
neve
r
be
blocked
or
covered.
-
Do
not
pl
ace
this
apparat
us in a
confined
space.
such
as
a
bookca
s
e,
or
bu
ilt
-i
n
ca
binet,
un
l
es
sp
ro
p
er
ven
tila
tion
is
provided.
-
Do
not
place
thi
s
apparat
us
near
or
over
a
radiator
or
heat
register,
or
whe
re
it
is
exposed
to
di
rect
sunl
i
ght
-
Do
no
t
place
vesse
ls
(vases
etc.)
containing
water
ont
hi
s
apparatus,
as
this
can
re
su
lt
in
a
fire
or el
ect
ri
c
shock.
•
Do
not
expose
this
apparatus
to
r
ain
or
place
it
near
water
(n
ear
a
bathtub,
washbow
l,
kitchen
sink,
or l
aundry
tub,
ina
wet
baseme
nt,
or
near
a
swimming
pool
etc.
). Ift
his
appa
ratus
acc
i
de
n
ta
lly
gets
wet,
unplug
it
and
contact
an
authorized
dea
l
er
imm
edia
t
ely.
•
Th
is
apparatus
uses
batteries
.In
your
commu
nit
y,
t
he
re
mi
ght
be
environmenta
l
reg
ula
ti
ons
th
at
requ
i
re
you
to
dispose
of
these
batte
ries
proper
l
y.
Please
contac
t
yo
ur
loca
l
authorities
for
disposa
l
or
recycling
i
nformation
.
•
Do
not
over
l
oad
wall
ou
tl
ets,
exte
nsion
cords
or
ada
pt
ors
be
yond
the
1r
capacity,
sin
ce
th
is
can
resu
lt in fireor
elec
tric
shock.
•
Power
-
supply
cords
s
hould
be
pl
aced
so
tha
t
they
are
not
likely
to
be
wa
lked
on
or
pinched
by
i
tems
placed
upon
or
again
st
them.
Pay
part
ic
ul
ar
attention
to
cords
at
the
plug
end
,at
wall
outle
ts
,
and
the
point
where
th
ey
e
xit
from
the
app
l
iance.
• To
protect
this
apparatus
from
al
igh
t
ni
ng
storm,
or
when
it is
left
unattended
and
unused
for
long
periods
of
t
im
e,u
nplug
it
from
the
wa
ll
ou
t
le
t
and
disconnect
the
antenna
or
cab
le
system.
Th
iswi
ll
prevent
damage
to
the
set
due
to
ligh
tni
ng
and
power
l
ine
surges.
•
Be
fo
re
con
nect
ing
the
AC
power
cord
to
the
DC
adaptor
ou
tlet,
make
sure
the
v
olt
age
desig
nation
of
the
DC
adaptor
corresponds
to
the
l
ocal
el
ectrica
l
supp
ly.
• N
eve
r i
nsert
anyt
hing
me
ta
l
lic
into
the
open
parts
of th
is
app
aratu
s.
Doing
so
may
cre
ate
a
danger
of
el
ec
t
ric
shoc
k.
•
To
avo
id
ele
c
tnc
s
ho
ck,
never
touch
the
1nside
of
thi
s app
ara
tus
.
On
lya
qua
lif
i
ed
te
ch
n
ic
ian
shou
ld
open
t
hi
s
appa
r
atus.
•
Make
su
re
to
plug
the
power
cord
in
until
it
isfi
rm
ly
sea
te
d.
When
un
p
lu
ggi
ng
the
po
wer
cord
from
a
wall
ou
tlet,
al
ways
pull
on
the
po
we
r
cord
's pl
ug.
N
ever
unplug
by
pu
ll
ing
on
th
e
power
co
r
d.
Do
not
tou
ch
th
e
powe
r
cord
with
wet
h
ands
.
• If
th
is
apparatus
does
not
operate
norma
l
ly
-
in
part
i
cular
,
if
there
are
any
unus
ual
sou
n
ds
or
sme
lls
coming
from
it -
unp
lu
git i
mmediatel
y
and
contact
an
authorized
dea
ler
or
serv
ic
e
center.
• Be
sure
to
pull
the
power
pl
ug
out
of
the
out
l
et
if
the
TV
is
to
remain
u
nuse
d
or
if
you
a
re
to
l
eave
the
ho
use
for
an
extended
period
of
time
(e
sp
ecia
ll
y
when
c
hild
re
n,
el
de
rly
or
disab
l
ed
peop
lew
ill
be
left
al
one
in
the
house)
.
-
Accumu
l
at
ed
dust
can
caus
e
an
electri
c s
ho
ck, anel
ec
tric
le
akage
ora
fi
re
by
ca
using
the
power
cord to g
enerate
s
pa
rks
and
hea
t
or
th
e
ins
ul
ation
to
de
te
riorat
e.
•
Be
s
ure
to
cont
ac
t
an
a
uth
or
i
ze
d
serv
i
ce
ce
nt
er
for
i
nform
at
ion
if
you
in
tend
to in
sta
ll
yo
ur
TV
in
a
location
with
h
ea
vy
dust,
high
or
l
ow
t
empe
r
atu
re
s,
high
humidity,
che
mi
cal
s
ubstan
ces,
or
where
it
wi
ll
ope
rate
24
hou
rsa
day
su
ch
in
an
airpo
rt
,a
train
s
ta
ti
on
,etc.
Fail
ingto
do
so
may
lead
to
serious
damage
of
your
TV.
• Use
on
ly
a
properly
g
ro
unded
plu
g
and
wa
lloutlet
-
An
I
mproper
ground
may
ca
use
el
ectric
shoc
k
or
eq
uip
ment
damage.
(C
l
ass
IE
quipment
o
nly
.)
•
To
turn
th
is
apparatus
off
com
pl
etel
y,
you
mu
st d
isco
nnec
t it f
ro
m
the
wa
ll
ou
tlet
Conseq
uently
,
the
wall
o
utlet
an
d
power
p
lu
g
mu
st
be
r
eadil
y
access
ibl
eat
all
tim
es.
• Do n
ot
allow
c
hildr
en to
hang
on
to
th
epr
od
uct
•
Store
the
acc
es
so
ri
es
(ba
ttery,
etc.)
in
al
ocat
ion
sa
fely
out
of
th
er
eac
h
of
c
hildren
• Donot
in
sta
ll
th
e
product
in
an
unst
ab
le l
ocation
su
ch
as
ash
aky
se
lf,
aslant
ed
fio
or
or
al
oca
tion
ex
p
os
ed
to
vi
bration.
• Donot d
ro
p or
app
ly
any
sh
ock
to
th
e
produc
t
II
the
prod
uc
t
is
damaged,
di
sconne
ct
th
e
power
cord
an
d
con
t
ac
t a
serv
i
ce
cente
r.
• To
clean
this
apparatus,
unplug
thep
ower
co
rd
from
th
e
wa
llo
utl
et
and
wi
pe
t
he
product
us
ing
a
so
ft,
dry
cl
ot
h.
Do
not
u
se
any
ch
e
mi
cals
such
as
wax
,
ben
z
ene,
alco
h
ol
, th
inne
rs,
In
sect
ic
ide,
a
ir
fr
esheners
,
lubri
can
t
s,
or
dete
r
ge
nt
These
c
hemi
ca
ls
ca
n
dama
ge
the
a
pp
earance
of
the
TV
or
era
se
th
e
pr
inti
ng
on
th
eproduct
•
Do
not
expose
t
hi
sa
ppa
rat
usto
dr
i
ppi
ng
or
spl
as
hing
.
• Do not di
sp
ose
of
batt
er
i
es
in li
re
• Do
not
short
-c
ir
c
ui
t,
di
sasse
m
ble
or
ove
rh
ea
t t
he
ba
tt
er
i
es.
• T
he
re
is
dan
ger
of
an
ex
pl
os
ion
if
yourepl
ace
th
e
ba
tte
ri
es
used
in
th
e
re
mo
te
w
ith
th
ew
ro
ng t
ype
of
bat
te
ry
.
Re
pl
ace
on
ly
wi
th
th
e
sa
me
or
equ
ivale
nt
type.
•
WARN
IN
G-
TO
PREVENT
THES
PREAD
OF
FIRE
,
KEEP
CA
NDL
ES
OR
OTHER
O
PEN
FLAMES
AWAY
FROM
T
HIS
PR
OD
UCT
AT
ALL
TIM
ES.
Contents
Basic Features
5
7
8
9
Using the Remote Control
6
Turning on the TV
Switching Be
tw
een Vid
eo
Sources
Universal Remote Control Setup
Viewing the e-Manual
10 Viewing the e-Manual
10
Scrolli!l[1
a
Pag
e
10
Usin~~
Top
Icons
-1 n
Pc,t'
'rn
:
+,n
the.
1-i
'r
-,rr'
,
e·
Page
-
!
'\.._
) I 1t
_..
i.J: !
i\
..._,
........
u 1 • !
\._.;
1 ,
'-
10
Sea
rching the
Inde
x
-:1
Sea
rchin
g
r:>ages
111
(~!nc)i
n
c
~
+r-,e
P -
f\1
J1
;m
...._,..
,
\...
~~-
,,
·'c_j
l.
l ! v
, ,
~,'
1
·1
Jur--r-1
ng
to a
1\!i
e
nu
it
ern
11
Updat1ng
the
e-
1\!ianual
Network Configuration
12 Connecting
to
a Network
12 N
k:=>t
'
\'
,/(-
,,.-1<
CnnrJ;:::or---
~~--,
'
nn
'-
'
,._
,_
,) , t
,_)~
'
....._,
.
..__...
.
\..,j
! '
12
VVi
reiess
i\Jetwork
12
1\J
etwork Sec
unty
Pr
otocols
I'~),
['\l
1e
---
-
tlt-v
'o
rk
Corli"'lr:)c··tl
'r\n
-\)\/ired
1
\.....
/ - · ··
!,,
1
.
'-...-
'
/,
.
~
,
:
~
··
14 What is Remote
Supp
ort?
Troubleshooting and Other
Information
15 Troubleshooting
16 Mounting the TV on the Wall Using
the
Wall
Mount Kit (Optional)
18 Assembling the Cable manager
18 Eco Sensor and Screen Brightness
19 Maintenance
19 Providing Proper Ventilation for Your TV
20 Securing the TV
to
the Wall
Specifications
21 Specifi
ca
tions
22 Dimensions
22 Licenses
Guides
23 Warranty Information
25 SAMSUNG BRAND PRODUCTS
25
Ll
i\!iiTED
V
Vf\RRA
NTY
TO
OFi
iG
NA
L.
PURCHASER
Figures and illustrations
in
this User Manual are provided for
refe
re
nce only and may differ from the actual
product appearance. Produ
ct
design and specifications
ma
y change without notice.
Features
of
your
new
1V
• SMART HUB:
This TV features Smart Hub, a multi-purpose entertainment and family center. With Smart Hub, you
can surf the web, download applications, and stay
in
touch with family and friends through social
networking services.
In
addition, you can view or play photo, video, and music files stored on external
storage devices.
Press 8 to launch Smart Hub. Choose a service using the icons displayed
in
the top part
of
the screen.
Smart Hub services and functionality include:
Social: Watch the latest
You
Tube videos and you and your friends video posts on Facebook and
Twitter.
You
can also make video
ca
ll
s
to
friends by connecting the TV to a camera (sold separately).
Apps: Samsung Apps offers
an
extensive collection of free and paid news, sports, weather, and
gaming content you can directly download
to
and enjoy on your
TV.
On
TV: Check a listing
of
programs that are currently airing or are scheduled
to
air.
Movies &TV Shows: Purchase and watch movies and seri
es
without a separate external device.
Photos, Videos
&
Music: Play back photo, video, and music files from
an
external storage device.
• Anynet+ (HDMI-CEC): This allows you
to
control
all
connected Samsung devices that support
Anynet+ with your Samsung TV's remote.
• e-Manual: Provides a detailed, on-screen user's manual built into your
TV.
•
SMART
Interaction: Using this function, you can access and control menu op
ti
ons and functions
using motions.
To
use the Smart Interaction Feature, connect the SMART TV camera (sold separatel
y)
to
your TV.
• Device Manager: Use the TV features with a USB keyboard and mouse.
• Screen Mirroring: Displays mobile device screens on your
TV
using a wireless connection.
Using
the
Remote
Control
Learn where the function buttons
are
on your remote. Especially note these: SOURCE, MUTE,
VOL,
CH,
MENU, TOOLS,
G',
INFO, CH LIST, RETURN, and EXIT.
~
This remote control has Braille points on the Power, Channel, and Volume buttons and can be used
by visually impaired persons.
Turns
the
TV
on
and
off.
Displays
and
selects
the
available
video
sources
.
.....,:.....:.._
__
STB:
Turn
on
and
off
the
satellite
or
cable
set-top
box
connected
to
the
TV.
Turn
on
the
backlight
for
the
buttons.
-----:~-1
STB
GUIDE:
Displays
the
STB's
EPG
(
Electronic
Program
Guide).
The
backlight
lasts
for
only
a
few
seconds.
Turns
the
remote
control
light
on
or
off.
When
on,
the
buttons
become
illuminated
for
a
moment
when
pressed.
(Using
the
remote
control
with
this
button
set
to
On
will
reduce
the
battery
usage
time.)
Gives
direct
access
to
channels.
Press
to
select
additional
digital
channe
ls
being
broadcast
by
the
same
digital
station.
For
example,
to
select
channel
'54-3',
press
'54',
then
press'-'
and
'3'.
Adjusts
the
volume.
STB
MENU:
Opens
the
STB's
OSD
(Menu)
.
~
These
buttons
are
only
available
when
the
universal
remote
control
is
set
and
TV
turns
on.
L:!_Jl2_j
l2J
000
JJ000
-----=-..:...._
1
8 0 (
PRE-CH
J---:-
1
-:-
1
---
Returns
to
the
previous
channel.
+
~
Cuts
off
the
sound
temporar;>;.
~
I
~
~
LJl__
Changes
channels.
CH
v
Displays
channel
lists
on
the
screen.
__
___:~----'
::===~W----
Brings
up
Smart
Hub
applications.
See
the
Opens
the
OSD
(Menu).
Quickly
selects
frequently
used
functions.
Moves
the
cursor,
selects
the
on-screen
------;.....;....-1
menu
items,
and
changes
the
values
seen
on
the
TV's
menu.
Returns
to
the
previous
menu.
Use
these
buttons
according
to
the
directions
on
the
TV's
screen.
Use
these
buttons
in
a
specific
feature.
Use
these
buttons
according
to
the
directions
on
the
TV's
screen.
SI\MSUNG
e-Manual
chapter,
Smart
TV
Features
>
Smart
Hub
.
--:-:----
Displays
the
EPG
(
Electronic
Program
Guide).
Displays
information
on
the
TV
screen.
Exits
the
menu.
Inserting
the
Batteries
(AAA
X
2)
Match the polarity
of
the batteries
to
the symbols
in
the battery compartment.
•
•
r.:-
~~
0
~-
f.
. ' ·
·.
0
"'~~~
~~~~
'
~
J
~NOTE
-Use the remote control within
23
feet
of
the
TV.
-Bright light may affect the performance of the remote
co
ntrol. Avoid using wh
en
near special
fluorescent lights
or
neon signs.
- The color and shape may vary depending on the model.
Turning
on
the
TV
Turn
on the TV using the
C)
button on the remote control
or
TV panel.
~
The product color and shape may vary depending on the model.
~
The first time you turn on your
TV,
it will immediately start the
ini
t
ial
setup.
~
The TV's Controller, a small joy stick like button on the rear right side of the
TV,
lets you control the TV
without the remote control.
Caution
of
the cover-jack
lL CAUTION
Open
Smart
Hub.
Open
the
menu.
Select asource.
Turn
off the 1V.
•
------------
"f
h"e"
coniro
i
stick
i
s
-~~~a~i~~~~-r·o·---------
"j
l
ower-left
corn
er
on
the
back
of
t
he
TV
. :
~
:
'
~
'
' '
'---
Remote
control sensor
:,
___________:
When
you
u
se
th
e
Remo
te
co
nt
rol,
t
he
standby
LED
does
n
ot
r
espond,
exce
pt
wh
en
you
pr
ess
th
e6
button.
Th
e cover-jack is for use by qua
lifi
ed
service personnel
only.
To reduce the risk of electric shock or fire hazard, do not use the cover jack, unless you are qualified to
do
so.
TV Rear Panel
~
The rear panel may differ depending on the mode
l.
Switching
Between
Video
Sources
Press the SOURCE button to switch between devices connected
to
the
1V
.
For example, to switch to a game conso
le
connected
to
the second HDMI connector, press SOURCE
button. From the Source list, select
HDMI2
. The connector names may vary depending on the product.
Select Tools at the upper-right corner ofthe source screen
to
access the following functions.
• Edit Name: Lets you associate a device name
to
an
input source.
You
can select the following device names
in
the Edit Name option:
VCR
I
DVD
I
Cable STB
I
Satellite STB
I
PVR STB
I
AV
Receiver
I
Game
I
Camcorder
I
PC
I
DVI
PC
I
DVI Devices
I
TV
I
IPTV
I
Blu-ray
I
HD DVD
I
DMA
To
associate a device name to
an
input source follow these steps:
1. Select Tools
in
the upper right corner ofthe source screen.
2.
Select Edit Name.
3. Find the
in
put source you want
in
the Source
li
st (HDMI1, HDMI2, Component, etc.).
4. Select the blank field next
to
the input.
5.
In
the device name list that appears, select the name
of
the device attached
to
the input.
When you view the Source list, the device name and the input jack will be displayed together.
-If you have connected a PC to the
HDMIIN
3 (DVI) port with
an
HDMI cabl
e,
select PC from the
device name list.
-If you have connected a PC to the
HDMIIN
3 (DVI) port with
an
HDMI
to
DVI
cable, select DVI PC
from the device name list.
-
If
you connected an
AV
device to the
HDMIIN
3 (DVI) port with
an
HDMI to
DVI
cable, select DVI
Devices from the device name list.
• Information: View detailed information about the connected devices.
• Refresh: Select if a connected device does not appear
in
the list. If the list does not show the device
after selecting Refresh, check the status of the
1V
-to-device
co
nnection.
• Remove USB: Remove the USB device from the list safely. This function
is
only
avai
lable
wh
en the
USB device selected.
Universal Remote Setup: U
se
to configure universal remote control settings. Using the universal remote
control, you can control external devices connected
to
the
1V,
such
as
a set-top box, Blu-ray
player,
and
AV
receiver.
:-:; :
,_.
'
~
·
·?
:~~"'~'
•
'c:;''
'
-<
~
''';
:·
. .
Universal
Remote
Control
Setup
This
1V
has a universal remote control feature that lets you control cable boxes, Blu-ray players, home
theaters, and other third-party external devices connected
to
the
1V
using the
1V's
remote control.
I
I
I
I
I
I
,,,,'''
I
'
'
'
,,,""'
~,
...........
,,
'''
\
~
\
I
I
I
I
I
I
I
I
,,'
....
__
_
__
...
,/
I
I
I
I
Keep a distance of 2 inches at least between the
IR
Extender and the external device, as the illustration
shows. Face the
IR
Extender toward the external device's remote control signal receiver. Note that it should
be no obstacle between
IR
Extender and external device. The presence
of
an
obstacle will interfere with
the transmission of the remote control signal.
Add
the
External
Device
1. Turn on the external device you wish
to
set up universal remote function for and then press SOURCE
to
bring
up
the Source screen.
2. Select Universal Remote Setup from the t
op
ofthe screen. This initiates the universal remote setup
process.
3. Fo
ll
ow
the on-screen instruction and set
up
the universal remote control.
If
it does not work, set up the
remote control by entering the model number manually.
Viewing thee-Manual
The embedded e-manual contains information about your
1V's
key features.
Navigate
to
the screen menu and select e-Manual
(Support > e-Manual).
1.
Select a category from the left side ofthe screen.
2. Select
an
item. Thee-Manual will open on the page containing the selected information.
~
Words
in
blue refer to screen menu
opt
ions and words
in
light blue refer
to
remote control buttons.
~
Arrows are used to indicate the menu path. (Example: Screen Menu >
Support > e-Manual)
Scrolling
a
Page
To
scroll a page, use
of
one of the following methods:
• Place the focus on the • or • button at the right edge
of
the screen.
• Place the focus on the
.oil.
or
~
button at the right edge ofthe screen, press t
he
up or down arrow
button on the remote.
Using
the
Top
Icons
Use the
Back, Forward,
and
Opened pages
icons on the
top
left
of
the screen
to
navigate through
pages. These icons are available after you have viewed
two
or
more pages.
Returning
to
the
Home
Page
To
return to the home page, press the
rJ
button or select
.ft.
on
the top right of the screen.
Searching
the
Index
Press the m
button
or
select
..1
.on the
top
right
of
the screen to display the index. Select a term
to
display
the page containing the term.
Searching
Pages
Press the
[!I
button or select
.
Cl..
.
on the
top
right of the screen, and enter search crite
ri
a.
Select a page
from the list of search results
to
display
it.
Closing
the
e-Manual
To
close thee-Manual, press hold the
RETURN
button
or
select X at the upper-right corner
of
the
screen.
Jumping
to
a
Menu
Item
To
jump directly
to
the menu item that is described
in
the current section, select
C
i~
~
lJ
It
is
possible
to jump from a menu item directly
to
the related section
in
thee-Manual. On the screen menu, press the
E-MANUAL
button that appears on the screen.
~
This feature may not be available, depending on the menu.
Updating
the
e-Manual
Open the
Smart Hub
and select
Apps,
and then select
More Apps.
The e-manual can be updated in the
same way with
an
application update.
On
the
More Apps
screen, select
Update Apps.
Select e-Manual from the
li
st. The e-Manual starts
updating
to
the latest
ve
rsion.
Connecting
to
a
Network
Connecting the TV
to
a network gives you access
to
online services such as Smart Hub and lets you
update the TV's software online directly from Samsung.com.
Network
Connection
-
Wireless
Connect the
TV
to
the Internet using a standard wireless router or modem.
The
LAN
Port
on
the
Wall
Wire
l
ess
IP
Router
or
Modem
that
has
a
DHCP
Server
LAN
Cab
le
(Not
Supplied
)
Wireless
Network
Precautions
-
---
··
-=-----
--
((<
; I
• This TV supports the
IEEE
802.11
a/b/g
/n
communication protocols. Samsung recommends using
IEEE
802.11
n.
Otherwise, when you play video over a network connection, the video may not play
smoothly.
•
To
use a wireless network, the TV must be connected
to
a wireless router
or
modem. If the wireless
router supports
DHCP,
the TV can use a DHCP or static
IP
address to
co
nnect to the wireless network.
• Select a channel that is not currently in use for the wireless router.
If
the channel set for the
wireless router
is
currently being used by another device, the result
is
usually interference and/
or
a
communications failur
e.
• Most wireless networks have an optional security system.
To
enable a wireless network's security
system, you need to create a security key using characters and
numb
ers, and then enter that key into
the router through its menu.
You
then must enter this security key into any other devices you want
to
connect
to
the wireless netw
ork
.
Network
Security
Protocols
The TV only supports the following wireless network security protocols:
• Authentication Modes:
WEP,
WPAPSK, WPA2PSK
• Encryption Types:
WEP,
TKIP, AES
In
compliance with the newest Wi-Fi cert
ifi
cation specifications, Samsung TVs
do
not support WEP
or
TKIP
security encryption
in
networks running
in
the 802.11 n mode.
If the wireless router supports WPS
(Wi
-
Fi
Protected Setup), you
ca
n
co
nn
ec
t the TV
to
your ne
tw
ork
using
PBC (Push Button
Co
nfiguration)
or
a P
IN
(Personal Identification Numbe
r).
W
PS
automati
ca
ll
y configures
the SS
ID
and
WPA
key settings.
Your Smart
TV
cannot
co
nnect
to
uncertified wireless routers.
Network
Connection
-
Wired
There are three main ways to connect your TV to your network using cable, depending on your network
setup. They are illustrated below:
The
M
odem
Port
on
the
Wall
Ext
e
rnal
M
odem
(ADSL
I V
DSL
I
Cab
le
TV)
Modem
Cable
(No
t
Supp
li
e
d)
LAN
Cab
le
(N
ot
Supp
li
ed)
The
Modem
Port
on
the
W
all
External
Modem
(
ADSL
I
VDSL
I
Cable
TV)
Mod
em
Cab
le
(
Not
Su
ppl
ied)
LAN
Cable
(No
t
Supp
li
ed)
The
LAN
Port
on
the
Wall
IP
Route
r
tha
t
has
a
DHCP
Se
rve
r
LAN
Cable
(Not
Supplied
)
LAN
Cab
le
(
Not
Supp
li
ed)
~
The
TV
does not support network speeds less than
or
equal to 10Mbps.
·
~
Use Cat 7 cable for the connection.
TV
Rear
Pa
nel
TV
Rear
Panel
TV
Rear
Pa
ne
l
What
is
Remote
Support?
Samsung Remote Support service offers you one-on-one support with a Samsung Technician who can
remotely.
• Diagnose your TV
• Adjust the TV settings for you
• Perform a factory reset
on
your TV
• Install recommended firmware updates
How Does
it
Work?
Having a Samsung Tech remotely service yourTV
is
easy.
~--.........,.,..,
~
,
l
.
l__
....
..· .· .;_
••
.
.•
•.
~,
.!'
...
..
·'
.·.·
-
.
~
'
'
' "
1. Call the Samsung
Contact Center
and ask for remote
support.
2. Open the menu
on your TV and
go
to
the Support
section.
3. Select Remote
Management and
Provide the Pin#
to
the agent.
4. The agent will th
en
access your TV.
That's
it!
Troubleshooting
If
the
TV
seems to have a
pr
ob
lem, first
re
v
ie
w t
hi
s list of possible problems and solutions. Also,
re
view
the Troubleshooting Section
in
thee-Manual. If none
of
the troubleshooting tips appl
y,
visit www.samsung.
com
/s
upport or call Samsung Customer Service at 1-800-SAMSUNG
(1
-800-726-786
4).
Flick
eri
ng
and
Dimm
ing
Compone
nt
Connections
/Scree
n
Co
lor
Sc
reen
Bri
gh
tness
Unwanted
P
owe
ri
ng
Off
Tr
oub
le
Power
i
ng
On
Sta
nd A
sse
m
bly
Cann
ot Fi
nd
aCh
annel
If
your
Samsung
Tel
ev
isi
on
is
flicke
r
in
g or di
mm
i
ng
spo
radically
,
you
ma
y
ne
ed
to
d
1sab
le
some
of
the
energy
efficiency
feat
u
res.
Disable
Energy
Saving (System >
Eco
Solution >
Eco
Sensor)and/or Energy Saving (
System
> Eco
Solution > Energy
Saving)
and
check
aga
i
n.
If
you
find
th
at
the color
on
your
Samsung
telev
ision
sc
r
een
1s not
correct
or
the
black
and
whi
te
colors
are
off,
run
a
Self
D
ia
g
nosis
P
icture
Test
(Support > Self Diagnosis > Picture
Test
).
If
the
picture
prob
l
em
is
caused
by
th
e
TV
,
th
e
prob
lem
should
be
vis
ibleint
he
Pictur
e
Tes
t.
If t
he
pr
ob
lem
is
not
visi
ble
,n
ext
con
fi
rm
that
the
TV
's vi
deo
i
nput
j
ack
s
are
co
nnec
ted
to
th
e
correct
extern
al
vi
deo
dev
i
ce
ou
t
pu
t
jacks
and
tha
t
none
of
the
connections
a
re
l
oose
.
Fina
lly,
if
possi
bl
e,
test
your
externa
l
vi
deo
devices
by
connecting
th
em
to
anothe
r
TV.
If
you
find
t
ha
t
the
c
ol
or
s
on
your
Samsung
TV
are
correct
but j
ust
alit
tl
etoo d
ark
or
br
igh
t,t
ry
adjust
ing
the
following
settin
gs
first.
Nav
ig
ate
to
Picture
and
adjust
Backlight,Contrast, Brightness, Sharpness, Color,Tint
(G/R)
and
other pic
tur
e
qua
lity adj
us
tmen
t
se
tt1
ng
s.
If
your
S
amsung
TV
appears
to
tu
rn
o
ff
by
it
sel
f,t
ry
di
sabl
ing
some
of
the
TV
's
ener
gy
effic
i
enc
y
an
d
automa
ti
c o
ff
featur
es.
Check
if
Sleep
Timer (
System
>
Time
> Sleep Timer)
has
been
enab
l
ed
.Sleep
Timer
au
tom
at
i
call
yt
urns
o
ff
th
e
TV
a
ft
eran
am
oun
t
of
t1me
th
at
you
se
l
ect.
If t
he
Sleep Timer
has
no
t
been
enab
l
ed
,
see
if
No
Signal
Power Off(
System
>
Eco
Solution >
No
Signal
Power
Off)
or
Auto
Power Off (System >
Eco
Solution >Auto Power
Off)
has
been
enabled
.
No
Signal Power
Off
turns
o
ff
the
TV
if
no
sig
nal
has
be
en
rece
iv
ed
by
t
he
TV
fora
spec
ifi
ed
per
i
od
t
im
e. Auto Power Off
tu
rns
off
th
e
TV
if
th
ere
has
bee
n
no
u
se
ri
nput
inf
ou
rho
ur
s.
When
the
TV
is turned
on
,the remote control receiver flashes 5 times before the screen turns on.
If
you
f
1nd
that
yo
u
ar
e
having
prob
l
ems
po
weri
ng
on
yo
ur
Samsung
t
elevis
i
on
,
th
ere
are
a
number
of
thin
gs
to
chec
k
befo
re
ca
lling
the
serv
i
ce
department.
If
the
p
ower
cord
is
connected
pr
ope
r
ly
and
the
remo
te
control
is
operating
n
or
mally,
t
he
pr
oblem
migh
t
be
wi
th
the
an
t
enn
a
ca
ble
connection
or
the
ca
ble/
satellite
box
no
t
being
turned
on.
Chec
k
the
ante
nna
connec
ti
on
or
turn
on
the
cab
l
e/sa
te
lli
te
box.
If you h
ave
anytro
ub
le
assembl
i
ng
the
st
and,
review
the
sta
nd
asse
mb
ly
instruc
ti
on
in
the
Qui
ck
St
art
Gu
i
de
.
Re
-r
un
Setup
(Go
to
Menu
> System > Setup)or r
un
Auto Program.
(Go
to
Menu
> Broadcasting >
Auto
Program
).
~
For detailed troubleshooting info
rm
a
ti
o
n,
watch the
tr
oubleshoot
in
g videos at
www
.samsung.com/
sps
n.
The
TV
won't t
urn
on
.
T
here
is
no
pi
c
ture/video.
•
Make
su
rethe
AC
power
co
rd
is
securely
pl
ugged
1n
to
the
wall
out
let
and
the
TV.
•
Mak
e
sure
the wa
ll
outlet
is
work
in
g.
•
Try
press
i
ng
the
6
button
on
th
e
TV
to make
sure
the
prob
l
em
is
not
the
remote.
If
the
TV
tu
rns
on
,
r
efer
to
"Remote
contro
l
does
not
work"
bel
ow
.
•
Che
ck
the
c
able
c
onnecti
o
ns
.
Remo
ve
and
r
econnect
all
ca
bles
con
ne
c
ted
tot
he
TV
and
externa
l
devi
ce
s.
•
Se
t
the
video
outputs
of
your
externa
l
dev
i
ces
(Cab
le/
Sat
Box,
DVD
, Bl
u-ray
etc)
to
ma
tcht
he
TV
's
input
connec
ti
ons
.
For
example,
if
an
externa
l
device's
output
is
HO
MI, it sho
uld
be
connected
to an
HOM
Iin
pu
t onthe
TV
.
•
Make
sure
yo
ur
c
onn
ected
devices
are power
ed
on.
• Be
su
reto
se
l
ec
t
th
e
cor
r
ect
i
nput
source
.
•
Reboot
thec
onn
e
cted
device
by
u
nplugg
in
g i
t,
and
then
reco
nnecting
th
e
device
's
pow
er cabl
e.
The
re
motecontrol
doe
snot wo
rk.
•
Repl
ace
th
e
rem
ote
contro
l batte
ri
es
.
Ma
ke
s
ure
the
ba
tte
ries
arein
st
a
ll
ed
with
their
po
les
(+
/-)
in
th
e
corr
ec
t d
irection.
•
Clean
th
e
senso
r'
s
transmission
wi
ndow
on
the
remote.
•
Try
point
i
ng
the
remote
directly
at
the
TV
f
rom
5-6
feet
awa
y.
Th
e
ca
bl
e/set top
box
re
mote
control
•
Program
t
he
Ca
ble/
Set
remote
con
t
ro
l
to
op
era
te
the
TV.
Re
f
er
tot
he
C
ab
l
e/Se
t-T
op-Box user
doesn
't
tu
rn
the
TV
on
or
off
or
ad
j
us
t the
manua
l
for
the
SAMSUNG
TV
code.
volume
.
~
This TFT
LED
panel uses a panel consisting of sub pixels which require sophisticated technology to
produce. There may b
e,
however, a few bright or dark pixels on the screen.
Th
ese pixels will
ha
ve
no
impact on the performance
of
the product.
~
To
keep your TV
in
optimum condition, upg
ra
de to the latest software. Use the Update Now or Auto
Update functions on the TV's menu (Screen Menu
> Support
>
Software Update
>
Update now
or
Screen Menu >
Support
>
Software Update
>
Auto Update).
Mounting
the
lV
on
the
Wall
Using
the
Wall
Mount
Kit
(Optional)
Wall or Ceiling Mounting
If
you mount this product on a wall, it should be mounted only as recommended by the
manufacture
r.
Unless
it
is correc
tl
y mounted, the product may s
li
de or
fall,
caus
in
g serious
injury to a child or adult, and ser
iou
s damage to the product.
Installing the Wall Mount Kit
The wall mount kit (sold separa
tely)
lets you mount the TV on the wall.
For deta
il
ed information about insta
llin
g the wall mount, see the
in
structions provided with the wall mount.
We recommend you contact a technici
an
for assistance wh
en
in
sta
llin
g the wall mount bracket.
We
do
not
advise you to do it yourse
lf.
Samsung Electro
ni
cs is not r
es
po
nsible for any damage to the product or
in
jury
to
yourself
or
others if you elect to insta
ll
the wall mount on your own.
To
order the wall mount kit, contact Samsung Customer Care at 1-800-SAMSUNG
(1
-800-726-786
4)
.
Installing a Wall Mount using the Wall mount adapter
~
For more detailed information, refer to the User
Manual ofthe
Wall
Mount Kit.
~
Wall mount adapters are provided only with 46-inch
or bigger TVs.
VESA Wall Mount Kit Notes and Specifications
~
Install y
our
wall mount on a solid wall perpendicular to the floor. Before attaching the wall mount to
surfaces other than plaster board, please
co
ntact your nearest dealer for additional information. If you
install the TV on a ceiling
or
slanted wall, it may fall and result
in
severe personal injury.
~
NOTE
• Standard dimensions for wall mount kits are shown
in
the tab
le
below.
• Samsung wall mount kits contain a detailed installation manual, and
all
parts necessary for
assembly
are
provided.
• Do not u
se
s
cr
ews that
do
not comply with VESA standard screw specifications.
• Do not use scre
ws
that a
re
longer than the standa
rd
length or
do
not
co
mply with VESA standard
screw specifications. S
cr
ews that are too long may cause damage
to
the inside of the TV set.
• For wall mounts that
do
not comply with the VESA standard screw specification
s,
the length of the
screws may differ depending on the wall mount specifications.
• Do not fasten the screws too firmly. This may damage the product or cause the product to fa
ll
,
leading to personal inju
ry
. Samsung is n
ot
lia
bl
e for the
se
kinds
of
accidents.
• Samsung
is
not liable f
or
product damage or personal inju
ry
when a non-VESA or non-spec
if
ied
wall mount is used or the consumer fails to follow the product installation inst
ru
ct
ions.
• Do not mount the TV at mo
re
than a
15
deg
ree
tilt.
•
Al
wa
ys have
tw
o people mount the TV on to a wa
ll.
19 -
22
75 X 75 M4
L
ED
-
TV
28 100X 100 4
[S
l
im
]
32 - 42 2
00X
200 M8
46 - 65 400 X 400
Do not
in
st
al
l
yo
ur Wa
ll
Mount Kit while your
TV
is turned o
n.
It
may
re
sult
in
personal
inju
ry
from electric sh
oc
k.
Assembling
the
Cable
manager
Eco
Sensor
and
Screen
Brightness
..
Eco Sens
or
measures the light in your room and optimizes the brightness ofthe
1V
automatica
ll
y
to
reduce
power consumption. This causes the
1V
to
bright
en
and dim automatically. If you want
to
turn this function
off,
go
to
Menu
>
System
>
Eco Solution
>
Eco Sensor
Do not block the sensor with any material. It can decrease picture brightness.
Maintenance
~
If
a sticker was attached to the TV screen, some debris can rema
in
after you remove the sticker.
Please clean the debris off before watching
TV.
~
The exterior and screen of the product can get scratched during cleaning. Be sure to wipe the exter
io
r
and screen carefully using a soft cloth to prevent scratches.
·
Fl-Y
.'
water directly ooto'the prod!Jct.
&r;ly
.
g6esJnto
th€{prod'O'
cf
may
cilUse
a ' Y',
e,
or
electric shock.···
>
Clean
tt:te
,
product
with
a,
::;oft
c
),a
tM
dam
pen~<;i
with
a small
'
c:lfnot.fnt
of
water.
'
~
o6
'
n'ot
use
a
fl
~fflm~b
le
~
. ..
liquid (e.g. benzene, thinners)
or:
a;cleaning
agent
Providing
Proper
Ventilation
for
Your
TV
When you install your
TV
, maintain a distance
of
at least 4
in
ches between the TV and other
ob
jects (wa
ll
s,
cabinet side
s,
etc.) to ensure proper ventilation.
Fa
iling to mainta
in
proper ventilation may result
in
a fire or a
problem with the product caused by an increase
in
it
s internal temperature.
~
Whether you
in
stall your TV using a sta
nd
or
a wall-mount, we strongly
re
commend you use parts
provided by Samsung Electro
ni
cs only.
•
If
you use parts provided by another manufacturer, it may cause difficulties with t
he
product or resu
lt
in
inj
u
ry
caused by the product
fal
li
ng.
lnstatiatl<>n
with
a
stanct
..
--
--
--
-
--
---
-r
--
-----------
: 4
in
c
he
s :
I I
I I
4i
nches
:
~
I
I
I
I
I
I
Other Warnings
:4inc
hes
rr-
1
I
I
I
I
I
I
tn~tallat
i
on
witti'a
wall
~
mount.
:
------------r
4
i
~c
-
h~~
- - -- - -:
:
:
4
inches
: : 4i
nch
es
~
-r-
I
:
______
__
__
__
_I_
~
Ln<;:~E)S
__
_
___
~
~
The actual appearance of the TV may differ from the images in t
hi
s manual, depending on the mode
l.
~
Be caref
ul
wh
en
you touch the
TV.
Some parts
ca
n be warm or hot.
Securing
the
TV
to
the
Wall
Caution: Pulling, pushing, or climbing on the TV may cause the
TV to fall.
In
particular, ensure your children
do
not hang
on
or
destabilize the
TV.
Doing so may cause the
TV
to tip over, causing
serious injuries or death. Follow all safety precautions provided
in
the Safety Flyer included with your
TV.
For added stability
and safety, you can purchase and install the anti-fall device as
described below.
To
Avoid
the
TV from Falling
1
.
Put the screws into the clamps and firmly fast
en
them onto the wall. Confirm that the screws ha
ve
been
firmly installed onto the wall.
~
You may
ne
ed additional material such as
an
anchor depending on the
typ
e
of
wall.
~
Since the necessary clamps, screws, and string are not supplied, please purchase these
additionally.
2. Remo
ve
the screws from the back center
of
the
1V,
put the screws into the clamps, and then fasten the
screws onto the
1V
again.
~
Screws may not be supplied with the product.
In
this case,
please purchase the screws
of
the following specifications.
~
Screw Specifications
• For a
19-
28 inches:
M4
• For a 32 -65 inche
s:
M8
3. Connect the clamps fixed onto the
1V
and the clamps
fi
xed onto
the wall with a strong cable and then tie the string tightly.
~
NOTE
Install the
1V
near
to
the wall so that it does not
fall
backwards.
It is safe to connect the string so that the clamps
fi
xed on the
wa
ll
are equal to or lower than the cla
mp
s fixed on the
1V.
Untie the string before moving the
1V
.
4. Verify a
ll
co
nnections are properly secured. Periodically ch
ec
k the
connections for
an
y sign of fatigue
or
failure. If you have any doubt
about the security
of
your connection
s,
co
ntact a professional
in
sta
ll
er.
..···
·········
...
:·~·
.·"
~
.
.
..
.
. .
. .
. .
.·
··
·····

Other manuals for UN32F5500 E-

1

This manual suits for next models

3

Other Samsung LED TV manuals

Samsung HG40ED590BB User manual

Samsung

Samsung HG40ED590BB User manual

Samsung 3 SERIES User manual

Samsung

Samsung 3 SERIES User manual

Samsung UE40F6320AW User manual

Samsung

Samsung UE40F6320AW User manual

Samsung QE75Q64TASXXN User manual

Samsung

Samsung QE75Q64TASXXN User manual

Samsung UE49K5500 User manual

Samsung

Samsung UE49K5500 User manual

Samsung HG24EE690 User manual

Samsung

Samsung HG24EE690 User manual

Samsung 6 series User manual

Samsung

Samsung 6 series User manual

Samsung QE55Q900RBU User manual

Samsung

Samsung QE55Q900RBU User manual

Samsung UE32ES6307U User manual

Samsung

Samsung UE32ES6307U User manual

Samsung The Frame 50LS03B User manual

Samsung

Samsung The Frame 50LS03B User manual

Samsung 6030 SERIES User manual

Samsung

Samsung 6030 SERIES User manual

Samsung UE40F6320 User manual

Samsung

Samsung UE40F6320 User manual

Samsung 6 series User manual

Samsung

Samsung 6 series User manual

Samsung UA40J5505 User manual

Samsung

Samsung UA40J5505 User manual

Samsung UE32H6410SS User manual

Samsung

Samsung UE32H6410SS User manual

Samsung Q75C Series User manual

Samsung

Samsung Q75C Series User manual

Samsung UE55H6203 User manual

Samsung

Samsung UE55H6203 User manual

Samsung QE55Q8CNAU User manual

Samsung

Samsung QE55Q8CNAU User manual

Samsung TH310 Series Guide

Samsung

Samsung TH310 Series Guide

Samsung UA46C5000 User manual

Samsung

Samsung UA46C5000 User manual

Samsung Series 4+ User manual

Samsung

Samsung Series 4+ User manual

Samsung QN65QN8 A Series User manual

Samsung

Samsung QN65QN8 A Series User manual

Samsung LED TV User manual

Samsung

Samsung LED TV User manual

Samsung QE43Q60BAUXXH User manual

Samsung

Samsung QE43Q60BAUXXH User manual

Popular LED TV manuals by other brands

Philips 42PFL7486T/12 user manual

Philips

Philips 42PFL7486T/12 user manual

LEECO L554UCNN quick guide

LEECO

LEECO L554UCNN quick guide

Avera 50AER10N user manual

Avera

Avera 50AER10N user manual

LG 42LM6410 user guide

LG

LG 42LM6410 user guide

Vizio D50u-D1 user manual

Vizio

Vizio D50u-D1 user manual

Philips 65PFT6909 user manual

Philips

Philips 65PFT6909 user manual

LG 65NANO95UPA owner's manual

LG

LG 65NANO95UPA owner's manual

Sandstrom S32HEDW13 instruction manual

Sandstrom

Sandstrom S32HEDW13 instruction manual

Vizio E650i-A2 Specifications

Vizio

Vizio E650i-A2 Specifications

LG 60LN5400 owner's manual

LG

LG 60LN5400 owner's manual

Panasonic TH-L47ET5M Service manual

Panasonic

Panasonic TH-L47ET5M Service manual

Telefunken TF-LED32S27T2 instruction manual

Telefunken

Telefunken TF-LED32S27T2 instruction manual

Ergo LE21CT5000AK user manual

Ergo

Ergo LE21CT5000AK user manual

Seiki SC-49AU300 instruction manual

Seiki

Seiki SC-49AU300 instruction manual

Polaroid 39GSR3000 user manual

Polaroid

Polaroid 39GSR3000 user manual

Sharp 32DB2E user manual

Sharp

Sharp 32DB2E user manual

Philips 55PFL5601 quick start guide

Philips

Philips 55PFL5601 quick start guide

Philips TPM15.5L LA Service manual

Philips

Philips TPM15.5L LA Service manual

manuals.online logo
manuals.online logoBrands
  • About & Mission
  • Contact us
  • Privacy Policy
  • Terms and Conditions

Copyright 2025 Manuals.Online. All Rights Reserved.