manuals.online logo
Brands
  1. Home
  2. •
  3. Brands
  4. •
  5. Samsung
  6. •
  7. Tablet
  8. •
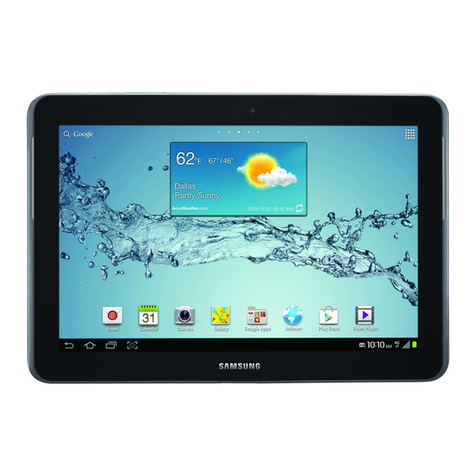
  9. Samsung GALAXY Note 10.1 User manual

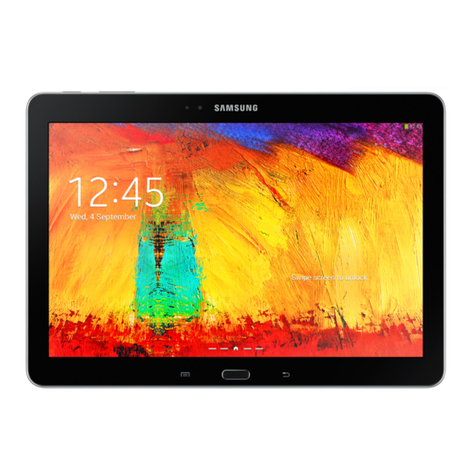
Samsung GALAXY Note 10.1 User manual

GALAXY Note 10.1 Quick Card
Quick Start Guide - Getting to know your new tablet
Volume Key
Power/Standby
/Lock Key
Headset
Jack
Charger/Accessory Port
Top Bottom
Power/Standby Key
Ambient
Light Sensor
Front Camera Lens
Rear Camera Lens Flashbulb
Speaker
Speaker
Back
Touch
screen
Back
Key
Home Key
Mini Apps Tray Network
Strength Battery
Power
S Pen Charger/Accessory Port
Samsung GALAXY Note 10.1 - Quick Start Guide: Page 1 of 3
Hardware and connectivity issues should first be directed to your Unit Manager. If issues persist,
please send the issue to: [email protected]
Samsung GALAXY Note 10.1 - Quick Start Guide: Page 2 of 3
GALAXY Note 10.1 Quick Card
Turning Your
Device On and Off
Press and hold the
Power
button on the top left corner
of the device to turn it on.
To turn the tablet off,
press and hold the
Power button, select
Power off and tap OK.
How to Enter
Standby Mode
To put the tablet in Standby
mode to conserve power,
press the Power button at
any time. To bring the
tablet out of Standby mode,
press the Power button.
Unlock the Touch
Screen
Turn on the screen by
pressing the Power
button and unlock the
touch screen by tapping
anywhere on the screen,
and then swiping across
the screen in any
direction.
Adjusting the
Screen Display
The screen brightness and
screen timeout duration can
both be adjusted to the
user’s preference.
Brightness:
1.
From the Home screen,
tap the icon in the upper
right corner of the
Secure Launcher bar at
the top of the screen.
2.
Tap on Settings.
3.
Tap on Display on the
left side of the screen.
4.
Drag the slider left or
right to adjust to the
desired brightness.
5.
Tap the icon to return
to the Home screen.
Screen Timeout duration:
1.
Follow steps 1-3 from
above.
2.
Tap the current setting
under Screen Timeout
Duration.
3.
Tap to select the desired
amount of time before
the screen turns off.
4.
Tap the icon to return
to the Home screen.
Charging the
Battery
1.
Insert the USB cable into
the Charging Head (1).
2.
Insert the USB cable into
the device’s
Charger/Accessory Port (2).
3.
Plug the Charging Head
into a standard AC power
outlet.
Battery Information
Tap the Smart Battery icon
on the Home Screen to
display the current battery
power level. When battery
power is 15% or less, your
device prompts to charge the
battery.
Screen Navigation
Touch
Touch items to select or
launch them:
• Touch the on-screen
keyboard to enter
characters or text.
• Touch a menu item to
select it.
• Touch an application’s
icon to launch the app.
Swipe, Flick or Slide
Swipe, flick or slide your
finger vertically or
horizontally across the
screen when:
• Unlocking the screen.
• Scrolling left or right or
vertically for a menu.
Command Buttons
Use command buttons
and the touch screen to
navigate.
Touch Back to return to
the previous screen, option
or step; Touch Home
to return to the Home
screen.
S Pen
The S Pen is a stylus that assists
you in performing different
functions.
1.
Locate the S Pen at the lower
right corner of the device (1).
2.
Use your fingernail to pull the
end of the S Pen out of the
device (2).
S Pen Screen Operations
The S Pen can be used for
various screen operations:
• Touch command buttons
such as & or icons
such as or with the S Pen
instead of your finger.
Tap an item or area on the
screen to select an item, open
a menu or launch an application.
• To sweep or move across a
screen, touch and drag the
screen left or right.
Double-tap: Quickly tap an
item or area on the screen twice.
Tap and hold: Tap and hold the
S Pen on an item for more than
two seconds.
Samsung GALAXY Note 10.1 - Quick Start Guide: Page 3 of 3
GALAXY Note 10.1 Quick Card
Hardware and connectivity issues should first be directed to your Unit Manager. If issues persist,
please send the issue to: [email protected]
Enter text using the onscreen
keyboard
Use the virtual QWERTY keyboard for text
entry, including letters, punctuation,
numbers and other characters. Access the
keyboard by touching any text entry field.
1 - Change case.
2 - Switch between Number and ABC mode.
3 - Clear your input.
4 - Start a new line.
5 - Insert a space.
There are two other types of keyboard: a
Floating and a Split keyboard.
To change the keyboard type:
1. Use two fingers, such as your index finger
and thumb, to make an inward pinch
motion on the screen, where the keyboard is
displayed.
A pop-up displays the three keyboard types.
2. Touch one of the keyboard types to display it.
The Split keyboard can be moved up and
down and the Floating keyboard can be
moved anywhere.
Tap and hold with two fingers to move the
Floating or Split keyboard.
How to Connect to a
Wi-Fi Network
1.
From the Home screen,
tap
the icon in the upper right
corner of the Secure
Launcher bar at the top of
the screen.
2.
Tap on Settings.
3.
Tap on Wi-Fi on the left
side of the screen.
4.
Tap on Scan on the right
side of the screen to have
the device search for
available networks.
5.
A list of available Wi-Fi
network names displays.
6.
Tap on the desired
network you wish to
connect with.
7.
If the network is secured,
use the onscreen keyboard
to enter the password and
then tap Connect.
8.
Once connected, the name
of the network will display
in the Connected to field.
9.
Tap the icon to return
to the Home screen.
How to Set Up
an Email Account
1.
Ensure that the device is
connected to the Internet prior
to setting up email.
2.
From the Home screen, tap
the Email icon.
3.
Tap the Corporate icon.
4.
Enter your current email
address in the top field.
(Ex. john.doe@acosta.com)
5.
Enter your current email
password in the Password
field.
Note: The Password field is case sensitive.
6.
Tap Next in the upper right
corner of the screen.
7.
Tap OK on the Activation
message.
8.
Tap OK on the Remote security
administration message.
9.
Tap Next in the upper right
corner on the Account options
screen.
10.
Tap Activate on the Activate
device administrator message
screen.
11.
Tap Next in the upper right
corner of the Set up email
screen to complete the email
setup.
Note: You may not receive all of the
messages or screens listed above.
Appendix
AirWatch Browser:
Tap to access the default
web browser.
Camera:
Tap to access the camera
to take pictures.
Content Locker:
Document management
and distribution tool.
Email:
Tap to setup, view and
manage your email account.
Gallery:
Tap to view all of the
captured images.
Maps:
Tap this app to get
directions.
Polaris Office:
Easy-to-use Microsoft Office
compatible product suite.
Smart Battery:
Tap to view the current
battery status.
GALAXY Note 10.1 Quick Card
Hardware and connectivity issues should first be directed to your Unit Manager. If issues persist,
please send the issue to: [email protected]
The Secure Content Locker or “Content Locker” is a document management and distribution tool that allows users
to securely access digital resources and documents from a central point on mobile devices.
It allows users to:
Receive automatic updates and notifications
Navigate through synced folders and categories
Tag content as favorite
Search for content
Browse via smart views for all, new and favorite content
Follow the steps below to access the Content Locker and view content.
1. From the Home screen, tap the Content Locker icon.
2. Use the onscreen keyboard to enter your password and then tap Done on the keyboard.
3. Tap Submit on the Authentication Request message if it displays.
4. Tap on Acosta Content in the Repositories section.
5. Tap on your team’s designated folder.
All of the currently available documents are listed.
6. Tap on the desired document and then tap on the Download icon on the bottom right side of the screen.
7. Tap Open on the bottom right side of the screen when the icon appears.
8. Tap on Polaris Office and Always on the message screen.
The selected document displays and can be viewed, scrolled and sized as necessary.
9. Tap the back arrow in the upper left corner of the screen when finished with the document.
10. Repeat steps 6 –9 to view any other documents.
11.

Other manuals for GALAXY Note 10.1

9

Other Samsung Tablet manuals

Samsung Galaxy Book 2 User manual

Samsung

Samsung Galaxy Book 2 User manual

Samsung SM-T387W User manual

Samsung

Samsung SM-T387W User manual

Samsung SM-P355M User manual

Samsung

Samsung SM-P355M User manual

Samsung GALAXY Note 8.0 Guide

Samsung

Samsung GALAXY Note 8.0 Guide

Samsung SM-T801 User manual

Samsung

Samsung SM-T801 User manual

Samsung SHWM180S User manual

Samsung

Samsung SHWM180S User manual

Samsung SM-T577U/DS User manual

Samsung

Samsung SM-T577U/DS User manual

Samsung SM-T817T User manual

Samsung

Samsung SM-T817T User manual

Samsung SM-T395 User manual

Samsung

Samsung SM-T395 User manual

Samsung SM-T505 User manual

Samsung

Samsung SM-T505 User manual

Samsung GALAXY TAB GT-p6200 User manual

Samsung

Samsung GALAXY TAB GT-p6200 User manual

Samsung GALAXY TAB User manual

Samsung

Samsung GALAXY TAB User manual

Samsung SM-P350 User manual

Samsung

Samsung SM-P350 User manual

Samsung GT-P3110 User manual

Samsung

Samsung GT-P3110 User manual

Samsung SM-T570 User manual

Samsung

Samsung SM-T570 User manual

Samsung Galaxy Tab S2 User manual

Samsung

Samsung Galaxy Tab S2 User manual

Samsung SM-P585Y User manual

Samsung

Samsung SM-P585Y User manual

Samsung SM-T531 User manual

Samsung

Samsung SM-T531 User manual

Samsung Galaxy light User manual

Samsung

Samsung Galaxy light User manual

Samsung SM-P905 User manual

Samsung

Samsung SM-P905 User manual

Samsung Galaxy Tab S3 User manual

Samsung

Samsung Galaxy Tab S3 User manual

Samsung Galaxy Tab S7 User manual

Samsung

Samsung Galaxy Tab S7 User manual

Samsung GALAXY TAB User manual

Samsung

Samsung GALAXY TAB User manual

Samsung SM-T537R4 User manual

Samsung

Samsung SM-T537R4 User manual

Popular Tablet manuals by other brands

Motion CFT-004 C5m User manaul

Motion

Motion CFT-004 C5m User manaul

Parblo Coast10 Quick setup guide

Parblo

Parblo Coast10 Quick setup guide

Bartec Agile X IS user manual

Bartec

Bartec Agile X IS user manual

Winn Technology Winn Pad 7 user manual

Winn Technology

Winn Technology Winn Pad 7 user manual

Hamlet XZPAD270 user manual

Hamlet

Hamlet XZPAD270 user manual

Getac CA-27 Operation manual

Getac

Getac CA-27 Operation manual

Archos 70b Cobalt manual

Archos

Archos 70b Cobalt manual

jp.ik TRIGONOXN01 user guide

jp.ik

jp.ik TRIGONOXN01 user guide

Fujitsu STYLISTIC Q509 operating manual

Fujitsu

Fujitsu STYLISTIC Q509 operating manual

Sony SGP511 White paper

Sony

Sony SGP511 White paper

DT Research 590SC Basic operation guide

DT Research

DT Research 590SC Basic operation guide

Zooti ZT-701 instruction manual

Zooti

Zooti ZT-701 instruction manual

Asus K007 user guide

Asus

Asus K007 user guide

Netronix E60QR2 quick start guide

Netronix

Netronix E60QR2 quick start guide

Prestigio PMP7100D Technical & service manual

Prestigio

Prestigio PMP7100D Technical & service manual

Manta MID702 user manual

Manta

Manta MID702 user manual

DT Research 313Y/MQ Basic operation guide

DT Research

DT Research 313Y/MQ Basic operation guide

TCL PIXI 5-10 4G VF Repair Document

TCL

TCL PIXI 5-10 4G VF Repair Document

manuals.online logo
manuals.online logoBrands
  • About & Mission
  • Contact us
  • Privacy Policy
  • Terms and Conditions

Copyright 2025 Manuals.Online. All Rights Reserved.