San Telequip (P) Ltd.,
504/505 Deron Heights, Baner Road, Baner
Pune 411045, Mah, India
Phone: +91-20-27293455,9764027070,8390069393 Connecting. Converting. Leading!
email:info@santelequip.com
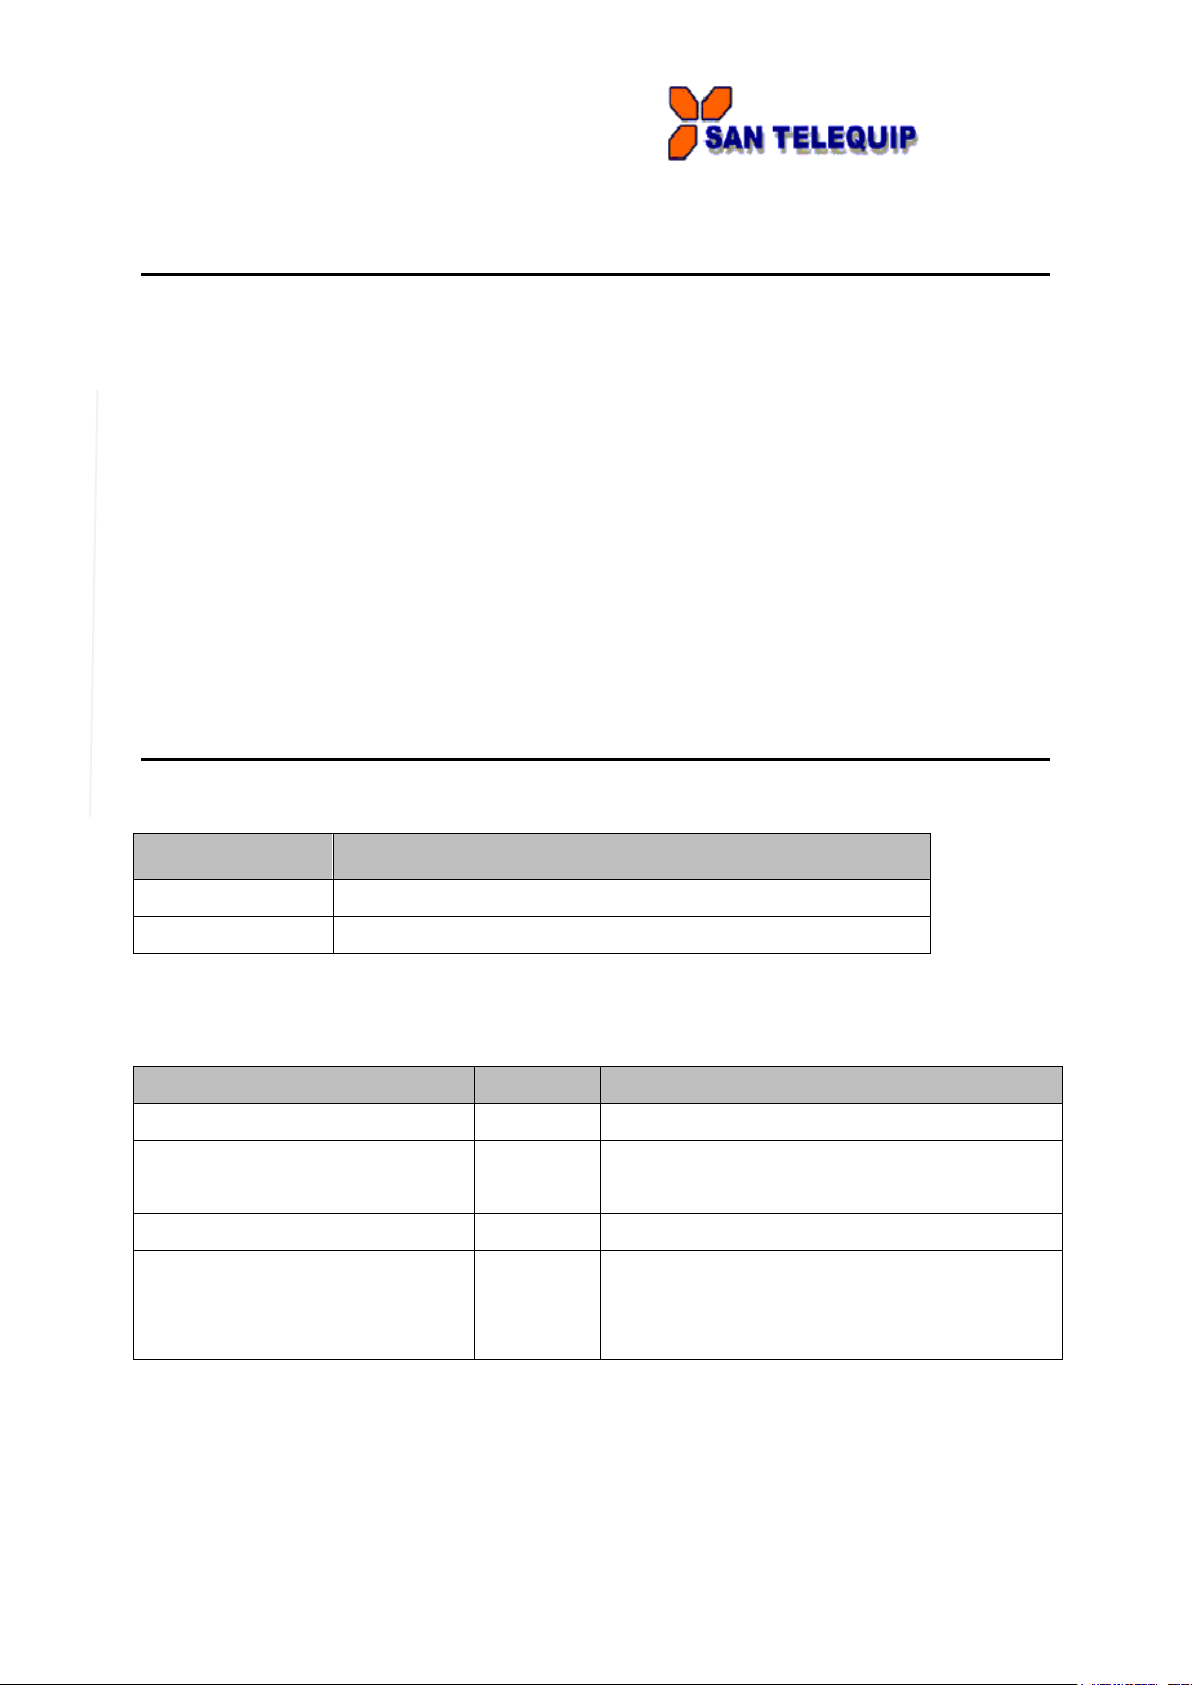
---------------------------------------------------------------------------------------------------------------------------------------
3
4.3 Networking Configuration...................................................................................... 39
4.3.1 LAN1 / LAN 2 Settings ...................................................................................39
4.3.2 DNS Settings ..................................................................................................40
4.3.3 SNMP Settings ...............................................................................................40
4.3.4 Redundancy Settings .....................................................................................41
4.4 COM Port Configuration......................................................................................... 41
4.4.1 TCP Server for Link Mode..............................................................................41
4.4.2 TCP Client for Link Mode ...............................................................................42
4.4.3 UDP Link Mode .............................................................................................. 42
4.4.4 Serial Settings ................................................................................................42
4.5 Alert Settings .......................................................................................................... 43
4.5.1 Configuring E-mail ..........................................................................................43
4.5.2 Configuring Alert Event ..................................................................................44
4.6 System Configuration ............................................................................................ 44
4.6.1 Link State........................................................................................................44
4.6.2 Time Settings.................................................................................................. 45
4.6.3 Security Settings............................................................................................. 46
4.7 Restoring Factory Default......................................................................................46
4.8 Restart System........................................................................................................46
5Link Modes and Applications .............................................................. 47
5.1 Link Mode Configuration .......................................................................................47
5.1.1 TCP Server Mode...........................................................................................47
5.1.2 TCP Client Mode ............................................................................................ 50
5.1.3 UDP Mode ......................................................................................................51
5.2 Link Mode Applications .........................................................................................53
5.2.1 TCP Server Application: Enable Virtual COM ................................................53
5.2.2 TCP Server Application: Enable RFC 2217 ...................................................54
5.2.3 TCP Client Application: Enable Virtual COM .................................................55
5.2.4 TCP Client Application: Enable RFC 2217.....................................................56