– 01 –
CONTENTS
ATSC Converter Box
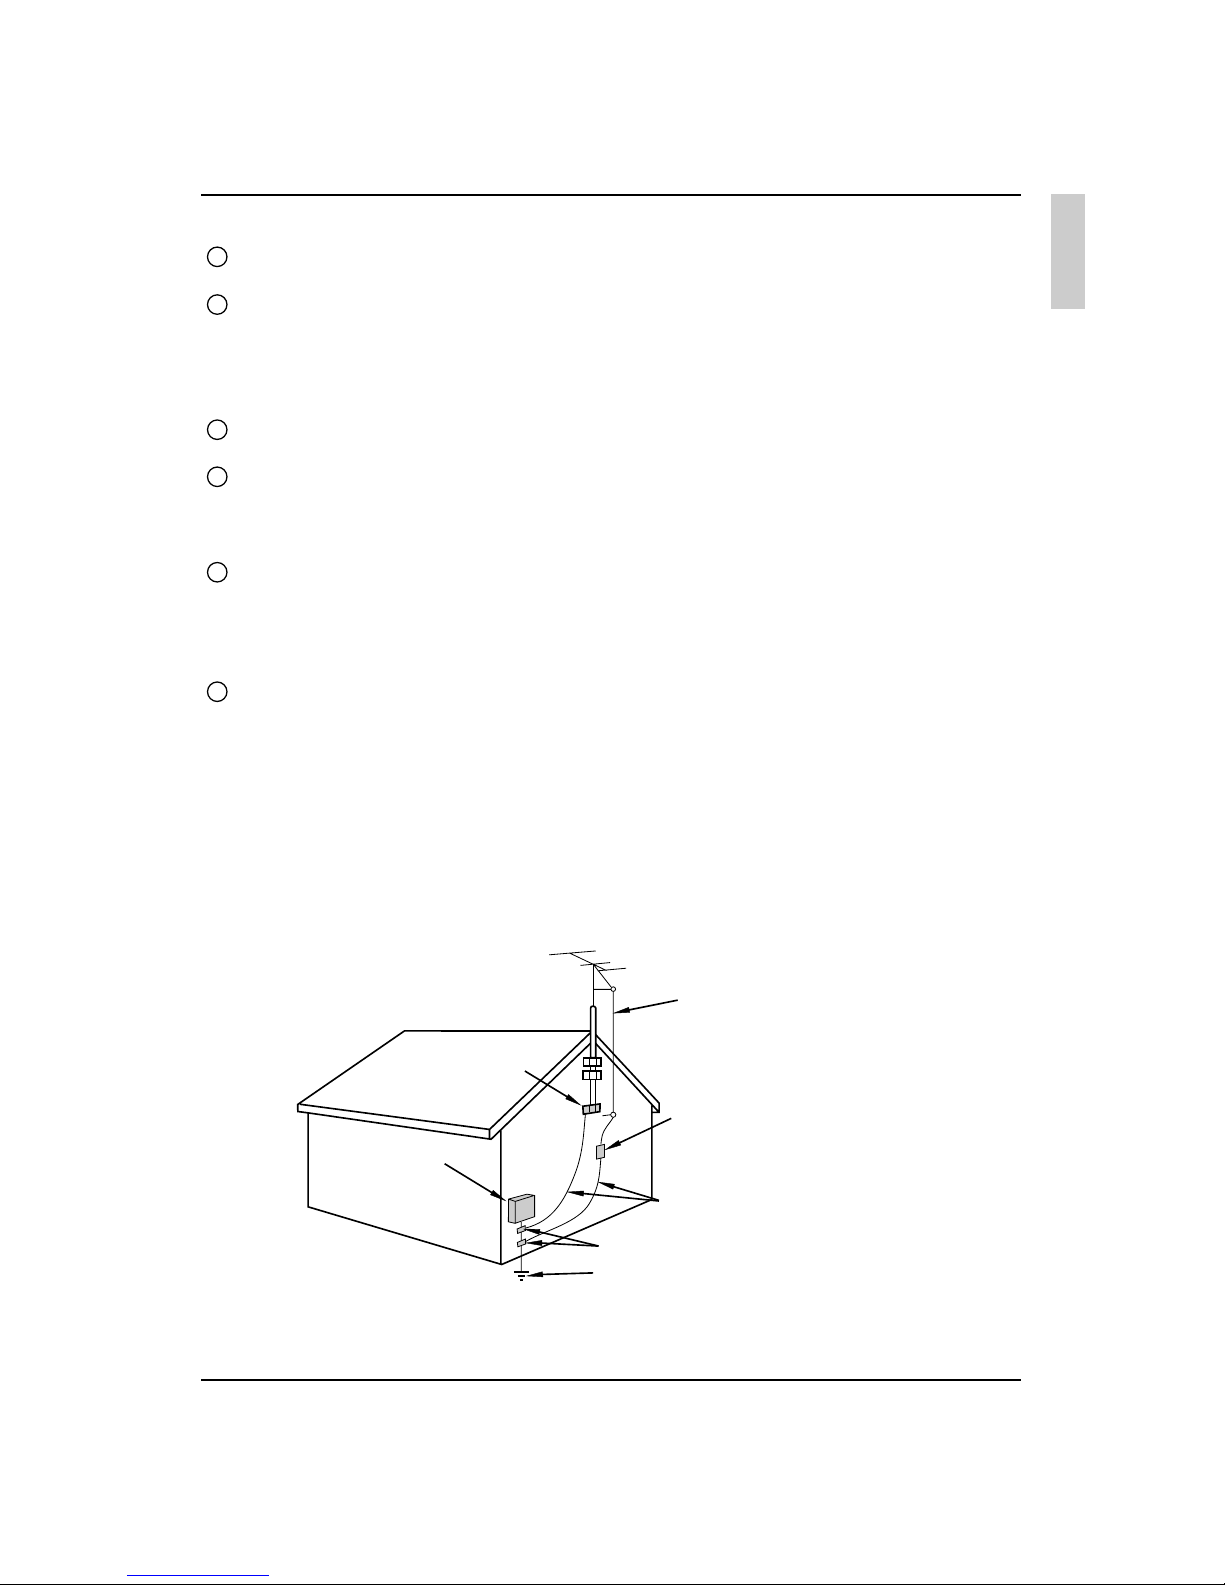
1. Important Safety Instructions ------------------------------------------------
2. Trademarks ---------------------------------------------------------------------
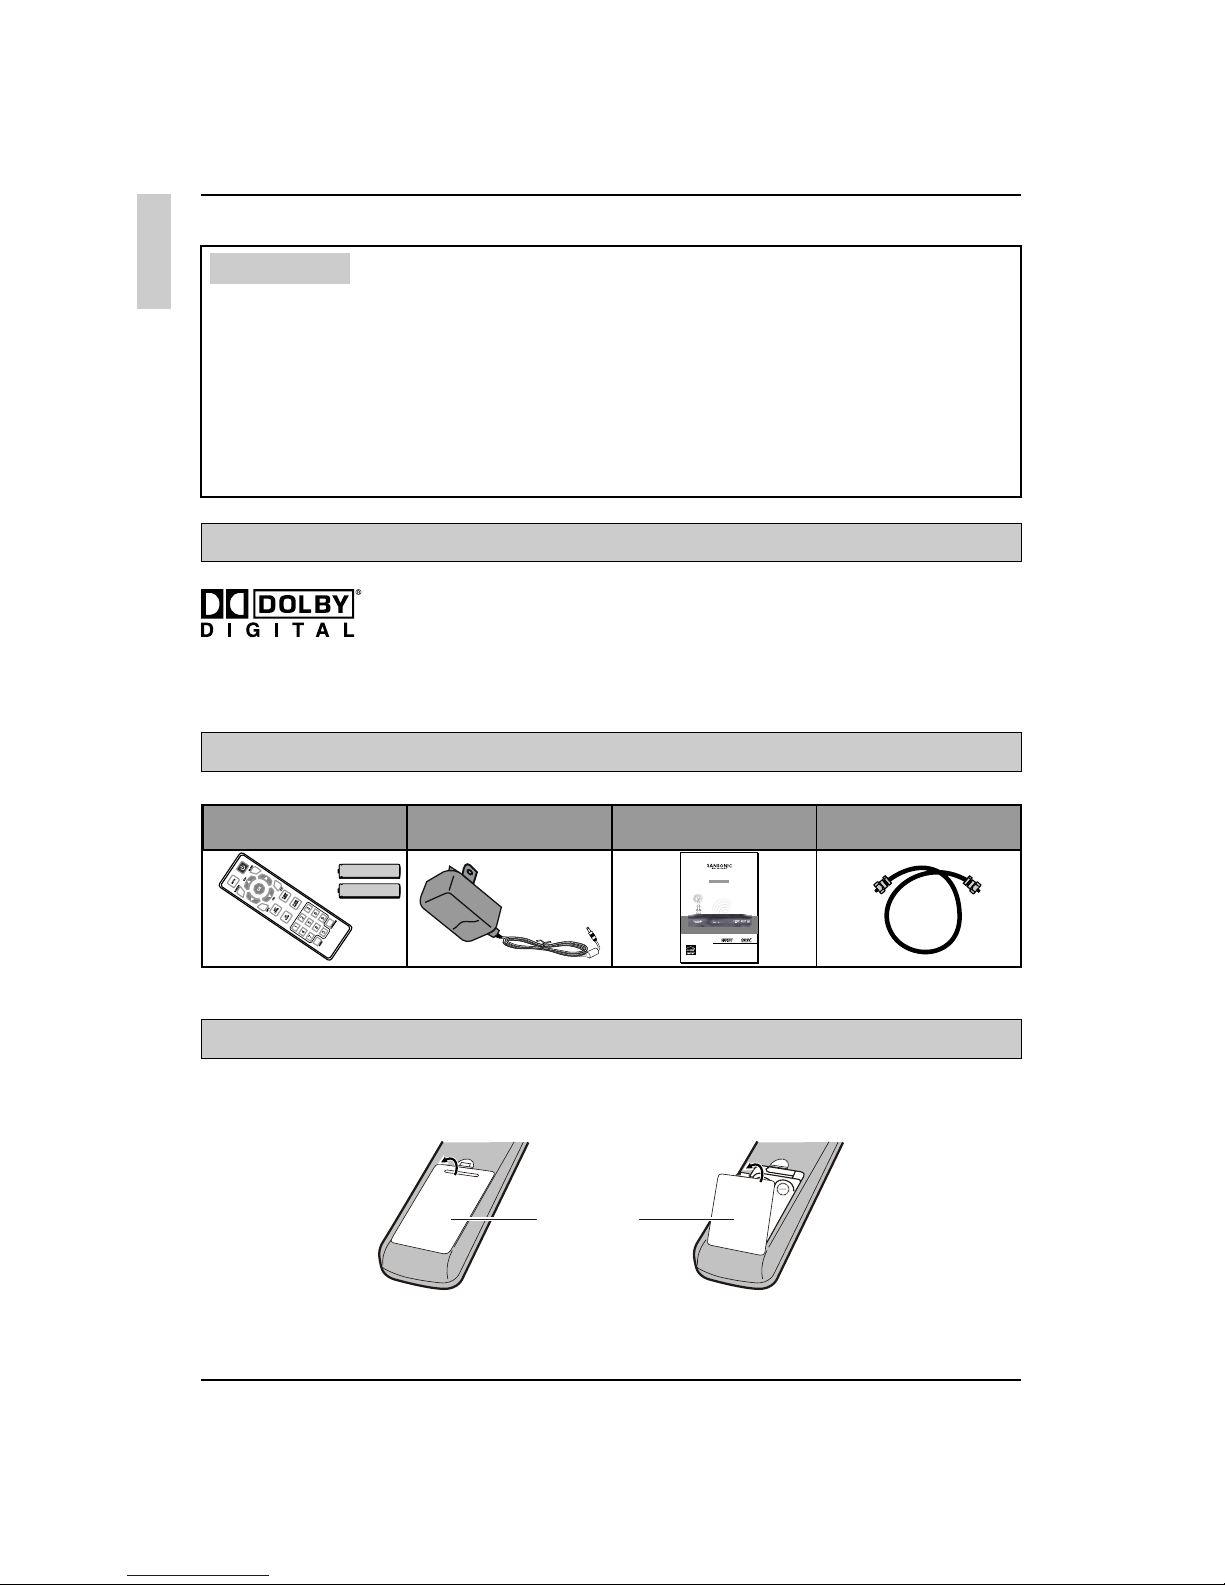
3. Accessories ---------------------------------------------------------------------
4. Before Operating ---------------------------------------------------------------
4-1. Prepare the Remote Control --------------------------------------------
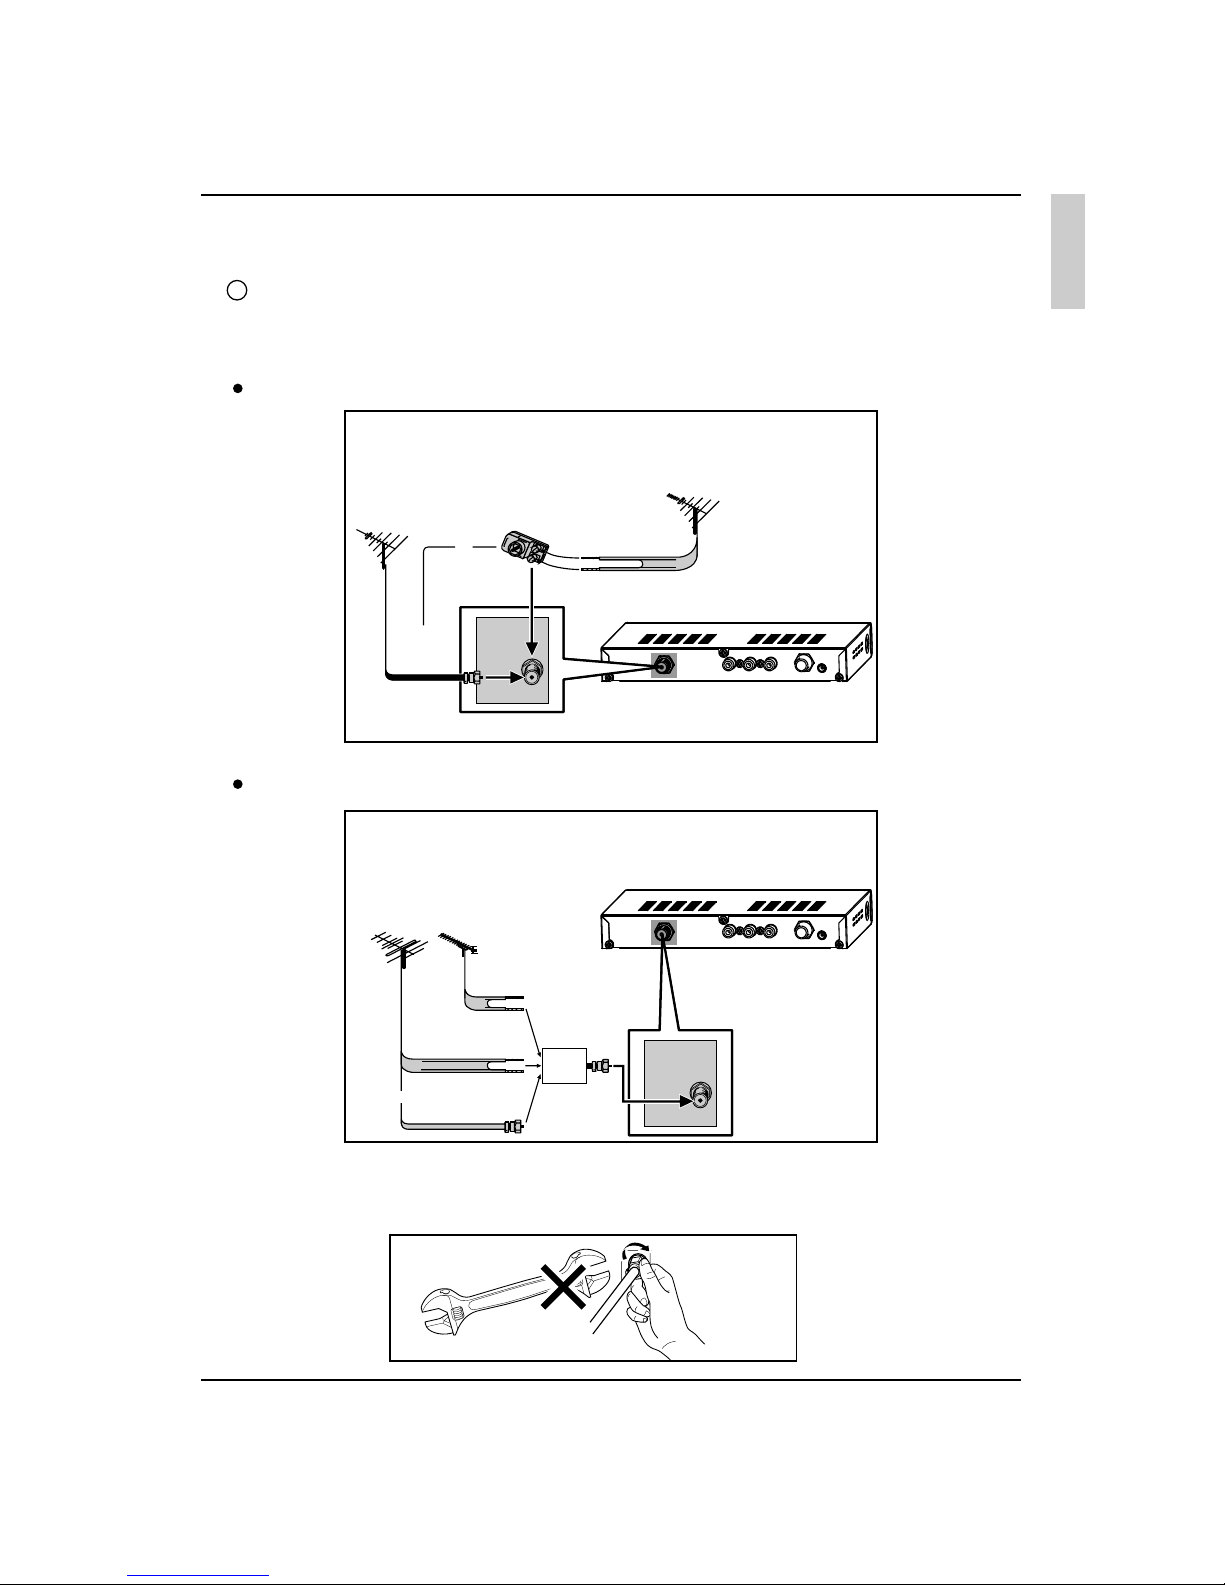
4-2. Antenna Connections ----------------------------------------------------
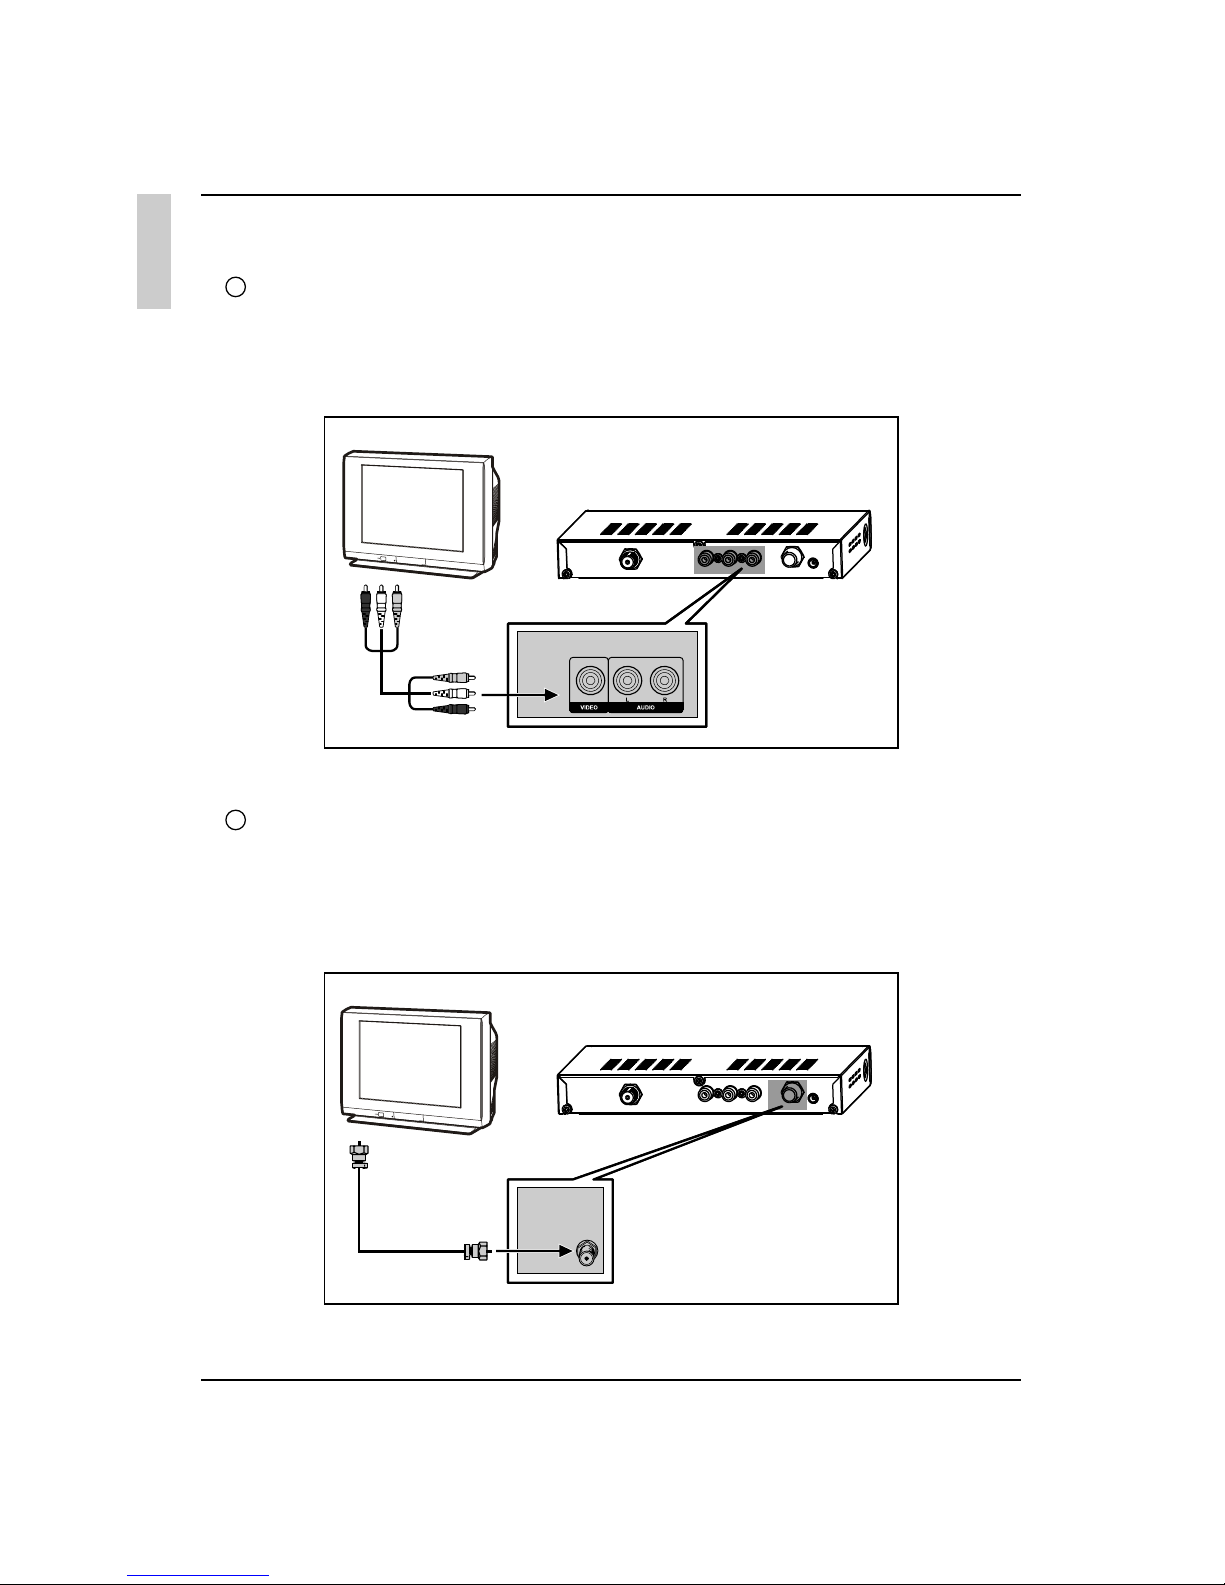
4-3. Connect to your analog signal TV display ----------------------------
5. Quick Reference Control Operation ----------------------------------------
5-1. Front Panel ----------------------------------------------------------------
5-2. Rear Panel -----------------------------------------------------------------
5-3. Remote Control -----------------------------------------------------------
5-4. Easy Setup For First Use ------------------------------------------------
5-5. Antenna Setup ------------------------------------------------------------
6. Basic Operation ----------------------------------------------------------------
6-1. Channel Scan -------------------------------------------------------------
6-2. Channel Information -----------------------------------------------------
6-3. Change Viewing Channel -----------------------------------------------
6-4. OSD Language -----------------------------------------------------------
6-5. Closed Caption -----------------------------------------------------------
6-6. Parental Control (V-CHIP) ----------------------------------------------
6-7. Mute -------------------------------------------------------------------------
6-8. Audio Menu ----------------------------------------------------------------
6-9. Screen Mode --------------------------------------------------------------
6-10. Sleep Timer---------------------------------------------------------------
7. Before Calling For Service ---------------------------------------------------
7-1. Quick Service Check List -----------------------------------------------
8. General Specifications --------------------------------------------------------
9. Remote Controller Code ------------------------------------------------------
9-1. Identify custom code: 00FF ---------------------------------------------
9-2. Remote key code ---------------------------------------------------------
- ----------------------------------
10. Limited Warranty -------------------------------------------------------------
93. Universal Remote Controller setting
02
04
04
04
04
05
06
07
07
07
07
08
10
11
11
11
12
12
12
13
18
18
19
19
19
19
20
21
21
21
21
22
English