Sansui VRDVD4005 User manual

DVD-RW RECORDER & VCR
R
DVD-RW RECORDER & VCR
OWNER S MANUAL
Before operating the unit, please read this manual thoroughly.
TV/CATV MODE SELECTION
When shipped from the factory, the TV/CATV menu option is set to the “CATV” (Cable Television) mode.
If not using CATV (Cable TV), set this menu option to the “TV” mode.
ORION WEBSITE
FOR INFORMATION ON OUR OTHER PRODUCTS, PLEASE VISIT OUR WEBSITE AT
WWW.ORIONSALESINC.COM
VRDVD4005
BEFORE USING
YOUR UNIT DISC PLAYBACK TAPE PLAYBACK RECORDING DUBBING
VARIOUS SETTINGS
ADDITIONAL
INFORMATION
EDITING OF THE
DISC
,
hyoushi 03.8.20, 11:23 PM1

2
Contents
Contents........................................................ 2
Sansui Dual Deck DVD Recorder ................. 4
Warranty..................................................... 4
Master Protection Agreements ................... 4
Before using your unit
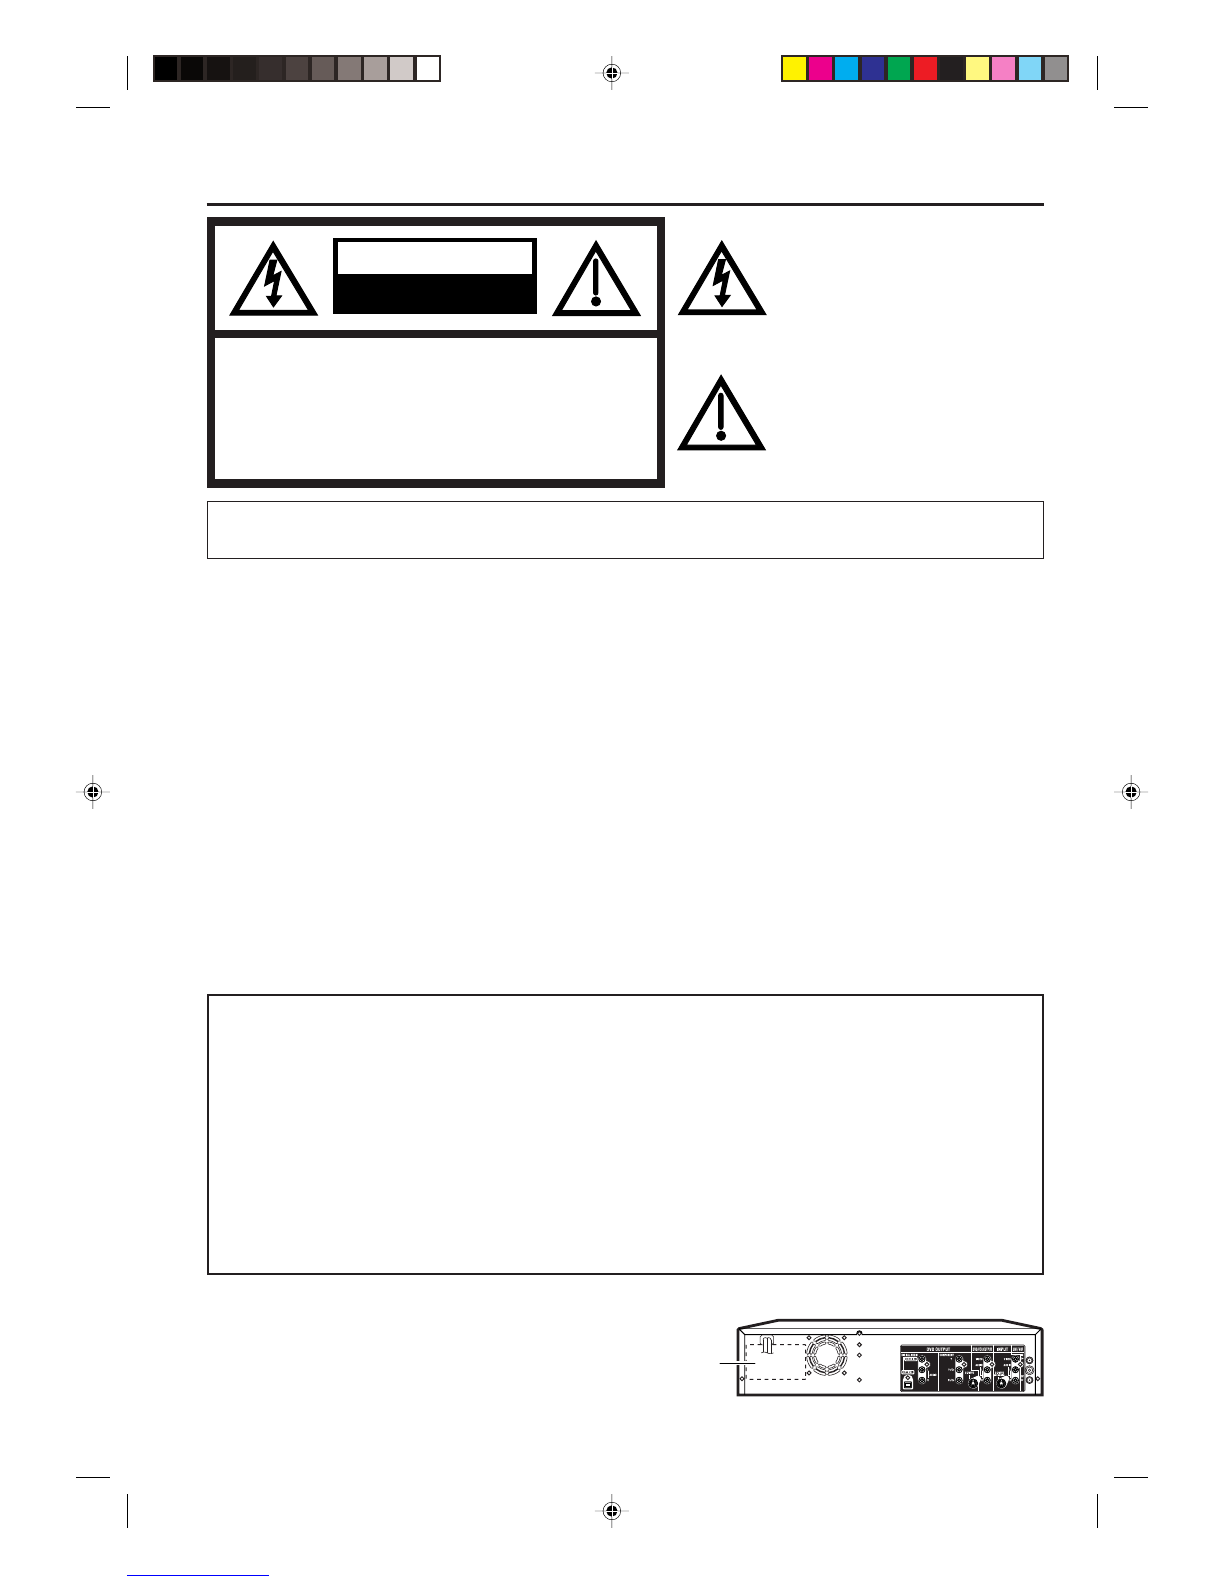
Caution .......................................................... 5
Important Safeguards .................................... 6
Disc ............................................................... 9
Handling discs ............................................ 9
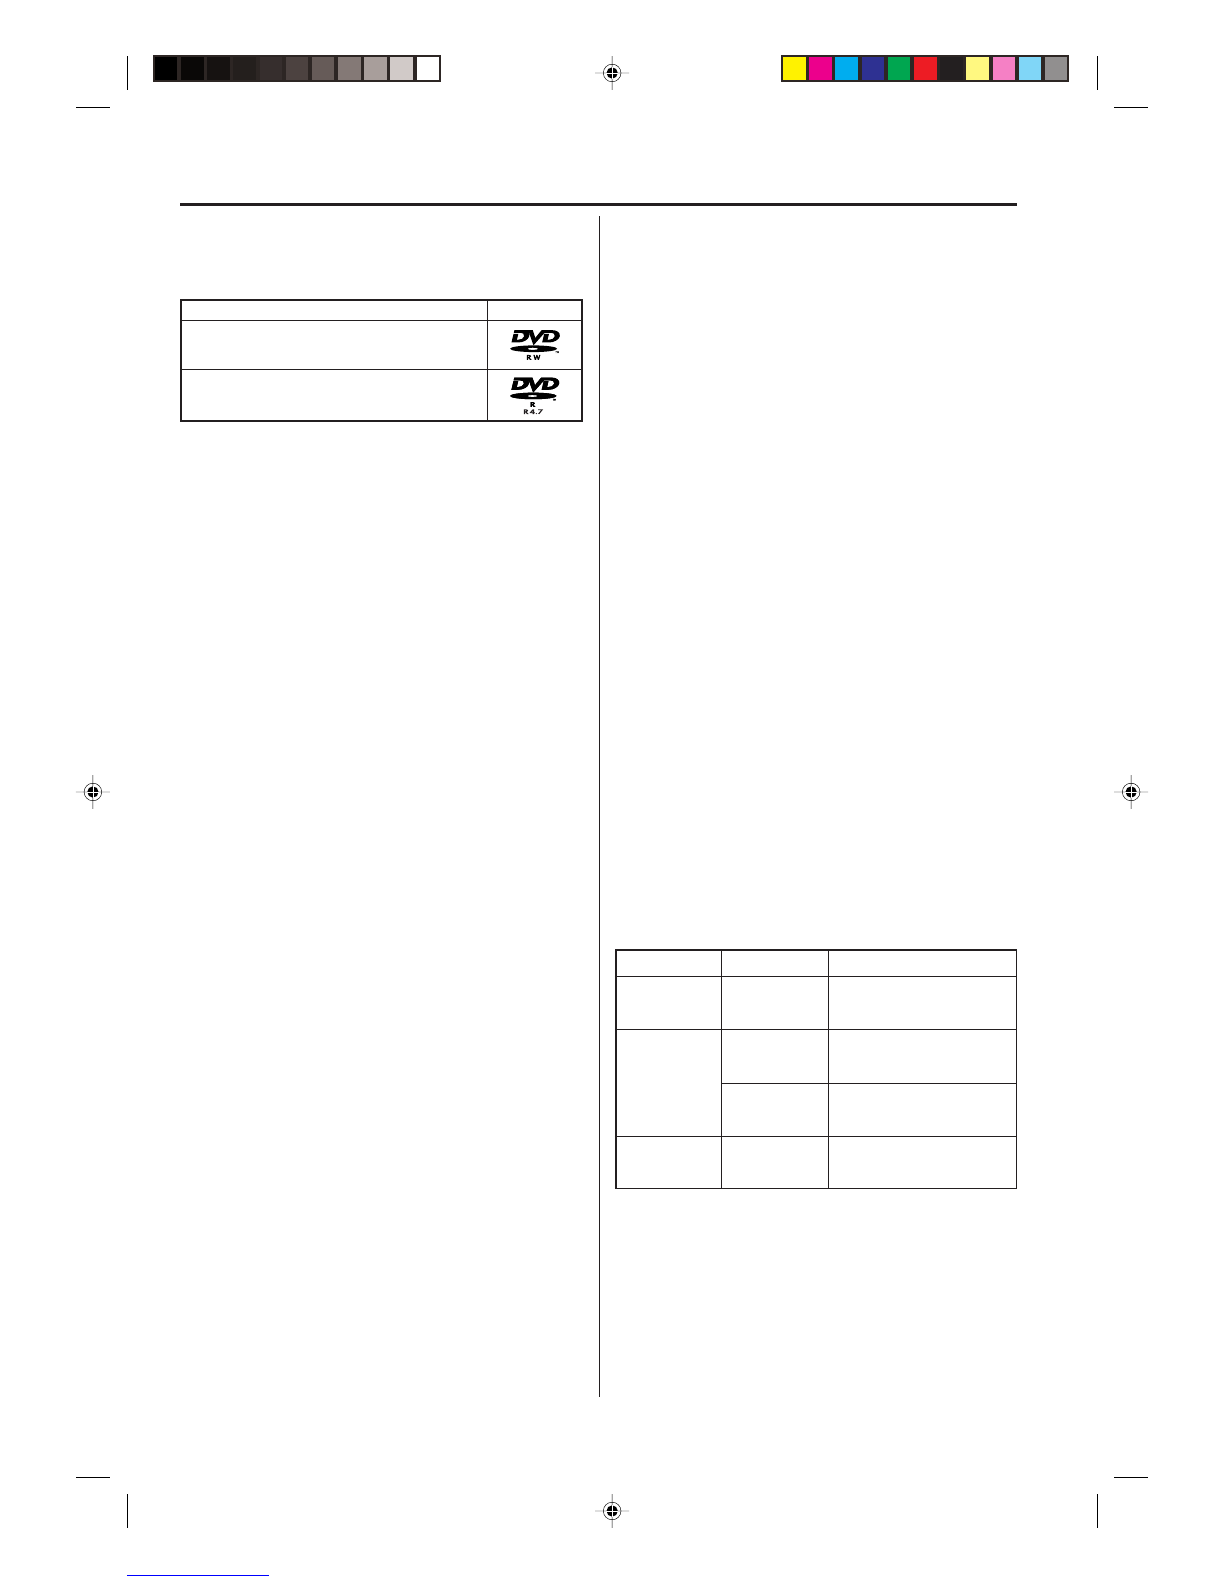
Discs which can be played back ................. 9
Discs on which video can be recorded ...... 10
Recordingformat....................................... 10
Disc playback in other players .................. 11
Parts and functions...................................... 12
Front ......................................................... 12
Rear .......................................................... 12
Display window ......................................... 13
Remote control.......................................... 14
Powersource ............................................ 15
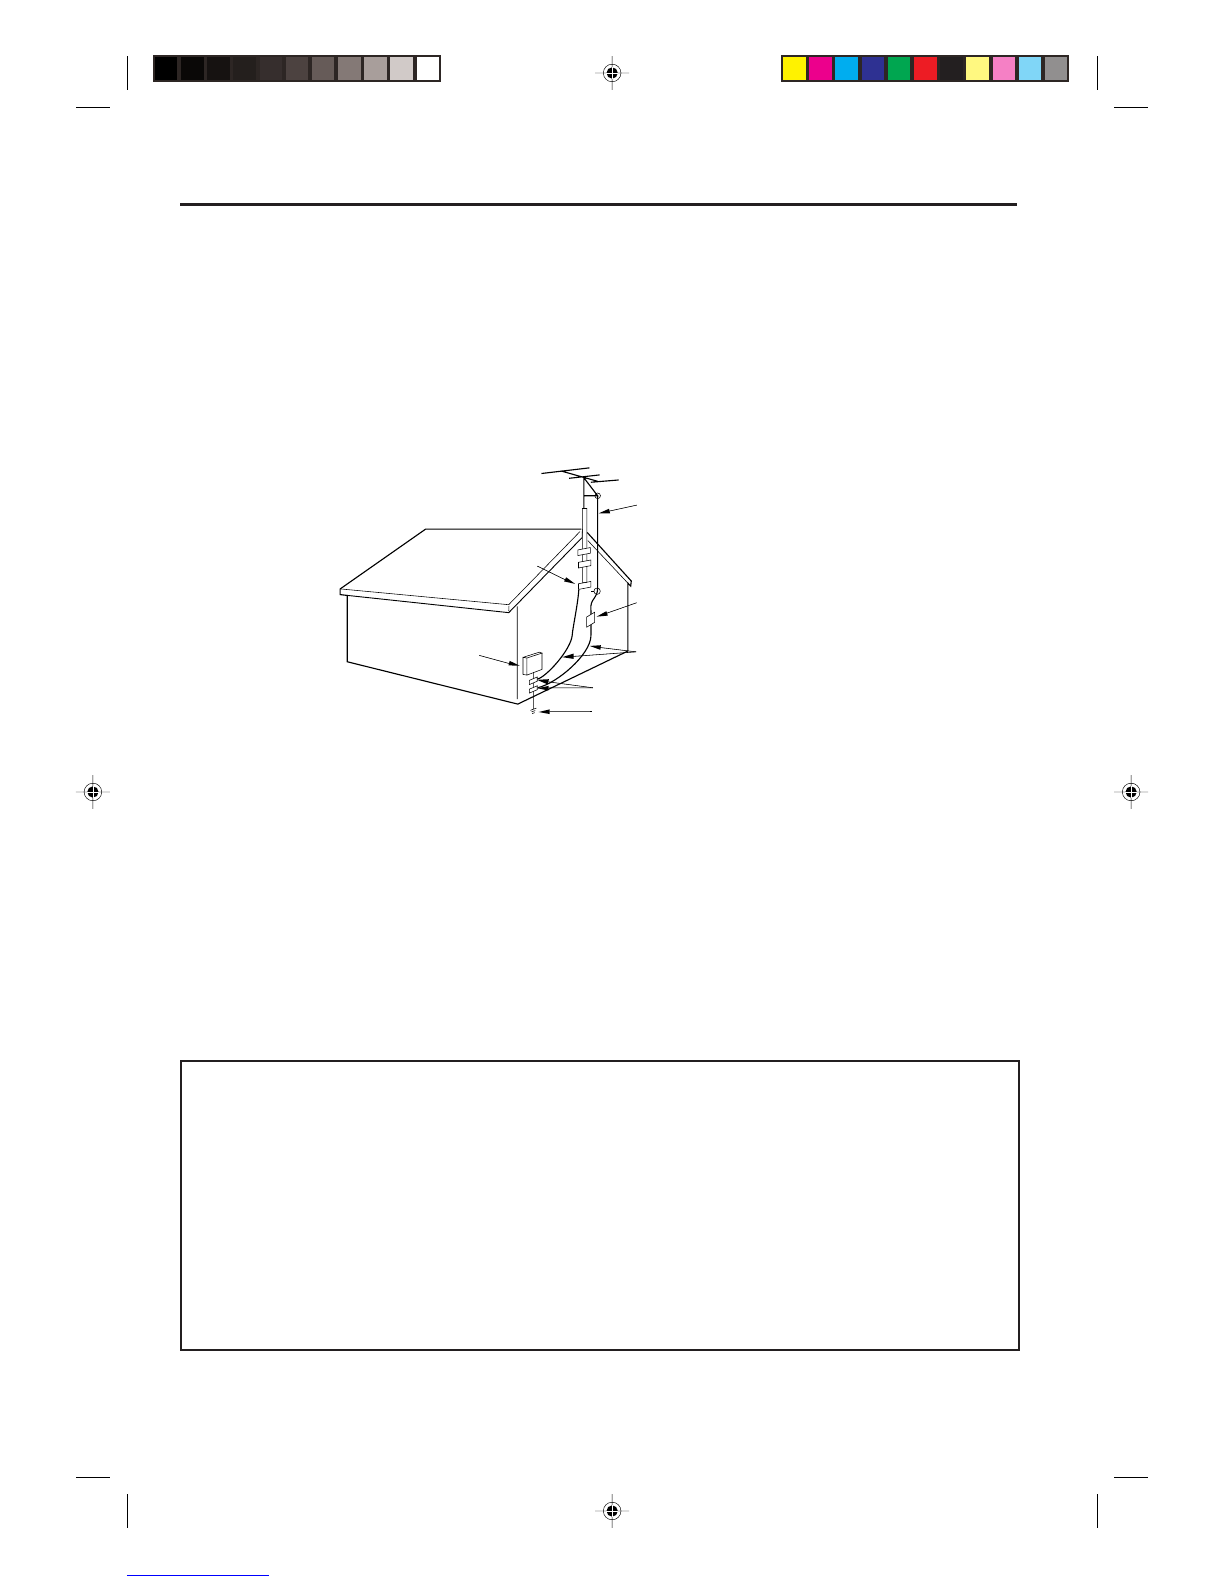
Antenna connections ................................... 16
CATV connections ....................................... 18
Connectionswith theTVor audiocomponent .... 20
Auto clock setting ........................................ 22
Setting the video channnel ........................... 22
Disc playback
Playback procedure ..................................... 23
Playback by selecting a title ........................ 24
Checking media information ......................... 25
Special playback.......................................... 26
Fast forword playback ............................... 26
Review playback ....................................... 26
Still playback ............................................ 26
Frame advance ......................................... 26
Slow motion playback ............................... 26
Locating a chapter or track........................ 26
Commercial skip ....................................... 27
Locating a specific scene ......................... 27
Repeat playback .......................................... 28
One touch repeat ...................................... 28
A-B repeat playback ................................. 28
Title, Chapterrepeat playback.................. 28
Title selection .............................................. 29
DVDmenu.................................................... 29
Changingangles .......................................... 30
Zooming....................................................... 30
Changingsoundtrack ................................... 31
Subtitles ...................................................... 31
Various operations on CD............................. 32
MP3/WMA/JPEG playback.......................... 34
PROGRESSIVE scan.................................. 37
Tape playback
Loadingand unloading.................................. 38
Cassette tape playback ............................... 39
Special playback.......................................... 40
Picture search........................................... 40
Still picture................................................ 40
Slow motion .............................................. 40
Frame by Frame picture ............................ 40
Adjusting tracking condition ...................... 40
Repeat playback ....................................... 40
ZERO RETURN function.............................. 41
Video index search system.......................... 41
Recording
Read this before recording video on disc...... 42
Types of disc ............................................ 42
Recordingmodes ...................................... 42
Disc remaining time .................................. 43
Images that cannot be recorded................ 43
Recording aTV program............................... 44
One touch timer recording (OTR).................. 46
Timerrecording ............................................ 47
Stereo recording and playback ..................... 50
Editing the disc
Editing the disc ............................................ 51
Creating and editing a playlist ...................... 52
Creating a playlist ..................................... 52
Renaming the title menu ........................... 53
Erasing scenes (Edit program) .................. 54
Combining the title .................................... 56
Erasing a playlist ...................................... 57
Editing original ............................................. 58
Adding a chapter mark .............................. 58
Combiningchapters .................................. 59
Renamingprogramname .......................... 60
Erasing a scene (Edit program) ................. 61
Erasing the original program...................... 62
Renaming a disc name ................................ 63
Renaming a disc name ............................. 63
Using the keyboard screen........................ 64
Dubbing
Dubbing a tape onto a disc........................... 66
Dubbing a disc onto a tape........................... 67
Dubbing video or audio by connecting other
equipment ................................................... 68

3
Contents
Various settings
SETUP MENU ............................................. 69
Using the SETUP MENU .......................... 69
Setting the language .................................... 70
OSD LANGUAGE ..................................... 70
DVD MENU ............................................... 70
AUDIO ...................................................... 70
SUBTITLE ................................................ 70
Selecting and cancelling of pareatal control . 71
Selecting parental control.......................... 71
Temporarily canceling parental control....... 71
Setting the clock .......................................... 72
CLOCK SET ............................................. 72
STANDARDTIME (Time zone setting) ...... 72
DAYLIGHT SAVINGTIME......................... 72
Disc setup and operation.............................. 73
REFORMAT .............................................. 73
NEW DISC FORMAT ................................ 73
FINALIZE.................................................. 73
PROTECT DISC ....................................... 74
UNDO FINALIZE....................................... 74
Other............................................................ 74
DIMMER (Turning the display window“ON”
or“OFF”)................................................... 74
DISPLAY/CALL (Selecting the screen dis-
play).......................................................... 74
Terning on the screen dispay........................ 75
TV SCREEN ............................................. 75
STILL MODE ............................................ 75
NO NOISE BACKGROUND ...................... 75
EXTERNALVIDEO INPUT ....................... 75
Terning on the quality control........................ 76
BRIGHTNESS .......................................... 76
DNR.......................................................... 76
Adjusting audio ............................................ 76
DRC.......................................................... 76
VIRTUALSURROUND(SpatializerN-2-2) ...... 76
EXTERNAL AUDIO INPUT ....................... 76
SAP (Second Audio Program)................... 77
Recording..................................................... 77
INITIALIZING RECTO .............................. 77
INITIALIZING REC MODE........................ 77
AUTOCHAPTER ...................................... 77
Selecting reception cannel ........................... 78
TV/CATV SELECT .................................... 78
AUTO CH MEMORY ................................. 78
ADD/DELETE ........................................... 78
Other............................................................ 78
JPEG INTERVAL ...................................... 78
Additional information
Glossary ...................................................... 79
Language code list ....................................... 81
Error message list........................................ 82
Troubleshooting ............................................ 83
Video head cleaning ..................................... 84
Specifications .............................................. 85
DVD-VIDEODVD-VIDEO
DVD-RW
VR
DVD-RW
VR
DVD-RW
Video
DVD-RW
Video
DVD-RDVD-R
CDCD
VCRVCR
DVD-Video
DVD-RW in VR mode
DVD-RW in video mode
DVD-R
Audio CD and CD-R/CD-RW
Video tape
Media mark
Each applicable media are indicated using the
symbol shown below.

4
Warranty
One Year Full Warranty on Sansui Dual Deck DVD Recorder
If this product is defective in material or workmanship within one year from the date of purchase, RETURN IT TO
YOUR NEAREST SEARS PARTS & REPAIR CENTER, and it will be repaired free of charge.
This warranty gives you specific legal rights, and you may also have other rights which vary from state to state.
Sears, Roebuck and Co., Dept. 817WA, Hoffman Estates, IL 60179
Master Protection Agreements
Congratulationsonmakingasmart purchase.
Your
new Dual Deck DVD Recorder is designed and
manufactured for years of dependable operation.
But like all products, it may require preventive
maintenance or repair from time to time. That’s
when having a Master Protection Agreement can
save you money and aggravation.
PurchaseaMaster ProtectionAgreementnowand
protect yourself from unexpected hassle and ex-
pense.
The Master Protection Agreement also helps ex-
tend the life of your new product. Here’s what’s
included in the Agreement:
Expert service byour12,000professionalre-
pair specialists
Unlimited service and no charge for parts
and labor on all covered repairs
“No-lemon” guarantee – replacement
of your covered product if four or more prod-
uct failures occur within twelve months
Product replacement if your covered prod-
uct can’t be fixed
Annual Preventive Maintenance Check at
your request – no extra charge
Fast help by phone – phone support from a
Sears technician on products requiring in-
home repair, plus convenient repair schedul-
ing
Power surge protection against electrical
damage due to power fluctuations
Rental reimbursement if repair of your cov-
ered product takes longer than promised
Once you purchase the Agreement, a simple
phone call is all that it takes for you to schedule
service. You can call anytime day or night, or
schedule a service appointment online.
Sears has over 12,000 professional repair spe-
cialists, who have access to over 4.5 million qual-
ity parts and accessories.That’s the kind of pro-
fessionalism you can count on to help prolong the
life of your new purchase for years to come.Pur-
chase your Master Protection Agreement today!
Some limitations and exclusions apply.
For prices and additional information call
1-800-827-6655.
Sears Installation Service
For Sears professional installation
of home
appliances, garage door openers, water heaters,
and other major home items, in the U.S.A. call
1-800-4-MY-HOME®
Sansui Dual Deck DVD Recorder
VRDVD4005_P02-P21 03.8.20, 11:38 PM4

5
WARNING: TO REDUCE THE RISK OF FIRE OR ELECTRIC SHOCK, DO NOT EXPOSE THIS APPLI-
ANCE TO RAIN OR MOISTURE.
CAUTION:
THIS DIGITAL VIDEO PLAYER EMPLOYS A LASER SYSTEM.
TO ENSURE PROPER USE OF THIS PRODUCT, PLEASE READ THIS USER’S GUIDE CAREFULLY AND
RETAIN FOR FUTURE REFERENCE. SHOULDTHE UNIT REQUIRE MAINTENANCE, CONTACT AN AU-
THORIZED SERVICE LOCATION-SEE SERVICE PROCEDURE.
USEOFCONTROLS,ADJUSTMENTS ORTHEPERFORMANCEOF PROCEDURESOTHERTHANTHOSE
SPECIFIED HEREIN MAY RESULT IN HAZARDOUS RADIATION EXPOSURE.
TO PREVENT DIRECT EXPOSURE TO LASER BEAM, DO NOT TRY TO OPEN THE ENCLOSURE. VIS-
IBLE LASER RADIATION MAY BE PRESENT WHEN THE ENCLOSURE IS OPENED. DO NOT STARE
INTO BEAM.
Location of the required Marking
The rating sheet and the safety caution are on the rear of the unit.
RISK OF ELECTRIC SHOCK
DO NOT OPEN
CAUTION
The lightning flash with arrowhead sym-
bol, within an equilateral triangle is in-
tended to alert the user to the presence
of uninsulated dangerous voltage within
the product’s enclosure that may be of
sufficient magnitude to constitute a risk
of electric shock to persons.
The exclamation point within an equilat-
eral triangle is intended to alert the user
to the presence of important operating
andmaintenance (servicing)instructions
inthe literatureaccompanyingthe appli-
ance.
CAUTION: TO REDUCE THE RISK OF ELECTRIC
SHOCK, DO NOT REMOVE COVER (OR
BACK).NO USER-SERVICEABLE PARTS
INSIDE. REFER SERVICING TO QUALI-
FIED SERVICE PERSONNEL.
WARNING: This equipment has been tested and found to comply with the limits for a Class B digital device,
pursuant to Part 15 of the FCC Rules. These limits are designed to provide reasonable protection
against harmful interference in a residential installation. This equipment generates, uses and can
radiate radio frequency energy and, if not installed and used in accordance with the instructions, may
cause harmful interference to radio communications.
However, there is no guarantee that interference will not occur in a particular installation.If this equip-
ment does cause harmful interference to radio or television reception, which can be determined by
turning the equipment off and on, the user is encouraged to try to correct the interference by one or
more of the following measures:
- Reorient or relocate the receiving antenna.
- Increase the separation between the equipment and receiver.
- Connect the equipment into an outlet on a circuit different from that to which the receiver is con-
nected.
- Consult the dealer or an experienced radio/TV technician for help.
CAUTION: Changes or modifications not expressly approved by the partly responsible for compliance with the
FCC Rules could void the user’s authority to operate this equipment.
CAUTION
CERTIFICATION: COMPLIES WITH FDA RADIATION PERFORMANCE
STANDARD, 21 CFR SUBCHAPTER J.
VRDVD4005_P02-P21 03.8.20, 11:38 PM5

6
1. READ INSTRUCTIONS
All the safety and operating instructions should be read before the unit is operated.
2. RETAIN INSTRUCTIONS
The safety and operating instructions should be retained for future reference.
3. HEED WARNINGS
All warnings on the unit and in the operating instructions should be adhered to.
4. FOLLOW INSTRUCTIONS
All operating and use instructions should be followed.
5. CLEANING
Unplug this unit from the wall outlet before cleaning. Do not use liquid cleaners or aerosol cleaners.
Use a damp cloth for cleaning the exterior cabinet only.
6. ATTACHMENTS
The manufacturer of this unit does not make any recommendations for attachments, as they may cause
hazards.
7. WATER AND MOISTURE
Do not use this unit near water. For example, near a bathtub, washbowl, kitchen sink, laundry tub, in a wet
basement, or near a swimming pool.
8. ACCESSORIES
Do not place this unit on an unstable cart, stand, tripod, bracket, or table.
The unit may fall, causing serious injury, and serious damage to the unit.
8A. An appliance and cart combination should be moved with care. Quick
stops, excessive force, and uneven surfaces may cause the appliance
and cart combination to overturn.
9. VENTILATION
Slots and openings in the cabinet back or bottom are provided for ventila-
tion, to ensure reliable operation of the unit, and to protect it from over-
heating.
These openings must not be blocked or covered. The openings should
never be blocked by placing the unit on a bed, sofa, rug, or other similar
surface.This unit should never be placed near or over a radiator or heat source.This unit should not be placed
inabuilt-ininstallationsuch asabookcaseor rackunlessproperventilationis providedand/orthe manufacturer’s
instructions have been adhered to.
10. POWER SOURCES
This unit should be operated only from the type of power source indicated on the rating plate. If you are not
sure of the type of power supply to your home, consult your appliance dealer or local power company. For
units intended to operate from battery power, or other sources, refer to the operating instructions.
11. GROUNDING OR POLARIZATION
This unit is equipped with a polarized alternating-current line plug (a plug having one blade wider than the
other).This plug will fit into the power outlet only one way.This is a safety feature. If you are unable to insert
the plug fully into the outlet, try reversing the plug. If the plug should still fail to fit, contact your electrician to
replace your obsolete outlet. Do not defeat the safety purpose of the polarized plug, if your unit is equipped
with a 3-wire grounding-type plug, a plug having a third (grounding) pin.This plug will only fit into a grounding-
type power outlet.This too, is a safety feature. If you are unable to insert the plug into the outlet, contact your
electrician to replace your obsolete outlet.Do not defeat the safety purpose of the grounding-type plug.
12. POWER-CORD PROTECTION
Power-supply cords should be routed so that they are not likely to be walked on or pinched by items placed
upon or against them, paying particular attention to cords at plugs, convenience receptacles, and the point
where they exit from the appliance.
13. LIGHTNING
To protect your unit from a lightning storm, or when it is left unattended and unused for long periods of time,
unplug it from the wall outlet and disconnect the antenna or cable system.This will prevent damage to the unit
due to lightning and power line surges.
S3125A
PORTABLE CART WARNING
(symbol provided by RETAC)
IMPORTANT SAFEGUARDS
VRDVD4005_P02-P21 03.8.20, 11:38 PM6

7
IMPORTANT SAFEGUARDS
14. POWER LINES
An outside antenna system should not be located in the vicinity of overhead power lines or other electric light
or power circuits, or where it can fall into such power lines or circuits. When installing an outside antenna
system, extreme care should be taken to keep from touching such power lines or circuits, as contact with them
might be fatal.
15. OVERLOADING
Do not overload wall outlets and extension cords, as this can result in a risk of fire or electric shock.
16. OBJECT AND LIQUID ENTRY
Do not push objects through any openings in this unit, as they may touch dangerous voltage points or short
out parts that could result in fire or electric shock.Never spill or spray any type of liquid into the unit.
17. OUTDOOR ANTENNA GROUNDING
Ifanoutsideantenna or cablesystemis connected to theunit,besurethe antenna or cablesystem is grounded
to provide some protection against voltage surges and built-up static charges, Section 810 of the National
Electrical Code, ANSI/NFPA 70, provides information with respect to proper grounding of the mast and sup-
porting structure, grounding of the lead-in wire to an antenna discharge unit, size of grounding conductors,
location of antenna discharge unit, connection to grounding electrodes, and requirements for the grounding
electrode.
18. SERVICING
Do not attempt to service this unit yourself as opening or removing covers may expose you to dangerous
voltage or other hazards. Refer all servicing to qualified service personnel.
19. DAMAGE REQUIRING SERVICE
Unplug this unit from the wall outlet and refer servicing to qualified service personnel under the following
conditions:
a. When the power-supply cord or plug is damaged.
b. If liquid has been spilled, or objects have fallen into the unit.
c. If the unit has been exposed to rain or water.
d. If the unit does not operate normally by following the operating instructions.Adjust only those controls
that are covered by the operating instructions, as an improper adjustment of other controls may result in
damage and will often require extensive work by a qualified technician to restore the unit to its normal
operation.
e. If the unit has been dropped or the cabinet has been damaged.
f. When the unit exhibits a distinct change in performance, this indicates a need for service.
20. REPLACEMENT PARTS
When replacement parts are required, be sure the service technician uses replacement parts specified by the
manufacturer or those that have the same characteristics as the original part.
Unauthorized substitutions may result in fire, electric shock or other hazards.
21. SAFETY CHECK
Upon completion of any service or repairs to this unit, ask the service technician to perform safety checks to
determine that the unit is in proper operating condition.
22. HEAT
The product should be situated away from heat sources such as radiators, heat registers, stoves, or other
products (including amplifiers) that produce heat.
23. DISC TRAY
Keep your fingers well clear of the disc tray as it is closing. It may cause serious personal injury.
24. CONNECTING
When you connect the product to other equipment, turn off the power and unplug all of the equipment from
the wall outlet. Failure to do so may cause an electric shock and serious personal injury. Read the owner’s
manual of the other equipment carefully and follow the instructions when making any connections.
25. LASER BEAM
Do not look into the opening of the disc tray or ventilation opening of the product to see the source of the laser
beam. It may cause sight damage.
VRDVD4005_P02-P21 03.8.20, 11:38 PM7

8
EXAMPLE OF ANTENNA GROUNDING AS PERTHE
NATIONAL ELECTRICAL CODE
CONDENSATION
Moisturewillform in the operatingsectionoftheDVD/VCR if the unit is brought from cool surroundings into a warm
room or if the temperature of the room rises suddenly. When this happens, the DVD/VCR’s performance will be
impaired.
To prevent this, let the DVD/VCR stand in its new surroundings for about an hour before switching it on, or make
sure that the room temperature rises gradually.
Condensation may also form during the summer if the DVD/VCR is exposed to the breeze from an air conditioner.
In such cases, change the location of the DVD/VCR.
26. DISC
Do not use a cracked, deformed, or repaired disc. These discs are easily broken and may cause serious
personal injury and product malfunction.
27. NOTE TO CATV SYSTEM INSTALLER
This reminder is provided to call the CATV system installer’s attention to Article 820-40 of the NEC that
provides guidelines for proper grounding and, in particular, specifies that the cable ground shall be connected
to the grounding system of the building, as close to the point of cable entry as practical.
ANTENNA
DISCHARGE UNIT
(NEC SECTION 810-20)
ANTENNA LEAD IN WIRE
GROUNDING CONDUCTORS
(NEC SECTION 810-21)
GROUND CLAMPS
POWER SERVICE GROUNDING
ELECTRODE SYSTEM
(NEC ART 250, PART H)
GROUND CLAMP
ELECTRIC SERVICE
EQUIPMENT
NEC-NATIONAL ELECTRICAL CODE
S2898A
IMPORTANT SAFEGUARDS
*This product incorporates copyright protection technology that is protected by method claims of certain U.S.
patents and other intellectual property rights owned by Macrovision Corporation and other rights owners.
Use of this copyright protection technology must be authorized by Macrovision Corporation and is intended
for home and other limited viewing uses only unless otherwise authorized by Macrovision Corporation.
Reverse engineering or disassembly is prohibited.
*Manufactured under license from Dolby Laboratories.“Dolby” and the double-D symbol are trademarks of
Dolby Laboratories.
*“DTS” and “DTS Digital Out” are trademarks of Digital Theater Systems, Inc.
* Unauthorized recording of copyrighted television programs, films, video cassettes and other materials may
infringe the rights of copyright owners and be contrary to copyright laws.
* Certain audio features of this product manufactured under a license from Desper Products, Inc. Spatializer®,
N-2-2™ and the circle-in-square device are trademarks owned by Desper Products, Inc.
VRDVD4005_P02-P21 03.8.20, 11:38 PM8

9
Disc
Handling discs
Removing the Disc from its case
Be sure to hold the disc by its edges.Do not touch the
surface of the disc.
Take the disc carefully from its case.
• Do not scratch the disc.
• Do not get dirt on the surface of the disc.
• Do not stick labels or adhesive tapes on the disc.
• Do not drop or bend the disc.
Storing discs
• Store the disc in the case to avoid any risk of
scratches, dirt or damage.
• Do not leave the disc exposed to direct sunlight or in
hot or humid places.
Cleaning discs
Wipe the disc with a clean, dry cloth from the center
outward toward the edges.
• Do not wipe the disc in a circular motion around the
center.
• Do not use liquid or aerosol cleaners.
Discs which can be played back
In this unit, use only discs that meet the standard, such
as those bearing the below logo mark on the disc label
surface. If you use the non-standardized disc, we can-
notguaranteeplayback.Evenif suchadisc canbeplayed
back, we cannot guarantee the image or sound quality.
The DVD logo is a registered trademark.
Region management information
This unit is designed and manufactured to support the
Region management information that is recorded on a
DVD disc.If the region number written on the DVD disc
does not correspond to the region number of this unit,
this unit cannot play that disc.
• The region number of this unit is “1”.
• The unit will play DVD-Video discs marked with la-
bels containing “1” or “ALL”.
Example:
1
Operating DVD-Videos
• Some operations of DVD-Videos may be prohibited
by the manufacturer, or some operation methods or
functions of the DVD-Videos may be different from
the description in this manual.
• If you attempt an operation that is prohibited by ei-
therthediscortheunit,a“ ”mark will appear on the
TVmonitor.For operationsprohibitedbythedisc,see
the information that came with the disc.
• When the menu screen or the operation guide ap-
pears during disc playback, follow the displayed in-
formation.
Discs which cannot be played back
The discs listed below cannot be played back in gen-
eral. Even if one of these can be played back, it may
not be played back correctly.If a disc is played back by
mistake, extensively loud sounds may blow the speak-
ers or may damage the hearing of those in hearing
range.Do not play back the below discs.
CDG, Photo-CD, CD-ROM, CD-TEXT, CD-EXTRA,
VCD,SVCD, SACD,PD, CDV, DVD-ROM,DVD-RAM,
DVD+R/RW, DVD audio, etc.
The below DVD-Videos may not be played back.
• DVD-Videos that do not have the region number “1”
or“ALL”.
• PAL/SECOM DVD-Videos.
• Prohibited or business-use DVD-Videos.
CD-R/CD-RWs cannot be played back for the fol-
lowing reasons.
• Compatibility of the disc and this unit.
• Compatibility of the disc and the recorder used.
• Unfinalized discs.
Do not playback the following discs. Playback of
these discs may cause a failure.
• Discs on which paper, labels or stickers are affixed.
• Discs that have sticky areas left by adhesive tape.
• Special-shaped discs.
* This unit is designed to playback music Compact Discs (CD) that
conform to the CD standard.CDs that contain (copy-restriction) sig-
nals to protect copyrights cannot be played back.
Media type Logo mark
DVD-Video
DVD-RW Ver.1.0 Ver.1.1
Ver.1.1CPRM support
DVD-R Ver.2.0
Audio CD*
CD-R/CD-RW
l
VRDVD4005_P02-P21 03.8.20, 11:38 PM9

10
Disc
Discs on which video can be re-
corded
To record video with this unit, use the below discs.
Recording format
This unit has two modes for formatting discs for record-
ing:VR mode and video mode.
When an unused DVD-RW (Ver.1.1) is loaded into this
unit, the automatic initialization function starts to initial-
izethe disc.(Forthe disc format setting in thisstep, see
page 73.)
VR mode
• This mode can be used for DVD-RWs.
• In this mode, the discs can be recorded and edited
repeatedly.
• The disc recorded in this mode can be played back
on other DVD-RW-supporting players.
• When aVer.1.1 CPRM disc is used, you can record a
TV program “One-time recordable”.
Video mode
• This mode can be used for DVD-Rs and DVD-RWs
(Ver.1.1).
• When you finalize the disc after recording, the disc
recorded with this unit can be played back in other
DVD players.
• Recording, editing or playback of an unfinalized disc
canbedoneonlywith thisunit.However, thereissome
limitation to editing operations.
• In this mode, you cannot record a TV program “one-
time recordable”.
• When you record a TV program of a bilingual broad-
cast, only the audio selected from main or sub can
be recorded.
Format modes that can be used each disc
Theusable formatdependsonthe mediatypeasshown
in the below table.
DVD-RW
• The disc can repeatedly record about 1,000 times.
• Only the VR mode can be used for Ver.1.0 discs.
• With Ver.1.1 discs, you can record by selecting the
VR mode or video mode.
• When you record in the VR mode, you can repeat-
edly record and erase. By erasing the unnecessary
title, you effectively increase remaining time.
• When you record in the video mode, you can record
until the disc becomes full.
• Whenyouusethe video mode, youcannewlyrecord
onthediscby initializing the disc.However,ifthedisc
is initialized, all the recorded content will be erased.
DVD-R
• You can record on the disc only in the video mode.
• You can record until the disc becomes full.
• Finalizing the discs allows playback on other DVD
players. However, the finalized discs can no longer
record or erase.
• Discs can be additionally recorded with this unit only
until they are finalized.
NOTES:
• There are some players that cannot play back discs
that were recorded with this unit.We cannot guaran-
tee the playback on other units.
• This unit cannot record on DVD-R and DVD-RWs of
8 cm diameter.
• This unit cannot record on CD-R or CD-RW.
Media type Format
DVD-RW
(Ver.1.0)
DVD-RW
(Ver.1.1 and
later)
DVD-R
(Ver.2.0and later)
Available functions
VR mode
VR mode
Video mode
Video mode
Playback, recordingand
editing(Original/playlist)
Playback, recordingand
editing(Original/playlist)
Playback and recording
Editing (with limitation)
Playback and recording
Editing (with limitation)
Media type Logo mark
DVD-RW Ver.1.0 Ver.1.1
Ver.1.1CPRM support
DVD-R Ver.2.0
VRDVD4005_P02-P21 03.8.20, 11:38 PM10

11
Disc
CHAPTER 1
TITLE1 TITLE2
DVD DISC
CHAPTER 2 CHAPTER 2 CHAPTER 3CHAPTER 1
Title/Chapter/Track
A DVD-Video has a large partition called a “title” and a
smaller partition called a “chapter”.
A music CD has another partition called a “track”. A
number is allotted to each partition and these numbers
are called “title numbers”, “chapter numbers” or “track
numbers”.
When recording in the VR mode
One-time recording is set to 1 title (1 chapter). How-
ever, if you stop recording temporarily or erase scenes
byediting,thechapterwillautomaticallybe partitioned.
The interval between chapters can be specified. (See
page 77.)
When recording in the video mode
One-time recording is set to 1 title.In recording, chap-
ters are set automatically.The interval between chap-
ters can be specified. (See page 77.)
NOTES:
• The title, chapter and track are numbered, but some
discs may not record the numbers.
• Recording on DVD-R/RW in the video mode is a new
standard approved at the 2000 DVD forum. Confor-
mity to this standard varies with each DVD player
manufacturer. Some models of DVD player or DVD-
ROMdrive,therefore,will not playback recordedvid-
eos.
• In the video mode, you can only change title names.
Other editing operations cannot be performed.
• The number of chapters that can be created on one
disc varies with the remaining memory space of the
disc,the targetnumberbeing200.However,thenum-
berofchapter marksthatcannot be erased(this chap-
ter is automatically created when a scene is added
or erased) is limited to 50 per title.
Disc playback in other players
A disc recorded in this unit can be finalized.The final-
ized disc can be played back in players other than this
unit that can playback DVD-RWs and DVD-Rs.
For more information on finalization, see “Finalization”
in “Disc setting” (page **).
When recording in the VR mode
A disc recorded in the VR mode can be recorded or
edited in this unit after finalization.
When you playback the disc in another player, make
sure that the DVD player supports DVD-RW and bears
the following mark.
When recording in the video mode
When a disc recorded in the video mode is finalized,
you cannot record the disc after that.Therefore, before
finalization, be sure to perform the necessary record-
ing. After finalization, a title menu that can be used by
the DVD player is automatically created.
NOTES:
• The finalization process requires a few minutes to
about 1 hour. (If there is much remaining space on
the disc, the process will take more time.)
• A DVD-RWVer.1.1 recorded in the video mode can-
not be recorded or edited after finalization, but if you
initialize the disc by erasing all the content, you can
record on this disc.
• A finalized disc may not play because of its condition
or the DVD player used for playback.
• Some players may not playback the discs recorded
with this unit.We cannot guarantee the playback us-
ing other players.
TRACK 1 TRACK 2 TRACK 3 TRACK 4 TRACK 5
Audio-CD
VRDVD4005_P02-P21 03.8.20, 11:38 PM11

12
Parts and functions
Rear
Front
AC power cord DVD COAXIAL DIGITAL
AUDIO OUT jack
DVD/VCR common
AUDIO (L/R)/VIDEO OUT jacks
DVD AUDIO (L/R)
OUT jacks
DVD/VCR common
AUDIO (L/R)/VIDEO
IN (LINE 1) jacks
DVD S-VIDEO
IN (LINE 1) jack
DVD S-VIDEO
OUT jack
DVD COMPONENT
OUT jacks
DVD OPTICAL DIGITAL
AUDIO OUT jack
RF IN jack
RF OUT jack
VCR/DVD
DVD FUNCTION
VCR FUNCTION
SELECT
VCR REC
REC
Cassette Loading Slot Display window
VCR indicator DVD indicator
EJECT
button
AUDIO (L/R)/VIDEO
IN (LINE 2) jacks
POWER
button VCR/DVD
button OPEN/CLOSE
button PLAY
button
STOP
button REC
button
REW (Rewind) button
FF (Fast Forward) button
CHANNEL button
Disc tray
DVD S-VIDEO
IN (LINE 2) jack
VRDVD4005_P02-P21 03.8.20, 11:38 PM12

13
No. Display Description
Lights during video tape playback.
1
Parts and functions
NOTE:
Some discs may be displayed wrong or e.g. chapter number, playback time, etc. may not be displayed.
Display window
Video tape is temporarily stopped.
Lights during video tape recording.
Progressive scanning mode.
Timer recording display.
P
P
2
1 3
4
2
4
Appears when a CD is inserted.
Appears when a CD-R is inserted.
Appears when a DVD video is inserted.
Appears when a DVD-R is inserted.
Appears when a DVD-RW is inserted.
Appears when a DVD-RW inVR mode is inserted.When the disc is set to video mode,VR does not appear.
Always appears when the disc is set toVCR or DVD mode.When you pressTV/VCR to selectTV mode,VCR disappears.
Video tape is in the unit.
Clock display (Colon [ : ] flashes.)
Counter display in hour/minute/second for VCR/DVD, minute/second for CD
CATV channel display
TV channel display for VCR
Track number display for CD
Display for remaining time
Display for afternoon (out in the morning)
The external input channel (L1 or L2) display
Error display
Lights during playback of DVD and CD. Flashes in auto resume.
DVD or CD is temporarily stopped.
Lights during DVD recording.
CD
CD-R
DVD
DVD--R
DVD--RW
VR
VCR
10:00
01H00M00S
C 36CH
2CH
TRK 2
REMAIN
PM
L1/L2
Err
3
4 DVD recording modes.XP, SP, LP or EP is selected in turn by pressing the REC MODE/SPEED each time.
2VCR recording modes.SP or SLP is selected in turn by pressing the REC MODE/SPEED each time.
SP/SLP
XP/SP/LP/EP
VRDVD4005_P02-P21 03.8.20, 11:38 PM13

14
Remote control Page
Parts and functions
POWER Turns power on/off. 00
EJECT Ejects the cassette tapes. 00
OPEN/CLOSE Opens or Closes the tray. 00
DVD/VCR Switches to operation between VCR and DVD. 00
0-9 Direct channel selection of TV 00
Setting input 00
Entering a password 00
TIMER REC Sets the unit to start recording at a preset time. 00
INPUT SELECT Switches the connected TV to external mode. 00
DISPLAY/CALL DisplaysVCR or DVD operation status. 00
RETURN Removes the DVD setup menu. 00
CLEAR/CANCEL Deletes the Timer program. 00
Cancels input data in the setting mode. 00
TITLE MENU/TOP MENU
Selects titles of a DVD disc. 00
CH / Channel selection for the connectedTV or VCR 00
/ Cursor buttons 00
TRK +/– Manual tracking buttons in the playback mode 00
/ Cursor buttons 00
ENTER/SELECT Option selection in the menu 00
DVD MENU Displays the menu of the DVD disc. 00
SETUP Displays the setup menu. 00
STOP Stop 00
PLAY Playback 00
PAUSE/STILL Still picture/Recording pause on/off 00
SKIP / Skips tracks in the forward or reverse direction 00
INDEX / Searches for the INDEX mark of a tape 00
REW/SEARCH Rewind/Review playback 00
F.FWD/SEARCH Fast Forward/Forward search playback 00
ONE TOUCH REPEAT
Repeats playback between the section played 00
10 seconds before and present section. 00
CM SKIP Skips commercial breaks. 00
SLOW Slow motion playback 00
REC/OTR Recording 00
REC MODE/SPEED Selects the recording mode. 00
DUBBING Copies VCR to DVD or DVD to VCR. 00
AUDIO/AUDIO SELECT
Switches sound between mono and stereo. 00
Changes the language of the DVD. 00
ZOOM Zoom 00
REPEAT A-B Repeats playback between A and B. 00
ZERO RETURN
Stops the tape when the counter reaches 00
H
00
M
00
S
.00
ANGLE Changes playback angle. 00
COUNTER RESET Resets the counter to 00H00M00S.00
SUB TITLE Resets subtitles of the DVD disc. 00
ATR Digital AUTO TRACKING 00
PLAY MODE Selects the playback mode. 00
REPEAT Repeats playback. 00
CLOCK/COUNTER Changes the front panel display mode. 00
TV/VCR Switches input between the TV andVCR. 00
PROGRESSIVE Activates the progressive scanning mode. 00
VRDVD4005_P02-P21 03.8.20, 11:38 PM14

15
Inserting Batteries
Parts and functions
3Replacethecompartment cover.
2Install two “AAA” batteries (not
supplied),payingattentionto the
polarity diagram in the battery
compartment.
1Open the battery compartment
cover in the direction of the ar-
row.
Battery precautions
The precautions below should be followed when using batteries in this device:
1.Use only the size and type of batteries specified.
2.Be sure to follow the correct polarity when installing the batteries as indicated in the battery compartment.
Reversed batteries may cause damage to the device. To avoid a potential short circuit, insert the “–” end first.
3.Do not mix different types of batteries together (e.g. Alkaline and Carbon-zinc) or old batteries with fresh ones.
4.If the device is not to be used for a long period of time, remove the batteries to prevent damage or injury from
possible battery leakage.
5.Do not try to recharge batteries not intended to be recharged; they can overheat and rupture. (Follow battery
manufacturer’s directions.)
Remote control basics
•Press POWER to turn the DVD/VCR on or off.
•Press CH or CH to move through the channels one channel at a time.
•The /// are also used to navigate on-screen menu system.
•You can directly access specific channels using numeric keys.
• Each press of DVD/VCR on the remote control, switches the screen between the DVD screen (DVD mode) and
the VCR screen (VCR mode).
Operation
• Aim the remote control at the remote sensor and press control buttons to
operate.
• Operate the remote control within 30°angle on either side of the remote
sensor, up to a distance of Approx.5 meters (15 feet).
Polarized AC Cord Plug
(One blade is wider than the other.)
AC Outlet
Wider Hole
and Blade
Power Source
TO USE AC POWER SOURCE
Use the AC polarized line cord provided for operation on AC. Insert the AC
cord plug into a standard 120V 60Hz polarized AC outlet.
NOTES:
• Never connect the AC line cord plug to other than the specified voltage
(120V 60Hz). Use the attached power cord only.
• If the polarized AC cord does not fit into a non-polarized AC outlet, do not
attempt to file or cut the blade. It is the user’s responsibility to have an
electrician replace the obsolete outlet.
• If you cause a static discharge when touching the unit and the unit fails to
function,simplyunplugtheunitfromtheAC outlet and plug it backin.The
unit should return to normal operation.
30°30°
Approx.5 meters (15 feet)
VRDVD4005_P02-P21 03.8.20, 11:38 PM15

16
NOTES: •A clear picture will not be obtained by the DVD/VCR unless the antenna signal is good. Connect the
antenna to the DVD/VCR properly.
•For better quality recording, an indoor antenna or a telescopic antenna is not recommended.The use
of an outdoor type antenna is required.
•If you are not sure about the connection, please refer to qualified service personnel.
If you are using an antenna system, follow these instructions. If you are a cable (CATV) subscriber, skip
ahead to page 18 for the proper connections.
ANTENNA TO DVD/VCR CONNECTION
The DVD/VCR must be connected “between” the antenna and the TV. First, disconnect the antenna from the TV
and connect it to the DVD/VCR.Then connect the DVD/VCR to theTV.Below are 3 common methods of connect-
ing an antenna system to a DVD/VCR. Find the type of antenna system you are using and follow the connection
diagram.
If both VHF and UHF antennas have 300 ohm twin lead (flat) wires,
use a combiner having two 300 ohm inputs and one 75 ohm output.
NOTE:
Basic connections
Combination VHF/UHF antenna with 75 ohm coaxial cable
Combination VHF/UHF antenna with 300 ohm twin lead (flat) wire
Separate VHF and UHF antennas
1
2
3
DVD/VCR
300 ohm twin lead (flat) wire
75
(su
Matching transformer
300 ohm input
75 ohm output
(not supplied)
DVD/VCR
300 ohm twin lead (flat) wire
75 ohm coaxial cable
UHFVHF
7
(s
Combiner
75/300 ohm input
75 ohm output
(not supplied)
DVD/VCR
75 ohm coaxial cable 75
VRDVD4005_P02-P21 03.8.20, 11:38 PM16

17
NOTE: If a VHF or UHF antenna is used,
set the TV/CATV menu option to
the “TV” mode.
TVwithsingle75 ohm UHF/VHF antenna
input
NOTE: If aVHForUHFantenna isused,
set theTV/CATV menu option to
the “TV” mode.
TV with 300 ohm UHF and 75 ohmVHF
antenna inputs
NOTE: If a VHF or UHF antenna is used,
set the TV/CATV menu option to
the “TV” mode.
TV with 300 ohm UHF and 300 ohm VHF
antenna inputs
DVD/VCR TO TV CONNECTION
After you have connected the antenna to the DVD/VCR, you must connect the DVD/VCR to the TV.
Below are 3 common methods of connecting your DVD/VCR to aTV.Find the type ofTV you are using and follow
the connection diagram.
This DVD/VCR has a single 75 ohm output for connection to a TV. If yourTV has separateVHF and UHF antenna
inputs (numbers 2 and 3 below), use a splitter to connect the DVD/VCR to the TV for VHF and UHF reception.
Basic connections
UHF
VHF
TV
75 ohm coaxial cable
(supplied)
Splitter
75 ohm input
75/300 ohm outputs
(not supplied)
UHF
VHF
TV
75 ohm coaxial cable
(supplied)
Splitter
75 ohm input
300 ohm outputs
(not supplied)
UHF/VHF IN
TV
75 ohm coaxial cable (supplied)
VRDVD4005_P02-P21 03.8.20, 11:38 PM17

18
Many cable companies offer services permitting reception of extra channels including pay or subscription chan-
nels.This DVD/VCR has an extended tuning range and can be tuned to most cable channels without using a cable
company supplied converter box, except for those channels which are intentionally scrambled. If you subscribe to
a special channel which is scrambled, you must have a descrambler box for proper reception.
CATV (CABLE TV) connections
NOTE: Whenever a converter/descrambler box is placed before the DVD/VCR, you must tune the DVD/VCR to the
output of the converter/descrambler box, usually channel 3 or 4.
ALLOWS: •Recording of nonscrambled channels.
•Use of the programmable timer.
•Recording of one channel while watching another.
ALLOWS: •Recording of channels through the converter box
(scrambled and unscrambled).
•Using the programmable timer to record only the
channel selected at the converter box.
PREVENTS:•Recording one channel while watching another.
•Using the DVD/VCR tuner to select channels.
1
2
3
ALLOWS: • Recording of nonscrambled channels.
• Use of the programmable timer.
• Recording an unscrambled channel while watching
any channel selected at the converter box.
PREVENTS: Recording scrambled channels.
NOTE:
If you are playing a tape or using the
tuner built into the DVD/VCR, the con-
verter must be set to the video channel
output of the DVD/VCR (either 3 or 4).
NOTE:
To record from converter/descrambler,
DVD/VCR tuner must be tuned to the
converter outputchannel,usuallychan-
nel 3 or 4.
UHF/VHF
IN (ANT)
TV
DVD/VCR
Incoming cable
UHF/VHF
IN (ANT)
TV
DVD/VCR
Incoming
cable
Converter/
descrambler
UHF/VHF
IN (ANT)
TV
DVD/VCR
Incoming cable Converter/
descrambler
VRDVD4005_P02-P21 03.8.20, 11:38 PM18

19
IMPORTANT: Make sure the TV/CATV menu option is set to the “CATV”mode.
ThisDVD/VCR cannot receivescrambled programssinceit doesnotcontain adescrambler.In orderto receivescrambled
programs,yourexistingdescrambler mustbe used.Descrambler boxes areavailable fromcable companies.Consult your
local cable company for more information concerning connection to their descrambler equipment.There are many ways
to connect your DVD/VCR to a cable system.Below are six common methods of connection.
4
5
6
ALLOWS: •Recording of one channel while watching another.
•Using the programmable timer to record only the channel selected at the converter box.
•Recording of all channels through the converter box.
PREVENTS:•Watching scrambled channels while recording another channel.
•Using the DVD/VCR tuner to select channels.
ALLOWS: •Recording of nonscrambled channels.
•Recording of one channel while watching another.
•Watching premium channels through the converter while recording nonscrambled channels.
•Using the programmable timer.
PREVENTS: Recording scrambled channels.
ALLOWS: •Recording of all channels through the converter box.
•Recording a scrambled or unscrambled channel while watching another (scrambled or
unscrambled) channel.
•Using the programmable timer to record only the channel selected at the converter box.
PREVENTS: Using the DVD/VCR tuner to select channels.
CATV (CABLE TV) connections
UHF/VHF
IN (ANT)
TV
DVD/VCR
Incoming
cable
Splitter
Converter/
descrambler
A/B switch
UHF/VHF
IN (ANT)
TV
DVD/VCR
Incoming
cable
Splitter
Converter/descrambler
A/B switch
UHF/VHF
IN (ANT)
TV
DVD/VCR
Incoming
cable
Splitter
Converter/descrambler
A/B switch
Converter/
descrambler
VRDVD4005_P02-P21 03.8.20, 11:38 PM19

20
Connections with the TV or audio component
The exact arrangement you use to interconnect various video and audio components to the DVD/VCR is depen-
dent on the model and features of each component.Check the Owner’s Manual provided with each component for
the location of video and audio inputs and outputs.
Connect to a TV with Audio/Video output
You can enjoy playback by connecting the unit to a TV.
Connect the unit to aTV equipped with audio input (L/R) and video input jacks using the supplied audio/video cable.
Connect to a TV with S-Video output (for DVD/CD playback)
If your TV has an S-VIDEO input, you can get higher quality by connecting it with the S-VIDEO output of the unit
using the S-video cable instead of connecting the video input of the TV to the VIDEO jack of the unit.
Connect to a TV with Component video output (for DVD/CD playback)
You can enjoy high quality picture by connecting the unit’s COMPONENTVIDEO OUT jacks to the COMPONENT
VIDEO IN jacks of your TV with the COMPONENT video cables (not supplied).
NOTES:
• When connecting to a TV using the VIDEO or S-VIDEO jack, make sure that the PROGRESSIVE indicator on
the display window is not lit. If it is lit, the VIDEO and S-VIDEO outputs do not feed the correct signals and you
cannot see any picture. To turn off the PROGRESSIVE indicator, make the Progressive scanning mode
inactive (see page 37).
• When the component video input jacks on aTV is of the BNC type, use an adapter to convert a pin jack to a BNC
jack (not supplied).
To Audio (R) input
AUDIO/VIDEO cable (supplied)
Audio (R) output
To Audio (L) input
Audio (L) output
To Video input
Video output TV
DVD/VCR
To Audio (R) input
AUDIO cable (not supplied)
Audio (R) output
To Audio (L) input
Audio (L) output
S-Video output To S-Video
intput
S-Video cable (not supplied) TV
DVD/VCR
To Audio (R) input
AUDIO cable (not supplied)
Audio (R) output
To Audio (L) input
Audio (L) output
TV
DVD/VCR
COMPONENT VIDEO cable (not supplied)
To Component
video output
To Component
video input
VRDVD4005_P02-P21 03.8.20, 11:38 PM20
Other manuals for VRDVD4005
1
Table of contents