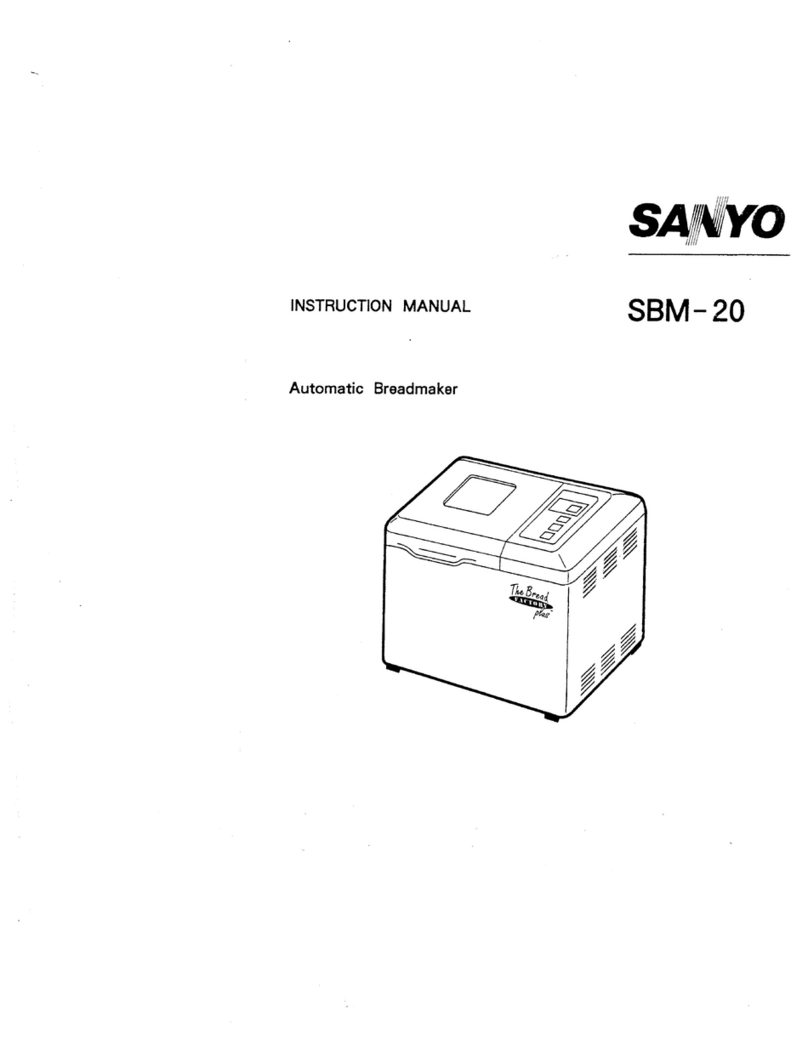
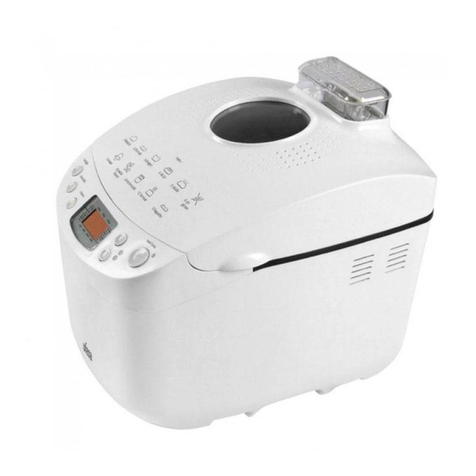
Sanyo SBM-20 User manual

“\ FILE NO. I
SERVICE MANUAL Automatic Bread Maker SBM-20 (NewZealand)
PRODUCTION CODE No.
343631200
REFERENCE NO. SM-680039

1. Specifications
Power Source 230V (50Hz)
Heater 430W
Power Consumption Main Motor 50 Hz 1Oow
Outer Dimensions 34.0 (W) x25.0 (D) x33.7 (H) cm
Weight Approx. 6.5 kg
Timer 2Hrs 50 min. up to 12 Hrs.
Cord Approx. 1.8 mlength
Thermal Fuse Baking temp. 192°C
Accessories Cook book, Instruction manual
2. Constructions and Operation Procedures
1. Constructions
The kneader blade attached to the inner pot ass’y is rotated by the main motor by way of the pulley and the
belt. The ingredients inside of the inner pot are kneaded by the kneader blade. The inside of the tempera-
ture is controlled by the thermal sensor and the heater between the processes of “kneading” and “baking”.
-—

Outline of Constructions I
N--
u
0
/
[
ElVA
n
El
n
\
Inner pot Ass’y,
‘L-
—
.
Kneader blade
Heater 4\\
~Thermal sensor
~Over temperature protector
Main motor Ass’y
Pulley Belt
2

3. Circuit Diagram
The sign A:
The parts marked with ~have special characteristics important for safety.
When replacing any of these parts, use only manufacturer’s specified parts.
I
I
I
I
I
I
I
I
I
I
I
I
I
-0’
01
<1
CD
M
%1
QI
w,
~!
xl I
I
I
I
I
I
.1 I
I
I
I
I
I
I
v
*4 I
I
I
I
I
I
I
I
I
I
I
I
0
sI
.I
I
$!=3
z
5
;o
0C108
5
R1ll
LD102 -( I!il I“l 1-1. IIJ
.-
—
+,
.b
I
I
I
I
I
I
I
I
I
I
I
I
I
++!
w
R18
-—— ——— ——— ——_ ——_ ___ ___ ___ ___ ___ ___ ___ ___ _ I
3
“’u’

(ELECTRICAL PARTS LIST)
POWER SUPPLY UNIT CONTROL UNIT
“L
SYMBOL ISPECIFICATION
Iclol IC AN7905 or UPC7905HF
TR101 Triac TM561 S-L
TR102 Triac TM361 S-L
D101 Diode Stack 1B4B42 or DBB1OB
D102 Diode GMAO1
Q101,Q1O2,Q1O3Digi. Tra. 2SA1348
Q104 Transistor 2SC181 5-Y
VAR101 VaristorERZV07D431UorERZC07DK431U
orERZC07DK431
VAR102 IVaristor ERZC1 ODK270
VAR103 Varistor MFCN08D431 K
PH101,PH1O2 Photo Triac. S21ME3 or S21ME3Y
SK101 Spark Killer ECQJO186X
C103 IMetallized Film Cap. O.11.LF250V
C104, C105 Metallized Film Cap. 0.1pF 50V
C106 Ceramic Cap. 1.5LF 25V
C107 IElectrolytic Cap. 22001LF25V
C108 IElectrolytic Cap. 10OOVF25V
R101 &rtXY12.7M~l/ZW
R102,R1O3 Flameproof Carbonl 00(2 l/2W
R104,R1O5 Metal Oxide 220S21W
R106,R1 07 IFlameproof Carbon 680f2 l/2W
R108 Carbon 620L2l/dW
R109 Carbon 150kL) l/dW
R11O Carbon 3.9kL2l/aW
Rlll IMetal Oxide 150L21W
BZ101 IPiezo Buzzer PKM24SP-3805
L101 Coil SL02B121
PT101 Power Transformer ETP35KCN61 TU
F102 Fuse 315mA 250V
SYMBOL SPECIFICATION
ICI IC UPD75006CU-081
IC2 Ic M51943BL
IC3 Ic MLC4049B
LD1 LED GL3P404N
TR1 ,TR2 Digi. Tra. UN6215
TR3, TR4,
TR5, TR6,
TR7, TR8, Digi. Tra. UN611 F
TR9, TR1 O,
TR1l, TR12,
TR13, TR14
TR15, TR16, Digi. Tra. UN6124
TR17, TR18
Dl, D2, Diode GMAO1
D3, D4
cl, C2, Ceramic Cap. 1.5pF25V
C3, C4
C5, C6 Ceramic Cap. 10OOpF50V
C7 Electrolytic Cap. 10OP.F6.3V
C8 Electrolytic Cap. 0.33pF50V
C9 Electrolytic Cap. 4.7 pF50V
Rl, R2 Carbon 4.7kKUldW
R3, R4 Carbon 2.2kG?l/dW
R5~R12 Carbon 1.2kG?VdW
R13 Metal Film 11k~l/4W
R14 Carbon 10OL2VaW
R15 Metal Film 1.5k~l/4W
R16 Carbon 47CY14W
R17 Carbon 10Okf2VdW
R18, R19 Metal Oxide 330(21W
R20 Carbon 330QV4W
xl Ceramic Osc. CST4.I 9MGW-TFO1
Swl ,SW2,
SW3, SW4, Key Switch EVQ-215-05R or SKHVBE
SW5
4
4. Operational Principles
1 ) Operation procedures L
Refer to the separate instruction manual.
Block diagram
Power
transformer Power circuit
7=
(IMotor control
—->--------lz51-
Heater control ------------
3) Power circuit
“Circuit diagram
ICI
Indicator circuit
E
EIEEEcl-
Ezcl
POWER SUPPLY UNIT < > CONTROL UNIT
1‘1x!K:‘::
,-
---------------. Rll
++
Clm C107 CI08
G
PTIOI ‘- -----D;o;--”- “-: IN OUT
(!) I
AIclol ‘/) B
●Voltage at each point (Ground is shown as VDD)
@-13V @-5V
.Description of operation
(1) VDD-VSSPower supply (-5V)
The secondary output of the power transformer (PT101 )is given
l-l--r
21 VDD
k
1
cl
42
ICI
Vss
I
bridge-rectification by the diode
stack (D101 )and the condenser (Cl 07) to produce -13V voltage at A. The voltage at Ais used to
compose B-5V power supply by the operation of constant voltage circuit consisting of 3-terminal
output voltage regulator (pRIMARY:lCl 01). 4
5

4) Heater and motor control circuits
“Circuit diagram
—
Q101
OVER
TEMPERATURE
PROTECTOR T
I
r--J’
I&
al
-TT
IPH102
QI; +
~i ,L—
R104 (o
L101 o
E
I I II I
C230V IAIA A
5(3H7 R105
----- 1
21 VDD
P60
P61
ICI
(J-13V
.Description of operation
(1) Heater control circuit
When the voltage at pin 32 of the microcomputer (IC1 )becomes Low (-5V), the signal will drive
transistor (TR4) ,transistor (QI 01),photo triac (PHI 01), and then triac (TR1 01)to operate the heater.
(2) Motor control circuit
When the voltage at pin 33 of the microcomputer (IC1 )becomes Low (-5V), the signal will drive
transistor (TR3) ,transistor (Ql 02) ,photo triac (PH1 02), and then triac (TR1 02) to operate the motor.
5) Reset circuit
—●
Circuit diagram
2’ VDD
IC2 R17
ICI
13 5 R16 3—
{)RESET
C7 +C2 C9 +
42 Vss
(1) The reset circuit generates the signal which resets the microcomputer.
6

6)
7)
Control circuit for inner temperature
●
Circuit diagram
21
,
TH1
TR5 24
25
23
R14 TR2 () C3
C8 +
18
42
IC3 I
VDD
P21
P20
P22
PI l/lNTl
Vss
●Description of operation
(1) The circuit controls the inner temperature during the timer setting and start of operation.
Oscillator circuit
+Circuit diagram xl
------- ...... 1
8) Buzzer circuit
●
Circuit diagram
5
n;
4
d.>
42
x2
ICI
xl
Vss
POWER SUPPLY UNIT <:>CONTROL UNIT 21
R20
+}
:RI
22
TRI
VDD
ICI
P231BZR
Vss -

5. Characteristics
-.Basic (Lg. Medium)
11
of Baking (Operation Processes)
(Lg. Dark) course
Setting KNEAD
o
Lg.Medium10min.~9hrs. 50 min.
Lg. Dark 10 min. -8 hrs. 50 min. >6min.
<
11
I
HI
Heater ON/OFF OFF
Main motor OFF *‘ON
.Basic (Reg.) course
KNEA
@
31mil
RS
SE
mir
.
8~
—
—
E
—
)FF
—
—
Se(
—
.
3FF
—
K
.
SHAPE
)se
.
—
—
)FF
—
)FF
—
aec
—
—
—
)FF
—
G
—
INAL KEEP
BAKE
ISE WARM
*2
1min. Lg.Mejium:50min. Max.
1sec. Lg.Dak :7Dmin. 80 min.
D
135C
Oc
*
)FF OFF OFF
Setting KNEAD KNEAD FIRST FINAL KEEP
SHAPE BAKE WARM
lomin. @ @ RISE RISE *2
-9 hrs. 63 min. Max.
*Orein, 6min. 27 min. 23 min. 5sec. 10 sec. 5sec. 40 sec. 40 min. 60 min.
<>
135C
38~ 4o”c
14C
Heater ONIOFF OFF ON/OFF
OFF ONIOFF OFF OFF OFF ONIOFF ON/OFF
Main motor OFF *’ ON ON OFF ON OFF ON OFF OFF OFF
Time until finish
of BAKE
Lg. Medium 2hrs. 50 min.
Lg. Dark 3hrs. 10 min.
Time until finish
of BAKE
2hrs. 40 min.
8

.Whole Wheat (Lg.) course
E
Heater
Main motor
Setting REST KNEAD KNEAD FIRST
10min. 0) @RISE
%7hrs.
soMin, 30 min. 6min. 25 min. 79 min
130”C II\30”C
w
14°c
)fVOFFON/OFFOFF OFF ON/OFf
&
.Whole Wheat (Reg.) course
#
PUNCH REST SHAPI
29 min.
15sec. 45 sec. 3sec
30”C
++
it
OFF OfVOFF OFF
ON OFF ON
FINAL
RISE
44 min
57 sec
::
30”C
BAKE
55 min.
135°c
r
ON/OFF
OFF
KEEP
WARM
*2
Max.
60 min.
\
ONIOFF
OFF
Setting REST KNEAD KNEAD FIRST PUNCH REST SHAPE FINAL BAKE KEEP
10min. 0(2) RISE RISE WARM
-7 hrs. 29 min. 54 min. *2
40min. 30 min. 6min. 18 min. 76 min. 10sec. 50 sec. 3sec. 57 sec. 45 min. Max.
60 min.
<>
135°C
3o”c 30”C 3o”c 30”C
14°C /
Heater ONIOFF
ONIOFFON/OFF OFF OFF ONIOFF OFF ONIOFF OFF ONIOFF ONIOFF
Main motor
OFF OFF *’ON ON OFF ON OFF ON OFF OFF OFF
Time until finish
of BAKE
4hrs. 30 min.
Time until finish
of BAKE
4hrs. 20 min.

●French course
KEEP
WARM
*2
Max.
~min
-
\
Setting
10min.
-8 hrs
IOmin.
PUNCH REST
28min.
40Sec.
-
3o”c
SHAPE ‘INAL
?ISE
3min
10Sec
-
36C
Time until finish
of BAKE
3hrs. 30 min.
(NEAD
@
22min.
FIRST
RISE
34min.
BAKE
65min.
-
1357.3
r
fOsec.
5sec. 5sec. 5sec.
OFF
Iosec
-
OFF
5SW.
-
OFF
_
-
OFF OFF
OFF ON
30T
14C
OFF
T
.- Heater RR
OFF
G
OFF
DN/OFF
OFF 2NIOFF
OFF
M/OFF
OFF
ONIOFF
OFF
Main motor
ON ON OFF ON OFF
“Sweet course
Setting
10min.
-8 hrs
10min.
147.3
PUNCH REST
28min.
40 sec.
SHAPE 1
Time until finish
KEEP
WARM
*2
Max.
50 min
‘INAL
W3E
16min
10sac
:NEAD
o
3min.
<NEAO
@
31min.
~lRST
W3E
!0 min.
BAKE
50 min
::
130V
r
Iof BAKE
3hrs. 25 min.
Osec
-
OFF
OFF
5sec. 5sec. 5sec.
OFF
T
IOsec 5sec.
_
4
30”C 36°C
3o”c
OFF
OFF
OFF OFF
E
Heater
Main motor
OFF
z
OFF ONIOFF
ON OFF
3NIOFF
OFF
Rim
OFF
)NIOFF
OFF
OFF )NIOFF
OFF
)t40FF
OFF
‘ON ON ON ON
10

●Dough course
*1
*2
E
Heater
Main moto
Setting
10 min.
,10 hrs.
10 min. .
14°C
DNIOFF
OFF
KNEAD
@
6min. .
OFF
*’ ON
KNEAD
@
24 min.
OFF
ON
FIRST
RISE
60 min. >
30”C
/
ONIOFF
OFF
1hr.30 min.
During the first 6min. of the KNEAD@ process, the main motor is operated intermittently.
The KEEP WARM process is maximum 60 minutes. Even if within 60 minutes, when temperature of sensor
is over 80 temperature impressed, the keep warm is completed.
11

(((’
Key
Indication Operation Remarks
START STOP SELECT A(Up) V(down)
(1) POWER Basic 0:00 only flashes at 1.66Hz. When power
ON operation ,11111, supply cord is
:l-l ●I-1 g-l :turned on.
,&t”&/&/ \
‘11111’
Operation xKey input is neglected.
against (While error is sounding)
input oTo STOP (2)
oTo SELECT (3)
xKey input is neglected.
(While error is sounding)
xKey input is neglected.
(While error is sounding)
(2) STOP Basic No indication When STOP
operation switch is
depressed in the
condition (1).
Operation xKey input is neglected.
against (While error is sounding)
input oTo STOP (2)
oTo SELECT (3)
xKey input is neglected.
(While error is sounding)
xKey input is neglected.
(While error is sounding)

Key
Indication Operation Remarks
START STOP SELECT A(up) ?(down)
(3) SELECT Basic
operation “1” is indicated. When SELECT
switch is depressed
in the condition (1)
or (2).
o
Operation
against
input
oMenu selected with the
SELECT key is started. For menu clsplay,
see the instruction
manual.
To STOP (2)
oThe display changes with each
SELECT switch input.
oTo TIMER SETTING (4)
.
CJ oTo TIMER SETTING (4)
(4) TIMER
SETTING Basic
operation “2:50” is displayed.
(In case of Basic (Lg. Medium)) When A(up) or
7(down) switch
is depressed in
the condition (3).
Operation
against
input
o
0
0
0
0
Starts according to timer
setting.
To START (6)
To STOP (2)
Moves onto menu select (5) of
timer settings.
TIMER SET time increases in
10 minute increments. ●When pressed,
time is added at
high speed.
.When pressed,
time is subtracted
at high speed.
TIMER SET time decreases in
10 minute increments.
(
(

(
A
+
(
Key
Indication Operation Remarks
START STOP SELECT A(up) V(down)
(5) Menu select Basic When SELECT
in timer operation switch is
settings. ●depressed in the
●:condition (4).
Operation oThe time preset by the timer
against setting key are starts counting.
input TO START (6)
oTO STOP(2)
oReturns to display in timer Course change is
settings. not carried out.
oReturns to timer setting time Display time is
display.
To TIMER SET (5) counted up 10
minutes.
oReturns to timer setting time Display time is
%%tiER SET (5) counted down 10
minutes.
(6) START Basic ~l~!l.i ~) Displays baking time.
operation ~,; ,<:f ~~ Operation starts for baking time When the START
selected by the SELECT key. key is pressed
The colon (:) changes from after selection or
being steadily lit to flashing, when the timer
and the display is counted has been set.
down 1minute at atime.
Operation xKey input is neglected.
against
input oMoves onto STOP (2) with
input of 1second or more.
xKey input is neglected.

1
Key
Indication Operation Remarks
START STOP SELECT A(up) V(down)
(7) Keep Basic The colon (:) in the “0:00” Changesto “keep
warm operation g-hi !// g-/ g-) display flashes. warm” mode after
mode #J. :#,,, _/g baking is complete.
Operation xKey input is neglected.
against
input oTo STOP (2)
xKey input is neglected
xKey input is neglected.
(8) Keep Basic #-/ ●t-l 8-) The colon (:) changes from Warning ends 1
warm operation :/.4/tf flashing to being steadily lit. hour after start of
.-
complete keep warm mode,
or when oven
temperature is
80”C or more.
Operation xKey input is neglected.
against (No error warning)
input oTo STOP (2)
xKey input is neglected.
(No error warning)
xKey input is neglected.
(No error warning)
xKey input is neglected.
(No error warning)
Demonstration(for inspection)
Inspection demonstration mode is set when power plug is connected to the power outlet while depressing ail of SELECT,DOWN and START switches.
Operation is the same as ordinary one. Only exception is that depressing of UP key at the time of starting makes the process move to the following one.
((((

7. Disassembly Procedures
1. Disassembly of lid
(1)
(2)
L
Remove the fitting screws on the left side of the lid hinge. Open the lid and, while lifting its left side slightly,
slide rightward to dismount the lid ass’y.
Finder glass, glass supporter and air exhaust can be dismounted by removing tab of outer lid fixing inner
lid. (Fig. 1)
Inner lid
Gla
Outer
2. Disassembly of main unit
(1)
(2)
(3)
b
(4)
(5)
(6)
The bottom lid can be dismounted by removing 4fitting screws and 4 feet on the bottom lid.
The power supply cord can be removed by unfastening 3screws on the terminal ass’y and the screw on the
cord bushing (Fig. 2)
Removing the fitting screw on the rear surface
of control panel. The control panel can be re-
moved from the main unit by removing tab of
control panel out of enclosure, through pressing
rightward on the rear surface of control panel.
The control panel can be dismounted by remov-
ing detached 2sockets from the control PCB
ass’y.
The control PCB ass’y can be removed from
control panel by removing the 2fitting screws
and tab of control panel.
Remove the 4fitting screws of the heating shel-
ter plate (B). The heating shelter plate (B)
can be dismounted by setting tab of heating
shelter plate (A) to its horizontal position.
(Fig. 2)
The main unit can be pulled up after removing 6
fitting screw of inner case (upper) ,and the
main unit can be separated out of enclosure.
(Fig. 2)
Self-tapping screw, pan hd. 3x8mm
F& Self-tapping screw, pan hd. 3x6mm
h
r
%Enc,.s.re
plate (A)
Power supply cord ass’y
(Fig. 2)
16

(7)
(8)
(9)
(lo)
(11)
(12)
(13)
(14)
(15)
(16)
(17)
(18)
(19)
Cut the 3fixers that hold the lead wire.
Then, remove the following sockets: socket from the motor (blue socket), socket from the heater (white
socket), socket from the over temperature protector ass’y (yellow socket).
The power supply PCB can be dismounted by removing the 2fitting screws of power supply PCB and the
fitting power supply PCB and fitting screw of power supply PCB supporting plate and lead wire 105L from
the terminal ass’y (blue and brown wire).
The capacitor can be dismounted by removing the fitting screw.
By removing the 3main motor fit-
ting screws, the main motor ass’y
and belt can be removed from
frame.
The pulley (big) and pulley
washer can be dismounted by re-
moving the pulley (big) fitting
ring.
The heating shelter plate (A)
can be dismounted by removing
the 2fitting screws of heating
shelter plate (A).
The inner pot connector base
ass’y and inner case ass’y can be
separated by removing the 3fit-
ting screws of inner pot connector
base ass’y. (Fig. 3)
Pull out the 2sockets of the lead
-,
.
(Fig. 3)
wire from the heater. The ground lead wire 40L can be detached be removing its 1fitting nuts. By remov-
ing the heater fitting nut and heater supporting insulator fitting nut, the heater ass’y can be dismounted
from the inner case.
By removing the fitting screw of the heater supporting plate,the heater supporting plate and the heater
supporting insulator (small) can be dismounted from heater ass’y.
By removing the 2fitting nuts of
the heater supporting insulator
(big), the heater supporting in-
sulator (big) can be dismounted
from inner case.
The over temperature protector
unit can be dismounted by re-
moving the screw inside of the in-
ner case which is fixing the over
temperature protector unit.
The over temperature protector
ass’y can be removed by
straightening the fixing tab of the
over temperature protector sup-
port. (Fig. 4)
The sensor ass’y and the sensor
holding plate can be dismounted
by removing the screw inside of
the inner case which is fixing the
sensor ass’y. (Fig. 4)
Washer spring 3mm
Heater supporting plate
Screw pan hd. 3x10mm
Sensor ass’y
V
)
c%
Sensor holding
date
~.—
Tarmi
pa;”hd~3 x6m’m 7“
Over temperature
protector ass’y
Heater supporting insulator (Big)
(Fig. 4)
The inner pot support spring can be taken out by removing its fitting screw.
17

(20) By removing
(Fig. 5) the 2hindge fitting screws, the hinge and reinforcement can be dismounted from
,= Tapping screw, pan hd. 4x8mm
Hinge
Reinforcement
Enclosure (Fig. 5)
enclosure.
Precautions for Reassembly
1. When mounting the power supply cord, the cord bushing should be attached to the cord holder so that the
dimension between the bushing and the exit of the lead wire is approx. 20 mm. (Fig. 6)
For wiring of the terminal section, see Fig.6.
Lead wire 105L
Ground
(greenly
(Fig. 6)
2. When mounting the belt, the belt is hooked on the pulley (small) is hooked partially from the lower side of
the pulley (big). The belt is wrapped on the pulley (big) by turning on the pulley (big) .(Fig. 7)
Pulley ame
Pulley (small)
Belt (Fig. 7)
18

3. Wiring should be made as shown in the specified wiring diagram. (Fig 8)
Motor
\
Motor ~Capacitor
Blue and red connector 4
Capacitor ------1 lllA
-2 J!!!i! 01 PCB
(Fig. 8)
IIllustration of Wiring I
L=%=@‘owers”pp’’cord
\\ .-”
BI
Heater
n
Terminal ass’y pw ~~ 1111
Blue
\\
‘‘“r= n!/iir
Green/Yellow,)
~uuu u\\
Control PCB
-
Capacitor
19
Other manuals for SBM-20
5
Table of contents
Other Sanyo Bread Maker manuals