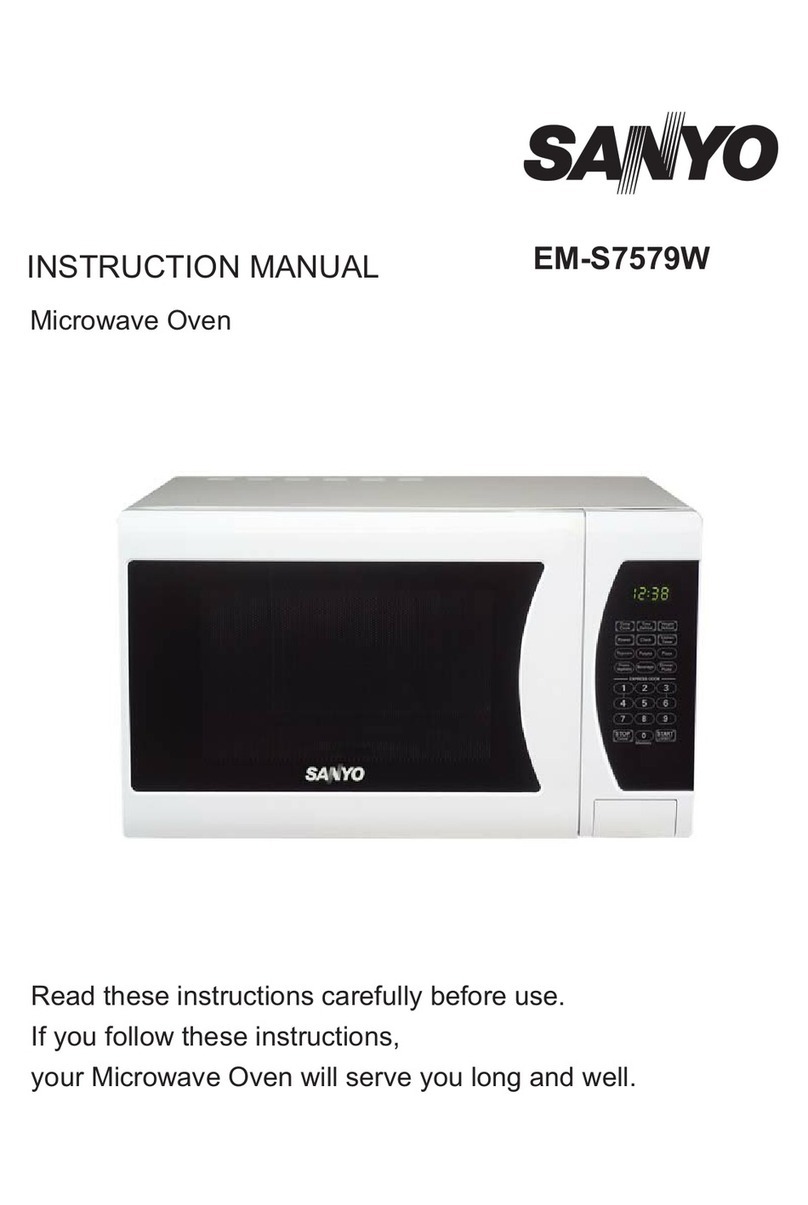
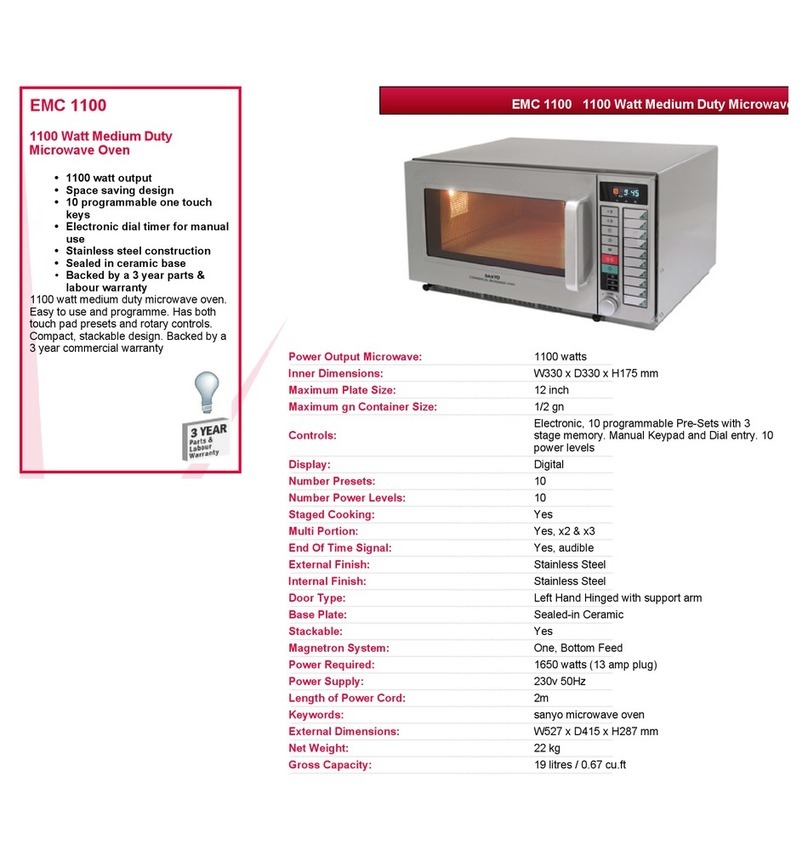
Sanyo EM-FL10N User manual

INSTRUCTION MANUAL EM-FL10N
EM-FL10N(W)
Read these instructions carefully before use.
If you follow these instructions, your Microwave
Oven will serve you long and well.
EUK
English
Microwave Oven
OM for EM-FL10N Draft_2 04-17.qxd 2003/04/17 18:14 Page 1

OM for EM-FL10N Draft_2 04-17.qxd 2003/04/17 18:14 Page 2

Oven Specifications 4
Safety Instructions
How To Use Your Oven Safely 4
Other Important Safety Instructions 5
Setting Up & Getting To Know Your Oven
Installation 6
Oven Parts and Accessories 7
Oven Control Panel 8
MAFF Rating 11
Operating Instructions
Setting the clock 9
Auto weight defrosting 9
Cooking in one stage 9
Cooking in two and three stages 10
Auto weight defrost and cooking in two stages 10
Child lock 11
To stop the oven when it is operating 11
Programmed recipes
Pizza 12
Beverages 12
Potatoes 12
Prepackaged popcorn 12
Hold warm 13
Dinner plate 13
Care Of Your Microwave Oven
Care and Cleaning 14
Before Calling For Service 14
Imperial to Metric Conversion Table 15
Warranty 15
Easy Use Chart 16
TABLE OF CONTENTS
OM for EM-FL10N Draft_2 04-17.qxd 2003/04/17 18:14 Page 3

EM-FL10N, EM-FL10N(W)
Power Source 230 V / 50Hz
Maximum Output Power 800 W*
Oven Capacity 0.7cu. ft. (19 L)
Outside Dimensions (W x D x H) 460mm x 322mm x 265mm
Net Weight 12.5 Kg
MAFF Rating 800 / E
*According to IEC 705 test procedures.
4
SPECIFICATIONS
1. When boiling water or other liquids, be sure to
use a wide mouthed container, this will allow air
bubbles to escape freely and prevent boiling over.
Overheating the liquid beyond boiling point can
occur without the evidence of bubbling. This
could result in a sudden boil over of the hot liquid.
2. Do not attempt to operate the oven while empty
as this will cause damage.
3. Do not deep fry in the microwave oven as the
temperature of the oil cannot be controlled and it
may overheat.
4. Never completely seal containers in the
microwave oven. Coverings are necessary but
containers must not be airtight.
5. Small quantities of food with low moisture
content or high fat or sugar content can burn, dry
out or catch fire if cooked or re-heated too long.
Please note that the heating / cooking period
required is extremely short: for example it only
takes approximately 15 seconds to heat one
mince pie or similar.
NOTE
It is quite normal for steam to be emitted around
the door, for misting to occur on the door, or
even for water droplets to appear below the door
during the cooking cycle. This is merely
condensation from the heat of the food and does
not affect the safety of your oven.The door is not
intended to seal the oven cavity completely but its
special SANYO design contributes to the
complete safety of the appliance.
6. Always pierce food which has a skin or
membrane, for example, potatoes, tomatoes,
apples, sausages etc. If you don't pierce them
steam will build up inside and they may explode.
7. When disposable containers of plastic, paper or
other combustible materials are used to reheat
food, it is advisable to check from time to time
during the cooking cycle.
HOW TO USE YOUR OVEN SAFELY (MICROWAVE)
ALTHOUGH YOUR OVEN IS PROVIDED WITH SAFETY FEATURES,
IT IS IMPORTANT TO OBSERVE THE FOLLOWING:
a. Do not tamper with safety interlocks.
b. Do not place any object between the oven and the door or allow any food residue to accumulate on
sealing surfaces. Wipe the door sealing area frequently with a mild detergent, rinse and wipe dry. Never
use abrasive powders or pads.
c. When opened, the door must not be subjected to strain, for example, a child hanging on an opened door
may cause the oven to fall forward resulting in injury.
d. If any damage is apparent, do not operate the oven. Contact your nearest SANYO SERVICE CENTRE.
e. Children may use the appliance only without supervision as long as instructions had been given which
enables the child for safe operation and makes the child aware of the dangers of false operation.
WARNING:
Only allowed children / Infirm Persons to use the
microwave, without supervision, when adequate
instructions have been given so that the child /
Infirm person is able to use the microwave oven in
safeway and understands the hazards of improper
use.
OM for EM-FL10N Draft_2 04-17.qxd 2003/04/17 18:14 Page 4

OTHER IMPORTANT SAFETY INSTRUCTIONS
The following safety precautions should be
followed when using this appliance:
1. Read all instructions before first use.
2. As with most cooking appliances, close
supervision is necessary.
If a fire should start:
* Keep the oven door closed.
* Turn the oven off.
* Disconnect the power cord or shut off the power
at the mains.
Other important safety points to remember are:
WHEN COOKING BY MICROWAVE:
1. Do not use wire ties in the oven. Be sure to
inspect purchased items for wire ties and
remove before placing food in the oven.
2. It is important to keep the oven interior clean.
Food particles left on the oven walls reduce the
efficiency of the microwaves.
3. Do not heat foods or liquids in bottles or jars
with lids on. Air must be allowed to escape from
the container.
4. Milk or food for babies should be heated on
480W. It should then be stirred thoroughly
and tested to ensure that it is at the correct
temperature before giving it to the baby.
5. Care must be taken when removing cups of hot
liquid from the turntable. Cups should be lifted
not slid to the edge of the turntable to prevent
tipping.
SAVE THESE INSTRUCTIONS
5
WARNING
(a) Do not adjust or repair microwave oven yourself. Do not operate the oven if it is damaged,
until it has been repaired by a service engineer trained by the manufacturer.
(b) It is dangerous for anyone other than a properly qualified engineer trained by the
manufacturer to carry out adjustments or repairs.
(c) If the power supply cord is damaged, it must be replaced by the manufacturer or its
service agent or a similarly qualified person in order to avoid a hazard.
(d) On no account remove or interfere with any parts or screws.
THIS COULD PROVE VERY DANGEROUS.
(e) Liquids or other food must not be heated in sealed containers since they are liable to
explode.
(f) Some products such as whole eggs and sealed containers - for example, closed glass jars
- may explode and should not be heated in this oven. Occasionally, poached eggs may
explode during cooking. Always pierce the yolk, then cover and allow the standing time of
one minute before removing cover.
OM for EM-FL10N Draft_2 04-17.qxd 2003/04/17 18:14 Page 5

6
INSTALLATION
CONNECTING TO THE MAINS
Before you use your oven, check that the voltage
shown on the data label located on the face of the
oven conforms with your mains supply. The mains
lead is fitted with a 13 amp plug containing a 13 amp
fuse. If the fuse requires replacing at any time, the
fuse cover should be removed using a small screw-
driver to lever it out. The old fuse should be replaced
by a 13 amp fuse and the fuse cover must be refitted
before the plug is used again.
If the plug supplied on the mains lead is not suitable
for the socket in your home, it should be cut off and
disposed of safely, or destroyed, to avoid any
possible shock hazard resulting from the plug being
inserted into a 13 amp socket elsewhere in the
house. A suitable replacement plug should then be
fitted. (If a 13 amp plug and socket are not used, the
circuit supplying the oven should contain a 13 amp
fuse).
If the fuse cover is lost or damaged, the plug must
not be used until a replacement is obtained.
Replacement fuse covers are available from SANYO
SERVICE CENTRES. It is important that the colour
of the replacement fuse cover corresponds with the
coloured insert or as embossed in words on the base
of the plug.
WARNING - THIS APPLIANCE MUST BE
EARTHED
IMPORTANT The wires in this mains lead are
coloured in accordance with the following code:
Green-and-yellow: Earth. Blue: Neutral. Brown:
Live.
As the colours of the wires in the mains lead of this
appliance may not correspond with the coloured
markings identifying the terminals in your plug,
proceed as follows:
The wire which is coloured green-and-yellow must be
connected to the terminal in the plug which is marked
with the the letter E or by the earth symbol or
coloured green or green-and-yellow.
The wire which is coloured blue must be connected
to the terminal which is marked with the letter N or
coloured black.
The wire which is coloured brown must be connected
to the terminal which is marked with the letter L or
coloured red.
OVEN POSITIONING
1. Install the oven on a flat, level
surface strong enough to
safely bear the weight of the
oven.
2. Do not locate the oven near
areas where heat and
moisture are generated as
this may lower oven efficiency.
3. Covering the air vents may
lead to malfunctioning,
therefore, leave a gap of at
least 5cm from the walls and
17cm above the microwave.
4. This oven conforms to EMC
Radio interference Directive
89/336/EEC, however some
interference may occur if it is
placed too close to a radio or
TV, so keep them as far apart
as possible.
5. The oven must be positioned
so that the supply plug is
easily accessible.
5 cm
17 cm
5 cm
OM for EM-FL10N Draft_2 04-17.qxd 2003/04/17 18:14 Page 6

OVEN PARTS AND ACCESSORIES
7
1. Position the roller rest within the circular indentation.
2. Place the turntable on top of the roller rest making
sure it is centered and securely interlocked with the
hub receptacle on the floor. Never place the
turntable upside down.
• Always place the turntable with the smooth side facing
up. The turntable should neverbe restricted.
• Both turntable and the roller rest must be always be
used during the cooking
• All food and containers of food must always be placed
on the turntable for cooking.
TURNTABLE INSTALLATION
Your oven is supplied with the following accessories:
Turntable 1
Turntable roller rest 1
Instruction manual 1
2
3
4
56
1
1. Door safety locks
2. Oven window
3. Roller rest
4. Turntable
5. Control panel
6. Door release button
OM for EM-FL10N Draft_2 04-17.qxd 2003/04/17 18:14 Page 7

8
OVEN CONTROL PANEL
1. Display
Shows cooking time, power level, clock time and
function indicators.
2. Auto Weight Defrost Keys
Use to set the desired defrosting category.
3. Pizza Key
Touch to reheat precooked pizza.
4. Beverage Key
Use to heat beverages.
5. Potato Key
Touch to cook potatoes.
6. Hold Warm Key
Use to keep the food warm after cooking is
completed.
7. Popcorn Key
Use to cook prepackaged popcorn.
8. Dinner Plate Key
Use to reheat plated foods.
9. Number keys (0-9)
Use to select the numbers for Stage 1, Stage 2
and Stage 3 cooking, present and Auto Weight
Defrost times and the cooking power levels.
10.Clock Key
Touch to set the present time.
11.Cook Key
Use to set the cooking time
12.Clear/Pause Key
Use to clear cooking data.
13.Power Level Key
Use to set the desired cooking power level.
14.Start Button
Use to start a selected operation.
15.Door Open Button
Pushing this button stops oven operation and
opens the door.
C
OO
KAU
TO
D
EF
R
OST P
AU
SE
POULTRY
MEAT FISH
POTATO
BEVERAGE
PIZZA
DINNER
PLATE
HOLD
WARM POPCORN
AUTO WEIGHT DEFROST
PROGRAMMED RECIPES
123
CLEAR
PAUSE POWER
LEVEL
123
456
78
0
9
CLOCK COOK
2
1
4
3
6
5
8
7
9
1
0
1
1
1
2
1
3
1
4
1
5
OM for EM-FL10N Draft_2 04-17.qxd 2003/04/17 18:14 Page 8

SETTING THE CLOCK
When the oven is first plugged in, the display
will flash "0:00" and a tone will sound. If the AC
power ever goes off, the display will flash "0:00"
when the power comes back on.
NOTE: If the oven is used before the present
time is set, the display will show "0" after the cook-
ing is completed and the door is opened.
To reset present time in the display window when
the oven is off, touch the CLOCK pad. The colon
starts blinking. Enter the correct present time by
following the above procedures.
The display will flash "0:00" and a tone will sound.
1. Press the Door Release button to open the door.
Touch the Number pads to set the correct present
time.
EXAMPLE: To set the time to “10:12”, touch “1”, “0”, “1”,
“2” in sequence. The display will show the numbers
pressed in the order you pressed them.
2. Touch the CLOCK pad.
The display will show the present time and stops blink-
ing. The 12 hour digital clock allows you to set it from
“1:00” to “12:59”.
AUTO WEIGHT DEFROSTING
AUTO WEIGHT DEFROST lets you easily defrost
foods by eliminating guesswork in determining
defrosting time. The minimum weight for Auto
Weight Defrost is 0.1kg. The maximum weight
depends on the food category. Up to 3.0 kg for
poultry, 2.0 kg for meat and 2.0 kg for fish.
Follow the steps below for easy defrosting.
2. Enter the food weight.
EXAMPLE: To select 0.5 (1/2) lbs, touch “5”.
3. Close the door and then touch the START pad.
When the START pad is touched, the AUTO
DEFROST indicator will blink, the display will count
down the remaining defrosting time in minutes and sec-
onds and will beep 5 times when defrosting is complet-
ed.
OPERATING INSTRUCTIONS
Category Display Food Range
1 dEF 1 Poultry 0.1kg to 3.0kg
2 dEF 2 Meat, Ground 0.1kg to 2.0kg
3 dEF 3 Fish 0.1kg to 2.0kg
1. Press the Door Release button to open the door.
Enter the desired auto weight category.
EXAMPLE: To select POULTRY, touch “1” ; the display
will show “dEF 1” and the AUTO DEFROST indicator
will light.
COOKING IN ONE STAGE
Use the 10 key pads (number pads) to select a
cooking or other operational time.
1. Press the Door Release button to open the door.
Touch the COOK pad.
The display will show “0” and a tone will sound; the
COOK indicator will light.
2. Touch the Number pads for desired cooking time.
EXAMPLE: To set the cooking time to “13:40”(13
min. 40 sec.), touch “1”, “3”, “4” and “0” in
sequence.
3. Touch the POWER LEVEL pad and then the
Number pad for the power.
EXAMPLE: To select 30% power, touch the POWER
LEVEL pad and then “3”. The display will show “PL 3”.
4. Close the door and then touch the START pad.
When the START pad is touched, the COOK indicator
will blink, the display will count down the remaining
cooking time in minutes and seconds and will beep 5
times when cooking is completed.
NOTE: If this step is omitted, the oven will cook
at full (100%) power.(PL10)
9
OM for EM-FL10N Draft_2 04-17.qxd 2003/04/17 18:14 Page 9

1. Press the Door Release button to open the door.
Touch the COOK pad.
The display will show “0” and a tone will sound. The
COOK indicator will light.
2. Touch the Number pads for the desired cooking
time for Stage 1.
EXAMPLE: To set the Stage 1 cooking time to
“11:40” (11 min. 40 sec.), touch “1”, “1”, “4” and “0” in
sequence. The display will show the numbers
pressed in the order you pressed them.
3. Touch the POWER LEVEL pad and then the
Number pad for the power.
EXAMPLE: To select 30% power, touch the POWER
LEVEL pad and then “3”. The display will show “PL
3”.
4. Touch the COOK pad.
The display will show “0” and a tone will sound.
5. Touch the Number pads for the desired cooking
time for Stage 2.
EXAMPLE: To set the Stage 2 cooking time to
“11:20” (11 min. 20 sec.), touch “1”, “1”, “2” and “0” in
sequence. The display will show the numbers
pressed in the order you pressed them.
6. Touch the POWER LEVEL pad and then the
Number pad for the power.
COOKING IN TWO AND THREE STAGES
For best results, some recipes call for one
power level for a certain length of time and
another power level for a different length of
time. Your microwave oven can be set to
change from one power level to another, or you
may Auto Weight Defrost in the first stage and
then cook in the second and/or third stages.
EXAMPLE: To select 80% power, touch the POWER
LEVEL pad and then “8”. The display will show
“PL8”.
7. Close the door and then touch the START pad.
The oven will begin cooking in Stage 1, then
switch to Stage 2.
When the START pad is touched, the COOK indicator
will start blinking to show the oven is cooking Stage 1.
The display will count down the remaining cooking time
in Stage 1,then the oven will beep and start Stage 2.
NOTE: If this step is omitted, the oven will cook
at full (100%) power. (PL10)
NOTE: If this step is omitted, the oven will cook
at full (100%) power. (PL10)
AUTO WEIGHT DEFROSTING AND COOK-
ING IN TWO STAGES (COOKING IN THREE
STAGES)
Some recipes require frozen foods to be thawed
before cooking.
This oven can be programmed to automatically
defrost foods before cooking.
OPERATING INSTRUCTIONS
1. Program the oven to perform the desired Auto
Weight Defrost function as described on page 9.
This is considered first stage when using the Auto
Weight Defrost feature in conjunction with Stage 1
and Stage 2 cooking.
2. Press the COOK pad and program the oven to
cook in the remaining two stages as described
starting on page 10.
NOTE: To Auto Weight Defrost and Cook in one
stage only, skip the programming of the first stage.
Press Power Level Wattage Output
none 10 800W
9 9 720W
8 8 640W
7 7 560W
6 6 480W
5 5 400W
4 4 320W
3 3 240W
2 2 160W
1 1 80W
WATTAGE OUTPUT CHART
10
OM for EM-FL10N Draft_2 04-17.qxd 2003/04/17 18:14 Page 10

TO STOP THE OVEN WHILE IT IS OPERAT-
ING
Open the door.
• You can restart the oven by closing the
door and touching the START pad.
OPERATING INSTRUCTIONS
CHILD LOCK
The Child Lock prevents unwanted oven opera-
tion by small children. The oven can be set so
that the control panel is deactivated or locked.
TO SET CHILD LOCK
1. Touch the “0” pad once.
2. Touch the START pad 5 times.
The display will show “LO C”.
TO CANCEL THE CHILD LOCK
1. Touch the “0” pad once.
2. Touch the START pad 5 times.
The display will return to the present time.
NOTE: No beep sound will be heard when setting
or cancelling the Child Lock.
11
Explanation of the heating category label for microwave ovens and small packs of food (up to 500g / 1lb
2oz, typical of ready meals for 1 or 2 people) as agreed by MAFF (the Ministry of Agriculture, Fisheries and
Food) in conjunction with food and microwave oven manufacturers.
The microwave power output
of the oven in watts,based on
an international agreed standard
(lEC 705).
This letter represents the heating
category of the oven to be used
when microwaving small food
packs.
MICROWAVE
SYMBOL
E
800
W
oven heating catergory
minutes minutes
power output
BD
65
650
W
750
W
65
Always follow instructions found on food
packaging. The higher the power output
and heating category of the oven, the less
heating time is required.
Always ensure that food is piping hot before
serving.
MAFF RATING
OM for EM-FL10N Draft_2 04-17.qxd 2003/04/17 18:14 Page 11

PREPACKAGED POPCORN
Place the popcorn package (100 g) onto a
microwaveable dish in the oven.
1. Open the door and then touch the POPCORN
pad.
When the POPCORN pad is touched, the display will
show “PO P”.
2. Close the door and then touch the START pad.
When the START pad is touched, the display will count
down the cooking time of 2:20 and will beep 5 times
when cooking is completed.
PROGRAMMED RECIPES
POTATOES
Place 1 – 3 medium size potatoes in the oven.
NOTE:
1. Use only 1 package (approx. 100 g) at a time.
2. Use only a microwaveable popcorn package in
the microwave oven.
3. Do not try to pop unpopped kernels.
4. Do not leave the oven unattended while pop-
ping popcorn. If the popcorn does not pop suffi-
ciently, do not press the POPCORN pad again
as the popcorn may burn. Check the popcorn
bag for cooking instructions.
5. When opening the package, face it away from
you to avoid contact with any steam released.
1. Press the Door Release button to open the door.
Touch the POTATO pad once for each potato.
When the POTATO pad is touched, the display will
show “PO 1”
2. Close the door and then touch the START pad.
When the START pad is touched, the display will count
down the remaining cooking time in minutes and sec-
onds and will beep 5 times when cooking is completed.
PIZZA
Use the Pizza feature to reheat refrigerated pizza
(1 – 3 slices).
1 Potato 2 Potatoes 3 Potatoes
“PO 1” “PO 2” “PO 3”
3.45 5.20 7.25
1. Press the Door Release button to open the door.
Touch the PIZZA pad once for each slice.
When the PIZZA pad is touched, the display will show
“P 1”.
2. Close the door and the touch the START pad.
When the START pad is touched, the display will count
down the remaining cooking time in minutes and sec-
onds and will beep 5 times when cooking is completed.
1 Slice 2 Slices 3 Slices
“P 1” “P 2” “P 3”
0.30 1.00 1.50
1. Open the door and then touch the BEVERAGE
pad repeatedly until the desired number of cups
appear in the display window.
EXAMPLE: To select 2 mugs, touch the BEVERAGE
pad 2 times; “CU P2” will appear in the display.
2. Close the door and then touch the START pad;
the beverage will be heated.
When the START pad is touched, the oven will start
heating. The display will count down remaining heating
time and will beep 5 times when cooking is completed.
BEVERAGES
Use the Beverage feature to heat up to 3 cups
(250cc per cup) of beverage. Place each cup in
the oven.
NOTE: Up to 3 mugs of beverage can be heated.
Heating time is as follows:
1 CUP CU P1 ( 1 Min., 55 Sec.)
2 CUPS CU P2 ( 3 Min., 30 Sec.)
3 CUPS CU P3 ( 5 Min., 05 Sec.)
12
OM for EM-FL10N Draft_2 04-17.qxd 2003/04/17 18:14 Page 12

1. Program the desired power level and cooking
time as previously instructed.
EXAMPLE: Select a cooking time of “25:10”.
2. Touch the HOLD WARM pad for every 10 min-
utes of Hold Warm time desired (up to 30 min-
utes).
EXAMPLE: To select 20 minutes, touch the
HOLD WARM pad 2 times.
3. Close the door and then touch the START pad;
the oven will begin cooking as programmed in
step 1.
EXAMPLE: To HOLD WARM indicator will light, the
oven will begin cooking and the display will count down
the remaining cooking time.
When cooking is completed, the HOLD WARM indicator
will start blinking. The display will count down the
remaining Hold Warm time. When the Hold Warm time
ends, you will hear 5 beeps.
When the cooking is completed, the oven will
begin the Hold Warm mode as programmed in
step 2.
HOLD WARM
The Hold Warm feature can be used to keep
food warm after microwave or conventional
cooking is completed.
PROGRAMMED RECIPIES
NOTES:
* The Hold Warm feature operates independently
or together with Stage 1 cooking.
* To keep food warm after conventional cooking,
omit step 1.
DINNER PLATE
Use the Dinner Plate feature to reheat pre-
cooked foods from the refrigerator.
1. Press the Door Release button to open the door.
Touch the DINNER PLATE pad once for regular
amount, twice for smaller amount and three
times for a larger amount of food.
EXAMPLE: For regular amount of food, touch the DIN-
NER PLATE pad once. “rE G” will be displayed.
2. Close the door and then touch the START pad.
The oven will start cooking and the display will count
down the cooking time. When cooking is completed, the
oven will beep 5 times.
REGULAR:
A regular amount of food: Approx. 250g (for
example, 4oz sliced meat or poultry, 3 oz
potato or rice and 2 oz vegetables or equiva-
lent.)
SMALL:
A smaller amount of food: Approx. 170g.
BIG:
A larger amount of food: Approx. 350g.
Regular Small Larger
“rE G” “SA L” “bI G”
2.00 1.25 2.35
13
OM for EM-FL10N Draft_2 04-17.qxd 2003/04/17 18:14 Page 13

CARE AND CLEANING
PROBLEMS
Oven will not start
Arcing or sparking
Unevenly cooked foods
Overcooked foods
Undercooked foods
Improper defrosting
You can often correct operating problems yourself.
If your microwave oven fails to work properly,
Iocate the operating problem in the chart below
and try the solutions marked for each problem.
If the microwave oven still does not work
properly,contact the nearest SANYO SERVICE
CENTRE.
It is important that no liquid food or grease
particles are left in the oven aas this ensures
the correct performance of your oven and
reduces the risk of corrosion. After use always
wipe out your oven thoroughly and dry.
INTERIOR OF THE OVEN
It is essential to keep your oven clean at all times.
The oven cavity should be cleaned and wiped dry
after each use. Please ensure that the oven is cool
before cleaning. Wipe out with a mild detergent
solution, paying particular attention to the
microwave outlet cover (see illustration opposite)
and the door seal area. Take particular care not to
allow water to seep through the small holes in the
oven walls. Wipe dry with a soft cloth.
Never use abrasive cleaning materials as these
can damage the oven cavity.
EXTERIOR OF OVEN
Wipe with a damp cloth. Do not allow water to seep
into vents. Never use abrasive cleaning materials
as these can damage your oven.
Do not use any type of oven cleaner on your
microwave oven as this can cause severe
damage.
REMOVABLE PARTS
The glass turntable and roller rest, metal drip tray
and grill racks can be removed for easy cleaning.
Wash in warm soapy water and dry. It is important
to clean the metal drip tray after use to prevent
deterioration of the non-stick surface.
Microwave Outlet
Cover
POSSIBLE CAUSES
Is power cord plugged in ? Turn or stir food.
Is door closed ? Do not operate when empty.
Cooking time not set. Use correct time / cooking power level.
Use microwave-safe cookware only. Check to see that ventilation ports are
not restricted.
Completely defrost food.
BEFORE CALLING SERVICE
XXXX
X
X
XX
XX
XXX
XX
X
14
OM for EM-FL10N Draft_2 04-17.qxd 2003/04/17 18:14 Page 14

ELECTRICAL APPLIANCE GUARANTEE (WARRANTY)
Note: Nothing in this express warranty affects the
statutory right available to the consumer.
Sanyo (the Company) WARRANTS to the user that
if this Microwave Oven (the Product) is or becomes
defective and the defect results from faulty materials
and or workmanship and not in any way from
accident, misuse or mishandling by the user, the
Company shall, at its sole option, repair or replace
such defective Product or part there of free of
charge on the following basis:—
1. In the case of components parts and of
workmanship- for a period of 12 months from the
date of purchase by the user: and
2. Provided that the glass tray and light bulbs shall
be excluded absolutely from this warranty.
The dealers / retailers dated bill of sale or delivery
ticket shall be evidence of the date of purchase.
This Warranty is valid in the United Kingdom only
and is not transferable.
The Warranty shall be null and void if the Product is
tampered with, misused or abused, or if the serial
number is defaced or removed.
IMPORTANT NOTICE:
This model in the Sanyo range of Microwave Ovens
is recommended for DOMESTIC USE ONLY. Its use
in a commercial capacity will render this guarantee
inoperative.
To obtain service under guarantee, you are advised
to contact either the dealer from whom the product
was purchased. Should this not be possible, please
contact Service Administration at:
SANYO EUROPE LIMITED
Otterspool Way,
Watford,
Herts, WD2 8JX
Telephone: Watford (01923) 246363
SANYO IRELAND LIMITED
41 Western Parkway Business Centre,
Ballymount Road,
Dublin 12,Ireland.
Service Tel No :Dublin 4503400 / 4568910
15
IMPERIAL TO METRIC CONVERSION TABLE
Mass (Weight) Metric Imperial
15 grams 1/2 oz
25 g 1 oz
50 g 2 oz
100 g 4 oz
200 g 8 oz
300 g 12 oz
450 g 1 lb
1 kilo 2 lb
OM for EM-FL10N Draft_2 04-17.qxd 2003/04/17 18:14 Page 15

CODE No: MO-P____ SANYO Electric Co. Ltd.
Printed in Thailand
EASY USE CHART
SETTING THE CLOCK
1. Open the door.
2. Touch “Number pads” to set
hour and minutes.
3. Touch "Clock" pad.
MICROWAVE COOKING
1. Open the door.
2. Touch Number pads to set
cooking time.
3. Touch "Power Level" pad to
set power level.
4. Close the door and touch
"Start".
AUTO WEIGHT DEFROST
1. Open the door.
2. Enter the desired “Auto Weight
Defrost” category.
3. Enter the food weight.
4. Close the door and touch
"Start".
PIZZA
1. Open the door.
2. Touch "Pizza" once for each
slice.
3. Close the door and touch
"Start".
BEVERAGES
1. Open the door.
2. Touch "Beverage" once for
each cup.
3. Close the door and touch
"Start".
POTATOES
1. Open the door.
2. Touch "Potato" once for each
potato.
3. Close the door and touch
"Start".
PREPACKAGED POPCORN
1. Open the door.
2. Touch "Popcorn" once.
3. Close the door and touch
"Start".
16
EM-FL10NEUK
OM for EM-FL10N Draft_2 04-17.qxd 2003/04/17 18:14 Page 16
This manual suits for next models
1
Table of contents
Other Sanyo Microwave Oven manuals

Sanyo
Sanyo EM-S2298V User manual

Sanyo
Sanyo EMN-109 User manual

Sanyo
Sanyo SM-GA0005 User manual

Sanyo
Sanyo EM-S7720V User manual

Sanyo
Sanyo EM-CD2900UK User manual

Sanyo
Sanyo EM-C1900 User manual

Sanyo
Sanyo EM-D953 User manual

Sanyo
Sanyo EM810FS User manual

Sanyo
Sanyo EM-S5002W Use and care manual

Sanyo
Sanyo EM-F1010MW User manual

Sanyo
Sanyo EM-D7750ECO User manual

Sanyo
Sanyo EM-G5595S User manual

Sanyo
Sanyo EM-C1900 User manual

Sanyo
Sanyo EM-S2585V Use and care manual

Sanyo
Sanyo EM-607T Use and care manual

Sanyo
Sanyo EM-SL40S User manual

Sanyo
Sanyo EMC 2001 User manual

Sanyo
Sanyo EM-C2001UK User manual

Sanyo
Sanyo EM-S8597V User manual

Sanyo
Sanyo EM-S105AW User manual