saro SC 70 User manual

BETRIEBSANLEITUNG
UMLUFTKÜHLVITRINE SC 70 / SC 100
OPERATION INSTRUCTIONS
REFRIGERATED SHOWCASE SC 70 / SC 100
Art.-Nr.: SC 70: 330-10001 (white) 330-10051 (black) 330-10031 (red) / 330-10041 (green)
SC 80: 330-1007 (white) / 330-1009 (black)
SC 100: 330-1012 (white) 330-1013 (black)
Order No.: SC 70: 330-10001 (white) 330-10051 (black) 330-10031 (red) / 330-10041 (green)
SC 80: 330-1007 (white) / 330-1009 (black)
SC 100: 330-1012 (white) 330-1013 (black)
Deutsch - Original
English Translation of
the original
SC 70 green
(300-10041) SC 70 red
(330-10031)
SC 100 black
(330-1013)
SC 80 white
(330-1007)
SC 100 white
(330-1012)

2Stand 03/18 IH TM / 01/19 TM
INHALT / CONTENT
Einleitung / Intodruction . . . . . . . . . . . . . . . . . . . . . . . . . . . . . . . . . . . . . . . . . . . . . . . . . . . . . . . . . . . . . . . . . . . . . . . . . . . . . . . . . . . . . . . . . . . . . . . . . . .3
Lieferumfang / Scope of delivery . . . . . . . . . . . . . . . . . . . . . . . . . . . . . . . . . . . . . . . . . . . . . . . . . . . . . . . . . . . . . . . . . . . . . . . . . . . . . . . . . . . . . . . . . . .3
Normen und Richtlinien / Standarts and directives . . . . . . . . . . . . . . . . . . . . . . . . . . . . . . . . . . . . . . . . . . . . . . . . . . . . . . . . . . . . . . . . . . . . . . . . . .3
Symbolerklärung / Explanation of symbols. . . . . . . . . . . . . . . . . . . . . . . . . . . . . . . . . . . . . . . . . . . . . . . . . . . . . . . . . . . . . . . . . . . . . . . . . . . . . . . . . .3
Technische Übersicht / Technical overview. . . . . . . . . . . . . . . . . . . . . . . . . . . . . . . . . . . . . . . . . . . . . . . . . . . . . . . . . . . . . . . . . . . . . . . . . . . . . . . . . .4
Allgemeine Hinweise / General information. . . . . . . . . . . . . . . . . . . . . . . . . . . . . . . . . . . . . . . . . . . . . . . . . . . . . . . . . . . . . . . . . . . . . . . . . . . . . . . . .5
Sicherheitshinweise / Safety notes . . . . . . . . . . . . . . . . . . . . . . . . . . . . . . . . . . . . . . . . . . . . . . . . . . . . . . . . . . . . . . . . . . . . . . . . . . . . . . . . . . . . . . . . .6
Erste Inbetriebnahme / First commissioning . . . . . . . . . . . . . . . . . . . . . . . . . . . . . . . . . . . . . . . . . . . . . . . . . . . . . . . . . . . . . . . . . . . . . . . . . . . . . . . .8
Temperaturregulierung / Temperature adjustment . . . . . . . . . . . . . . . . . . . . . . . . . . . . . . . . . . . . . . . . . . . . . . . . . . . . . . . . . . . . . . . . . . . . . . . . . .9
Bedienung / Operation. . . . . . . . . . . . . . . . . . . . . . . . . . . . . . . . . . . . . . . . . . . . . . . . . . . . . . . . . . . . . . . . . . . . . . . . . . . . . . . . . . . . . . . . . . . . . . . . . . . . .9
Elektrischer Schaltplan / Circuit diagram . . . . . . . . . . . . . . . . . . . . . . . . . . . . . . . . . . . . . . . . . . . . . . . . . . . . . . . . . . . . . . . . . . . . . . . . . . . . . . . . . . 10
Fehlersuche und Behebung / Troubleshooting and settlements . . . . . . . . . . . . . . . . . . . . . . . . . . . . . . . . . . . . . . . . . . . . . . . . . . . . . . . . . . . 11
Bedienung / Service. . . . . . . . . . . . . . . . . . . . . . . . . . . . . . . . . . . . . . . . . . . . . . . . . . . . . . . . . . . . . . . . . . . . . . . . . . . . . . . . . . . . . . . . . . . . . . . . . . . . . . 12
Reinigung und Wartung / Cleaning and maintenance . . . . . . . . . . . . . . . . . . . . . . . . . . . . . . . . . . . . . . . . . . . . . . . . . . . . . . . . . . . . . . . . . . . . . 13
Reinigung von Edelstahlartikel / Cleaning of stainless steel articles . . . . . . . . . . . . . . . . . . . . . . . . . . . . . . . . . . . . . . . . . . . . . . . . . . . . . . . . 14
Reinigung des Kondensators / Cleaning the condenser. . . . . . . . . . . . . . . . . . . . . . . . . . . . . . . . . . . . . . . . . . . . . . . . . . . . . . . . . . . . . . . . . . . . 15
Explosionszeichnung SC 70 / Exploded drawing SC 70 . . . . . . . . . . . . . . . . . . . . . . . . . . . . . . . . . . . . . . . . . . . . . . . . . . . . . . . . . . . . . . . . . . . . 16
Teile Name SC 70 / Part name SC 70 . . . . . . . . . . . . . . . . . . . . . . . . . . . . . . . . . . . . . . . . . . . . . . . . . . . . . . . . . . . . . . . . . . . . . . . . . . . . . . . . . . . . . . 17
Explosionszeichnung SC 80 / Exploded drawing SC 80 . . . . . . . . . . . . . . . . . . . . . . . . . . . . . . . . . . . . . . . . . . . . . . . . . . . . . . . . . . . . . . . . . . . . 18
Teile Name SC 80 / Part name SC 80. . . . . . . . . . . . . . . . . . . . . . . . . . . . . . . . . . . . . . . . . . . . . . . . . . . . . . . . . . . . . . . . . . . . . . . . . . . . . . . . . . . . . . . 19
Explosionszeichnung SC 100 / Exploded drawing SC 100 . . . . . . . . . . . . . . . . . . . . . . . . . . . . . . . . . . . . . . . . . . . . . . . . . . . . . . . . . . . . . . . . . . 20
Teile Name SC 100 / Part name SC 100 . . . . . . . . . . . . . . . . . . . . . . . . . . . . . . . . . . . . . . . . . . . . . . . . . . . . . . . . . . . . . . . . . . . . . . . . . . . . . . . . . . . . 21
Verpackungs-Entsorgung / Packaging disposal . . . . . . . . . . . . . . . . . . . . . . . . . . . . . . . . . . . . . . . . . . . . . . . . . . . . . . . . . . . . . . . . . . . . . . . . . . . 22
Geräte-Entsorgung / Device disposal . . . . . . . . . . . . . . . . . . . . . . . . . . . . . . . . . . . . . . . . . . . . . . . . . . . . . . . . . . . . . . . . . . . . . . . . . . . . . . . . . . . . . 22

3
Stand 03/18 IH TM / 01/19 TM
EINLEITUNG
Bevor Sie dieses Gerät in Betrieb nehmen, lesen Sie diese
Bedienungsanleitung sorgfältig und aufmerksam und
beachten Sie die darin gegebenen Hinweise.
In dieser Bedienungsanleitung erhalten Sie Informationen
zum Aufbau, zur Einrichtung, zum Betrieb, zur Wartung, zur
Reinigung und zur etwaigen Entsorgung dieses Gerätes.
Diese Bedienungsanleitung ist Bestandteil des Gerätes
und sollte, für alle Personen, die mit der Installation, dem
Betrieb, der Reinigung oder der Wartung dieses Gerätes zu
tun haben, jederzeit zugänglich, in der Nähe des Gerätes,
aufbewahrt werden.
Bei der Weitergabe des Gerätes an Dritte, muss diese
Bedienungsanleitung mitgegeben werden.
Bei Nichtbeachtung dieser Bedienungsanleitung ist die
Sicherheit des Gerätes nicht mehr gewährleistet.
Der Hersteller/Händler kann nicht verantwortlich gemacht
werden für Schäden, die durch die Nichtbeachtung dieser
Bedienungsanleitung entstehen.
Dieses Gerät wird für den gewerblichen Gebrauch in
Hotels, Restaurants, Bars, Gaststätten etc. genutzt und ist
ausschließlich dazu gedacht Lebensmittel zu kühlen.
Bitte nur zum Gebrauch in Gebäuden.
INTRODUCTION
Before commissioning this device, read these operating
instructions carefully and carefully and observe the
information given therein.
This manual contains information on the structure,
installation, operation, maintenance, cleaning and possible
disposal of this unit.
This instruction manual is an integral part of the unit
and should be kept in the vicinity of the unit at all times,
accessible to all persons involved in the installation,
operation, cleaning or maintenance of this unit.
If the device is passed on to third parties, these operating
instructions must be included.
If these operating instructions are not observed, the safety of
the device is no longer guaranteed.
The manufacturer/dealer cannot be held responsible for
damage caused by non-observance of these instructions.
operating instructions.
This device is used for commercial use in hotels, restaurants,
bars, restaurants, etc. and is intended exclusively for cooling
food.
For indoor use only.
LIEFERUMFANG
• 1 Umluftkühlvitrine
• 3 (SC 70, SC 80) bzw. 4 (SC 100) höhenverstellbare Roste
• 1 Betriebsanleitung
SCOPE OF DELIVERY
• 1 forced-air showcase
• 3 (SC 70, SC 80) or 4 (SC 100) adjustable grids
• 1 instruction manual
NORMEN UND RICHTLINIEN
Das Gerät entspricht den aktuellen Normen und Richtlinien
der EU.
Bei Bedarf lassen wir Ihnen die entsprechende
Konformitätserklärung zukommen.
STANDARDS AND DIRECTIVES
The device complies with current EU standards and
directives.
If necessary, we will send you the corresponding declaration
of conformity.
WARNUNG!
Dieses Symbol kennzeichnet Gefahren, die zu Verletzungen führen können.
Halten Sie die angegebenen Hinweise zur Arbeitssicherheit unbedingt genau ein und verhalten Sie sich in diesen Fällen besonders vor-
sichtig.
WARNING!
This symbol indicates dangers that may cause injury.
It is imperative that you strictly adhere to the information on occupational safety and be particularly careful in these cases.
WARNUNG: GEFAHR DURCH ELEKTRISCHEN STROM!
Dieses Symbol macht auf gefährliche Situationen durch elektrischen Strom aufmerksam. Bei Nichtbeachten der Sicherheitshinweise
besteht Verletzungs- oder Lebensgefahr!
WARNING: DANGER FROM ELECTRICAL CURRENT!
This symbol draws attention to dangerous situations caused by electrical current. Failure to observe the safety instructions may result in
injury or death!
WARNUNG: FEUERGEFÄHRLICHE STOFFE - VERBRENNUNGSGEFAHR!
Dieses Symbol weist darauf hin, dass Gefahren aufgrund von feuergefährlichen Stoen für Leben und Gesundheit von Personen bestehen.
Verbrennungsgefahr bei Nichtbeachtung!
WARNING: FIRE HAZARDOUS MATERIALS - DANGER OF BURNING!
This symbol indicates that there are dangers for life and health of persons due to ammable substances. Risk of burns if ignored!!
SYMBOLERKLÄRUNG / EXPLANATION OF SYMBOLS

4Stand 03/18 IH TM / 01/19 TM
TECHNISCHE ÜBERSICHT / TECHNICAL OVERVIEW
Technische Änderungen vorbehalten
Subject to technical modications.
SC 70 white (330-10001) SC 100 white (330-1012)SC 80 white (330-1007)
MODELL / MODEL SC 70
white / black / red / green)
SC 80
white / black)
SC 100
white / black)
Bestell Nr.
Order No.
330-10001 (white)
330-10051 (black)
330-10031 (red)
330-10041 (green)
330-1007 (white)
330-1009 (black)
330-1012 (white)
330-1013 (black)
Material: (Gehäuse)
Material: (housing)
Kunststo
plastic
Kunststo
plastic
Kunststo
plastic
Maße: (Innen)
dimensions: (intern) B 367 x T 305 x H 560 mm B 367 x T 305 x H 635 mm B 367 x T 305 x H 785 mm
Maße: (Außen)
dimensions: (extern) B 430 x T 380 x H 880 mm B 430 x T 380 x H 960 mm B 430 x T 380 x H 1110 mm
Maße Gitterrost:
dimensions grate: B 365 x T 307 mm B 365 x T 307 mm B 365 x T 307 mm
Anschluss(V,PH,Hz,kW):
connection (V,PH,Hz,kW): 230 / 1 / 50 / 0,18 230 / 1 / 50 / 0,18 230 / 1 / 50 / 0,18
Temperatur (C°):
Temperatur (C°): 0 / +12 0 / +12 0 / +12
Gewicht (kg) (netto):
weight (kg) (net): 32,5 33,8 38
Inhalt (Ltr.):
Content (ltr.): 68 78 98
Kältemittel:
Refrigerant: R600a (40g) R600a (40g) R600a (40g)
Abtauung:
Defrosting:
automatisch
automatic
automatisch
automatic
automatisch
automatic
Umluftkühlung
forced-air cooling
ja
yes
ja
yes
ja
yes
Digitale Temperaturkontrolle /
-anzeige
digital temperature control /
display
ja
yes
ja
yes
ja
yes
Innenbeleuchtung
internal light
ja
yes
ja
yes
ja
yes
4 seitig dopelverglast
4 sided double glazing
ja
yes
ja
yes
ja
yes
Höhenverstellbare Roste
(Kunststobeschichtet)
adjustable grids
(plastic coated)
3 Stk. / 3 pcs. 3 Stk. / 3 pcs. 4 Stk. / 4 pcs.
EAN-Code
4017337 038794 (white)
4017337 038824 (black)
4017337 038817 (green)
4017337 038800 (red)
4017337 047956 (white)
4017337 047963 (black)
4017337 330393 (white)
4017337 330409 (black)

5
Stand 03/18 IH TM / 01/19 TM
ALLGEMEINE HINWEISE
• Lesen Sie die Bedienungsanweisung sorgfältig durch,
weil sie wichtige Informationen enthält.
• Es ist ratsam, die Bedienungsanleitung dort
aufzubewahren, wo man sie immer schnell zur Hand hat.
Sollten Sie das Gerät an Dritte weitergeben, muss diese
Bedienungsanleitung mit ausgehändigt werden.
• Keine Bedienung (Vornahme von Display-Einstellungen)
durch Kinder oder Personen mit eingeschränkten
körperlichen, sensorischen bzw. geistigen Fähigkeiten,
da diese die Gefahren bei Benutzung von Elektrogeräten
und/oder Kühlgeräten nicht erkennen können und es so
zu Unfällen, Brand, Explosion oder Sachbeschädigung
kommen kann.
• Das Gerät ist kein Spielzeug!
• Sobald Sie das Gerät ausgepackt haben, prüfen Sie auf
Vollständigkeit und ob alles in einwandfreiem Zustand
ist.Sollte etwas beschädigt sein, so schließen Sie das
Gerät nicht an, sondern benachrichtigen Sie Ihren
Händler.
• Bewahren Sie die Verpackung des Gerätes auf. Nur in der
Originalverpackung kann das Gerät sicher transportiert
werden, z. B. zu Reparaturzwecken, bei einem Umzug
etc. Falls eine Aufbewahrung nicht möglich ist, trennen
Sie die verschiedenen Verpackungsmaterialien und
liefern Sie diese bei der nächstgelegenen Sammelstelle
zur sachgemäßen Entsorgung ab. Beachten Sie, dass
alle Bestandteile der Verpackung (Plastikbeutel, Karton,
Styroporteile, usw.) Kinder gefährden können und
deshalb nicht in deren Nähe gelagert werden dürfen.
• Die Vitrine wurde hergestellt, um Lebensmittel wie
Kuchen, Getränke und ähnliches kühlend zu lagern
und sichtbar auszustellen bzw. verkaufsfördernd zu
präsentieren.
• Die Vitrine ist geeignet für den Einsatz in Restaurants,
Kantinen, Kiosk, Cafès. Missbräuchlicher Einsatz kann
Schäden verursachen und führt zum Verlust der
Garantie.
• Die Vitrine ist doppelverglast, mit Zugri durch eine Tür.
• Benutzen Sie das Gerät nicht im Freien bei Regen und
auch nicht in feuchten Räumen!
• Bevor Sie das Gerät anschließen, vergewissern Sie sich,
ob eine Schukosteckdose (mit Erdung) und ein 230 Volt-
Anschluss vorliegen und dass dies mit den Angaben auf
dem Typenschild übereinstimmt. Andere Stromarten
können zur Überhitzung des Gerätes führen.
• Beachten Sie die für den Einsatzbereich geltenden
Unfallverhütungsvorschriften und die allgemeinen
Sicherheitsbestimmungen.
• Vor der ersten Inbetriebnahme reinigen Sie das Gerät
sorgfältig.
• Bevor Sie das Gerät reinigen, müssen Sie erst den
Stecker ziehen. Nun ist das Gerät aus (kein separater
Ein-/Ausschalter!).
• Der Hersteller/Händler kann nicht verantwortlich
gemacht werden für Schäden, die durch
Nichtbeachtung dieser Bedienungsanleitung entstehen.
Außerdem ist dann die Sicherheit des Gerätes nicht
mehr gewährleistet.
• Im Falle einer Störung und/oder Fehlfunktion ziehen
Sie den Stecker aus der Steckdose und Benachrichtigen
Sie Ihren Händler. Er wird die Reparatur mit
Originalersatzteilen ausführen.
GENERAL INFORMATION
• Read the operating instructions carefully because they
contain important information.
• It is advisable to keep the operating instructions where
they are always readily available. If you pass the device
on to third parties, these operating instructions must
also be handed over.
• Do not allow children or persons with limited physical,
sensory or mental abilities to operate (adjustment
of display settings) since they cannot recognize
the dangers when using electrical appliances and/
or refrigerators and can thus cause accidents, re,
explosion or damage to property.
• The device is not a toy!
• Once you have unpacked the unit, check that it is
complete and in perfect condition; if anything is
damaged, do not connect the unit but contact your
dealer.
• Keep the unit‘s packaging. The device can only be
transported safely in its original packaging, e. g. for
repair purposes, when moving house, etc. If storage is
not possible, separate the various packaging materials
and return them to the nearest collection point for
proper disposal. Please note that all components of the
packaging (plastic bags, cardboard, polystyrene parts,
etc.) may endanger children and must therefore not be
stored near them.
• The display case was manufactured to store foodstus
such as cakes, drinks and the like in a refrigerating way
and to display them visibly or to promote sales.
• The showcase is suitable for use in restaurants, canteens,
kiosks and cafés. Misuse may cause damage and void
the warranty.
• The display cabinet is double-glazed with access
through a door.
• Do not use the device outdoors in rain or in wet rooms!
• Before connecting the device, make sure that there is
a grounded socket outlet and a 230 volt connection
and that this corresponds to the information on the
nameplate. Other types of current may cause the unit to
overheat.
• Observe the accident prevention regulations applicable
to the area of application and the general safety
regulations.
• Clean the unit thoroughly before using it for the rst
time.
• Before cleaning the device, you must rst remove the
plug. Now the device is o (no separate on/o switch!).
• The manufacturer/dealer cannot be held responsible for
damage caused by non-observance of these operating
instructions. In addition, the safety of the device is no
longer guaranteed.
• In the event of a malfunction and/or malfunction,
unplug the plug from the socket and notify your dealer.
He will carry out the repair with original spare parts.

6Stand 03/18 IH TM / 01/19 TM
SICHERHEITSHINWEISE
• Falsche Bedienung und unsachgemäße Behandlung
können zu Störungen am Gerät führen und zu
Verletzungen des Benutzers.
• Das Gerät nicht mehr als 45 Grad neigen.
• Vor der Bewegung immer erst den Stecker ziehen!
• Nach der Bewegung (Gerät steht wieder auf seinem
Platz) erst wieder nach 2 Stunden starten - durch
Einstecken des Steckers.
• Nach einem Transport jedoch, vorsichtshalber das Gerät
24 Stunden ruhen lassen, bevor der Stecker eingesteckt
wird.
• Das Gerät an einem trockenen, gut belüfteten Ort
aufstellen.
• Das Gerät keiner direkten Sonneneinstrahlung
aussetzen, da sonst die gewünschte Kühlleistung nicht
erreicht werden kann.
• Ebenso das Gerät nicht in der Nähe von anderen
Wärmequellen (Heizung, Herd, Ofen, oenes Feuer)
aufstellen.
• Das Gerät benötigt ausreichend Platz: je 10 cm zu den
Seiten und 10 cm zur Wand. Sonst kann die Luft nicht
ausreichend zirkulieren und das Gerät würde nicht
richtig kühlen.
• Die Lüftungsschlitze immer freihalten, nicht abdecken
oder zustellen.
• Sorgen Sie für einen sicheren Stand auf einem
trockenen, rutschfesten Untergrund.
• Bewegen Sie das Gerät nicht während der Benutzung.
• Keine leicht entzündlichen oder explosiven Stoe in der
Nähe des Gerätes lagern.
• Keine Arbeiten mit leicht entzündlichen Stoen in der
Nähe des Gerätes ausführen (kein Lackoder Farbspray o.
ähnliches). Es könnte sonst zu einem Feuer oder zu einer
Explosion führen.
• Lagern Sie keine brennbaren und/oder explosiven
Produkte in diesem Gerät wie Ether, Benzin,
hochprozentigen Alkohol, Kleber oder ähnliches.
• Ebenso ist das Gerät nicht für das Lagern von
Medikamenten vorgesehen. Diese gehören in einen
abschließbaren Medizinschrank.
• Keine schweren Gegenstände oder Lasten auf das Gerät
abstellen.
• Vor Anschluss ans Netz prüfen Sie, ob die Stromart
und die Netzspannung mit den Angaben auf dem
Typenschild übereinstimmen.
• Verwenden Sie keine Adapter oder Verlängerungskabel.
• Durch das Betreiben von mehreren Geräten über
eine Steckdose / einen Verteiler kann es schnell zu
Erwärmungen von Kabeln kommen. Es besteht dann
Brandgefahr!
• Lassen Sie das Netzkabel nicht über scharfe
Kanten hängen und halten Sie es fern von heißen
Gegenständen und oenen Flammen.
• Ziehen Sie das Kabel immer nur am Steckergehäuse aus
der Steckdose.
• Achten Sie darauf, dass ein unbeabsichtigtes Ziehen am
Kabel oder ein Stolpern darüber nicht möglich ist.
• Überprüfen Sie regelmäßig das Kabel. Wenn es
beschädigt ist, z. B. durch Quetschen, dann muss es von
einem qualizierten Fachmann ausgewechselt werden.
• Das Gerät, Kabel und Stecker nicht mit nassen oder
feuchten Händen anfassen.
SAFETY NOTES
• The showcase should be connected to a separate
socket. Do not use similar devices which allow numbers
of electrical appliances to be operated together from
electrical outlet.
• The outlet must be easily accessible, so that the plug can
easily be removed in the case of an emergency.
• If you pull the plug from the socket, always pull at the
plug and never at the cable.
• The cable must not come into contact with water or hot
parts.
• Do not touch the cable and the plug with moist or wet
hands.
• Regularly check the cable. If it is damaged, it must be
exchanged by a specialist.
• Do not block the air intake openings and the air
discharge outlets in the showcase. They have to be
cleaned from time to time, because dirt and dust can
block the slots.
• Do not place any heavy objects on top of the showcase.
• Never put dangerous products (inammable and
explosive) nearby the showcase.
• Repairs may only be undertaken by a qualied specialist
using original spare parts.
• Do not attempt to repair the showcase by yourself.
• Do not touch the compressor (burn danger).
• Ensure that children do not play with showcase
respectively the door.
• Before each cleaning session or repair pull the power
plug out of the socket. Do not use a wet rag (only moist),
high pressure cleaner or a jet of water.
• Before connecting to the mains, check that the type
of current and the mains voltage correspond to the
information on the nameplate.
• Do not use adapters or extension cables.
• The operation of several devices via a socket / distributor
can quickly lead to heating of cables. There is then a risk
of re!
• Do not let the power cord hang over sharp edges and
keep it away from hot objects and naked ames.
• Always pull the cable out of the socket only at the plug
housing.
• Make sure that unintentional pulling on the cable or
tripping over it is not possible.
• Check the cable regularly. If it is damaged, e. g. due to
crushing, it must be replaced by a qualied specialist.
• Do not touch the device, cables and plugs with wet or
damp hands.

7
Stand 03/18 IH TM / 01/19 TM
SICHERHEITSHINWEISE
• Vorsicht! Das Gerät steht unter Strom so lange es am
Stromnetz angeschlossen ist.
• Nach einem eventuellen Stromausfall oder kurzem
Steckerziehen, schalten Sie das Gerät kurz aus, warten 5
Minuten ab, stecken den Stecker wieder ein und starten
das Gerät.
• Das Gerät darf nicht in Wasser oder andere Flüssigkeiten
getaucht werden bzw. mit Flüssigkeiten benetzt werden.
• Sollte das Gerät dennoch einmal nass geworden
sein, sofort den Netzstecker ziehen und das Gerät vor
erneutem Gebrauch von einem Fachmann überprüfen
lassen. Es besteht Lebensgefahr durch Stromschlag.
• Ein beschädigtes Gerät darf nicht benutzt werden! In
diesem Falle trennen Sie das Gerät vom Stromnetz und
wenden Sie sich an Ihren Fachhändler!
• Versuchen Sie nie, das Gerät selbst zu önen oder gar zu
reparieren. Es besteht Lebensgefahr!
• Berühren Sie nicht den Kompressor, es könnte zu
Verbrennungen kommen.
• Bohren oder stechen Sie kein Loch in das Gerät, weder
von außen noch im Innenraum.
• Installieren Sie keine anderen Geräte an die Vitrine oder
bringen keine fremden Dinge an die Vitrine an.
• Greifen Sie nicht in den Kühlkreislauf ein! Dafür ist ein
Fachmann zuständig!
• Hängen Sie sich niemals an die Tür des Gerätes und
klettern Sie niemals auf das Gerät. Das Gerät könnte
umkippen und beschädigt werden oder Verletzungen
verursachen.
• Greifen Sie den Türgri, wenn Sie die Türe des Gerätes
schließen. Die Türe an anderen Stellen anzufassen und
zu schließen kann zu eingeklemmten Fingern und Ver-
letzungen führen.
• Drücken Sie niemals kräftig gegen die Glasscheibe der
Tür, da das Glas brechen und Verletzungen verursachen
könnte.
• Werfen Sie keine Gegenstände auf die Einlegeböden.
• Vergewissern Sie sich, dass die Einlegeböden korrekt
und gesichert eingelegt sind. Herunterfallende Böden
könnten Verletzungen verursachen.
• Der Raum für die Installation des Gerätes muss min. 1
Kubikmeter pro 8 Gramm Kältemittel betragen. Die in
diesem Gerät enthaltene Kältemittelmenge ist in Gramm
angegeben; Sie ist auch auf dem Typschild des Gerätes
vermerkt.
• Vor jeder Reinigung ziehen Sie den Stecker aus der
Steckdose, ebenso bei längerer Nichtbenutzung.
• Aus hygienischen Gründen wird mindestens eine
tägliche Reinigung empfohlen, aber auch bei
Notwendigkeit im Laufe eines Tages.
SAFETY NOTES
• Watch out! The device is live as long as it is connected to
the mains.
• After a possible power failure or a short disconnect, switch
o the device briey, wait 5 minutes, reconnect the plug
and start the device.
• The device must not be immersed in water or other liquids
or wetted with liquids.
• Should the device nevertheless become wet, immediately
disconnect the power plug and have the device checked
by a specialist before reusing it. There is danger to life
through electric shock.
• Damaged equipment must not be used! In this case,
disconnect the device from the power supply and contact
your specialist dealer!
• Never attempt to open or repair the device yourself. There
is danger to life!
• Do not touch the compressor, it could cause burns.
• Do not drill or pierce a hole in the device, either from the
outside or inside.
• Do not install any other devices on the display case or
attach any foreign objects to the display case.
• Do not interfere with the cooling circuit! An expert is
responsible for this!
• Never hang yourself on the door of the unit or climb onto
it. The device could tip over and be damaged or cause
injury.
• Grasp the door handle when closing the door of the unit.
Touching and closing the door in other places can lead to
trapped ngers and injuries.
• Never press strongly against the glass pane of the door, as
the glass could break and cause injury.
• Do not throw any objects on the shelves.
• Make sure that the shelves are correctly and securely
inserted. Dropping oors could cause injuries.
• The space for the installation of the unit must be at least
1 cubic meter per 8 grams of refrigerant. The quantity of
refrigerant contained in this unit is indicated in grams; it is
also indicated on the type label of the unit.
• Always disconnect the plug from the power outlet before
cleaning, as well as after prolonged periods of non-use.
• For hygienic reasons at least one daily cleaning is
recommended, but also during the day if necessary.
Nach Lieferung bzw. einem Transport des Gerätes, schließen Sie dieses erst an, nachdem das Gerät für
mindestens 24 Stunden still gestanden hat. Dies ist unbedingt notwendig, damit sich das Kühlmittel im
Kompressor sammeln kann.
After delivery or transport of the device, connect it only after the device has been stationary for at least 24
hours. This is absolutely necessary so that the coolant can collect in the compressor.

8Stand 03/18 IH TM / 01/19 TM
ERSTE INBETRIEBNAHME
• Seien Sie bitte vorsichtig bei Transport und beim Versetzen der
Kühlvitrine
• Um einen möglichen Schaden des Kompressors zu vermeiden,
darf die Kühlvitrine nicht mehr als 45° im Winkel gekppt
werden. Sollte die Vitrine doch einmal im größeren Winkel
gekippt worden sein, stellen Sie die Vitrine aufrecht und
warten Sie 1 Stunde bis zum erneuten Einschalten.
• Verhindern Sie bei Transport Stöße und Rüttelbewegungen.
• Packen Sie die Vitrine sorgfältig aus und stellen Sie diese auf
eine stabile, ebene Fläche.
• Achten Sie gut auf die Glasscheiben und die Türe.
• Wählen Sie eineen Platz, wo keine direkte
Sonneneinstarahlung ist. bzw sonstige Wärmequellen, wie z.B.
Öfen etc.
• Zwischen der Vitrine und einer Wand muss mindestens ein
Freiraum von 10 cm sein.
• Achten Sie darauf, dass die Vitrine nicht mit Wasser in
Berührung kommt. Eine sehr hohe Luftfeuchtigkeit sollte in
dem Raum auch nicht sein.
• Das Gerät darf nur an eine vorschriftsmäßig installierte
Steckdose angeschlossen werden. Schließen Sie kein anderes
Gerät an die gleiche Steckdose an. die Steckdose muss
grundsätzlich zugänglich bleiben, damit das Gerät im Notfall
vom Stromnetz getrennt werden kann.
• Bevor Sie die Vitrine rienigen, ziehen Sie den Stecker aus der
Steckdose. Bitte stets am Steckergehäuse und nicht am Kabel.
• Das Kabel darf nicht über Tischdecken bzw. scharfe Kanten
hängen und mit heißen Teilen oder miut Wasser in Berührung
kommen.
• Überprüfen Sie regelmäßig das Kabel. Wenn es beschädigt ist
z.B. durch Quetschen dann muss es von einem qualizierten
Fachmann augewechselt werden.
• Halten Sie die Luftein- und Luftauslassönungen frei, sonst ist
die richtige Innentemperatur nicht gewährleistet.
• Stellen Sie nicht zuviele Lebensmittel in die Vitrine, damit
genug Platz für die Luftzirkulation bleibt.
FIRST COMMISSIONING
• After removing the packaging material, checking for
completeness of the delivery and checking that there is no
defect in the unit.
• Place the unit on a horizontal, stable, non-slip and dry surface
with sucient space for air circulation. (See also Safety
Instructions).
• After transportation (delivery) please leave the unit to rest for
approx. 24 hours before switching on. Do not tilt above 45
degrees. If the device is moved in any other way, e. g. when
changing places by cleaning, plug in the plug again after
approx. 2 hours and start again.
• Before using the unit for the rst time, clean it:
• The glass surfaces can be washed with mild detergent, warm
water and a soft cloth and can also be cleaned with glass
cleaner. Remove any residues from the cleaning agent and dry.
Wipe the outside of the device with a warm and moist cloth,
then dry it with a soft cloth.
• Never use an aggressive or scratchy cleaning agent or any hard
objects. The device could otherwise be scratched or the glass
panes or glass shelves could be scratched.
• Make sure that the cable and plug do not get wet during
cleaning.
• Place the glass shelves as required. To do this, use the plastic
holders supplied, which are hooked into the holes provided in
the side supports of the device.
• After cleaning, ventilate the unit for some time with the door
open.
• If the standstill time is over (after delivery approx. 24 hours),
plug in the connector, start the device.
• Make sure the door is properly locked.
• Once the desired temperature has been reached, the device
can be equipped with the goods.
• Your device is now ready for use.
Die 3 Seiten und die Vitrinentüre bestehen aus einer
Doppelverglasung.
Sie bieten eine Rundumsicht auf die ausgestellten Produkte.
Der Umluftverdampfer sorgt für eine gleichmäßige Temperatur
in der Vitrine.
Die Außenächen sind beschichtet mit einem hitze-
reektierenden Film und schützen dadurch gegen warme
Außentemperaturen.
Die Vitrine taut automatisch ab.
The 3 sides and the showcase door consist of double
glazing.
They oer an all-round view of the products on display.
The circulating air evaporator ensures an even temperature
in the display case.
The outer surfaces are coated with a heat-reecting lm and
thus protect against warm outside temperatures.
The display case defrosts automatically.

9
Stand 03/18 IH TM / 01/19 TM
TEMPERATURREGULIERUNG
BEDIENUNG
TEMPERATURE ADJUSTMENT
OPERATION
• Önen Sie die untere Frontplatte der Vitrine.
• Der Thermostat wurde im Werk auf eine mittlere
Kältetemperatur eingestellt.
• Drehen Sie den Knopf im Uhrzeigersinn, um eine kältere
Temperatur einzustellen bzw. umgekehrt. Im allgemeinen
besteht aber kein Grund, die vom Werk eingestellte Temperatur
zu verändern.
• Beachten Sie, dass die Kühlvitrine eine Auftau-Zeitschaltuhr hat,
die einige Male am Tag einsetzt, um Eisbildung im Verdampfer
zu verhindern.
• Open the lower front panel of the display case.
• The thermostat has been set at the factory to an average
cooling temperature.
• Turn the knob clockwise to set a colder temperature or vice
versa. In general, however, there is no reason to change the
temperature set at the factory.
• Note that the refrigerated display case has a defrost time switch,
which is used several times a day to prevent ice formation in the
evaporator.
Allgemeines
• Reinigen Sie die Vitrine und die Roste mit einem feuchten Tuch
und einem milden Reinigungsmittel.
• Setzen Sie die Roste ein.
• Stecken Sie den Stecker in die Steckdose.
• Das Innenlicht schalten Sie ein, indem Sie den Lichtschalter
betätigen, der sich oben im Innenraum bendet.
Preparation for use
• Clean the showcase and the grids with a moist rag and a mild
detergent.
• Put the grids into the showcase.
• Put the plug into the plug socket.
• Switch the interior light on with the switch, which is under the
interior cover.
Türe
• Achten Sie darauf, dass die Türe stets gut verschlossen ist.
Wenn das nicht der Fall ist, bildet sich Eis im Verdampfer und
die Vitrine wird nicht korrekt gekühlt.
• Vermeiden Sie unnötiges Önen der Türe.
Door
• Make sure that the door is always well locked. If this is not the
case, ice forms in the evaporator and the display case is not
cooled correctly.
• Avoid opening the door unnecessarily.
Luftzirkulation
• Stellen Sie nicht zu viele Produkte in die Vitrine, damit
genügend Raum für die Luftzirkulation bleibt. Sorgen Sie dafür,
dass die Lufteinlassönungen und Luftauslassönungen frei
sind.
• Setzen Sie Vitrine auf einen Platz mit ausreichender
Luftzirkulation. (Siehe hierzu unter Punkt 3„Aufstellung“.
air circulation
• Do not place too many products in the display case to leave
enough space for air circulation. Make sure that the air inlet
and outlet openings are free.
• Place the display case in a place with sucient air circulation.
(See„Installation“ under point 3.
Das Auswechseln der inneren Lampe
• Ziehen Sie den Stecker aus der Steckdose.
• Drehen Sie die Kuppel ab.
• Ziehen Sie die Lampe aus dem Steckersockel.
• Drehen Sie die Kuppel wieder auf.
• Stecken Sie den Stecker in die Steckdose.
Replacement of the internal light globe
• Disconnect the plug from the socket.
• Turn o the dome.
• Disconnect the lamp from the plug socket.
• Turn the dome back on.
• Plug the plug into the socket.

10 Stand 03/18 IH TM / 01/19 TM
ELEKTRISCHER SCHALTPLAN CIRCUIT DIAGRAM
Abtaufühler defrost probe Lüftermotor fan motor
Thermostat-Sonde thermostat probe Kompressor compressor
Digitaler
Temperaturregler digital temperatur
controller Überlastschutz over load protector
Anzeigetafel display panel Lampe lamp

11
Stand 03/18 IH TM / 01/19 TM
FEHLERSUCHE UND BEHEBUNG TROUBLESHOOTING AND SETTLEMENTS
Störung / Trouble Behebung / Settlement
Die Vitrine kühlt nicht.
The showcase does not cool.
Prüfen Sie, ob ein Stromausfall die Ursache ist. Ist der
Netzstecker in der Steckdose?
Check whether a power failure is the cause. Is the mains plug in
the socket?
Schlechte Kühlleistung
The showcase does not work well.
Sind die Schlitze für Lufteinlass- bzw. Luftauslass frei?
Wurde die Vitrine nicht aufrecht transportiert und hat
danach nicht lange genug (mind. 1 Stunde) aufrecht
gestanden?
Ist der Temperaturregler richtig eingestellt. Falls er in der
Position„low‘‘ steht, stellen Sie ihn höher.
Steht die Vitrine direkt unter Sonnenbestrahlung oder in der
Nähe von irgendwelchen Wärmequellen (Öfen etc.)?
Ist die Türe gut verschlossen?
Önen Sie die Türe sehr häug?
Sind zuviel Lebensmittel in der Vitrine bzw. zu warm
hineingestellt?
ls the plug in the plug socket?
Are the air intake openings and the discharge openings at the
both inner sides blocked?
Was the showcase upright transported?
lf not, did it stand after transportation upright for enough time
(at least 1 hour)?
ls the temperature regulator not correctly adjusted? lf it is in the
position „low‘‘, put it higher.
ls the showcase in direct sunlight or near to other sources of
warmth?
ls the door closed well?
ls the door too often opened?
May be too hot food or too much was placed in it
Geräuscheentwicklung
Noise
Steht die Vitrine auf einem stabilen achen Boden?
Hat die Rückseite der Vitrine Berührung mit der Wand?
Wenn es sich wie ießendes Wasser anhört, so ist das keine
Störung, sondern das Kältemittel ießt, z. B. beim Starten.
Does the showcase stand on a stable and at surface?
Does the back of the showcase have contact with the wall?
lf the sound is like water ows, it is no trouble, but the sound of
owing refrigerant, for example when starting.
ACHTUNG!
Wenn sich auf den Glasscheiben Tautropfen bilden, so ist das keine Störung. Die Vitrine steht dann in einem Raum
mit hoher Luftfeuchtigkeit (z.B. in der Regenzeit). Wischen Sie die Tropfen mit einem feuchten Tuch ab.
Attention!
If dew drops form on the glass panes, this is no problem. The display case then stands in a room with high humidity
(e.g. in the rainy season). Wipe the drops with a damp cloth.

12 Stand 03/18 IH TM / 01/19 TM
BEDIENUNG
BETRIEB
Die Geräte sind mit einem Ein- / Ausschalter und einem
digitalen Thermostat ausgestattet.
EIN UND AUSSCHALTER DES GERÄTES
Drücken Sie den Wippenschalter, um das Gerät einzuschalten.
Der Schalter leuchtet dann auf und auf dem Display erscheint
die momentane Innentemperatur des Gerätes.
TEMPERATURANZEIGE
Während des Normalbetriebs zeigt das Display die
momentane Temperatur im Kühlraum an.
EINGESTELLTE TEMPERATUR EINSEHEN
1. Einmal kurz SET-Taste betätigen. Die eingestellte
Temperatur wird angezeigt (Sollwert).
2. Nochmals kurz SET-Taste betätigen oder 5 Sek. warten, um
die Raumtemperatur anzuzeigen.
EINGESTELLTE TEMPERATUR ÄNDERN
1. SET-Taste 2 Sekunden gedrückt halten.
2. Anzeige des Sollwerts, LED blinkt.
3. Innerhalb von 10 Sekunden ändern mit Taste
4. Neuen Sollwert speichern: Nochmals kurz die Taste SET
betätigen oder 10 Sekunden warten.
SERVICE
OPERATION
The units are equipped with an on/o switch and an digital
thermostat.
ON AND OFF SWITCH OF THE DEVICE
Press the rocker switch to turn on the unit. The switch then
lights up and the current internal temperature of the device
appears on the display.
TEMPERATURE DISPLAY
During normal operation, the display shows the current
temperature in the refrigeration room.
VIEW SET TEMPERATURE
1. Briey press the SET key once. The set temperature is
displayed (set point).
2. Press the SET key again or wait 5 seconds to display the
room temperature.
CHANGE SET TEMPERATURE
1. Press and hold the SET key for 2 seconds.
2. Display of the setpoint, LED blinks.
3. Change within 10 seconds with key
4. Save the new setpoint: Press the SET key again briey or
wait 10 seconds.
BEFÜLLUNG
Mit dem Ziel die bestmögliche Leistung des Gerätes zu
erhalten, ist es notwendig, die folgenden Regeln zu beachten:
• Füllen Sie das Kühlgerät erst, wenn es die gewünschte
Temperatur erreicht hat (auf dem Display ablesbar)
• Stellen Sie keine warmen Speisen oder warme Flüssig-
keiten sowie nicht abgedeckte Nahrungsmittel in das
Kühlgerät.
• Lebensmittel immer gut verschließen bzw. verpacken.
• WICHTIG: Stellen Sie nichts auf den Geräteboden und
überfüllen Sie das Kühlgerät nicht, weil sonst die Luftzir-
kulation beeinträchtigt wird.
• Lassen Sie Türen und Schubladen nicht längere Zeit ge-
önet und vermeiden Sie häuges Önen derselben.
FILLING
In order to obtain the best possible performance of the
device, it is necessary to observe the following rules:
• Fill the cooling unit only when it has reached the desired
temperature (readable on the display)
• Do not place hot food or warm liquids or uncovered food
in the refrigerator.
Always seal or pack food well.
• IMPORTANT: Do not place anything on the oor of the
appliance and do not overll the refrigerator, as this will
impair air circulation.
• Do not leave doors and drawers open for long periods of
time and avoid opening them frequently.

13
Stand 03/18 IH TM / 01/19 TM
GRUNDSÄTZLICHE INFORMATIONEN ZUM
WERKSTOFF EDELSTAHL
Edelstahl gibt es in verschiedenen Qualitäten, mit
unterschiedlichen Eigenschaften - da der Einsatz dieses
Werkstoes auch sehr variabel sein kann.
Edelstahl ist ein Sammelbegri für nichtrostende Stähle, für
mehr oder weniger komplexe Legierungen aus Eisen und
anderen Metallen.
Durch diese Legierungen wird unter Sauersto-/Lufteinuss
eine dünne Schutzschicht, nur wenige Atomlagen dick, an
ihrer Oberäche gebildet. Die sogenannte Passivschicht.
Diese Passivschicht kann auch immer wieder neu gebildet
werden, unter der Voraussetzung einer metallisch blanken,
von Verunreinigungen freien Oberäche.
Ein Trugschluss ist aber, dass rostfreier Edelstahl überhaupt
nicht rosten kann. Bei unzureichendem Schutz oder Pege
ist das sehr wohl möglich. Wichtig ist auch die Erstreinigung.
BASIC INFORMATION ON THE MATERIAL
STAINLESS STEEL
Stainless steel is available in dierent qualities, with dierent
properties - as the use of this material can also be very
variable.
Stainless steel is a collective term for stainless steels, for more
or less complex alloys of iron and other metals.
Under the inuence of oxygen and air, these alloys form a
thin protective layer on their surface, which is only a few
atomic layers thick. The so-called passive layer.
This passive layer can also be formed over and over again,
provided that the surface is shiny and free of impurities.
However, a fallacy is that stainless steel cannot rust at all. In
case of insucient protection or care, this is possible. Initial
cleaning is also important.
ERSTREINIGUNG VON
EDELSTAHLARTIKELN / MÖBELN
Während Herstellung, Transport, Lagerung und Montage
können die Oberächen der Edelstahlartikel / -möbel
verschmutzen. Z. B. durch das Absetzen von Schleifstaub,
Spänen, Schweißspritzer von Arbeiten an Stahl oder
stahlähnlichen Teilen aus dem Umfeld, Ruß oder durch
Abrieb von Fremdmaterial kann es zu Flugrost kommen.
Dieses Rosten von Fremdmaterial auf der Edelstahloberäche
führt zur Beschädigung und zum Durchdringen der
Passivschicht. Diese lokale Beschädigung kann dann zu
Lochfraß im Edelstahl führen.
Auch deshalb ist die Erstreinigung so wichtig, nicht nur aus
hygienischen Gründen.
Oft wird Edelstahl durch eine Kunststo-Folie für Produktion
und Transport wirksam geschützt.
Diese vor Gebrauch des Artikels bitte abziehen, von oben nach
unten und so bald wie möglich.
Vor allem durch Sonneneinstrahlung lassen sich die
Folien auf Dauer nur noch mühsam abziehen. Folien- oder
Klebereste könnten anschließend auf der Oberäche
verbleiben. Diese sind zwingend zum Schutz der
Passivschicht und zum Korrosionsschutz des Edelstahls
rückstandslos zu entfernen.
INITIAL CLEANING OF STAINLESS STEEL
ARTICLES / FURNITURE
During manufacture, transport, storage and assembly, the
surfaces of stainless steel articles/furniture can become
soiled. Flying rust can occur, for example, as a result of the
settling of grinding dust, chips, welding spatter from work on
steel or similar steel parts from the surrounding area, soot or
as a result of the abrasion of foreign material.
This rusting of foreign material on the stainless steel surface
leads to damage and penetration of the passive layer. This
local damage can then lead to pitting in the stainless steel.
This is another reason why initial cleaning is so important,
and not only for hygienic reasons.
Stainless steel is often eectively protected by a plastic lm
for production and transport.
Please remove these before using the item, from top to bottom
and as soon as possible.
The lms can only be removed with great diculty in the
long run, especially due to solar radiation. Foil or adhesive
residues could then remain on the surface. These must be
removed without leaving any residue to protect the passive
layer and to protect the stainless steel against corrosion.
REINIGUNG UND WARTUNG
Aus hygienischen und funktionellen Gründen sollte das Gerät
mindestens einmal pro Tag gereinigt werden.
Vor jeder Reinigung muss der Stecker aus der Steckdose
gezogen werden.
CLEANING AND MAINTENANCE
For hygienic and functional reasons, the unit should be
cleaned at least once a day.
The plug must be removed from the socket before each
cleaning.

14 Stand 03/18 IH TM / 01/19 TM
REINIGUNG VON EDELSTAHLARTIKEL
Reinigen Sie die Oberächen regelmäßig mit einem
feucht-warmen Tuch/Schwamm/Vlies, gerne auch ein
Mikrofasertuch ohne Metallanteile.
Zur Fettlösung o. für starke Verschmutzungen kann ein
mildes Reinigungsmittel (Spülmittel) verwendet werden.
Hartnäckige Verschmutzungen können durch das 10 bis
20 minütige Auegen von einem feuchten Tuch (auch
Küchenrolle) auf dieser Stelle - gelöst werden, um die
Reinigung zu erleichtern.
Eventuelle Spülmittelreste sind durch Nachwischen mit
klarem Wasser zu entfernen. Anschließend mit einem
weichen Tuch/Schwamm die Flächen trocken reiben.
Bitte beachten Sie für die Häugkeit der Reinigung auch die
aktuell geltenden Hygieneschutzbestimmungen.
Selbstverständlich gibt es ebenfalls die Möglichkeit mit
einem eigens dafür entwickelten Edelstahlreiniger zu
Reinigen und zu Pegen.
Für die Grobreinigung des Ascheauangbehälters benutzen
Sie nach dem Entsorgen der Aschereste einen weichen
Pinsel, um festsitzende Ascherückstände zu beseitigen.
CLEANING OF STAINLESS STEEL ARTICLES
Regularly clean the surfaces with a damp, warm cloth/
sponge/eece, also a microbre cloth without metal parts.
A mild detergent (detergent) can be used for grease solution
or heavy soiling. Stubborn dirt can be removed by placing
a damp cloth (also a kitchen roll) on this spot for 10 to 20
minutes to facilitate cleaning.
Any residual detergent must be removed by wiping with
clear water. Then rub the surfaces dry with a soft cloth/
sponge.
Please also observe the current hygiene protection
regulations for the frequency of cleaning.
Of course, there is also the possibility of cleaning and care
with a specially developed stainless steel cleaner.
For the rough cleaning of the ash collector, use a soft brush
after disposing of the ash residue to remove stuck ash
residues.
ACHTUNG:
• Auch Würzkonzentrate wie Senf, Essig- oder
Zitronensäureessenzen, Kochsalzlösungen,
Würztabletten und ähnliches können zur Schädigung
der Edelstahloberäche führen, wenn sie nicht sofort
beseitig werden.
• Kratzer entstehen durch die Verwendung von
Scheuermilch, Schabern, Metall- / Topfschwämmen,
Stahlwolle und anderen harten Gegenständen.
• Während der Benutzung kann es zu Schäden durch
andere bewegliche Geräte / -utensilien aus hartem
Material wie Edelstahl o. ä. kommen, die über die
Edelstahlächen z. B. gezogen werden. Achten Sie auch
hierauf.
CAUTION:
• Seasoning concentrates such as mustard, acetic or citric
acid essences, saline solutions, seasoning tablets and
similar can also damage the stainless steel surface if they
are not removed immediately.
• Scratches are caused by the use of scouring milk,
scrapers, metal / pot sponges, steel wool and other hard
objects.
• During use, damage may be caused by other movable
equipment made of hard material such as stainless steel
or similar, which may be pulled over the stainless steel
surfaces, for example. Pay attention to this, too.
Bitte verwenden Sie unter keinen Umständen folgene Reinigunsmittel:
Chlor- o. chloridhaltig, mit Salzsäure (in sauren Reinigern), mit Schwefelsäure o. andere aggressive
Reinigungsmittel. Diese verursachen Verfärbungen (schwarz) des Edelstahles o. schädigen die Passivschicht
für den Korrosionsschutz.
Please do not use the following cleaning agents under any circumstances:
Chlorine- or chloride-containing, with hydrochloric acid (in acidic cleaners), sulphuric acid or other aggressive
cleaning agents. These cause discoloration (black) of the stainless steel or damage the passive layer for corrosion
protection.

15
Stand 03/18 IH TM / 01/19 TM
REINIGUNG DES KONDENSATORS
Aus funktionellen Gründen ist auch der Kondensator
regelmäßig (je nach Verschmutzungsgrad) zu reinigen.
• Vor jeder Reinigung ziehen Sie den Stecker aus der Steck-
dose.
• Reinigen Sie den Kondensator, indem Sie den Staub, der
sich an der Oberäche angesammelt hat, mit einer Bürste
und einem Staubsauger entfernen.
• Der Kondensator bendet sich je nach Gerät an unter-
schiedlichen Stellen, z. B. neben dem Kühlraum, unter-
halb oder oberhalb des Kühlraums.
• Bei den Geräten, die eine Blende vor dem Kondensator
haben, müssen diese vor der Reinigung entfernt werden.
Hierzu lösen Sie die Schrauben und nehmen die Blende
ab. Wenn hinter der Blende ein Filter ist, dann sollte auch
dieser gesäubert werden.
• Der Kondensator bei Aufsatzvitrinen bendet sich neben
dem Kühlraum Hier entfernen Sie die Blende, indem Sie
die 4 Schrauben (2 im Kühlraum und 2 außerhalb) lösen.
Vor dem Reinigen des Kondensators nehmen Sie die
GN-Behälter heraus.
• Bei Kühl- und Tiefkühlschränken bendet sich der Kon-
densator oberhalb des Kühlraums. Zur Reinigung benöti-
gen Sie eine Leiter.
• Bei Kühl- und Tiefkühltischen bendet sich der Konden-
sator neben dem Kühlraum, und zwar hinter einer Türe.
Diese Türe önen Sie mit dem mitgelieferten Schlüssel.
CLEANING THE CONDENSER
For functional reasons, the condenser must also be cleaned
regularly (depending on the degree of soiling).
• Always remove the plug from the socket before cleaning.
• Clean the condenser by removing the dust that has
accumulated on the surface with a brush and a vacuum
cleaner.
• Depending on the device, the condenser is located at dif-
ferent locations, e.g. next to the cooling chamber, below
or above the cooling chamber.
• Devices with an aperture in front of the condenser must
be removed before cleaning. To do this, loosen the
screws and remove the cover. If there is a lter behind the
aperture, it should also be cleaned.
• The condenser on top showcases is located next to the
refrigeration room. Remove the cover by loosening the 4
screws (2 in the refrigeration room and 2 outside). Remo-
ve the GN containers before cleaning the condenser.
• In refrigerators and freezers, the condenser is located
above the cold store. For cleaning you need a ladder.
• In refrigerated and deep-freeze tables, the condenser is
located next to the cold store, behind a door. Open this
door with the supplied key.

16 Stand 03/18 IH TM / 01/19 TM
EXPLOSIONSZEICHNUNG EXPLODED DRAWING
SC 70

17
Stand 03/18 IH TM / 01/19 TM
TEILE NAME PART NAME
SC 70
Nr. / No. Bezeichnung Name Nr. / No. Bezeichnung Name
1Basisfüße base feet 28 Lampenfassung lamp holder
2Seitlicher Gril side grill 29 Lampenhalter lamp bracket
3Kunststotür plastic door 30 helle Decke light ceiling
4Frontgrill front grill 31 Seitenscheibe side glass
5-1 Temperaturfühler temperature probe 32 Hinterglas back glass
5-2 Abtaufühler defrost probe 33 Rückenpol back pole
5-3 Hauptplatine main circuit board 34 seitliches Edelstahlstück side stainless iron piece
5-4 Temperaturanzeige temperature display 35 oberes und unteres Edelstahlstück top and bottom stainless iron piece
6Kondensator condensator 36 Buchse bush
7Kissen des Kondensators cushion of condensator 37 Stahlkugel steel ball
8Schaltkasten control box 38 Türstift door pin
9Bedienfeld control panel 39 Ventilatorügel fan blade
10 Verdampferschutzkarton evaporator protect board 40 Motorgebläse motor fan
11 Entlüftungsschacht vent tray 41 Schaumstobasis des Verdampfers foam base of evaporator
12 Regalklemme shelf clip 42 Ventilatorschaufelfeder fan blade spring
13 Regal shelf 43 Verdampferschale evaporator tray
14 Gri handle 44 Verdampfer evaporator
15 rechte und linke Türstange right and left door pole 45 Motor-Fixring motor xed ring
16 Türglas door glass 46 Kunststosockel plastic base
17 oberer Türrahmen upper door frame 47 Verdichter compressor
18 vordere Stange front pole 48 oberes/unteres Sickerrohr upper/bottom seep tube
19 Türdichtung door gasket 49 Drahtbrett wire board
20 oberer Edelstein upper gemel 50 Kunststozaun plastic fence
21 innenliegende Lichtabdeckung inside light cover 51 Rohrschelle pipe clip
22 Lampeneinsatz Schaumsto lamp insert foam 52 Füllleitung charging pipe
23 äußere Lichthülle outer light cover 53 Netzkabel power cord
24 obere Abdeckung upper cover 54 Trockenlter dry lter
25 Schraubdeckel screw cover 55 Metallbasis des Lüftermotors metal base of fan motor
26 Lichtrohr light tube 56 Steuerbügel control bracket
27 Ballast ballast

18 Stand 03/18 IH TM / 01/19 TM
EXPLOSIONSZEICHNUNG EXPLODED DRAWING
SC 80

19
Stand 03/18 IH TM / 01/19 TM
TEILE NAME PART NAME
SC 80
Nr. / No. Bezeichnung Name Nr. / No. Bezeichnung Name
1 Füße base feet 29 Lamp holder Lampenhalter
2 Seitlicher Grill side grill 30 Lamp bracket Lampenfassung
3 Kunststotür plastic door 31 Switch Schalter
4 Vordergrill front grill 32 Light ceiling Lichtdecke
5-1 Temperaturfühler temperature probe 33 Side glass Seitenscheibe
5-2 Abtaufühler defrost probe 34 Back glass Hinterglas
5-3 Hauptplatine main circuit board 35 Back Pole Rückenstange
5-4 Temperaturanzeige temperature display 36 Side stainless lron piece Seitliches rostfreies Bügeleisenstück
6 Transparent windshield Transparente
Windschutzscheibe 37 top and bottom stainless lron
piece
oberes und unteres rostfreies Bügel-
eisenstück
7 Condensator Kondensator 38 Bush Buchse
8 cushion of Condensator Kondensatorkissen 39 Steel ball Stahlkugel
9 Control box Steuerkasten 40 Door pin Türstift
10 Control panel Bedienfeld 41 Fan blade Ventilatorügel
11 Evaporator protect board Verdampferschutzplatte 42 motor fan Motorgebläse
12 Vent tray Entlüftungswanne 43 Foam base of evaporator Schaumboden des Verdampfers
13 Shelf clip Regalklemme 44 Fan blade spring Ventilatorügel-Feder
14 Shelf Regal 45 Evaporator tray Verdampferschale
15 Handle Handgri 46 Evaporator Verdampfer
16 Right and left door pole Rechter und linker Türpfos-
ten 47 Motor xed ring Motor-Fixring
17 Door glass Türverglasung 48 Plastic base Kunststosockel
18 Upper door frame Oberer Türrahmen 49 Compressor Kompressor
19 Front pole Vordere Stange 50 Upper /Bottom seep tube Oberes / unteres Sickerrohr
20 door gasket Türdichtung 51 Wire board Drahtbrett
21 Upper gemele Obere gemele 52 Plastic fence Kunststozaun
22 Inside light cover Innere Lichtabdeckung 53 Pipe clip Rohrschelle
23 Lamp insert foam Lampeneinsatz Schaumsto 54 Charging pipe Laderöhre
24 Upper cover Obere Abdeckung 55 Power cord Netzkabel
25 Outer light cover Äußere
Lichtabdeckung 56 Dry lter Trockenlter
26 Screw cover Schraubdeckel 57 Metal base of fan motor Metallbasis des Lüftermotors
27 Light tube Lichtrohr 58 Control bracket Steuerhalterung
28 Ballast Ballast

20 Stand 03/18 IH TM / 01/19 TM
EXPLOSIONSZEICHNUNG EXPLODED DRAWING
SC 100
This manual suits for next models
1
Table of contents
Popular Merchandiser manuals by other brands

Hussmann
Hussmann IMPACT ED1 installation instructions

Fri-Jado
Fri-Jado COLD DELI CD 3 Self Service manual

Hussmann
Hussmann IMPACT RL installation instructions

Hussmann
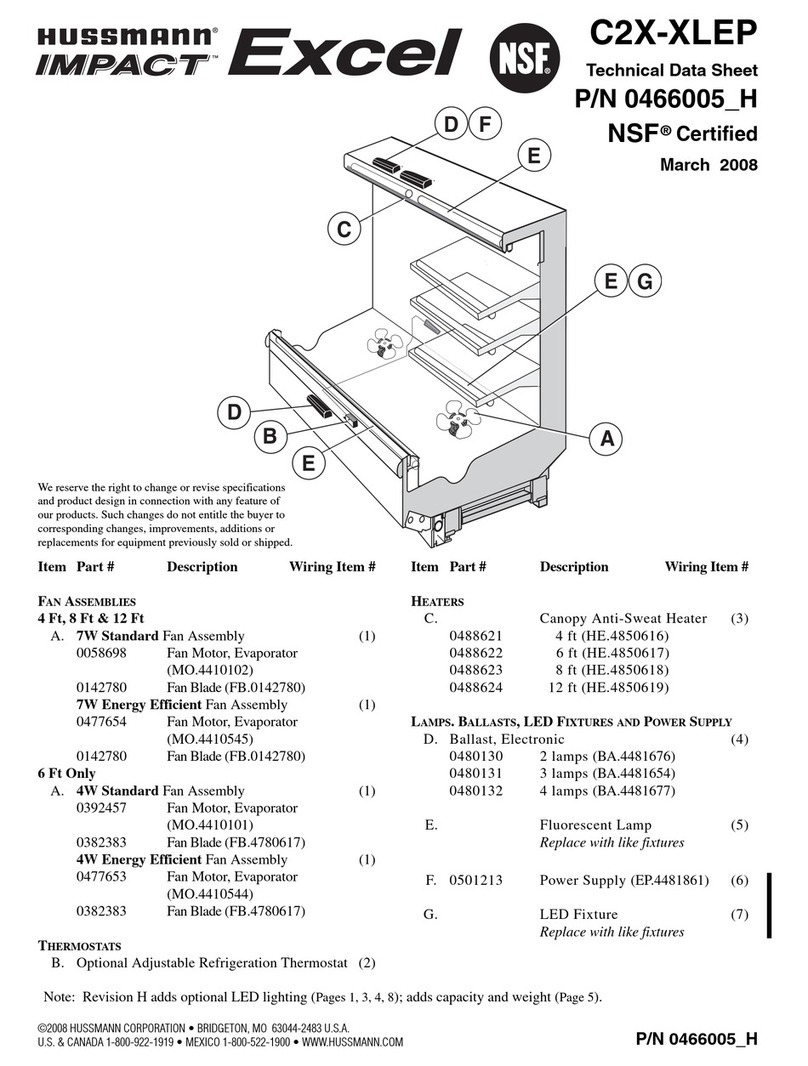
Hussmann Impact Excel M4X-EP Technical data sheet

Howard McCray
Howard McCray R-CFS40E-4C Specifications

Hussmann
Hussmann NDD5 Installation and operation manual

Hatco
Hatco FLAV-R-SAVOR FSHC-6W1 Installation and operating manual

Hussmann
Hussmann LG installation instructions

Hussmann
Hussmann GSVM4060F Installation & operation manual

Hussmann
Hussmann SCSS Installation and operation guide

Hussmann
Hussmann IMPACT P1X datasheet

Hussmann
Hussmann IMPACT Elite E2V Joining instructions