Satfinder 5 HD SLIM User manual

S
SA
AT
TF
FI
IN
ND
DE
ER
R
5
5
H
HD
D
S
SL
LI
IM
M
EN USER GUIDE
Please read this manual carefully for using your Signal Meter.
TR KULLANIM KILAVUZU
Ürünü kullanmak için lütfen bu kılavuzu dikkatlice okuyunuz.

- 2 -
INDEX:
Safety Instructions.......................
3
Product Content..........................
4
Basic Features.............................
4
Technical Features.......................
5
Control Panel View.......................
6
Equipment Incl.With the Product....
7
User Instructions.........................
9
Satellite Search Menu...................
10
USALS Motor Settings..................
11
UNICABLE Settings......................
12
Diseq-C 1.2 Motor Setting.............
12
Spectrum Analysis Menu...............
13
Satellite Tp Control Menu..............
15
Constellation Menu.......................
16
Cross Polarity Menu.....................
17
Multi-Level Menu.........................
17
Auto Port Search Menu.................
18
Usb/Multimedia Menu...................
19
Channel List Menu.......................
19
Satellite Settings Menu.................
21
Device Settings Menu...................
21
Troubleshooting...........................
23
Warranty Certificate.....................
24

- 3 -
SAFETY INSTRUCTIONS:
Issues to be Observed:
Make sure to observe the following
instructions in order to prevent
yourself and your device from
incurring any harm.
Pull out the charging cable before
cleaning your device, and turn it off
using the Power On/Off button, and
clean it with a dry cloth.
Do not use accessories or additional
attachments that are not
recommended by the manufacturer
since it may damage your device or
invalidate your device's warranty.
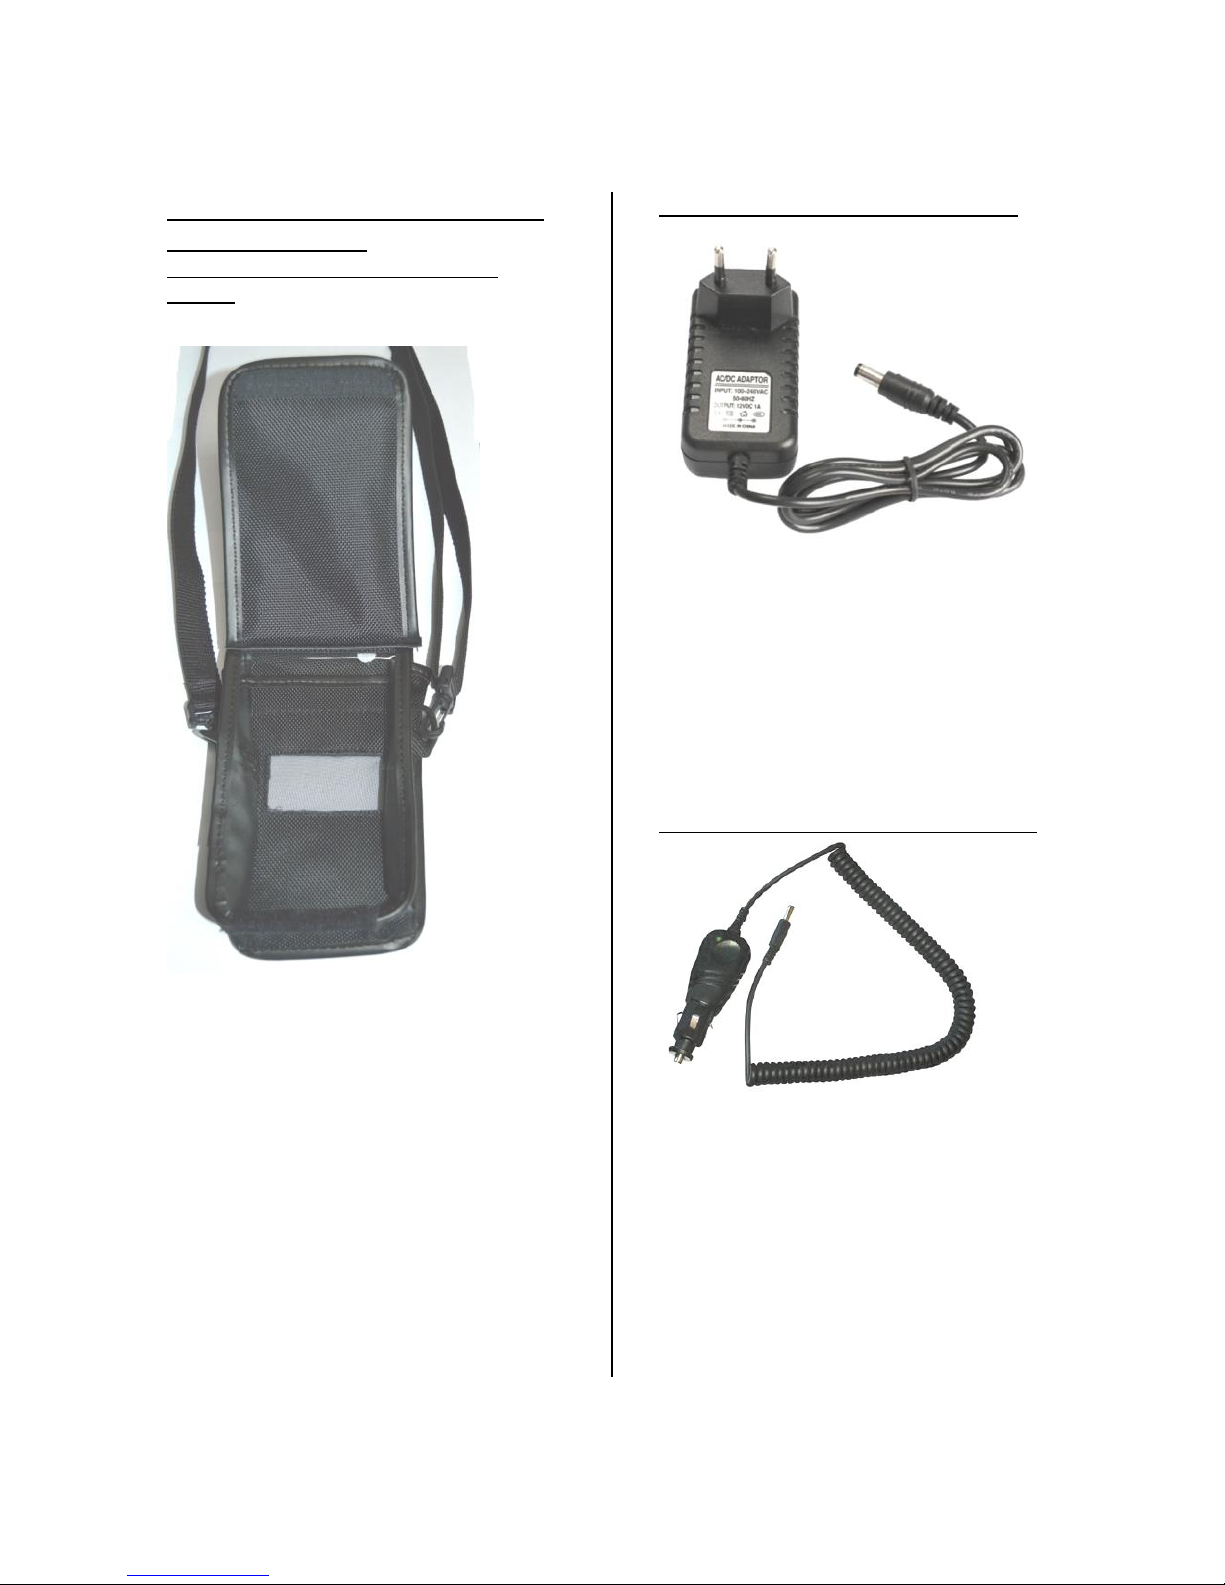
Protect your device from impacts
and falls while carrying it, otherwise
it might be damaged. Make sure to
carry your device in its bag and do
not carry it in boxes such as toolbox
and with equipment which may
cause damage on it, otherwise your
device's warranty will become void.
Avoid using your device in outdoors
in rainy and snowy weather, in order
to protect it from contact with water.
If you detect smoke odor or other
odors or unusual sound coming from
the inside of your device, turn it off
and consult to technical service.
Charge your device with the
recommended charging adapter and
car lighter charger. Inappropriate
charging devices will damage the
batteries in your device, and may
cause events such as overheating
and explosion or it may harm you,
and such cases are under the user's
own responsibility. Make sure the
charging adapters are supplied with
12 volts (middle +). Do not leave
your device open, as the batteries in
devices which are left open will lose
their function in time.
Lighter charger, charging adapter
and batteries are outside the scope
of warranty since their life span
varies depending on usage. Be
careful against short circuits while
connecting your device to LNB,
otherwise the LNB and your device
might be damaged.
Issues Regarding Service:
Do not attempt to repair your device
yourself. Your device will no longer
be within the scope of warranty if
you open its cover. Consult your
dealer or technical service for all
services regarding the device.
Use the batteries sold or
recommended by the manufacturer.

- 4 -
BASIC FEATURES:
SATFINDER 5 HD Slim Real Time
and NIT Function Spectrum
Analyzer, HD Video Display 3.5" Lcd
Tft , DVBS/S2 Satellite Signal Meter
Device.
SATFINDER 5 HD Slim is a
professional measuring device for
ensuring most accurate installation
of dish antenna. With the device
3.5" Lcd Tft color monitor you can
display SD and HD Digital TV
programs and also the frequency
spectrum between 950-2150 Mhz.
(in normal and advanced mode).
The device has 32 different LNB
type memory. It also has 3 user-
customizable LNB types. 22Khz Tone
- 13/18V selectable. Supports
Diseq-C 1.0-1.1-1.2 and Multiswitch
central systems. It may perform
USALS motor system installations
and may measure UNICABLE types
on a single cable. The Lnb supply
has protection against short circuits,
and has screen warnings.
You may use the device with
2400mAh 3.7V Lithium Polymer
charging batteries, and charge it
with External 220V AC charging
device and Car lighter charging
device. Battery packs and charging
circuits are protected against short
circuits and high currents. Its
average Operating span is about 3
hours. This sensitive device has
many functions, yet it is versatile
and easy to use.
English, Turkish, German, French,
Spanish, Portuguese, Russian,
Arabic, Dutch, Kurdish and Italian
OSD Menu Languages are available.
It is a super lightweight measuring
device weighing only 800 grams
with its carrying bag and batteries.
PRODUCT CONTENT:
1 pc. SATFINDER 5 HD Slim
1 pc. Protective Bag with Shoulder
Strap
1 pc. 220V Charging Device
1 pc. Lighter Charging Device
1 pc. A-V Tos Cable
1 pc. User Manual
1 pc. 90° F Inter Connector

- 5 -
TECHNICAL FEATURES
• Digital HD display.
• Reads NIT Broadcaster Chart and
identifies satellite orbit and names.
• Real time Full Band Spectrum
Analyzer (350ms)
• dBuV , dBmV or dBm signal power
indicator
• Level and BER measurement
• Signal quality Detailed screen (
BER evaluation )
• S/N ve C/N measurement
• Constellation Diagram
• 800 MHz processor Speed
• 8MB Memory / 512Mb Ram
• 5000 TP Capacity
• 8000 Tv Channel Capacity
• 250 Satellite Capacity
• Phosphor Keyboard
• High quality gold clad mainboard.
• Low Threshold level DVBS2 ST
Processor Tuner
• LNB Supply: 13/18V , 500 -
650mA , 22 kHz
• supports KA / KU / C band.
• V/H and L/R selectable Polarity.
• KA - BAND L.O. Frequency : 17,25
/ 18,25 / 18,75 / 19,25 / 19,75 /
20,25 GHz selectable
• 32 pcs. LNB Type and 3 pcs.
changeable User Lnb Type
• Level range: -65 dBm ~ - 25dBm
• FEC Qpsk 1/2, 3/5, 2/3, 3/4, 4/5,
5/6, 8/9, 9/10 - 8psk 3/5, 2/3, 3/4,
5/6, 8/9, 9/10 ( automatic)
• Symbol Rate :2 to 45Msps DVBS,
DSS, DVBS2 QPSK and 8PSK
• Automatic DiSEqC 1.0 , 1.1, 1.2
Recognition
• DiSEqC 1.2 and USALS Motor
Control
• F - Connector input
• USB 2.0 Memory Interface, may
perform Tp frequency update to USB
via PC.
• Software update via USB
• Windows XP/7/8
compatible(32/64bit)
• Detects Satellite position within 1
second (max)
• Easy, small and lightweight design
• Long Lasting Lithium-Polymer
battery (2400mAH) support
• 3 hours of battery usage ( 80 -
100mA LNB current draw )
• 2 hours brief battery charge
duration
• Video and audio input
• Dimensions ( W x H x D ) : 18 x
10 x 4 cm
• Weight : 0.8 kg including batteries

- 6 -
CONTROL PANEL VIEW:
LNB INPUT
TURN ON/OFF
TV / RADIO
TURN OFF
SOUND
& LIST
SEE THE LEVEL
MOTOR SETTINGS
C/N DETAILS
CHANGE
COLOR
ADJUSTMENT
SPECTRUM
RANGE
RETURN TO MENU
SAVE THE DISPLAY
SATELLITE SELECTION
UPWARDS
DIRECTION
APPROVAL AND ENTRY
LEFT DIRECTION
RIGHT DIRECTION
EXIT
DOWNWARDS
DIRECTION
12V DC / 1A INPUT
CHARGING LED
USB MEMORY INPUT
A/V INPUT

- 7 -
EQUIPMENT INCLUDED WITH
THE PRODUCT:
1 Protective Bag with Shoulder
Strap:
The protective bag with shoulder
strap protects your device from
negative external factors such as
dust, dirt and moisture. Do not carry
your device in a kitbag. The
protective bag cannot protect
against squeezing and heavy
impacts. Your device may become
outside the scope of warranty.
1 piece of 220V Charging Device:
With your 12 Volt output electrical
charging adapter, you can ensure
your device is kept charged all the
time, and thus use your device in
environments where electricity is not
available. Prevent your charging
adapter from squeezing, impacts
and overload. Do not open for
repairing or examining.
1 piece of Lighter Charging Device:
With your 12 Volt output lighter
charging adapter, you can ensure
your device is kept charged all the
time, and thus use your device in
environments where electricity is not
available. You can charge your
device while you are driving your
car. Prevent your lighter charging
adapter from squeezing, impacts
and overload. Do not open for
repairing or examining.

- 8 -
1 A-V Tos Cable:
You can test the external Video and
Audio signals with the AV input of
your device. You can also test
devices such as security cameras
which require focus and direction
adjustment.
1 pc. 90° F Inter-Connector:
Use your 90° F Inter-Connector in
your device all the time. With the
90° F Inter-Connector, the Tuner
input of your device will not be
affected by factors such as wearing,
tearing and overuse.

- 9 -
USER INSTRUCTIONS:
TURNING ON THE DEVICE:
Open your device by pressing the
POWER ON/OFF button. The
Tv/Radio channel list will appear on
the screen when you press ENTER
on the TV Broadcast Screen.
SOUND ADJUSTMENT:
While you are watching any channel,
you can adjust the sound volume
with the RIGHT/LEFT buttons or turn
off the sound by pressing the MUTE
button.
COLOR SETTINGS:
You can adjust the Color settings on
the channel picture display if you
press and keep pressed the EDIT
button while you are watching any
channel.
LEVEL INDICATOR:
You can instantly see the signal
levels of the displayed channel in
real time by pressing the LEVEL
button any time while watching any
channel.

- 10 -
SATELLITE SEARCH MENU:
Enter the MAIN MENU by pressing
the MENU button, and here select
the SATELLITE SEARCH menu by
using the up and down buttons.
Select the satellite for which you
want to make the dish antenna
adjustment or whose signal levels
you want to see, the transponder
and the lnb type, and press ENTER.
You can see the signal levels on the
displayed screen. You can check
whether the signal levels are at the
highest values. You can see the
levels on the detailed screen by
pressing the LEVEL button. You can
change the order of transponders
using the RIGHT / LEFT buttons.
You can execute a CHANNEL SCAN
by pressing ENTER after adjusting
the signal levels as best as you can.
You can make the scanning
operations in the form of SINGLE TP
/ ALL TP and BLIND SCAN, and then
you can add the channels found to
the CHANNEL LIST following the
guidelines on the following pictures.

- 11 -
Now the channels are saved and are
added to the end of the CHANNEL
LIST.
USALS MOTOR SETTING :
Choose the DISEQC type as USALS
MOTOR in order to use Diseqc
Motors with Usals commands.
Enter the USAL SETTING menu by
pressing and keeping pressed the
EDIT button for 2-3 seconds. Enter
the coordinates of the region for
which you will make the satellite
adjustment, tick the OK box and
then press GO, ENTER, thus the
DISH ANTENNA will AUTOMATICALLY
turn to the position of the satellite.

- 12 -
UNICABLE SETTING MENU:
You can use this menu for UNICABLE
Multiswitch or Unicable SCR lnb
types, and you can test them after
making these adjustments. First, set
the DISEQC type as UNICABLE, go
to PORT section and keep pressed
the EDIT button for 2-3 seconds.
On this screen you can adjust the
output IF Frequencies according to
the Unicable Multiswitch or Unicable
SCR Lnb type which you will TEST.
Then you can test the signals on the
SATELLITE SETTING menu.
DISEQC 1.2 MOTOR SETTING MENU:
First select Diseqc 1.2 Motor on the
DISEQC TYPE section and go to
SATELLITE SETTING menu signal
levels by pressing ENTER.
Here you can see the SIGNAL levels
and you can manually turn your
Diseqc 1.2 Motor to EAST / WEST
directions with the RIGHT / LEFT
keys. In this menu your battery may
deplete a lot faster than normal
since DISEQC MOTOR will draw
more currents. You are
recommended to keep your charging
devices with you for this type of
search.

- 13 -
SPECTRUM ANALYSIS MENU:
Press MENU, then select SPECTRUM
ANALYSIS from the MAIN MENU.
After making your satellite, LNB
voltage, Scan Width and Diseq-c
adjustments, select the IF frequency
you want, and press OK.
The C/N value will appear on the
screen when you press the LEVEL
key in this screen once.
We can save the spectrum levels on
the screen using CAPTURE and SAVE
upon pressing the MENU button on
the SPECTRUM ANALYSIS screen,
then later you can LOAD them from
the memory during your future
installations, and make your
installations again with the same
settings.
You can change the SPECTRUM
SPEED from the SPEED box.
However, you may not see some
signal levels in detail in the FAST
mode.
You can fit the upper and lower
signal levels to the automatic
measuring levels screen using the
AUTO RANGE mode.
You can change the IF Frequency,
BANDWIDTH and LNB VOLTAGE
values by pressing the EDIT key.

- 14 -
NIT IDENTIFICATION FEATURE:
You can find the CHANNEL LIST and
the SATELLITE Position in the Uplink
automatically by matching the IF
Frequency arrow to any signal on
the Spectrum Analysis menu and
pressing ENTER.
NOTE: In some cases the wrong
satellite name might be displayed
because of the information in the
received NIT data if the NIT data in
the signals sent by the Broadcasting
institution is wrong or if the
broadcasting institution is
broadcasting to 2-3 satellites
simultaneously.
You can see the channel lists, and
save the channels in the
adjustments made with the
UNIVERSAL lnb.

- 15 -
SATELLITE TP CONTROL MENU:
Press MENU, then select SATELLITE
TP CONTROL from the MAIN MENU.
The Satellite Tp Control menu
enables display of signal levels of
several TP frequencies on the same
screen simultaneously.
SINGLE SATELLITE CONTROL:
Select SINGLE type and press
ENTER after making the necessary
SATELLITE adjustments.
As indicated on the above screen,
you can see the signal levels of 4
different frequencies from 1 satellite
on the same screen. This way you
can check whether the signal levels
and antenna setting is correct on all
frequencies.
DUAL SATELLITE CONTROL:
Select DUAL type and press ENTER
after making the necessary
SATELLITE adjustments.
As indicated on the above screen,
you can see the signal levels of 8
different frequencies from 2 satellite
on the same screen. You can test
and check whether the Multiswitch
and System installations are correct
by seeing all frequencies on the
same screen.

- 16 -
CONSTELLATION MENU:
Press MENU, then select
CONSTELLATION from the MAIN
MENU. The constellation menu
shows on a graphic the accuracy of
the coordinates of Digital I/Q
symbols received in any instance.
Enter the Constellation menu, select
the satellite and Tp frequency whose
accuracy you will check, make your
adjustments and press ENTER.
There are 4 coordinate points in the
QPSK signals in the constellation
diagram. The closer the I / Q points
are to each other, the more accurate
it is.
There are 8 coordinate points in the
DVBS2 / 8PSK signals in the
constellation diagram. The closer the
I / Q points are to each other, the
more accurate it is.

- 17 -
CROSS POLARITY MENU:
Press MENU, then select CROSS
POLARITY from the MAIN MENU. You
can adjust the LNB position the best
way according to the satellite and
frequency using the Cross Polarity
menu.
Enter the Cross Polarity menu,
select the satellite and Tp frequency
for which you will make the Lnb
Position adjustment, and press
ENTER.
The screen will display levels with
the signal level of the polarity of
selected TP frequency on the top
and the cross polarity level on the
bottom. The best values would be
set in this menu with the level of the
frequency you selected on the top
and the other polarity exactly
across.
MULTI-LEVEL CONTROL MENU :
Press MENU, then select MULTI-
LEVEL CONTROL from the MAIN
MENU.
The Multi-Level Control menu
displays the signal levels of one
frequency each from 2 different
satellites on the same screen can
easily make the Monoblock Lnb
installation or Multiswitch tests.

- 18 -
AUTO PORT SEARCH MENU :
Press MENU, then select AUTO PORT
SEARCH from the MAIN MENU. Here
you can see which satellite is
connected to which Diseq-C port.
Select NONE when there is no
Diseq-C switch and the cable is
directly connected to lnb.
Tone Burst port scan.
Diseq-C 1.0 Port Scan :
Diseq-C 1.1 Port Scan :
Unicable Port Scan:

- 19 -
USB / MULTIMEDIA MENU :
You can perform the procedures
which are made via USB on this
menu. You can see the photos you
saved on your USB.
You can save the CHANNEL LIST in
your device to USB. Then you can
reload this channel list of yours in
the USB to your device.
You can save the software you
downloaded from our web page
www.x-sat.gr in the USB, and
update your device software using
the FIRMWARE UPGRADE menu.
CHANNEL LIST MENU:
You can display the CHANNEL LIST
from the MAIN MENU or by pressing
ENTER while watching any channel.
You can select the TV and Radio
channels one by one or according to
satellite name, delete and re-order
in the Channel List menu.

- 20 -
ORDERING ACCORDING TO
SATELLITE:
Enter the CHANNEL LIST menu,
press MENU and select a SATELLITE
on the screen. In this case only the
channels of the satellite you selected
will appear on the screen.
DELETING CHANNELS:
Press EDIT while you are in the
CHANNEL LIST menu, and select
DELETE.
Select the channels you wish to
remove one by one using the ENTER
key, and then press EDIT. If you tick
YES when the question "SAVE THE
CHANGES?" while exiting from all
menus appears, the channels will be
completely deleted from the list.
MOVING CHANNELS:
Press EDIT while you are in the
CHANNEL LIST menu, and select
MOVE.
Select the channels you wish to
move one by one using the ENTER
key, and then press EDIT while you
are in the position you wish to move
the channels to. If you tick YES
when the question "SAVE THE
CHANGES?" while exiting from all
menus appears, the channels will be
moved to the place you selected.
Table of contents
Popular Measuring Instrument manuals by other brands

Flexitron
Flexitron webdyn MTX-StarWater Software user manual

Air Monitor
Air Monitor AUTO-purge III Installation, operation and maintenance manual

Endress+Hauser
Endress+Hauser StamoLys CA 71 MN operating instructions

Boyo
Boyo VTM7012QFHD user manual

bluelab
bluelab EC pen Care and use guide

Topcon
Topcon DIGI-STAR TMR3610 Operator's manual