THE PROFESSIONAL EQUIPMENT------------------|USER’S MANUAL| THE PROFESSIONAL EQUIPMENT------------------|USER’S MANUAL|
Table of Contents
1.GUIDE.......................................................................
1.1 Important Safety Instructions............................
1.2 Unpacking.........................................................
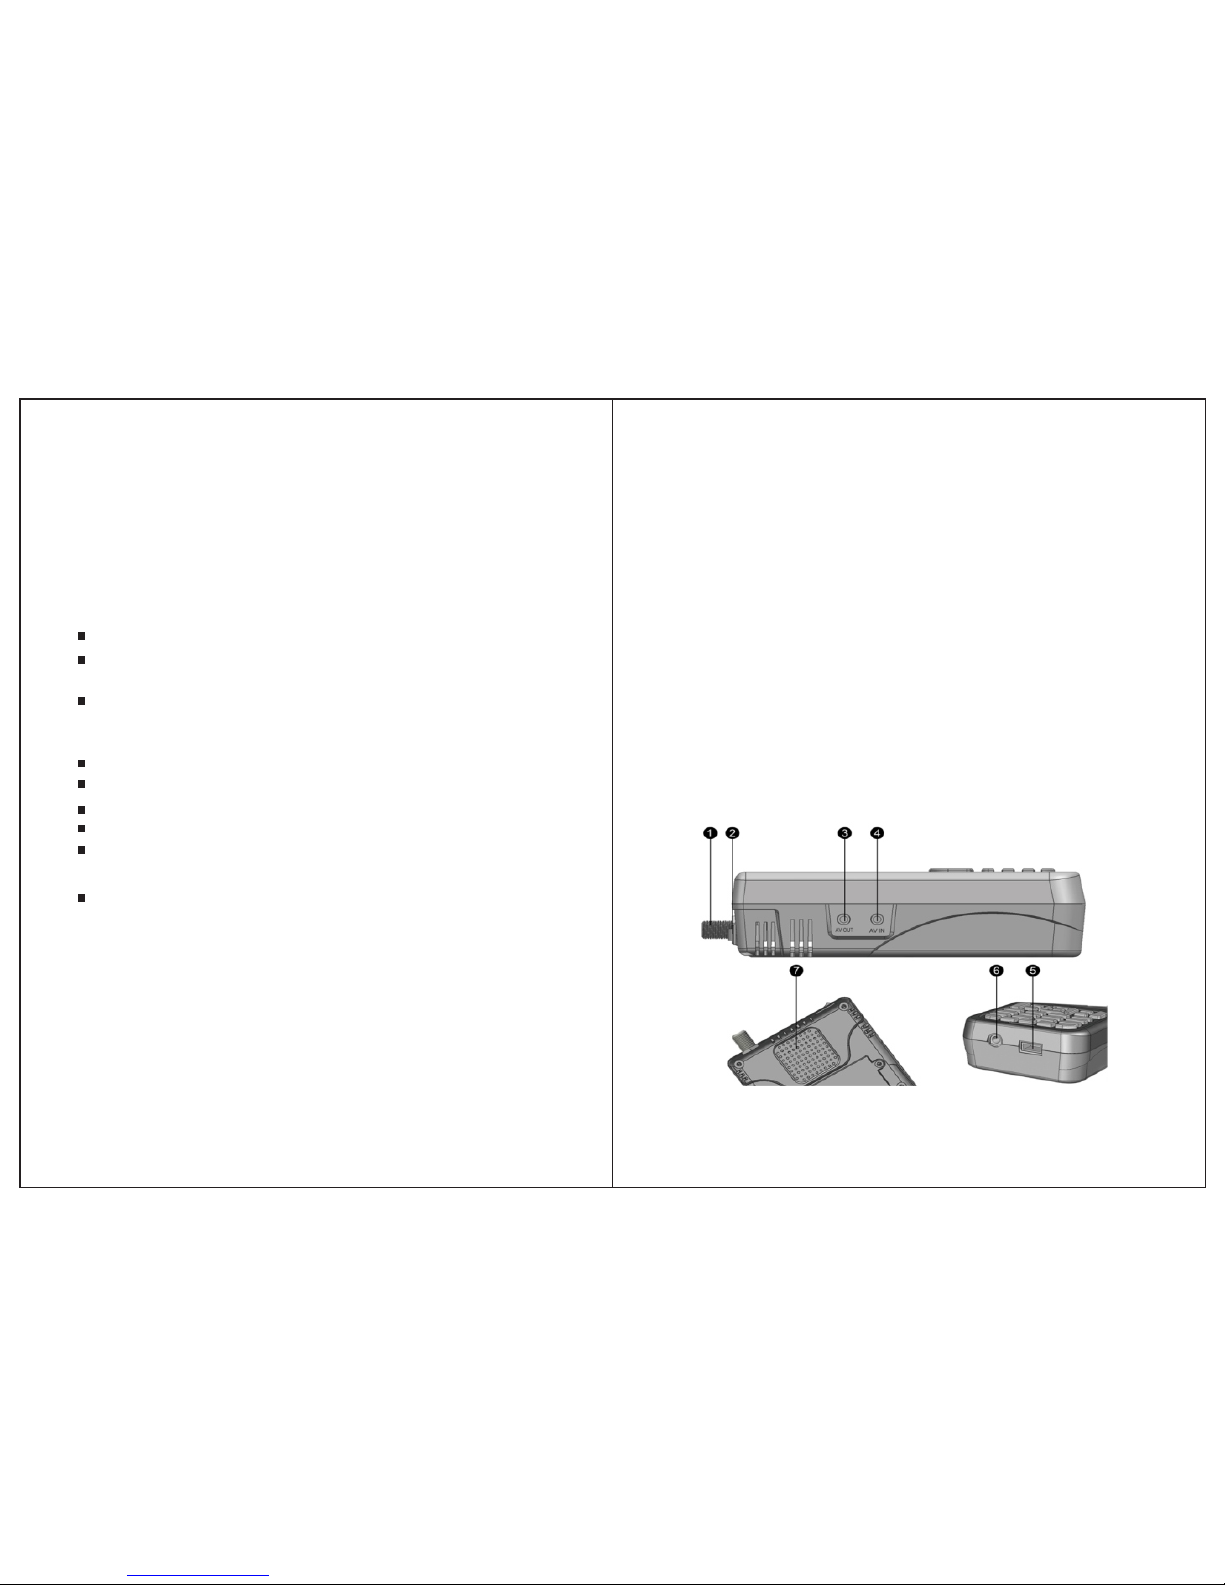
1.3 PRODUCT OVERVIEW & ILLUSTRATION......
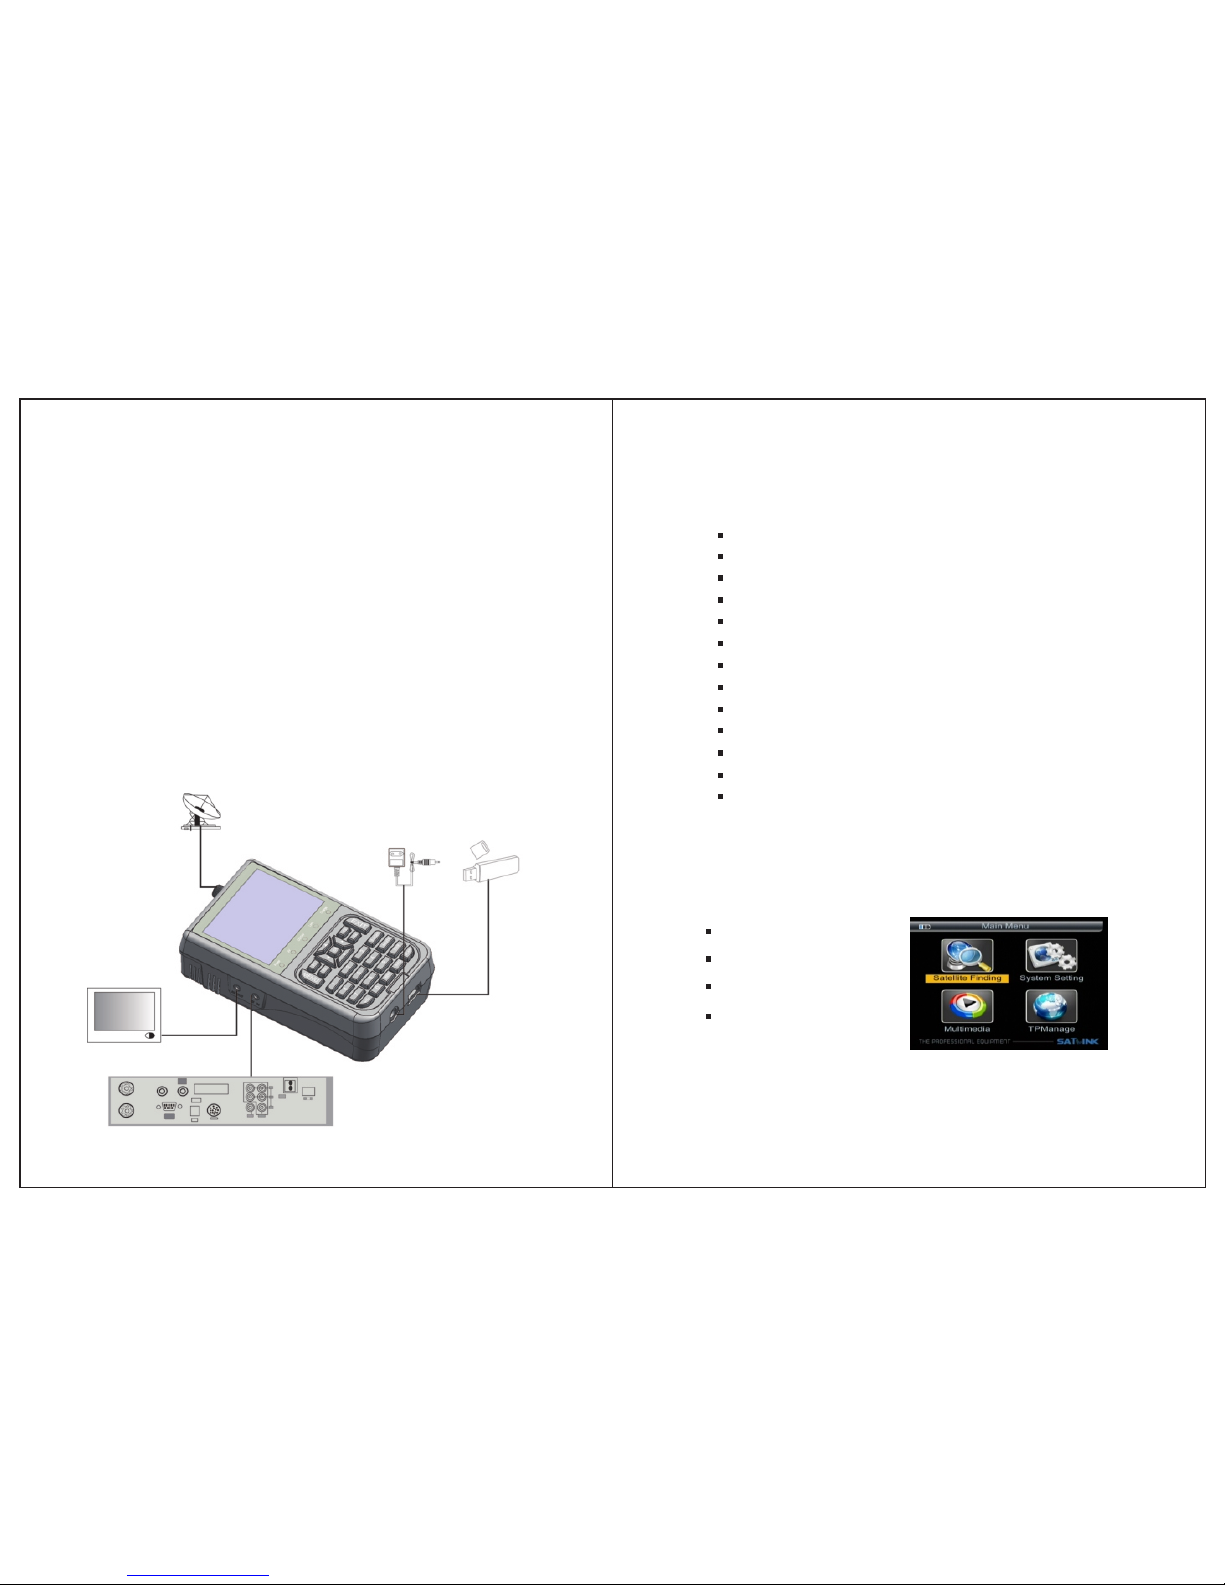
1.4 INSTALLATION OF METER.............................
2.OUTLINE...................................................................
3.THE MENU OSD INSTRUCTION..............................
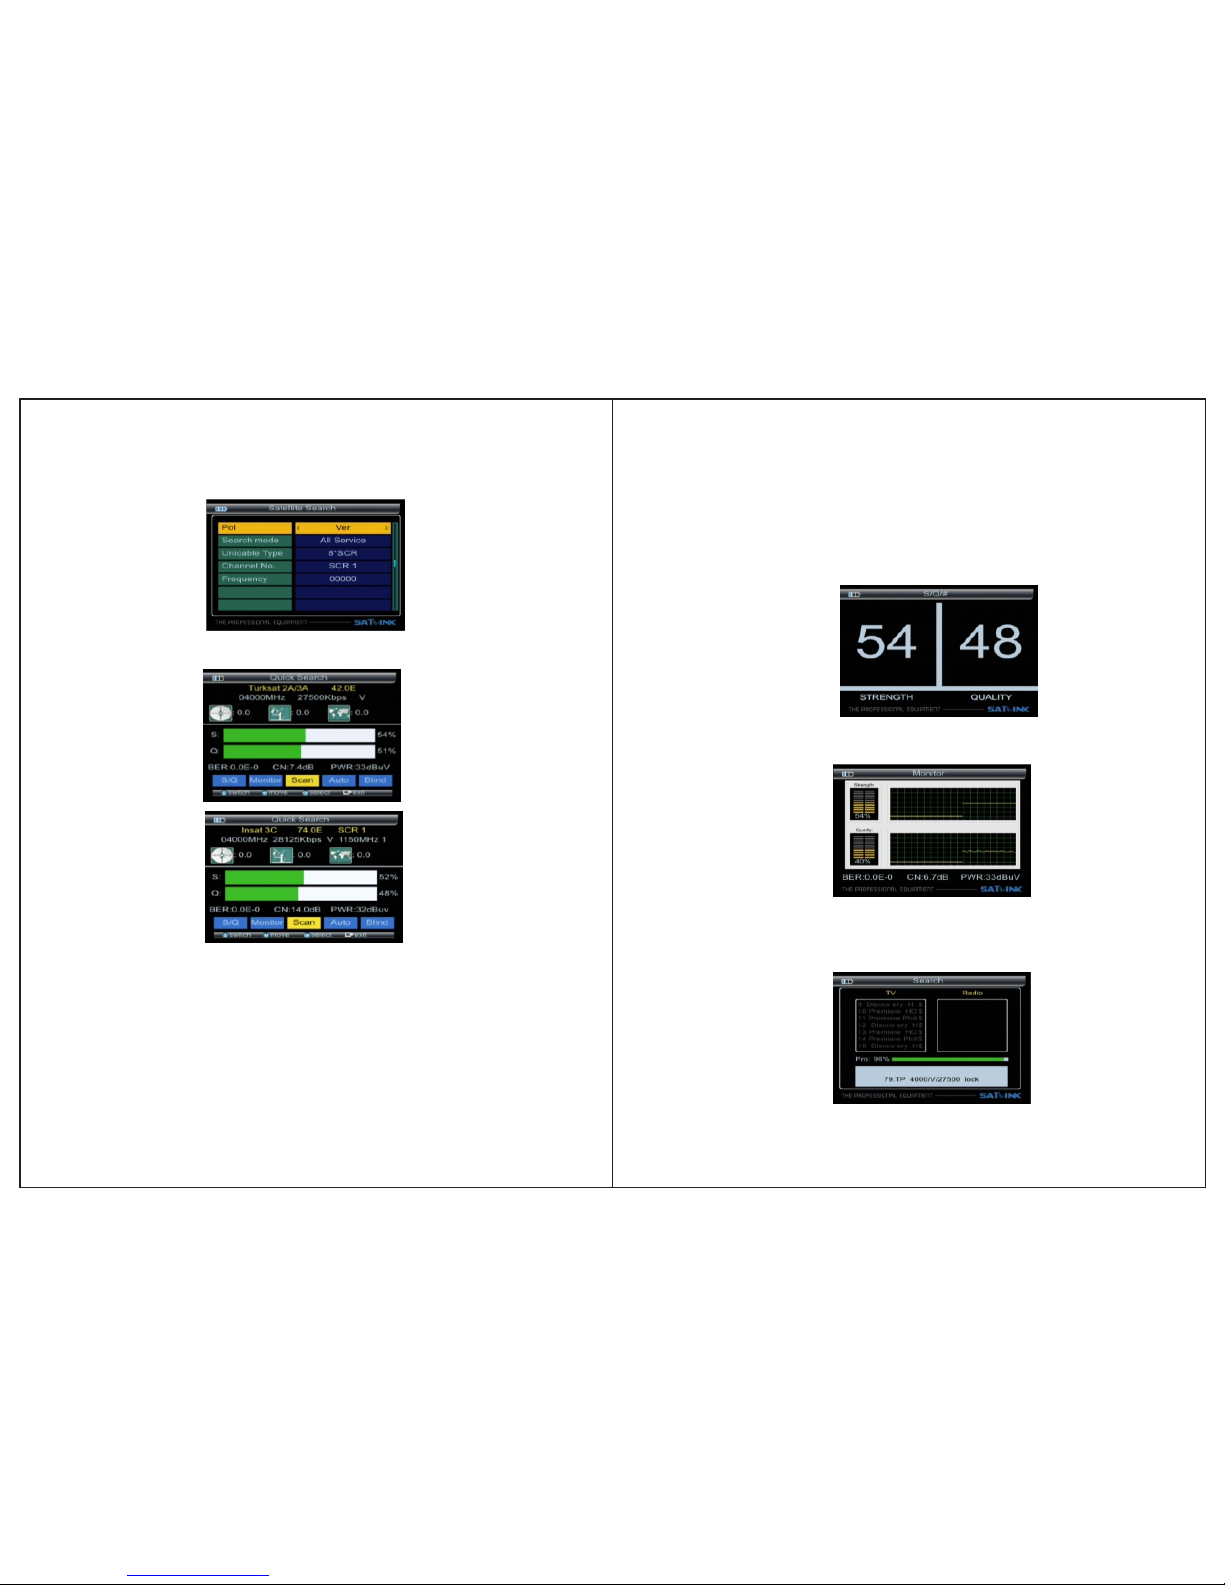
3.1 Search...............................................................
3.1.1 Satellite....................................................
3.1.2 LNB type..................................................
3.1.3 ......................
3.1.4 TP Num....................................................
3.1.5 ..................................................
3.1.6 ...................................................
3.1.7 .............................................................
...............................................
...............................................
............................................
...............................
......................................................
.....................................
.........................................
........................................................
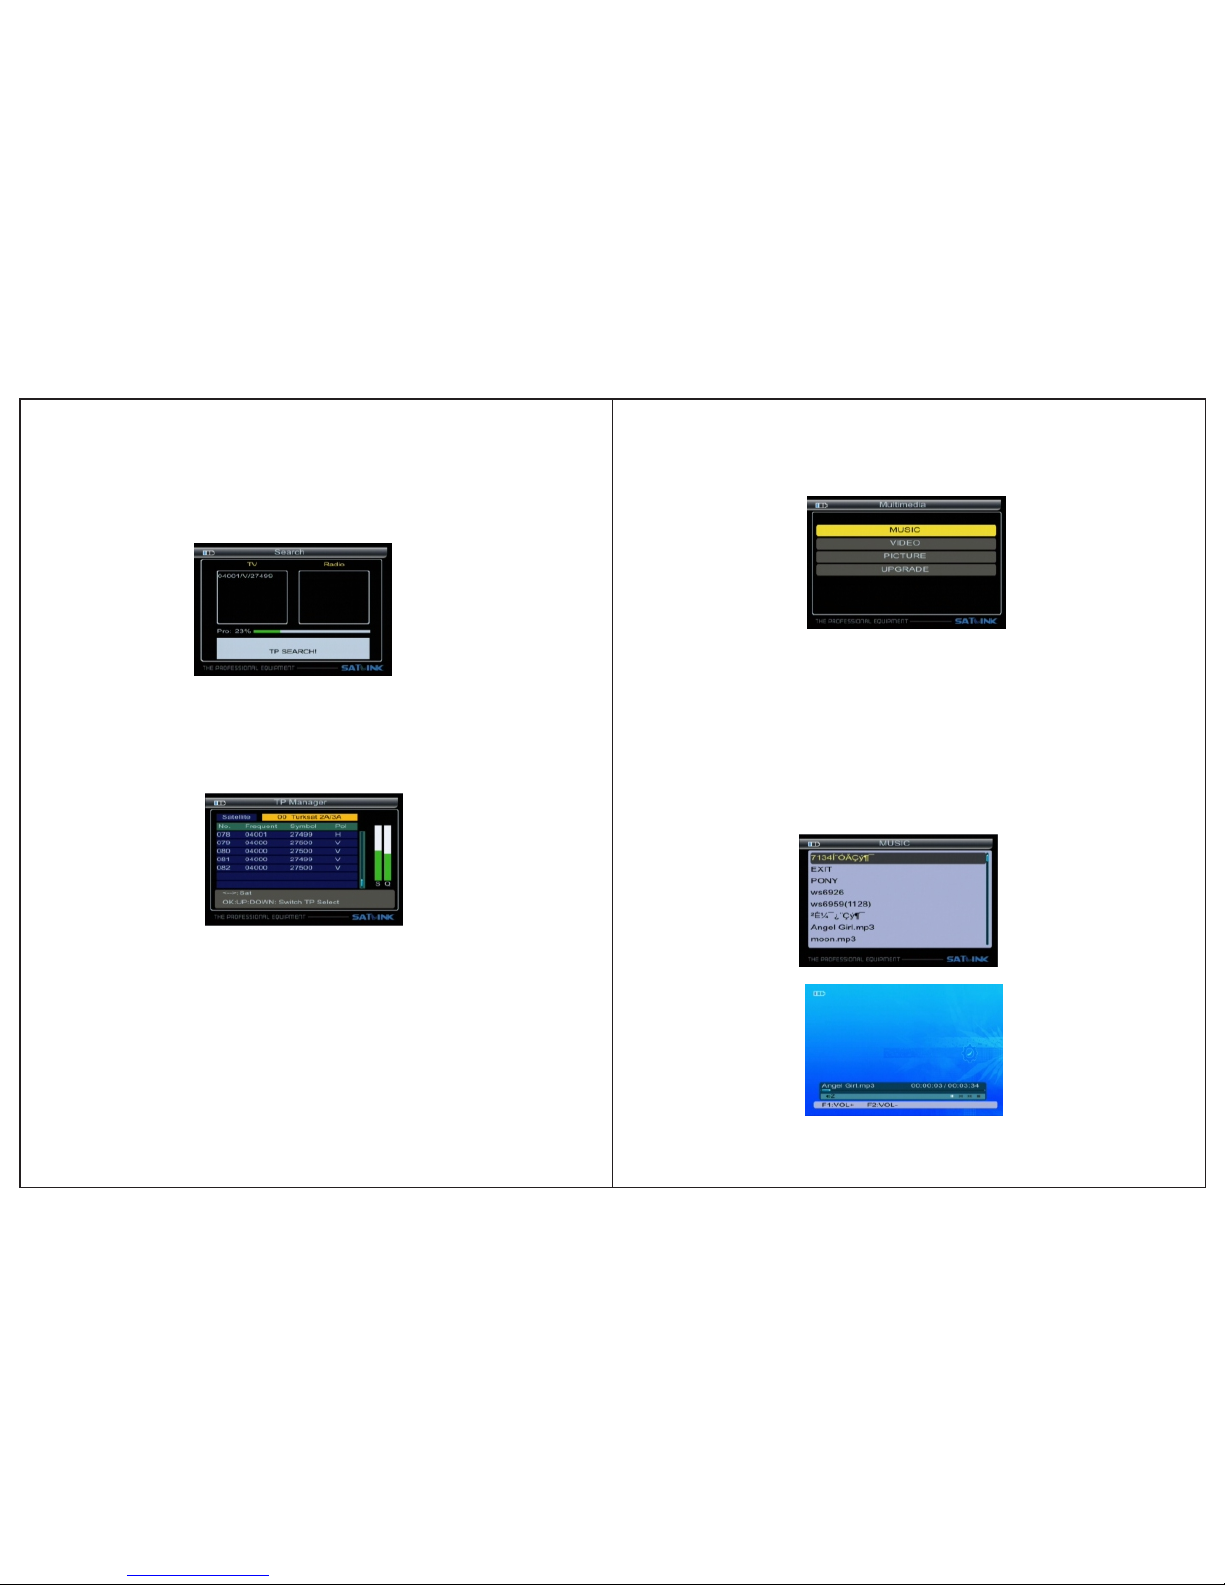
3.3 Multimedia.........................................................
3.3.1 MUSIC.....................................................
3.3.2 VIDEO.....................................................
LOW FREQ / HIGH FREQ
Frequency
Symbrate
Pol
3.1.8 NIT Search
3.1.9 LNB Power
3.1.10 LNB 22KHZ
3.1.11 DisEqc type & Input
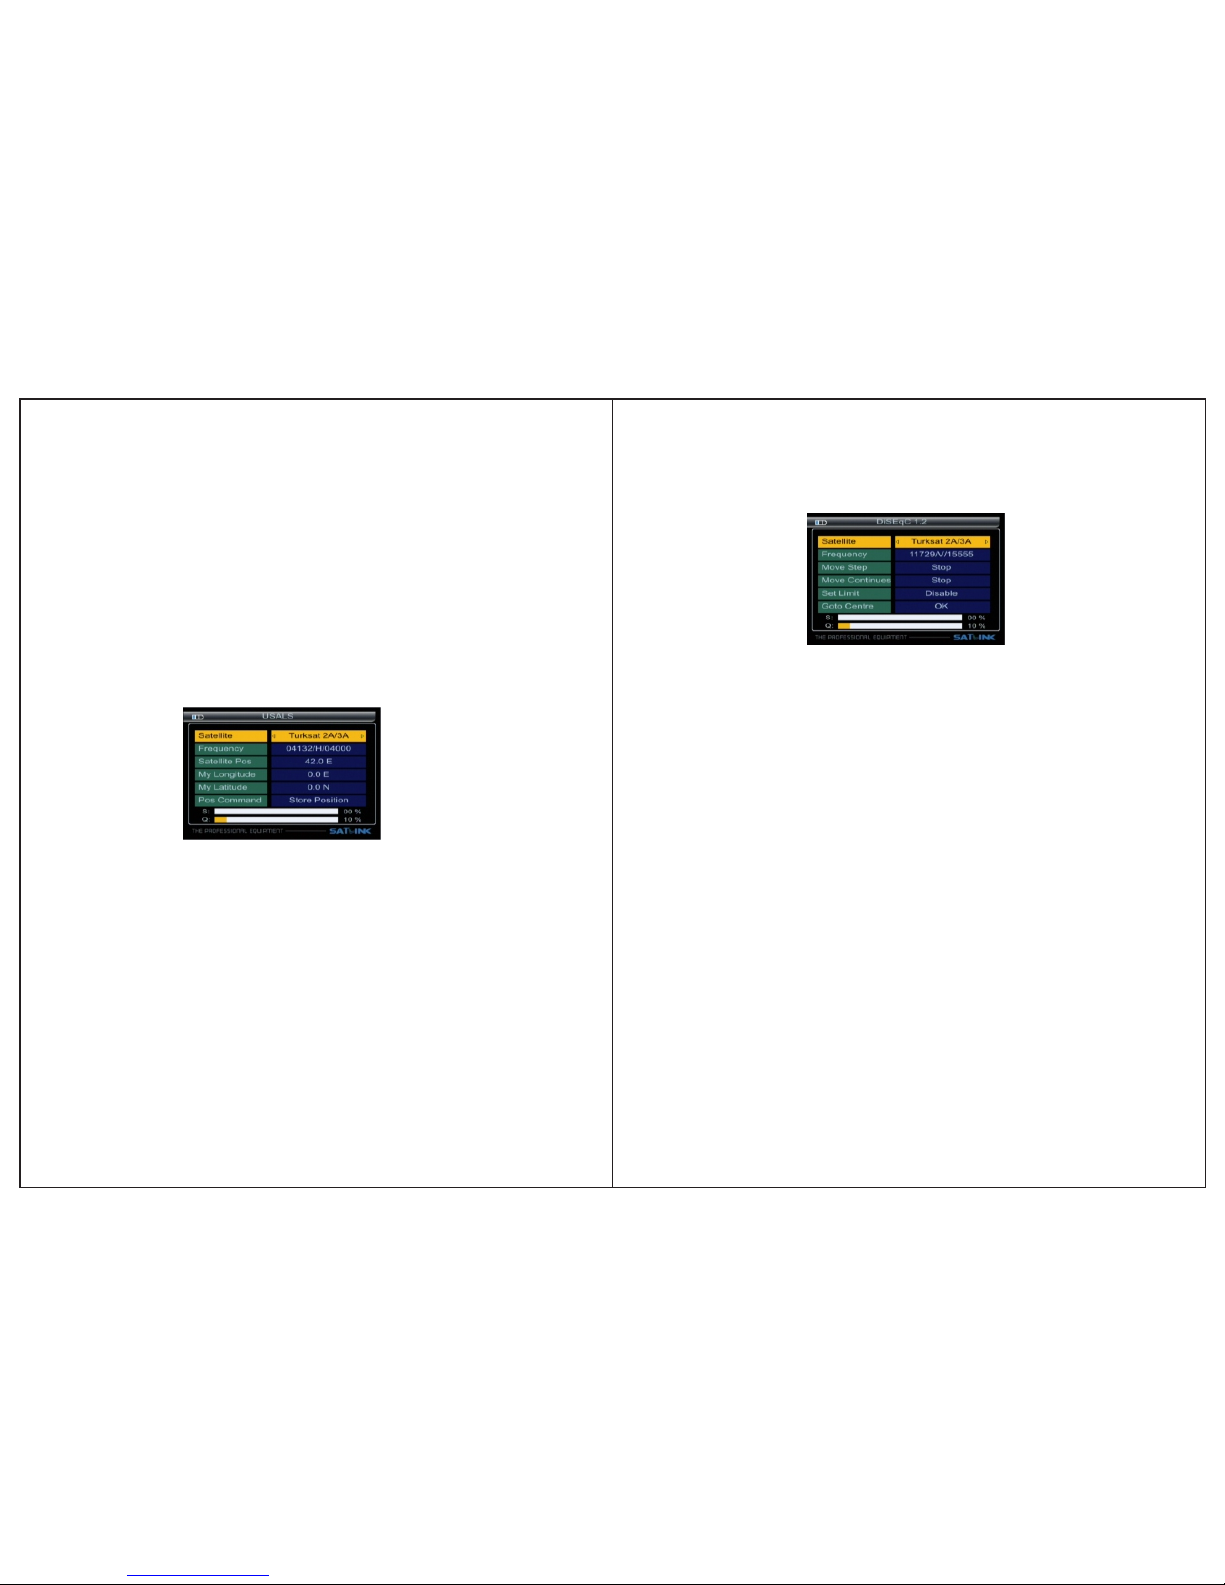
3.1.12 Motor
3.1.13 Unicable setting
3.1.0.1 Quick Search
3.2TP Manager
3.3.3 PICTRUE.................................................
3.3.4 Upgrade...........................................................
3.4 System Setting....................................................
3.4.1 Language...................................................
3.4.2 Screen format............................................
3.4.3 ..............................................
3.4.4
..................................................
3.4.5 Time Zone..................................................
3.4.6 Channel reset.............................................
3.4.7 Mode, SW VER, Release Time..................
4. Channel......................................................................
4.1 Manager Channel...............................................
4.1.1 Rename Channel.......................................
4.1.2 Del Channel...............................................
4.1.3 Lock Channel.............................................
4.1.4 Skip Channel..............................................
4.2 Favorite Manager.................................................
4.2.1 ........................................................
4.2.2 .....................................................
4.2.3 ..................................................
4.2.4 ..................................................
4.2.5 ......................................................
4.3 EPG.....................................................................
4.4 Program List.........................................................
4.5 ................................................
5 Technical Specification..............................................
6 Trouble Shooting.......................................................
Factory reset
Longitude & Latitude; Location &Hemisphere
...................
Rename
Sort order
Favorite set
Favorite Sort
TV/Radio
4.2.6 Sat sort.......................................................
Subtitle & Teletext
01
05
02
06
07
08
08
10
13
01
06
07
07
08
08
08
08
08
08
09
11
11
13
14
02
26
28
15
15
16
18
18
18
18
18
18
18
19
19
19
19
25
25
24
23
23
23
22
22
21
21
21
20
20