satmap active 20 User manual

QUICK-START GUIDE

32
What’s in the box?
Active 20
GPS device
Lithium Polymer
battery pack
Micro SD
mapcard*
Micro SD
reader
Wall chargers (UK, EU)*
USB charging
/Sync cable*
Spare USB door* Car chargerAllen / hex key*
Remove battery
pack from unit.
1. Remove MicroSD card from
SD card adapter and insert
into MicroSD card slot.
2.
Turn on and follow
on screen instructions
4.
Replace battery pack.
3.
Initial setup
ON
button
*Box contents above are for reference only and are subject to change without notice.
Actual items shall depend on your chosen product package.

54
Button and Icon Overview TOUCHSCREEN Overview
Indicates current
backlight level
Indicates whether the trip log
is paused or recording
Indicates current
battery level
Indicates there is
toggleable mapping
available at the
current zoom level
Press to cycle
through backlight
brightness levels.
Hold to take
screenshot of
current screen
8-way directional pad
with centre-press
Current screen
Trip Log Icon
Toggle maps
Data Boxes Zoom out
Zoom in
Power
Options
Battery icon
Map Toggle Icon
Locate me Advance to
next primary
screen
D-Pad / joystick
Backlight button
Backlight icon
Indicates current
GPS signal strength
GPS icon
All the functions can be operated from the
button touch points on the screen

76
• Whilst in GPS MAP, moving the d-pad or dragging the map on the touchscreen will take you
into Planning mode and the blue Current Location circle changes to orange with crosshairs.
In this mode you can move about the map using the d-pad or touchscreen.
• Toggle Maps & Zoom In / Out work the same as in GPS Map mode.
• Centre press on the joystick to go to the POSITION INFO screen.
• Current Location is shown by the blue circle. If you are moving the Direction Indicator will
be displayed.
• Toggle Maps will switch the mapping between the base maps and any other mapping
scales from the inserted MapCard, if any are available at position and zoom level.
• Zoom In / Zoom Out to change the magnication of the map data on the screen.
Map layers will change at certain set levels (where available).
• Data Boxes These can be overlaid on the map in groups of two or four, and provide live
data on your current trip; the data displayed can be customized in the settings menu
(Main Menu > Settings > x Data Box Layout). There is also an option to overlay an altitude
graph; please see full user guide for more information.
• North Up / Trail Up / Trail Up (Low) This changes map orientation from North Up
(i.e. top of screen is xed north), Trail Up (map automatically orientates in direction of
travel), and Trail Up (Low) [as Trail Up, but with the Current Location indicator set lower on
the map screen; best for fast moving activities such as cycling].
Primary Screen: GPS Map Primary Screen: PLANNING mode
Current Location
Toggle Maps
Data Boxes
North Up / Trail Up /
Trail Up (Low)
Zoom out
Zoom in

98
• This mode shows useful information about the current cursor location, such as the current
grid reference and latitude and longitude.
• Set Marker - Used to get a straight-line distance and bearing between the marker and the
current cursor location.
• Set GoTo - Sets a single-leg route between your current/last known GPS location and the
selected GoTo position.
• Map Packs - Displays the map(s) available on the Map card in the device.
• Press Next to go to the Trip Log.
• Records and displays key statistics such as distance travelled, speed, and so on, with a handy
elevation prole of the trip.
• Remember to press Start to begin the TRIP LOG; this option will then change to Stop.
The Trip Log will now start recording your trail, and will leave a trail of red dots on the GPS
Map mode.
• When nished, or when pausing for rest, press Stop to stop the TRIP LOG.
• Menu - Various options to convert and save your route data.
• Track / Trail - A “snail” Trail is the line of red dots recording where you HAVE been. A Track is
a set of saved data that will display in the ROUTES MENU and can be recalled at any time to
follow on the map screen as a coloured route.
Primary Screen: TRIP LOGPrimary Screen: POSITION INFO
Next

1110
• Active Map - Displays title of map currently in use in GPS MAP / PLANNING SCREENS.
• Active Route - Displays title of current Route being shown in GPS MAP / PLANNING SCREENS.
• OOI Menu - Create, edit, and view “Objects of Interest” (Points [POI], Areas [AOI], Lines [LOI],
and Items [IOI] of Interest) stored on the Active 20 and current MapCard.
• Routes Menu - Create, edit, and view routes stored on the Active 20 and current MapCard.
• GoTo and Marker - Set a GoTo or Marker using a postcode, map coordinates, or POI.
• Settings - This is where all the device settings can be viewed and altered.
• GPS Map - Takes you back to the GPS MAP mode.
Primary Screen: COMPASSPrimary Screen: MAIN MENU
• The Active 20 features both a magentic and GPS compass, and switches between the two at
preset speeds (Main Menu > Settings > GPS Settings).
• The lower the speed set, the sooner the GPS compass takes over from the magnetic compass.
• Calibrate Compass - Calibrates onboard magentic compass. We advise that this be done at the
start of any important journey to ensure accurate bearings from the magentic compass.
• Pointer - Swaps between standard compass and pointer mode.
• Pointer mode allows you to select a target destination from the OOIs on your device.
• For more detailed information on this feature please see the full Active 20 User Guide.
Pointer
Next screenNext GPS MapGPS map
Calibrate Compass

1312
• The SHARED DATA screen shows nearby Active 12 & 20 devices
(that may have data that can be shared).
• This Device - here you can view the routes & OOIs on your device which you have enabled
sharing on. To enable sharing on a route/OOI:
• (Main Menu > OOI Menu > List All OOIs > *select the OOI you want to be sharable* > Edit > Share)
• (Main Menu > Routes Menu > *select Internal or SD Storage* > *select the route you want to be
sharable* > Edit > Share Route)
• Other Devices - These are nearby Active 12 & 20 devices listed below This Device. Highlight a
device using the joystick and press Select to see what Routes/OOIs may be available to Fetch to
your device.
• Turn Bluetooth Off - Toggles Bluetooth on/off
• Bluetooth Devices - View all nearby Bluetooth enabled devices. Shows as Settings if Bluetooth
is off.
• Location – Gives your current location. Format depends of your choice Position Display Format
(Main Menu > Settings > GPS Settings)
• Elevation – Gives your current elevation. Measurement depends on your choice of units
(Main Menu > Settings > Units and Set Speed).
• UTC Time – Gives the current time in Coordinated Universal Time.
• Av SNR & Max SNR – Indicates the current average and maximum Signal to Noise ratio.
• Accuracy – Gives current accuracy of the GPS signal. Measurement depends on your choice
of units (Main Menu > Settings > Units and Set Speed). Until a GPS lock is acquired, “Acquiring
GPS” is shown in place of Accuracy.
• The GPS Status screen shows a live graph of the number & type of satellites the device can
currently see and their relative signal strength.
• A minimum of 4 satellites are needed for a GPS lock, which is indicated when the signal bar
turns from dark blue to bright green. Satellite lock times may vary, subject to conditions (e.g.
weather, tree cover, GPS satellite position relative to your location, etc).
• For more detailed information on the data shown on this screen, please see the full user guide.
• If the device has not currently obtained a satellite lock, the date, time, and location of the last
known GPS lock are shown in place of Elevation.
Primary Screen: GPS STATUSPrimary Screen: SHARED DATA
NextGPS map

1514
battery Handling
As part of ensuring the Active 20
stays watertight, the battery pack
features a snug silicone rubber seal.
As such, after the battery pack has
been left in the unit for an extended
time without being removed, you may
nd that the snug silicone rubber
seal on the battery pack slightly
impedes its removal from the unit.
If this occurs, the best way to remove
the battery pack is to pinch the battery
pack latches a few times to disrupt
the seal, and then pull the pack out;
you may nd that gently prying the
battery pack at the top between the
unit and pack with a ngernail will help.
When storing the Active 20 for a
long period we recommend that the
battery pack be disengaged; simply
pinch and pull the battery pack from
the unit and leave loose in the unit.
Spare batteries
Whether you are going for a short walk
or a long hike, we recommend that you
always carry a spare set of batteries
(Rechargeable LiPol or Lithium AA),
keeping them in a watertight container
(e.g. a small clip-lock food container),
as although the Active 20 will give you
many hours of use with fresh batteries,
having a set of spare batteries with
you gives simple peace of mind just
in case you nd yourself out in the
wilds with the battery running low.
Using MapCards:
1. If Active 20 is on, power off.
2. Remove battery from unit.
3. Insert microSD card into slot, printed side upward;
if another Mapcard already present, remove rst.
4. Replace battery and turn Active 20 on.
5. Once the Active 20 has loaded, the unit will beep 3 times to indicate it has
seen that a MapCard is present. Loading times will vary depending on the
amount of mapping data on the MapCard (e.g. a National Trail MapCard will
load faster than a Whole GB 1:25k MapCard simply due to the area covered).
6. When the MapCard has been loaded, the Map Packs screen will
appear. From here you can press View Map to see the mapping
from its centrepoint, or Back to return to the last screen.
7. If the inserted MapCard has more than one mapping scale (e.g. our GB
Platinum Whole MapCards), the scales can be easily toggled in to by
pressing the Toggle button on the mid-left side of the unit. Please be
aware that you will need to be at a suitable zoom level to toggle each
layer. As a rough guide, to view 1:10k maps you will need to be below
1:15k, 1:25k maps below 1:30k, and 1:50k maps below 1:70k.
Tips & Tricks
The Active 20 is purpose-built for the
great outdoors, offering a long battery life
in a shock and waterproof casing.
Although the unit has been built to be
rugged and reliable, you should remember
that this is a complex electronic device
requiring specic care and maintenance
to ensure many years of accurate and
reliable use.
Spare Mapping
Although the Active 20 has been
designed for use in the great
outdoors, it is good practice to carry
a compass along with a paper map
of the area(s) you intend to travel
over. Ensuring you know how to
make correct use of both can help
to avoid unexpected difculties.
Understanding Your Map
Whilst the Active 20 can show you
your position on the map within a
few metres, it cannot alert you to
any potential dangers. As such it is
very important that you understand
the symbols and notations on
the map before setting out.
If you are unfamiliar with any symbols
or notations, the map legends for all
our mapping can be viewed in the
Knowledge Centre on our website.
https://satmap.com/knowledge-base

1716
Accuracy
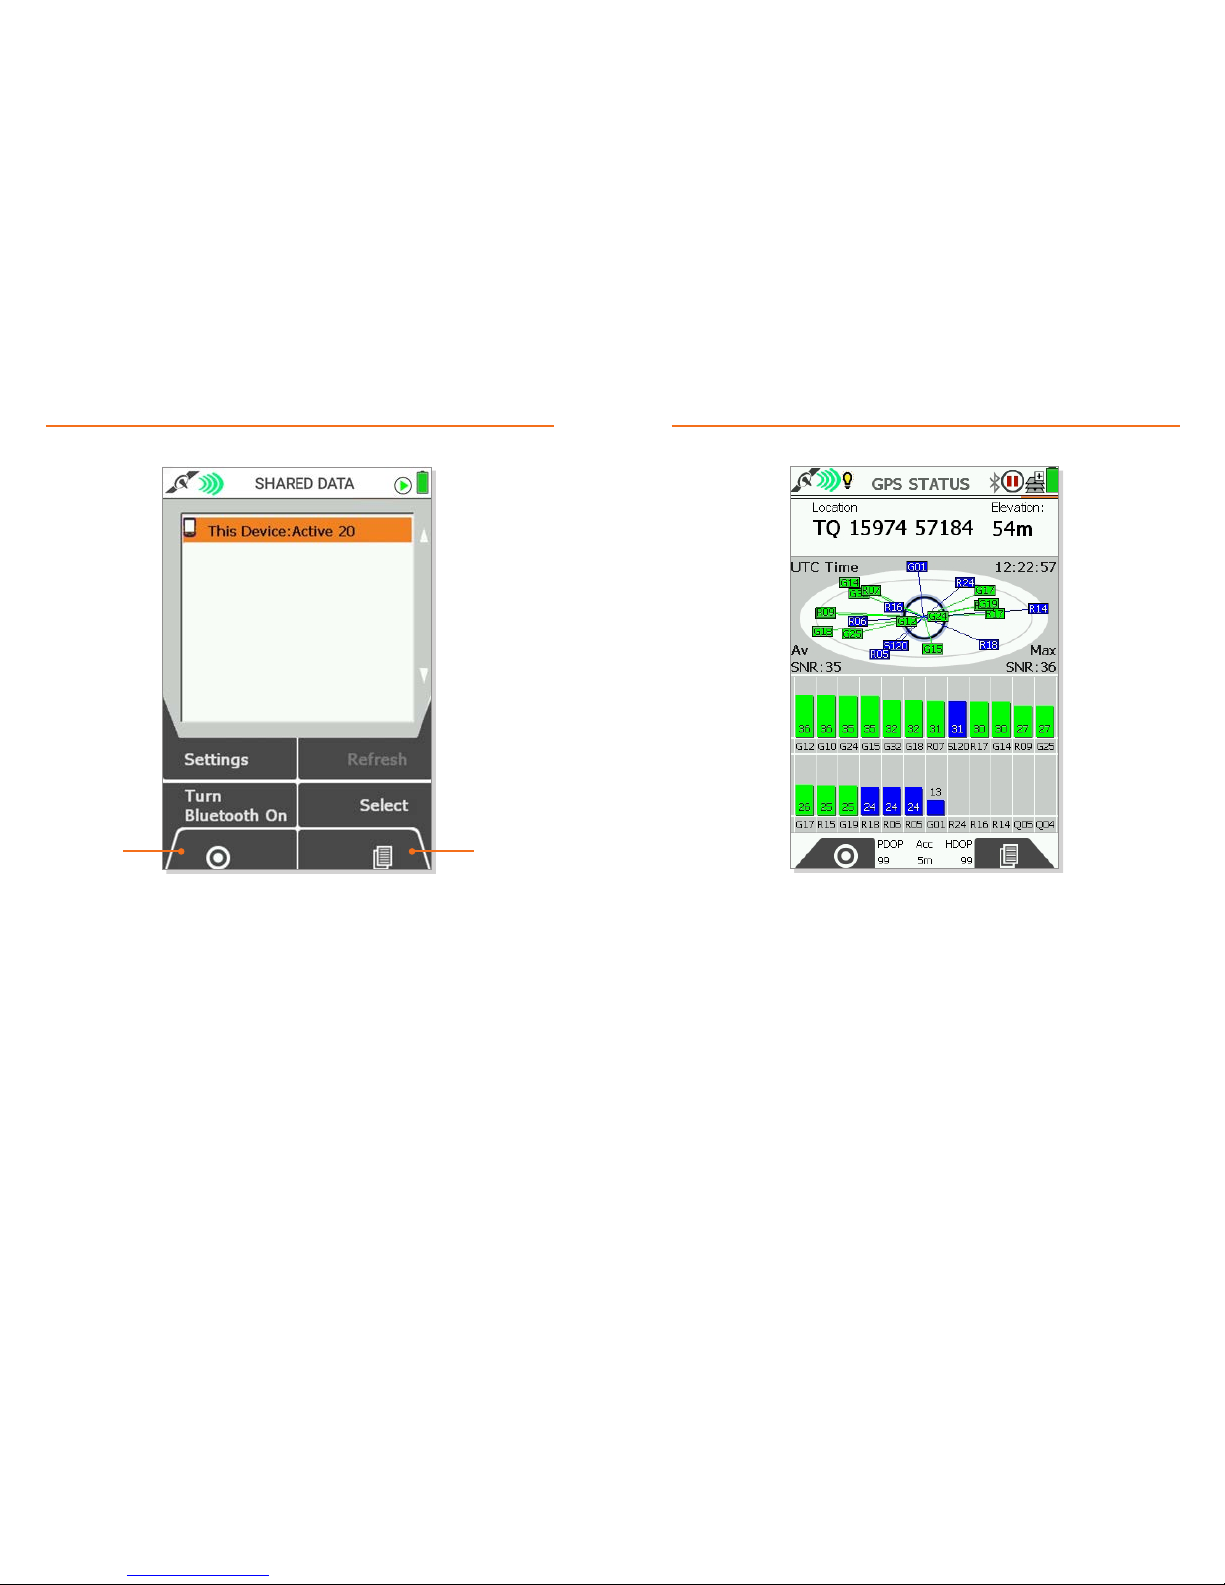
It is important you understand
the accuracy of any GNSS (Global
Navigation Satellite System) device
is variable. The GNSS system, which
includes the GPS, GLONASS, and
GALILEO satellite constellations,
uses triangulation between these
constellations and your Active 20
to determine your location. There
are a number of factors which can
reduce the accuracy of this, including
poor weather, a restricted view of
the sky (e.g. inside a building, city
environments, thick tree cover,
etc). You may also notice a variable
performance from one day to
the next; this is due to the fact
that the position of the satellites
overhead changes, which results
in different triangulation values.
Understanding this variability in the
accuracy is important when enjoying
outdoor pursuits in the proximity of
dangerous features (e.g. lakes, rivers,
marshes, cliffs, etc) as users must
still apply safe practice and be aware
of the weather conditions and their
own abilities in order to avoid potential
dangers and unnecessary risks.
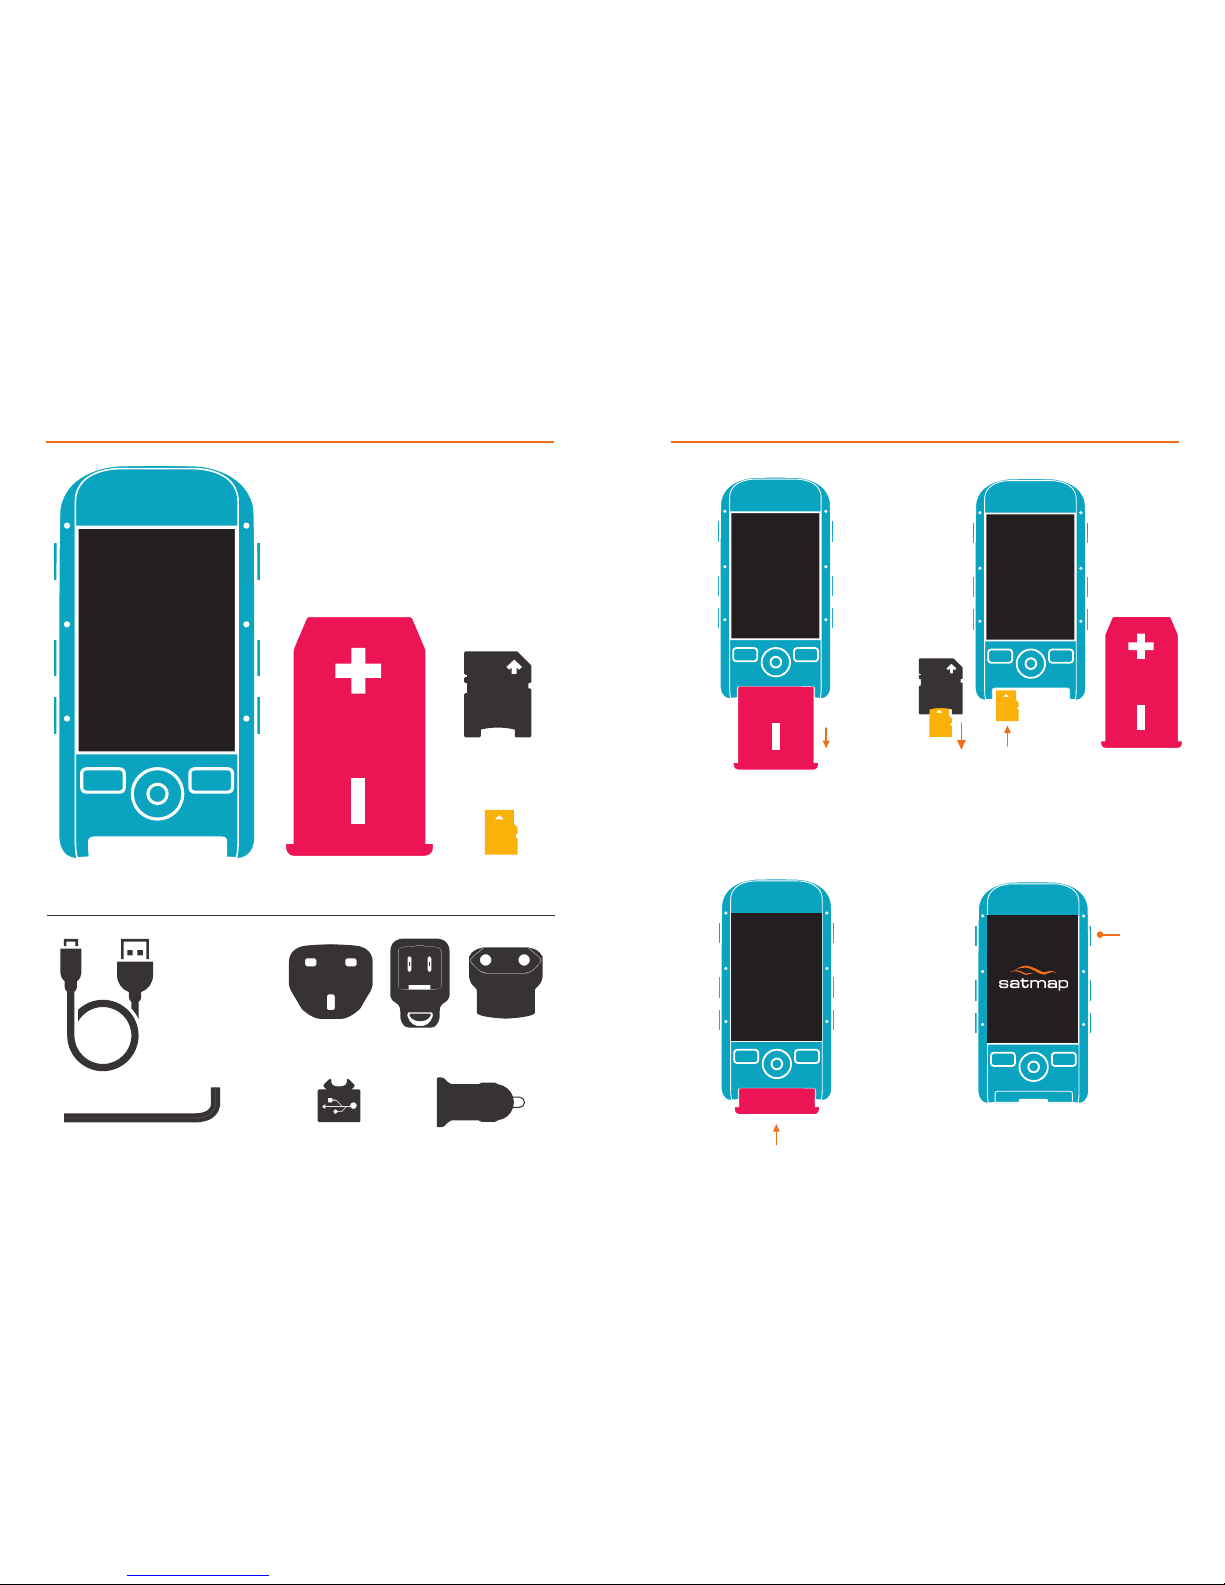
Battery charging
When using the Lithium Polymer
(LiPol) battery pack supplied with
the Active 20, it is recommended
that it is charged using original
Satmap charging devices (e.g. such
as the wall charger & car charger
supplied with the unit) for optimal
performance, as these provide power
at 5v 1a which in turn allows for fast
and safe charging of the Active 20.
Receive regular notices on new
products, special offers and
software updates. If a lost Active 20
is found, we can trace the owner.
Battery Options
We recommend using the
rechargeable Lithium Polymer
(LiPol) battery in your Active
20 as this has been designed
to offer the best performance
compared to AA batteries.
If you wished to use AA batteries,
we recommend using Lithium
AA batteries as these will have
a longer running time than
standard Alkaline AA batteries.
Missing / Worn Parts
Whilst we hope that the Active 20
will provide years of trouble free
usage, if any parts of the Active 20
become lost or worn down during
your adventures, we recommend
that the unit be sent in to us for
assessment and repair. Failure to do
so promptly may result in irreparable
damage and also result in partial
or complete loss of warranty.
Rubber seals, such as the USB port
cover and main seal on the LiPol
Battery Pack and AA Battery Caddy,
should be checked periodically for
signs of wear to ensure that the
device remains in top condition.
Caring for your Active 20
Support
Register your Active 20
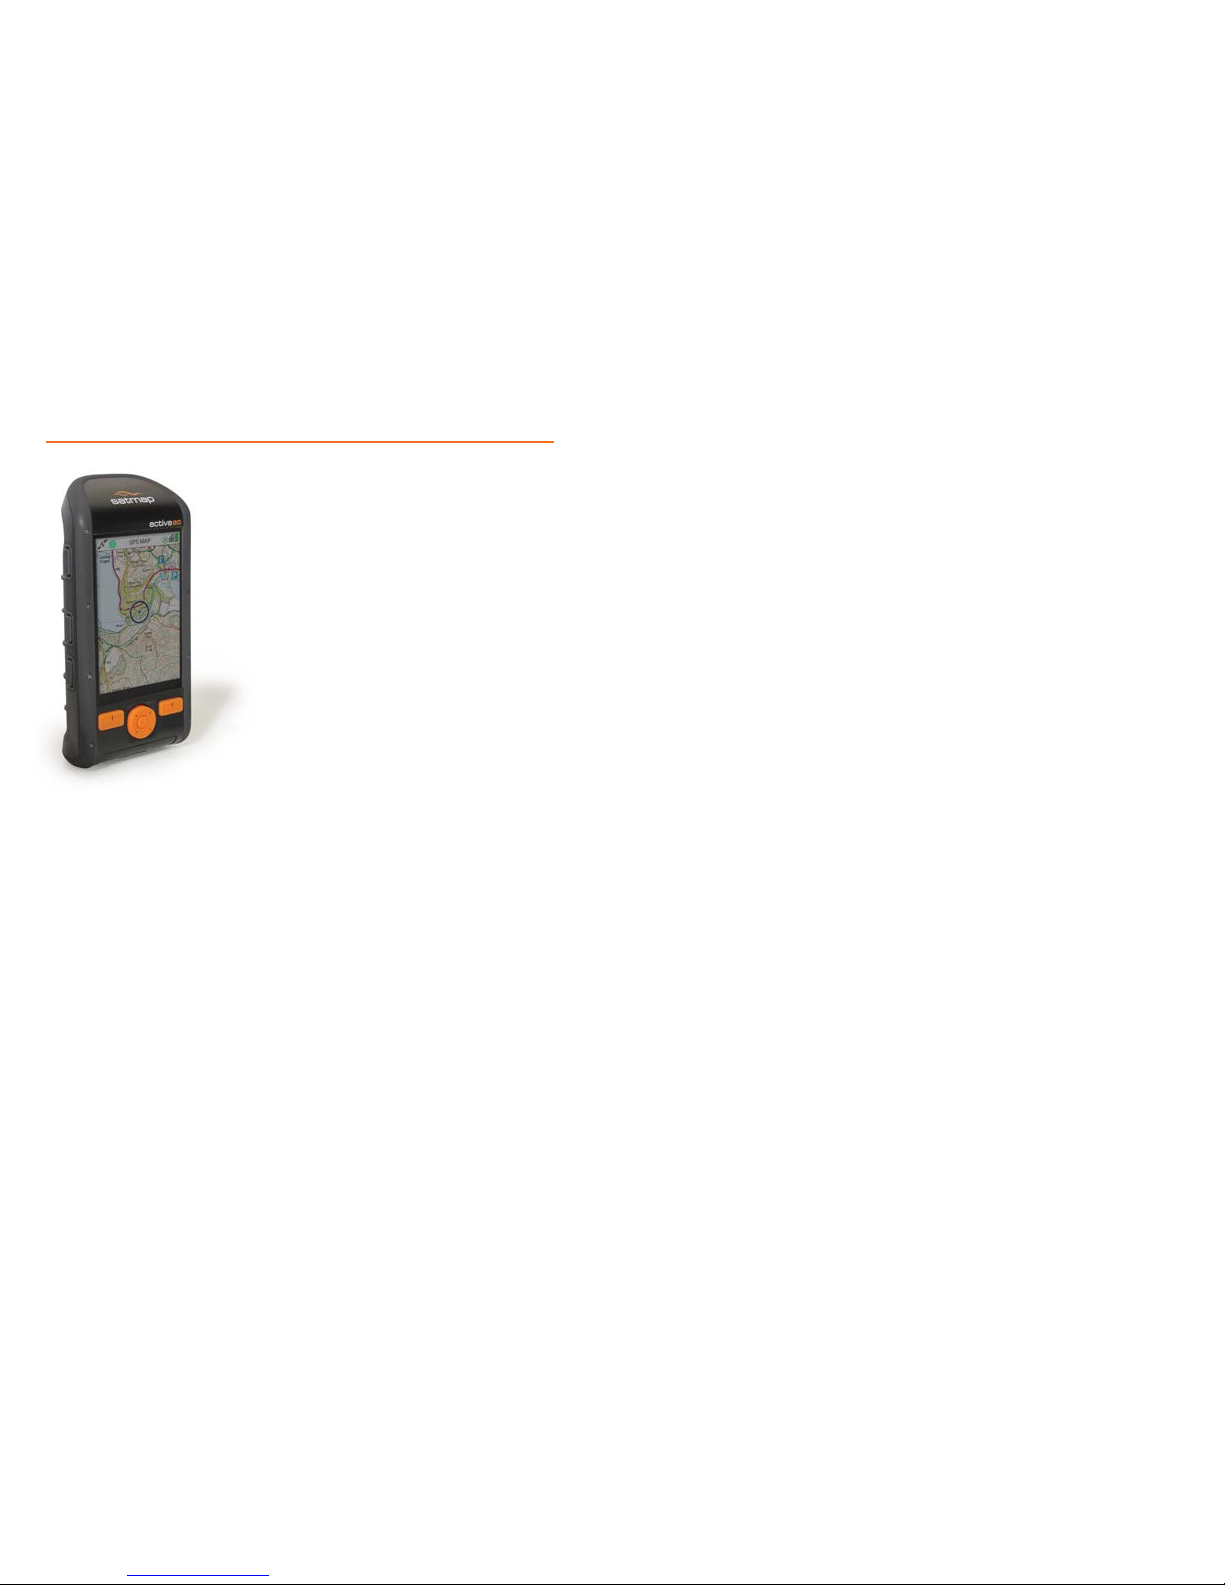
The Active 20 has been
designed to resist all inclement
weather conditions and even
submersion in water up to 3m.
Rated at IP68, the Active 20
should easily handle wet or
dusty environments, as long as
these care tips are followed.
It is extremely important to ensure
the battery pack and USB door are
rmly closed at all times; failure
to do so will negate the watertight
capability of the Active 20.
In the event you need help with any
aspect of your Active GPS device
or guidance on choice of mapping
or accessories, please do not
hesitate to contact us via our online
knowledge centre and help desk.
Where possible do not open the
USB door or remove the battery
pack in inclement weather. If
completely unavoidable make all
attempts to keep the unit and battery
pack dry to ensure that moisture
is not allowed into the unit.
Do not expose the MapCards
to moisture. They should be
kept clean and dry at all times
to ensure functionality.
NEVER insert a damp, wet, or dirty
Micro SD card into the Active 20.
Here you will nd a vast library of
frequently asked questions with
detailed answers, and through
which you may contact us directly
with any other enquiries.
Select the ‘Register Active 20’ option
when you visit: www.satmap.com

1918
Map Voucher
Maps & Accessories
We have mapping for all the UK, in Ordnance Survey
and our own Adventure Mapping
USB charging/Sync cable
Vehicle Mount
Lanyard
Bike Mount
Wall chargers (UK, EU)
Front Mount
Spare USB Door
(single)
Spare USB Door
(Set of 3)
Spare USB Door
(Set of 5)

Other manuals for active 20
2
Table of contents
Other satmap GPS manuals