Thank you for purchasing this light fitting. Please read the instructions carefully before use to ensure safe and
satisfactory operation of this product. Please retain these instructions for future reference.
Warning
Technical data
Please read these instructions carefully before
commencing any work.
This light fitting should be connected to a circuit
with a 30mA RCD fitted.
We recommend that you use H05RN-F
specification cable (not supplied) which is an
outdoor grade, rubber sheathed cable.
The mains supply cable must have a minimum
cross sectional area of 1.0mm²
The products can be wall or ceiling mounted. If
wall mounting ensure that the power supply is
at the bottom.
This unit must be fitted by a competent and
qualified electrician.
Check the pack and make sure you have all of the
parts listed.
To prevent electrocution switch off at mains supply
before installing or maintaining this fitting.
Ensure other persons cannot restore the electrical
supply without your knowledge.
Install in accordance with IEE Wiring regulations
and current Building Regulations.
Supply
Bulb Type:
Voltage: 240V~, 50 Hz
LED (16W) SMD 2835 3000K
The light source of this luminaire is not replaceable; when the light source reaches its end
of life the whole luminaire shall be replaced.
Conformity with all relevant EC Directive requirements.
Waste electrical products should not be disposed of with household waste.
Please recycle where facilities exist.Check with your Local Authority or
local store for recycling advice.
This product is not suitable for dimming.
Class I product, must be connected to earth.
Splash-proof
Installation
Commissioning
Existing fittings must be completely removed before installation of a new product. Before removing the
existing fitting, carefully note the position of each set of wires.
•Note that the switch is turned off before installation.
•Ensure that the screws and cable entry points
are sealed to maintain the IP rating of the product.
•Refit the shade, ensuring that the seals are
correctly located.
•Rotate and remove the shade.
•Hold the product in place and mark the position of the holes.
Ensure the wall is capable of holding the weight of the
product, or if fitting to a ceiling, ensure there is a joist
at the point of fixing to support the weight of the product.
•Fix the base to the wall using the screws and plugs.
Take care to avoid damaging any concealed wiring
and pipes. The correct fixings should be used for
brick, cavity walls or plasterboard.
•Pierce a hole in the grommet, and pull the cable through.
IP44
or plastic trunking.
Cables must be protected using suitable conduit
If replacing an existing fitting, make a careful note
of the connections.
Layout
•Plan the desired layout of these fittings carefully, ensuring the cables will reach the distances
each light fitting.
•Avoid locating any cables in positions that would
cause a hazard. Position cables and junction
boxes (not supplied) away from areas where
they may be at risk from being cut,
trapped or damaged.
If this unit is being fitted in a room containing
a bath or shower, a 30mA RCD must be
used - in accordance with IEE regulations.
•
This product is suitable for use in living areas,
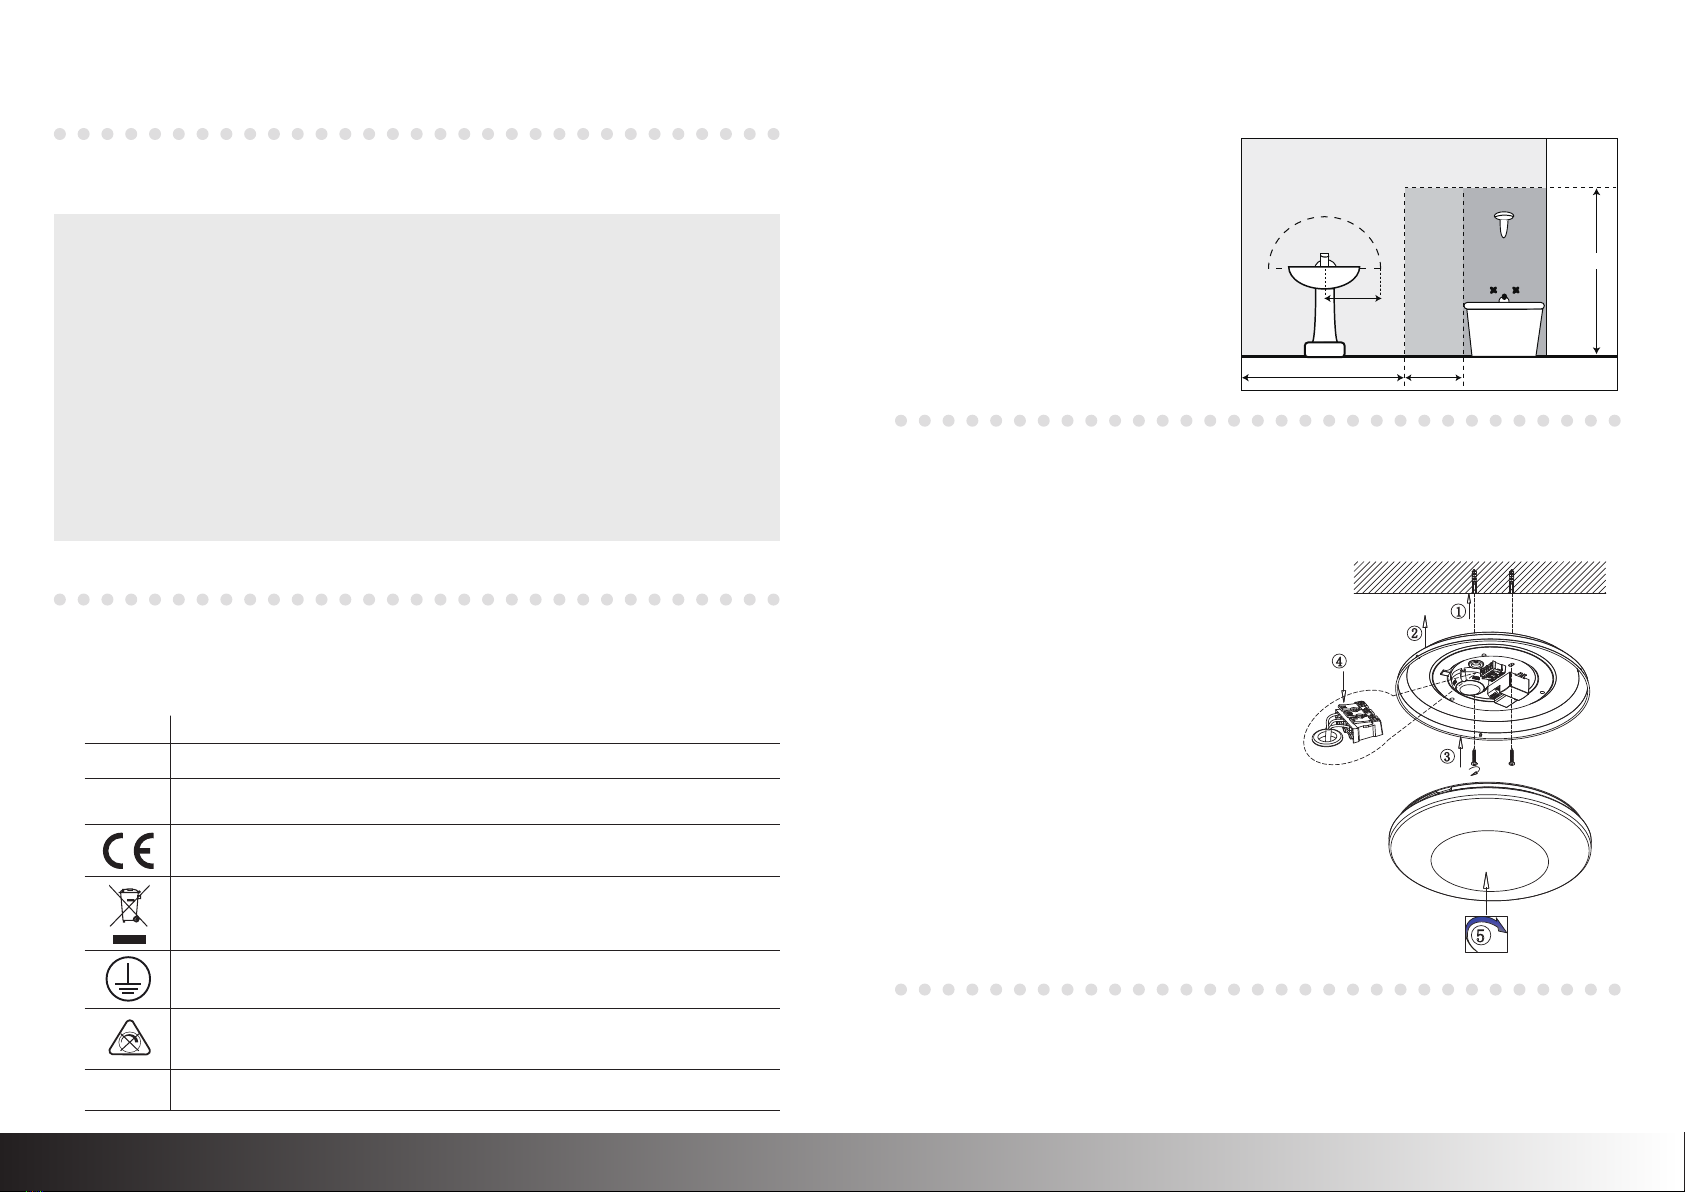
Bathroom Zone 2 and outsides of zones.
•
225cm
60cm240cm
60cm
radius
from tap
ZONE 1
ZONE 0
ZONE 2
ZONE 2
Bathroom Zones Diagram
•Gently push your chosen casing onto
the shade until it clips in place.
•Replace fuse or circuit breaker and
switch on. Your light is now ready for use.


