Page 2
version 2.0.4 SCARAB Gimbal assembly 14 Feb 2013 www.MultiCopterPilot.com
thru the open side - marked with a small ring/
ridge on the black plastic. Use ball link pliers
(Align K10338A)
11. Screw the two ends together until the gap is
approx 13mm. Take care not to damage the rod
ends. Use your hands/ngers to install.
12. Screw one ball into the outer hole of the Red
collar arm
13. There are three tray sizes - 23mmL ; 26mmL
and 29mmL which can be ordered for the
gimbal to suit various common servos.
14. The suplied servo uses the 26mmL CF plate
15. Servo - trim the servo ange with side cutters
to allow the pan heads to sit ush to the servo.
Bolt the Servo to the plate with 2 screws and
2 washers/nuts M3. Orientate the servo as
shown. so the pivot is furtherest away from the
boom
16. Screw one of the ball ends into the centre hole
(drill 1.5mm) of servo arm from the bottom
side
17. Use a servo tester to set the servo to mid
point 1500uSec and attach the servo arm so it
sits at 90° when at Rc Tx/Rx midpoint of 1500
uSecs - all angles should be 90°
18. Tighten down the top half of the gimbal main
assembly (temporarily) with 2 M2*6 screws
- then attach the servo plate to the assembly
with 2 M3 screws. Remove the M2 screws now.
19. Add a servo extension lead now if necessary
to reach your PARIS Cm2 pin. Complete the
remainer of mid deck electronics steps for
SCARAB - then close the two main frames
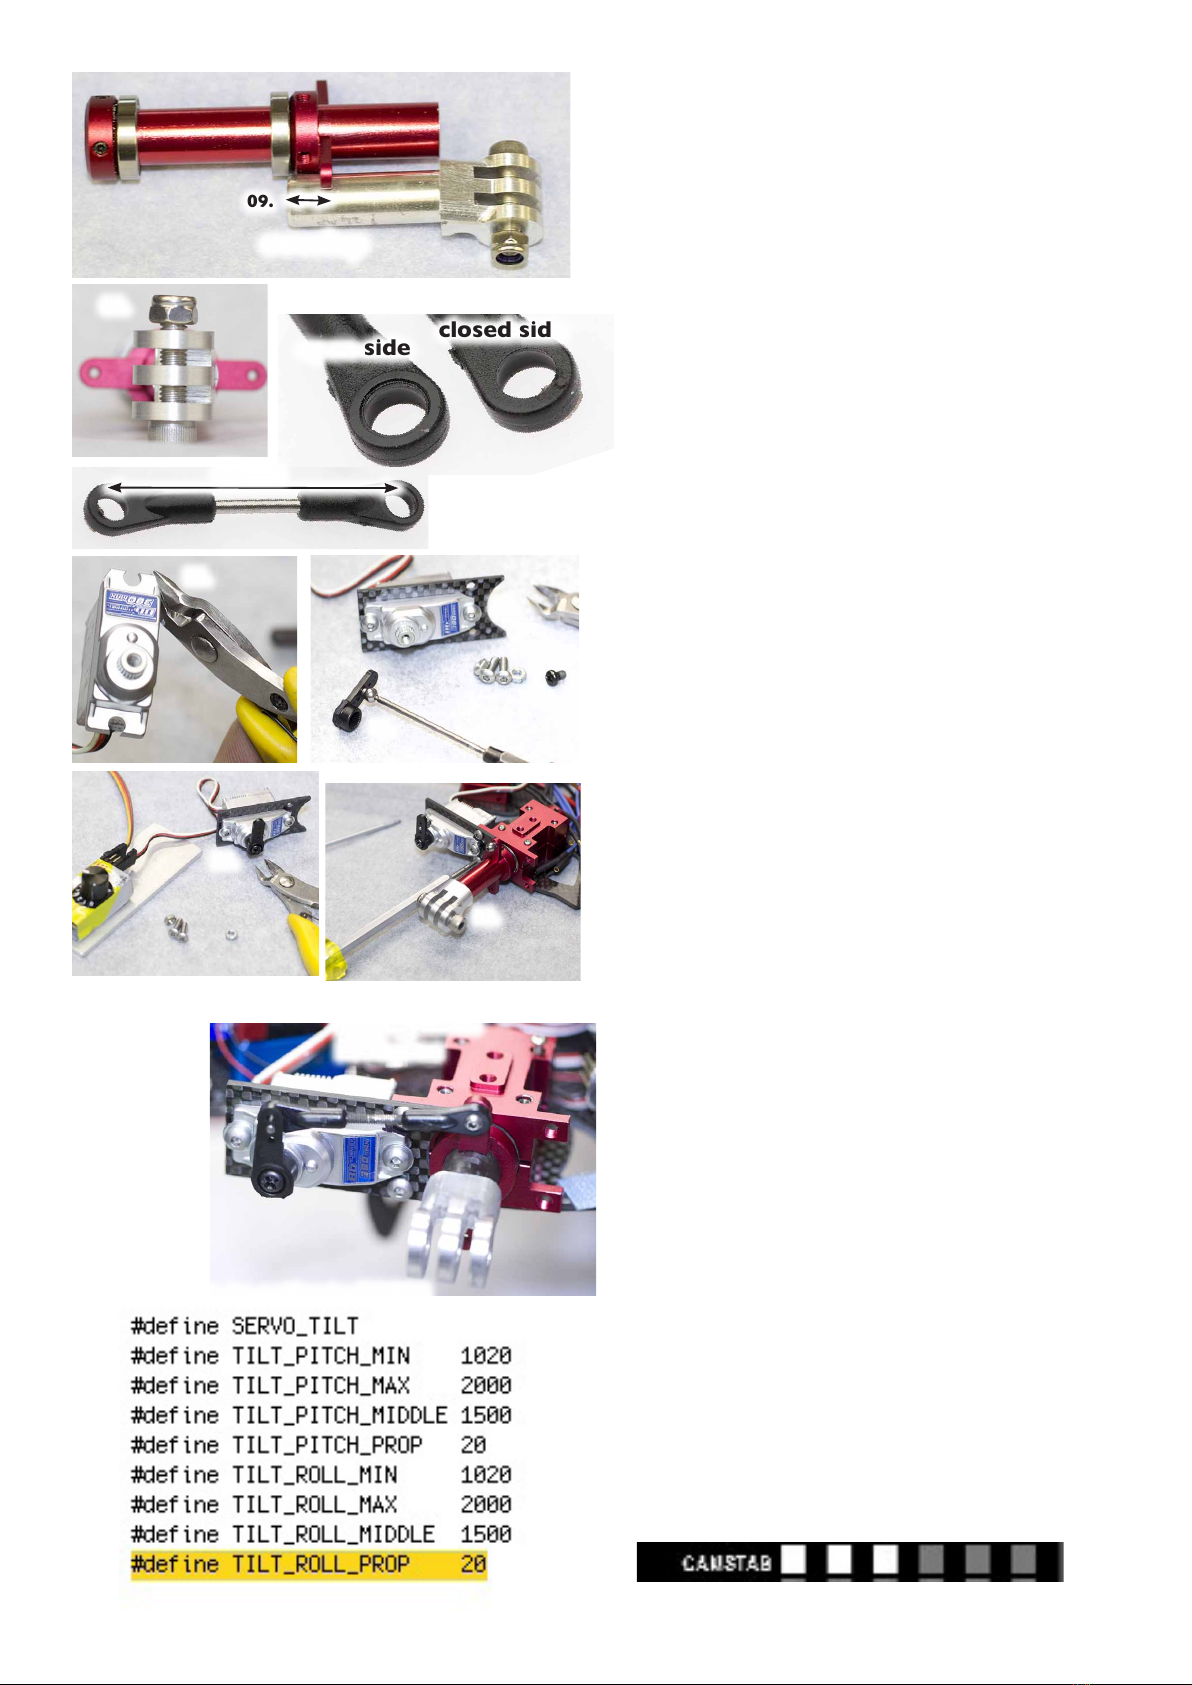
20. MultiwiiCopter Software 1.9 - In the GUI
activate the three boxes for CAMSTAB (below)
and press WRITE. In the Arduino code (below-
left) uncomment # dene servo tilt - set TILT_
ROLL_PROP to 20 (left).A setting of 16->22 is
usually OK. 16 for smoother centre.
21. There should be no play in the linkage drive
train - if assembled correctly. With the rod-link
OFF - check the gimbal for smooth movement
- the two red collars must be ush. The Servo
must NOT collide with anything at full travel -
use a servo tester to check clearances.
22. Balance all props dynamically - wishing a prop is
balanced just wont cut the mustard - you HAVE
to balance it for smooth video !!!
open side closed side
18.
16.
09.
09. 10.
15.
15.
17.
overlap
90° degrees
alignment at
1500uSec
arduino code to activate PARIS
40mm


