Schulze HotMug GIGANT User manual

Instruction manual
Version 11.01
HotMug
GIGANT
Version 11.01
1/11

1. Introduction
1.1 Content
1. Introduction 02
1.1 Content 02
1.2 Construction of the oven 03
1.3 Technical data 03
1.4 Safety arrangements of the oven 03
1.5 Safety precautions at the orkplace 04
2. Preparation activities 04
2.1 Remarks regarding transportation 04
2.2 Installation of the oven 04
2.3 Po er supply 04
2.4 Installation of the oven 05
3. Working wit t e oven 05
3.1 Programming of electronic devices 05
3.2 Application range and sample adjustments of the oven 05
3.3 Printing on the caps 06
4. Maintenance 07
4.1 Replacing the main fuse 07
4.2 Replacing electronic devices 07
4.3 Replacing the temperature sensor 08
4.4 Troubleshooting 09
4.5 Connection diagram 10
4.6 Testing report 11
4.7 EC-Conformance-Declaration 11
Version 11.01
2/11

1.2 Construction of t e oven
1. Grip
2. Oven
3. Electronics
4. Time start-button
5. Ventilator
6. Top ith the electronics
7. Main fuse
8. Main s itch
1.3 Tec nical data
Dimensions of the oven . . . . . . . . . . . 50 x 59 x 72 cm
Weight . . . . . . . . . . . . . . . . . . . . . . . . . . . . . . . . .35 kg
Operation voltage . . . . . . . . . . . . . . . . . . . . . . 230VAC
Performance . . . . . . . . . . . . . . . . . . . . . . . . . . . 2400 W
main fuse . . . . . . . . . . . . . . . . . . . . . . . . . . . . . . . 12A
Temperature range . . . . . . . . . . . . . . . . . . . 0 – 200°C
Time settings. . . . . . . . . . . . . . . . . . . 1sek – 99:59 Min
1.4 Safety arrangements of t e oven
The oven is equipped ith different safety arrangements, to make a safe usage possible.
Main fuse 12A
The main fuse 12A is placed next to the main s itch of the oven. In case of overcharge, the main fuse prevents the oven from getting
damaged.
Once the fuse as activated, it has to be replaced. The instruction for replacing the main fuse can be found in chapter 4.1.
Acoustic signal
3 Seconds before the end of the pressing process an acoustic signal ill sound.
Version 11.01
3/11

1.5 Safety precautions at t e workplace
Testing of t e oven
After a correct installation of the oven it is important to ensure that the oven orks properly, isn't damaged and has no safety defects. The
testing can only be done by the employer or other authorized persons and is mandatory to guarantee correct installation and safe usage of
the oven.
If any irregularities regarding functionality or safety are found during the testing, these have to been noted and reported to Walter Schulze
GmbH in ritten form ithin 7 days. Until clarification the press can not be used.
Information and Education
According to § 81 industrial relations la and § 14 employment protection la the employer has to make arrangements to give all
information about the function and the range of application to the user.
In particular the user needs to be acquainted ith the complete manual and be explicitly informed of the dangers of orking ith the oven.
The details have to be explained in a coherent form and language.
Safety distance and ventilation
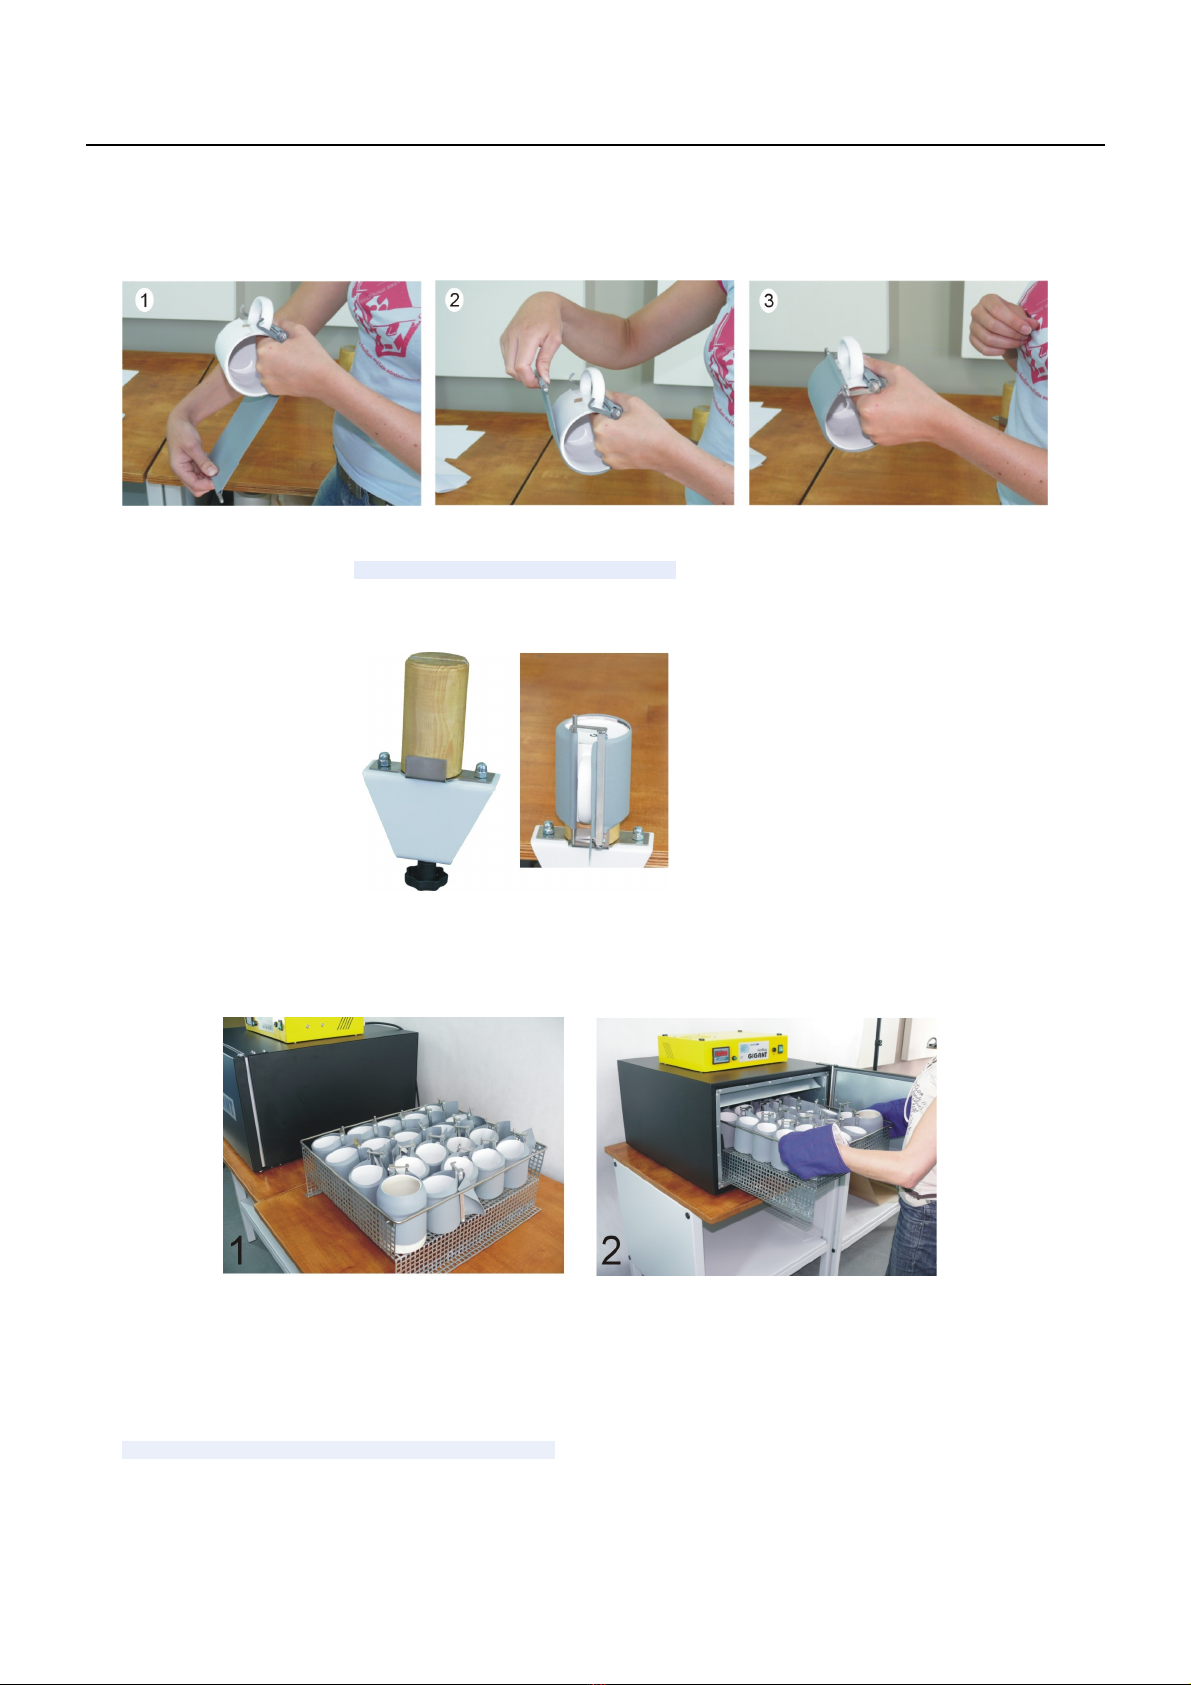
The oven has to be installed at a place hich gives enough space on both sides to put the cup in.
The space in front of the oven has to be ide enough to let nothing disturb the user at ork.
Using the oven ith certain materials may create a strong smell. That’s hy the user should evaluate the need for a ventilation system at
the orkplace.
Safety instruction:
•The oven should only be used by trained personal after notice of this manual.
•Only one person is allo ed to ork on the oven at a time.
•The surface of the table must be heat resistant.
•Be are of the oven – risk of burns.
•The plug has to be pulled out of the po er outlet hile maintenance.
•Caution: please do not connect this press to any other outlet (socket) than those equipped ith ground-fault protection ELCB
(earth leakage circuit breaker).
2. Preparation activities
2.1 Remarks regarding transportation
The HotMug GIGANT is covered ith a cardboard for transport. Right after the receiving you should check if the cardboard and the oven
are in good condition. Later on, if you have to send the oven some here, e ask you to cover the oven ith the same cardboard and in
the same ay. The oven has to be cold.
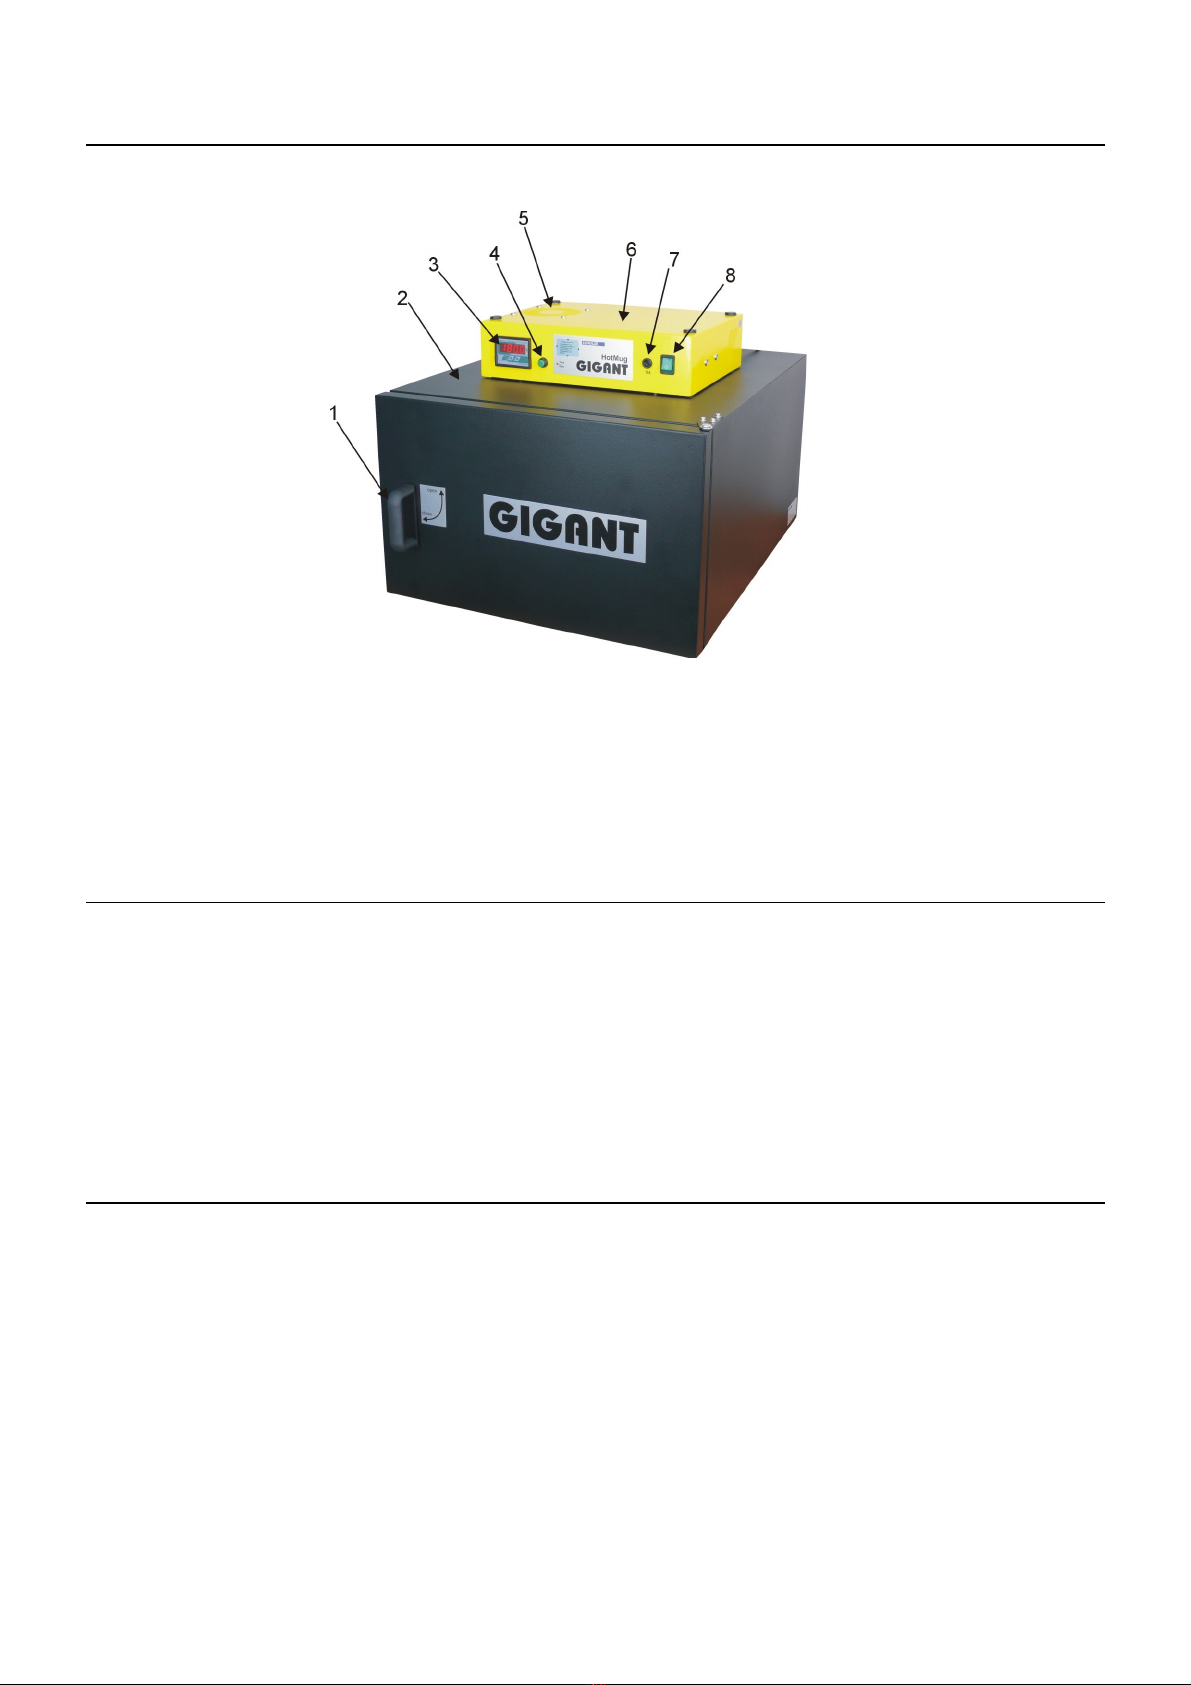
2.2 Installation of t e oven
The oven is delivered in a cardboard. After unpacking and connecting oven can be orked ith. The HotMug GIGANT doesn't need any
other installations.
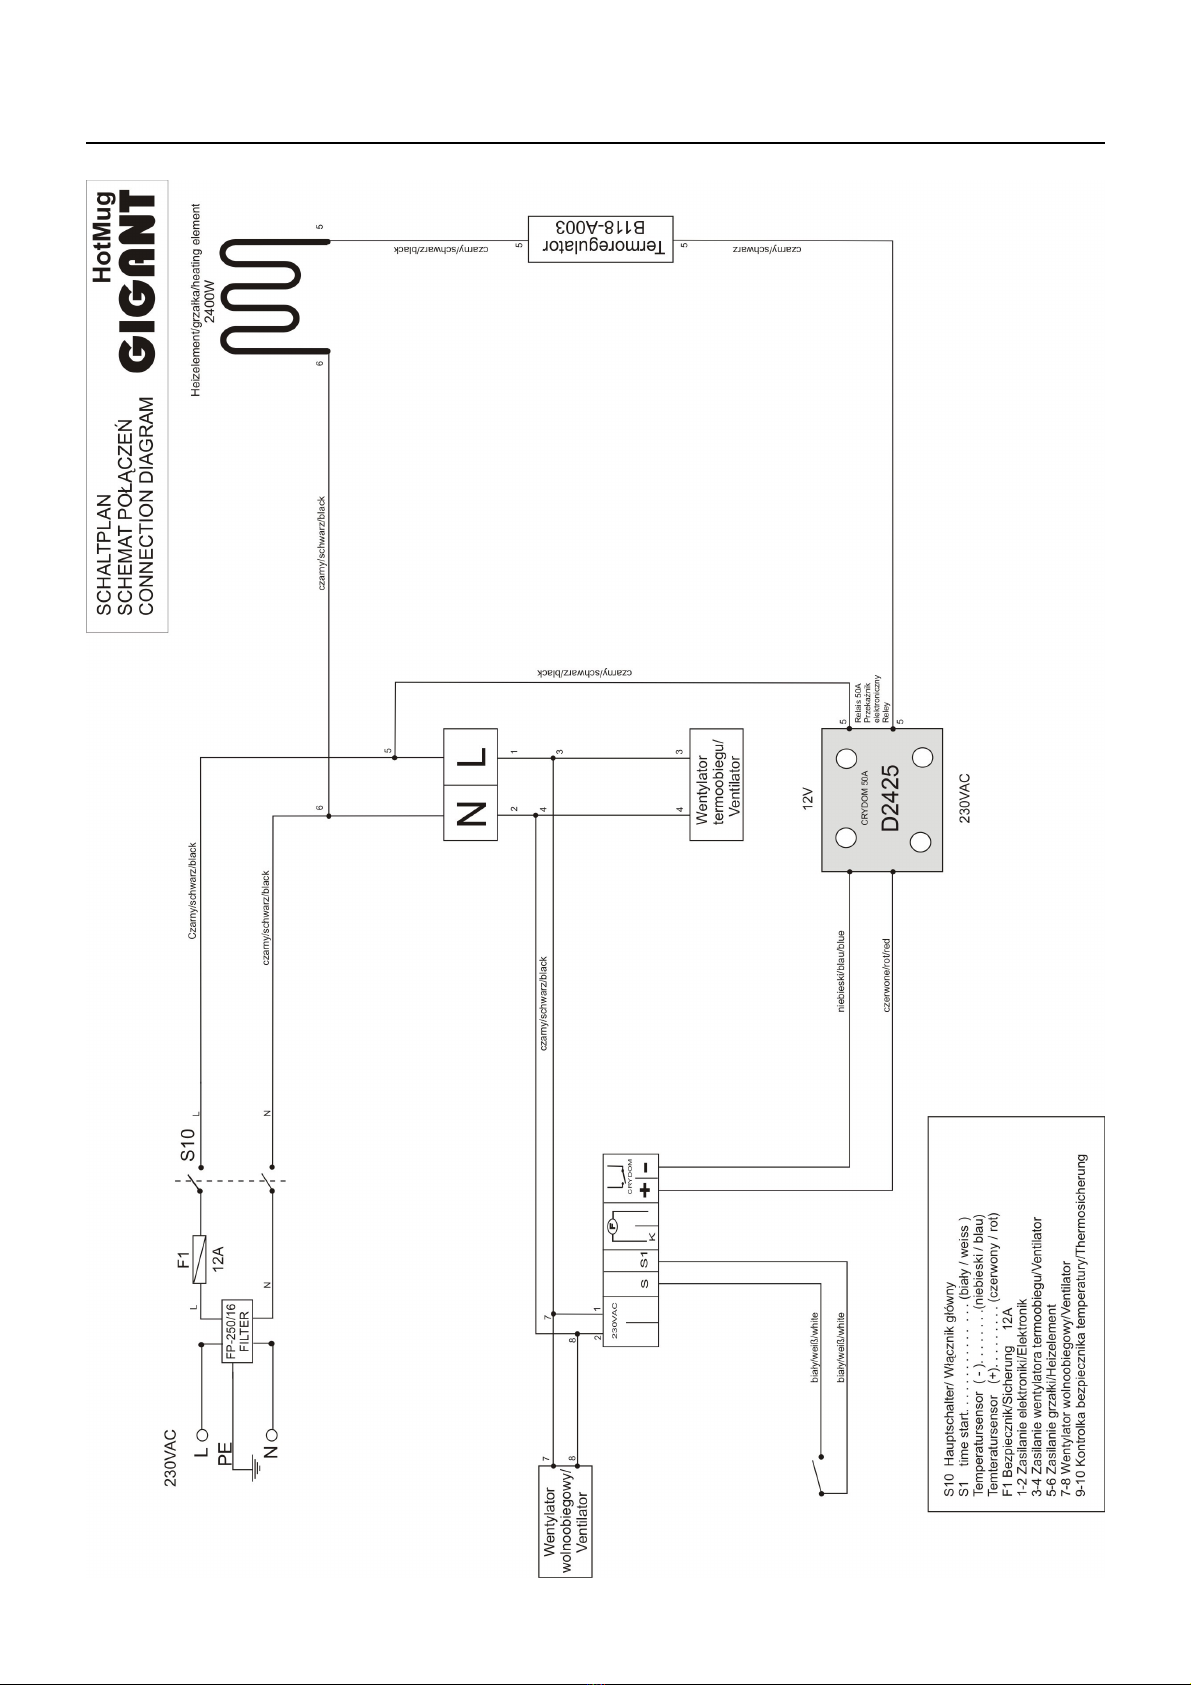
2.3 Power supply
The HotMug GIGANT has to be connected to a voltage of 230VAC/ 50Hz. The oven is equipped ith a plug. Make sure that the po er
outlet is in the right condition and that the grounding is connected to the po er outlet.
Caution: please do not connect this press to any other outlet (socket) than those equipped ith ground-fault protection ELCB (earth
leakage circuit breaker).
2.4 Installation of t e oven
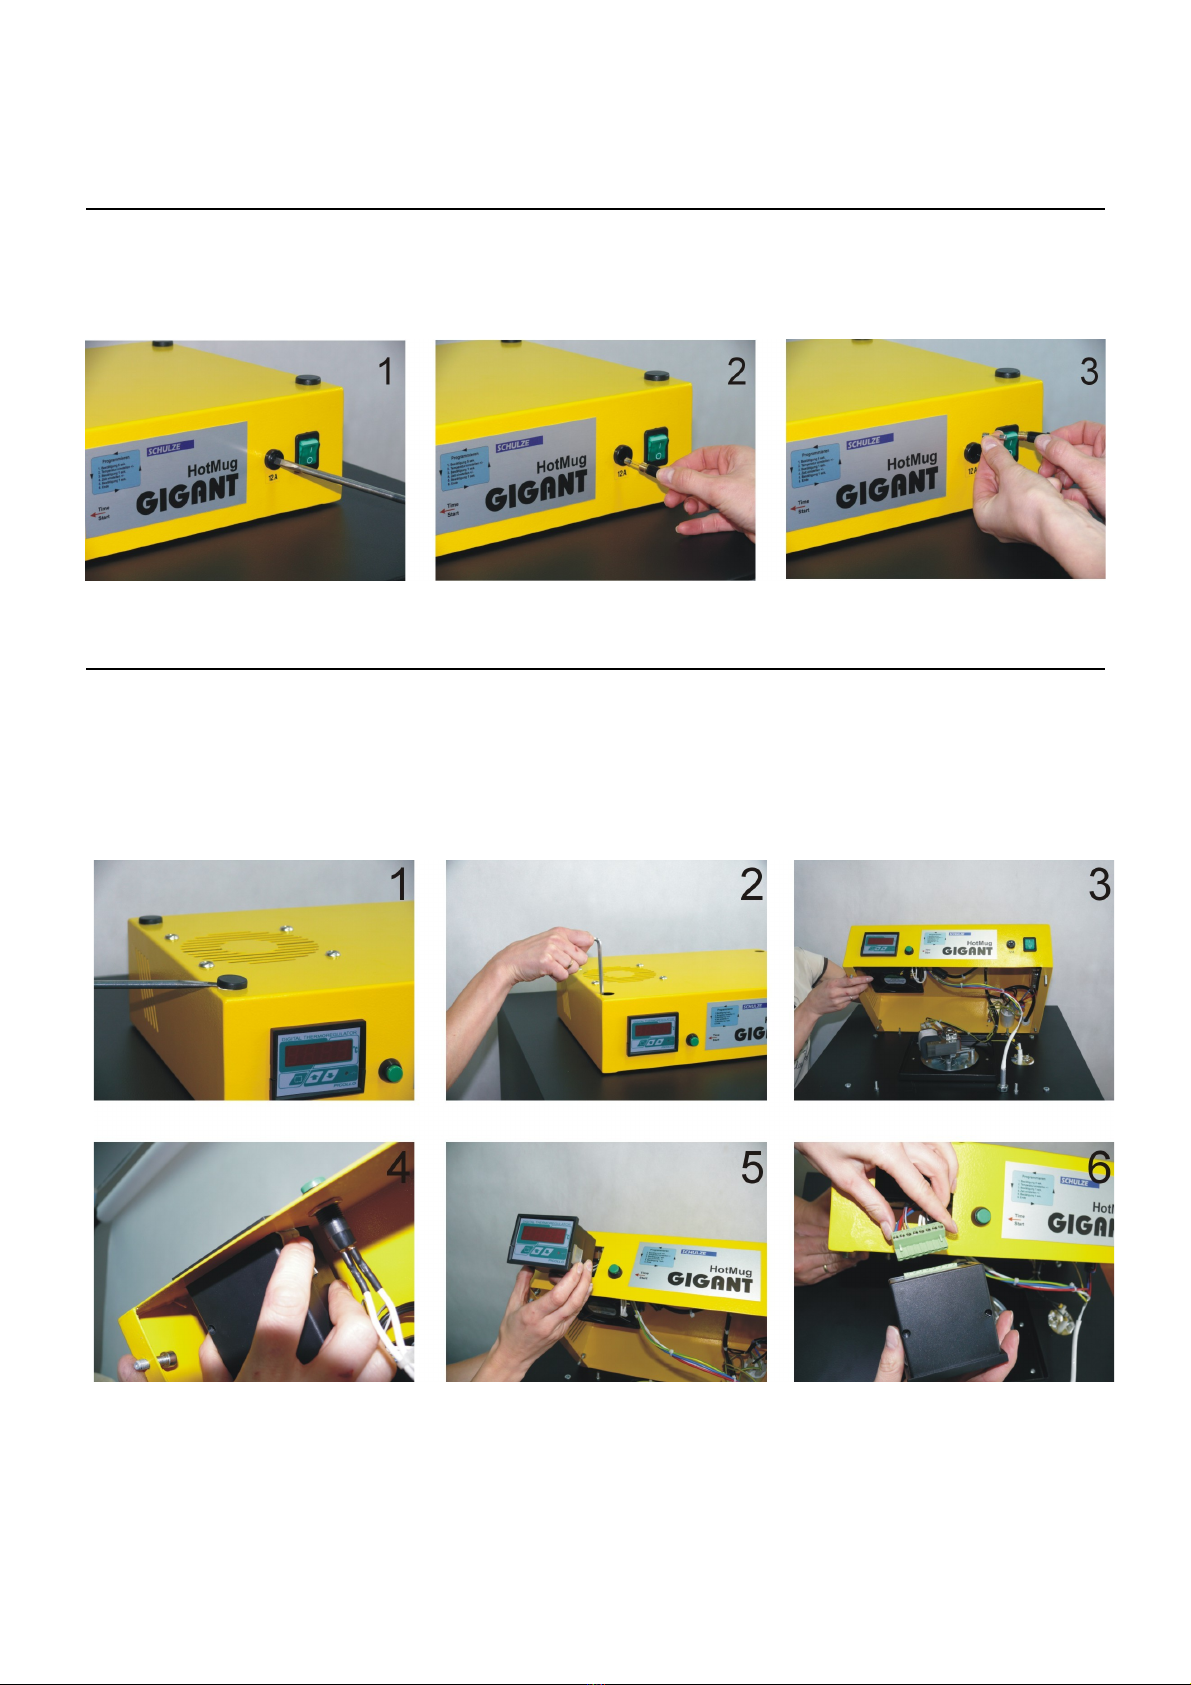
While po ering up the oven, the door of the oven has to be close. The oven also has to be close hile heating up. The oven can be
turned on ith the green s itch. f the green s itch glo s the oven up to the adjusted temperature. After finishing the ork ith the oven
the s itch has to be turned off and the plug has to be pulled out.
Version 11.01
4/11

3. Working wit t e oven
3.1 Programming of electronic devices
After s itching on the press, the current temperature is
indicated on the display and the press heats up.
To change the settings, you must:
1. The programming mode sho s up hen you press Button
1 for about 5 seconds, until the LED1 blinks up.
2. LED1 blinks and the programmed temperature sho s up.
The programming mode is activated.
3.The temperature gets programmed ith button 2 and 3.
4.Press Button 1 shortly.
On the display you no can see the programmed time.
You can adjust the time by pushing Button 2 and 3.
5. Press Button 1 shortly to save the changes and leave the
programming mode.
All settings are saved.
or:
5. To get to the ECO programming, press Button 1 for 3
seconds.
6. With Button 2 and 3 you can s itch bet een the ECO
modes:
„Eco 0” - ECO Mode turned off,
„Eco 1” - ECO Mode turned on.
7. To leave the programming mode press Button 1 shortly.
All settings are saved.
Control of adjusted temperature
If you ant to control hich temperature is adjusted at the
moment, press button 2. The temperature sho s up on the
display.
Control of adjusted time
If you ant to control hich time is adjusted at the moment,
press button 3. The time sho s up on the display.
3.2 Application range and sample adjustments of t e oven
This oven is used to apply transfers on cups and mugs. Here are some settings:
Sample setting, sublimation and laser transfers on cups
–Temperature 180°C - 200°C
–Time 15 - 17 minutes,
If you print less than 20 cups, you can shorten the time to 12 minutes.
Version 11.01
5/11

3.3 Printing on t e caps
Print your photo on the sublimation paper. Then attach the paper ith the motif ith a heat resistant tape on the cup. Insert the HotMug -
SIMPLE on the cup.
HotMug-SIMPLE
1. The Hot Mug - SIMPLE on the cups attach - Photo 1
2. The Hot Mug - SIMPLE clamp slightly so that it creates an even pressure - Photo 2
3. Close the Hot Mug - SIMPLE. Check the even pressure of the cuff - Photo 3
We recommend the HotMug - HOLDER
for simple and rapid preparation
You can also put up to 20 cups in the oven. Put the prepared cups in the basket. The oven must be preheated. Then push the basket ith
the cups in the oven and close him. Press the time-start button. The time is running. If the time is over, open the door and take
the basket from the oven. Caution ot. Burns!
HotMug MAX
For printing ith laser printer, you must use the Hot Mug Max
Version 11.01
6/11

4. Maintenance
4.1 Replacing t e main fuse
If the oven does not ork after s itching on, check the main fuse of the oven. The main fuse 6A is placed in the upper part of the press
(p oto 1). To exchange the fuse, switc off t e eat press first and pull t e plug. There are additional fuses in the manual. Then
remove the fuse bracket (p oto 1 and 2). Replace the fuse (p oto 3) and tighten the fuse bracket again (p oto 1).
4.2 Replacing electronic devices
Inside the upper part of the press there are electronic devices, hich control the temperature and time of the press.
To replace t e electronic devices, turn off t e press and pull t e plug.
Scre the cap off (p oto 1-5). Disconnect the green s itch (p oto 6) and take out the electronic devices.
Put in the ne electronic devices, connect them ith the green plug and reattach it to the upper part of the oven. Last reassemble the
oven again.
Version 11.01
7/11

4.3 Replacing t e temperature sensor
In the oven is a temperature sensor. Located in the upper part of the oven. The replacement must be done by an authorized person.
To replace the temperature sensor, turn off t e oven and pull t e plug. The oven must be cold. Scre the cap off, as in chapter 4.2
(P oto 1 – 3). Remove the t o scre s (P oto 1-2). Then take out the temperature sensor (P oto 3). Loosen the direction of the
temperature sensor in the green plug (P oto 4). Attach the ne temperature sensor in the oven and connect it to the electronics.
Attention!!! Watc t e polarity, blue and red to blue to red. Then scre the cover back on
Version 11.01
8/11

4.4 Troubles ooting
Version 11.01
9/11
Problem DebuggingCause
Green s itch blink, but: main fuse 10 A is defect Exchange main fuse 10 A
display doesn´t glo If main fuse is okay, than check Exchange electronic devices
oven doesn´t heat
oven doesn´t heat up to adjusted temperature thermal fuse on heatplate is defect Exchang e thermal fuse
even if the red diode glo s
after s itching on, temperature rises
but falls after short time
the display just sho s 4 dashes temperature sensor defect or cable broken check cable to tmeperature sensor
no temperature or time information or exchange temperature sensor
no acustic signal after end of pressing beeper is defect Exchange electronic devices
temperature rises more, than it should
even the red diode doesn´t glo
Examplel:temperature 180°C as regulated
temperatue rises to 180°C – the red diode glo s up solid state relay CRYDOM is defect exchange solid state relays CRYDOM
After reaching - the diode doesn´t glo
Temperature rises more than 220°C, than it is sinking
to circa 90°C and rises again to 220°C
Button doesn´t ork setting buttons are defect exchange setting buttons
no settings possible in temperature and time
real temperature doesn´t match ith temperature breakdo n of electronic devices exchange setting buttons
Sho n on the display – temperature too high/lo

4.5 Connecting diagram
Version 11.01
10/11

4.6 Testing Report
Final check of the over:
o- base, paint
o- electronic connection, safety ire, po er cable
o- electronic, max. temperature 220°C
o- electronic, check of all functions
o- orking time at 200°C . . . . . . . hours
o- test ith a cups
o- caution labels
Serial number . . . . . . . . . . . . . . . . . . Date . . . . . . . . . . . . . . . . . . . . Signature . . . . . . . . . . . . . . . . . . . . . . . . . . .
4.7 EC-Conformance-Declaration after EC- guideline for mac ines 2006/46 ECC
The Walter Schulze GmbH
Schmalenbachstraße 15
12057 Berlin
as European representative of the manufacturer company ROMANIK hereby declares that the follo ing machine:
Heat press . . . . . . . . . . . . . . . Serial number . . . . . . . . . . . .
is compliant ith the specifications of the follo ing EC directives:
Machinery ( 2006/46)
Lo Voltage (2006/95)
EMC (2004/108)
used norms and technical specifications:
EN 292-1 EN 292-2 safety of machines
EN 60204-1 electrical equipment of machines
Berlin , . . . . . . .
_____________________________
Peter Meidinger
President
All SCHULZE eat presses are exempt from t e waste disposal law under reg. no. DE 231060054.
Version 11.01
11/11
Table of contents
Popular Oven manuals by other brands

Bosch
Bosch HB Series User manual and installation instructions

Everdure
Everdure UFCW661 Installation, operation & maintenance instructions

Belling
Belling IB609FV Operating and installation instruction

Creda
Creda REFLECTION Installation and use instructions

Panasonic
Panasonic HL-BT62S Service manual

LG
LG MP9885FRBZ owner's manual