2 OPERATION
After first ensuring that the current voltage selection is appropriate to your
mains supply, the mains lead can be connected to the rear of the unit. The
power supply switch (14)
1
is mounted on the front panel and causes the
power on indicator to light (13).
Please note that the instrument has a number of circuits within it that require
time to settle on power up. This can cause the output meter to jump to full
scale for a short time on power up. This is most noticeable if the time
constant control (3) is set to a high value (above 1S). To speed up the
settling process turn the time constant control (3) to 1S or below.
If there is no reference signal connected to the unit then the offset nulling
circuitry within the unit does not operate and hence an offset may be seen
on the output. This is normal and will be removed when a reference signal is
applied.
It is safe to apply signals to the unit whilst the lock-in is switched off, though
this is not recommended for any length of time. However, the input
impedance of the signal input and reference input with unit switched off may
drop producing an unacceptable load on the sources of these signals. It is
hence recommended that the unit is switched on whenever input signals are
applied to it.
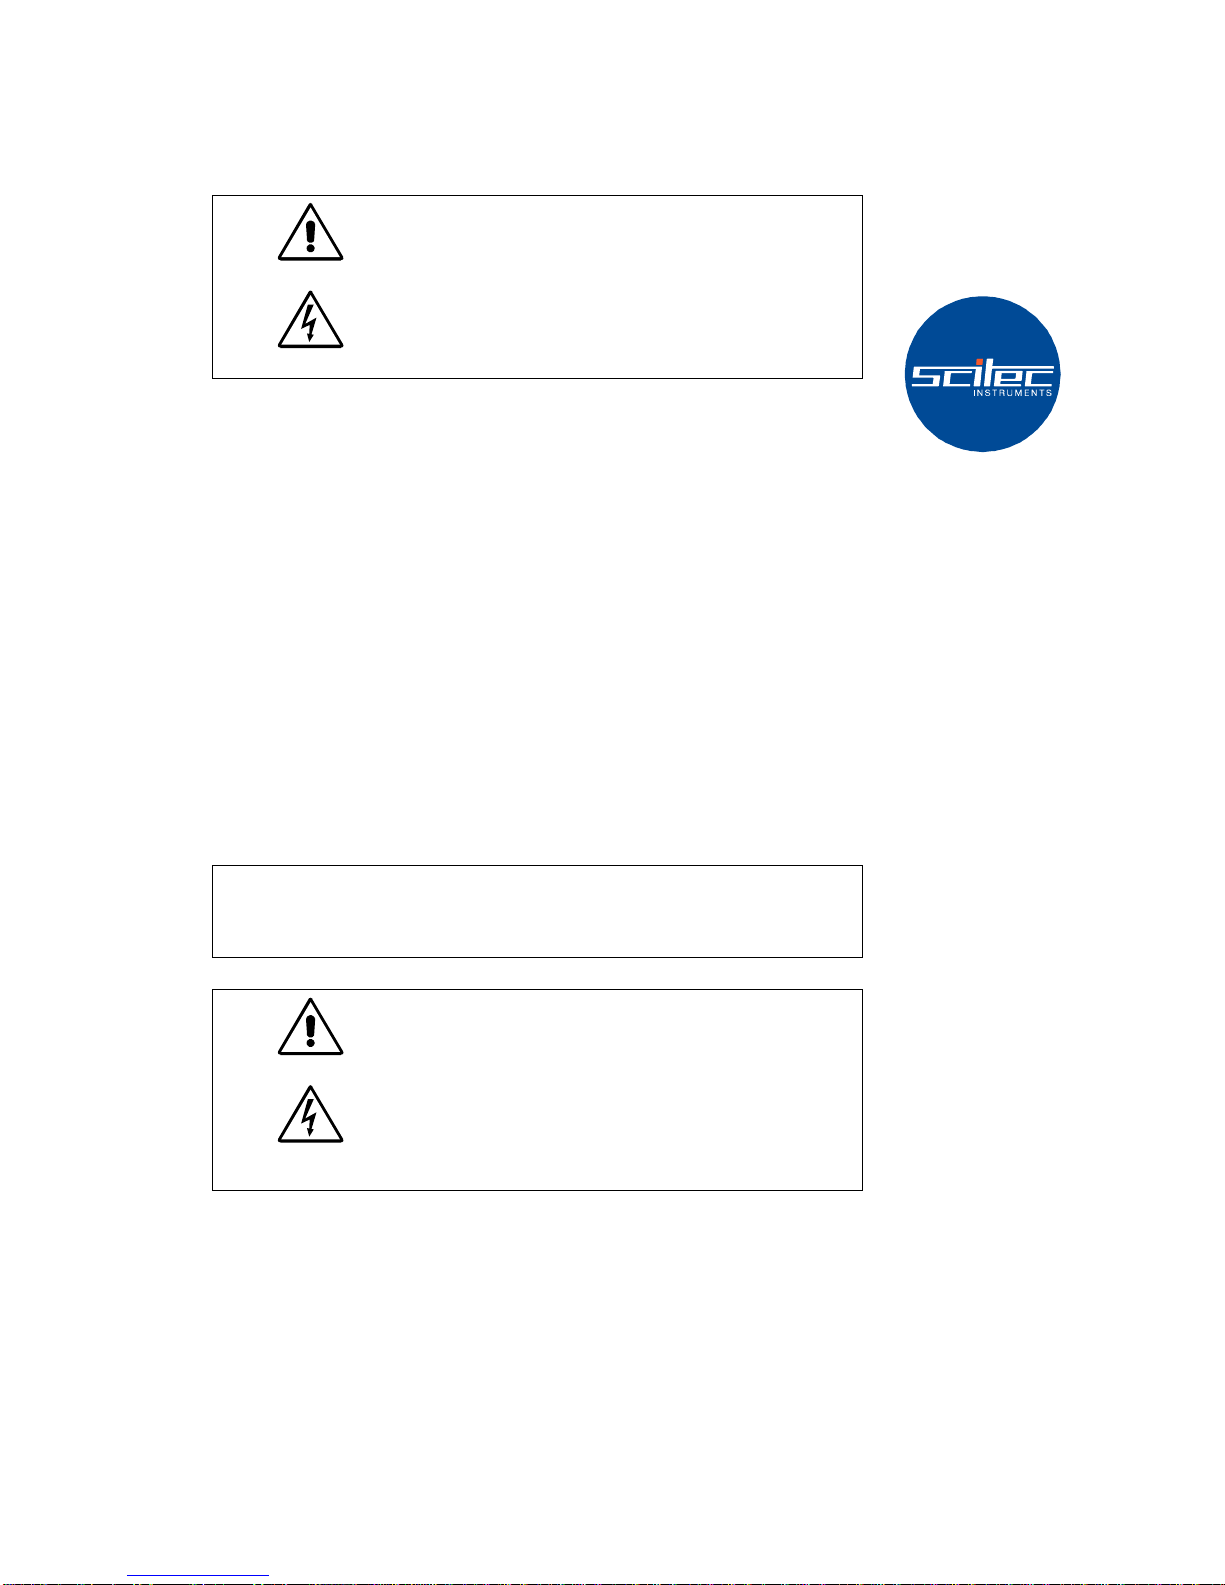
Care should be made that the reference signal does not affect the input
signal. The reference signal is commonly many factors larger than the signal
to be measured and it is therefore relatively easy for the reference signal to
be picked up on input signal cable. For this reason keep the cabling for the
input signal as far away as possible from the cabling for the reference signal.
Careful screening helps but it is still possible for the input cable to pick up
the reference signal if significant lengths are put into close contact.
1
The numbers in brackets refer to the numbers used in Figure 17 at the back of this manual.