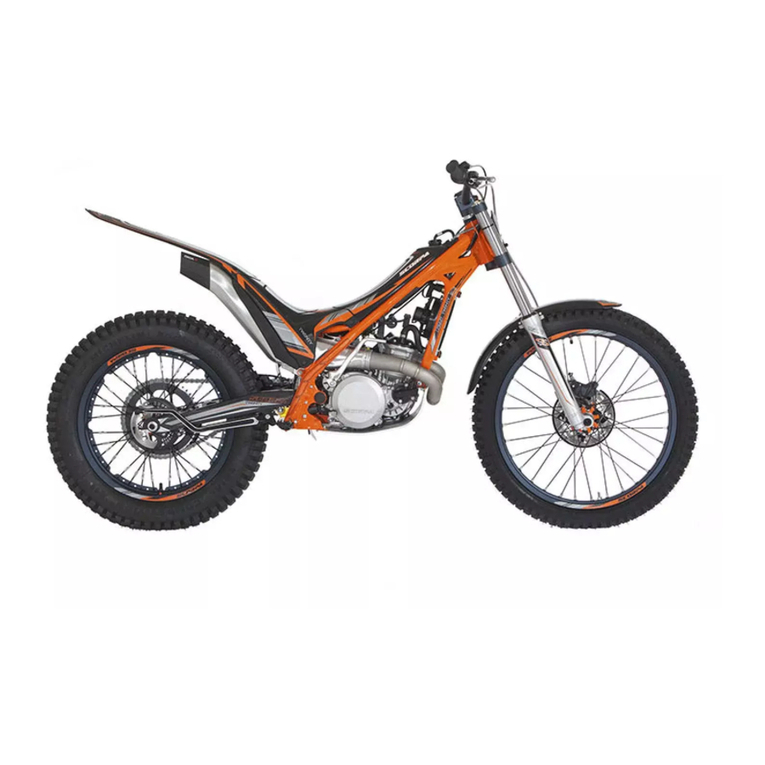
Scorpa SY-250FR 2008 Assembly instructions


Congratulations!
You have just bought a SCORPA SY-250FR 15thA. Welcome in the family of the SCORPA‟s
customers.
This motorbike is the fruit of the experience of the high level of trial and of advanced
technology. As all products of our range, it benefits from the expertise of our suppliers and
from the high level of quality in the manufacturing of our motorbikes, which is well known in
the world of trial.
The use of SY-250FR 15thA motorbike requires the greatest precaution in order to take
advantage of the abilities. It is very important to read this user manual before starting the
bike. In this, you could find the pieces of information about the maintenance and the controls
of your SCORPA SY-250FR 15thA. First and foremost you will find all security instructions to
avoid the risks and the danger of motorbike-riding.
Moreover, the advice given in this manual will help you to keep your motorbike in perfect
working order. If necessary, do not hesitate to go and see your dealer SCORPA. The
company SCORPA wishes you would find pleasure in riding your SCORPA SY-250FR 15thA. Do
not forget the security must always be the first preoccupation.
Thank you very much.
USER’S MANUAL
This document belongs to SCORPA. It can not be distributed,
copied or used without SCORPA‟s authorization.


1
Those symbols give you pieces of information about the most important notions. They are
described here:
WARNING DANGER! BE CAREFUL, IT CONCERNS THE SECURITY
WARNING If the instructions given are not respected, it can have serious
consequences for the health of the rider, of third party and of the people
who work on the bike.
This symbol concerns the indications, the precautions and the instructions
which must be followed to avoid the deterioration of your vehicle.
NB This symbol introduces pieces of information which will allow you to
maintain your bike.
NB : The user manual takes part in the bike and must be given to the new owner in case the bike is
sold. SCORPA is always working to develop and to improve its products, so that you could find a few
modifications in this manual in comparison with your bike.

2
CONTENTS
1SECURITY ..........................................................................................................................................................................4
2DESCRIPTION OF THE VEHICLE................................................................................................................................4
2.1 IDENTIFICATION ............................................................................................................................................................4
2.2 RIGHT SIDE ....................................................................................................................................................................5
2.3 LEFT SIDE ......................................................................................................................................................................5
2.4 HANDLE BAR CONTROLS................................................................................................................................................6
3CONTROLS AND INSTRUMENTS.................................................................................................................................6
3.1 CONTROLS AND ELECTRIC SWITCHES.............................................................................................................................6
3.1.1 Engine circuit breaker..............................................................................................................................................6
3.1.2 Speedometer .............................................................................................................................................................6
3.1.3 Light switches...........................................................................................................................................................7
3.2 MECHANICAL CONTROLS AND INDICATORS...................................................................................................................8
3.2.1 Speedometer .............................................................................................................................................................8
3.2.2 Clutch lever ..............................................................................................................................................................8
3.2.3 Gearshift lever..........................................................................................................................................................9
3.2.4 Front brake lever......................................................................................................................................................9
3.2.5 Rear brake pedal ....................................................................................................................................................10
3.2.6 Choke handling.......................................................................................................................................................10
3.2.7 Antitheft lock...........................................................................................................................................................11
3.3 FUEL TANK ..................................................................................................................................................................11
3.3.1 Fuel tank cap..........................................................................................................................................................11
3.3.2 Fuel.........................................................................................................................................................................12
3.3.3 Fuel tap ..................................................................................................................................................................13
3.4 SIDE STAND .................................................................................................................................................................13
4CHECK BEFORE USE ....................................................................................................................................................14
4.1 CHECK POINTS BEFORE USE .........................................................................................................................................14
5INSTRUCTIONS AND ADVICE BEFORE STARTING THE BIKE.........................................................................16
5.1 STARTING (COLD ENGINE) ...........................................................................................................................................16
5.2 START (WHEN THE ENGINE IS ALREADY WARM)..........................................................................................................17
5.3 GEAR CHANGE.............................................................................................................................................................17
5.4 FUEL CONSUMPTION REDUCTION.................................................................................................................................17
5.5 ENGINE LAPPING..........................................................................................................................................................18
5.6 PARKING......................................................................................................................................................................18
6MAINTENANCE AND LITTLE FIXING......................................................................................................................19
6.1 TOOLS .........................................................................................................................................................................19
6.2 REGULAR LUBRICATIONS AND MAINTENANCE.............................................................................................................19
6.3 SPARK PLUG CHECK.....................................................................................................................................................23
6.4 ENGINE OIL..................................................................................................................................................................24
6.4.1 Engine oil level check.............................................................................................................................................24
6.4.2 Oil change ..............................................................................................................................................................25
6.5 AIR FILTER CLEANING..................................................................................................................................................25
6.6 CARBURETOR ADJUSTMENT.........................................................................................................................................26
6.6.1 Tuning engine.........................................................................................................................................................26
6.7 PLAY OF THE VALVES ..................................................................................................................................................28
6.8 WHEEL-AXLE UNITS ....................................................................................................................................................28
6.8.1 Front wheel removal...............................................................................................................................................28
6.8.2 Front wheel fitting..................................................................................................................................................29
6.8.3 Rear wheel removal................................................................................................................................................29

3
6.8.4 Fitting of the rear wheel.........................................................................................................................................29
6.9 TIRES...........................................................................................................................................................................30
6.9.1 Check of the conditions and of the treads depth of the tires...................................................................................30
6.9.2 Pieces of information about the tires......................................................................................................................30
6.10 THE SPOKE WHEEL.......................................................................................................................................................31
6.11 TRANSMISSION CHAIN .................................................................................................................................................31
6.11.1 Check of the tension...........................................................................................................................................31
6.11.2 Setting ................................................................................................................................................................32
6.11.3 Lubrication.........................................................................................................................................................32
6.12 RIDER ENVIRONMENT..................................................................................................................................................32
6.12.1 Adjustment of foot rest support ..........................................................................................................................32
6.12.2 Adjustment of handlebar....................................................................................................................................33
6.13 ADJUSTMENT OF THE CLUTCH LEVER LOOSE ...............................................................................................................33
6.14 BRAKES .......................................................................................................................................................................34
6.14.1 Adjustment of the brake levers loose..................................................................................................................34
6.14.2 Adjustment of the rear brake pedal loose...........................................................................................................34
6.14.3 Pad wear control................................................................................................................................................35
6.14.4 Brake fluid level control.....................................................................................................................................35
6.14.5 Brake fluid change.............................................................................................................................................36
6.15 LUBRICATIONS ............................................................................................................................................................36
6.15.1 Cable..................................................................................................................................................................36
6.15.2 Brake pedal, gearshift levers..............................................................................................................................36
6.16 SIDE STAND .................................................................................................................................................................37
6.17 FRONT SUSPENSION .....................................................................................................................................................38
6.17.1 Inspection...........................................................................................................................................................38
6.17.2 Adjustment..........................................................................................................................................................38
6.18 REAR SUSPENSION .......................................................................................................................................................38
6.18.1 Inspection...........................................................................................................................................................38
6.18.2 Adjustment..........................................................................................................................................................38
6.19 FRONT FORK AND STEERING ........................................................................................................................................39
6.19.1 Front fork check.................................................................................................................................................39
6.19.2 Check of the functioning of the fork ...................................................................................................................39
6.19.3 Check of the steering..........................................................................................................................................40
6.19.4 Check of the wheel bearings ..............................................................................................................................40
6.20 REPLACEMENT OF ELECTRIC ELEMENTS ......................................................................................................................40
6.20.1 Replacement of a light bulb................................................................................................................................40
6.20.2 Replacement of the indicators bulbs ..................................................................................................................41
6.20.3 Replacement of the rear light bulb.....................................................................................................................41
6.21 DIAGRAM OF BREAKDOWNS AND DEDICATED CHECKS ................................................................................................41
6.21.1 Fuel....................................................................................................................................................................41
6.21.2 Compression ......................................................................................................................................................42
6.21.3 Ignition...............................................................................................................................................................42
7PUT IN CONFORMITY FOR A ROAD USE................................................................................................................43
7.1 INSTALL THE HOMOLOGATED EXHAUST PIPE ...............................................................................................................43
7.2 INSTALL THE SPEEDOMETER ........................................................................................................................................43
7.3 INSTALL THE ELECTRICAL WIRING...............................................................................................................................44
8CARE AND STORING OF THE BIKE..........................................................................................................................47
8.1 CARE ...........................................................................................................................................................................47
8.1.1 Before cleaning.......................................................................................................................................................47
8.1.2 Cleaning .................................................................................................................................................................48
8.1.3 After the cleaning ...................................................................................................................................................48
8.2 PUTTING AWAY ...........................................................................................................................................................48

4
1Security
The motorbike is a really particular vehicle, which gives incomparable sensations of power and freedom.
However, it is very important not to forget that the best motorbike has only two wheels, so that it can
not escape from physical laws.
As a consequence, the vehicle has to be maintained in the best work order. That is exactly the same for
the rider. SCORPA recommends you to respect the laws of the country where you are riding, not to ride
under the influence of alcohol or of drugs. To be in a great form, without extreme fatigue, can allow you
a safe driving and quick reflexes.
Riding motorbike implies that you wear sturdy bike clothes. The helmet, the clothes (of leather or of
reinforced synthetic materials), solid shoes (preferably bike boots) and gloves are essential for the rider.
Wearing such equipments must not lead to change of the way of riding, and the security instructions
must be respected.
2Description of the vehicle
2.1 Identification
Your SCORPA SY-250FR 15thA is identified with a serial number placed on the right side of the
steering column.
Your SCORPA SY-250FR 15thA has a homologation plate where is written the number of the frame.
The keys used to block the steering have an identification number. This number must be used if you
need a new key, in case of loosing the original one.

5
2.2 Right side
2.3 Left side
Handle bar
Rear suspension
Fork
Brake
Steering locker
Fuel tank tag
Rear light
Fuel tap
Air cleaner case
Side stand
Rear brake

6
2.4 Handle bar controls
3Controls and instruments
3.1 Controls and electric switches
3.1.1
Engine circuit breaker
Engine circuit breaker : “ ”
Press this button in emergency, like a fall. The effect is to cut the motor.
3.1.2
Speedometer
Clutch lever
Choke
Speedometer
Brake lever
Throttle
Tank cap
Switchers
Left handgrip
Digital screen
Indicator light

7
3.1.3
Light switches
This part is made up of three controls :
Side light / low beam / high beam : //
You put the control on “”to switch on the high beam, on “” to switch on the low beam.
The sidelight is shown by the symbol “ ”
Indication control : “”
In order to indicate a turn to the left: push the control to the left, towards the symbol “”.
In order to indicate a turn to the right: push the control to the right: towards the symbol “”.
NB: when the indicators control is released, it goes back to the middle. In order to turn the
indicators off, press the control when it is back in central position.
Horn control : the horn rings when you push this control.
Horn
Sidelight
Low beam
High beam
Indicators

8
3.2 Mechanical controls and indicators
3.2.1
Speedometer
This part is made up of 4 elements:
1. A speedometer : it indicates the speed you are riding at
2. A odometer : it gives the number of kilometers covered
3. The turn indicators light (look at the previous paragraph)
4. The high beam light (look at the previous paragraph)
3.2.2
Clutch lever
The clutch lever is located on the left side of the handlebar. It is fixed near the left handgrip. To decltch,
pull the lever towards the handgrip. To engage, just release the lever. If you would like to obtain
smoothly driving, the solution is to pull the lever very quickly and to release it very progressively.
Lever
Handle
2
1
3
4

9
3.2.3
Gearshift lever
The gearshift lever is situated on the left side of the bike, at left toes level, when the heel rests on the
left rest-foot. The use of the gearshift lever must be done only when the engine is released. That means
the clutch lever is pulled towards the handgrip. The gearshift lever allows choosing one of the 5 gears of
the gearbox.
3.2.4
Front brake lever
The front brake lever is situated on the right side of the handlebar. To operate the front brake, pull the
lever towards the handgrip.
Precautions in the handling of the brake levers.
The brake levers handling must be accompanied by high precautions. In fact, a wheel lock often means
the fall of the rider and its bike. That is one of the main reasons why the motorcyclists can fall. It is
recommended to pull the lever as progressively as possible.
Lever

10
3.2.5
Rear brake pedal
The rear brake pedal is situated on the right side of the bike, at the front of the right foot level, when
the heel rests on the right rest-foot. To operate the rear brake, push the pedal towards the ground.
Precautions in the rear brake handling
As told for the front brake lever, be careful not to operate too strongly the rear brake pedal. Otherwise it
can lead to the lock of the rear wheel and the fall of the rider.
3.2.6
Choke handling
As the engine is cold, it may need to have recourse to the choke, in order to make the air / fuel mixture
richer. Pull the control to open the choke and enrich the mixture. Push the control towards the ground to
close the choke and to impoverish the air / fuel mixture.
Pedal
On
Off

11
3.2.7
Antitheft lock
Locking the direction: insert the key in the lock and turn it a quarter of turn towards left. Push it and,
while maintaining it pushed, turn it a quarter of turn towards right. Withdraw the key, the direction is
locked.
Unlocking the direction: insert the key in the lock and turn it a quarter of turn towards left: the lock goes
up. Turn the key a quarter of turn towards right to withdraw the key and put it in your pocket.
WARNING
Do not let the key in the key while riding. Always withdraw it before starting using your bike.
3.3 Fuel tank
3.3.1
Fuel tank cap
B
A
Lock

12
To remove the cap from the fuel tank, turn it anticlockwise (in the direction A), until it can be taken
away. As soon as the cap is not screwed on the fuel tank, you can take it.
To put it back, turn the cap clockwise into the fuel tank (in the direction B).
When the tightening becomes harder, it is important to give one more effort, in order to be sure the fuel
cap is tightened enough.
WARNING
It is very important to check that the cap is tightened enough before starting the engine and riding the
bike.
3.3.2
Fuel
The recommended fuel is only lead-free high octane petrol. The highest capacity of the fuel tank is 2,0
litres and the reserve is 0,6 L.
WARNING: the use of another fuel than this recommended by the manufacturer can cause serious
deteriorations on the engine and on the exhaust system. SCORPA will not be responsible for any
problem in that case
Before each use, check that the quantity of fuel is sufficient. In case it is not, complete in the tank. The
filling up must absolutely not exceed the maximum level. Otherwise, the fuel contained in the tank could
easily flow along it.
WARNING
The fuel tank must not be too much filled. In fact, as the engine is very close, the overflowing would be
increased by the expansion due to the warmth.
The filling up has to be operated with a lot of precautions. There must not be fuel on the engine. This is
recommended not to fill the fuel tank near a flame or near a source of heat.
WARNING :
When a little amount of fuel overflows on the tank during the filling up, wipe it thanks to a sweet, soft
and dry duster, in order to avoid to damage plastic, polished and painted parts.
Filling up mouth
Maximum level

13
3.3.3
Fuel tap
Its aim is to control the flow of fuel from the fuel tank to the carburettor, as the rider wants it to be
regulated. This tap contains a filter, which role is to hold back the particles which could damage the
engine. This diagram shows the three different possible positions. The chosen one is pointed out thanks
to the drawn arrow.
There are three different positions :
OFF : The tap is off and the fuel is not able to flow to the carburettor. The tap must be on „off‟
when the engine does not run.
ON : the tap is running and the fuel can flow to the carburettor. The tap must be on „on‟ before
trying to start the engine and during the use of the bike.
RES (Reserve): when the fuel tank is almost empty and the fuel does not flow anymore, put the
tap on the position „res.‟. This system is expected to allow you to join the first filling station. Fill
up the fuel tank as soon as possible. When the tank is full, put back the tap on the position „on‟.
3.4 Side stand
sidestand

14
The side stand is fixed to the swinging arm on the right side of the bike. It automatically folds back as
soon as the bike is put vertical.
WARNING
During the fallback of the side stand, take care not to let one of your limbs near the mechanism and be
sure the third parties do so. That is the way to minimize the risks of plucking. However the stand
includes a protective rubber.
4Check before use
The owner is responsible for the condition of his vehicle. The bike may suffer damages during the use
and during the parking too (bad weather or acts of vandalism for example). The damaging of parts
which take part in the security can have very serious consequences. SCORPA recommends you to check
visually those sensitive spots. If necessary, a more detailed check is naturally advocated. In case you
have any doubt, do not hesitate to get in touch with your dealer.
4.1 Check points before use
Heading
Check points
Fuel
Fuel level check.
Filling up if necessary.
Fuel hose check to detect a possible leak.
Engine oil
Engine oil level check.
If necessary, filling up to the recommended level, with
the indicated oil:
Motul 300V Sport 100% synthesis-ester-SAE
10w40.
Visual check to detect a possible leak.
Front brake
Check of the functioning.
In case the brakes are soft or spongy, ask your dealer to
bleed the circuits.
Check of the play of the lever.
Adjustment if necessary
If necessary filling up to the recommended level : Motul
Brake fluid DOT 5.1 or 4
Check of the circuit to find a potential leak.
Rear brake
Check of the functioning.
In case the brakes are soft or spongy, ask your dealer to
bleed the circuits.
Check of the play of the lever.
Adjustment if necessary.
If necessary filling up to the recommended level: Motul
Brake fluid DOT 5.1 or 4
Check of the circuit to find a potential leak.
Throttle
Make sure of the functioning progressiveness.
Check of the play of the accelerator cable.
If needs be, ask your dealer to adjust the play, and to
lubricate the cable and the housing of the accelerator
handle.

15
Clutch
Check the functioning
Check of the play of the lever
Adjustment if necessary
Chain
Check of the tension.
Adjustment if necessary.
Check of the condition.
Lubrication if necessary :
Motul Chain lub Off Road.
Wheels and
tyres
Check of the condition.
Check of the depth of the treads.
Check of the air in the tires.
Bring back to the recommended pressure if necessary.
Gearshift
lever
Make sure of the functioning progressiveness and
regularity.
Lubrication of the rotating parts if necessary :
Motul EZ Lub.
Brake levers
and clutch
lever
Make sure of the functioning progressiveness and
regularity.
Lubrication of the rotating parts if necessary :
Motul EZ Lub.
Frame
fastenings
Check of the nuts and screws tightening.
Tighten if necessary.
Lights,
signalling and
electric
contacts
Check the functioning
Adjustment and correct if necessary
NB : It is strongly recommended to check all those points before each use. It only takes a few minutes
and the security depends on it.
WARNING
In case there still is a problem after the adjustments, fillings and lubrications please make it check by
your dealer before starting or using the bike.

16
5Instructions and advice before starting the bike
WARNING
Before using the SY-250FR 15thA, it is recommended to familiarise yourself with the engine and verify
all of the functional commands in a non-hazardous area. When in doubt, refer to the SY-250FR 15thA
manual and if need be your local dealer.
The engine never must be started in a closed area or room, even for a very short period of time. The
exhaust gases are very toxic. Some of them are colourless and odourless, but can cause very serious
suffocatins (even fatal).
5.1 Starting (cold engine)
Before you start the engine, you have to put the gearbox in neutral position for security reasons :
The gearbox is placed on neutral
If the bike is in gear, the clutch lever must be pulled and the side stand folded up.
1. Turn the tap towards to „ON‟ :
2. Pull the choke lever and release the accelerator handling :
3. Spread the kick-starter.
4. Place you right foot on it and step very violently on it towards to the ground.
5. If the engine does not start, operate the two last indications again.
6. As soon as the engine starts, release the first half of the choke lever.
7. When it is warm enough, release totally the choke lever.
NB : you can consider that the engine is warm enough when it accelerates well, even when the choke is
totally released.
WARNING: in order to improve the useful life of your vehicle, make sure the engine is not excessively
accelerated until it is warm enough !
On
Off
This manual suits for next models
1
Table of contents
Other Scorpa Motorcycle manuals
