ScottyMakesStuff Glider Pro 3 Duo User manual

Glider Pro 3 Duo - 4th Axis
Stabilizer
User Guide

Getting Started with your 4th Axis Stabilizer 3
Let’s get your new Stabilizer out! 4
Attaching the gimbal mount to your gimbal 6
Now for a quick once over 7
Variable Fluid Damping Cartridges 7
Suspension System 8
Handles 10
Initial Setup 11
Handle Position 11
Balancing 12
What angle should the support arms be when loaded? 12
How low / high can you go? 12
So what’s the optimal position? 13
It’s all about control and how much you can do without! 13
Holding your stabilizer with a soft touch 14
Testing 17
Payload -> Shoot, Analyse, Adjust, Repeat 17
Variable Fluid Damping 18
Adjusting Damping 20
Damping Settings: 20
Fluid Damping -> Shoot, Analyse, Adjust, Repeat 21
Common Rig Configurations 23
Upright Mode 23
High Mode 23
Mid Mode 24
Low Mode 25
Rigid Mode 25
Advanced Usage 26
Semi-Rigid Mode 26
Pro Rig Setups 26
Load Support 27
1
User Guide - Glider Pro 3 Duo - 4th Axis Stabilizer - 20180917 ScottyMakesStuff.com

Re-Tuning AKA Troubleshooting 28
Some common problem sounds include the following:- 28
Knocking spring adjuster 28
Scratching or scraping around the spring adjuster 29
Scratching or scraping around the gimbal mount 29
General Care 30
Temperature range 30
Rain, Dust and moisture 30
Cleaning, Maintenance and Care 31
OK, that’s it! Congratulations! :) 31
2
User Guide - Glider Pro 3 Duo - 4th Axis Stabilizer - 20180917 ScottyMakesStuff.com

Getting Started with your 4th Axis Stabilizer
We all know that handheld gimbals are the biggest game changer in the past few
years for filmmakers! - You turn it on and out comes the magic footage!
But they do have their (bumpy) limitations which is why you’re here.
Our 4th Axis Stabilizers are designed to reduce that bounce that you typically see
when someone is walking with a gimbal. That vertical bounce from your steps
transferred to your hands can be mostly absorbed before it gets to the camera.
But it doesn’t stop at walking, you can go from softer motion all the way to
jumping around like crazy.
The best steadicam support arm operators usually take years
before they truly master their trade, but with our 4th Axis
Stabilizers and a handheld gimbal the learning curve is vastly
quicker to get smooth results. You might be a natural right out of
the box but most of us will need to dedicate time to getting your technique
and settings right for each shooting scenario. Follow this guide to get up to
speed as quickly as possible and you’ll soon understand the finer points about
how to get lovely smooth footage!
As there are moving parts in the stabilizer there are a
number of pinching hazards that you will need to take
care of so as not to injure yourself.
3
User Guide - Glider Pro 3 Duo - 4th Axis Stabilizer - 20180917 ScottyMakesStuff.com

Let’s get your new Stabilizer out!
Your 4th axis stabilizer (also called a Z axis stabilizer) comes to you fully
assembled. All you need to do is add your mount to your gimbal and connect it.
You’ll also find this printed guide, an M3, M4, M5 allen keys and an M6 socket
which are used for tuning and upgrades but typically you should rarely need to
use them as the stabilizer is mostly tool-less.
Note:
Your stabilizer is fully tuned out of the box so don’t be tempted
to go and tighten everything before you start or else you’ll have to go
over the re-tuning process unessesarily!
The only parts you’ll normally be adjusting are the handles, payload adjusters,
fluid damping adjusters and stabilizer arm attachments which are all tool-less!
The re-tuning section near the end of this guide is helpful if you make upgrades to
your stabilizer or on the rare occasion that the stabilizer has become out of tune.
4
User Guide - Glider Pro 3 Duo - 4th Axis Stabilizer - 20180917 ScottyMakesStuff.com

Although your stabilizer is ‘tough as old boots’ extremely high temperatures can
cause permanent damage so please remember:-
Note:
Just as you wouldn’t leave your expensive cameras in a car on
an extremely hot day, don’t do likewise with your Glider Pro 3 Duo.
Temperatures exceeding 80°C (180°F) can cause permanent
deformation!
Attaching the gimbal mount to your gimbal
Before you add the stabilizer to your gimbal you need to first add the gimbal
mount (
Note
: This is for standard mounts. Some specialized mounts may connect
differently)
. This mount is essentially a clamp that holds your stabilizer in place on
your gimbal. In most cases the mount should attach high on the handle but
occasionally you may wish to change the position to lower down the handle for
even higher shots or when inverted for even lower shooting positions.
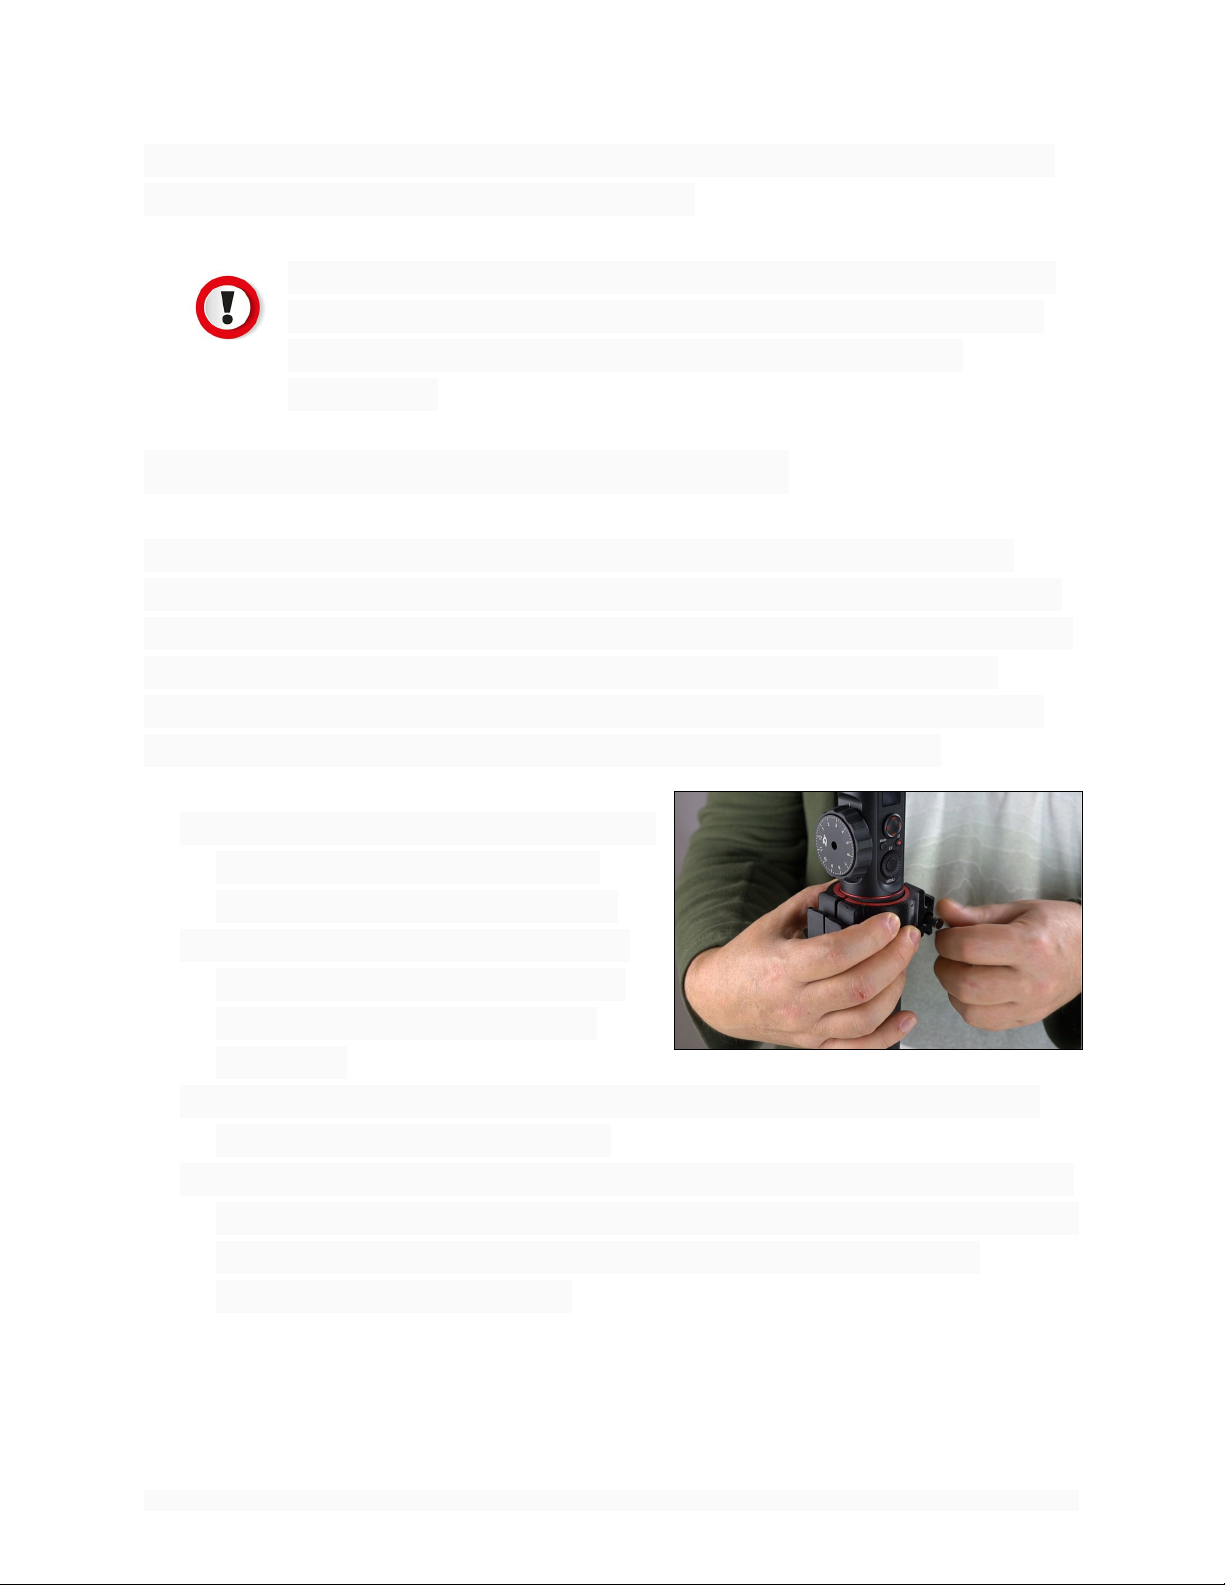
1. Take your mount halves, the bolts that
come with the mount and the M4
allen key (the middle size allen key)
2. Place both sides of the mount clamp
around the handle and line them up
so that the top sides sit level with
each other.
3. While holding the clamp in position with one hand use your free hand to
start to screw the bolts in by hand.
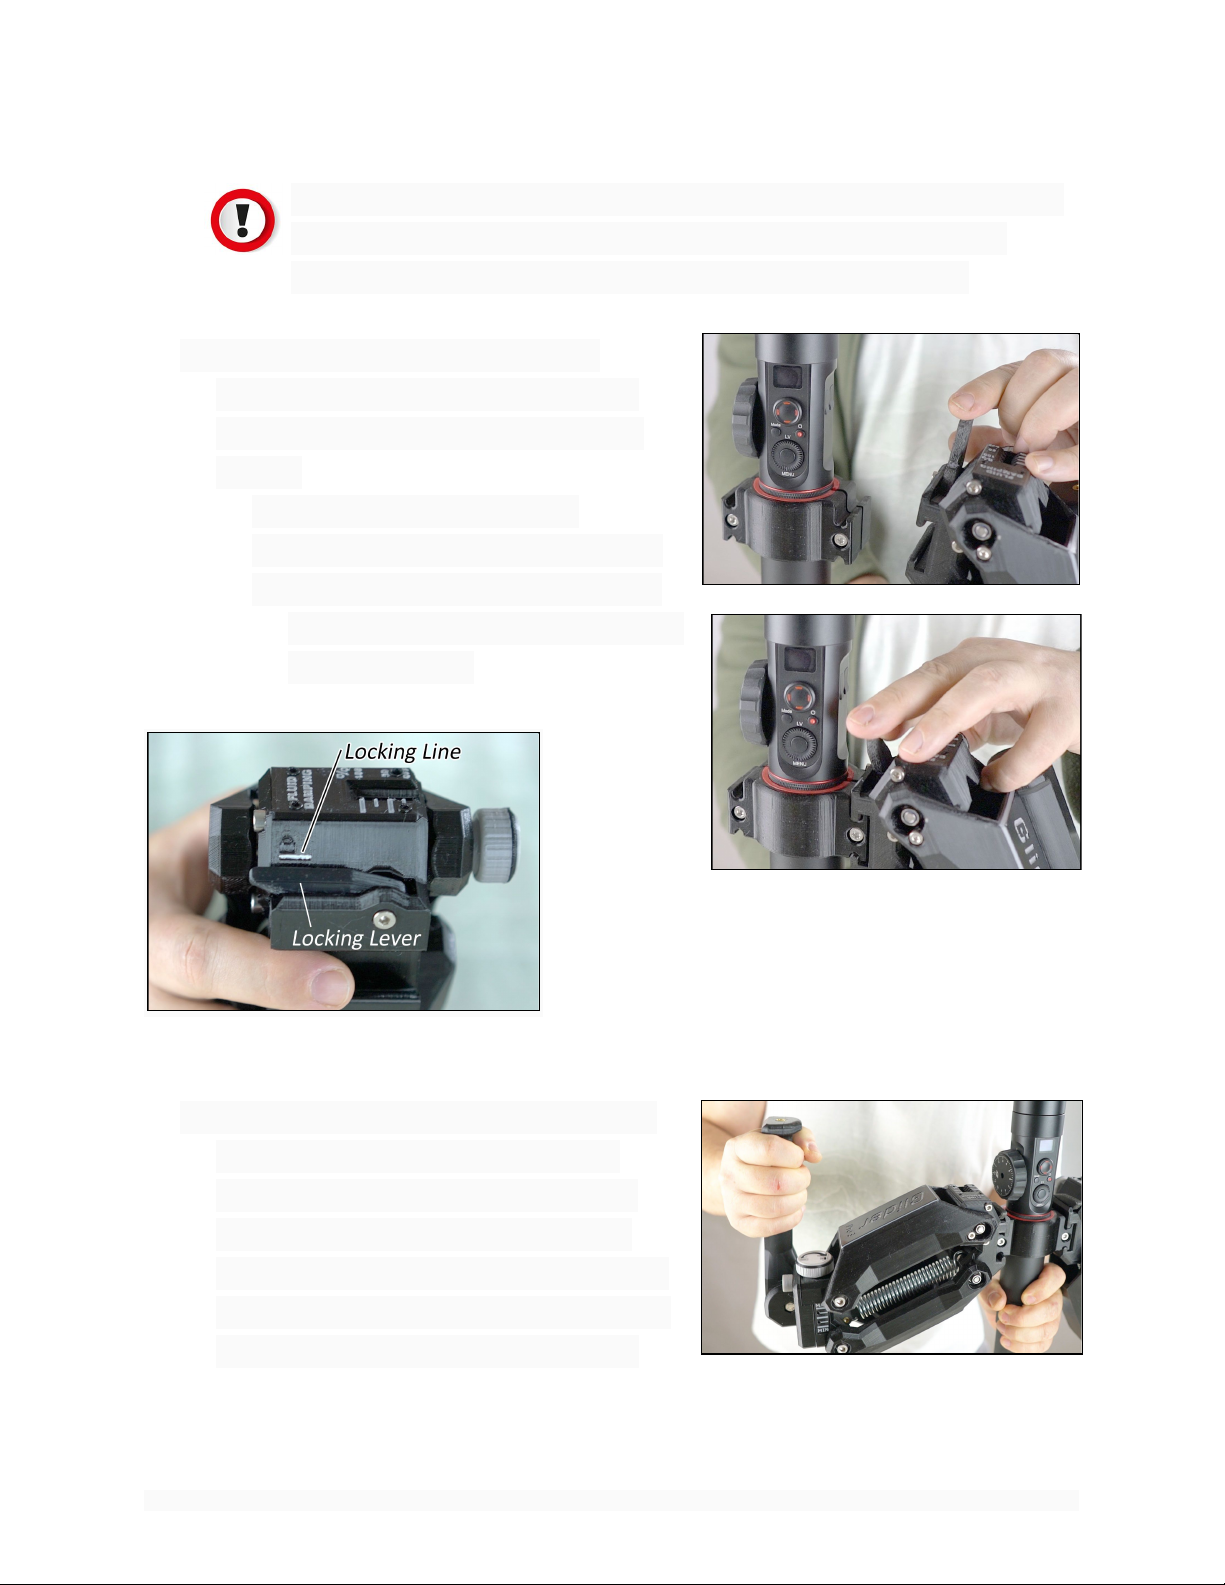
4. Then continue using the M4 allen key tightening each side alternately just a
turn or two until the clamp holds firmly
and won’t be moved easily by hand.
There’s no need to tighten fully at this point. There should be a gap
between the two clamp halves.
5
User Guide - Glider Pro 3 Duo - 4th Axis Stabilizer - 20180917 ScottyMakesStuff.com

Note:
Do not overtighten! Unlike alloy dual rigid handles these don’t
need excessive force to hold your gimbal securely! This is a very
secure clamp and the rubber surface provides a strong hold.
5. Add the two Pro 3 Modules in the
Upright Position Note:
Make sure the
damping knobs face to the rear of the
gimbal.
a. Open the locking lever up
b. Slide module along mounting rail
c. Hold module firmly while locking
down the locking lever until it lines
up with the line.
6. Now you finally test the holding power
of the gimbal clamp by gripping the
gimbal firmly and trying to rotate the
4th axis handle. If the gimbal rotates
inside the clamp then tighten the clamp
bolts another quarter turn and try again
and repeat until it won’t move easily.
6
User Guide - Glider Pro 3 Duo - 4th Axis Stabilizer - 20180917 ScottyMakesStuff.com

Now for a quick once over
Variable Fluid Damping Cartridges
On each side of the gimbal mount are the two smaller adjuster knobs for
the variable fluid damping cartridges. The suspension springs, by their
nature when stretched bounce back and forth until the springs initial
energy or bounce is lost in the system via friction.
That bounce can be reduced
and absorbed in the fluid
damping cartridge by setting
the damping knob; turn it
towards the ‘+’ to increase the
strength of the damping and
towards the ‘-’ to lighten the
damping. The white indicating
gauge on the top indicates the
relative range for the amount of damping. This a concept that’s easy to
misunderstand so please read the more detailed explanation about this in
the ‘Fluid Damping’ section?
7
User Guide - Glider Pro 3 Duo - 4th Axis Stabilizer - 20180917 ScottyMakesStuff.com

Suspension System
Support Arms
The two sets of support arms connect the spring adjusters to gimbal mount
and holds the sprung system in tension in a ‘McPherson Strut’
arrangement.
This geometry is what gives you the
range of support for different weight
rigs. It’s also mostly responsible for
the very soft up to the more firm
elastic suspension.
Payload Spring Adjusters
The payload spring adjusters attach to the ends of the support arms and
the other side to the handles via the rosette mount. The main purpose
though is to adjust the spring
tension so that you can balance
your rig properly.
The spring adjustment knob
turns towards the ‘+’ to increase
the spring tension and the scale
on the side moves towards the
‘Max’. This will support an
increased payload weight while
at the same time decreasing the iso-elasticity.
Turning the other way towards the ‘-’ and the scale on the side moves
towards the ‘Min’. This will decrease the spring tension (also increasing the
iso-elasticity). In most cases you want to be using the most ‘Iso-Elastic’
setting for your rig but please read the ‘Balancing’ section to find out more
about this as there’s reasons to break these rules too!
8
User Guide - Glider Pro 3 Duo - 4th Axis Stabilizer - 20180917 ScottyMakesStuff.com

Think of it in the same way that car suspension smooths out a bumpy
road. So too our suspension system does the same to your bumps.
Now consider the difference between the super soft suspension of a
luxury limo and the very rigid suspension of an off-roader.
In a luxury limo you barely feel any bumps and this is ‘Iso-Elastic’ suspension.
With the stiff suspension of the off-roader you feel the bumps a lot more and
this is more ‘Elastic’ or ‘springy’ suspension.
Handles
They may just look like the things you hold
onto but there’s a bit more to them than that.
For starters, they are offset slightly towards the
rear so as to give a slight forward lean to aid in
reducing ‘forward / aft’ wobbles.
Secondly, there’s a lip at
the top of the handles
that aids in supporting the
load.
Thirdly, there’s 4 brass ¼-20 attachment points on
the handles for adding field monitors, audio and
other gear.
Lastly they attach via a ‘Rosette Knob’ that gives a full 240 degree range of
positions.
9
User Guide - Glider Pro 3 Duo - 4th Axis Stabilizer - 20180917 ScottyMakesStuff.com

Initial Setup
Handle Position
Just for reference we call the side of your stabilizer with the fluid damping and the
‘Scotty’ rosette knobs the ‘back’ and this side should always face you when
filming. This way you can make adjustments on the fly.
Now you’ll start with the modules in ‘Upright’
mode. Even if you’re planning on using your
stabilizer predominantly with the modules
inverted you’ll find it easier to set up and
balance in ‘Upright’ mode first before moving to
‘Inverted’ mode.
Loosen the Rosette Knobs until
the handles can be rotated.
I prefer my handles pointing out
at around a 10 degree angle but
this is just my preference so
whatever angle you’re
comfortable with. Some people
like the handles rotated in
slightly as it narrows the width
for a narrower grip and more compact form. Once both sides are at the same
angle just tighten up the Rosette knobs making sure that the rosette teeth are
meshed together and locked in place. You don’t need to overtighten these knobs,
just tighten until you meet a firm resistance. You may find if you’re shooting for
instance while ‘crabbing’ to the side that adjusting the handles independently to
different angles may be more ergonomic for you.
10
User Guide - Glider Pro 3 Duo - 4th Axis Stabilizer - 20180917 ScottyMakesStuff.com

Balancing
To start balancing you’ll first need to balance
your camera on your gimbal just as you
normally do. It helps if you have your gimbal
on a mini tripod for this.
Now you’ll adjust the fluid damping so that
the top edge of the white indicator range
lines up with 50% which is ideal for your
setup and testing.
Note:
During other times when you’re adjusting the damping
adjustment knob to 0% or 100% you will feel an increase in resistance
when you get close to the limits. As soon as you feel this increase in
resistance, stop and back off the damping a half turn to set it.
Tightening further may permanently damage the damping
cartridge!
What angle should the support arms be when loaded?
When you hold the stabilizer with the rig loaded you’ll notice that the support
arms either point up towards the centre or down. The most common use is for
typical walking shots and the angle of the support arms is not as important as the
setting for the most optimal smoothing. Typically the best angle to have your
support arms is the angle that removes most of the bobbing from your footage.
How low / high can you go?
As low as you like as long as you have enough play in the stabilizer so that the
arms don’t bottom out while filming. The same concept applies if your rig is sitting
high. Do a test run first to confirm your settings will work. For the majority of your
shots (from gentle to brisk movement) the illustrated range shows what loaded
angles should work.
11
User Guide - Glider Pro 3 Duo - 4th Axis Stabilizer - 20180917 ScottyMakesStuff.com

So what’s the optimal position?
Have a look at where the line on the bolt runners lines up with ‘Min’ to ‘Max’
scale. I typically consider from the ‘Min’ to the halfway point as the range of the
‘Iso-Elastic’ suspension and above that is ‘Elastic’ suspension which goes up to the
‘Max’. Of course in reality there is really a gradual change between the two.
It’s all about control and how much you can do without!
Typically I operate in the ‘purple’ zone where at the firm end I have most control
and at the softest end I have the least control.
12
User Guide - Glider Pro 3 Duo - 4th Axis Stabilizer - 20180917 ScottyMakesStuff.com

In other words,
●the firmest end allows me enough control to frame the shot easier at the
expense of more vertical movement in the footage and;
●the softest end has the potential to give you a shot that looks ‘like it’s on
rails’ but until you master it you likely find it too hard to control and you’ll
lose your framing easily - It usually takes some practice with the rig to
master using the Glider Pro 3 Duo at this level - but don’t despair too much
since if a guy like me with a bung knee can do it then you can too!
Ok, sensai, show me ‘the way’!
Holding your stabilizer with a soft touch
Before you start testing you first need to perfect your grip technique.
Many of us that come from using rigid dual handles are used to operating with
the dual handle ‘power grip of death’ ;-)
The biggest key to transitioning to the Glider Pro 3 Duo 4th axis is to relax that
strong grip and start using ‘soft hands’ instead. There’s an art to ‘soft hands’ so
please read on?
The reason this is so important is that your Duo is truly a dynamic system and
what you want to do is eliminate any inward or outward pressure on this dynamic
system. It may be hard to ‘un-learn’ the techniques you’ve learnt but the silky
smooth footage you get will be worth it!
1. The first step is to hold your Duo and place your hands so that the lip at the
top of the handles sits on your hand and bares the majority of the weight.
13
User Guide - Glider Pro 3 Duo - 4th Axis Stabilizer - 20180917 ScottyMakesStuff.com

2. Now feel the rig in your hands. You should feel the rig leaning slightly
forward. This is by design and assists in preventing unwanted forward to aft
wobbles that can affect overall stability.
3. Now try pushing inwards and outwards to see what effect it has on the
vertical position of the gimbal. This will vary by whether the arms are
pointing up or down. This is the motion you’re attempting to avoid.
4. Finally drop your hands to make the gimbal bounce without any inwards or
outwards pressure.
14
User Guide - Glider Pro 3 Duo - 4th Axis Stabilizer - 20180917 ScottyMakesStuff.com

When you look at the Glider Pro 3 Duo in motion you’ll see that both suspension
modules sweep in an arc. You’re trying to reduce any sideways force from your
hands affecting this smooth arc. It takes time but there’s one very easy way to
practice this technique so you can get a feel for it fairly quickly. It might remind
you of that weird jerking exercise gadget but bouncing the arms up and down
repetitively will quickly teach you whether you are doing it right or not. The aim is
to bounce the hands while keeping the gimbal as steady as possible. At first you’ll
find it may be hard to keep it steady but not before too you’ll get the hang of it!
15
User Guide - Glider Pro 3 Duo - 4th Axis Stabilizer - 20180917 ScottyMakesStuff.com

Testing
Payload -> Shoot, Analyse, Adjust, Repeat
You’ll start your testing by finding the best settings for your payload and your
current level of ability.
The easiest way to do this is to practise the same short filming movement and
analyse it to find the best settings for you.
What works best is if you repeat a short 15 to 30 second shot that involves
walking on hard and soft surfaces, with some changes in direction and if possible
also on an uneven surface such as that found on a lawn.
1. Start with both Payload Spring Adjusters set all the way to the ‘Min’.
2. Set the fluid damping adjustment as before so that the top of the white
range indicator lines up with 50%.
3. Rotate in full revolutions both Payload Spring Adjusters the same number
of revolutions until they’re high enough not to bottom out on your practise
shoot. (This is now the minimum setting for the weight of your rig)
4. Now do the old Bounce Test to make sure the spring tension is even. It’s
critical to focus on using soft hands or the test might fail. Once you have
16
User Guide - Glider Pro 3 Duo - 4th Axis Stabilizer - 20180917 ScottyMakesStuff.com

the arms roughly in the right position then you evenly bounce your hands
down and let it bounce back up to see if the gimbal favours one side or the
other.
If your gimbal bounces say to the right then the right Payload Spring is
weaker than the left and you need to increase the payload adjuster tension
on the right side to even it up with the left. When your gimbal bounces
straight up you’re all set to start your test shot!
5. Let’s be optimistic and start at this low setting! Film the movement with
this setting and if possible look at the results on a monitor to see 1) how
well bounce was controlled and 2) if you lost your framing or not. If you’re
not there yet then increase both Payload Spring Adjustment Knobs exactly
the same quantity of revolutions towards the positive, check with a ‘Bounce
Test’ and then shoot again and repeat until you find the optimal balance
(pun intended!
) for your own style of filming.
17
User Guide - Glider Pro 3 Duo - 4th Axis Stabilizer - 20180917 ScottyMakesStuff.com

Variable Fluid Damping
Your stabilizer has two variable adjustment fluid damping cartridges. These can be
adjusted independently to smooth out a large range of spring bounce in your
system. The range of fluid damping is seen on both of the white marked gauges
with the percent range next to them indicating the minimum (0%) to maximum
(100%) damping levels. When it comes to the level of damping for various filming
movements I can tell you what works for me but as we each move differently you
might find your own settings vary so please experiment to find what suits you.
Understanding how to set the damping
When you set the damping to a certain level you are actually
setting the dampening range i.e. Setting the fluid damping to 100%
(Max) will not dampen out all vertical motion. Max damping will
only dampen the most extreme vertical motion and light to medium motion
will not be damped out. You need to think of this setting more as a range
between the top and bottom of the white indicator. For instance, if I set the
damping with the black centre line at 30% I find that motion from slow
walking thru to walking down stairs will be smoothed out but any harder or
softer motion won’t be smoothed out.
18
User Guide - Glider Pro 3 Duo - 4th Axis Stabilizer - 20180917 ScottyMakesStuff.com

Adjusting Damping
To adjust the amount of fluid damping you turn the
two Damping Adjuster knobs. It’s best to keep these
at the same level. As you can see, like the payload
adjusters you’ve got positive arrows to indicate an
increase in damping and negative arrows to indicate
a decrease. If you turn the knob in the direction of
the negative arrow the variable fluid damping will
gradually decrease until there’s no damping at all
and the spring will bounce back and forth easily.
Here’s a few other pointers on the fluid damping cartridges:-
1. The maximum (100%) fluid damping is when the white gauge is furthest
away from you towards the front.
2. Take Care when near the ends of the damping gauge (0% and
100%) as overtightening past when you meet firm resistance may
permanently damage the damping cartridge!
3. The maximum damping setting will vary in position slightly from the coldest
to the hottest year round temperatures. When turning the knobs use the
increase in the resistance as an indicator being just past the maximum /
minimum damping.
4. There are very few actual scenarios to have your fluid damping set at 100%
(i.e. except for say jumping up and down very hard). The majority of soft
motion to running fast will likely be between 0% and 80% fluid damping.
We each move and shoot differently. This guide is a good starting
point but you each need to find the range of damping to suit your
own shooting styles.
19
User Guide - Glider Pro 3 Duo - 4th Axis Stabilizer - 20180917 ScottyMakesStuff.com
Table of contents
Other ScottyMakesStuff Camera Accessories manuals
Popular Camera Accessories manuals by other brands

Sony
Sony CSS-PHB - Cybershot Station For DSCP200 Digital... operating instructions

Commlite
Commlite CM-EF-E HS user manual

SLIK
SLIK Slim-Pod II operating instructions

Vicon Security
Vicon Security V670-HT202VK instruction manual

SONLUX
SONLUX LightmaXX instruction manual

PROAIM
PROAIM HS-1000 instruction manual