manuals.online logo
Brands
  1. Home
  2. •
  3. Brands
  4. •
  5. Scytek electronic
  6. •
  7. Car Alarm
  8. •
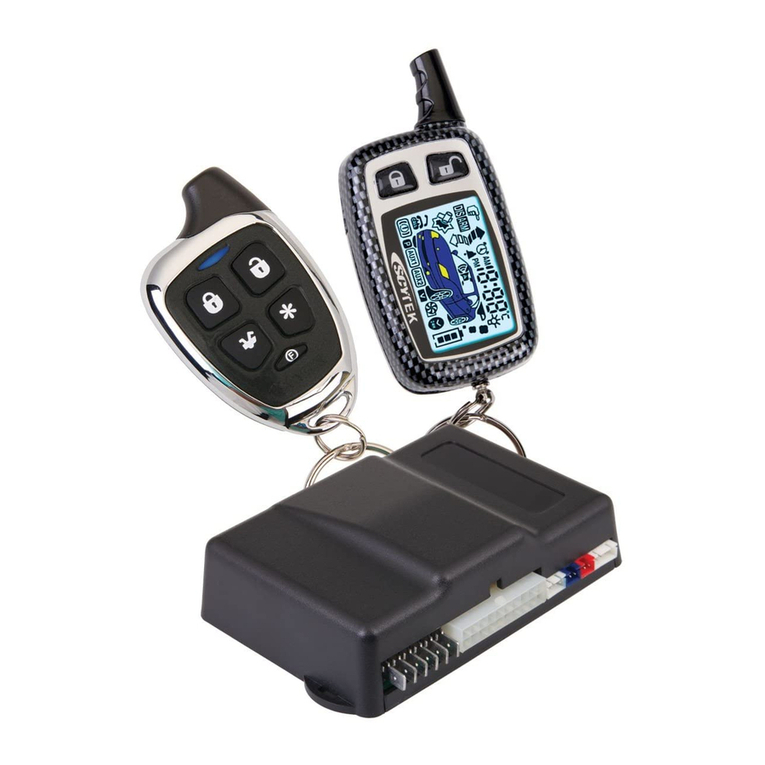
  9. Scytek electronic 5000RS-2W User manual

Scytek electronic 5000RS-2W User manual

This manual suits for next models

1

Other Scytek electronic Car Alarm manuals

Scytek electronic G-20 User manual

Scytek electronic

Scytek electronic G-20 User manual

Scytek electronic Astra 200 User manual

Scytek electronic

Scytek electronic Astra 200 User manual

Scytek electronic Galaxy 2000RS-2W-DBP User manual

Scytek electronic

Scytek electronic Galaxy 2000RS-2W-DBP User manual

Scytek electronic Vectra X5 User manual

Scytek electronic

Scytek electronic Vectra X5 User manual

Scytek electronic G5.2W SERIES User manual

Scytek electronic

Scytek electronic G5.2W SERIES User manual

Scytek electronic ASTRA 777 Mobile User manual

Scytek electronic

Scytek electronic ASTRA 777 Mobile User manual

Scytek electronic 5100RS-22W User manual

Scytek electronic

Scytek electronic 5100RS-22W User manual

Scytek electronic 600 User manual

Scytek electronic

Scytek electronic 600 User manual

Scytek electronic Vectra X55 series User manual

Scytek electronic

Scytek electronic Vectra X55 series User manual

Scytek electronic Galaxy 3000Plus Series User manual

Scytek electronic

Scytek electronic Galaxy 3000Plus Series User manual

Scytek electronic PRECISION PRO 5500 User manual

Scytek electronic

Scytek electronic PRECISION PRO 5500 User manual

Scytek electronic ASTRA 1000RS-DBP User manual

Scytek electronic

Scytek electronic ASTRA 1000RS-DBP User manual

Scytek electronic VISIONGUARD 8000 User manual

Scytek electronic

Scytek electronic VISIONGUARD 8000 User manual

Scytek electronic P10 Series User manual

Scytek electronic

Scytek electronic P10 Series User manual

Scytek electronic ASTRA 777-TC User manual

Scytek electronic

Scytek electronic ASTRA 777-TC User manual

Scytek electronic Vectra X1 User manual

Scytek electronic

Scytek electronic Vectra X1 User manual

Scytek electronic Galaxy 5000RS Plus Series User manual

Scytek electronic

Scytek electronic Galaxy 5000RS Plus Series User manual

Scytek electronic ASTRA 70000000 User manual

Scytek electronic

Scytek electronic ASTRA 70000000 User manual

Scytek electronic G777 User manual

Scytek electronic

Scytek electronic G777 User manual

Scytek electronic GALAXY 5100RS SERIES User manual

Scytek electronic

Scytek electronic GALAXY 5100RS SERIES User manual

Scytek electronic Precision 700 series User manual

Scytek electronic

Scytek electronic Precision 700 series User manual

Scytek electronic Vectra X3 User manual

Scytek electronic

Scytek electronic Vectra X3 User manual

Scytek electronic Galaxy 5000RS User manual

Scytek electronic

Scytek electronic Galaxy 5000RS User manual

Scytek electronic Astra 4000RS User manual

Scytek electronic

Scytek electronic Astra 4000RS User manual

Popular Car Alarm manuals by other brands

jablotron Athos CA-1202 user manual

jablotron

jablotron Athos CA-1202 user manual

Audiovox AVX1B4S Programming guide

Audiovox

Audiovox AVX1B4S Programming guide

Clifford 3606X owner's guide

Clifford

Clifford 3606X owner's guide

Clifford Nova 3 owner's manual

Clifford

Clifford Nova 3 owner's manual

Ultra Start 2500M SERIES install guide

Ultra Start

Ultra Start 2500M SERIES install guide

Viper 560XV owner's guide

Viper

Viper 560XV owner's guide

Ultra Start 650 Series owner's manual

Ultra Start

Ultra Start 650 Series owner's manual

Audiovox Prestige Platinum+ APS-511C owner's manual

Audiovox

Audiovox Prestige Platinum+ APS-511C owner's manual

Sparkrite SRA8 Guide

Sparkrite

Sparkrite SRA8 Guide

Federal Signal Corporation Pathfinder Siren Series Installation and maintenance manual

Federal Signal Corporation

Federal Signal Corporation Pathfinder Siren Series Installation and maintenance manual

Falcon Predator XL3 Installer manual

Falcon

Falcon Predator XL3 Installer manual

Audiovox Auto Security XR91 Programming guide

Audiovox

Audiovox Auto Security XR91 Programming guide

Clifford Sabre II owner's manual

Clifford

Clifford Sabre II owner's manual

SECO-LARM 300C owner's manual

SECO-LARM

SECO-LARM 300C owner's manual

CrimeStopper CS-8717 Wiring diagram

CrimeStopper

CrimeStopper CS-8717 Wiring diagram

Python 660XP owner's guide

Python

Python 660XP owner's guide

Clifford CYBER 2 owner's manual

Clifford

Clifford CYBER 2 owner's manual

Gemini 7057 user manual

Gemini

Gemini 7057 user manual

manuals.online logo
manuals.online logoBrands
  • About & Mission
  • Contact us
  • Privacy Policy
  • Terms and Conditions

Copyright 2025 Manuals.Online. All Rights Reserved.

55000000RRSS-22WW PPLLUUSS
SSEERRIIEESS
VEHICLE SECURITY SYSTEM
WITH REMOTE START
PRODUCT MANUAL
LLiimmiitteedd LLiiffeettiimmee WWaarrrraannttyy
This vehicle security system is warranted to the original purchaser, to be free from defects in
material and workmanship. The manufacturer will repair or replace at its option, and free of
charge for the first twelve (12) months, any part that proves defective in material or workmanship
under normal installation, use, and service, provided the product is returned to the manufacturer
freight prepaid. After the first 12 month warranty period there will be a maximum service charge
of $25.00 per calendar year (if required) for repair and/or replacement of any defective parts.
A copy of the original purchase receipt must accompany any products returned for warranty
service. Warranty is limited to defective parts and/or replacement parts only and excludes any
incidental, and consequential damages connected therewith.
The manufacturer of this theft deterrent system makes no warranty against the theft of the vehicle
or its contents. This warranty is not to be construed as an insurance policy against loss.
WARRANTY OF INSTALLATION LABOR, REMOVAL AND RE-INSTALLATION CHARGES ARE
NOT THE RESPONSIBILITY OF THE MANUFACTURER.
1. About Your System . . . . . . . . . . . . . . . . . . . . . . . . . . . . . . . . . . . . . . . . . . . . . . . . . . . . . . .Page 1
2. Remote Transmitters . . . . . . . . . . . . . . . . . . . . . . . . . . . . . . . . . . . . . . . . . . . . . . . . . . . . . .Page 2
Remote Transmitter Description . . . . . . . . . . . . . . . . . . . . . . . . . . . . . . . . . . . . . . . . . .Page 2
Adding/Replacing Transmitters . . . . . . . . . . . . . . . . . . . . . . . . . . . . . . . . . . . . . . . . . .Page 2
Two Car peration . . . . . . . . . . . . . . . . . . . . . . . . . . . . . . . . . . . . . . . . . . . . . . . . . . .Page 3
Battery Replacement . . . . . . . . . . . . . . . . . . . . . . . . . . . . . . . . . . . . . . . . . . . . . . . . .Page 3
ptional 2-way LCD Remote Transmitter Description . . . . . . . . . . . . . . . . . . . . . . . . . . .Page 4
Adding/Replacing ptional 2-way Transmitters . . . . . . . . . . . . . . . . . . . . . . . . . . . . . . .Page 4
LCD Transmitter Battery Replacement . . . . . . . . . . . . . . . . . . . . . . . . . . . . . . . . . . . . .Page 5
3. System peration . . . . . . . . . . . . . . . . . . . . . . . . . . . . . . . . . . . . . . . . . . . . . . . . . . . . . . . .Page 8
Remote Arming . . . . . . . . . . . . . . . . . . . . . . . . . . . . . . . . . . . . . . . . . . . . . . . . . . . . .Page 8
Remote Disarming . . . . . . . . . . . . . . . . . . . . . . . . . . . . . . . . . . . . . . . . . . . . . . . . . . .Page 8
Tamper Alert . . . . . . . . . . . . . . . . . . . . . . . . . . . . . . . . . . . . . . . . . . . . . . . . . . . . . . .Page 9
Silent Arming/Disarming . . . . . . . . . . . . . . . . . . . . . . . . . . . . . . . . . . . . . . . . . . . . . . .Page 9
Passive Arming . . . . . . . . . . . . . . . . . . . . . . . . . . . . . . . . . . . . . . . . . . . . . . . . . . . . .Page 9
Panic Mode . . . . . . . . . . . . . . . . . . . . . . . . . . . . . . . . . . . . . . . . . . . . . . . . . . . . . . .Page 10
Emergency verride . . . . . . . . . . . . . . . . . . . . . . . . . . . . . . . . . . . . . . . . . . . . . . . . .Page 10
ptional Coded Emergency verride . . . . . . . . . . . . . . . . . . . . . . . . . . . . . . . . . . . . .Page 10
Automatic Rearming . . . . . . . . . . . . . . . . . . . . . . . . . . . . . . . . . . . . . . . . . . . . . . . . .Page 11
Valet Mode . . . . . . . . . . . . . . . . . . . . . . . . . . . . . . . . . . . . . . . . . . . . . . . . . . . . . . .Page 11
4. Remote Start Features . . . . . . . . . . . . . . . . . . . . . . . . . . . . . . . . . . . . . . . . . . . . . . . . . . . .Page 12
Remote Starting . . . . . . . . . . . . . . . . . . . . . . . . . . . . . . . . . . . . . . . . . . . . . . . . . . . .Page 12
Shut Down . . . . . . . . . . . . . . . . . . . . . . . . . . . . . . . . . . . . . . . . . . . . . . . . . . . . . . .Page 12
Quick Stop . . . . . . . . . . . . . . . . . . . . . . . . . . . . . . . . . . . . . . . . . . . . . . . . . . . . . . . .Page 12
Automatic Start Mode . . . . . . . . . . . . . . . . . . . . . . . . . . . . . . . . . . . . . . . . . . . . . . . .Page 13
Turbo Timer Feature . . . . . . . . . . . . . . . . . . . . . . . . . . . . . . . . . . . . . . . . . . . . . . . . .Page 13
5. Extended Features . . . . . . . . . . . . . . . . . . . . . . . . . . . . . . . . . . . . . . . . . . . . . . . . . . . . . . .Page 14
Ignition Door Locking . . . . . . . . . . . . . . . . . . . . . . . . . . . . . . . . . . . . . . . . . . . . . . . .Page 14
Ignition Door Unlocking . . . . . . . . . . . . . . . . . . . . . . . . . . . . . . . . . . . . . . . . . . . . . .Page 14
Dome Light Activation . . . . . . . . . . . . . . . . . . . . . . . . . . . . . . . . . . . . . . . . . . . . . . . .Page 14
Auxiliary Function utputs . . . . . . . . . . . . . . . . . . . . . . . . . . . . . . . . . . . . . . . . . . . .Page 14
Disarm with Auxiliary Function . . . . . . . . . . . . . . . . . . . . . . . . . . . . . . . . . . . . . . . . . .Page 14
Remote Sensor Disable . . . . . . . . . . . . . . . . . . . . . . . . . . . . . . . . . . . . . . . . . . . . . . .Page 14
6. System Installation . . . . . . . . . . . . . . . . . . . . . . . . . . . . . . . . . . . . . . . . . . . . . . . . . . . . . .Page 15
Mounting the Control unit . . . . . . . . . . . . . . . . . . . . . . . . . . . . . . . . . . . . . . . . . . . . .Page 16
Mounting the Siren . . . . . . . . . . . . . . . . . . . . . . . . . . . . . . . . . . . . . . . . . . . . . . . . . .Page 16
Mounting the Shock Sensor . . . . . . . . . . . . . . . . . . . . . . . . . . . . . . . . . . . . . . . . . . . .Page 16
7. System Wiring . . . . . . . . . . . . . . . . . . . . . . . . . . . . . . . . . . . . . . . . . . . . . . . . . . . . . . . . .Page 17
6-Pin Starter Harness . . . . . . . . . . . . . . . . . . . . . . . . . . . . . . . . . . . . . . . . . . . . . . . .Page 17
20-Pin Main Harness . . . . . . . . . . . . . . . . . . . . . . . . . . . . . . . . . . . . . . . . . . . . . . . . .Page 17
Plug-in Connectors . . . . . . . . . . . . . . . . . . . . . . . . . . . . . . . . . . . . . . . . . . . . . . . . . .Page 18
8. Jumper Settings . . . . . . . . . . . . . . . . . . . . . . . . . . . . . . . . . . . . . . . . . . . . . . . . . . . . . . . .Page 19
Jumper Selection . . . . . . . . . . . . . . . . . . . . . . . . . . . . . . . . . . . . . . . . . . . . . . . . . . .Page 19
9. System Programming . . . . . . . . . . . . . . . . . . . . . . . . . . . . . . . . . . . . . . . . . . . . . . . . . . . . .Page 20
Entering System Programming . . . . . . . . . . . . . . . . . . . . . . . . . . . . . . . . . . . . . . . . . .Page 20
Default Reset . . . . . . . . . . . . . . . . . . . . . . . . . . . . . . . . . . . . . . . . . . . . . . . . . . . . . .Page 20
Programmable System ptions . . . . . . . . . . . . . . . . . . . . . . . . . . . . . . . . . . . . . . . . .Page 20
Branch Table . . . . . . . . . . . . . . . . . . . . . . . . . . . . . . . . . . . . . . . . . . . . . . . . . . . . . .Page 21
10. Wiring Diagrams . . . . . . . . . . . . . . . . . . . . . . . . . . . . . . . . . . . . . . . . . . . . . . . . . . . . . . . .Page 24
11. Door Lock Diagrams . . . . . . . . . . . . . . . . . . . . . . . . . . . . . . . . . . . . . . . . . . . . . . . . . . . . .Page 25
12. Two Stage Door Lock Diagrams . . . . . . . . . . . . . . . . . . . . . . . . . . . . . . . . . . . . . . . . . . . . .Page 26
13. Technical Information . . . . . . . . . . . . . . . . . . . . . . . . . . . . . . . . . . . . . . . . . . . . . . . . . . . .Page 28
14. System Diagnostics . . . . . . . . . . . . . . . . . . . . . . . . . . . . . . . . . . . . . . . . . . . . . . . . . . . . . .Page 29
15. Wiring Diagram . . . . . . . . . . . . . . . . . . . . . . . . . . . . . . . . . . . . . . . . . . . . . . . . . . . . . . .Back Page
TTaabbllee ff CCnntteennttss
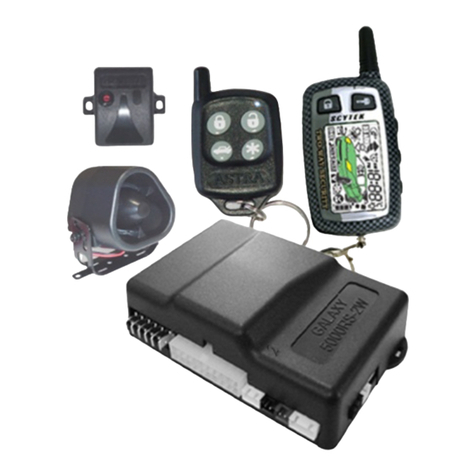
The ScyTek Galaxy 5000RS Plus is a combination vehicle security and remote starting system featuring a
built-in "ScyNet Network Port" that allows direct connection of optional accessory modules and a PC
interface offering expanded system operation. With proper installation this system will provide superior
protection and performance for many years to come.
The Galaxy 5000RS Plus’ built-in remote start feature is designed to offer maximum convenience by remote
starting your vehicle’s engine, turning on the heater/air conditioner, and then running for a pre-determined
time to provide a comfortable environment once you enter your vehicle.
To ensure the safety and security of the system while it is remote started, the Galaxy 5000RS Plus employs
several safeguards. In the event the alarm is triggered while the engine is remotely running, the remote
start will immediately shutdown to prevent unauthorized users from attempting to drive the vehicle. The
system is equipped with a hood pin input to prevent access to the engine compartment while the vehicle
is remotely running. The Valet Mode prevents the remote start feature from operating in the event the
vehicle is to be serviced. Finally, the brake pedal also acts as a safety by shutting down the remote start
when pressed.
System C ntents:
•Main Unit with built-in ScyNet Network Interface Port
•5-Button 2-Way LCD Remote Transmitter
•5-Button Random Code Remote Transmitter
•High utput 6-tone Siren
•Dual Stage Shock Sensor
•Status LED
•Coded Emergency verride / Valet Switch
Opti nal ScyNet Netw rk Interface Access ries:
•ScyNet Network Interface Software
•Two-Way FM Paging Module w/ LCD Transmitter
Opti ns and C nvenience Features*
This ScyTek system includes several optional inputs and outputs allowing the creation of a completely
personalized security and convenience system by offering many optional features such as:
*May require additi nal parts and/ r lab r, see st re f r details.
Galaxy 5000RS-2W Plus - Page 1
· Second Car peration
· Keyless Entry
· Two Stage Door Unlocking
· Starter Defeat
· Horn Honk
· Illuminated Entry
· Turbo Timer
· Remote Window Control
· Power Trunk / Hatch Release
· Glass Breakage Sensor
· Radar Sensor
· Remote Head Lamp Control
· Back-up Battery Siren
AAbbuutt YYuurr SSyysstteemm
PLEASE NOTE:
S me f the features described in this manual may require additi nal parts and/ r lab r, and may n t be included
as part f the standard installati n f this unit. Additi nally, many features f this security system have
selectable pti ns that must be activated r pr grammed during the system’s installati n. These items will be
identified in the f ll wing secti ns. Please discuss these features and any questi ns y u may have regarding the
installati n f this pr duct with Y ur Auth rized Dealer.
Standard Rem te Transmitter Descripti n
The Galaxy 5000RS Plus is compatible with the optional 5-button Remote Transmitters used to control
system operations.
N te: Using the optional PC or Pocket PC interface with the network software, it is possible to reconfigure
the functionality of the transmitter buttons. The standard (default) setting for operation of the transmitters
is described below.
Button 1
Arms the system and when held for 2 seconds, activates the system’s Panic feature. Button 1 also
locks the doors when the system is in Valet Mode.
Button 2
Disarms the system. Pressing Button 2 again operates the Passenger Unlock feature (if installed).
Button 2 also unlocks the doors when the system is in Valet Mode.
Button 3
Activates the Auxiliary 1 output. This output will remain on for as long as the button is pressed.
Button 4
Activates the Remote Start feature.
Button 5
is the Page Shift button. Each time the Shift Button is pressed, the LED on the transmitter will
illuminate and the transmitter functions will shift to the next page, allowing access to another set of
features. nce shifted to another page (there are 4 pages total), the transmitter will remain on that page
for 10 seconds or until a button is pressed, then return to page 1. Each time a transmitter button is pressed
and held, the LED will flash a number of times to indicate from which page it is transmitting. Under
normally operation, only pages 1 and 2 are used. Pages 3 and 4 are usually used for Two Car peration
(see page 3) or optional expansion modules.
Shift then Button 1
Arms the system silently.
Shift then Button 2
Disarms the system silently.
Shift then Button 3
Activates the Auxiliary 2 output. This output will remain on for as long as the button
is pressed.
Page 2 - Galaxy 5000RS-2W Plus
RReemmttee TTrraannssmmiitttteerrss
Button 1 Button 2
Button 5
LED
Button 3 Button 4
Adding/Replacing Transmitters
To replace lost or stolen transmitters or to add additional transmitters into the system, have all desired
transmitters ready and follow the steps below.
N te: Up to 4 transmitters can be programmed to operate the system. To erase any previously stored
transmitter codes, be sure to program all 4 transmitter memory locations.
To program the transmitter(s):
1. Turn on the ignition key n, ff, n, ff, and back n. (Key n 3 times)
· The siren will chirp 3 times.
2. Press and hold the verride switch for 5 seconds.
· The siren will chirp 5 times.
· The LED will illuminate.
3. Press Button 1 on the first transmitter.
· The siren will chirp once.
4. Press Button 1 on the first transmitter again.
· The siren will chirp twice to indicate it has learned the code.
5. Repeat steps 3 and 4 for each transmitter (up to 4).
6. Turn off the ignition key.
Tw Car Operati n
If two vehicles are equipped with Galaxy 5000RS Plus systems, for convenience both can be operated using
the same remote transmitter. If all four transmitters are to be used with both cars, program transmitters
A and B into the first vehicle in the manner described above. Program transmitters C and D by pressing
the Shift button twice before performing steps 3 and 4 above.
When finished programming the first vehicle, program transmitters C and D into the second vehicle as
normal, then program transmitters A and B by pressing the Shift button twice before performing steps 3
and 4 above.
When programmed in this manner, the driver of the first car can also operate the second vehicle by pressing
the Shift button twice and the desired function button.
Battery Replacement
Your Galaxy Remote Transmitter uses a 12 volt alkaline battery (type 23A), which will require replacement
in time. Depending on the amount of use, the battery may last up to six months or more before it needs
replacement. When the battery needs replacing, the system’s operating range will decrease or the
transmitter LED may not be as bright.
In order to change the battery, first remove 2 screws from the back of the transmitter and separate the top
and bottom halves of the case. While replacing the battery make sure that the positive and negative
terminals are positioned correctly, then carefully reassemble the transmitter case.
Galaxy 5000RS-2W Plus - Page 3
Page 4 - Galaxy 5000RS-2W Plus
2-way LCD Rem te Transmitter Descripti n
The Galaxy 5000RS-2W Plus is supplied two 2-way LCD remote transmitters, offering increased range and
confirmation of any activated features.
Button 1
Arms and Disarms the system and when held for 2 seconds, activates the system’s Panic feature.
Button 1 also locks/unlocks the doors when the system is in Valet Mode.
Button 2
Activates the Remote Start feature.
Button 3
Activates the Auxiliary 1 output normally used for trunk release (note trunk icon on button).
Button 4
Activates the Auxiliary 2 output. This output will remain on for as long as the button is pressed.
Button 5
is the Confirmation and Programming button. Quickly pressing button 5 will activate the LCD
display’s backlighting for use in the dark. Pressing button 5 for 2 seconds activates the system’s
confirmation feature which will then display the current status of the system (armed, disarmed, engine
running, etc.).
Adding/Replacing Opti nal 2-way LCD Transmitters
When adding a 2-way LCD transmitter to the system, follow these steps:
1. Turn on the ignition key n, ff, n, ff, n, ff, and back n. (Key n 4 times)
· The siren will chirp 4 times.
2. Press and hold the verride switch for 5 seconds.
· The siren will chirp 4 times.
· The LED will illuminate.
3. Press Button 1 on the first transmitter.
· The siren will chirp once.
4. Turn off the ignition key.
5. Repeat steps 1-4 to add an additional 2-way transmitter.
Button 1 Button 2
Button 3
Button 4
Button 5
Galaxy 5000RS-2W Plus - Page 5
LCD Transmitter Battery Replacement
Your Galaxy Remote Transmitter uses a 1.5 volt AAA alkaline battery, which will require replacement in time.
Depending on the amount of use, the battery may last up to six months before it needs replacement. When
the battery needs replacing, the system’s operating range will decrease, the LCD display will show only one
of three bars in the battery icon, or the display and sounds may suddenly stop and start as the battery
voltage drops below minimum.
In order to change the battery, first slide the battery door locking pin to the side. Carefully slide the battery
cover downward until it is free. While replacing the battery make sure that the positive and negative
terminals are positioned correctly, then carefully reassemble the transmitter case.
Setting The Time
The LCD display is equipped with a 12-hour clock that in addition to displaying the time, offers an alarm
clock function as well as a remote activation timer.
To set the time:
1. Press and hold Buttons 2 and 3 for three seconds.
· The remote will beep two times and three bars will be shown indicating time set mode is entered.
2. Press Button 2 until the correct hour is displayed.
3. Press Button 3 until the desired minute is displayed. The button may be held down to scroll faster.
4. When the desired time is displayed, press Button 5 to store.
· The remote will play a melody to indicate the time has been set.
Setting The Alarm Cl ck
The alarm clock function can be set to play an alert melody at a specific time of day.
To set the alarm clock function:
1. Press and hold Buttons 2 and 3 until the remote beeps three times.
· The alarm clock bell and three bars will be shown indicating alarm clock set mode is entered.
2. Press Button 2 until the desired hour is displayed.
3. Press Button 3 until the desired minute is displayed. The button may be held down to scroll faster.
4. When the desired time is displayed, press Button 5 to store.
· The remote will play a melody to indicate the alarm clock has been set.
To disable the alarm clock function:
1. Press and hold Buttons 2 and 3 until the remote beeps three times.
· The alarm clock bell and three bars will be shown indicating alarm clock set mode is entered.
2. Press Button 1 to disable the alarm clock.
· The remote will play a melody to indicate the alarm clock has been disabled.
Setting The Aut matic Start Or Aut Activate Functi n
The Automatic Start Function provides a timer that allows the vehicle to automatically remote start at a
preset time of day. For non-remote start equipped systems, this feature allows activation of an auxiliary
feature at a preset time of day.
To set the automatic start / auto activate function:
1. Press and hold Buttons 2 and 3 until the remote beeps four times.
· The fan and clock will be shown indicating automatic start mode is entered.
2. Press Button 2 until the desired hour is displayed.
3. Press Button 3 until the desired minute is displayed. The button may be held down to scroll faster.
Page 6 - Galaxy 5000RS-2W Plus
4. When the desired time is displayed, press Button 5 to store.
· The remote will play a melody to indicate the alarm clock has been set.
To disable the automatic start / auto activate function:
1. Press and hold Buttons 2 and 3 until the remote beeps four times.
· The fan and clock will be shown indicating automatic start mode is entered.
2. Press Button 1 to disable the alarm clock.
· The remote will play a melody to indicate the alarm clock has been disabled.
LCD Backlight
Transmitter Button 5 is used for confirmation, transmitter programming, as well as activation of
the LCD backlighting for use in the dark. Press button 5 momentarily to activate the LCD
backlight.
System C nfirmati n
The 2-way transmitter's confirmation feature allows the current vehicle status to be displayed
at any time.
To display system status:
1. Press and hold Button 5 until the display shows C N.
· The transmitter will beep once.
2. Release Button 5.
· The transmitter will beep once.
· The icons representing current system status will be displayed on the LCD panel.
Transmitter Pr gramming
Pressing and holding transmitter button 5 will scroll through several transmitter programmable
options that may or may not be available depending on the model of system installed- CHP,
SND, and PSV. The CHP or chirp function allows remote enabling or disabling of the vehicle
siren's confirmation chirps.
Note: This feature may not be available on all systems.
To turn the siren chirps on or off:
1. Press and hold Button 5 until the display shows CHP.
·The transmitter will beep twice.
2. Release Button 5.
· The transmitter will beep once.
· The LCD panel will show a siren if the chirps are enabled or "off" if the chirps are
disabled.
The SND or sound function allows disabling of the transmitter's confirmation tones.
To turn the transmitter confirmation tones on or off:
1. Press and hold Button 5 until the display shows SND.
· The transmitter will beep three times.
2. Release Button 5.
· The transmitter will beep once.
· The LCD panel will play a tone if the sounds are enabled or "off" will be displayed if the
chirps are disabled.