Sea Quest Black Diamond User manual
R
OWNER’S MANUAL

2Black Diamond Owner’s Manual
Black Diamond Owner’s Manual 3
SAFETY INFORMATION ..................................................... 3
General Precautions & Warnings ...................................................3
BASIC SETUP ..................................................................... 5
Attaching the LP Hose to the First-Stage............................................... 5
Securing the BC to the Cylinder............................................................. 6
Threading the Cylinder Band ................................................................. 7
Double Cylinder Setup ........................................................................... 8
ADJUSTING THE FIT .......................................................... 9
Adjusting the Cummerbund Length........................................................ 9
Adjusting the Chest Strap .................................................................... 10
WEIGHT INTEGRATION FEATURES ................................11
Weight System - Setup & Installation ......................................... 11
Loading the Weight Pouches................................................................ 11
SureLock™ Weight Pouch Installation ................................................. 13
Releasing the SureLock™ Weight Pouches................................14
Non-Releasable Weight .................................................................15
DONNING AND ADJUSTMENT PROCEDURES .............. 16
INFLATION METHODS...................................................... 17
Oral Ination......................................................................................... 17
Power Ination...................................................................................... 17
DEFLATION METHODS .................................................... 18
Deation via Oral Inator...................................................................... 18
Deation via Dual Exhaust Valve ......................................................... 18
Overpressure Relieve (OPR)/ Dump Valve .......................................... 19
SPECIAL FEATURES........................................................ 20
Knife Attachment.................................................................................. 20
Pockets................................................................................................. 20
PRE-DIVE INSPECTION.................................................... 21
POST-DIVE CARE & MAINTENANCE .............................. 22
DEALER INSPECTION & SERVICE ................................. 23
WARRANTY INFORMATION............................................. 24
ANNUAL SERVICE & INSPECTION RECORD ................ 26
CONTENTS
2Black Diamond Owner’s Manual
Black Diamond Owner’s Manual 3
SAFETY INFORMATION
General Precautions & Warnings
Before using this buoyancy compensator (BC), you must receive in-
struction and certication in SCUBA diving and buoyancy control from
a recognized training agency. Use of SCUBA equipment by uncertied
or untrained persons is dangerous and can result in injury or death.
Read this owner’s manual completely before attempting to use your
BC, and become familiar with it rst in a controlled environment such
as a swimming pool, in order to weight yourself properly and to be-
come comfortable with using its many features and adjustments.
Before every dive, perform a complete pre-dive inspection according to
the procedure prescribed in this manual, to ensure that all components
are functioning properly and no signs of damage or leaks are pres-
ent. If you nd that your BC is not functioning properly or is damaged,
remove it from service until it can be repaired by an authorized Aqua
Lung/SeaQuest Dealer.
Your BC is not a lift bag. DO NOT use it to bring heavy objects to the
surface. Doing so may cause permanent damage to the BC, and could
also result in serious injury or death due to embolism or decompres-
sion sickness.
In an emergency such as an out of air situation or uncontrolled de-
scent, it is important to remove and jettison weight immediately. DO
NOT depend solely on using your BC’s power inator to lift you to the
surface.
In the event of an uncontrolled, rapid ascent, it is important to immedi-
ately begin venting air from the BC. Continue venting air to slow your
ascent rate if neutral buoyancy cannot be reestablished.
DO NOT inhale from your oral inator. The BC may contain harmful
contaminants or gasses, which could cause suffocation or injury.
Factory prescribed service for this BC must be performed at least
once annually by a factory trained technician who is employed by an
authorized Aqua Lung/SeaQuest Dealer. Annual service consists of a
complete overhaul of the power inator, and a general air leak inspec-
tion of the bladder and valve connections.
Disassembly, repair, or lubrication must not be attempted by persons
who are not factory trained and authorized by Aqua Lung/SeaQuest.
Unauthorized service will render the warranty null and void.
4Black Diamond Owner’s Manual
Black Diamond Owner’s Manual 5
WARNING: A buoyancy compensator (BC) is NOT a life
jacket! It is not designed to provide face-up flotation in all
situations, and therefore it does not meet U.S. Coast Guard
regulations for a life preserver or personal flotation device
(PFD). If you become unconscious in the water without a
buddy present to immediately give assistance, you may suf-
fer serious injury or death from drowning.
Your buoyancy compensator is primarily designed to help you maintain
neutral buoyancy while in a comfortably balanced, face-down swimming
position underwater. It is also designed to provide you with otation so
that you can rest on the surface, but it is not designed to function as a
life preserver or personal otation device (PFD). In order to meet U.S.
Coast Guard regulations, a PFD must be designed so that it automati-
cally rights you to a face-up position and holds your head out of the
water on the surface. The design characteristics of a personal otation
device are therefore different from those of a buoyancy compensator.
The ability of any otation device to oat you in a face-up position can
also be affected by other diving equipment you wear, including a cylin-
der, weight or exposure suit, and whether it can be inated before you
lose consciousness.
For this reason, it is important to always dive with a buddy, and maintain
close proximity with them at all times. Do not depend on any otation
device to hold your face above the surface in the event that you are ren-
dered unconscious in the water while diving.
WARNING: Although this manual provides some basic
guidelines for certain buoyancy control techniques, it is not
a substitute for training from a professional diving instruc-
tor. Failure to weight yourself properly may create a hazard-
ous condition that could lead to serious injury or death. If
you are unsure how to weight yourself in order to achieve
optimum buoyancy underwater and on the surface, do not
dive until you have obtained the necessary instruction
from your diving instructor or an authorized Aqua Lung/
SeaQuest Dealer.
If you have any questions regarding your Buoyancy Compensator or
these instructions, contact your local dealer or Aqua Lung/SeaQuest at
(760) 597-5000
4Black Diamond Owner’s Manual
Black Diamond Owner’s Manual 5
BASIC SETUP
Note: The terms “hook,” “loop,” and “hook & loop” are used through-
out this manual. Hook & Loop is commonly known as Velcro®, which
is a trademarked brand of hook & loop. Many of the BC’s components
have hook & loop attachments, including the waistband, cylinder bands,
and weight pouch aps.
Aqua Lung/SeaQuest recommends that you bring your buoyancy com-
pensator, together with your regulator, to your authorized dealer for the
installation of the low pressure (LP) inator hose and other accessories.
The retailer can also answer any questions you may have pertaining to
the information in this manual. If it is not possible to return the BC with
your regulator to your authorized dealer, you may install the LP quick
disconnect inator hose by carefully performing the steps in the following
procedure.
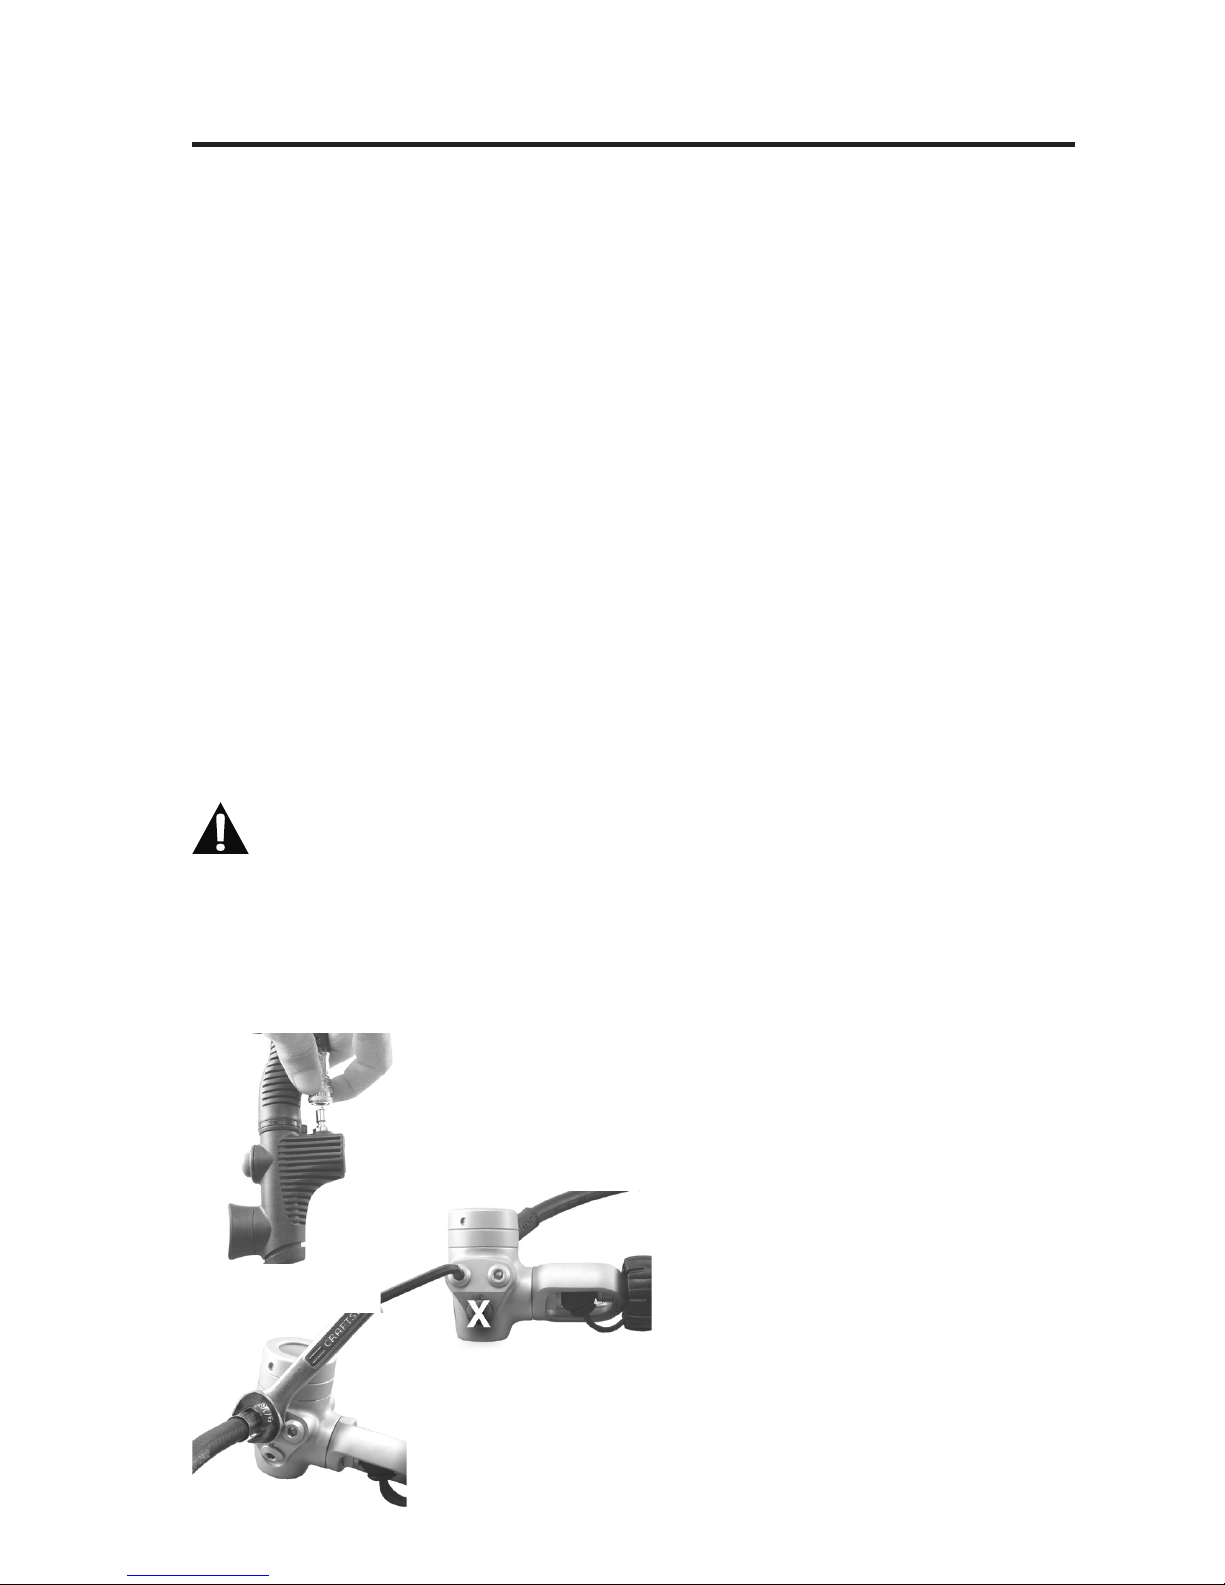
Attaching the LP Hose to the First-Stage
WARNING: DO NOT connect the inflator hose to a high
pressure (HP) port (greater than 200 psi / 14 bar). This may
cause the hose to burst when pressurized, which can result
in serious injury. If you are unsure which regulator port is
low pressure (LP) or high pressure (HP), consult your regu-
lator owner’s manual or your dealer before attaching the
hose.
1. Remove the inator hose from the power ina-
tor body by gripping the grooved sleeve over the
quick disconnect coupling with your thumb and
forenger and sliding the sleeve back (Fig. 1).
Fig. 1
2. Remove the port plug
from a low pressure (LP)
port on the regulator us-
ing an appropriately sized
wrench (Fig. 2).
3. Check to ensure the O-ring is present and in good
condition, and screw the threaded end of the hose
into the port. Tighten to 40 inch-pounds (46 kg/cm)
with a ⁹⁄₁₆” wrench (Fig. 3).
Fig. 3
Fig. 2
F
Table of contents
Other Sea Quest Diving Instrument manuals


