SeaLand VacuFlush VG4-12 User manual
1
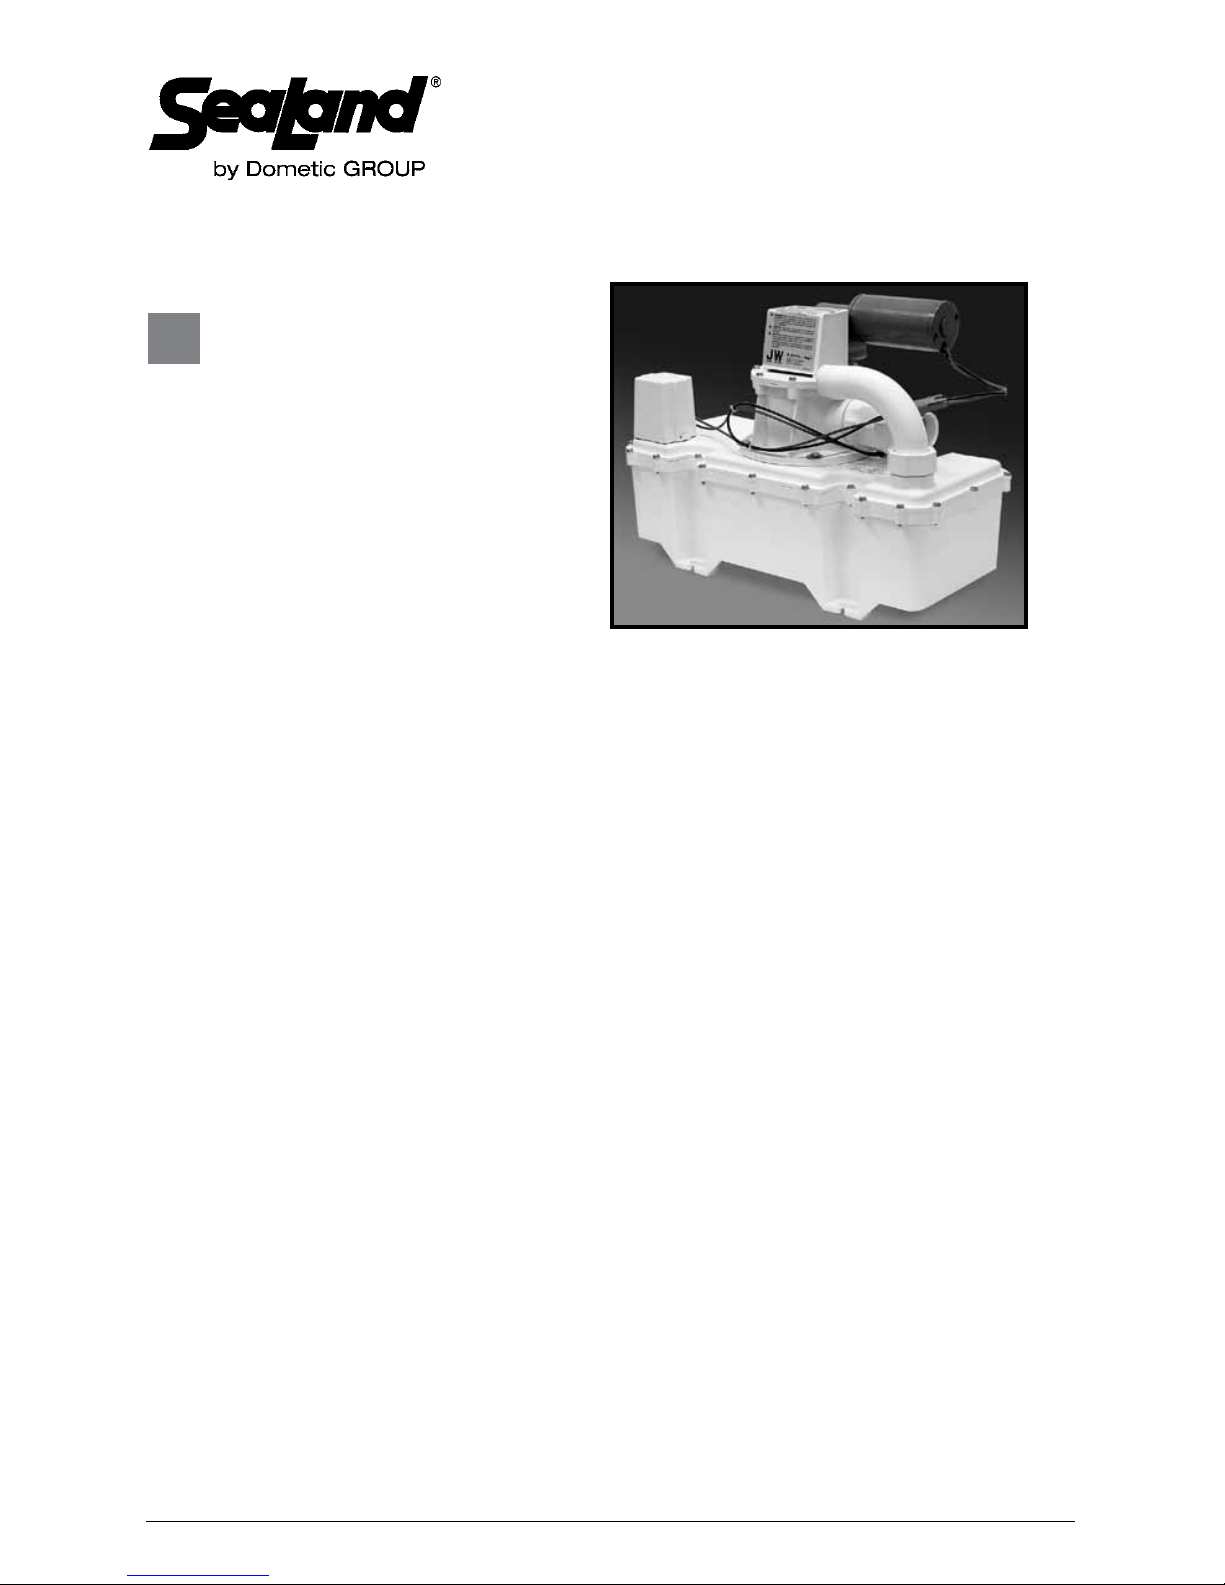
JW Series
VacuFlush®
Vacuum
Generator
Vacuum generator
instruction manual
EN
Abwasser-Auslasspumpe
Bedienungsanweisung ........... 12
DE
Pompe d’évacuation
Mode d’emploi ................. 12
FR
Bomba de descarga
Manual de instrucciones . . . . . . . . . . 12
ES
Aftappomp
Instructihandleiding.............. 12
NL
Pompa di scarico
Manuale di istruzioni ............. 12
IT
Tyhjennyspumppu
Käyttöohje .................... 12
FI
Avloppspump
Handbok ..................... 12
SV
Udledningspumpe
Instruktionsmanual .............. 12
DA
Tømmepumpe
Bruksanvisning ................. 12
NO

2
SeaLand JW Vacuum Generator
A
B
C
D
E
F
1
2 3
1 Notes on using the manual .................................................3
2 General safety instructions .................................................3
3 Intended use ............................................................3
4 Specications ...........................................................4
5 Components ............................................................4
6 Installation ...........................................................5 - 6
7 Operation...............................................................6
8 Warranty ............................................................6 - 7
9 Customer service.........................................................8
EN
Table of contents
A
A
B
B
C

3
2.1 Warnings
The following statements must be read and understood before installing, servicing and/or
operating this product. Modification of this product may result in property damage.
Dometic recommends that a qualied technician or electrician install or service this product.
Equipment damage, injury to personnel or death could result from improper installation. DOMETIC
ACCEPTS NO RESPONSIBILITY OR LIABILITY FOR DAMAGE TO EQUIPMENT, OR INJURY OR
DEATH TO PERSONNEL THAT MAY RESULT FROM IMPROPER INSTALLATION, SERVICE OR
OPERATION OF THIS PRODUCT.
SeaLand JW Vacuum Generator Notes on using the manual
1 Notes on using the manual
Note
Supplementary information for operating the device.
fig. 1 A, page 2 : This refers to an element in an illustration. In this example, item A in
gure 1 on page 2.
1
Caution!
Safety Instruction: Failure to observe this instruction can cause material damage and
impair the function of the device.
CAUTION! ELECTRICAL HAZARD
DO NOT CONNECT JW SERIES VACUUM GENERATOR DIRECTLY TO STANDARD
RESIDENTIAL WIRING SYSTEM. JW series vacuum generator operates on 12 V DC
or 24 V DC through a 10-amp or 5-amp circuit (see Section 4.2 for electrical specica-
tions. For residential use, this product must be connected to a minimum 12-amp power
converter with 12 V DC electrical output.
2 General safety instructions
The manufacturer will not be held liable for claims for damage resulting from the following:
• Faultyassemblyorconnection
• Damagetotheunitfrommechanicalinuences,misuseorabuse
• Alterationstotheunitwithoutexpresswrittenpermissionfromthemanufacturer
• Useforpurposesotherthanthosedescribedintheoperatingmanual
3 Intended use
The SeaLand JW series vacuum generator creates the powerful vacuum of a VacuFlush toilet
system.Whenthetoiletisushed,thevacuuminthedischargelinepullsthetoiletcontentsinto
thevacuumgenerator,whichthenpropelstheefuenttoaholdingtankorotherwastetreatment
device.
3.1 Benefits
Versatile installation. Powerful vacuum pump allows toilet to be located up to 50 ft. (15.2 m) away
and 20 ft. (6.1 m) from holding tank or other waste destination.
Automatic “full tank” shut-down. When installed with holding tank that includes a “full tank” level
indicator, an automatic shut-down relay will stop electrical power to the vacuum generator when
the holding tank level reaches “full.” This prevents holding tank overll which can cause damage
to the toilet system.
Easy maintenance. Two-piece design allows easy access to vacuum tank interior if required.

4
5 Components
(g. 1 , page 2)
Ref. Description
A Inlet tting
B Outlet tting
C Vacuum tank
1
Refer to complete parts list (packed separately) for additional information.
4.2 Electrical specifications
4.3 Dimensions (g. 2 , page 2)
Ref. Dimension
A 20.125 in. / 511 mm
B 14 in. / 356 mm
C9.125 in. / 232 mm
2
4 Specifications
4.1 Materials
Pump body: glass-lled polypropylene
Pump bellows: engineered PP/PE resin
Duckbill valves: EPDM
Vacuum tank and fittings: glass-lled
polypropylene
SeaLand JW Vacuum Generator
Specifications
Model Voltage (DC) Power Draw
(amp average)
Fuse/
breaker
Flow
(GPM/LPM)
Wire
size
Weight
(kg/lbs.)
VG4-12 12 610 5.1 / 19.3 follow local
codes* 15.1 / 6.9
VG4-24 24 3 5 5.1 / 19.3 follow local
codes* 15.1 / 6.9
* For marine applications follow ABYC wiring recommendations.
Specications subject to change without notice.
Ref. Description
D Vacuuum switch
E Vacuum pump motor
F Vacuum pump body
CAUTION! ELECTRICAL HAZARD
DO NOT CONNECT JW SERIES VACUUM GENERATOR DIRECTLY TO STANDARD
RESIDENTIAL WIRING SYSTEM. JW series vacuum generator operates on 12 V DC
or 24 V DC through a 10-amp or 5-amp circuit (see Section 4.2 for electrical specica-
tions). For residential use, this product must be connected to a minimum 12-amp power
converter with 12 V DC electrical output.
5
SeaLand JW Vacuum Generator Installation
6 Installation
6.1 General guidelines
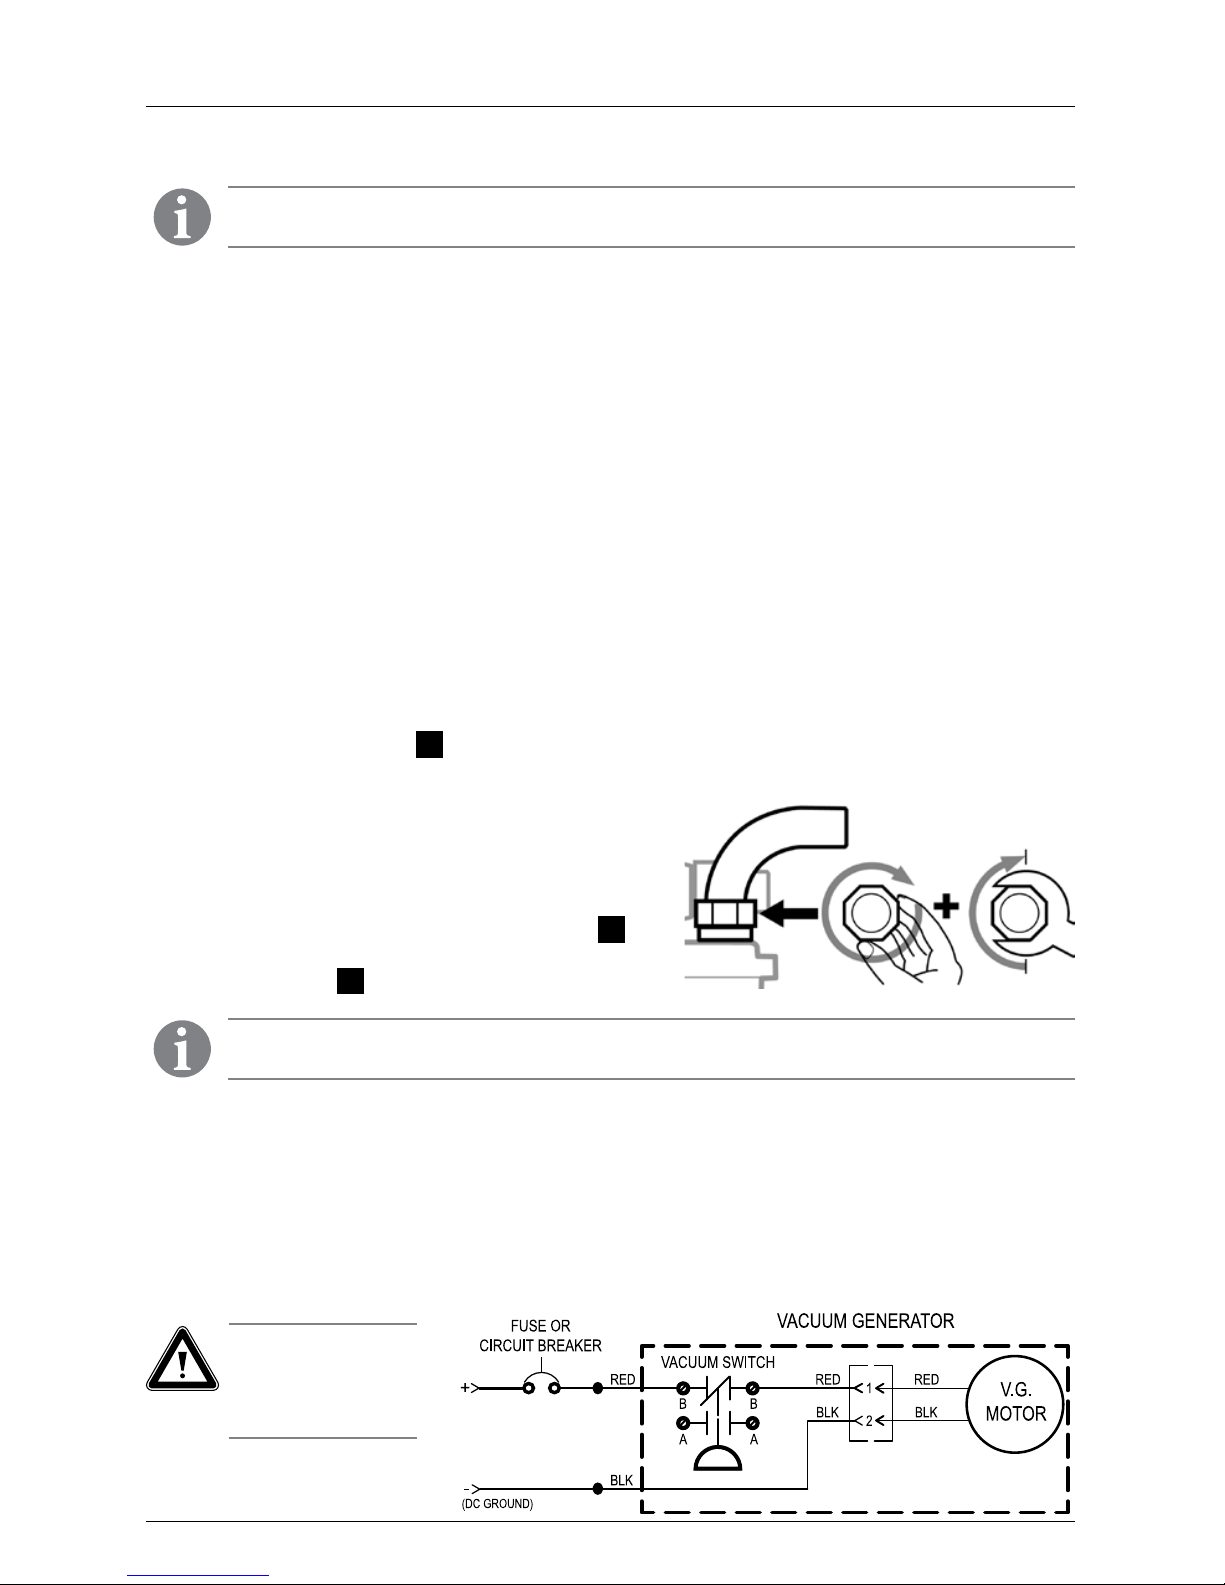
6.3 Wiring
Note
Two-toilet VacuFlush systems require a vacuum generator for each toilet.
Note
Make sure to connect toilet discharge hose to inlet tting of vacuum generator.
1. Vacuum generator must be installed
horizontally only.
2. The vacuum generator can be located up to
50 feet (15.2 m) from the VacuFlush toilet,
and 20 feet (6.1 m) from the holding tank or
other waste destination.
1. Wire vacuum generator according to diagram below and Electrical Specications, Section 4.2.
2. Pre-wired connectors (if applicable) can be cut off to complete wiring.
3. Use stranded copper wire. Protect wires with grommets or other protective devices at holes
and sharp edges.
4. Do not overfuse. Overfusing the vacuum generator will result in warranty invalidation.
1. Make sure the vacuum generator is properly located before proceeding. Place the vacuum
generatoronatsurface.Positionasneeded.Usingacenterpunch,markthefourslotted
holes in the pump feet. Remove vacuum generator.
2. Using a 3/16-inch (5 mm) drill bit, drill the four mounting holes. Use #14 wood screws and
washers to secure vacuum generator.
3. Position pump body (g. 1F, page 2) to accommodate plumbing layout, if necessary, by
loosening four fasteners that hold pump onto vacuum tank, rotating pump body to desired
position, and retightening fasteners.
4. Spin-nut connections on inlet and outlet ttings
allow easy installation and positioning of hoses.
After positioning inlet tting in proper direction to
accept inlet hose from toilet, tighten spin-nut
1/2-turn past hand-tight with wrench (g. 3A,
page 2). Use two hose clamps for each hose
connection (g. 3B, page 2).
6.2 Installation and plumbing
Caution – Pump
starts automatically.
Turn off power before
making nal electrical
connection or servicing.
3. The vacuum generator inlet must not be
located more than 6 feet (1.8 m) higher than
the toilet discharge outlet.
4. The maximum head pressure on the
discharge side must not exceed 6 ft. (1.8 m).
5. To minimize standing sewage in discharge
hose, position vacuum generator inlet at
same level or lower than toilet outlet where
possible.
6
SeaLand JW Vacuum GeneratorInstallation
6.3 Wiring (continued)
6.4 Vacuum testing
1. Prime pump with water before performing vacuum test. If vacuum generator is part of
compost system, make sure discharge hose from vacuum generator is not connected to
compost unit during priming process.
2. POSITIVE PRESSURE TESTING IS NOT RECOMMENDED. JW series vacuum generator is
designed to seal with negative pressure (vacuum), and will not hold positive pressure.
Note
Ifvacuumgeneratorconnectstoelectronic-ushVacuFlushtoilet,refertoVacuFlushtoiletwiring
diagram for complete information.
North America and Rest of the World:
Manufacturer’s One-Year Limited Warranty
Dometic Corporation, Sanitation Division warrants to the original purchaser only that this product,
if used for personal, family or household purposes, is free from defects in material and workman-
ship for a period of one year from the date of purchase.
If this Dometic product is placed in commercial or business use, it will be warranted to the original
purchaser only to be free of defects in material and workmanship for a period of ninety (90) days
from the date of purchase.
Dometic reserves the right to replace or repair any part of this product that proves, upon
inspection by Dometic, to be defective in material or workmanship. All labor and transportation
costs or charges incidental to warranty service are to be borne by the purchaser-user.
EXCLUSIONS
IN NO EVENT SHALL DOMETIC BE LIABLE FOR INCIDENTAL OR CONSEQUENTIAL DAMAGES,
FOR DAMAGES RESULTING FROM IMPROPER INSTALLATION, OR FOR DAMAGES CAUSED
BY NEGLECT, ABUSE, ALTERATION OR USE OF UNAUTHORIZED COMPONENTS. ALL IMPLIED
WARRANTIES, INCLUDING ANY IMPLIED WARRANTY OF MERCHANTABILITY OR FITNESS
FOR ANY PARTICULAR PURPOSE, ARE LIMITED TO A PERIOD OF ONE YEAR FROM DATE OF
PURCHASE.
8 Warranty and product liability
7 Operation
WhenaVacuFlushtoiletisushed,vacuumpressurecreatedbythevacuumgeneratorpulls
waste from the toilet to the vacuum generator. The increase of ambient pressure in the vacuum
tank causes the vacuum switch (g. 1 D, page 2) to turn on power to the vacuum generator. The
vacuumpumpbeginstocreatevacuumandpushtheefuentinthedischargelinetotheholding
tank or other destination. After vacuum is restored in the discharge system (about 60-90 seconds,
depending on the installation), the vacuum switch shuts off electrical power, and the toilet system
isreadyforthenextush.
Caution!
Vacuum pump may start automatically. Turn off electrical power before servicing.
1

7
IMPLIED WARRANTIES
No person is authorized to change, add to, or create any warranty or obligation other than that
set forth herein. Implied warranties, including those of merchantability and tness for a particular
purpose, are limited to one (1) year from the date of purchase for products used for personal,
family or household purposes, and ninety (90) days from the date of purchase for products placed
in commercial or business use.
OTHER RIGHTS
Some states do not allow limitations on the duration of an implied warranty and some states do
not allow exclusions or limitations regarding incidental or consequential damages; so, the above
limitations may not apply to you. This warranty gives you specic legal rights, and you may have
other rights which vary from state to state.
To obtain warranty service, rst contact your local dealer from whom you purchased this product
or go to http://www.dometic.com for a dealer near you.
Europe:
Warranty and Customer Service
Warranty arrangements are in accordance with EC Directive 44/1999/CE and the normal condi-
tions applicable for the country concerned. For warranty or other service, please contact our
Dometic/Waeco Service department listed elsewhere in this manual. Any damage due to improper
use is not covered by the warranty.
The warranty does not cover any modications to the product or the use of non-original Dometic
parts; the warranty does not apply if the installation and operating instructions are not adhered to
and no liability shall be entertained.
Product Liability
Product liability of Dometic Group and its subsidiary companies does not include damages which
may arise from: faulty operation; improper alterations or intervention in the equipment; adverse
effects from the environment which may impact the equipment itself or the direct vicinity of the
equipment or persons in the area.
To obtain warranty service, rst contact your local dealer from whom you purchased this product
or go to http://www.dometic.com for a dealer near you.
SeaLand JW Vacuum Generator Warranty

8
DOMETIC CORPORATION, SANITATION DIVISION
13128 SR 226 | PO BOX 38
BIG PRAIRIE, OHIO 44611 USA
www.DometicSanitation.com
® Registered; ™ Trademark of Dometic Corporation
© Dometic Corporation
600345151 02 6/13
SeaLand JW Vacuum Generator
A worldwide customer service network assists
in servicing and maintaining your sanitation
system. For the Authorized Service Center near
you, please call from 8:00 a.m. to 5:00 p.m.
(ET) Monday through Friday.
You may also contact or have your local
dealer contact the Parts Distributor nearest
you for quick response to your replacement
parts needs. They carry a complete inventory
for the SeaLand product line.
Telephone: 1 800-321-9886 U.S.A. and Canada
330-439-5550 International
Fax: 330-496-3097 U.S.A. and Canada
330-439-5567 International
Web site: http://www.DometicSanitation.com
http://www.Dometic.com
9 Customer service
Dometic Group is a customer-driven, world-leading
provider of leisure products for the RV, automotive,
truck and marine markets. We supply the industry and
aftermarket with a complete range of air conditioners,
refrigerators, awnings, cookers, sanitation systems,
lighting, mobile power equipment, comfort and safety
solutions, windows, doors and other equipment that
make life more comfortable away from home.
Dometic Group supplies a wide range of workshop
equipment for service and maintenance of built-in air
conditioners. Dometic Group also provides specially
designed refrigerators for hotel rooms, ofces,
wine storage and transport and storage of medical
products.
Our products are sold in almost 100 countries and are
produced mainly in wholly-owned production facilities
around the world.
This manual suits for next models
1
Table of contents


