SETTING THE CODE
You may want someone to help at this point.
The following procedure prevents the opener from learning the
code of another remote control that is transmitting.
1. Decide on a 4-digit code using numbers from 0 to 9. You can
use a number more than once (for example, 4, 0, 4, 1).
2. Press the selected code digits on the keypad. PRESS AND
HOLD the ENTER button. The keypad light will blink. Press
the 'Smart' button on the opener end panel. The adjacent
indicator light will flash and the door will begin to move. The
receiver has now learned the selected keypad code.
After programming the
keypad, test your
portable remote control.
If the pushbutton(s) no
longer activates the door
opener, reprogram the
remote control.
To change your code
at any time, repeat
Steps 1 and 2.
BATTERY: The 12 Volt battery should produce power for at
least one year. As long as there is adequate power, the keypad
will illuminate and receiver will operate when number and
ENTER keys are pressed. Replace the battery when keypad
illumination becomes dim.
MODEL 139.53776
MULTI-FUNCTION KEYLESS ENTRY
To comply with FCC rules, adjustment or modification of receiver and/or transmitter
is prohibited, except for changing the code setting and replacing the transmitterl
battery. THERE ARE NO OTHER USER SERVICEABLE PARTS.
This remote control can be used with any 53000SRT series
garage door opener receiver.
Personalized Code: Up to 10,000 possible combinations.
Code can easily be changed if desired.
Operation: Opener activates when 4-digit code and ENTER
button are pressed.
If wrong numbers are accidentally pressed, correction can be
made immediately. The ENTER key will transmit only the last
four digits.
The keypad will blink for 15 seconds after the code is
transmitted. During that time you can STOP or REVERSE door
travel just by pressing the ENTER key.
The Multi-Function Keyless Entry can be used with any
'SMART' receiver. The keypad will illuminate for 5 seconds at
the first push of ANY key.
All 53000SRT garage door opener receivers have a separate
memory channel for the Multi-Function Keyless Entry to
operate the opener.
Power Supply: 12 Volt battery.
INSTALLATION
1.Center the keypad at eye level
against the selected location on
the garage exterior (as shown
below).
NOTE: For a one-piece door on
a brick, stone or aluminum
sided garage, use the optional
location shown in the illustration
to avoid injury as the door swings up
and out.
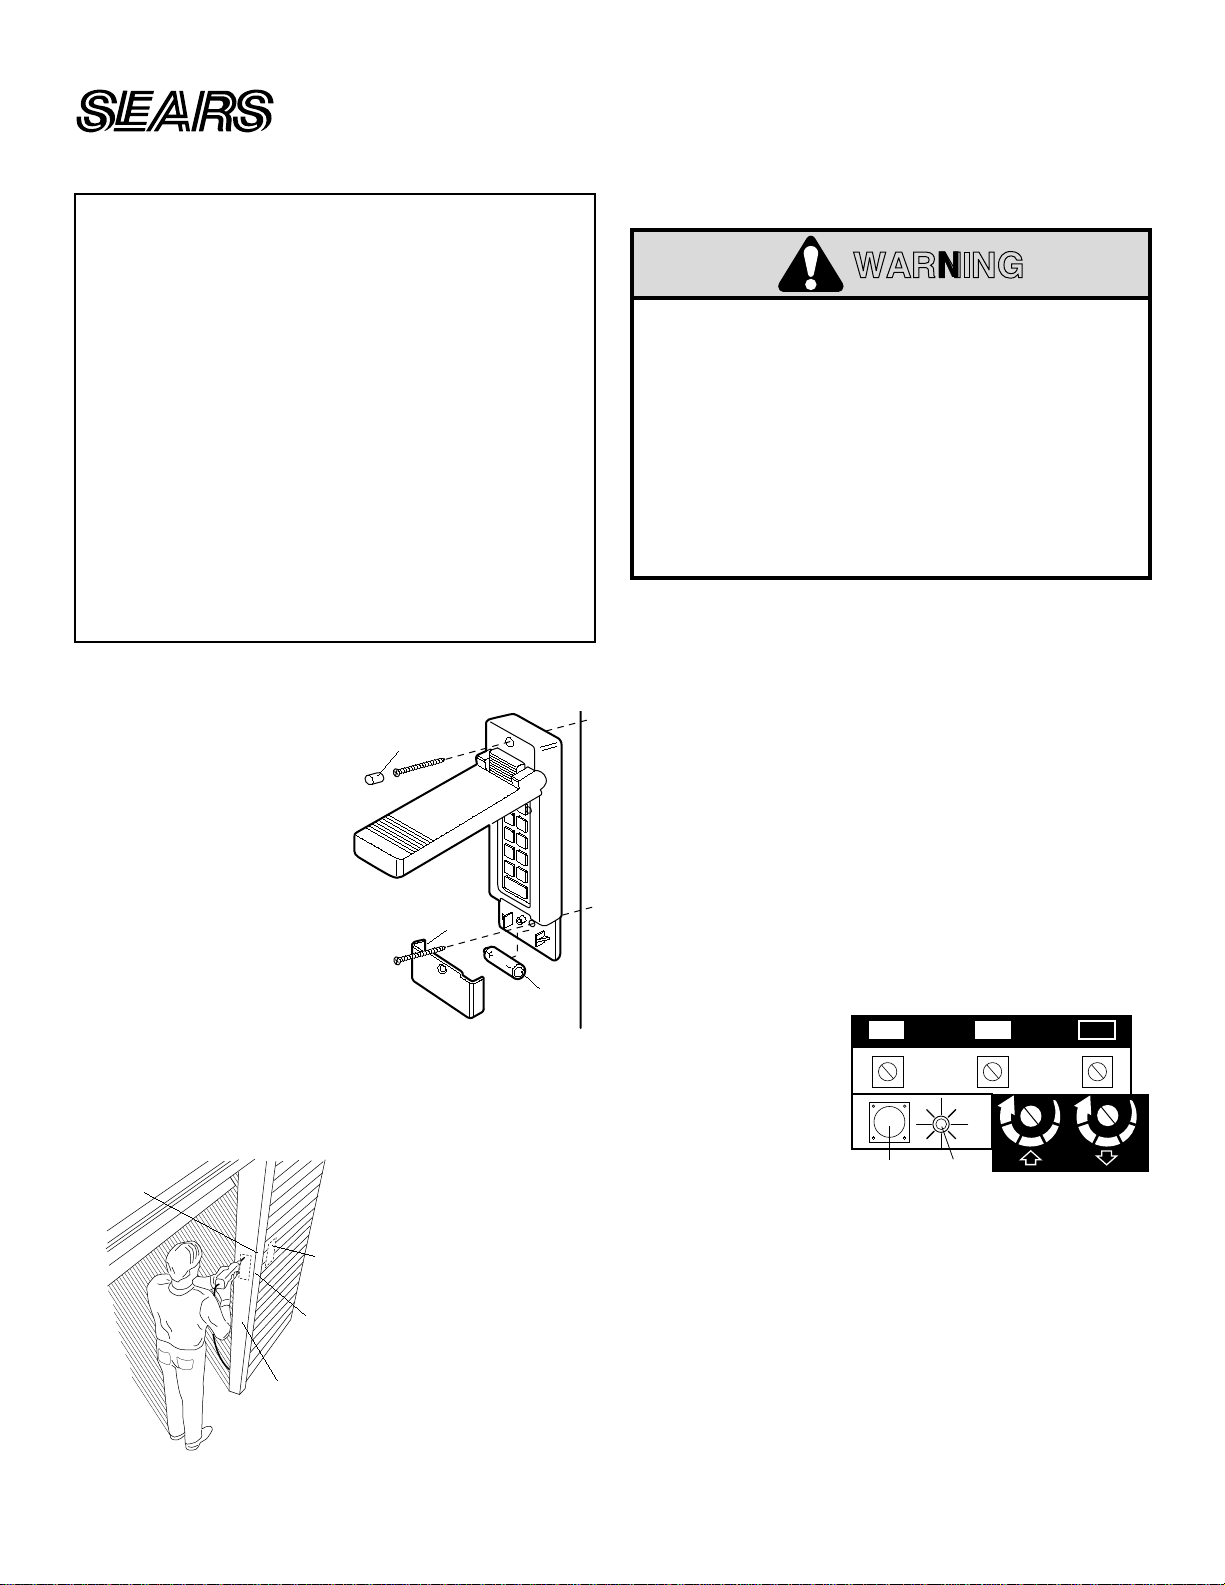
2.Hold keypad firmly with cover half
open so both top and bottom
mounting holes are visible. Use a
punch to mark each hole. Drill two 1/8"
pilot holes. Fasten securely with screws provided.
3.Insert the plug provided into top hole to cover the fastening
screw.
Return the battery, being sure to observe polarity.
Refasten compartment cover.
Children operating or playing with a garage door opener
can injure themselves or others.
The garage door could
close and cause serious injury or death.
Install the door control (or any additional push buttons)
out of the reach of children and away from all moving
parts of the door and door hardware,
but where the
garage door is visible.
Do not allow children to operate
the push button(s) or the remote control(s).
A moving garage door could injure someone under it.
Activate the opener only when the door is properly
adjusted, you can see it clearly, and there are no
obstructions to door travel.
WARNING
©1994, Sears Roebuck & Company
114A1399D All Rights Reserved Printed in Mexico
Door Jamb Edge
(Optional Location
for 1-Piece Door)
Keypad
Door Jamb Face
Sectional Door Only
KEYPAD MUST BE INSTALLED
WITHIN SIGHT OF THE DOOR
Exterior Front Wall
1-Piece or
Sectional Door
KG KG
1
3
9
75
1
3
9
75
123
Indicator
Light
"Smart"
Button
GARAGE DOOR OPENER RECEIVER
(With "Smart" Button)
Plug
Battery
Battery
Cover
FEATURES OF THE MULTI-FUNCTION KEYLESS ENTRY
OWNER'S INSTRUCTIONS
Open the keypad cover and remove the battery compartment screw. Set cover aside and remove battery.
NOTE BATTERY
POLARITY AS MARKED ON COMPARTMENT.
Follow the installation instructions described below.


