ENFORCER Wall-Plate Cameras
SECO-LARM U.S.A., Inc. 3
Before Starting:
Overview:
Mounting the Camera to the Plate: Mounting Options:
Changing the Mounting Angle:
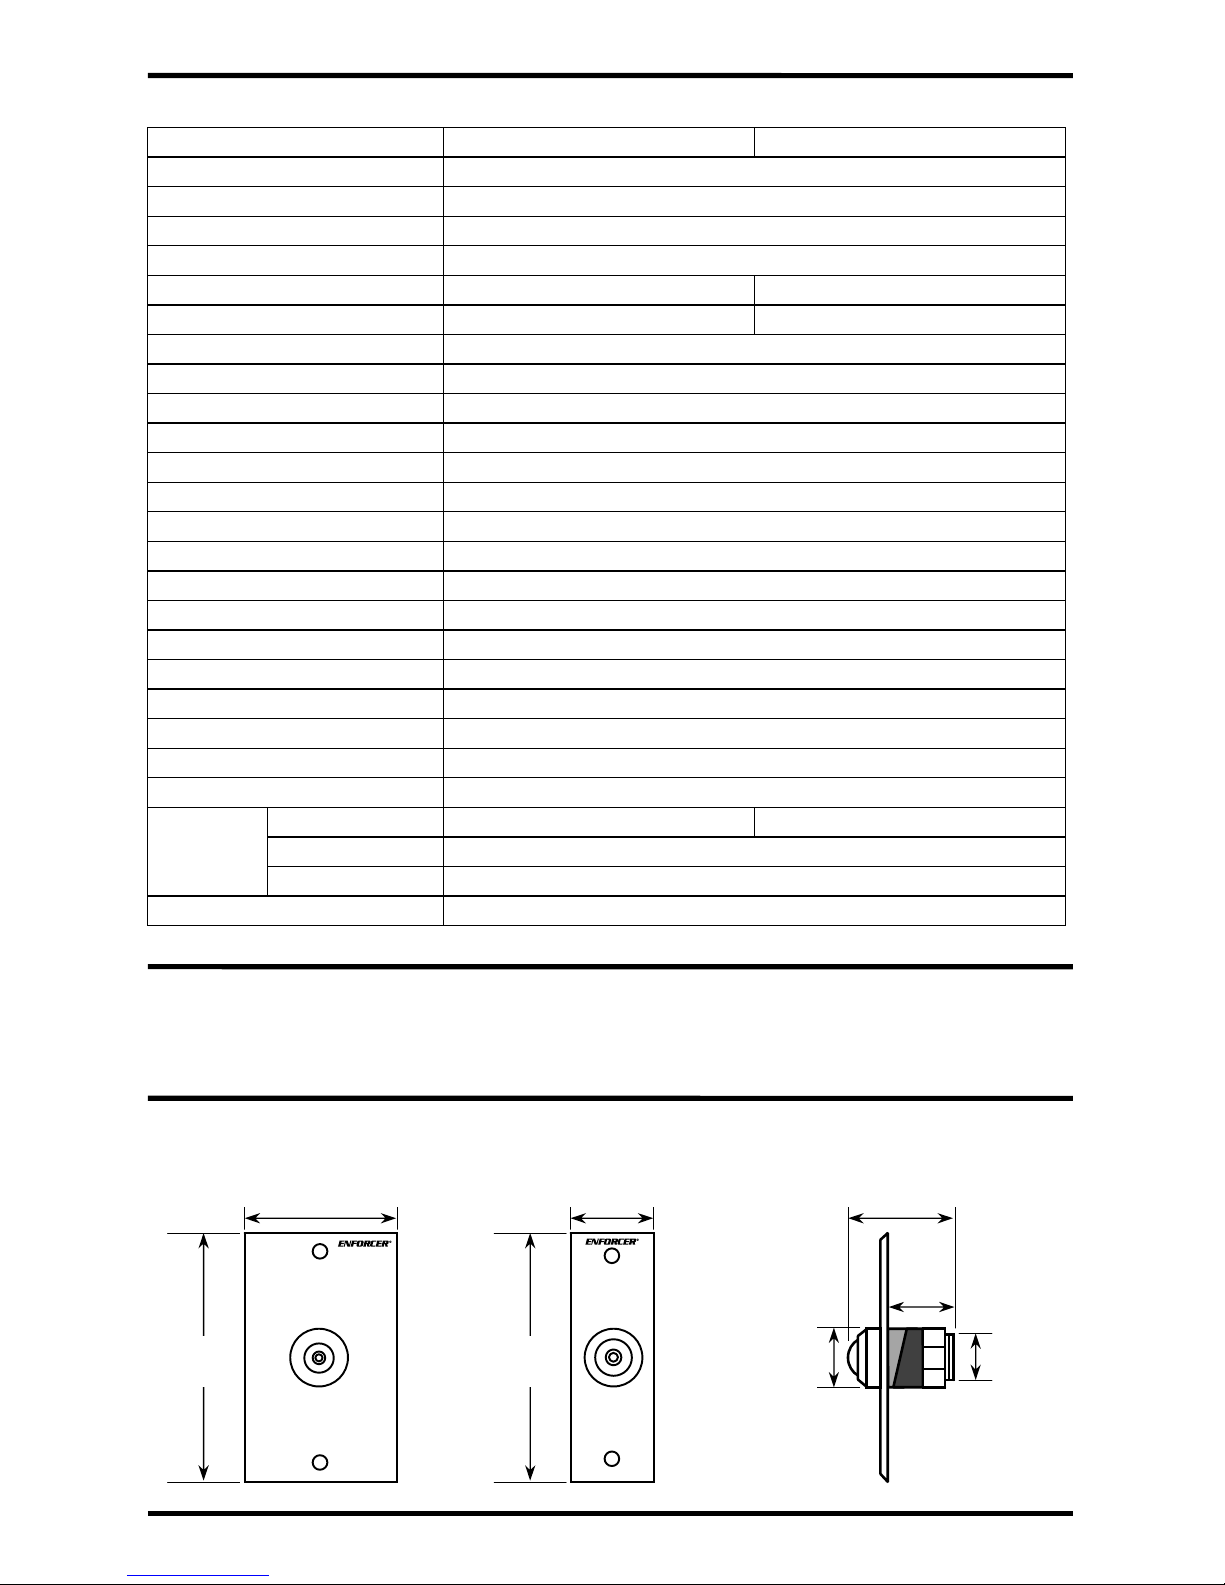
To mount the camera to the plate, position the angled
rings behind the plate and twist the aluminum hex nut
on to secure the plate to the camera.
Plate
Camera Female BNC connector
DC Jack
Note polarity when connecting power
IMPORTANT: Do not cut the video or power wires as warranty will be voided.
Install the angled rubber ring on the front of the plate
so that the camera is tilted (approximately 20°).
If an object installed next to the camera on the wall
is blocking the field of vision, the angled rings may
be installed in front of the wall plate to move the
field of vision forward.
Mount directly to the back box (not included).
Drill a 7/8" (22mm) hole in the wall to fit the camera
body. Mount the plate directly to the wall.
Drill a 7/8" (22mm) hole into the wall to fit the camera
body. If mounting to a thick surface, it may not be
necessary to use the angled rings.
With a plate and back box (suggested):
Aluminum hex nut
Plate, no back box:
No Plate and no Back Box:
Back
box
Min. wall thickness:
5/16" (8mm)
EV-5105-N1SQ shown
Max. wall thickness:
3/4" (20mm)
1. Read this manually carefully and keep it for
future reference.
2. Use the camera within given temperature and
electrical limits.
3. Do not point the camera at the sun. Heat could
damage the camera, even when not in use.
4. Do not mount the camera in areas exposed to
radiation, strong magnetic fields, or strong
electrical signals.
5. Do not open or disassemble the camera. There
are no user-serviceable parts inside.
6. Do not subject the camera to extreme shock.
Angled
aluminum ring
Angled rubber ring