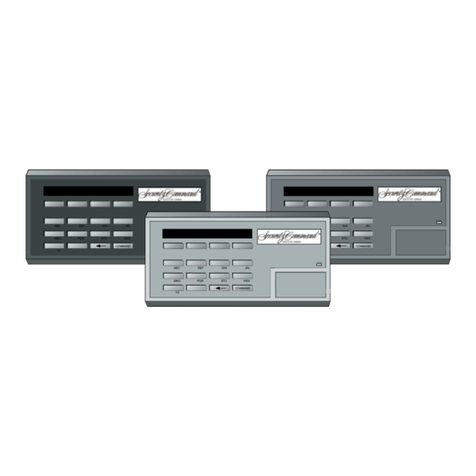
Security Command 670 User manual

1234
5678
90
COMMAND
A B C DEF GHI JKL
VWX
STUPQRMNO
YZ
POWER
User's Guide

This equipment complies with part 68 of the FCC rules. On
thetopofthisequipmentisalabelthatcontains,amongother
information,theFCCRegistrationNumberandRingerEquiva-
lence Number (REN) for this equipment. You must, upon
request, provide this information to your telephone com-
pany.,
The REN is useful to determine the quantity of devices you
mayconnecttoyourtelephonelineandstillhaveallofthose
devicesringwhenyourtelephonenumberiscalled. Inmost,
but not all areas, the sum of the REN's of all devices
connected to one line should not exceed five (5.0). To be
certain of the number of devices you may connect to your
line,asdeterminedbytheREN,youshouldcontactyourlocal
telephonecompanytodeterminethemaximumRENforyour
calling area.
If your telephone equipment caused harm to the telephone
network, the Telephone Company may discontinue your
service temporarily. If possible, they will notify you in
advance, but if advance notice is not practical, you will
notified as soon as possible. You will be informed of your
right to file a complaint with the FCC.
FCC Information Supplied to Users
Your telephone company may make changes in its facili-
ties,equipment,operations,orproceduresthatcouldaffect
theproperfunctioningofyourequipment. Iftheydo,youwill
benotifiedinadvancetogiveyouanopportunitytomaintain
uninterrupted telephone service.
If you experience trouble with this telephone equipment,
please contact Digital Monitoring Products, Incorporated,
2841 E. Industrial Drive, Springfield, MO 65802, for infor-
mation on obtaining service or repairs. The telephone
companymayaskthatyoudisconnectthisequipmentfrom
the network until the problem has been corrected or until
you are sure that the equipment is not malfunctioning.
This equipment may not be used on coin service provided
by the telephone company. Connection to party lines is
subject to state tariffs.
The device is equipped with an USOC RJ31X connector.

1
Menu Options
Alarm Silence................................................. 13
Fire Reset ...................................................... 14
Door Access .................................................. 15
Armed Areas .................................................. 16
Loop Status.................................................... 17
Bypass Loops ................................................ 18
Loop Monitor .................................................. 19
System Status ................................................ 20
System Test ................................................... 21
User Codes .................................................... 22
Schedules ...................................................... 26
Time............................................................... 28
Remote Authorize .......................................... 29
DisplayEvents ............................................... 30
Special SECURITY COMMAND messages .......... 2
Special SECURITY COMMAND tones .................. 2
Special SECURITY COMMAND keys ................... 3
Terms ..................................................................... 4
Status ..................................................................... 5
Closing Check/Extend ............................................ 6
System Arming and Disarming For Area System.... 7
Area System Arming ........................................ 8
Area System Disarming ................................... 9
System Arming and Disarming For All/Permieter.. 10
All/Perimeter Arming ...................................... 11
All/Perimeter Disarming ................................. 12
TABLE OF CONTENTS
Model 670, 770, 771 Security Command
User's Guide
For use with DMP Series 1512 Controls
Copyright © 1992 – 1993 Digital Monitoring Products, Incorporated.
Information furnished by DMP is believed to be accurate and reliable.
This information is subject to change without notice.

2
Special SECURITY COMMAND Messages
ENTER CODE:- Thismessage willbe displayed when the SECURITYSECURITY
SECURITYSECURITY
SECURITY
COMMANDCOMMAND
COMMANDCOMMAND
COMMANDisrequestingacodenumber. Codenumbersareneededforarming,
disarming, and many of the various system options. When you press the
SECURITYCOMMANDSECURITYCOMMAND
SECURITYCOMMANDSECURITYCOMMAND
SECURITYCOMMANDkeystoenteryourcodenumberthenumbersyouenterwill
notbe displayed. Instead a *will be displayed for each digit. Thisis to keep other
peoplefromseeingyourcodenumberwhenyouenterit. AlwayspressCOMMAND
after you complete the entry of your code number.
TRY AGAIN This message is displayed when a code number is
entered the first time which does not exist in the alarm system memory.
INVALID CODE This message is displayed when a code number is
entered a second time which does not exist in the alarm system memory.
INVALID LEVEL Thismessagemaybedisplayedwhen trying to access
one of the Menu Options. When a code number is entered which is in the alarm
systemmemory,butisnotahighenoughleveltoaccessaparticularMenuOption,
this message will be displayed.
INVALID TIME This message is displayed when a level 1 or 2 code
numberisenteredoutsidepermanentortemporaryschedules. Level1or2codes
will function only during a permanent or temporary schedule.
This message is displayed when there is an electronic
failureinyouralarmsystem. Youshouldcontactyouralarmdealerifthismessage
is ever displayed.
Special SECURITY COMMAND Tones
Keystroketone:Keystroketone:
Keystroketone:Keystroketone:
Keystroketone: Shortbeep. Thisshortbeepisemittedeachtimeakeyispressed
on the SECURITY COMMAND.
Prewarntone:Prewarntone:
Prewarntone:Prewarntone:
Prewarntone: Pulsedtone,onesecondon,onesecondoff,continuous.Thistone
isemittedafteranentrydelaydoorisopenedtoremindyoutodisarmyourburglary
system.
Monitor tone:Monitor tone:
Monitor tone:Monitor tone:
Monitor tone: Pulsed tone, onesecond on thenoff, onepulse only. Thistone is
emitted when using the loop monitor option. The tone will be emitted every time
the loop is displayed in the alert condition.
Troubletone:Troubletone:
Troubletone:Troubletone:
Troubletone: Steadytone,alwayson.WhenusingtheStatusDisplayoptionthis
tonewillbeemittedforanyfireorsystemtroubleuntilthetoneisacknowledgedby
pressing any top row select key on the SECURITY COMMAND.
SERVICE REQUIRED

3
TheCOMMANDkeyisusedtospeedupsystemoperation.Itcanbepressedtogo
“forward” one step during various operations of your alarm system. It can go
forwardthroughthelistofMenuOptionsorthrougheachstepofaparticularMenu
Option. The COMMAND key is excellent for quickly stepping through a list of
informationsuchasthenamesofthearmedloopsintheLoopStatusMenuOption.
TheCOMMANDkeyisalsousedwhenenteringinformation,suchascodenumbers
oraloopnumber. Thinkofitasacarriagereturnonatypewriterandpressitwhen
youhaveenteredinformationonthekeypadandyouarereadyfortheSECURITY
COMMANDto take it. Theinformation requested bythe SECURITYCOMMAND
must be entered first. The COMMAND key will not skip past a step that requires
you to make an entry.
The back arrow is used for “backing up” when operating your system. It can be
pressedtoback upthroughthe list ofMenu Options orwhen entering information
such as a code number. If an error is made while entering information press the
back arrow and the character will be erased.
ThebackarrowwillalsobackupastepintheoperationofanyMenuOption.Ifthe
back arrow is pressed at the first step in a Menu Option the option will terminate.
This is a quick way to exit a Menu Option when you are finished with it. The back
arrow will not back up through a list of information within a Menu Option, such as
Alarmed Loops or System Status.
Special SECURITY COMMAND Keys
Select keys
14
ABC DEF GHI JKL
MNO PQR STU VWX
YZ COMMAND
COMMAND
Back Arrowkey Command key
32
8
0
6
5
9
7
Thetoprowofkeysarecalledtheselectkeys. Eachtimeaselectkeyistobeused
its function will be labeled by the display above it. By labeling each key with the
displaytheycanbeusedformanydifferentapplicationssuchasenteringAMorPM
whensettingtimeorselectingwhich areas of yoursystemyouwanttoarmduring
systemarming. The mostcommon use is selecting a Menu Option. Thisis done
by pressing any one of the select keys when the name of the Menu Option is
displayed.
▲
▲

4
TERMS
Areas:
A group of loops assigned together for arming and disarming. Each loop in your
burglary system must be assigned to an area. These loops are then armed and
disarmedby area. Example:Thebasementareamaybemadeupofthebasement
doorloop,thebasementwindowloopandthebasementmotiondetectorloop. By
armingthebasementarea all three loops wouldbearmed. 24hourloopsarenot
assigned to an area since they are always armed.
Transmit:
Reporting alarms, troubles, system disarming, etc. to a central station receiver.
Yoursystemcanbeprogrammedtoreportalarms,troubles,oranycombinationof
themanysystemreportstoacentralstationreceiver.Youshouldconsultyouralarm
dealerforinformationaboutwhichreportswillbetransmitted.Whenacombination
burglary and fire alarm system is installed all fire transmissions will have priority
over burglary transmissions.
Loop:
Loop describes the wiring run from your alarm control cabinet to each protection
point in your alarm. Therefore each door, window, motion detector, smoke
detector, etc. which has been individually wired to the alarm control cabinet via a
“loop”ofwireisreferredtoasaloop. Sinceeveryloopcanhaveanameandnumber
the SECURITY COMMAND can use these to identify a protection point for you.
Like, loop: 3 Front Door or loop: 12 Smoke Detector.
Entry/ Exit loop:
Aloopwhichhasanentryandexitdelaytimeassigned. Eachtimetheloopisarmed
itwill ignore anytrips until the exit delay expires. When the systemis armed and
the loop is tripped an alarm signal will not be transmitted if the loop is disarmed
before the delay expires. This allows you to enter the alarm system through the
entry door so you can disarm the system at the SECURITY COMMANDSECURITY COMMAND
SECURITY COMMANDSECURITY COMMAND
SECURITY COMMAND keypad.
Instant Loop:
A loop which has no entry/exit delay. If this loop is tripped when armed an alarm
will be transmitted.
24 Hour Loop:
A loop which is always armed. It is not controlled by arming and disarming.
Example: Fire loop, panic loop, etc.

5
Status is a system feature which automatically displays the armed or disarmed
statusofyourburglarysystem,aswellasanyalarmortroubleconditionsofaloop
or internal system monitor. You can choose to have all of the available status
informationdisplayed,onlyselecteditems,ornostatusdisplayatall. Youcanalso
choosewhichSECURITYCOMMANDSECURITYCOMMAND
SECURITYCOMMANDSECURITYCOMMAND
SECURITYCOMMANDswilldisplaytheStatusList. Theseoptions
areprogrammedduringsysteminstallation. Allofthe availablestatusinformation
is described in this section.
StatusworksautomaticallywhentheSECURITYCOMMANDSECURITYCOMMAND
SECURITYCOMMANDSECURITYCOMMAND
SECURITYCOMMANDisnotperformingany
otherfunction. Thiscouldberightaftersystemarmingordisarmingiscompleteor
justafteryou have finished using a menu option. TheSECURITYCOMMANDSECURITY COMMAND
SECURITYCOMMANDSECURITYCOMMAND
SECURITYCOMMAND
will stay in Status until you choose to go to system arming/disarming or a menu
option.
Armed Status:
Armed Status will display the current armed condition of your burglary system in
one of two ways. If this is an area arming system, the area number is displayed
if the area is armed.
Examples: Both areas are armed = 1 2
Area 2 is armed = 2
Ifthis is an all/perimeter systemand theinterior orperimeter is armed the display
will read ON .
ArmedStatuswilldisplayatallSECURITYCOMMANDSinthesystem.Ifnoareas
are armed the display will be blank.
STATUS
Status List:
Status List will display any alarm or trouble condition on a loop, and any trouble
condition on any internal system monitor. The system monitors are AC power,
batterypower,panelboxtamperandphonelinemonitor. Ifmorethanonealarm
ortroubleconditionisdisplayedtheSECURITYCOMMANDSECURITYCOMMAND
SECURITYCOMMANDSECURITYCOMMAND
SECURITYCOMMANDwillcontinuetoscroll
through the list.

6
CLOSING CHECK/EXTEND
Opening and Closing SchedulesOpening and Closing Schedules
Opening and Closing SchedulesOpening and Closing Schedules
Opening and Closing Schedules may be utilized to check to see if the burglary
systemisarmedbyascheduledtimeeachday.Theclosingcheckfeaturewillverify
thatallareasofthesystemarearmedwhenthepermanentandtemporaryschedule
expires. If an area is not armed the keypad will display CLOSING TIME.* The
steady trouble tone will also sound. If the system is not armed or a schedule
extended within ten minutes, a no closing report will be transmitted to the central
station receiver.
Theclosingschedulecanbelengthenedbyenteringatemporaryscheduleorusing
theextendfeature.Theextendfunctionstepbystepfollows.Temporaryschedules
are described in the schedule menu option section.
Ifanareahasbeendisarmedoutsideofanypermanentortemporaryschedule,the
closing check sequence will occur one hour after the area was disarmed.
Extending A ScheduleExtending A Schedule
Extending A ScheduleExtending A Schedule
Extending A Schedule is accomplished by pressing a top row key to silence the
closingtimedisplay.Afteravalidcodenumberisacceptedthekeypadwillrequest
thenew closingtime.Anytimemaybeenteredupto11:59p.m.Ifnotimeisentered
the closing time will be extended for one hour.
Step by Step:Step by Step:
Step by Step:Step by Step:
Step by Step:
1. When a schedule expires CLOSING TIME!CLOSING TIME!
CLOSING TIME!CLOSING TIME!
CLOSING TIME! *will be displayed and
the steady trouble tone will sound.
2. Press any top row key to silence the tone. The display will read
ENTER CODE:-ENTER CODE:-
ENTER CODE:-ENTER CODE:-
ENTER CODE:- .
3. Enter at least a level six code number and press
. The display will read
- : AM PM- : AM PM
- : AM PM- : AM PM
- : AM PM .
AM PM
4. Enter the new closing time and press the or
key.
5. If no time is entered in step 4, the schedule will be extended for one hour
* Ifthe system has been programmedto provideindependent schedulesper
area, the closing time will be replaced by AREA NAME-LATEAREA NAME-LATE
AREA NAME-LATEAREA NAME-LATE
AREA NAME-LATE .
COMMAND

7
Area Assignment:Area Assignment:
Area Assignment:Area Assignment:
Area Assignment: The Area Arming system can contain one or two individual
areas.Yourburglaryalarmsystemhasbeendividedinto___separateareas.The
specific area names should be listed below for easy reference.
Area Name
_______-_______________________
_______-_______________________
ArmingorDisarming:ArmingorDisarming:
ArmingorDisarming:ArmingorDisarming:
ArmingorDisarming: Thefirstchoicetobemadeisifyouwishtoarmordisarm.
Arming or disarming may be done for all areas at one time or each area may be
controlled individually. If a code number is required you will only be allowed to
control the areas which are assigned to your code number.
Arming:Arming:
Arming:Arming:
Arming: When arming is selected a code number may be required. This is
optional.Theoptionisprogrammedduringsysteminstallation.Ifacodenumberis
required you will only be able to arm the areas which are assigned to your code
number. If no code number is required you will be able to arm all areas.
All Or Selective Arming:All Or Selective Arming:
All Or Selective Arming:All Or Selective Arming:
All Or Selective Arming: After entering your code number you will be asked if
youwishtoarmalloftheareastowhich you have access or onlyaselectedarea.
Ifyou choose to arm all areas thesystem willbegin checking to see that all loops
are in a good condition. If you choose to arm a selective area the SECURITYSECURITY
SECURITYSECURITY
SECURITY
COMMANDCOMMAND
COMMANDCOMMAND
COMMAND will allow you to choose the individual area you want to arm before
beginning the loop check.
Bypassing:Bypassing:
Bypassing:Bypassing:
Bypassing: After you have made your arming selection the SECURITYSECURITY
SECURITYSECURITY
SECURITY
COMMANDCOMMAND
COMMANDCOMMAND
COMMAND willdisplayanyloopswhichhavebeenbypassedpriortoarming. This
is for your information only and they may not be reset during arming. They will
remain bypassed until disarmed or reset. Any 24 hour loops which are in a bad
condition will also be displayed. The system will then check to see that all doors
and windows which will be armed are closed and that any motion detectors, etc.,
are set properly.
SYSTEM ARMING AND DISARMING FOR AN AREA SYSTEM
Ifnoproblemsexisttheareasyouhaveselectedwillbearmed. Ifaproblemdoes
exist on one or more loops the SECURITY COMMANDSECURITY COMMAND
SECURITY COMMANDSECURITY COMMAND
SECURITY COMMAND will display the problems
andallow you to bypass those loops. If the problems can be corrected by simply
closingadoororwindowyoushouldnotbypass. Youshouldcorrecttheproblems
and repeat the arming procedure. If the loop or loops are in some way damaged
andcannotbecorrectedtheymaybebypassed. Bypassingaloopmeansitwillbe
ignoredwhilethesystemisarmed. Acodenumbermayberequiredtobypass. This
is optional and is programmed during system installation.
ArmedMessage:ArmedMessage:
ArmedMessage:ArmedMessage:
ArmedMessage: Afterallloopsarebypassedorcorrectedtheareasyouselected
will be armed. The SECURITY COMMANDSECURITY COMMAND
SECURITY COMMANDSECURITY COMMAND
SECURITY COMMAND will display “ALL SYSTEM ON” if all
areas are armed. The display will read “SYSTEM ON” if all areas are not armed.
Thedisplaywillthenshowyoutheexitdelay. Anyexitloopswillnotbearmeduntil
the delay expires.
One Moment Message:One Moment Message:
One Moment Message:One Moment Message:
One Moment Message: Your system may be programmed to wait for the
transmission of the arming signal to the central station receiver before displaying
theArmedMessage. Thisis to insurethatyourphone lines areworkingproperly.
While the system is waiting for the transmission the display will read “ONE
MOMENT...”. If the test is okay the Armed Message will be displayed. If the test
fails the display will read “LOCAL ALARM ONLY” before displaying the Armed
Message. If this is a multiplex communicating system and the closing report can
onlybeaccomplishedviaadigitalbackup,the display will read"DIGITALALARM
ONLY". This communication test is optional and is programmed during system
installation.
Arming Report:Arming Report:
Arming Report:Arming Report:
Arming Report: A report of the system arming or loops which were bypassed
can be transmitted to your central station. This is optional and is programmed
during system installation.

8
Step By Step:Step By Step:
Step By Step:Step By Step:
Step By Step:
1. Pressthe keyuntil ARM DISARMARM DISARM
ARM DISARMARM DISARM
ARM DISARM isdisplayed.
ARM
2. Press to arm areas.
3. Enter your code number if required. The display will read
ALL NO YESALL NO YES
ALL NO YESALL NO YES
ALL NO YES
NO
4. Press to arm selective areas. Go to step 5.
YES
Press toarmallareastowhichyouhaveaccess. Gotostep6.
5. If NO is selected in step 4 the display will list each area to which you have
access, followed by NO and YES. Example: OFFICE NO YESOFFICE NO YES
OFFICE NO YESOFFICE NO YES
OFFICE NO YES
YES
5a. Press for every area you wish to arm.
NO
5b. Press for every area you do not wish to arm.
6. Loops which have been bypassed prior to arming and bad 24 hour loops will
be displayed. No action is required by you.
7. Bypass any bad loops if required (step 7a, 7b, 7c)
7a. Ifaproblemexistsononeormoreloops, theloopnameandproblemwill
be displayed followed by BYPASS? NO YESBYPASS? NO YES
BYPASS? NO YESBYPASS? NO YES
BYPASS? NO YES
NO
7b. Select to stop the arming sequence without bypassing
any loops. Correct the problem and return to step 1.
YES
Select to bypass all loops displayed as bad.
7c. Enter your code number if required to bypass loops.
8. The display will read SYSTEM ONSYSTEM ON
SYSTEM ONSYSTEM ON
SYSTEM ON
system is armed, and ALL SYSTEM ONALL SYSTEM ON
ALL SYSTEM ONALL SYSTEM ON
ALL SYSTEM ON if all areas in the system are
armed.
9. The exit time will be displayed in seconds and begin counting down,
EXIT : XXEXIT : XX
EXIT : XXEXIT : XX
EXIT : XX . When the delay expires the exit loops will be armed.
if at least one area in the
AREA SYSTEM ARMING
COMMAND

9
Disarming:Disarming:
Disarming:Disarming:
Disarming: Youshouldenterthe premises throughanentry/exit delay door. By
doing this the SECURITY COMMANDSECURITY COMMAND
SECURITY COMMANDSECURITY COMMAND
SECURITY COMMAND prewarn tone will pulse to remind you to
disarm. Entering a delay door prior to disarming is not required. When disarming
isselecteda code numbermay be required.Thisis optional.Acode number may
not be required within permanent or temporary schedules, or the system may be
programmedtoalwaysrequireacoderegardlessoftime. Ifacodeisrequiredyou
shouldnote that level2 User Codesonly function duringpermanent or temporary
schedules.Ifacodenumberisrequiredyouwillonlybeallowedtocontroltheareas
which are assigned to your code number.
AllOr Selective Disarming:AllOr Selective Disarming:
AllOr Selective Disarming:AllOr Selective Disarming:
AllOr Selective Disarming: Afterenteringyour code numberyou will beasked
if you wish to disarm all of the areas to which you have access or only a selected
area. Ifyouchoosetodisarmallareasthesystemwilldisarmthemall. Ifyouchoose
todisarmaselectiveareatheSECURITYCOMMANDSECURITYCOMMAND
SECURITYCOMMANDSECURITYCOMMAND
SECURITYCOMMANDwillallowyoutochoosethe
individual area you want to disarm.
AlarmDisplay:AlarmDisplay:
AlarmDisplay:AlarmDisplay:
AlarmDisplay: AfterselectingyourareastheSECURITYCOMMANDSECURITYCOMMAND
SECURITYCOMMANDSECURITYCOMMAND
SECURITYCOMMANDwilldisplay
any loops which tripped in the areas you are disarming or any transmission
problemswhichoccurredduringthearmedperiod. Allburglaryloopsintheareas
youselected are then disarmed and any bypassedloops areautomatically reset.
Disarmed Message:Disarmed Message:
Disarmed Message:Disarmed Message:
Disarmed Message: After disarming, the SECURITY COMMANDSECURITY COMMAND
SECURITY COMMANDSECURITY COMMAND
SECURITY COMMAND will display
“ALL SYSTEM OFF” if all areas are now disarmed.
Central Station Report:Central Station Report:
Central Station Report:Central Station Report:
Central Station Report: Areport ofthe systemdisarming canbe transmittedto
your Central Station. This is optional and is programmed at the time of system
installation.
Step By Step:Step By Step:
Step By Step:Step By Step:
Step By Step:
1. Press the key until
ARM DISARMARM DISARM
ARM DISARMARM DISARM
ARM DISARM is displayed.
(Note: during entry delay the display immediately jumps to step 3.)
DISARM
2. Press to disarm areas.
3. Enter your code number if required. The display will read
ALL NOALL NO
ALL NOALL NO
ALL NO
YESYES
YESYES
YES
.
NO
4. Press to disarm selective areas. Go to step 5.
YES
Press to disarm all areas to which you have access.
Go to step 6.
5. If NO is selected in step 4 the display will list each area to which you have
access, followed by NO and YES. Example: OFFICE NO YESOFFICE NO YES
OFFICE NO YESOFFICE NO YES
OFFICE NO YES .
YES
5a. Press for every area you wish to disarm.
NO
5b. Press for every area you do not wish to disarm.
6. Any loops which tripped or any communication problems which occurred
during the armed period are automatically displayed.
7. Thedisplaywill read ALL SYSTEM OFFALLSYSTEM OFF
ALLSYSTEM OFFALLSYSTEM OFF
ALLSYSTEM OFF ifallareasin thesystemare
now disarmed.
AREA SYSTEM DISARMING
COMMAND

10
SYSTEM ARMING FOR ALL/PERIMETER SYSTEM
AreaAssignment:AreaAssignment:
AreaAssignment:AreaAssignment:
AreaAssignment: Yourburglaryalarmsystemhasbeendividedintotwoseparate
areas.Interiorloopslikemotiondetectors,inside doors,etc.,havebeenassigned
to the interior area. Perimeter loops like windows, outside doors, etc., have been
assignedtotheperimeterarea. Thespecificloopnamesandtheirareaassignment
are listed below for easy reference.
Interior area Perimeter area
Loop Name Loop Name
____ _________________________ ____ ________________________
____ _________________________ ____ _______________________
____ _________________________ ____ ______________________
____ _________________________ ____ ______________________
____ _________________________ ____ ______________________
____ _________________________ ____ ______________________
____ _________________________ ____ ______________________
____ _________________________ ____ ______________________
____ _________________________ ____ ______________________
____ _________________________ ____ ______________________
AllorPerimeter:AllorPerimeter:
AllorPerimeter:AllorPerimeter:
AllorPerimeter: Whenarmingyoursystemyoumayarmonlytheperimeterarea
ifyouareremaininginside,orarmbothareasifyouareleaving. Theuseofacode
number for system arming is optional. This option is programmed during system
installation.
Bypassing:Bypassing:
Bypassing:Bypassing:
Bypassing: Afteryou have made your armingselection andhave enteredyour
codenumber,ifrequired,theSECURITYCOMMANDSECURITYCOMMAND
SECURITYCOMMANDSECURITYCOMMAND
SECURITYCOMMAND willdisplayanyloopswhich
have been bypassed prior to arming. This is for your information only. They will
remainbypasseduntildisarmedorresetusingtheBypassLoopsmenuoption. Any
24 hour loops which are in a bad condition will also be displayed.
Thesystemwillthen check to seethatalldoorsand windows whichwillbearmed
areclosedandthatanymotiondetectors,etc.,aresetproperly.Ifnoproblemsexist
the system will be armed. If a problem does exist on one or more loops the
SECURITY COMMANDSECURITY COMMAND
SECURITY COMMANDSECURITY COMMAND
SECURITY COMMAND will display the problems and allow you to bypass those
loops. If the problem can be corrected by simply closing a door or window you
should not bypass. You should correct the problems and repeat the arming
procedure.Ifthelooporloopsareinsomewaydamagedandcannotbecorrected
theymaybebypassed.Bypassingaloopmeansitwillbeignoredwhilethesystem
is armed. A code number may be required to bypass. This is optional and is
programmed during system installation.
Armed Message:Armed Message:
Armed Message:Armed Message:
Armed Message:
After all loops are bypassed or corrected the system will be
armed. The SECURITY COMMANDSECURITY COMMAND
SECURITY COMMANDSECURITY COMMAND
SECURITY COMMAND will display the “SYSTEM ON” message if
onlythe perimeteris armedor “ALLSYSTEM ON”if bothhave beenarmed. The
displaywillthenshowyoutheexit delay. Anyexitloopswillnotbearmeduntilthe
delay expires. All other non-exit loops are armed immediately.
One Moment Message:One Moment Message:
One Moment Message:One Moment Message:
One Moment Message:
Your system may be programmed to wait for the
transmission of the arming signal to the central station receiver before displaying
theArmedMessage. Thisistoensurethatyourphonelinesareworkingproperly.
While the system is waiting for the transmission the display will read “ONE
MOMENT...”. If the test is okay the Armed Message will be displayed. If the test
fails the display will read “LOCAL ALARM ONLY” before displaying the Armed
Message. If this is a multiplex communicating system and the closing report can
onlybeaccomplishedviaadigitalbackup,the display will read"DIGITALALARM
ONLY". This communication test is optional and is programmed during system
installation.
Instant:Instant:
Instant:Instant:
Instant:
Ifyouwishtocancelallexitandentrytimes,causingallloopstobeinstant
loops,youshouldpressthe“INSTANT”keywhiletheexitdelayisbeingdisplayed.
Thisimmediatelyarmsallentry/exitloopsandtherewillbenoentrydelaywhenthe
system is disarmed.
Arming Reports:Arming Reports:
Arming Reports:Arming Reports:
Arming Reports: Areport ofthe systemarming orloops whichwere bypassed
can be transmitted to your central station. This is optional and is programmed
during system installation.

11
Step By Step:Step By Step:
Step By Step:Step By Step:
Step By Step:
1. Press the key until PERIM ALLPERIM ALL
PERIM ALLPERIM ALL
PERIM ALL is displayed.
PERIM
2. Press to arm areas.
ALL
Press to arm areas.
3. Enter your code number if required.
4. Loops which have been bypassed prior to arming and 24 hour loops which
are in a bad condition will be displayed. No action is required by you.
5. Bypass any bad loops if required (step 5a, 5b, 5c).
5a. Ifa problem exists on oneor more loops the loop name andproblem will
be displayed and followed by BYPASS? NO YESBYPASS? NO YES
BYPASS? NO YESBYPASS? NO YES
BYPASS? NO YES .
NO
5b. Select to stop the arming sequence without bypassing
any loops. Correct the problem and return to step 1.
YES
Select to bypass all non-24hour loops displayed as bad.
5c. Enter your code number if required to bypass loops.
6. The display will read SYSTEM ONSYSTEM ON
SYSTEM ONSYSTEM ON
SYSTEM ON if only the perimeter is armed,
and ALL SYSTEM ONALL SYSTEM ON
ALL SYSTEM ONALL SYSTEM ON
ALL SYSTEM ON if both the perimeter and interior are armed.
7. The exit time will be displayed in seconds and begin counting down,
EXIT DELAY: XXEXIT DELAY: XX
EXIT DELAY: XXEXIT DELAY: XX
EXIT DELAY: XX . When the delay expires the exit loops will be
armed.
INSTNT
8. Press while the exit delay is displayed to immediately
arm all exit loops and make them instant.
ALL/PERIMETER ARMING
COMMAND

12
To disarm your burglary system you should enter the premises through an entry/
exitdelaydoor. Bydoingthis the SECURITYCOMMAND prewarn tonewill pulse
to remind you to disarm. Entering a delay door prior to disarming is not required
however, you can simply press COMMAND until DISARM? is displayed and
proceed from that point.
Code number:Code number:
Code number:Code number:
Code number: A code number may be required when disarming. If this is a
residential system a code number is normally required to disarm. If this is a
commercial system a code number may not be required within permanent or
temporary scheduled opening times. This is optional. The system may be pro-
grammedtoalwaysrequireacoderegardlessoftime.Ifthisisthecaseyoushould
note that level 2 User Codes only function during temporary or permanent
scheduled opening times. The disarming code options are programmed during
system installation.
Alarm Display:Alarm Display:
Alarm Display:Alarm Display:
Alarm Display: After entering a code number, if required, the SECURITY
COMMAND will display any loops which tripped or any transmission problems
whichoccurredduringthearmedperiod.Allburglaryloopsarethendisarmedand
any bypassed loops are automatically reset.
Central Station Report:Central Station Report:
Central Station Report:Central Station Report:
Central Station Report: Areport ofthe systemdisarming canbe transmittedto
your Central Station. This is optional and is programmed at the time of system
installation.
Step By Step:Step By Step:
Step By Step:Step By Step:
Step By Step:
1. Press the key until
DISARM?DISARM?
DISARM?DISARM?
DISARM? is displayed.
(Note: during entry delay the display immediately jumps to step 3.)
2. When DISARM?DISARM?
DISARM?DISARM?
DISARM? is displayed press any one of the top four
select keys.
3. Enter your code number if required. If a code number is not required the
display will read PRESS COMMANDPRESS COMMAND
PRESS COMMANDPRESS COMMAND
PRESS COMMAND during entry delay only.
4. Any loops which tripped or any communication problems which occurred
during the armed period are automatically displayed.
5. Thedisplay will read ALLSYSTEM OFFALLSYSTEM OFF
ALLSYSTEM OFFALLSYSTEM OFF
ALLSYSTEM OFF toconfirmthat the systemis
disarmed.
ALL/PERIMETER DISARMING
COMMAND

13
User Code Level:User Code Level:
User Code Level:User Code Level:
User Code Level: 2-During permanent or temporary schedules only
3-Anytime
Function:Function:
Function:Function:
Function: Silences alarm bell
AlarmSilenceisusedtosilencethealarmbellorsirenofyouralarmsystem. When
selected you will be asked to enter your code number. When the code number
is accepted the alarm bell or siren will be turned off.
Step By Step:Step By Step:
Step By Step:Step By Step:
Step By Step:
1. Press the key until ALARM SILENCE?ALARM SILENCE?
ALARM SILENCE?ALARM SILENCE?
ALARM SILENCE? is displayed.
2. When ALARM SILENCE?ALARM SILENCE?
ALARM SILENCE?ALARM SILENCE?
ALARM SILENCE? is displayed press any one of the top four
select keys. The display will read ENTER CODE: -ENTER CODE: -
ENTER CODE: -ENTER CODE: -
ENTER CODE: - .
3. Enteryour codenumber and press . Thealarm bell or siren
will be turned off.
ALARM SILENCE
User Code Level:User Code Level:
User Code Level:User Code Level:
User Code Level: 1- During permanent or temporary schedules only
3- Anytime
Function:Function:
Function:Function:
Function: Resets smoke detectors
FireResetisused to resetsmokedetectors after theyhavebeentripped. Once a
smokedetectorhasbeentrippeditmustberesetbeforeitwillfunctionagain. When
FireResetisselectedthesmokedetectorsareautomaticallyreset. Insurethatall
smoke is cleared from the detector before resetting.
Step By Step:Step By Step:
Step By Step:Step By Step:
Step By Step:
1. Press the key until FIRE RESET?FIRE RESET?
FIRE RESET?FIRE RESET?
FIRE RESET? is displayed.
2. When FIRE RESET?FIRE RESET?
FIRE RESET?FIRE RESET?
FIRE RESET? is displayed press any one of the top four
select keys. The display will read ENTER CODE:-ENTER CODE:-
ENTER CODE:-ENTER CODE:-
ENTER CODE:- .
3. Enter your code number and press . The display will read
DETECTORS OFFDETECTORS OFF
DETECTORS OFFDETECTORS OFF
DETECTORS OFF then change to DETECTORS ONDETECTORS ON
DETECTORS ONDETECTORS ON
DETECTORS ON to
confirm that the smoke detectors have been reset.
FIRE RESET
COMMAND
COMMAND
COMMAND
COMMAND

14
User Code Level:User Code Level:
User Code Level:User Code Level:
User Code Level: 1- During permanent or temporary schedules only
3- Anytime
Function:Function:
Function:Function:
Function: To operate the door strike
DoorAccessis used tooperatethe door strikeat asingleSECURITYCOMMANDSECURITYCOMMAND
SECURITYCOMMANDSECURITYCOMMAND
SECURITYCOMMAND
WhenDoorAccessisselectedyouwillbeaskedtoenteryourcodenumber. When
thecodenumberisacceptedthedoor strike at theSECURITY COMMANDSECURITY COMMAND
SECURITYCOMMANDSECURITY COMMAND
SECURITYCOMMAND you
are operating will turn on for five seconds.
DoorAccessalsofunctionsanytimeanyareaofthesystemisdisarmedatthedoor
strike keypad or by simply entering your code number and pressing COMMAND.
A report of this entry can be transmitted to your central station. This report is
optional and is programmed during system installation.
Step By Step:Step By Step:
Step By Step:Step By Step:
Step By Step:
1. Press the key until DOOR ACCESS?DOOR ACCESS?
DOOR ACCESS?DOOR ACCESS?
DOOR ACCESS? is displayed.
2. When DOOR ACCESS?DOOR ACCESS?
DOOR ACCESS?DOOR ACCESS?
DOOR ACCESS? is displayed press any one of the top four
select keys. The display will read ENTER CODE: -ENTER CODE: -
ENTER CODE: -ENTER CODE: -
ENTER CODE: - .
3. Enter yourcodenumber and press . Thedoorstrike willturn
on for five seconds.
DOOR ACCESS
.
COMMAND
COMMAND

15
ARMED AREAS
User Code Level:User Code Level:
User Code Level:User Code Level:
User Code Level: None
Function:Function:
Function:Function:
Function: Displays all armed areas
Armed Areas is used to display all of the armed areas in your system. Each area
that is armed will be displayed with area number and name.
Step By Step:Step By Step:
Step By Step:Step By Step:
Step By Step:
1. Press the key until ARMED AREAS?ARMED AREAS?
ARMED AREAS?ARMED AREAS?
ARMED AREAS? is displayed.
2. When ARMED AREAS?ARMED AREAS?
ARMED AREAS?ARMED AREAS?
ARMED AREAS? is displayed press any one of the top four
select keys. The display will list each armed area one at a time.
3. If no areas are armed the display will read NONENONE
NONENONE
NONE .
COMMAND

16
User Code Level:User Code Level:
User Code Level:User Code Level:
User Code Level: None
Function:Function:
Function:Function:
Function: Displays a list of armed, bypassed, or alarmed loops; or checks the
status of individual loops.
LoopStatuscanbeusedtogiveyoualistofloopsbycategoryordisplaythecurrent
status of an individual loop number. The three categories are:
1) Armed Loops; loops which are currently armed.
2) Bypassed Loops; loops which are currently bypassed.
3) Alarmed Loops; loops which have tripped during the current
or previous armed period.
WhenLoopStatus is selectedyouwill be askedwhichkindof display youwantto
see. Ifyouchooseoneofthethreecategories,thelistofloopsinthatcategorywill
follow immediately, including loop number and name. If you choose to enter an
individualloopnumberyouwillbeaskedforthespecificnumberthentheloopname
and status will be displayed.
Step By Step:Step By Step:
Step By Step:Step By Step:
Step By Step:
1. Press the keyuntil LOOPSTATUS?LOOPSTATUS?
LOOPSTATUS?LOOPSTATUS?
LOOPSTATUS? isdisplayed.
2. When LOOP STATUS?LOOP STATUS?
LOOP STATUS?LOOP STATUS?
LOOP STATUS? is displayed press any one of the top four
select keys. The display will read ARMARM
ARMARM
ARM BYPSBYPS
BYPSBYPS
BYPS ALRALR
ALRALR
ALR NBRNBR
NBRNBR
NBR .
LOOP STATUS
ARM
3. Press for a list of loops which are currently armed.
BYPS
Press for a list of loops which are currently bypassed.
ALR
Press for a list of loops which have tripped during the current
or previous armed period.
NBR
Press and
LOOP: -LOOP: -
LOOP: -LOOP: -
LOOP: - will be displayed.
4. If NBR is selected enter the desired loop number and press
The loop name will be displayed followed by its current status:
-OKAY = loop in normal condition
-BYPAS = loop is bypassed
-BAD O = loop is open
-BAD S = loop is shorted
5. Afterdisplayingtheloopstatusthedisplaywillreturnforanotherloopnumber.
COMMAND
COMMAND

17
BYPASS LOOPS
User Code Level:User Code Level:
User Code Level:User Code Level:
User Code Level: 6
Function:Function:
Function:Function:
Function: Bypasses and Resets loops prior to arming.
Bypass Loops is used to bypass individual loops from the alarm system. This is
usuallydonebecausetheloopisinoperative. Bypassingmeansthealarmsystem
willnotrespondtoanyactivityonthebypassedloopexceptthattheloopnamewill
still appear in the Alarmed Loops list. A loop may be bypassed only while it is
disarmed. Since fire, panic, emergency, and supervisory type loops are always
armed they can never be bypassed. Bypassing may also be done during system
arming.
Bypass Loops can also be used to reset a loop, which has been bypassed, back
intothesystem. Thiscanonlybedonewhiletheloopisstilldisarmed. Abypassed
loop is automatically reset during system disarming.
When Bypass Loops is selected you will be asked to enter your code number.
When the code number is accepted you may enter the desired loop number and
bypassor resetit. A report of bypassed or reset loopscan betransmitted toyour
centralstation. This report is optional andis programmedduring systeminstalla-
tion.
Step By Step:Step By Step:
Step By Step:Step By Step:
Step By Step:
1. Press the key until
BYPASS LOOPS?BYPASS LOOPS?
BYPASS LOOPS?BYPASS LOOPS?
BYPASS LOOPS? is displayed.
2. When BYPASS LOOPS?BYPASS LOOPS?
BYPASS LOOPS?BYPASS LOOPS?
BYPASS LOOPS? is displayed press any one of the top four
select keys. The display will read ENTER CODE: -ENTER CODE: -
ENTER CODE: -ENTER CODE: -
ENTER CODE: - .
3. Enter your code number and press . The display will read
LOOP: - RST BYPSLOOP: - RST BYPS
LOOP: - RST BYPSLOOP: - RST BYPS
LOOP: - RST BYPS . RST
4. Enter the desired loop number and press to reset or
BYPS
5. The loop number will automatically disappear and a new loop number may
be entered in step 4.
to bypass.
COMMAND
COMMAND

18
LOOP MONITOR
User Code Level: 4
Function:Function:
Function:Function:
Function: Monitorselecteddisarmed loopsanddisplay theirname when tripped.
Loop Monitor will monitor any disarmed loop and will display the loop name and
soundthe keypad monitortone when theloop trips. Theloopwill bedisplayed at
all SECURITY COMMANDSECURITY COMMAND
SECURITY COMMANDSECURITY COMMAND
SECURITY COMMANDs in the system. Any combination of disarmed loops
may be placed in Loop Monitor. If more than one loop is in Loop Monitor the last
loop that tripped will be displayed. When the loop is armed the name is cleared.
Loop Monitor display will alternate with Armed Display and Status List. Armed
Display and Status List are optional. The options are selected at the time the
system is programmed.
Step By Step:Step By Step:
Step By Step:Step By Step:
Step By Step:
1. Press the key until LOOP MONITOR?LOOP MONITOR?
LOOP MONITOR?LOOP MONITOR?
LOOP MONITOR? is displayed.
2. When LOOP MONITOR?LOOP MONITOR?
LOOP MONITOR?LOOP MONITOR?
LOOP MONITOR? is displayed press any one of the top four
select keys. The display will read ENTER CODE: -ENTER CODE: -
ENTER CODE: -ENTER CODE: -
ENTER CODE: - .
3. Enter your code number and press . The display will read:
PERIM ALL NBRPERIM ALL NBR
PERIM ALL NBRPERIM ALL NBR
PERIM ALL NBR .
PERIM
4. Press toplace all disarmed perimeter loopsintoloopmonitor.
(PERIM is displayed on all/perimeter systems only.)
ALL
Press to place all disarmed loops into loop monitor.
NBR
Press to enter a specific loop number for loop monitor.
5. If ALL or PERIM is selected the display will ask if the loops are to be added
or removed from loop monitor.
6. If NBR is selected the display will read LOOP : - ADD RMVLOOP : - ADD RMV
LOOP : - ADD RMVLOOP : - ADD RMV
LOOP : - ADD RMV .
ADD
6a. Enter the desired loop number and press to add to, or
RMV
7. Theloopnumberwillautomaticallydisappearandanewloopnumbermaybe
enteredinstep6. AloopisautomaticallyremovedfromLoopMonitorwhenit
isarmed. The loopcan be returned to the Monitor mode automatically,when
disarmed, or it may be required to manually reenter the loop number each
arming cycle. This option is selected at the time the system is programmed.
to remove from Loop Monitor.
COMMAND
COMMAND
This manual suits for next models
2
Table of contents
Other Security Command Measuring Instrument manuals
Popular Measuring Instrument manuals by other brands
PROGRESSIVE RC
PROGRESSIVE RC UNIVERSAL LIPO ESR METER instructions

Kane
Kane KANE452NO Quick reference guide
R.U. Ready
R.U. Ready Speed-Timer 3000 instruction manual

ATI Technologies
ATI Technologies PQ45P O & M Manual

Roche
Roche cobas Urisys 1100 Quick reference guide
Klein Tools
Klein Tools CL2000 instruction manual
