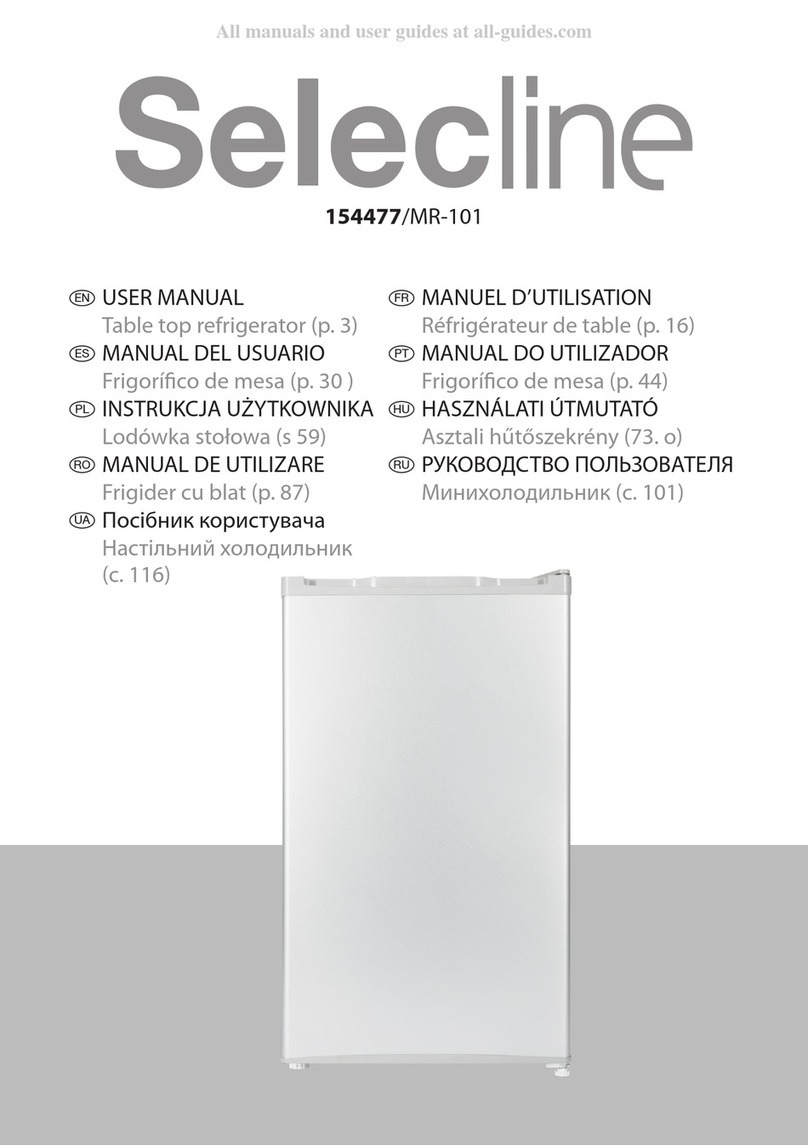
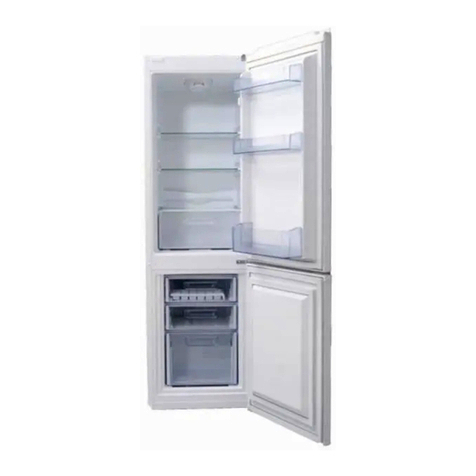
Selecline 600081548 User manual

600081548
DF1-28N-4
USER MANUAL
Refrigerator (P.03)
MANUAL DE UTILIZACIÓN
Frigoríco (P.41)
INSTRUKCJA OBSŁUGI
Lodówka (S.75)
MANUAL DE UTILIZARE
Frigider (P.109)
ІНСТРУКЦІЯ З ЕКСПЛУАТАЦІЇ
Холодильник (C.143)
MANUEL D’UTILISATION
Réfrigérateur (p.24)
MANUAL DE UTILIZAÇÃO
Frigoríco (P.59)
HASZNÁLATI ÚTMUTATÓ
Hűtőszekrény (93.o.)
РУКОВОДСТВО
ПОЛЬЗОВАТЕЛЯ
Холодильник (C.125)

36
5
4
2
1
2

3 4
6
5
1 2
3

7
10
8
9
4

A
B
C
D min= 0
E min=50
F
G
H
F F
F
I I 3
11 12
13 14
15
5

16
17 18
20
19
6

21
7

1/ SAFETY INSTRUCTIONS
Before using this electrical appliance, read the instructions
below carefully and keep them for future reference:
1. This appliance can be used by children aged from 8
years and above and persons with reduced physical, sensory
or mental capabilities or lack of experience and knowledge if
they have been given supervision or instruction concerning
use of the appliance in a safe way and understand the
hazards involved. Cleaning and user maintenance shall not
be made by children without supervision. Children aged
from 3 to 8 years are allowed to load and unload refrigerating
appliances.
2. Children should be supervised to ensure that they do
not play with the appliance.
3. Cleaning and user maintenance should not be made by
children unless they are aged 8 years or above and they are
appropriately supervised.
4. Keep all packaging well away from children. There is a
risk of suocation.
5. If you are discarding the appliance, pull the plug from the
socket, cut the connection cable as close to the appliance
cabinet as possible, and remove the door to prevent children
from suering an electrical shock or close themselves into
the decommissioned appliance.
TABLE OF CONTENTS:
1/SAFETY INSTRUCTIONS ______________________________ P. 8
2/TECHNICAL SPECIFICATIONS_________________________ P. 13
3/PRODUCT DESCRIPTION_____________________________ P. 13
4/BEFORE FIRST USE __________________________________ P. 13
5/USE _______________________________________________ P. 15
6/CLEANING AND CARE _______________________________ P. 21
7/WARRANTY AND LIMITATION OF LIABILITY ____________ P. 23
8

6. If the appliance featuring magnetic door seals is
replacing an older model appliance with a spring lock/latch
on the door or lid, be sure to make the door spring lock/latch
unusable before you discard the old appliance. This prevents
it from becoming a death trap for a child.
7. WARNING! Keep the ventilation openings, in the
appliance enclosure or the built-in structure, clear of
obstruction.
8. WARNING! Do not use mechanical devices or other
means to accelerate the defrosting process, other than those
recommended by the manufacturer.
9. WARNING! Do not damage the refrigerant circuit.
10. WARNING! Do not use other electrical appliance, such
as ice-cream makers, inside of the refrigerator appliance,
unless they are approved for such use by the manufacturer.
11. WARNING! Do not touch the light bulb if it has been on
for a long period of time as it could be very hot.
12. WARNING! When positioning the appliance, ensure the
power supply cord is not trapped or damaged.
13. WARNING! Do not locate multiple portable socket-
outlets or portable power-suppliers at the rear of the
appliance.
14. Do not store explosive substances such as aerosol cans
with a ammable propellant in this appliance.
15. The refrigerant isobutane (R-600a) is contained within
the refrigerant circuit of the appliance. This is a natural gas
with a high level of environmental compatibility, which is,
nevertheless, ammable.
16. During the transportation and installation of the
appliance, be certain that none of the components of the
refrigerant circuit become damaged.
- Avoid open ames and sources of ignition.
- Thoroughly ventilate the room in which the appliance
is situated.
9

17. It is dangerous to alter the specications or modify this
product in any way.
18. Any damage to the cord may cause a short-circuit, re,
and/or electric shock.
19. This appliance is intended to be used in a household and
similar applications, such as:
- Sta kitchen areas in shops, oces, and other work
environments;
- Farm houses and by clients in hotels, motels, and other
residential-type environments;
- Bed and breakfast type environments;
- Catering and similar non-retail applications.
20. WARNING! Any electrical components, such as the plug,
power cord, compressor, and so on, must be replaced by a
certied service agent or qualied service personnel.
21. WARNING! The light bulb supplied with this appliance is
a special-use lamp bulb usable only with this appliance. This
special-use light bulb is not usable for domestic lighting.
22. The power cord must not be lengthened.
23. Make sure the power plug is not squashed or damaged
by the back of the appliance. A squashed or damaged power
plug may overheat and cause a re.
24. Make sure that you can reach the mains plug of the
appliance.
25. Do not pull on the mains cable.
26. If the power plug socket is loose do not insert the power
plug. There is a risk of electrical shock or re.
27. Do not operate the appliance without the lamp.
28. This appliance is heavy. Take care when moving it.
29. Avoid prolonged exposure, of the appliance, to direct
sunlight.
30. Do not put hot items on the plastic parts of the appliance.
31. Do not place food products against the rear wall of the
appliance compartment.
10

32. Appliance manufacturer’s storage recommendations
should be strictly adhered to. Refer to relevant instructions.
33. To avoid the contamination of food, please follow these
instructions:
- Do not open the door for long periods of time as this
can cause a signicant increase in the temperature in
the appliance compartment.
- Regularly clean the surfaces that can come in contact
with food.
- Keep the drain clear.
- Clean the water tanks if they have not been used for
48 hours.
- Flush the water system connected to a water supply if
water hasn’t been drawn for 5 days.
- Store raw meat and sh in suitable containers so that
the food does not come in contact with or drip on
other food stored in the appliance.
- If the appliance is left empty for long periods of time,
switch it o, defrost, clean, and dry it. Leave the door
open to prevent mould from developing inside the
appliance.
34. If the supply cord is damaged, it must be replaced by a
special cord or assembly available from the manufacturer or
its service agent.
35. This appliance does not contain gasses which
could damage the ozone layer, in either its
refrigerant circuit or insulation materials. The
appliance shall not be discarded together with the urban
refuse and rubbish. The insulation foam contains ammable
gasses. The appliance shall be disposed of according to the
appliance regulations in your locality. Contact your local
authorities to obtain a copy of the regulations. Avoid
damaging the cooling unit, especially the heat exchanger.
The materials used on this appliance marked by the symbol
11

are recyclable. Dispose of the packaging materials in a
suitable collection container to recycle it.
36. This symbol on the appliance or on its packaging
indicates that this appliance may not be treated as
household waste. Instead, it should be taken to the
appropriate collection point for the recycling of electrical
and electronic equipment. By ensuring that this product is
disposed of correctly, you will help prevent potential
negative consequences for the environment and human
health,whicharerisksshouldthisappliancebeinappropriately
disposed of. For more detailed information about recycling
this appliance, contact your local council, your household
waste disposal service, or the retailer where you purchased
the appliance.
37. The symbol indicates the coldest area of the
refrigerator. It denes the top of this area.
Disposing of the Appliance
38. Disconnect the appliance mains plug from the mains
socket.
39. Cut o the mains cable and discard it.
40. WARNING! During use, service, and disposal of
the appliance, pay attention to this symbol,
located at the rear of the appliance, on the rear
panel or the compressor, and is a yellow or orange color to
make it stand out and draw your attention.This symbol warns
of a re risk. There are ammable materials in the refrigerant
pipes and the compressor. Stay far away from any ame or
re source when using, servicing, or disposing of the
appliance.
41. All accessories, such as drawers, shelves balconies,should
be kept there for lower energy consumption.
12

2/ TECHNICAL SPECIFICATIONS
Power Supply 220-240 V~, 50Hz
Power Consumption 215 kWh/y
Exterior Dimensions (H x L x W) 146.9 x 57.5 x 59 cm
Net Weight 38 kg
Protection Class Class I
3/ PRODUCT DESCRIPTION
1- Freezer Shelf
2- Thermostat and Light
3- Glass Shelves
4- Crisper Cover
5- Crisper
6- Balconies
4/ BEFORE FIRST USE
UNPACKING
1. Unpack all of the parts.
2. Immediately after unpacking, check for completeness and any damage
sustained during shipping. If your package is damaged or incomplete, please
contact our After-Sales department.
REVERSE DOOR
Tools Required: Philips screwdriver, at-bladed screwdriver, hexagonal spanner,
and adjustable wrench.
Notes:
■Ensure the appliance is unplugged and empty.
■To remove the door, it is necessary to tip the appliance backwards. Rest the unit
on something solid so that it will not slip during the door reversal process.
■All parts removed must be saved as they are required to reinstall the door.
■Do not lay the appliance at as this may damage the coolant system.
■This is a 2-person task as it will take more than 1 person to handle the appliance
during assembly.
1. Using the at screwdriver, carefully remove the top hinge cover. See Figure 1.
2. Using the Philips screwdriver, remove the top hinge. See Figure 2.
3. Using the at screwdriver, remove the hole cap. See Figure 3.
4. Move the hole cap to the other side of the door. Lift the upper door and, to
prevent scratching, place it on a padded surface. See Figure 4.
5. Unscrew the middle hinge. Lift the lower door and, to prevent scratching, place
it on a padded surface. See Figure 5.
6. Move the two middle hole caps to the other side of the appliance. See Figure 6.
13

7. Lay the cabinet back on a soft pad. Unscrew the bottom hinge and levelling feet.
See Figure 7.
8. Unscrew and remove the bottom hinge pin, turn the bracket over, and replace it.
See Figure 8.
9. Install the hinge on the other side of the appliance. Replace the levelling feet.
See Figure 9.
10. Stand the appliance cabinet up and place the door into the bottom hinge. Make
sure the bottom hinge core is inserted in the door hole. Move the hinge hole
cap of the bottom door to the other side. See Figure 10.
11. Install the middle hinge. See Figure 11.
12. Place the top door in the middle hinge and replace the upper hinge.
See Figure 12.
13. Snap the hinge cover and the hole cap on the top of the unit. See Figure 13.
14. Detach the fridge and freezer door gaskets, rotate them, and reattach them.
See Figure 14.
INSTALLATION
Space Requirement
■Ensure there is enough room to open the door to at least 90° wide.
See Figure 15.
Levelling the Unit
■Adjust the two levelling feet at the front of the appliance for setting the level of
the appliance. See Figure 16.
Important! The appliance must be level for the doors and magnetic seal
alignments to work properly.
Positioning
Install the appliance in a location with an ambient temperature corresponding to
the climate class indicated on the rating plate of the appliance.
For refrigerating appliances with climate class:
■Extended temperate: This refrigerating appliance is intended to be used at
ambient temperatures ranging from 10° C to 32° C (SN).
■Temperate: This refrigerating appliance is intended to be used at ambient
temperatures ranging from 16° C to 32° C (N).
■Subtropical: This refrigerating appliance is intended to be used at ambient
temperatures ranging from 16° C to 38° C (ST).
■Tropical: This refrigerating appliance is intended to be used at ambient
temperatures ranging from 16° C to 43° C (T).
14

Location
■The appliance should be installed well away from sources of heat such as
radiators, boilers, direct sunlight, and so on. Ensure that air can circulate freely
around the back of the appliance cabinet. To ensure the best performance, the
minimum distance between the top of the appliance and any overhanging wall
unit is at least 50 mm. Ideally, the appliance should not be positioned below any
overhanging wall units.
■Accurate levelling is ensured by one or more adjustable feet at the base of the
appliance cabinet.
■This refrigerating appliance is not intended to be used as a built-in appliance.
Warning! It must be possible to disconnect the appliance from the mains power
supply; the electrical plug must, therefore, be easily accessible after installation.
Electrical Connection
■Before plugging the appliance in, ensure that the voltage and frequency
shown on the rating plate corresponds with your domestic power supply. The
appliance must be grounded/earthed. The power supply cable plug is provided
with a contact for this purpose. If the domestic power supply socket is not
grounded, connect the appliance to a separate earth in compliance with current
regulations. Consult a qualied electrician.
■The manufacturer declines all responsibility if the above safety precautions are
not observed.
■This appliance complies with the E.E.C. Directives.
5/ USE
FIRST USE
Cleaning the Interior
Before using the appliance for the rst time, wash the interior and all internal
accessories with lukewarm water and a neutral soap. Dry thoroughly. This will clear
the typical smell of a brand-new product.
Important! Do not use detergents or abrasive powders as these will damage the
nish.
Temperature Setting
■Plug in your appliance. The internal temperature is controlled by a thermostat.
There are eight settings available (see Figure 17). 1is the warmest temperature
and 7is the coldest temperature setting. When set at 0, the appliance is turned
o. When set at 7, the compressor does not stop.
■The appliance may not operate at the correct temperature if it is in a particularly
hot location or if you open the door frequently.
15

DAILY USE
Place dierent foods in dierent compartments of the refrigerator according to the
table below.
Refrigerator Compartments Types of Food
Door or balconies of fridge
compartment
■Foods with natural preservatives.
Foods such as jams, juices, drinks, and
condiments.
■Do not store perishables on the door.
Crisper bin (salad drawer)
■Fruits, herbs, and vegetables should be
placed separately in the crisper bin.
■Do no store fresh bananas, onions,
potatoes, or garlic in the refrigerator.
Refrigerator Shelf – middle ■Dairy products and eggs.
Refrigerator Shelf – top ■Foods that do no require cooking, such as
ready-to-eat foods, deli meats, leftovers,
and so on.
Freezer drawer(s)/shelf
■Foods for long-term storage.
■Bottom drawer/shelf for raw meat, poultry,
and sh.
■Middle drawer/shelf for frozen vegetables
and chips.
■Top drawer/shelf for ice-cream, frozen fruit,
and frozen baked goods.
16

Temperature Setting Recommendation
The table below provides the recommended temperature settings for the
refrigerator.
Environment Temperature Temperature Regulation Setting
Summer (Above 38° C)
Set on 2~4
Normal
Set on 4
Winter (Below 16° C)
Set on 4~6
IMPACT ON FOOD STORAGE
■Under recommended setting, the best storage time of fridge is no more than
3days.
■Under recommended setting, the best storage time of freezer is no more than
1month.
■The best storage time may reduce under other settings.
17

Freezing Fresh Food
■The freezer compartment is suitable for both freezing fresh food and storing
deep-frozen foods for an extended period.
■Place fresh food in the freezer compartment. Do not lean it against already
frozen foods.
■The maximum amount of food that can be frozen in a 24-hour period by the
freezer compartment is listed on the appliance rating plate.
■The freezing process takes 24 hours to complete. During this time, it best to not
add additional items to the freezer.
Storing Frozen Food
■When rst starting the appliance, or when restarting after a period without
power, let the appliance run for at least 2 hours to come to temperature before
putting food into the freezer.
Important! In the event of accidental defrosting, for example when the power
has been o for longer than the value shown on the technical characteristics
chart under “rising time,”the defrosted food must be consumed quickly or cooked
immediately and then refrozen.
Thawing Frozen Food
■Deep-frozen or frozen food, prior to being used, can be thawed in the
refrigerator compartment or at room temperature, depending on the time
available for this process.
■Small pieces may even be cooked while still frozen, directly from the freezer. In
this case, the cooking will take longer.
Ice-Cubes
■This appliance may be equipped with one or more trays for the production of
ice cubes.
ACCESSORIES
■Movable Shelves
The walls of the refrigerator are equipped with a series of runners so that you can
customize the position of the shelves to meet your needs. See Figure 18.
■Positioning the Door Balconies
To facilitate the storage of various-sized packaged foods, the door balconies can be
adjusted to dierent heights. To make these adjustments, follow these instructions
illlustrated in Figure 19:
1. Gently pull the balcony upwards. It should come free of the door.
2. Reposition the balcony and gently push down until it is seated in its new
position.
18

TROUBLESHOOTING
Caution! Before troubleshooting, disconnect the power supply. Any
troubleshooting beyond what is described below should be done by a qualied
electrician.
Important! There are some sounds during normal use, such as those from the
compressor and refrigerant circulation.
If the malfunction repeats, contact the Service Center.
Problem Possible Cause Solution
Appliance doesn’t work. Temperature
regulation knob is set
at number 0.
Set the knob at another
number to switch on
the appliance.
Mains plug is not
plugged in or is loose. Insert mains plug.
Fuse has blown or is
defective. Check fuse, replace if
necessary.
Socket is defective. Mains malfunctions are
to be corrected by an
electrician.
The food is too warm. Temperature is not
properly adjusted. Please review the
Temperature Setting
Recommendation
section.
Door was left open for
an extended period of
time.
Open the door only as
long as necessary.
A large quantity of
warm food was placed
in the appliance
within the last 24
hours.
Temporarily turn the
temperature regulator
to a colder setting.
The appliance is
situated near a heat
source.
Please review the
Installation Location
section.
Appliance cools too
much. Temperature is set too
cold. Temporarily turn the
temperature regulation
knob to a warmer
temperature.
19

Problem Possible Cause Solution
Unusual noises. - Appliance is not
level. Adjust the levelling feet.
- The appliance is
touching the wall
or other object.
Move the appliance
slightly until it is
standing clear.
- A component,
such as a pipe,
on the rear of
the appliance is
touching another
part of the
appliance or the
wall.
If necessary, carefully
bend the component
out of the way.
Water on the oor. The water drain hole is
blocked. Please review the
Cleaning the Drain
Hole section.
Side panel is hot. The condenser is
inside the side panel. This is normal.
HELPFUL HINTS AND TIPS
Hints for Freezing
To help you make the most of the freezing process, here are some important hints:
■The maximum amount of food that can be frozen in a 24-hour period is shown
on the appliance rating plate.
■The freezing process takes 24 hours. No additional food should be added during
this time.
■Only freeze high quality, fresh, and thoroughly cleaned foodstus.
■Prepare food in small portions to make it easier to freeze evenly, rapidly, and
completely. It also makes it easier to unthaw only the amount required, later.
■Wrap the food in aluminium foil or polythene and ensure the packages are
airtight.
■Do not allow fresh, unfrozen food to rest against food that is already frozen. This
avoids a rise in temperature in the frozen food.
■Lean foods store better and longer than fatty foods. Salt reduces the storage life
of food.
■Water ices. If consumed directly after being taken from the freezer, ice can cause
freezer burn to the skin.
■It is advisable to show the freezing date on individual packages stored in the
freezer. This aids you in tracking how long food has been in the freezer.
20
This manual suits for next models
1
Table of contents
Languages:
Other Selecline Refrigerator manuals
