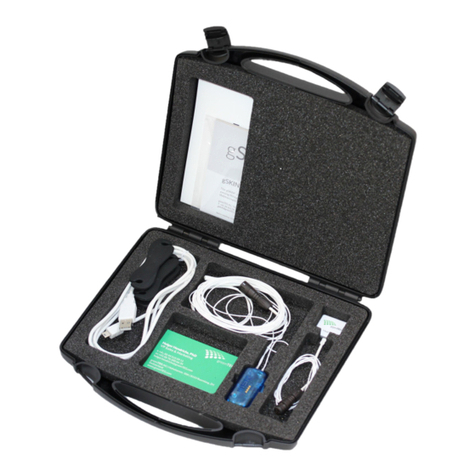
Sencon SL2000 User manual

SL2000
Temperature logger
User's Guide
092-07900-04


Sales, service and support:
Sencon (UK) Ltd
Stonebridge Cross Business Park
Droitwich WR9 0LW
UK
Tel: +44 1905 827800
Fax: +44 1905 795876
Sencon Inc. (USA)
6385 West 74th Street
Bedford Park, IL 60638
Tel: +1-708-496-3100
Fax: +1-708-496-3105

Copyright
This documentation is copyrighted with all rights reserved. It may not be copied
without the prior written consent of Sencon.
Warranty
All Sencon products carry a 12 month warranty (except for wear and tear on
probes and insulating jackets) for faulty workmanship and materials
Limited Warranty
Sencon disclaims all other warranties of any kind for SL2000 data logging
products, excluding the implied warranties of merchantability and fitness for the
specified purpose.
Limited Liability
Sencon shall have no liability for direct, indirect, incidental or consequential
damage or cost arising out of the use of or inability to use SL2000 data logging
products and/or Hexagon software.
Note: As a result of continuous improvements, these products and accompanying
documentation are subject to change without notice.
Microsoft is a registered trademark and Windows is a trademark of Microsoft
Corporation.

5
Contents.............................................................................................................................5
Safety information.............................................................................................................6
Logger Batteries..........................................................................................................................6
Introduction .......................................................................................................................7
Introduction .......................................................................................................................7
Setting up your system.....................................................................................................9
Running Hexagon software.........................................................................................................9
Operating mode...........................................................................................................................9
Setting up Communications........................................................................................................9
Setting up the communications port .....................................................................................9
Setting up the baud rate ........................................................................................................9
Controlling the logger.....................................................................................................10
Controlling the logger.........................................................................................................10
Sending a set of logging instructions to the logger.............................................................11
Downloading logged information from the logger.............................................................12
Logger..............................................................................................................................13
Guarantee ..................................................................................................................................13
Care of your logger ...................................................................................................................13
Operating temperatures.......................................................................................................13
Calibration.................................................................................................................................13
Replacing the logger battery .....................................................................................................14
Battery Activation...............................................................................................................14
SmartReader....................................................................................................................15
Guarantee ..................................................................................................................................15
Care of your SmartReader.........................................................................................................15
Operating temperatures.......................................................................................................15
Replacing the SmartReader battery...........................................................................................16
Troubleshooting..............................................................................................................17
Contents

6
Logger Batteries
WARNING: If you mistreat the logger batteries you risk causing fire,
explosion and chemical burns.
• Replace the logger battery only with the recommended type of 7.4volt
Lithium cell. This is available from Sencon, Order Ref: SL2061. If you
use another type of battery you risk causing fire or explosion.
• Store any spare batteries in a cool, dry place in the packaging in which you
receive them.
• Keep batteries out of the reach of children
• Keep each battery pack separate from the others to prevent short circuit.
• Dispose of used batteries promptly
• Do not try to recharge the logger batteries.
• Do not heat above 145°C or dispose of in fire.
• Do not open, puncture or squeeze.
• Do not weld or solder to the battery's body.
• Do not expose the contents to water.
Safety information

7
• This guide gives an overview of the Sencon data logging
system, information about using the system and what to do if
you have a problem.
• This guide does not explain in detail how to use the Hexagon
software program. Please refer to your Hexagon for
Windows User's Guide for full instructions on installing and
using Hexagon.
NOTE: A Hexagon symbol in the text, for example:
Getting Started - Installing Hexagon
means that more information can be found under that heading in the
Hexagon for Windows User's Guide.
You can also use the Hexagon program's on-line help by clicking on
the Help menu or pressing F1when you want information about the
part of the program you are using.
Introduction


9
Running Hexagon software
To run Hexagon, double click on the Hexagon program icon in the Windows
Program Manager.
Operating mode
Note that you can use the Hexagon program in either of two modes:
Operator mode - in which you can set up and download the logger but
cannot change the way the Hexagon program works.
Administrator mode - in which you can use all the features of the Hexagon
program.
Getting Started - Setting up your system - Operating modes
Setting up Communications
The following actions must be carried out in Administrator mode
The logger does not need to be connected to the PC.
Setting up the communications port
From the Hexagon 'Set up' menu select 'Communications'.
Choose the correct communications port from the pull down list.
Press OK to confirm the selection and close.
Setting up the baud rate
Choose Communications from the Hexagon Setup menu.
Select the correct baud rate from the pull-down list. Most computers operate
at 19,200. If you have a very fast computer you can try a faster baud rate. If
you have problems getting data later on, change to a slower baud rate.
Press OK to confirm the selection and close.
Getting Started - Setting up communications
Setting up your system
Double click

10
Connect the logger to the SmartReader and connect the SmartReader to the
selected communications port on your PC.
SmartReader's 9 way D-type connector attaches to the back of the PC
SmartReader's 19-way multi-way connector plugs into the socket on the
logger.
The green light on the SmartReader will only be lit when Hexagon is
communicating with the logger.
Controlling the logger
Choose Control Logger from the Hexagon Logger menu to
•define a new set of logging instructions and send them to the logger
•download any logged information already in the logger.
Hexagon will display a message telling you how long the logger has run.
Note: If the logger is already logging, it will stop when you connect the
logger to the PC and open this dialog box.
Logging and downloading - Controlling the logger
Controlling the logge
r

11
Sending a set of logging instructions to the logger
Select Activate Logger.
In Operator mode, you will see the settings which will be sent to the logger
but you will not be able to make changes.
If you are in Administrator mode, you can change the settings before
sending them to the logger.
Note: If you proceed, any data already stored in the logger will be
overwritten, so make sure you have downloaded it first if necessary.
Click OK to send the logging instructions to the logger.
You will be asked 'Clear Memory and Activate Logger, are you sure?' Click
YES to proceed or NO to return to the previous dialog box.
If you click YES, you will see a 'Logger Activated' message. Click OK.
The logger is now set up and will begin logging immediately (when the green
light on the SmartReader goes out) or after any Start Conditions are met.
Disconnect the logger from the SmartReader and plug in your sensors. (The
sensors plug into the same 19-way multi-way socket on the logger.)
Logging and downloading - Setting up the logger

12
Downloading logged information from the logger
Select Get Data to download all the data from the logger and store it on disk
as a data file.
Note: the Get Data button will only be available if there is data in the logger.
Hexagon displays the File Information Dialog box into which you can enter
information about the file you are going to download.
Click OK
Hexagon downloads all the information in the logger and saves it to disk as a
data file with a .dat file extension.
Hexagon then displays, in graph view, the file you have just downloaded.
The filename appears in the title bar of the active window.
Logging and downloading - Downloading logged data
Handling data files and Viewing your data give more information on
working with data files.

13
Guarantee
The Sencon logger is guaranteed for one year against faulty parts and
workmanship.
Care of your logger
We recommend that you change the logger batteries at least once a year.
Do not immerse the logger in liquid.
PLEASE NOTE: The logger is of rugged design and construction but
excessive shock may damage the internal electronics.
Operating temperatures
0°C (32°F) minimum
120°C (248°F) maximum transient
110°C (230°F) maximum continuous.
Note: Use of an insulating jacket will allow the logger to withstand higher
temperatures. Please see current data sheets for details.
Calibration
The logger is calibrated (traceable to NAMAS standards) before despatch. It
should be returned to us every year for recalibration. This annual
recalibration is included in your service contract with us, if you have one.
If you do not have a service contract, please ask us for a quotation for
recalibration.
Logge
r

14
Replacing the logger battery
Before replacing the logger battery, read the safety information at the
front of this Guide.
The logger requires a 7.4 volt Lithium cell, available from Sencon. Order
Ref: SL2061 (single battery).
Unclip the battery cover to remove the battery connector. Clip on the new
battery and place it inside the logger. Replace the battery cover securely.
Battery Activation
After replacing the logger battery, you should always do the following:
1 Connect the logger to the SmartReader.
2 Press and release the black button on the back of the SmartReader.
'
Activate logger battery' light
glows yellow or red.
3 Leave the logger attached to the SmartReader until the light goes out - this
will take approximately 15 minutes.
4 After the 'Activate logger battery' light goes out, let the logger rest for at
least 15 minutes.
5 Press and release the black button again.
light glows red light glows yellow then light glows yellow
replace logger battery red within 10 seconds logger battery is OK
replace logger battery do not replace
6 To exit battery check mode, connect the SmartReader to the PC and choose
Logger, Control logger from the Hexagon menu bar. You can now
continue logging or disconnect the logger from the SmartReader.

15
The SmartReader allows Hexagon, running on your PC, to communicate with
your data logger.
Communication is via an RS232 interface operating at a maximum rate of
57,600 baud.
Connection to the PC is via a 9-way D type connector
Connection to the logger is via a 19 way multi-way connector.
The SmartReader has three LEDs:
'9v battery low' (red) tells you that the SmartReader battery
islow
'On-line' (green) shows that Hexagon is communicating
with the logger
'Activate logger lights when the logger battery is being
battery' (yellow/red) activated
Guarantee
The Sencon SmartReader is guaranteed for one year against faulty parts and
workmanship.
Care of your SmartReader
Do not immerse the SmartReader in liquid.
Operating temperatures
0°C (32°F) minimum
40°C (104°F) maximum
SmartReade
r

16
Replacing the SmartReader battery
If the red light next to '9V battery low' lights, you should change the
SmartReader battery the next time you use the system.
Note: This light will only be seen when the SmartReader is in
communications mode.
The SmartReader is powered by a 9V alkaline battery. We recommend the
Procell MN1604 or a similar 9V battery. Rechargeable 9V batteries can also
be used.
To replace the battery:
Disconnect the SmartReader from the logger and from the PC.Remove the
battery cover underneath the SmartReader. Unclip the battery connector and
clip on a new battery. Replace the battery cover securely.

17
If you have any of the following problems, try the suggested actions (in
order) until the problem is solved.
If this does not help, or if you have a problem not listed here, try looking at
the Hexagon on-line help or refer to your Hexagon for Windows User's
Guide.
If you still cannot solve the problem, please call your supplier for advice.
Problem or message
Probable cause and action
The red light on the
SmartReader next to
'9V battery low' lights.
• The battery inside the SmartReader is low.
Change the battery next time you use the
logger.
Note: This light will only be seen when the
SmartReader is in communications mode.
Message: Please check
connections. No logger
detected.
• Check the connections between the logger,
the SmartReader and the PC.
• Check that the correct communications port
is selected and that the SmartReader is
connected to the correct port.
• The SmartReader battery may be low.
Replace the SmartReader battery.
• The SmartReader may not be working
correctly. Call your supplier.
Message: Cannot activate
logger. Check your
batteries.
• Activate the logger battery.
• Replace the logger battery and activate it.
I set up the logger and left it
to log but no data was
recorded.
• The logger battery may be low. Replace
the logger battery and activate it.
• You set impossible start conditions. Refer
to the Hexagon User's Guide.
Troubleshooting

18
Problem or message Probable cause and action
Message: Enter Serial
Number
• This may appear when you connect the
logger to the PC after a battery change.
Hexagon needs the correct serial number in
order to calibrate logged data correctly.
Type in the logger serial number (you will
find this on the outside of the logger
housing) and press OK.
Message: The logger shut
down early as a result of
being too hot.
• The logger's internal temperature rose too
high and logging stopped to protect the
electronics. You can still download the
information recorded before logging
stopped.
Message: The logger shut
down early as a result of low
battery voltage.
• The logger's battery voltage became too
low and logging stoppped to preserve the
readings already collected. You can still
download the information recorded before
logging stopped.
Message: Please select fewer
channels or decrease logging
rate.
• The number of channels you can log may
be limited, particularly at very fast logging
rates or for certain data types. Select fewer
channels, or select a slower logging rate.
If you need further help, contact your
supplier.
Table of contents
