- 5 - 06/2023
2023, .
4. If the brewed coffee flows out very slowly, it means that the beans
are ground too finely and acoarser grind should be set. On the other
hand, if the brewed coffee flows out too fast, it means that the grains
are ground too coarsely and afiner grind should be set.
Milk Frothing System
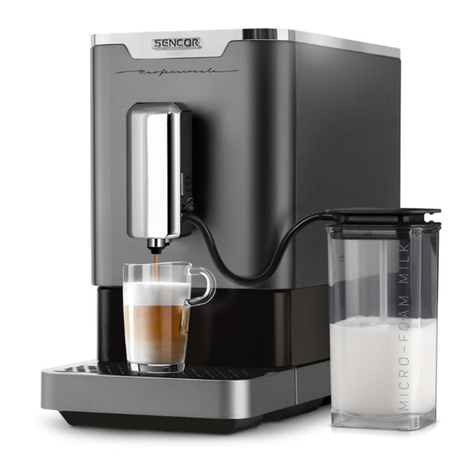
If you are planning to prepare latte, cappuccino, or need to froth milk, it is
necessary to attach the milk frothing system. Follow these steps:
1. Carefully remove the coffee outlet cover by pressing its sides and
pulling it away from the outlet.
2. Attach the milk frothing system to the coffee outlet from below
(Figure C1). Push gently upwards and then secure it onto the
pins so that the round shape of the outlet fits into the round
cutout (Figure C2).
3. Reattach the coffee outlet cover.
Milk Container
If you are planning to make latte, cappuccino, or need to froth milk,
assemble the milk container as follows:
1. Pour fresh, cold milk into the container. Always fill below the
maximum level. The maximum capacity of the milk container is
750ml.
2. Insert the milk tube into the hole on the inner side of the lid (Figure
D1).
3. Place the milk container on astable and flat surface at asufficient
distance from the coffee machine.
4. Put the lid on the container.
5. Insert one end of the connecting hose into the hole in the lid of the
milk container (Figure D2).
6. Open the plug of the inlet opening in the milk frothing system and
insert the other end of the connecting hose into the opening (Figure
D3).
Brewing Head Height Adjustment
• The brewing head can be moved up/down according to the height of
the cup in which you will be preparing the coffee. First, place the cup
under the brewing head and then adjust the height.
Brewing Unit
• Gently press on the bottom part of the service door where the
indentation is located. The service door will swing open. Remove it
and check it the brewing unit is properly installed in its place. When
inserting the brewing unit into the coffee machine, align the arrow on
the brewing unit with the arrow above the brewing unit compartment.
After checking, reattach the service door.
• If you remove and reinsert the brewing unit and hear aclick, it
indicates that the brewing unit is properly installed.
• If the warning indicator light is continuously on, the brewing unit is
not installed correctly.
• If the warning indicator light blinks when you press the beverage
preparation button, the service door is not closed properly.
Coffee Grounds Container and Inner Tray
• Gently press on the bottom part of the service door where the
indentation is located. The service door will swing open. Remove it and
check if the coffee grounds container and the inner tray are properly
installed in their place.
• If the warning indicator light is continuously on, the inner tray or
coffee grounds container is not installed correctly.
Drip Tray
• Attach the grid to the drip tray.
• Place the folded drip tray against the lower front wall of the coffee
machine and press it slightly into the machine.
• The tray must be securely in place to prevent the cup with hot
beverage from tipping over during preparation.
• Water from the outlet flows into the drip tray during each rinsing, self-
cleaning, and also coffee brewing, which may cause spills. Therefore,
clean and empty the drip tray daily.
. . . . . . . . . . . . . . . . . . . . . . . . . . . . . . . . . . . . . . . . . . . . . . . . . . . . . . . . . . . . . . . . . . . .
USING THE COFFEE MACHINE
• Place the coffee machine on aflat, dry and clean surface at
asufficient distance from the from the power socket. Ensure there is
enough space around it for manipulation, at least 15 cm around the
entire coffee machine.
• Make sure that the water tank is refilled with fresh water, the bean
hopper has an adequate amount of coffee beans, and that the
appliance is properly assembled.
• Plug the power cord connector into the socket in the coffee machine
and connect the power cord plug to the power socket.
Note:
When refilling water and coffee beans, always follow the
instructions provided in chapter “Filling the Water Tank”
and “Filling the Bean Hopper”.
Turning on the Coffee Machine, Rinsing and Preheating
• Switch the main power switch at the back of the machine to the “I”
position (on). You will hear asound alert and the control panel will
briefly light up. Once it goes off, the coffee machine automatically
switches to the standby mode.
• Place acup or bowl under the coffee outlet.
• Press the button to turn the appliance on. The button will start
blinking and the button will light up. The coffee machine starts
heating up, and the preparation process begins, during which water
is pumped into the internal circuit, the grinder is checked, and the
coffee outlet is rinsed, with asmall amount of water flowing into the
cup. During this time, the grinder and pump will briefly operate. This is
anormal occurrence.
• At the same time, the steam delivery system will warm up and, during
this time, the buttons , , , and will slowly blink. The
coffee machine cannot be operated during this time.
• Once the control buttons light up, the coffee machine is ready to use.
Note:
The coffee machine will automatically rinse if it has been
in standby mode for more than 4 hours and always after
turning it on with the main power switch.
Turning off the Coffee Machine
• When you have finished using the coffee machine, press the button
to turn it off. The coffee machine will switch to the standby mode.
• To completely turn it off, switch the main power switch to the “0”
position (off) and unplug the power cord from the power socket.
Note:
The coffee machine is equipped with an automatic standby
mode feature. This occurs after 28 minutes of inactivity.
This is anormal occurrence.
Preparing Espresso (1 and 2 cups) and Americano
1. Place acup, mug or glass under the brewing head. Adjust the height
of the brewing head by moving it up or down depending on the size
of your cup, mug or glass. If the cup or glass is too tall, you may
remove the drip tray. After removing the cup or glass, return the drip
tray to its place.
2. Press the button (for preparing 1 cup of espresso), (for
preparing 2 cups of espresso) or the button (for preparing
Americano). The selected button will light up, the other buttons will
turn off except for the button .
3. The coffee machine will automatically start the grinding, dosing,
tamping and dispensing process.
4. Once the coffee dispensing process is complete, you will hear
asound alert, the button will briefly blink, indicating that the
coffee machine is heating up to operating temperature. Once the
control panel lights up, the coffee machine is ready to make another
coffee.
• Preparing 2 cups of espresso involves two consecutive preparations of
1 cup of espresso. Do not remove the cup from under the brewing head
until the preparation of the second cup is complete.