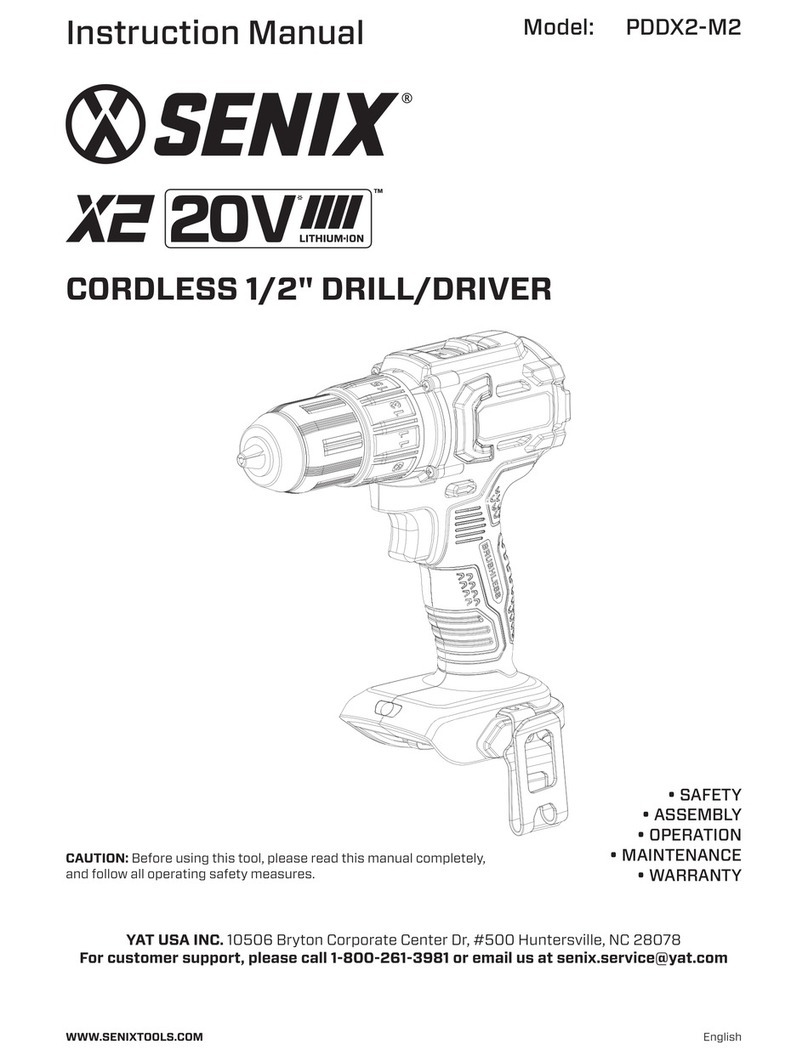
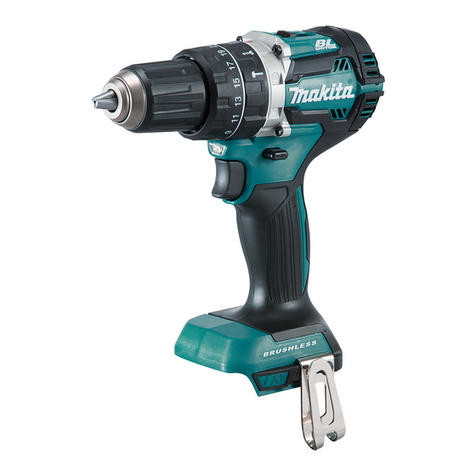
Senix PDHX2-M2 User manual

EnglishWWW.SENIXTOOLS.COM
CORDLESS 1/2" HAMMER DRILL/DRIVER
• SAFETY
• ASSEMBLY
• OPERATION
• MAINTENANCE
• WARRANTY
CAUTION: Before using this tool, please read this manual completely,
and follow all operating safety measures.
Instruction Manual
YAT USA INC. 10506 Bryton Corporate Center Dr, #500 Huntersville, NC 28078
For customer support, please call 1-800-261-3981 or email us at senix.service@yat.com
Model: PDHX2-M2

EN - 2 WWW.SENIXTOOLS.COM
TABLE OF CONTENTS
SAFETY & INTERNATIONAL SYMBOLS..............2
SAFETY INSTRUCTIONS.........................................3
KNOW YOUR UNIT.....................................................7
SPECIFICATIONS*.....................................................8
ASSEMBLY...................................................................8
OPERATION................................................................10
MAINTENANCE.........................................................13
TROUBLESHOOTING..............................................15
WARRANTY................................................................16
SAFETY &
INTERNATIONAL
SYMBOLS
Explanation of Safety & International Symbols
describes safety and international symbols
and pictographs that may appear on this
product. Read the operator’s manual for
complete safety, assembly, operating and
maintenance and repair information.
Caution / Warning.
To reduce the risk of injury, user
must read instruction manual.
Wear eye protection.
Wear a dust mask.
Wear safety footwear.
Wear protective gloves.
Do not dispose of battery packs in
rivers or immerse in water.
Do not dispose of battery packs in
fire. They will explode and cause
injury.
Use the battery in a maximum tem-
perature of 122°F (50°C).
Max 122°F
Do not disassemble, crush, heat
above 212°F (100°C); Never expose
the battery to microwaves or high
pressures.
Keep bystanders a safe distance
away from the work area.
Indoor use only. Only use battery
charger indoors.

3 - EN
WWW.SENIXTOOLS.COM
SAFETY INSTRUCTIONS
GENERAL POWER TOOL
SAFETY WARNINGS
WARNING!
Read all safety warnings, instructions,
illustrations and specifications, provided with
this power tool. Failure to follow all instructions
listed below may result in electric shock, fire
and/or serious injury.
Save all warnings and instructions for future
reference.
The term "power tool" in the warnings refers
to your mains-operated (corded) power tool or
battery-operated (cordless) power tool.
1. Work Area Safety
a. Keep work area clean and well lit. Cluttered
or dark areas invite accidents.
b. Do not operate power tools in explosive at-
mospheres, such as in the presence of flam-
mable liquids, gases or dust. Power tools
create sparks which may ignite the dust or
fumes.
c. Keep children and bystanders away while op-
erating a power tool. Distractions can cause
you to lose control.
2. Electrical Safety
a. Do not expose power tools to rain or wet
conditions. Water entering a power tool will
increase the risk of electric shock.
3. Personal Safety
a. Stay alert, watch what you are doing and use
common sense when operating a power tool.
Do not use a power tool while you are tired
or under the influence of drugs, alcohol or
medication. A moment of inattention while
operating power tools may result in serious
personal injury.
b. Use personal protective equipment. Always
wear eye protection. Protective equipment
such as a dust mask, non-skid safety shoes,
hard hat or hearing protection used for ap-
propriate conditions will reduce personal
injuries.
c. Prevent unintentional starting. Ensure the
switch is in the off position before connect-
ing to power source and/or battery pack,
picking up or carrying the tool. Carrying
power tools with your finger on the switch or
energizing power tools that have the switch
on invites accidents.
d. Remove any adjusting key or wrench before
turning the power tool on. A wrench or a key
left attached to a rotating part of the power
tool may result in personal injury.
e. Do not overreach. Keep proper footing and
balance at all times. This enables better
control of the power tool in unexpected sit-
uations.
f. Dress properly. Do not wear loose clothing
or jewelry. Keep your hair and clothing away
from moving parts. Loose clothes, jewelry or
long hair can be caught in moving parts.
g. If devices are provided for the connection of
dust extraction and collection facilities, en-
sure these are connected and properly used.
Use of dust collection can reduce dust-relat-
ed hazards.
h. Do not let familiarity gained from frequent
use of tools allow you to become complacent
and ignore tool safety principles. A careless
action can cause severe injury within a frac-
tion of a second.
4. Power Tool Use And Care
a. Do not force the power tool. Use the correct
power tool for your application. The correct
power tool will do the job better and safer at
the rate for which it was designed.
b. Do not use the power tool if the switch does
not turn it on and off. Any power tool that
cannot be controlled with the switch is dan-
gerous and must be repaired.
c. Disconnect the plug from the power source
and/or remove the battery pack, if detach-
able, from the power tool before making any
adjustments, changing accessories, or stor-
ing power tools. Such preventive safety mea-
sures reduce the risk of starting the power
tool accidentally.
d. Store idle power tools out of the reach of
children and do not allow persons unfamiliar
with the power tool or these instructions to
operate the power tool. Power tools are dan-
gerous in the hands of untrained users.
e. Maintain power tools and accessories.
Check for misalignment or binding of mov-
ing parts, breakage of parts and any other
condition that may affect the power tool’s
operation. If damaged, have the power tool
repaired before use. Many accidents are
caused by poorly maintained power tools.
f. Keep cutting tools sharp and clean. Properly
maintained cutting tools with sharp cutting
edges are less likely to bind and are easier
to control.
g. Use the power tool, accessories and tool bits

EN - 4 WWW.SENIXTOOLS.COM
SAFETY WARNINGS FOR
DRILL
1. Safety Instructions For All Operations
a. Hold the power tool by insulated gripping
surfaces when performing an operation
where the cutting accessory or fasteners
may contact hidden wiring. Cutting acces-
sory or fasteners contacting a "live" wire
may make exposed metal parts of the pow-
er tool "live" and could give the operator an
electric shock.
2. Safety Instructions When Using Long Drill
Bits
a. Never operate at higher speed than the
maximum speed rating of the drill bit. At
higher speeds, the bit is likely to bend if
allowed to rotate freely without contacting
the workpiece, resulting in personal injury.
b. Always start drilling at low speed and with
the bit tip in contact with the workpiece.
At higher speeds, the bit is likely to bend if
allowed to rotate freely without contacting
the workpiece, resulting in personal injury.
c. Apply pressure only in direct line with the
bit and do not apply excessive pressure.
Bits can bend and cause breakage or loss
of control, resulting in personal injury.
3. Dust/Chip Extraction
Dust from materials such as lead-containing
coatings, some wood types, minerals
and metal can be harmful to one’s health.
Touching or breathing in the dust can cause
allergic reactions and/ or lead to respiratory
infections of the user or bystanders. Certain
dust, such as oak or beech dust, is considered
carcinogenic, especially in connection with
wood-treatment additives (chromate, wood
preservative). Materials containing asbestos
may only be worked on by specialists.
a. Ensure the workplace is properly ventilated
at all times.
b. Wearing a P2 filter-class respirator is rec-
ommended while working in a dusty envi-
ronment.
c. Observe the relevant regulations in your
country for the materials to be worked on.
d. Avoid dust accumulation at the workplace.
Dust can easily ignite.
ADDITIONAL SAFETY
etc. in accordance with these instructions,
taking into account the working conditions
and the work to be performed. Use of the
power tool for operations different from
those intended could result in a hazardous
situation.
h. Keep handles and grasping surfaces dry,
clean and free from oil and grease. Slippery
handles and grasping surfaces do not allow
for safe handling and control of the tool in
unexpected situations.
5. Battery Tool Use And Care
a. Recharge only with the charger specified by
the manufacturer. A charger that is suitable
for one type of battery pack may create a risk
of fire when used with another battery pack.
b. Use power tools only with specifically des-
ignated battery packs. Use of any other bat-
tery packs may create a risk of injury and fire.
c. When battery pack is not in use, keep it away
from other metal objects, like paper clips,
coins, keys, nails, screws or other small met-
al objects, that can make a connection from
one terminal to another. Shorting the battery
terminals together may cause burns or a fire.
d. Under abusive conditions, liquid may be
ejected from the battery; avoid contact. If
contact accidentally occurs, flush with water.
If liquid contacts eyes, seek additional medi-
cal help. Liquid ejected from the battery may
cause irritation or burns.
e. Do not use a battery pack or tool that is dam-
aged or modified. Damaged or modified bat-
teries may exhibit unpredictable behaviour
resulting in fire, explosion or risk of injury.
f. Do not expose a battery pack or tool to fire
or excessive temperature. Exposure to fire
or temperature above 266°F(130 °C) may
cause explosion.
g. Follow all charging instructions and do not
charge the battery pack or tool outside the
temperature range specified in the instruc-
tions. Charging improperly or at tempera-
tures outside the specified range may dam-
age the battery and increase the risk of fire.
6. Service
a. Have your power tool serviced by a qual-
ified repair person using only identical
replacement parts. This will ensure that the
safety of the power tool is maintained.
b. Never service damaged battery packs. Ser-
vice of battery packs should only be per-
formed by the manufacturer or authorized
service providers.

5 - EN
WWW.SENIXTOOLS.COM
INFORMATION FOR DRILL
a. Secure the workpiece. A workpiece
clamped with clamping devices or in a vice
is held more securely than by hand.
b. Always wait until the power tool has come
to a complete stop before placing it down.
The drill or driving bit can jam and cause
you to lose control of the power tool.
c. Switch the power tool off immediately if
the drill or driving bit becomes blocked. Be
prepared for high torque reactions which
cause kickback. The drill or driving bit be-
comes blocked when it becomes jammed
in the workpiece or when the power tool
becomes overloaded.
d. Use suitable detectors to determine if
there are hidden supply lines or contact the
local utility company for assistance. Con-
tact with electric cables can cause fire and
electric shock. Damaging gas lines can lead
to explosion. Breaking water pipes causes
property damage.
e. Hold the power tool securely. When tight-
ening and loosening screws be prepared
for temporarily high torque reactions.
f. In case of damage or improper use of the
battery, vapors may be emitted. The battery
can be set aflame or explode. Ensure the
area is well ventilated and seek medical
attention should you experience any ad-
verse effects. The vapors may irritate the
respiratory system.
g. Do not open the battery. There is a risk of
short-circuiting.
h. The battery can be damaged by pointed
objects such as nails or screwdrivers or by
force applied externally. An internal short
circuit may occur, causing the battery to
burn, smoke, explode or overheat.
i. Only use the battery with products from the
manufacturer. This is the only way in which
you can protect the battery against dan-
gerous overload.
SAFETY WARNING FOR
BATTERY PACK AND
BATTERY CHARGER
• Recharge only with the charger specified
by the manufacturer. A charger that is
suitable for one type of battery pack may
create a risk of fire when used with another
battery pack.
• Use appliances only with specifically des-
ignated battery packs. Use of any other
battery packs may create a risk of injury
and fire.
WARNING!
Use only with SENIX X2 batteries: B20X2 /
B25X2 / B40X2 / B50X2.
• When battery pack is not in use, keep it
away from other metal objects, like paper
clips, coins, keys, nails, screws or oth-
er small metal objects, that can make a
connection from one terminal to another.
Shorting the battery terminals together
may cause burns or a fire.
• Under abusive conditions, liquid may be
ejected from the battery; avoid contact.
If contact accidentally occurs, flush with
water. If liquid contacts eyes, additionally
seek medical help. Liquid ejected from the
battery may cause irritation or burns. (This
advice is considered correct for conven-
tional NiMh, NiCd, lead acid and lithium-ion
cell types. If this advice is incorrect for a
cell design that differs from these, then the
correct advice may be substituted.)
• Do not use a battery pack or charger that
is damaged or modified. Damaged or mod-
ified batteries may exhibit unpredictable
behavior resulting in fire, explosion or risk
of injury.
• Do not expose a battery pack or charger to
fire or excessive temperature. Exposure to
fire or temperature above 266°F(130°C)
may cause explosion.
• Follow all charging instructions and do not
charge the battery pack or product out-
side of the temperature range specified in
the instructions. Charging improperly or
at temperatures outside of the specified
range may damage the battery and in-
crease the risk of fire.
• Do not modify or attempt to repair the
product or the battery pack (as applicable)
except as indicated in the instructions for
use and care.

EN - 6 WWW.SENIXTOOLS.COM
VIBRATION + NOISE
REDUCTION
To reduce the impact of noise and vibration
emission, limit the time of operation, use low-
vibration and low-noise operating modes as
well as wear personal protective equipment.
Take the following points into account to
minimize the vibration and noise exposure
risks.
• Only use the product as intended by its
design and these instructions.
• Ensure that the product is in good condi-
tion and well maintained.
• Use correct attachments for the product
and ensure they are in good condition.
• Keep tight grip on the handles/grip surface.
• Maintain this product in accordance with
these instructions and keep it well lubricat-
ed (where appropriate).
• Plan your work schedule to spread any high
vibration tool use across a longer period of
time.
EMERGENCY
Familiarize yourself with the use of this
product by means of this instruction manual.
Memorize the safety directions and follow
them to the letter. This will help to prevent
risks and hazards.
• Always be alert when using this product,
so that you can recognize and handle risks
early. Fast intervention can prevent serious
injury and damage to property.
• Switch off the product and remove the bat-
tery pack if there are malfunctions. Have
the product checked by a qualified profes-
sional and repaired, if necessary, before
you operate it again.
INTENDED USE
This 20V max cordless hammer drill/driver
is intended for drilling in wood and metal and
masonry materials with drill bits and driving
screws into wood and drywall with screwdriver
bits. Do not use it for other purposes.

7 - EN
WWW.SENIXTOOLS.COM
KNOW YOUR UNIT
1
2
3
4
5
6
7
12
11
10
13
8
9
APPLICATIONS
Model: PDHX2-M2
As a cordless hammer drill/driver:
Drilling in wood, metal products and masonry
with drill bits;
Driving screws into wood, metal and drywall
with screwdriver bits.
1 Speed Selector
2 Function Selector
3 Torque Ring
4 Chuck
5 Jaw
6 Bit (Not included)
7 Variable Speed
8 Work Light
9 Release Button
10 Battery Pack
11 Belt Clip
12 Handle
13 Direction Selector

EN - 8 WWW.SENIXTOOLS.COM
SPECIFICATIONS*
Model PDHX2-M2
Motor Type Brushless
Input Voltage 9Š90D[
Max Torque 540 in-lbs (61 Nm)
No Load Speed 0-600 / 0-2000 RPM
Impacts per Minute 0-10200 / 0-34000
IPM
Chuck Size 1/2"
Chuck Type 1/2" Keyless,
Ratcheting Chuck
Drilling Capacity Steel: 1/2"
Wood: 1-1/2"
Masonry: 1/2"
Variable Speed 2 Speed Gearbox
Weight 2.8 lbs
Forward and Reverse Switch
LED Light
Battery Model B20X2
Rated Voltage 18 V Š(20 V Max*)
Rated Capacity 2.0 Ah
Weight 0.89 lbs
Charger Model CHX2
Rated Input 100 V - 240 V
~ 50 Hz / 60 Hz
Rated Output 21 V, 2 A
Charging Time
(with 2.0 Ah battery) 65 min
Protection class
(for charger) / II
Weight 0.75 lbs
*20V Max battery, maximum initial battery
voltage (measured without a workload) is 20V.
The nominal voltage is 18V.
ASSEMBLY
1. Unpack all parts and lay them on a flat, sta-
ble surface:
2. Remove all packing materials and shipping
devices, if applicable.
3. The scope of delivery varies depending on
the country and purchased variant:
Model of PDHX2-M2
• Hammer drill x1
• Battery Pack x1
• Charger x1
• Storage bag x1
• Belt clip x1
• Instruction manual x1
4. If you find that parts are missing or show
damage do not use the product and con-
tact your dealer. Using an incomplete or
damaged product represents a hazard to
people and property.
5. Ensure that you have all the accessories
and tools needed for assembly and oper-
ation. This also includes suitable personal
protective equipment.
WARNING:
Wear protective gloves for this as-
sembly work and always lay the
product on a flat and stable surface
while assembling. Follow the as-
sembly instructions step-by-step
and use the pictures provided as a
visual guide to easily assemble the
product! Do not insert the battery
pack before the power tool is com-
pletely assembled or adjusted!

9 - EN
WWW.SENIXTOOLS.COM
BELT CLIP
Fix the belt clip to either side of tool by screw.
Make sure the belt clip is firmly installed so
that it can support the weight of the tool.
Belt Clip
Screw
BIT
WARNING:
Observe the technical requirements of this
product (see section “SPECIFICATIONS”) when
purchasing and using bit. Always use special
bits according to the work to be performed.
The chuck and the bit can be very hot after
working, do not assemble/disassemble them
before cooling down.
To install:
Turn the chuck clockwise to open the jaw.
Align and insert the bit as far as into the jaw.
Then turn the chuck counterclockwise so that
the jaws evenly secure onto the bit. Continue
tightening until the chuck begins to ratchet
onto the bit.
To remove:
Turn the chuck counterclockwise to open the
jaw and pull the bit out of the jaw.
NOTE:
Make sure the bit is fixed firmly and will never
come out before use.
BATTERY PACK
NOTE:
Prior to installation, lock the switch trigger by
moving the direction selector to the center
lock position to avoid unintentional start.
To install:
Align and slide the battery pack to the battery
foot until it is locked in place.
To remove:
Press the release button on battery pack and
slide the battery pack out.
OPERATION

EN - 10 WWW.SENIXTOOLS.COM
OPERATION
WARNING:
Always wear eye, hearing, hand protection to
reduce the risk of injury when operating the
tool. Keep all parts of your body away from the
rotating bit.
RUNNING DIRECTION
The motor runs forward or backward for
driving the bit in or out. It is controlled by the
direction selector.
WARNING:
Do not change direction of rotation while
chuck is rotating.
Forward Reverse
Mode Application
Forward Driving screws or drilling with drill
bits
Reverse Backing out screws or drill bits
Center
Lock Locking the trigger
NOTE:
When changing bits or when the tool is not
in use, the direction selector shall be kept in
“center lock" position to avoid unintended
start.
FUNCTION
Rotate the mode selector so the arrow is
pointing to desire mode.
Mode Setting Application
Driving Driving screws,
bolts.
Drilling Drilling in wood
and metal.
Impact
Drilling
Drilling in
masonry.
TORQUE
Select a suitable torque value from 1-19 when
in Driving mode on the torque ring. Rotate the
clutch until the arrow points to the desired
torque setting. The driving depth of the
fastener will be limited when the preset torque
is reached.

11 - EN
WWW.SENIXTOOLS.COM
NOTE:
The torque required depends on the type and
size of the fastener to be driven, as well as the
material to be driven into.
SPEED SETTINGS
Mode Setting Application
Low 1 0-600 RPM
High 2 0-2,000 RPM
The tool reaches its highest speed when the
selector is set to the "2" setting.
WARNING:
Only switch the speed selector when the
power tool is completely stopped.
SWITCHING ON/OFF
1. Press the trigger to switch on the power
tool. It will stop when the trigger is released.
2. Applying more pressure to the trigger leads
to faster speeds under current speed set-
ting.
3. The work light automatically turns on when
trigger is pressed and turns off a few sec-
onds after the tool stops.
HOW TO CHARGE THE
BATTERY PACK
WARNING:
This Lithium-Ion battery pack is shipped
partially charged. Fully charge the battery
pack before using it for the first time.
NOTE:
Charge the battery at an ambient temperature
range of 32°F - 104°F (0°C - 40°C).
1. Charge the Lithium-Ion battery pack only
with the correct charger.
2. Connect the charger to a power supply, the
light indicator of the charger turns red.
3. Align the raised ribs of the battery pack
with the slot in the charger.
4. Insert the battery pack into the charger, the
light indicator of the charger turns green
and it flashes.
5. The charger will communicate with the bat-
tery pack to evaluate the condition of the
battery pack.
6. It is fully charged when the four lights of the
battery turn on. Disconnect the power sup-

EN - 12 WWW.SENIXTOOLS.COM
ply from the charger. Remove battery pack
from the charger.
CHARGING INDICATOR
Press the light button on the battery pack to
check whether it needs to charge.
Light Button Indicator
Lights
Status
Fully Lit 2ŕ Blinking
75% - 100%
50% - 75%
25% - 50%
5% - 25%
< 5%
(needs to be
charged)
WARNING:
A malfunction may have occurred if all four
lights are blinking simultaneously.
OVERHEAT PROTECTION
When the tool/battery is overheated, the tool
stops automatically. In this situation, let the
power tool/battery cool before turning the tool
on again.
OVERDISCHARGE
PROTECTION
When the battery capacity is not enough, the
tool stops automatically. In this case, remove
the battery from the tool and charge the
battery.
PRACTICAL ADVICE
1. General
a. Ensure the tool is fitted with a suitable bit
for current work and the direction selector
is at center lock position before start.
b. Always keep the product perpendicular to
the work area. Otherwise, bit is more likely
to slip or be jammed and cause damage to
the tool.
c. Place the power tool in a start position first
and then switch the product on.
d. The feeding force and running speed
depends on tool characteristics and the
work material. Excessive feeding force
will overload the power tool and increase
the risk of losing control. Ask a power tool
specialist for advice if necessary.
e. If the tool gets stuck in work area, switch
off and try to perpendicularly draw it
out with slight force to avoid damage.
If this does not work, switch to reverse
mode, run the tool at a slow speed and
perpendicularly draw out with slight force.
f. Check the power tool and its clamping
status regularly during work. Refit or
replace it if necessary.
2. Wood/Metal Drilling
a. Attach a bit designed for drilling and set the
function selector to “ ”.
b. Pre-drill larger holes with a small diameter
drill bit in advance for a easier operation
and better result.
c. In order to prevent the bit from slipping,
punch a point beforehand especially when
drilling metals.
d. Start with a low speed. Gradually increase
speed as drill bit bites into material.

13 - EN
WWW.SENIXTOOLS.COM
e. When drilling through holes, place a block
or wood behind the workpiece to prevent
ragged edges on the back side of the hole.
f. If necessary, use a cooling lubricant when
drilling metal.
3. Screw Driving
a. Attach a screwdriver bit and set the
function selector to “ “.
b. Select a proper torque according to the
type and size of screw and material work
area.
c. Pre-drill a hole of proper diameter and
depth before driving big screws into work
area.
d. Hold the tool perpendicular to the screw
head and keep the bit tip well fitted into the
screw recess, then switch on the tool.
e. Start at a low speed. Gradually increase
speed as the screw is driven in.
f. Remove a jammed screw in the reverse
mode.
4. Masonry Drilling
a. Install a specialty bit designed for masonry
drilling and set the function selector to “
“.
b. Drill evenly keeping a uniform force on the
drill, don’t force too much otherwise some
brittle materials are likely to be cracked.
c. If you are experiencing a smooth,even flow
of dust, that indicates a good drill rate is
applied.
d. Occasionally pull the bit out to clean dust
and chips if you are drilling a deep bore hole
into masonry.
MAINTENANCE
WARNING:
Only perform cleaning and maintenance work
according to these instructions!
All further works must be performed by a
qualified specialist!
WARNING:
TO PREVENT SERIOUS INJURY FROM
ACCIDENTAL OPERATION: Make sure the
trigger is locked and battery pack is removed
before performing any procedure in this
section.
TO PREVENT SERIOUS INJURY FROM TOOL
FAILURE: Do not use damaged equipment. If
abnormal noise or vibration occurs, have the
problem corrected before further use.
There are no user-serviceable parts in your
power tool.
If any of following conditions are found, stop
using it and send it to the authorized service
center for repair.
• leaking, swollen, or cracked battery pack
• loose hardware
• misalignment or binding of accessories.
• cracked or broken parts.
• any other condition that may affect its safe
operation.
CLEANING
1. Clean dust and debris from air vents.
2. Keep handle clean, dry and free of oil or
grease.
3. Make sure the chuck is not clogged with
debris.
4. Remove stubborn dirt from housing with
high pressure air (max. 3 bar).
NOTE:
Do not use chemical, alkaline, abrasive or
other aggressive detergents or disinfectants
to clean this product as they might be harmful
to its surfaces.
TRANSPORTATION
1. Ensure the direction selector is in the cen-
ter lock position.
2. Only carry by its handle.
3. Protect from any heavy impact or strong
vibrations which may occur during trans-
portation in vehicles.
4. Secure to prevent it from slipping or falling
over.
STORAGE
1. Clean thoroughly as described above.
2. Store in a dark, dry, frost-free and well-ven-
tilated area that is inaccessible to children.
Store the battery within a temperature
range of 32°F - 77°F (0°C - 25°C).
3. Use original package for storage or cover
with a suitable cloth to protect it against
dust.

EN - 14 WWW.SENIXTOOLS.COM
NOTE:
To prolong battery life, store the battery
pack separately from the tool in a 30%-50%
charged condition. It's recommended to have
your battery pack charged at least every 6
months.
DISPOSAL
Waste product should not be disposed of with
household waste. Please recycle where
facilities exist.
Check with your local authority or retailer for
recycling advice.
Debris or dust may produced by the tool
during operation, users should clean these
objects to protect environment.
Electrical products should not be
discarded with household products.
Used electrical products must be
collected separately and disposed
of at collection points provided for
this purpose. Talk with your local
authorities or dealer for advice on
recycling.

15 - EN
WWW.SENIXTOOLS.COM
TROUBLESHOOTING
6XVSHFWHGPDOIXQFWLRQVDUHRIWHQGXHWRFDXVHVWKDWWKHXVHUVFDQŖ[WKHPVHOYHV7KHUHIRUH
check the product using this section. In most cases the problem can be solved quickly.
PROBLEM POSSIBLE CAUSE SOLUTION
Product does not
start
Direction selector at center locking
position
Switch the direction selector to
proper side
Battery pack not properly attached Attach properly
Battery pack discharged Charge the battery pack
Product does not
reach full power
Battery pack capacity too low Charge the battery pack
Battery pack reaches its life cycle Replace with new battery pack
Incorrect torque setting Adjust to a proper torque setting
Unsatisfactory
result
Drill/screwdriver bit is dull/damaged Replace with new one
Drill/screwdriver bit is not suitable for
intended operation Use proper drill/screwdriver bit.

EnglishWWW.SENIXTOOLS.COM
WARRANTY
SENIX TOOLS LIMITED WARRANTY
FOR FIVE YEARS from the date of original purchase this product is warranted against defects in material or
workmanship. WITH PROOF OF ORIGINAL PURCHASE a defective product will receive free repair. If the product
cannot be repaired it will be replaced free of charge.
For details to obtain warranty coverage, visit www.senixtools.com, email senix.service@yat.com,
or call 1-800-261-3981.
• This warranty does not cover repairs necessary due to product accident or abuse, or failure to operate or
maintain the product according to all supplied instructions.
• This warranty does not cover an included battery pack or charger, which offer three-year, replacement-only
coverage. See battery pack or charger instruction manuals for complete warranty details.
• This warranty does not cover expendable items that can wear out from normal use within the warranty
period, including but not limited to drill bits, cutting blades and trimmer spool or line.
• This warranty does not apply to damage resulting from repairs to the product made or attempted by other
than SENIX authorized agents.
• This warranty does not cover the cost of mailing or transporting the power tool to receive warranty
coverage.
• The warranty is void if the product has been used for commercial, professional, or rental service purposes.
• The warranty applies to the original retail purchaser and is not transferable.
• Proof of purchase is required to obtain warranty coverage.
THIS WARRANTY IS GIVEN IN LIEU OF ALL OTHERS, INCLUDING THE IMPLIED WARRANTY OF MERCHANTABILITY
AND FITNESS FOR A PARTICULAR PURPOSE, AND EXCLUDES ALL INCIDENTAL OR CONSEQUENTIAL DAMAGE.
Some states do not allow limitations on how long an implied warranty lasts or the exclusion or limitation of incidental
RUFRQVHTXHQWLDOGDPDJHVVRWKHVHOLPLWDWLRQVPD\QRWDSSO\WR\RX7KLVZDUUDQW\JLYHV\RXVSHFLŖFOHJDOULJKWV
and you may have other rights which vary in certain states or provinces.
NOTE: Battery pack warranty voided if the battery pack is tampered with in any way. SENIX is not responsible for
any injury caused by tampering and may prosecute warranty fraud to the fullest extent permitted by law.
90-DAY MONEY-BACK GUARANTEE
,I IRU DQ\ UHDVRQ ZLWKLQ GD\V IURP WKH GDWH RI RULJLQDO SXUFKDVH \RX DUH QRW FRPSOHWHO\ VDWLVŖHG ZLWK WKH
performance of this SENIX product, you can return it with the original sales receipt for a full refund.
Latin America: This warranty does not apply to products sold in Latin America. For products sold in Latin America,
VHH WKH FRXQWU\VSHFLŖF ZDUUDQW\ LQIRUPDWLRQ FRQWDLQHG LQ WKH SDFNDJLQJ FDOO WKH UHWDLOHU IURP ZKLFK LW ZDV
purchased, or visit the website for warranty information.
Free warning label replacement: If your warning labels become illegible or are missing, call 1-800-261-3981 for a
free replacement.
REGISTER ONLINE - www.senixtools.com/pages/product-registration
Thank you for your purchase! Register your product now for:
Warranty Service:5HJLVWHULQJ\RXUSURGXFWZLOOKHOS\RXREWDLQPRUHHŘFLHQWZDUUDQW\VHUYLFHLQFDVHRIDSUREOHP
with your product.
&RQŖUPDWLRQRI2ZQHUVKLS,QFDVHRIDQLQVXUDQFHORVVVXFKDVŖUHŗRRGRUWKHIW\RXURZQHUVKLSUHJLVWUDWLRQ
will serve as proof of purchase.
For your safety:5HJLVWHULQJ\RXUSURGXFWZLOODOORZXVWRFRQWDFW\RXLQWKHXQOLNHO\HYHQWDVDIHW\QRWLŖFDWLRQLV
required under the Federal Consumer Safety Act.
YAT USA INC. 10506 Bryton Corporate Center Dr, #500 Huntersville, NC 28078

EspañolWWW.SENIXTOOLS.COM
• SEGURIDAD
• ENSAMBLAJE
• OPERACIÓN
• MANTENIMIENTO
• GARANTÍA
PRECAUCIÓN: Antes de usar esta herramienta, lea
completamente este manual y siga todas las medidas de
seguridad de operación.
Manual de instrucciones
YAT USA INC. 10506 Bryton Corporate Center Dr, #500 Huntersville, NC 28078
Para servicio al cliente en EE.UU., por favor llame al 1-800-261-3981 o envíenos un correo
electrónico a senix.service@yat.com
TALADRO DE PERCUSIÓN/DESTORNILLADOR DE
1/2" (13 mm) INALÁMBRICO
Modelo: PDHX2-M2

ES - 18 WWW.SENIXTOOLS.COM
ÍNDICE
SÍMBOLOS INTERNACIONALES Y DE SEGURI-
DAD...............................................................................18
INSTRUCCIONES DE SEGURIDAD.....................19
CONOZCA SU UNIDAD..........................................24
ESPECIFICACIONES*............................................25
ENSAMBLAJE..........................................................25
OPERACIÓN.............................................................. 27
MANTENIMIENTO....................................................31
SOLUCIÓN DE PROBLEMAS...............................32
GARANTÍA .................................................................33
SEGURIDAD Y SÍMBOLOS
INTERNACIONALES
Este manual del operador describe la seguri-
dad y los símbolos y pictogramas internacio-
nales que pueden aparecer en este producto.
Lea el manual del operador para obtener infor-
mación completa sobre seguridad, montaje,
operación y mantenimiento y reparación.
Precaución / Advertencia.
Para reducir el riesgo de lesiones,
el usuario debe leer y entender el
manual de instrucciones.
Use protección para los ojos.
Use una mascarilla antipolvo.
Use calzado de seguridad.
Use guantes de protección.
No deseche los paquetes de ba-
terías en los ríos ni los sumerja en
agua.
No arroje los paquetes de baterías
al fuego. Explotarán y causarán
lesiones.
Utilice la batería en una temperatura
máxima de 50°C (122°F).
Max 50°C
No desensamble, aplaste o caliente
por encima de los 100°C (212°F).
Nunca exponga la batería a mi-
croondas o altas presiones.
Mantenga a los transeúntes a una
distancia segura de la zona de tra-
bajo.
Para uso solo en interiores. Utilice
el cargador de batería únicamente
en interiores.

19 - ESWWW.SENIXTOOLS.COM
INSTRUCCIONES DE
SEGURIDAD
ADVERTENCIAS DE
SEGURIDAD GENERALES
PARA HERRAMIENTAS
ELÉCTRICAS
¡ADVERTENCIA!
Lea todas las advertencias de seguridad, ins-
WUXFFLRQHVLOXVWUDFLRQHV\HVSHFLŖFDFLRQHV
que se ofrecen con esta herramienta eléctrica.
Si no se cumple con todas las instrucciones
mencionadas a continuación, se pueden
producir descargas eléctricas, incendios y/o
lesiones graves.
Guarde todas las advertencias e instrucciones
para su consulta futura.
El término "herramienta eléctrica" que apare-
ce en las advertencias se refiere a herramien-
tas alimentadas por la red eléctrica (con ca-
ble) o a herramientas alimentadas por batería
(sin cable).
1. Seguridad en el área de trabajo
a. Conserve el área de trabajo limpia y bien
iluminada. Las áreas desordenas invitan a
los accidentes.
b. No opere herramientas eléctricas en am-
bientes explosivos, como ante la presencia
de líquidos, gases o polvos inflamables. Las
herramientas eléctricas generan chispas
que pueden hacer arder el polvo o los vapo-
res.
c. Mantenga a los niños y espectadores ale-
jados mientras esté operando una herra-
mienta eléctrica. Las distracciones pueden
hacerle que pierda el control.
2. Seguridad eléctrica
a. No exponga las herramientas eléctricas a la
lluvia o a condiciones húmedas. El agua que
ingresa a una herramienta eléctrica aumen-
tará el riesgo de descarga eléctrica.
3. Seguridad personal
a. Manténgase alerta, preste atención a lo
que está haciendo y use el sentido común
cuando opere una herramienta eléctrica.
No utilice una herramienta eléctrica cuando
esté cansado o bajo la influencia de drogas,
alcohol o medicamentos. Un momento de
descuido durante la operación de herramien-
tas eléctricas puede provocar una lesión
personal seria.
b. Use los equipos de protección personal.
Use siempre protección para los ojos. Los
equipos de protección que utilice para las
condiciones adecuadas, como mascarillas
antipolvo, zapatos de seguridad antidesli-
zantes o protección auditiva, reducirán las
lesiones personales.
c. Evite arranques accidentales. Asegúrese
que el interruptor esté en la posición de OFF
(apagado) antes de conectar la fuente de
energía y/o el bloque de baterías, recoger
la herramienta o transportarla. Transportar
herramientas eléctricas con el dedo en el
interruptor o energizar herramientas eléc-
tricas con el interruptor encendido, invita a
accidentes.
d. Retire cualquier llave de ajuste antes de
encender la herramienta eléctrica. Una llave
que se haya dejado fijada a una parte gira-
toria de la herramienta eléctrica puede dar
como resultado una lesión personal.
e. No extienda el cuerpo en exceso. Mantenga
su posición de pie y su equilibrio en todo
momento. Esto permite un mejor control
de la herramienta eléctrica en situaciones
inesperadas.
f. Vístase correctamente. No use ropa suelta
ni joyas. Mantenga su cabello y ropa aleja-
dos de las piezas móviles. La ropa suelta, las
joyas o el cabello largo pueden atascarse en
las piezas móviles.
g. Si se suministran dispositivos para la cone-
xión de instalaciones de extracción y colec-
ción de polvo, asegúrese que estén conecta-
das y que se usen correctamente. El uso del
colector de polvo puede reducir los peligros
relacionados con el polvo.
h. Cuide que por la familiaridad obtenida con
el uso frecuente de herramientas no le haga
volverse complaciente y termine ignorando
los principios de seguridad de la herramien-
ta. Una acción descuidada puede llegar a
causar lesiones severas en una fracción de
segundo.
4. Uso y cuidado de la herramienta eléc-
trica
a. No fuerce la herramienta eléctrica. Use la
herramienta eléctrica para su aplicación. La
herramienta eléctrica correcta hará mejor y
más seguro el trabajo a la velocidad para la
que ha sido diseñada.
b. No use la herramienta eléctrica si el inte-
rruptor no lo enciende y apaga. Cualquier

ES - 20 WWW.SENIXTOOLS.COM
nados. El uso de cualquier otro paquete de
batería puede generar riesgo de lesiones e
incendio.
c. Cuando el paquete de batería no esté en uso,
manténgalo alejado de otros objetos me-
tálicos como clips, monedas, llaves, clavos,
tornillos u otros objetos pequeños de metal,
que puedan hacer una conexión entre una
terminal y otra. Un cortocircuito en las termi-
nales de la batería podría causar quemadu-
ras o incendios.
d. En condiciones extremas, el líquido podría
ser eyectado de la batería; en ese caso, evite
el contacto. Si hay contacto accidental, en-
juague con agua. Si el líquido entrara en los
ojos, busque ayuda médica. El líquido eyec-
tado de la batería puede causar irritación o
quemaduras.
e. No use el paquete de batería o la herramien-
ta si esté dañada o modificada. Las baterías
dañadas o modificadas pueden tener un
comportamiento impredecible que puede
resultar en incendios, explosiones o riesgo
de lesiones.
f. No exponga el paquete de batería o la herra-
mienta al fuego o a temperaturas excesivas.
La exposición al fuego o a temperaturas
superiores a 130°C (266°F) puede causar
explosiones.
g. Siga todas las instrucciones de carga y
no cargue el paquete de batería o la he-
rramienta fuera del rango de temperatura
especificado en las instrucciones. La carga
inadecuada o a temperaturas que excedan el
rango especificado puede dañar la batería e
incrementar el riesgo de incendio.
6. Servicio
a. Haga reparar su herramienta eléctrica con
un reparador calificado, utilizando solamente
piezas de repuesto idénticas. Esto asegurará
que se mantenga la seguridad de la herra-
mienta eléctrica.
a. Nunca mande paquetes de batería dañados
a mantenimiento. El mantenimiento o repa-
ración de los paquetes de baterías lo deben
realizar únicamente el fabricante o los pro-
veedores autorizados de servicio.
ADVERTENCIAS DE
SEGURIDAD PARA EL
TALADRO
1. Instrucciones de seguridad para todas las
herramienta eléctrica que no pueda ser con-
trolada con el interruptor es peligrosa y debe
repararse.
c. Desconecte el enchufe de la fuente de ener-
gía y/o retire el bloque de baterías, si es des-
montable, de la herramienta eléctrica antes
de hacer cualquier ajuste, cambiar acceso-
rios o guardar la herramienta eléctrica. Tales
medidas de seguridad preventivas reducen
el riesgo de que la herramienta eléctrica se
encienda accidentalmente.
d. Guarde las herramientas eléctricas inactivas
fuera del alcance de los niños y no permita
el uso de la herramienta eléctrica por parte
de personas que no estén familiarizadas con
esta o con sus instrucciones. Las herramien-
tas eléctricas son peligrosas en manos de
usuarios sin capacitación.
e. Mantenga las herramientas eléctricas y los
accesorios. Compruebe que no hayan piezas
móviles desalineadas, atoradas o rotas ni
ninguna otra condición que pueda afectar el
funcionamiento de la herramienta eléctrica.
Si se daña, repare la herramienta eléctrica
antes de usarla. Muchos accidentes son
causados por herramientas eléctricas con
mal mantenimiento.
f. Conserve limpias y afiladas las herramien-
tas de corte. Las herramientas de corte con
un mantenimiento adecuado son menos
propensas a trabarse y son más fáciles de
controlar.
g. Use la herramienta eléctrica, los accesorios
y las brocas de la herramienta, etc. en con-
formidad con estas instrucciones, tomando
en cuenta las condiciones del trabajo y la
tarea a realizar. El uso de la herramienta
eléctrica para operaciones distintas de las
previstas, podría dar como resultado una
situación peligrosa.
h. Mantenga las asas y las superficies de aga-
rre secas, limpias y sin aceite o grasa. Con
asas y superficies de agarre resbalosas,
no es posible tener un manejo seguro y un
control de la herramienta en situaciones
inesperadas.
5. Uso y cuidado de la herramienta de ba-
tería
a. Recargar solo con el cargador especificado
por el fabricante. Un cargador adecuado
para un tipo de paquete de batería podría
crear un riesgo de incendio si se usa con
otro paquete de batería distinto.
b. Use herramientas eléctricas solo con los
paquetes de batería específicamente desig-
Table of contents
Languages:
Other Senix Drill manuals
