SENKE SK125-22 User manual

T h e manual o f S K 1 2 5 - 2 2
Please study this manual carefully before using the motorcycle at your fist time.

HESHAN GUOJI NANLIAN MOTORCYCLE INDUSTRY CO.,LTD.
。
Thank you for choosing SENKE SK125-22 motorcycle. To ensure you a pleasure and safe
riding, please be sure to read this manual carefully before formal operation.
FOREWORD
This manual summarized the method of how to use and maintain the model correctly. If you can
follow the rules and guidelines of the manual strictly, then your motorcycle could be durable and keep
in good condition. The after-sales staff who received specialized training from qualified distribution
unit has accumulated rich experience; they will provide you excellent after-sales service with sincere
and warm attitude and complete tool equipment.
All the date、 pictures and specifications are of the latest products when this manual published.
Due to the continuous improvement and other changes of products, there maybe some discrepancies
with the actual condition. We reserve the right to appropriate changes at any time.

1
4
7
17
19
21
23
27
50
56
58
一、NOTICE OF USER
二、THE INSTALLATION OF SPARE PARTS
三、CONTROL PART
四、FUEL AND ENGINE OIL RECOMMENDATION
五、MOTORCYCLE RUMNING-IN
六、INSPECTION BEFORE RIDING
七、RIDING TIPS
八、INSPECTION AND MAINTENANCE
十、CLEANING AND MAINTENANCE
十一、TECHNICAL SPECIFICATION
CONTENT
九、TROUBLESHOOTING

1
一、NOTICE OF USER
Safety instruction for driver’s operation
Wear safety helmet
Loose, fancy clothing can be uncomfort
able and unsafe when riding your motorcycle
choose good quality motorcycle riding appar
el when riding your motorcycle.
Riding apparel
Inspection before riding
Motorcycle riding is of great fun and an exciting
sport. Motorcycle riding also requires that some extra
precautions be taken to ensure a safe riding, you must
obey the traffic rules and the following provisions.
Safe riding starts from wearing a safety helmet.
This is an important factor of driving motorcycle.
You must wear helmet that meets safety standard
when driving motorcycle.
Please read all the instructions in INSPECTION
BEFORE BIDING. In accordance with the driving
provisions will assure a safety riding for you and
passenger.
Be familiar with your motorcycle structure
Your riding skill and your mechanical knowledge
is the foundation for safe riding practices. We suggest
that you practice riding your motorcycle in a non-traffic
situation until you are thoroughly familiar with your
machine and its controls. Remember practice makes
perfect.
Don't refitting
Without manufacturer’s approve, any refit of
this model(e.g. adding the third tire) can lead to
unpredictable risk. To refit the model optionally
or remove the original device can not gurantee
the safety of driving and it is illegal. User must
comply with the using rules of vehicles from the
traffic administrative department.
2
Know your limits
Pay extra attention to safety in rainy days
Take special note in rainy days. Keep in mind
the braking distance of rainy day is twice as much
as sunny days. Stay off manhole cover、 painted
marks and greasy dirt when driving. Don’t take a
sudden turn while driving. Be very careful when
pass railways and bridges. Remember to keep a
safe distance from the motorcycle in front.
Don’t ever speeding. Whether speeding depends
on the ground conditions、weather and you own.
whenever in the familiar range driving can avoid the
accident.
Do not overload
The maximum load of this model is 150kg, it can
be hazardous if over loading and it will be difficult
to control the motorcycle when riding. Please
remember no over loading.
Swrial number location
The frame(VIN NO)and/or engine seri
ne serial numbers are used to register the mo
torcycle. The numbers will assist your dealer
to provide you better service when order spare
parts or entrust the special service.
Frame number
(VIN number)
Engine number
Frame number print on the stand pipe of the
frame, metal nameplate pin on the stand pipe of
the frame. Engine number print on the left side of
the crankcase.

3
Frame number(VIN number)
Engine number
About information of security
Read and observe this Manual carefully. These
terms such as “Warning”, “Caution” and “Notice”are
used to emphasize intensity of precaution. Please
study and understand their meanings thoroughly.
For warning information, in order to protect
you and other people’s safety as well as avoid
damaging your motorcycle, this precaution must
be read.
It is notice information; In order to extend
service life of your motorcycle and exert its
performance well, please carry out according to
notice information.
It can help you to use your motorcycle in best
of all condition based on its useful information.
“Warning”
“Caution”
“Notice”
Please write down the numbers blow for your
future reference.
4
4
1
2
3
4
5
6
7
8
9
二、THE INSTALLATION OF SPARE PARTS
Seat
Side cover
Turning lights
In-take tube
Rear brake pedal
Muffler
Rear brake panel
Front disc brake
1
2
3
4
5
6
7
8
9
Carburetor

5
10
11
12
13
14
15
16
17
Rearview mirror
Front light
Fuel tank
Fuel valve
Rear sprocket
Gearshift lever
Side stand
Center stand
10
11
12
13
14
15
16
17

6
Clutch lever Left handlebar switch Front brake lever
Throttle grip
Meter
Fuel tank lock
Right handlebar switch
18
20
19
21
22
23
24
18
19
20
21
22
23
24

7
三、CONTROL PART
KEY
This motorcycle is equipped with two
keys and please put one of them in the safe
place as the spare key.
IGNITION SWITCH
“ ”
The ignition switch has three positions:
(OFF) POSITION
The ignition circuit is on state of turning off and
the engine can’t be started now, the key can removed
from the ignition switch in this position.
“ ”
(ON)POSITION
The ignition circuit is connected and the
engine can be started. The key can not be
removed from the ignition switch in this posit
ion.
“ ”STEERING LOCK
To lock head steering, turn the steering
handleber all the way to the left,insert the
ignition switch key in the steering lock and
turn it clockwise.
!WARNING:
In the steering lock state, you can never
push the motorcycle or it will out of balance.

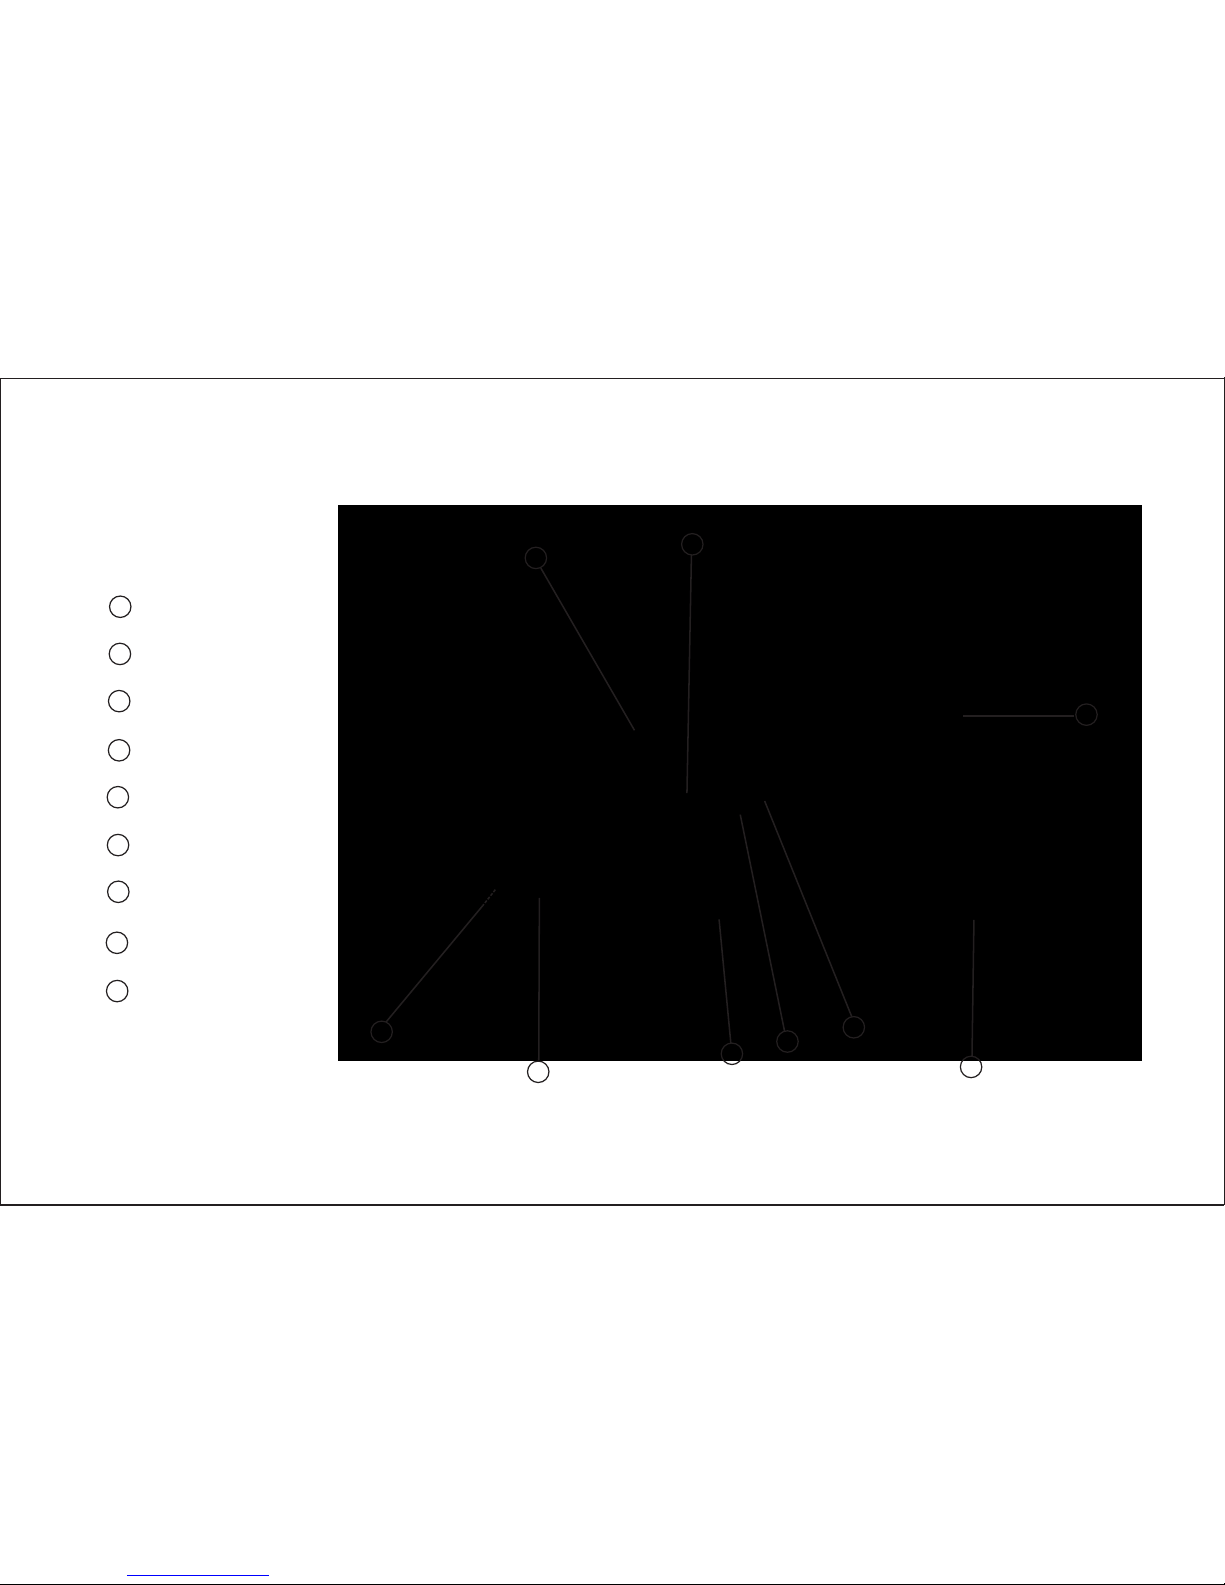
INSTRUMENT PANEL
Speedometer
①
8
1234567
8
9
10
11
12
The speed table indicates the current speed,
the unit is the number of kilometers per hour. When
the vehicle speed reaches 90km/h or more (red
pointer to 90 or more), speed meter will show a red
warning backlight, remind the driver to slow down
the running safety.
②
This meter can indicate the rotate speed
of the engine perminute. The red zone in the
tachometer is the most limit of the engine's
rotate speed, it will shorten the life of the engi
ne if it is continual rotate long time in this
zone, it should be avoid the finger of the
tachometer point to this red zone.
Tachometer
③Lrdicator light
When using the high beam and pressing
theovertaking button, this lamp lights up.
④Neutral indicator light
When this batton light, the motorcycle cou
ld park sately.
⑤Turn light indicator
When the turn signals are being operated
either to the right or to the left,the indicator will
flash at the same time.
9
⑦M
Key
Metric and inch display switching and time
key.Kmh metric, inch Mph.
⑧
This fuel level meter can indicate the fuel
in the fuel tank, it is full when the finger point to
the“F”position;it is empty when the finger
point to the“E”position and you need refueli
ng now.
R
⑨Gear indicator
The numeral in this indicator shows the
gear position,1,2,3,4,or5.The numeral disapp
ears as you shift back to neutral; NEUTRAL IN
DICATORLIGHT(green)will burn instead.
10
11
12 Oil level indicator
The total mileage and the taxi number switch.
Long press this button for 3 seconds to switch
time adjustment of ODO mode, when the time
display area flashing, press the button
for time adjustment.
10
7
TRIP mode for short-distance traffic counts, or
as fuel calculations long press 3 seconds may be
a few years on the meter to Zero.
Engine lubrication indicator
Area of show time
This meter show the current time now.
When the indicator appears flashing, remind
the replacement of oil kilometer number has been
reached, hold about 5 seconds to eliminate
flicker.
⑧
Key
⑥Odometer
The main display of the car running total mileage
accumulation.
!WARNING:
Please be careful when accelerate between
1st and 2nd gear as the indicator would point to the
red zone.
The red zone indicates the limit of engine speed
.If engine rotates in this zone, The engine will be
influenced.

①
Clutch grip
To start the engine or make a gear shifting,
press the grip to release the drive system and cut
off the clutch.
LEFT HANDLEBAR CONTROL SYSTEM
10
①
②
③
④
③
②
Dimmer switch
High beam/city beam operation
Moving the switch to the upper position
the headlight high beam and the blue indicator
light will be lit at the same time.Moving the
switch to the down position the headlight
lower beam and the blue indicator light will be
lit at the same time.
Turn signal operation
Moving the switch to the “ “ position will
flash the left turn sighal. Moving the switch to the
“ “ position will flash the right turn signal.
The indicator light will also flash intermittently.
④
Horn button
Press the button to sound the horn.
!WARNING:
When you want to change lanes or make
a turn, turn on the signal lights in advance.
And after a lane change, turn off the signal
light in time. Otherwise it may cause an
accident.
11
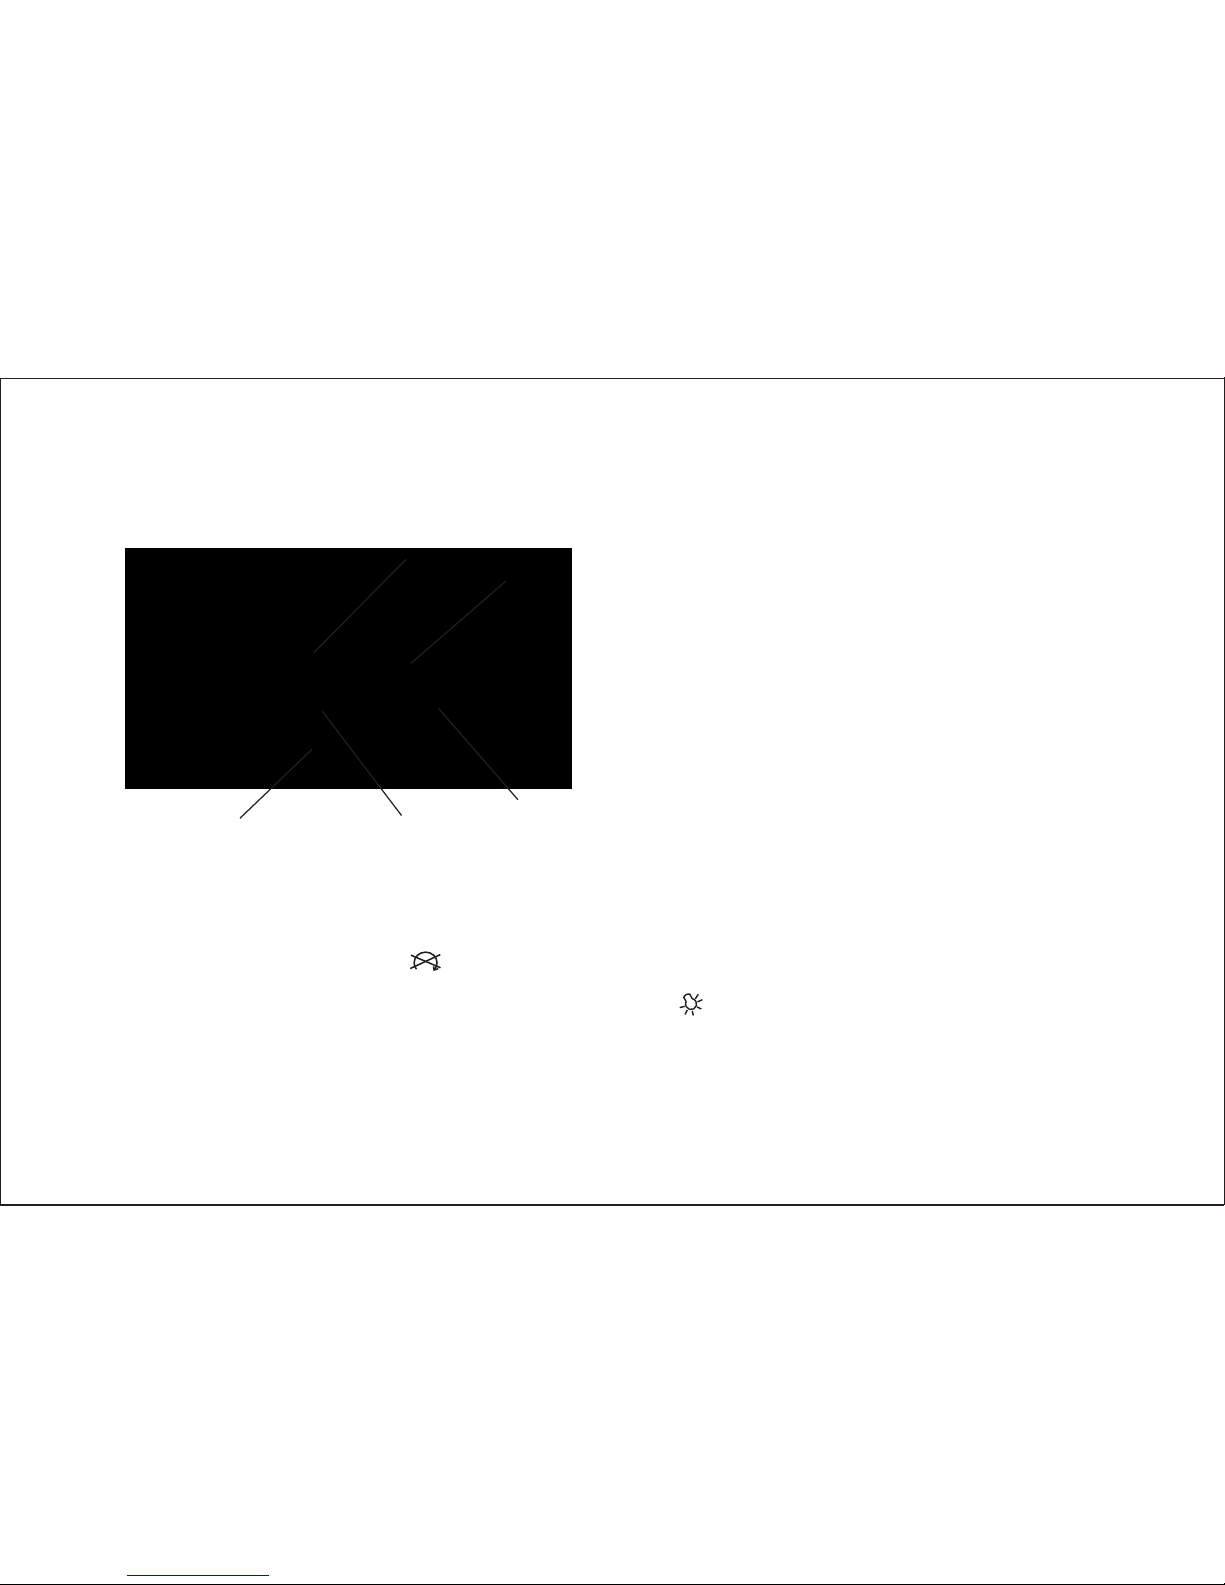
RIGHT HANDLEBAR CONTROL SYSTEM
①②
③
④
⑤
①Engine stop switch
If your press the switch at “ ” position, the
engine can’t be started. When pressing the switch
at “ ” position, and the circuit is connected. then
the engine can be started. This is the emergency
switch.
②
③
Front brake lever
Front brake grip is on the right hand, if you want
to operate front brake, pull brake grip to the direction
of the handgrip. As this madel using hydraulic brake
disc, so you can brake holding easily. When holding
brake grip tightly, rear brake light will light up
automatically.
Throttle grip
The throttle rolling handle is used to control
engine speed. Turn the handle toward yourself
in clockwise direction to speed up the engine(
turn from motorcycle to outside). On the contrary
, turn the handle toward yourself in inanti-clockwise
direction to slow down the engine speed(turn from
motorcycle to outside).
④Light switch
“ ”
Switch position
Turn on the headlight, position light, taillight
at same time.

Continuous running motor can not exceed 5
seconds one time. The circuit and motor will be
abrormal fever after a large number of electro-
dischange. If it can not start after trying, you should
check the oil supplying and the start circuit system
(please refer to the chapter “troubleshooting”).
!WARNING:
12
Fuel tank cap
To open the fuel tank cap insert the igniti
on key and turn it clockwise.With the key still
held in a clockwise position remove the cap.
To install the fuel tank cap,simply line up the
fuel tank guid pins and push down until the
locking pins click into position.The key must
be in the cap before installing the cap.Turn
the key counterclockwise and remove the
ignition key from the cap.
⑤Starting switch
After press this switch to start the engine.
“ ”
Close light position
Turn off the headlight, position light, at same time.
FUEL TANK CAP AND AUDIO CONTROL PANEL
①
②
① Fuel tank cap ② Audio control panel
Turn on the position light, taillight at same time.
“ ” Position
!WARNING:
You can not add the excessive fuel and let
the fuel reach on the hot engine. Do not add fuel
on the oil filler. Otherwise it will overflow if fuel
temperature increse. Stop the engine when add
the fuel, and turn the key to the position of “stop”.
Avoid the fire when add the fuel.
Audio control panel
①②
③④⑤
①
②
③
④
⑤
USB socket
There will be music, insert U disk, play music
song immediately appropriate format, you can also
charge their cell phones.
TF card socket
There will be music in the direction of TF card
is inserted, you van play music songs appropriate
format
Cue up/Volume down key
In the Mp3 player mode, short press this button
to select the previous song; long press decrease
the playback volume.
Power switch/Mode switch button
After electrifying, short press the key to boot,
long press this button to shutdown.
In the boot mode, short press mode button:switch
between USB and TF card.
Down selections/Volame incresa button
In the Mp3 player mode, short press this button
to select the nest song, long press to increase the
playback volume.
13

14
FUEL VALVE
This motorcycle is equipped with a manually
operated fuel valve. There are three positions:
“ ”(Open) , “ ” (Reserve)and
“ ”(Close).
“ ” Open position
To run the engine, turn the fuel valve to the
“ ”position. In this position, fuel will flow
from the fuel valve to the carburetor whenever
the fuel level in the carburetor drops.
“ ” Reserve position
“ ”
If the fuel in the fuel tank is too low,turn the
lever to the“ ”position to use the1.6L
of reserve fuel supply.
Close position
Turn the lever to the“ ”position wh
enever the engine stopping for more than a
few minutes.
Add the fuel in the near oil station when turn
the fuel switch on the “store” position. Turn the
fuel switch on “start” position after finishing.
!NOTICE:
!WARNING:
Turn the fuel tank switch on the “start” or
“store” position when stop. This position will
lead carburetor leakage or fuel run into the
engine. When engine start and fuel run into the
engine, it would bring up the serious damage.

15
GEAR LEVER
The model is equipped with 5 gear recycle tran-
smission,shown in the picture,the gear lever is
connected with the ratchet wheel.The gear lever
automatically goes back to its original position
ready to be changed to the next gear.The low gear
is put on when the gear lever is stepped down from
the neutral position.the gear increase a level every
time the gear lever is stepped down Due to the face
that it is of a ratchet wheel structure,it cannot be
added more than 2 levels at one time.
!NOTICE:
In order to avoid the damage of engine,
speed variator and transmission chain which
can’t withstand the pounding of mandatory
shift in the design of these parts, be sure to
use clutch when shift gear.
When it is in the neutral gear, the indicator
on the meter would show the green. Although
the light is on, you also need to loosen the
clutch level to make sure whether it enter into
the neutral position.
!CAUTION:

16
This motor has the center stand① and side
stand② . When you want to put the motorcycle
on the main stand, you should step on the pedal
of main stand, and hold the carrier by right hand
and the by left hand. Then pull up the motorcycle
fixing into the stand .When you want to park the
motorcycle by side stand, then you should step
onto the end of the side stand, and depress it
using your strength, until the side stand turning
to its end onto the floor still .
STAND
①
②
①Center stand ②
Side stand
REAR BRAKING PEDAL
It will works when push the brake padal.
The brake indicator would be lighted. You should
push even To avoid the strong pushing, you can
use the snub: pay attention to combine the front
brake and engine brake to reduce the brake
distance.

17
②
①
四、FUEL AND ENGINE OIL
RECOMMENDATION
Use unleaded gasoline with an octane
rating or 93 oil higher (Research method).If the
engine give out a slight knock, it may be because
of using normal level fuel as the succedaneum
that need to be replaced.
Fuel tank port Fuel level
①
②
!CAUTION:
When you park the motorcycle on the slope
you should make the front head as the above
position of slope, to avoid the motorcycle fall
off by the side cover. Or you could put into gear
1.
!WARNING:
Side stand is used only for the temporary
parking, Pay attention to check whether it
turn to the upper limit position.Before starting
it never park in other place. Never riding the
motorcycle before the side stand lift up.
Table of contents


