Senoven SEN 3100 S Specification sheet

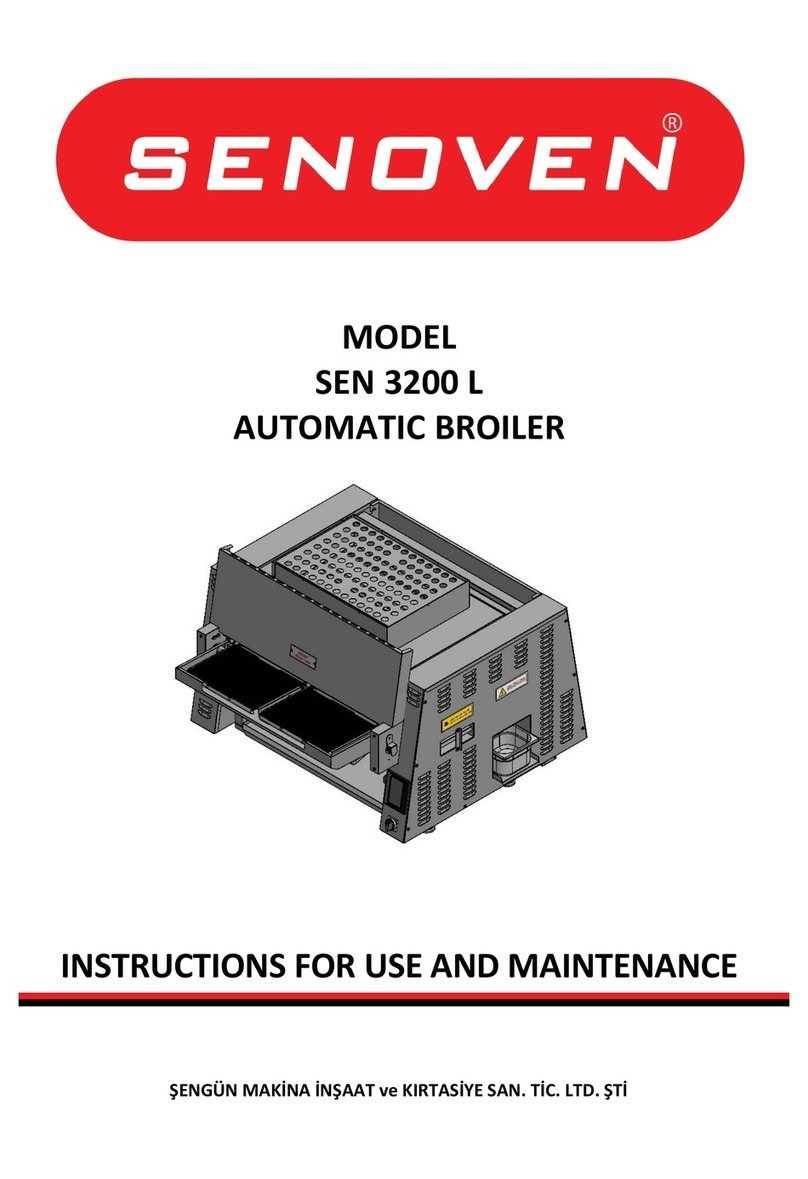
MODEL
SEN 3100 S
AUTOMATIC BROILER
INSTRUCTIONS FOR USE AND MAINTENANCE
MANUFACTURER: ŞENGÜN MAKİNA İNŞAAT ve KIRTASİYE SAN. TİC. LTD. ŞTİ

1
These instructions are valid only if the country code appears on the device. If country code
does not feature on the device, please resort to technical requirements comprising
necessary instructions for the adjustment of device to the current requirements in the
country.
This device should be installed according to the applicable regulations and should only be
used in a well-ventilated environment. Before installing and using the device, please refer
to the instructions.

2
CERTIFICATE OF WARRANTY
BATCH NR. :
DATE OF SALE:
SEN –3100 S AUTOMATIC BROILER and AUXILLIARY EQUIPMENT, which has been sold on the date specified
above is put under guarantee for a period of 1 YEAR against all kinds of manufacturing defects by its
manufacturer ŞENGÜN MAKİNA İNŞAAT ve KIRTASİYE SAN. TİC. LTD. ŞTİ.
Warranty Terms;
-Warranty terms start after the product delivery for 1 year.
- Recommended daily working time is 10 hours. The scope of warranty is assessed by year or by working
hours.
- Documents are invalid, if haven’t sale date and confirm signature of company. You have to show the
warranty certificate to benefit from the warranty.
- Device is guaranteed against defects if mount and use as described ın the use and maintenance manual.
- Detection the location of defects, and elimination of the problems are responsibilities of the ŞENGUN
MAKİNA…
- Warranty terms include only one device. You can’t claim any rights or compensation for another devices.
- If Changes are made at the type, model and serial numbers, the warranty eliminates.
- If material, worker or assembly defects appear, repaired free by ŞENGÜN MAKİNA at the product
warranty period (Transportation cost is not included).
- Failures are only repaired by ŞENGÜN MAKİNA’s personal. The intervention of unauthorized person
cancels the appliance of warranty.
- Installation have to be done by ŞENGÜN MAKİNA’s personal. İf usage place changes, customer must give
information to ŞENGÜN MAKİNA
- In the event of failure service must be informed.
- The failures and damages given by external factors are out of the warranty terms.
- Any failure of the product warranty period is added to the product warranty time. The repair time is until
20 working days.
- Istanbul courts are competent in case of dispute.
AUTHORIZED
STAMP –SIGRNATURE

3
PREAMBLE
Dear User,
Thank you for your trust in our company and for preferring our machine. Your country included, our
machines are used in 39 countries across the world in industrial kitchens.
Our machine was produced in accordance with the international standards. You are strictly advised to read
the instructions for use or make the user read these in order to get the best of machine and enjoy a long
service life. You are kindly asked to take note of following warnings before you call our service.
SENOVEN
Please read this manual and make sure the users read it carefully before you install the machine. The
machine shall fall out of warranty coverage if you operate the machine without having read the
manual beforehand.
This manual, which contains information regarding the assembly, usage and maintenance of the
product purchased, should be read carefully. Make sure that electrical installations for the machine
connection be prepared accordingly by qualified personnel in accordance with the legal regulations
before our service personnel arrives for appliance assembly.
In the case of hesitation or where you are not clear about certain issues, please call the nearest
authorized service and ask for information.
We kindly remind you that charges and expenses for waiting times shall be billed to you on hourly basis,
should you stand the called service personnel up.

4
Important Warnings and Safety Instructions:
NOTE: This manual contains important safety, installation and operation instructions. All operators
are required to read this manual thoroughly before operating and using the unit. Erroneous installation, setting and
maintenance may cause damage to the unit, to injuries or even death.
WARNING: This product is not intended for use by kids or incapable adults. Incapable persons are only
allowed to use this product under the supervision of an attending adult once said attending person takes necessary
safety measures. It should be ensured that small children do not toy with the product.
WARNING: Erroneous installation, arrangement, replacement or maintenance may cause damage to
the unit, to injury or even death. Do not use the product or put into service before reading the instructions for
installation, cleaning and maintenance.
ATTENTION! You should not work with long hair, full clothes or dangling jewelry near the belt.
Getting caught by the belt may cause serious injury.
ATTENTION! For your safety, do not store or place gas, gasoline or any other imcombustible stuff
near the product.
WARNING! If the power line is damaged, do not attempt to operate the product. Immediately
contact technical service or call an experienced electrician.
ATTENTION! Do not attempt to broiler the product to be broiled with incombustible stuff like paper.
Such attempts may cause fire.
ATTENTION! Do not place any object (hot pan, plate, tray etc.) on any part of the machine other
than the belt.
ATTENTION! Always be very careful when using the product.

5
ELECTRICITY WARNING
It includes information about a possible electricity shock danger. Observations mistakes may cause
equipment damages and/or serious injury or even death.
HOT SURFACE WARNING
It includes information about contact with equipment and parts. Failure of compliance may cause body
injury.
The broiler should be placed under a ventilation cover or a hood. Make sure that the broiler is sufficiently
aerated and the ventilation is adequate.
Make sure that the broiler is adequately distanced from walls and any other incombustible stuff. The
minimum required distances are to be found in the following sections.
Keep the broiler always clean. Remove possibly incombustible substances from the broiler.
Ventilation gaps should be sufficiently dimensioned, so as to ensure proper ventilation of the broiler.
Do not block ventilation openings. Do not congest ventilation openings with foreign bodies.
Broiler shall only be used with the fuel specified on specifications’ plate fixed onto it.
Store the manual in a suitable place, considering that you may need to look at it again in the future.
Obtain a list from your gas provider which instructs you on what to do when you sense a gas smell. Hang this
list on a visible spot.
Gas won’t pass the burner when there’s no power.
In addition to the warnings and precautions in this manual, apply the following directives for Senoven Automatic
Broiler to operate safely:
• Read and apply all the instructions before using this equipment.
• Use the broiler only for its intended use as described in this manual.
•Do not operate this device if it has a defective cable or plug or if it’s otherwise damaged.
• Only authorized personnel is allowed to carry out maintenance or repair work on this device.
Please contact your local Senoven branch.
•Please use only original Senoven spare parts for the broiler. Otherwise the guarantee becomes void and
cooking performance may be drastically impaired. Use of parts that are not produce of Senoven affects
these criteria and broiler performance may affect part service life and food health safety.
Warnings and instructions below appear throughout the manual and shall be diligently complied with:
•Shut the gas valve for turning the broiler off and unplug before any service,
maintenance or cleaning work to be done.
•Wait for the broiler to cool down completely before carrying out any service, maintenance
or cleaning. Failure to do so may cause body injuries.
•Procedures in this manual may contain references to use of chemical products. Senoven does not endorse
the use of any particular cleaning / degreasing agent. Make sure to use chemicals that are approved for use
in kitchen.
•The broiler should be grounded in accordance with the local electricity codes in order to avoid
risk of electricity shock. These fuses are protected by electric circuit breakers. Separate electricity
lines require a grounding plug.
6
•All electrical connections should comply with local electricity codes and other applicable
regulations.
•Operate the machine in an adequately ventilated place. Make sure to leave lateral safety
clearances in order to avoid the emergence of a fire safety risk. In case of emergency, follow the
directives for shutting down.
• Do not attempt to turn on the device in case of power cut.
WARNING: Danger of electrical shock. Failure to comply with these instructions may lead to serious
injuries or even death:
_ Device needs to be grounded.
_ If you have doubts about the proper operation of the device, check with a qualified electrician.
_ In order to avoid the risk of serious injury or death on the control box, do not use water in its proximity.
WARNING: Hot surfaces and high temperatures. Failure to follow these procedures may lead to serious
injury:
_ Make sure to have cooled down the device in accordance with the instructions in this manual
before carrying out any cleaning or maintenance work.
Responsibilities of Vendors
In general, the responsibilities of the vendors are as written below:
To verify that electricity and gas service are applied under conditions required by the manufacturer and to
check whether the connections are in conformity with the manufacturer’s requirements.
To take the broiler out of its package as described in instructions for use and operation, install the broiler
and place it appropriately.
To verify that electricity and gas connections are made by a qualified person. To make sure that the
connections are implemented in accordance with the applicable provincial / regional / country standards.
IMPORTANT NOTE
Broiler cleanness and overall maintenance status are the key factors that affect the broiler
performance. All operations that are to be carried out without applying the instructions in this manual
may lead to breakdown of machine parts, thereby exclusion thereof from guarantee coverage, or to
injuries or even to death. Therefore, please read the instructions in the manual carefully, understand
them and remember that this manual will guide you on the proper use of this product.

7
CONTENTS
CERTIFICATE OF WARRANTY
PREAMBLE
IMPORTANT WARNINGS AND SAFETY INSTRUCTIONS
PART 1: INTRODUCTION
1.1 Definition
1.2 Description of Body Elements
1.3 Warranty Information
1.4 Microprocessor Control
1.5 Cooking Feature
1.6 Conveyor (belt)
1.7 General Information
1.8 Graphical Features
1.9 Broiler Electricity -Gas Technical Specifications Table
1.10 Dimensioning
PART 2: INSTRUCTIONS FOR USE
2.1 Pre-Installation
2.2 Assembly
2.3 Leveling
2.4 Clearance Requirements
2.5 Ventilation
2.6 General Information about Ventilation
2.7 Gas Installation- 1/2 ’’ n.P.T.
2.8 Installing Gas Appliance Connectors and Flexible Gas Lines Correctly
2.9 Required Items for Installation
2.10 Broiler Electricity -Gas Technical Specifications Table
2.11 Restraining Requirements
2.12 Pre-operation check

8
PART 3: OPERATING, PROGRAMMING AND SHUTDOWN
3.1 Controls and Indicators
3.2 Operating Procedures
3.3 Operating
3.4 Programming
3.5 Shutdown
3.6 Warnings
3.7 Errors/ Warning Messages
3.8 Temperature Reading Failure (sensor failure)
3.9 Temperature Limit Exceeded
3.10 Low Battery Appears on Screen
3.11 Ready
3.12 Ignition Failure
PART 4: CLEANING AND DISASSEMBLY
PART 5: CALCULATION OF TOTAL PRODUCTION YIELD
PART 6: SPARE PARTS MANUALS
PART 7: ELECTRICAL DIAGRAM
PART 8: TROUBLESHOOTING
8.1 Temperature Limit Exceeded
8.2 Low Battery Appears on Screen
8.3 Temperature Reading Failure (sensor failure)
8.4 Ignition Failure
8.5 Products are not cooking
8.6 How to Call Technical Service
8.7 Labels
8.8 Notes

9
PART 1: INTRODUCTION
1.1 Description
SENOVEN SEN 3100 S brings about Cooking by evenly distributing
high-temperature air between its belts. Its air system substantially
decreases energy consumption. It’s readily cleanable and easy-to-use.
Its easy-to-use control panel reduces user errors to a minimum level.
This manual contains safety, assembly and operation instructions
For Senoven Automatic Broiler Model SB 3000. You are advised to read
all the information in this manual for an easier installation and use.
1.3
Description of
Body Members

10
1.3
Warranty Information
Read warranty content fully. If the unit suffers damage during transportation, immediately contact the shipment
company and notify them of the damage. Shipment damages are under the responsibility of receiver and is not
covered by the guarantee.
Situations not covered by the guarantee:
•Damages arising during shipment or caused by wrongful usage.
• Damages caused by electric service.
• Damages due to non-compliance with maintenance instructions in the manual.
•Breakdowns resulting from non-compliance with the manual or any other applicable training
•Damages resulting from inappropriate or inadvertent use apart from normal operating
procedures specified in this manual.
•Situations where electrical components suffer damage due to humidity.
•Situations arising from external impact or absence of safety precautions.
1.4 Microprocessor control
The broiler is controlled by a programmable microprocessor. This microprocessor controls all the functions
of the broiler. It may be set to any desired temperature between 300 °C and 500 °C. In SB 3000 automatic
broilers, cooking time (conveyor speed) may be adjusted in a range of 1 minute up to 7 minutes. Thanks to
program storage feature, all cooked products may be prepared in consistent standards and shorter times.
IMPORTANT!
Keep the user manual in a place where you can readily retrieve it. If the product changes
hands, make sure the manual is delivered together with the machine.
Şengün Makina reserves the right to change technical specification and
configuration. Alterations and improvements in revisions do not apply to previously
sold products.

11
1.5 Cooking feature
Pressurized air circulating in the automatic broiler body makes sure the products are cooked homogenously
and quickly with the help of burners.
1.6 Conveyor (Belt)
Conveyors enable the product to pass through the broiler. The belt is controlled by microprocessor and in
SEN 3100 S automatic broilers it may reach a speed between 1 up to 7 minutes. The belt speed determines how long
the product will stay in the broiler, which is actually the Cooking time. The width of the belt is 178 mm. The belt
consists of stainless steel wires which engage each other in a locking manner. It’s designed in a spaced manner for
an easy circulation of heat and air.
1.7 General Information
Instructions below are intended to serve as a guide for you in the installation of the broiler.
First and foremost, the broiler boxes should be counted and be inspected carefully for any visible damage.
Prior to installation, proper and safe storage systems should be provided if the broiler requires to be
constantly protected against external conditions and humidity.
UPPER HEAT ELEMENTS
BOTTOM HEAT
ELEMENT
CONVEYOR BELT

12
1.8 Graphical features
SEN 3100 S
Conveyor belt width :
178 mm
Usable belt width
152,5 mm
Heating zone (chamber) length :
512 mm
Cooking chamber dimensions :
L 512 mm X W 192,5 mm x H 54 mm
Conveyor cooking zone :
0,08 m²
Rough dimensions –Single storey at the bottom :
Automatic broiler width: 496 mm
Broiler height: 800 mm
Total length: 1087 mm
Net weight :
87 Kg
Transportation Single Oven Weight –Domestic
(Machine + Chassis + Packing) :
Transportation Single Oven Weight –Abroad
(Machine + Chassis + Packing) :
Average gas consumption :
0,3 m³ / hour
Gas consumption in full capacity :
0,70 m³ / hour
Capacity :
6,5 kW
Acceptable temperature range :
300 °C –500 °C
Conveyor drive system :
Microprocessor-controlled conveyor control system supporting a
variable mains voltage between 208 and 300 Volts
Cooking time :
Adjustable between 1 min and 7 mins
Insulation, Isolation :
On both sides
Heat source :
2 pieces of heater (burner)
Cooking chamber :
304 stainless steel
Outer body steel :
304 stainless steel
DB Level :
< 60 dba
Power
Electricity and gas
1.9 Broiler Electricity –Gas Technical Specifications Table
BROİLER ELECTRICITY –GAS TECHNICAL SPECIFICATIONS TABLE
Voltage
Phase
N
T (PE)
Ampere
Loading
Gas Inlet
Pressure
Capacity
(Kw)
Gas
consumption
in full
capacity
Average gas
consumption
BTU
230 V 50-
60 Hz
1
1
1
3
21 mbar
6,5 kW
0,70 m³/
hour
0,3 m³ /hour
22,000
/hour
POWER SUPPLY: SINGLE PHASE, 230 V AC, 50-60 Hz / 3 Amp: 1Neutral, 1 Ground
IMPORTANT!: Electrical inlet connections should be performed according to the arrangement in inlet terminals.
(PHASE TO PHASE–NEUTRAL TO NEUTRAL–GROUND TO GROUND)
Note: Specifications can vary or be altered. The information above is only intended for information purposes.

13
1.10 Dimensioning:

14
PART 2: INSTRUCTIONS FOR USE
2.1 Pre-installation
Broiler parts can move from the place during shipment. Assemble such parts according to their designated
places. If any of the parts have suffered an explicit or implicit damage during shipment, the shipping agent shall
assume responsibility for such parts. Factory guarantee does not cover shipping damages.
2.2 Assembly
If installation is not performed by our technical service, please follow the assembly instructions.
2.3 L eveling
The oil drainage system is based on gravity flow design. Thus, it’s crucial for the machine to be fixed on a
level surface.
2.4 Clearance Requirements
Keep combustibles away from the machine zone. Leave 600 mm clearance from surfaces in order to facilitate
disassembly and to allow for a comfortable work by technical service.
Required and recommended clearances
Note: Do not install this broiler in places with ambient temperatures over 40 oC. Otherwise, broiler parts may suffer
damage. Operate the broiler only in approved areas in conformity with instructions to ensure a long service life and a
safe operation.
2.5 Ventilation
This device should be installed under adequate ventilation conditions. Remember that ventilation is of vital
importance especially for gas broilers. Determine installation area taking into consideration your country’s fire and
safety regulations. Guidance information about ventilation shall be given in the next part.
2.6 General information about ventilation
Ventilation duct or hood should be adequate to absorb heat and cooking odors. Moreover, ventilation in gas
broilers should be adequate to expel combustion products. Broiler owner bears the responsibility for functional and
a duly structured ventilation. Ventilation opening (hood) should be congruent with general aeration and heating
system.
Attention: Do not block combustion and ventilation air flow. Adequate air source should be available for a safe and
proper operation of the device. Now you are ready to set up energy supply for the machine. This shall be done by a
competent electrician or installer of your choice.
Clearance
requirement for
combustible walls
and other
structures
-
Clearance
requirement for
incombustible
walls and other
structures
Clearance
recommendation for
Senoven service and
installation
Rear side of broiler
300 mm
130 mm
130 mm
Sides of broiler
300 mm
130 mm
130 mm
Front of broiler (feed
end)
300 mm
130 mm
600 mm

15
2.7 Gas installation - 1/2”n.P.T.
In order to have a safely and efficiently operating broiler, you have to install the broiler properly. Installation
should be performed in accordance with national fuel legislation, manufacturer’s installation instructions and
municipal construction and local construction codes.
1. When the broiler is subjected to pressure test under a pressure higher than 35 mbar, the isolating valve for the
broiler and the gas supply line should not disconnect from the gas supply line.
2. When subjected to pressure test under pressures lower than or equal to 35 mbar, the gas supply line should be
isolated from the broiler with the help of an isolating valve provided on the gas supply line.
Nominal inlet gas supply should not fall below 15 mbar, which is "the gas supply pressure impacting the broiler
connection for natural gas".
2.8 Installing gas appliance connectors and flexible gas lines correctly
Proper connection of connectors is vital in terms of ensuring safety and maximum service life in kitchen zone.
Connectors should be congruent with standard connector inlets and gas-fueled emergency stop system should be
compatible with standard emergency stop systems.
The pipe should be attached with a pipe elbow in order to avoid damages to connector connections due to sharp
edges.
For easy movement of the appliance, the connector should be installed with a "lazy" loop for minimum tension.
NOTE: Gas appliances should be disconnected prior to maximum movement. (Minimal movement is
possible to connect hose.)
2.9 Required items for installation:
1 x 20 ampere (K OTOMAT) –fuses in electrical panel
1,5 mm² cable section for the cable (TTR CABLE –1 PHASE/ 1 NEUTRAL/ 1 GROUNDİNG)
NOTE: (TTR Cable is flexible and as such resistant to relaxation and bending during right-left, front-rear movement of
the broiler. Our company recommends use of TTR cables.)
The grounding should be robust.
If voltages are high or low, a protected voltage regulator (regulator) is attached.
NOTE: The conditions above should be met for a smooth and quick installation. We ask for your consideration and
wish you an enjoyable work.
WARNING
This product may cause cancer, birth defects or other reproductive disorders and lead to
an exposure to fuel or fuel combustion products, if installation is not performed and
maintained in accordance with manufacturers’ instructions.

16
2.10 Broiler Electricity –Gas Technical Specifications Table:
BROİLER ELECTRICITY –GAS TECHNICAL SPECIFICATIONS TABLE
Voltage
Phase
N
T
(PE)
Ampere
Loading
Gas Inlet
Pressure
Capacity
(Kw)
Gas
consumption
in full
capacity
Average gas
consumption
BTU
230 V/50-
60 Hz
1
1
1
3
21 mbar
6,5 kW
0,70 m³/
hour
0,3 m³ /hour
22,000
/hour
PORWER SUPPLY: SINGLE PHASE, 230 V AC, 50 Hz / 3 Amp: 1 Neutral, 1 Grounding
IMPORTANT!: Electrical inlet connections should be performed according to the arrangement in inlet terminals.
(PHASE TO PHASE–NEUTRAL TO NEUTRAL–GROUND TO GROUND)
Power requirements are stated on the unit nameplate and must be connected accordingly. This appliance, when
installed must be electrically grounded in accordance with local codes, or in the absence of local codes, with the
National Electrical Code, as applicable. Before starting the machine, tighten all electrical connections in control box.
An electrical wiring diagram can be found inside the control box.
Note: Disconnect power before servicing.
Terminal
Bock
N
PE
L1

17
2.11 Restraining Requirements
1. This installation shall be performed with a gas connection element suited to connection members’ standards
for movable gas appliances and a fast disconnecting device suited to fast disconnecting standards for gas
appliances. ,
2. Restraining installation should restraint the movement of broiler independent of connector member. Fast
disconnecting device or its pipe should restraint broiler movement.
3. If the restraint is dismounted due to cleaning or maintenance, it should be reversed to its original state once
the cleaning or maintenance is completed.
Note:
If restraint connection needs to be disconnected, bring the machine back to its original state once you are
done with your work.
1. Screw part “B” to orifice “A” together with its dedicated cable.
2. Screw part “C” to the support “D” on the wall or to the anchor “E” on the ground together with its dedicated
cable.
2.12 Pre-operation check
Be sure that all parts are installed in the proper location:
Ventilation is turned on
Broiler is plugged in
Gas line is connected
DON NOT ATTEMPT TO OPERATE THE BROILER before an authorized technical service personnel or authorized sales
representative arrives and checks all the connections and system completely. This service makes sure that the
machine connections are properly installed and system functions accurately. Guarantee goes into effect once the
installation is approved. The guarantee shall not be effective if the broiler is operated before the check by authorized
sales representative or authorized technical service personnel.
ATTENTION! You should not work with long hair, full clothes or dangling jewelry near the belt.
Getting caught by the belt may cause serious injury.
ATTENTION! If the power line is damaged, do not attempt to operate the product. Immediately
contact technical service or call an experienced electrician.
A

18
PART 3: OPERATION, PROGRAMMING AND SHUTDOWN
3.1 Controls and Indicators
Right control box
There’s a touch control panel (1). Device settings like belt speed,
temperature and the like are controlled on this panel.
Main On / Off Switch (2) serve to turn the machine on and off.
Broiler rear side
Belt buttons (a)–Use these buttons to reverse the rotation direction
whenever the machine gets jammed. They may also be used during
cleaning.
3.2 Operation Procedures
Pre-Lighting Preparation
1. Center the broiler underneath the hood.
2. Bring the handle to a parallel position with pipe and open gas valve.
3. Turn ventilation system on.
WARNING. THE VENTILATION SYSTEM MUST BE ON AT ALL TIMES DURING BROILER OPERATION.
OPERATING BROILER WITHOUT PROPER VENTILATION IS A SEVERE FIRE HAZARD.
a
1
...
7
8
9
10
11
12
13
14

19
3.3 Operation
Normal ignition
SEN 3100 S Automatic Broiler is equipped with automatic ignition. When the broiler is turned on, a hot surface
igniter turns on 5 seconds before the flow of gas. Gas then flows to all of the burners. If the burners are not lit
within 10 seconds, the control will reset and try again for a duration of 10 seconds. This occurs 3 times. If the
broiler does not light after the third attempt, the ignition failure light will flash and the main on/off switch must
be cycled to repeat the procedure. If this still doesn't light the broiler, see the MANUAL IGNITION instructions
1. Turn the MAIN POWER SWITCH (a) on
2. Allow broiler to heat for 45 minutes before cooking.
Manual ignition
1. Turn the feeder off (if present) and remove the
OIL TRAY. Turn the MAIN POWER SWITCH on. Hold a
Lighter for upper first burner. Once the first burner is lit,
then all burners get ignited.
3.4 Programming
All functions of the broiler are controlled by a microprocessor. The broiler
should be preset for operation. In the following pages, programming is described step by
step with reference to exercises. These exercises were prepared with the assumption
that the broiler is operated for the first time after installation stage.
Turn the switch on; once it’s turned on the operator panel will also turn on and a logo
appears on the screen.
Touch the logo image. (The machine won’t start to operate unless you touch on the logo image). Then “SELECT” page
will appear on the screen.
Table of contents
Other Senoven Broiler manuals
Popular Broiler manuals by other brands

Nieco
Nieco BroilVection JF64 owner's manual

Vulcan-Hart
Vulcan-Hart GHIR44 Specifications

Imperial Range
Imperial Range 24BR-XB specification

Vulcan-Hart
Vulcan-Hart VCB25S ML-44908Z Installation & operation manual

Black & Decker
Black & Decker Toast-R-Oven TRO910B Use and care book

Wells
Wells B-406 Operation manual