Sensar Secure Cam USB User manual

Sensar…Secure®Cam
User Guide
Sensar Document
101476DOC
Camera User Guide

Page 2
Notices
FCC Notice
This device complies with part 15 of the FCC Rules. Operation is subject to the
following two conditions: (1) This device may not cause harmful interference,
and (2) this device must accept any interference received, including any that
causes undesired operation.
Note: This equipment has been tested and found to comply with the limits for a
Class B digital device, pursuant to part 15 of the FCC Rules. These limits are
designed to provide reasonable protection against harmful interference in a
residential installation. This equipment generates, uses and can radiate radio
frequency energy and, if not installed and used in accordance with the instructions,
may cause harmful interference to radio communications. However, there is no
guarantee that interference will not occur in a particular installation. If this
equipment does cause harmful interference to radio or television reception, which
can be determined by turning the equipment off and on, the user is encouraged to
try to correct the interference by one or more
of the following measures:
• Reorient or relocate the receiving antenna.
• Increase the separation between the equipment and receiver.
• Connect the equipment into an outlet on a circuit different from that to
which the receiver is connected.
• Consult the dealer or an experienced radio/TV technician for help.
The FCC requires the user to be notified that any changes or modifications made
to this device that are not expressly approved by Sensar, Incorporated may void
the user’s authority to operate the equipment.

Page 3
EEC Notice
This product conforms to emissions product standards EN55022, class B and
EN50082-1 (1992) of the European Economic Community.
Copyright Notice
Sensar, Inc. makes no warranty of any kind with regard to this material, including,
but not limited to, implied warranties of merchantability and fitness for a
particular purpose.
This document contains proprietary information which is protected by copyright.
All rights are reserved. No part of this document may be photocopied, reproduced,
or translated to another language without prior written consent of Sensar.
© 1999 Sensar, Inc.
All Rights Reserved
Windows is a registered trademark of Microsoft Corporation. All other product
names mentioned herein are the trademarks of the product owners.

Page 4
Licensee Notice
IriScan of Marlton, New Jersey, USA holds the exclusive world-wide patents on
the iris recognition concept originated by Drs. Leonard Flom and Aran Safir and
the software and process technology invented by Dr. John Daugman, Cambridge
University, England. Sensar uses, under license, the iris recognition process
developed and owned exclusively by IriScan. IRISCAN®is a trademark of
IriScan, Inc., of Marlton, New Jersey, and is used by Sensar, Inc. under license
from IriScan, Inc.

Page 5
Table of Contents
NOTICES....................................................................................................................................2-4
INTRODUCTION.........................................................................................................................6
SYSTEM REQUIREMENTS ......................................................................................................7
INSTALLATION..........................................................................................................................8
SOFTWARE INSTALLATION ............................................................................................................8
Windows 95 .................................................................................................................................8
Windows 98 .................................................................................................................................9
Windows NT4.0...........................................................................................................................9
HARDWARE INSTALLATION.........................................................................................................10
USB Camera...............................................................................................................................10
Parallel Port Camera...................................................................................................................11
CONFIGURING YOUR BROWSER .......................................................................................14
Internet Explorer 4 (IE4)............................................................................................................14
INTERNET EXPLORER 4 UPGRADE ...............................................................................................14
NETSCAPE...................................................................................................................................15
VIEWING THE TUTORIAL ....................................................................................................16
PRACTICE USING THE CAMERA........................................................................................18
GETTING STARTED................................................................................................................19
ENROLLMENT..............................................................................................................................19
TROUBLESHOOTING .............................................................................................................21
TECHNICAL SUPPORT...........................................................................................................22
SPECIFICATIONS.....................................................................................................................22
PACKAGE CONTENTS............................................................................................................22
ADDING A USB CARD .............................................................................................................23
USER TIPS ..................................................................................................................................24

Page 6
Introduction
Today’s digital world requires us to access and protect computer information and
interact securely with computer systems. The use of passwords has long been the
most popular method for accomplishing these tasks. . .until now. Sensar has
introduced a personal identification system which allows you to conveniently and
securely identify yourself to your PC and the Internet.
It all starts with an image of your eye—iris recognition. The Sensar Secure®Cam
captures an image of your iris and creates an identifying template. This is your
enrolled digital code and is stored in a secure database. When verification of your
identity is then requested, the camera will take another image of your eye, digitally
encode it, and compare it to your enrolled digital code. If they match, then your
identity has been verified.
Iris recognition is called a biometric because it uses a measurable physical
characteristic. With 266 measurable characteristics, the iris is the most unique,
data rich physical structure on the human body—substantially more unique than a
fingerprint. And, unlike other measurable human features, the patterns in the iris
do not change over time.
No two people on earth have the same irises. In fact, even the left iris and right
iris of the same person have uniquely different patterns.
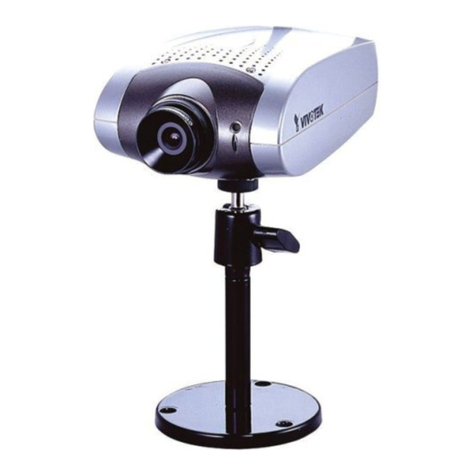
There are two versions of the Sensar Secure®Cam; a Parallel Port (LPT) camera
and a USB camera.

Page 7
System Requirements
•486 processor or better
•Sound card / speakers (optional, recommended)
•LAN or Internet connection and 28.8bps or greater modem
•Internet Explorer 4.01 or later or Netscape Navigator 4.06 or later
Parallel Port Camera
•Microsoft Windows 95, 98, or Windows NT 4.0 or later versions
USB Camera
•USB (Universal Serial Bus) port equipped Pentium IBM compatible
•Microsoft Windows 95 or 98 (Windows 98 is strongly recommended)

Page 8
Installation
Software Installation
Windows 95
To install the USB or Parallel Port version of the camera software, please follow
this procedure:
1. To find out if your version of Windows 95 is USB compliant, right-click the
“My Computer” icon and select Properties. The System should be 4.00.950B
(Windows 95B) or later. If you are running Windows 95B and USB is not
available, you need to execute a program from your Windows 95 installation
CD. Your Windows 95 CD should say on it “With USB Support.” Open the
Windows Explorer and go to the directory Drivers\USB\Enduser. Double click
on the file USBSUPP.EXE to install USB support to Windows 95. If you do
not find this file in this location, go to the Start Menu and select Find–Files or
Folders and search for USBSUPP.EXE on the CD. To find out more about the
Universal Serial Bus standard, visit the USB Website at www.usb.org.
2. Insert the camera CD into your CD-ROM drive. Run the program SETUP.EXE
located in the root directory of the CD. Follow the instructions as they appear
on your screen.

Page 9
Windows 98
To install the USB or Parallel Port version of the camera software, please follow
this procedure:
1. Insert the camera CD into your CD-ROM drive. Run the program SETUP.EXE
located in the root directory of the CD. Follow the instructions as they appear
on your screen.
Windows NT4.0
To install the Parallel Port version of the camera software, please follow this
procedure:
1. Insert the camera CD into your CD-ROM drive. Run the program SETUP.EXE
located in the root directory of the CD. Follow the instructions as they appear
on your screen.

Page 10
Hardware Installation
USB Camera
1. Find the USB port on your computer. If your computer does not have a
USB port, a USB card can be added. See Section “Adding a USB Card.”
2. Plug the flat rectangular end of the detachable USB cable into any USB port
of your computer.
Figure 1
Plug the USB Camera into Your PC
3. Plug the square end of the detachable USB cable into the rear of the camera.
Figure 2
Plug the USB Cable into the Camera
4. Windows will automatically recognize the USB camera.
The most common problem for users installing a USB device for the first time is
that the computer’s BIOS does not have the USB hardware on the motherboard

Page 11
enabled. To rectify the problem you must restart the computer and enter the
SETUP utility to enable the USB hardware on the computer’s motherboard. After
entering the SETUP utility there will be a peripheral or advance section that will
allow you to enable the USB hardware. After enabling the USB, exit the SETUP
utility making sure you SAVE the changes when exiting. See your PC owner’s
manual for starting the BIOS Settings Utility specific to your PC.
Parallel Port Camera
1. Make sure the power to your computer is off.
2. Remove the printer cable from your PC, if installed.
Figure 3
Locate and Remove Your Printer Cable, If Present
3. Connect the camera cable to the printer port on your PC.
Figure 4a, b
Connect Camera Cable

Page 12
4. Reconnect the printer cable, if present, to the adapter cable.
Figure 5a, b
Reconnect Your Printer Cable, If Present
Note: You can not PRINT and use Sensar Secure®Cam at the same time.
5. Remove the keyboard cable from your PC.
6. Connect the camera cable with the round male connector to the keyboard
port on your PC.
Figure 6
Locate and Remove Your Keyboard Cable

Page 13
7. Reconnect the keyboard cable (round male connector) to the cable with the
round female connector.
Figure 7a, b
Reconnect Your Keyboard to the Camera Cable
8. Turn the power to your computer back on.

Page 14
Configuring Your Browser
In order to ensure secure transactions over the world wide web, the Sensar
Secure®Cam Demo uses a ‘Secure Sockets’ (or SSL) connection over the internet.
Follow the steps indicated below for your browser in order to invoke the correct
SSL level.
Internet Explorer 4 (IE4)
To invoke the correct SSL level within IE4:
1. Invoke the browser if you have not already done so.
2. Click on the "View" menu.
3. Select the "Internet options" label.
4. Select the "Advanced" tab in the dialog box that appears.
5. Scroll down to the "Security" label.
6. Deselect "PCT 1.0" and deselect "SSL 3.0" (the boxes should not have an
"x" when you are through.)
7. Click "OK" when you are done.
Important Note:
When using the software you may be alerted by the Microsoft Browser that signed
content from Sensar is being loaded. This is normal and completely secure since
the content from Sensar is digitally signed, and can be checked by examining the
digital certificate. You may examine the digital certificate by clicking on the TBD
button, and you may elect to trust content from Sensar for future downloads by
clicking the “Always trust content from Sensar” check box. Click "Yes" to exit
the dialog box.
Internet Explorer 4 Upgrade
Sensar Secure®Cam Demo requires the latest version of the “Java Virtual
Machine” which allows IE4 to operate Java Applets in the standard java mode.
On the installation CD you will find the file “MSJavx86.exe” located in the root
directory. Run this application to upgrade your IE4’s Java Virtual Machine (Note
that this will require re-booting your PC).

Page 15
Netscape
To invoke the correct SSL level within Netscape:
1. Invoke the browser if you have not already done so.
2. Click the "Security" Icon.
3. Click on the "Navigator" link.
4. Disable "SSL v3" box (remove the check mark if it is present.)
5. Click "OK" when you are done.
Important Note:
When using the software you may be asked by the Netscape browser to grant
permission to enable "high risk activities"–our system requires resources of the
operating system not usually granted to browsers. This is completely safe, and
Sensar's software is digitally signed (you may view the certificate) so that you
know that you are truly running software provided by Sensar. You may wish to
click on "remember this decision" so that you will not be prompted with this
dialog the next time you wish to run the application.

Page 16
Viewing The Tutorial
The installation procedure will place an animated tutorial “video” onto your PC.
This file, named “SecureNET.exe,” can be found in the directory “C:\Program
Files\Sensar\SecureCam.” To run the program, use the shortcut found in the “Start
Menu,”–look under “Program Files,” then “Sensar Utilities” for the entry labeled
“Tutorial Video.” You can also locate the tutorial using Windows Explorer and
launch it by “double-clicking” the file. Once you are connected to the demo web
page, you may run it by clicking the camera icon located at the bottom right of the
web page.
The tutorial shows a typical camera user demonstrating the use of the Sensar
Secure®Cam camera. A few things to note from the tutorial…
•The tutorial may not run immediately – hit the space key twice to start the
animation. Hitting the space key pauses the animation; hitting it again resumes
the motion. Hit the “Esc” key to exit.
•The camera’s range starts about 4 inches away from the eye.
•Moving the camera closer or farther away will make the yellow ball of light
shrink or grow respectively.
•Moving the camera up, down, left, or right will move the yellow ball
accordingly, without making the ball shrink or grow.
The goal is to put the yellow ball in the center, then make it shrink or grow until it
just fills the dark, open area in the center of the blue field.
Even after the goal is met we suggest, as the tutorial shows, that you move the
camera just slightly (~1/4 inch) closer then farther away. This will put your eye in
the best focal range.

Page 17
The tutorial will run continuously until the “escape key” is hit. Below is one
screen from the tutorial.
Figure 8
Tutorial Animation Screen Shot

Page 18
Practice Using The Camera
The installation procedure will place a “TroubleShooting Assistant and Camera
Practice” application onto your PC. This file, named “Practice.exe,” can be found
in the “C:\Program Files\Sensar\SecureCam” directory. A shortcut to this progam
may be found under the “START” menu (Start->Program Files->Sensar Utilities-
>Practice). You can also locate the Practice Application using Windows Explorer
and launch it by “double-clicking” the file.
Practice using the camera with and without your glasses. You do not need to
remove your contact lenses.
Below is a screen shot from the practice application.
Figure 9
Screen Shot From Practice Application

Page 19
Getting Started
Figure 10
The Sensar Secure®Cam
Enrollment
After you have finished installing the camera, you will need to enroll for the first
time. Enrolling is the process of collecting several iris images and comparing
them against each other. The system collects from 1 to 4 eye images for
enrollment. The best image is selected as your enrolled image and will be used in
comparison checks during all future verifications.
Enrollment will automatically start by a software application or web page you
download from a site supporting the Sensar…Secure®Cam system. Enrollment
software is not provided with this package. You should remove your glasses for
the enrollment process.
Focusing—You must position your eye about four inches away from the lens
before a focused image can be taken. You will see a ball of light when looking
into the lens which gets bigger or smaller as you move toward or away from the
window. The goal is to make the ball of light approximately the same size as the
target window. You should slowly move the camera slightly closer and then
farther away (~1/4 inch) to attain the correct focus position.
The camera can be placed on an elevated level surface or you can pick up the
camera with your hand. Keeping your eyes wide open, position your eye in the
focus range and listen for four shutter sounds from your speakers. These indicate
the four images being taken. If needed, cover the opposite eye to aid in image
taking. If no sound occurs, first check your sound setup. Next, try moving your

Page 20
eye closer or farther away from the lens slightly (alternatively, you can move the
camera!). You will hear a “ding” if the enrollment is successful, otherwise you
will need to try again. The system may timeout after 10 seconds if it finds no
suitable images and you may need to start enrolling again. The key points are to
place your eye in focus and to keep your eye as wide open as possible. Another
suggestion is to try to keep the face of the camera “flat” with respect to your
eye…try not to squint which may occur if you close the other eye (keep both eyes
open and cover one eye).
Once you have succeeded in enrolling your eye (you may choose to enroll both
eyes if you wish), use the verify feature to verify your eye image. In this
operation, only one image will be taken and compared to your enrolled image. If
they match, then you will have verified your eye. Place your eye in focus and you
will hear a “ding” sound to signal that you have been verified successfully. If it
does not work, try the same suggestions as in the enrolling process.
NOTE: Do not obstruct the black window during any portion of the enrollment or
verification process.
Congratulations! You can now use the Network Security System for secure access
over the Internet.
This manual suits for next models
1
Table of contents


