sensolus TRACK 1030 User manual

TRACK 1030 Installation and activation manual
Installaon with bolts
Bolt M5 Spring washer Washer Nut 1. It is recommended to use M5 bolts and to use thread
locking glue on the bolts. We recommend Locte Thread
Locker Blue 242.
2. Protect the casing with a washer and use a spring
washer to migate the eects of vibraon and
temperature variaons.
3. The maximum allowed torque is 1.25Nm for an M5 x
12 mm screw used with a washer. Applying more torque
may severely damage the tracker’s casing.
Rivets diameter 5mm
Drilled hole
min 5.1 mm
Rivets are advised are they are more secure and tamper
proof.
The height of the casing where the mounng holes are
located is 8mm.
We recommend Gesipa Blind Rivets Aluminium/Steel
Standard Flat Head 5x 16mm.
We recommend to install with rivets
Do not push the tamper buon before
installaon
Do not open the tracker.
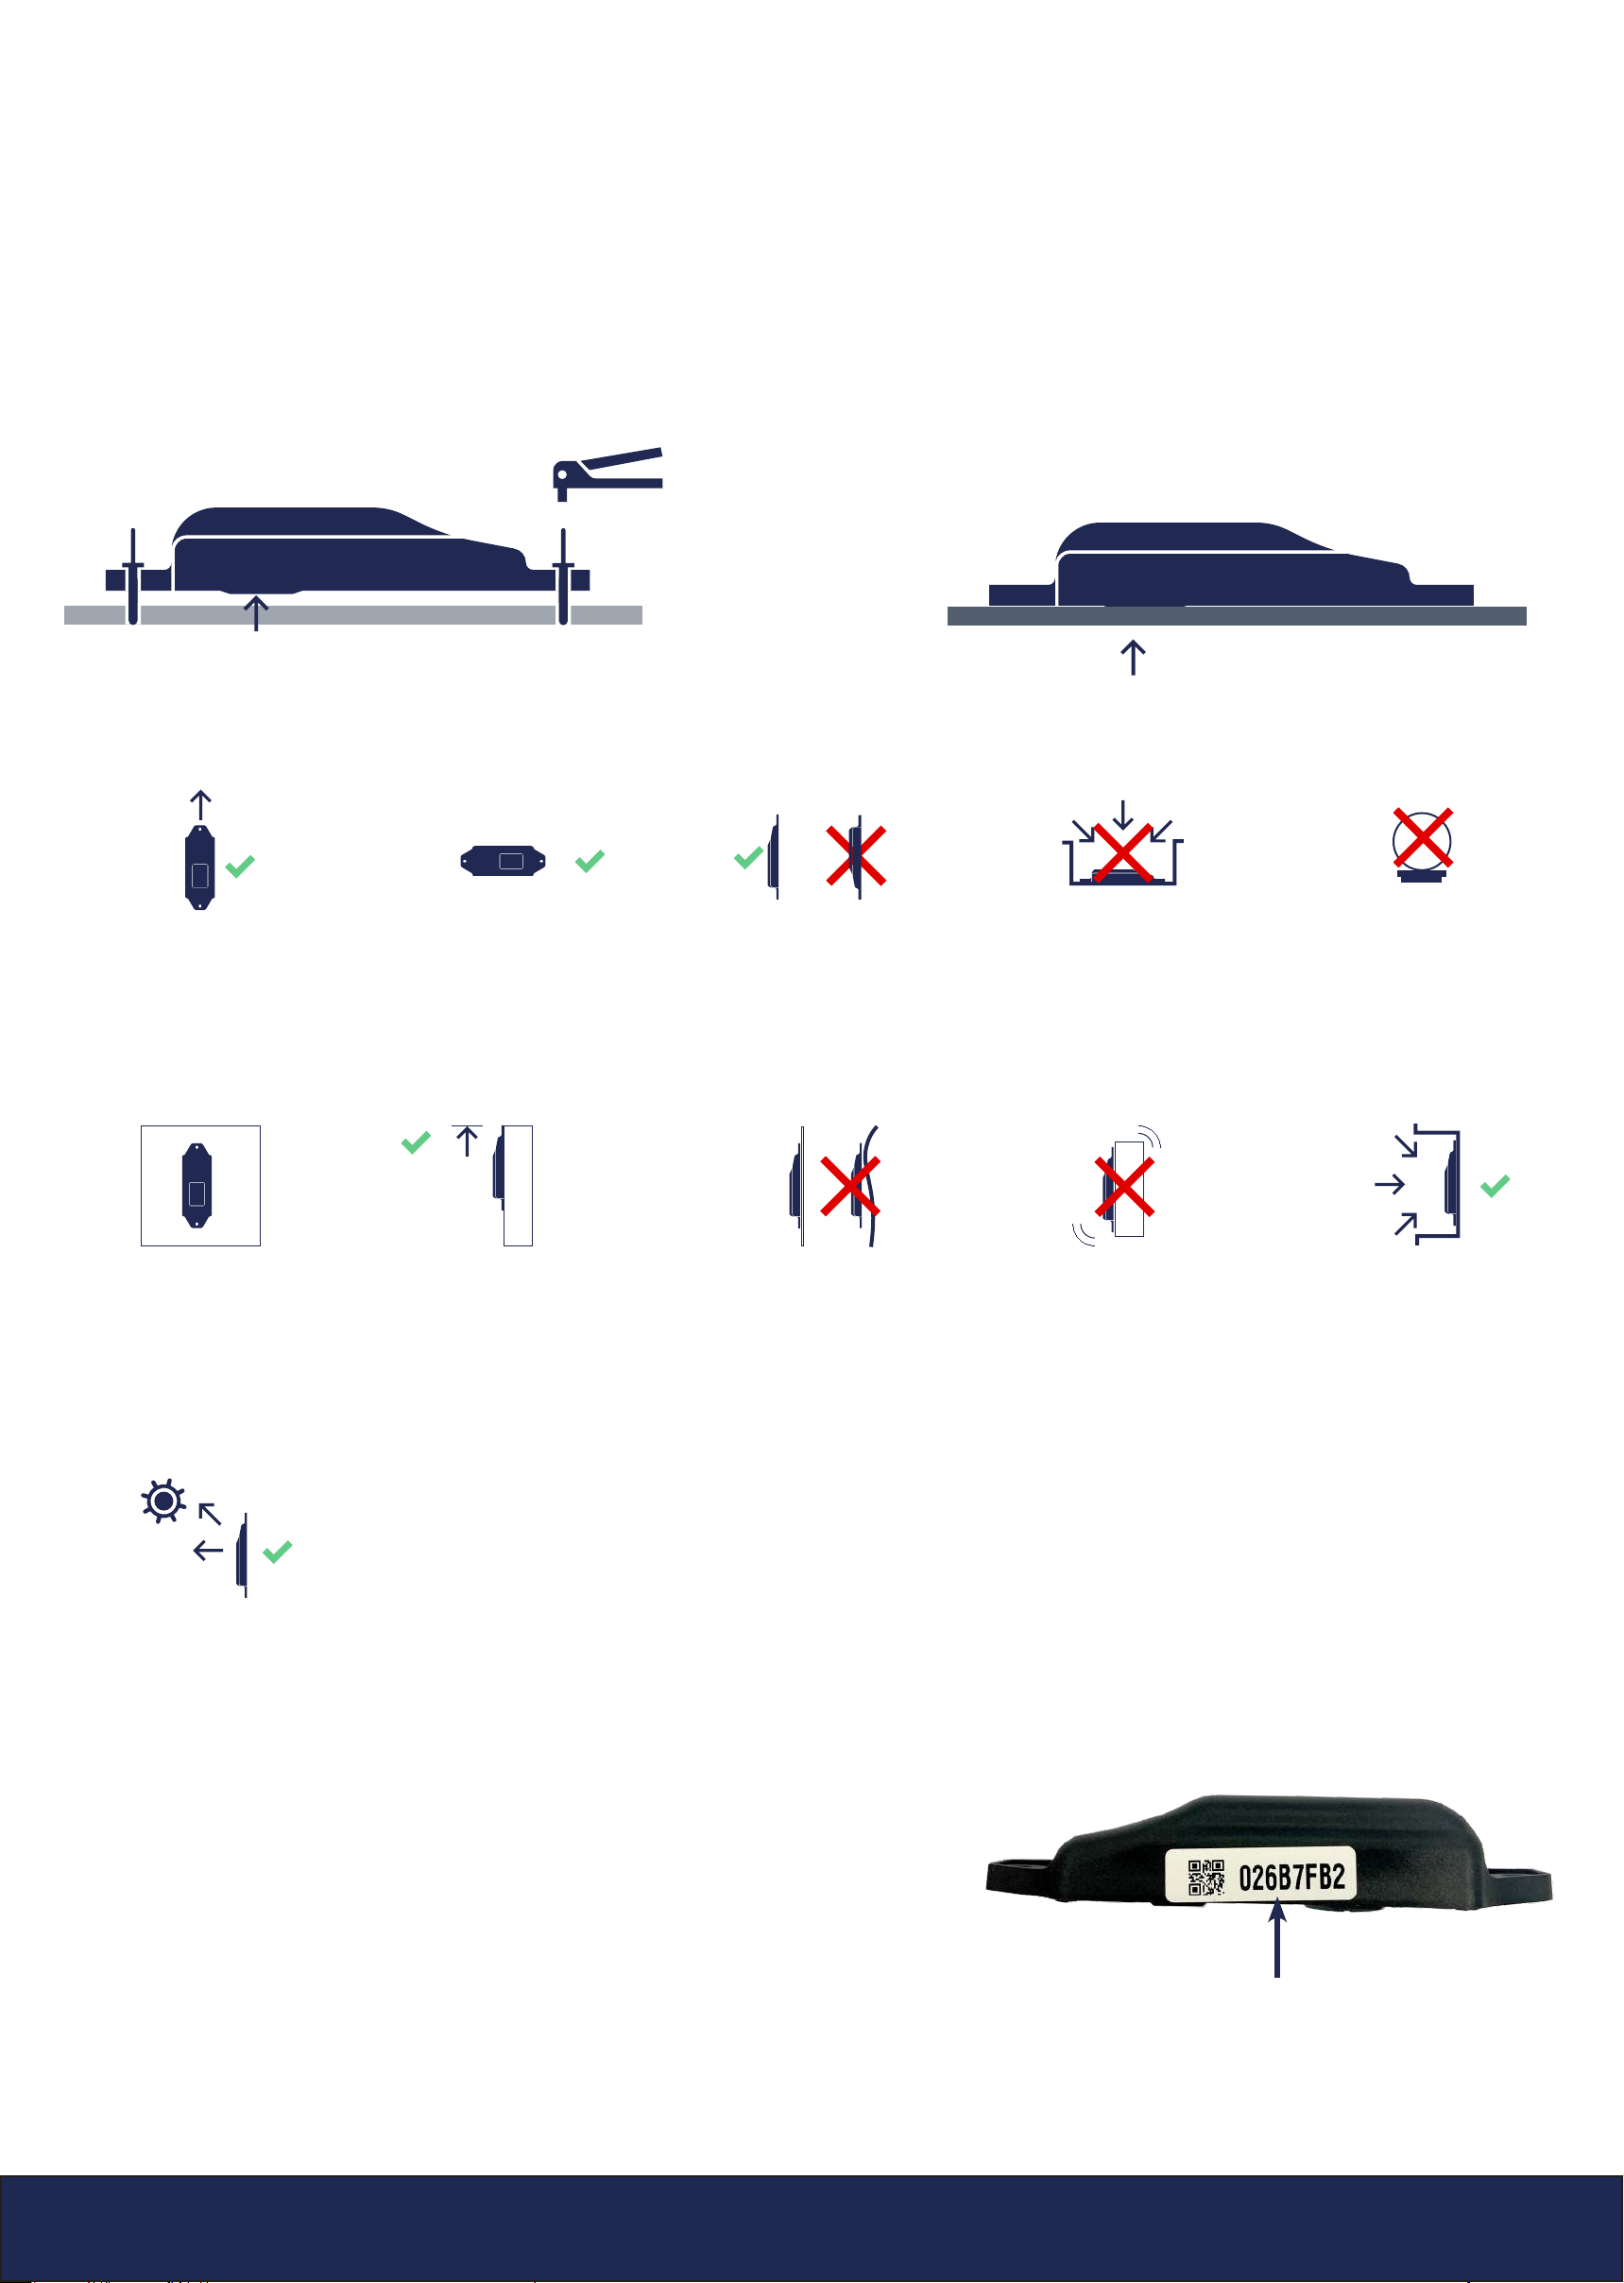
• Acvaon of the tracker is preferably done with clear skies, and not inside (e.g.
factory or warehouse).
• Trackers are not acvated when delivered to your premises.
• The subscripon in the plaorm will start within six month of purchase.
The acvaon is done automacally when the tracker is installed properly on an at
surface and the tamper buon is pressed connuously for 60 seconds.
Make sure the tamper
buon is pushed
Tracker installaon and acvaon
Avoid blocking the
tracker’s view with metal
or carbonbre walls.
They weaken or block the
radiofrequency signals.
The recommended
orientaon is vercal
(upright) with the arrows
on the scker poinng
upwards.
Place the tracker as high
as possible on the asset
to ensure good network
coverage.
Make sure the tracker has a
clear view on the sky..
Do not install the tracker
on parts that receive
frequent shocks or
vibraons.
You can place the tracker
in a protected locaon,
but never with metal or
carbonbre above the
tracker.
Avoid placing the tracker
in a place that can collect
water.
Make sure the mounng
surface is at and clean, for
a strong and durable bond
and to secure the tamper
funcon will work.
Do not mount on round
surfaces, this will impact
the tamper functionality.
Do not mount the tracker
upside down.
The second best
orientaon is horizontal
(sideways).
Tamper buon
Step 1: Install the tracker
Step 2: Check in the plaorm
Check in the plaorm or the Sensolus app if the tracker is online. To nd a tracker in the
plaorm.
The trackers do not have a Sensolus serial on the device but the Sigfox device ID.
• You can nd your trackers by entering the Sigfox ID in the global search. (Find the
Sigfox ID on the side of the TRACK 1030).
• To see the asset Sigfox IDs in the asset list, click Column settings > Select Sigfox
device ID checkbox > Save.
Sigfox device ID
Other sensolus GPS manuals


