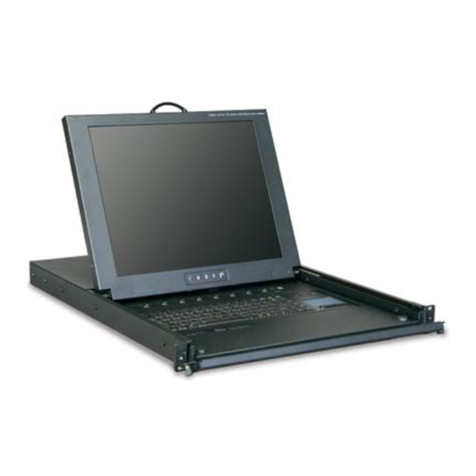
serverLink LKS-CD17DR User manual

Table of Contents
▓INTRODUCTION ....................................................................................................1
▓DUAL RAIL LCD CONSOLE
Overview...............................................................................................................2
Features................................................................................................................2
Packing List...........................................................................................................3
KVM Module..........................................................................................................4
Assembly...............................................................................................................5
Installation.............................................................................................................8
Front Panel............................................................................................................9
Control Selection................................................................................................ 10
Open and Close Console................................................................................... 11
Replaceable Keyboard and Touch Pad .............................................................. 14
LCD Specification............................................................................................... 17
Please read this manual thoroughly and follow the installation procedures to
prevent any damage to the product or any connected devices.

ServerLink Dual Rail LCD Console
1
------------------------
Introduction
The ServerLink LCD offers the ultimate in styling and computer management. With a keyboard, mouse, TFT
LCD panel and a ServerLink LCD KVM switch module housed in an industry standard 19" 1U-height rack
drawer, it saves you up to 1/3 of valuable real estate from a rack cabinet. Better yet, when the ServerLink
LCD Console is cascaded with other ServerLink LCD KVM switch modules to increase server management
capacity, you save even more!
The Dual Rail design allows the keyboard and LCD display to slide in and out the rack independently of
each other which allows the keyboard to be conveniently stowed away while the monitor is still displayed.
All KVM switch modules come with a universal C-36 connector for connection between the console drawer
and a ServerLink LCD KVM switch module. This modularized design offers the maximum flexibility, as you
can choose and swap the modules to fit your needs. AServerLink LCD KVM switch module can also be
used as an independent KVM switch.
The ServerLink LCD Console comes in three parts
A1RU Dual Rail Drawer with Keyboard, Touch Pad and LCD Monitor
B1 KVM Switch Module
B2 Extension Kit
C Rear Bracket

ServerLink Dual Rail LCD Console
2
Overview
This Dual Rail 17” Full HD widescreen LCD console drawer is designed for applications where space is at a
premium.
The drawer can be pulled out from the rack during operations and latched in the extended position. When
not in use, the display can be folded down, locked and secured while pushed in.
With different rear bracket & extension kits, the ServerLink LCD Console can be mounted in rack cabinets of
various depths.
Model LKS-CD17DR
Keyboard Replaceable Yes
Touch Pad Replaceable Yes
Module Selection Yes
H x W x D (mm) 44 x 440 x 700
Features
Dual-Rail console drawer with keyboard, touch pad and LCD monitor in 1RU height
Front panel On Screen Display (OSD) control and LED indicator for easy adjustment of display image
LED lighting bar indicating power status
Flip-open 17” Full HD widescreen LCD panel supports resolution up to 1920 x 1080
Low power consumption
Embedded USB-A connectors support wireless keyboard / mouse ( or wireless keyboard and mouse
combo)
Full 105 key, low-profile, sturdy keyboard included
Special slip-free handle design
A universal C-36 connector for connection between console drawer and KVM switch function module
Support Sun keyboard mapping and Mac keyboard mapping
Water-proof and dust-proof touch pad
Tilt-free bolt design for transportation and installation
Special scratch-free design in dual tray system
Replaceable keyboard and touch pad
LCD monitor auto shut down under 45°

ServerLink Dual Rail LCD Console
3
Packing List
ServerLink LCD Console: LCD panel + keyboard + mouse pad
Rear bracket & extension kit: This kit contains two pieces of rear brackets and two pieces of extensions.
Make sure you have the correct kit to fit the depth of your cabinet. Note:the following length is
measured between "front pole and rear pole inside a rack cabinet" not the outside depth of a rack
cabinet enclosure.
RW-2
RW-1
Rear Bracket Pairs of Different Length
Cabinet’s Front Pole
to
Rear Pole Distance
17” LCD Drawer
RW-1* RW-2**
cm (inch) cm (inch)
Minimum 40.0 (15.8) 60.0 (23.7)
Maximum 95.0 (37.4) 115.0 (45.3)
* RW-1 (385mm long) is an optional order.
**RW-2 (575mm long) is included with the standard packaging.

ServerLink Dual Rail LCD Console
4
KVMModules
Model name LKS-101CM LKS-801CM LKS-1601CM LKS-801CRM LKS-1601CRM
For computer PS/2, USB, USB-Sun, USB-Mac PS/2-PC, USB-PC, USB-Sun, USB-Mac
No. of console
ports N/A 1 1 1 1
No. of computer
ports 1 8 16 8 16
OSD menu N/A Yes Yes
Built-in IP No Yes
Height 1U 1U
Cable type SL-CKP-XX SL-ECK-XX and SL-USB-XX SL-ECK-XX and SL-USB-XX

ServerLink Dual Rail LCD Console
5
Assembly
BracketandExtensionKit
Cabinet Screw X 8
Counter-Sunk
Screw X 8
Step 1. Use 4 Counter-Sunk Screws to attach the extensions (from the Rear bracket & extension kit) to
both sides of the KVM switch module. Please note the length of the extensions in advance and
then mount them in the following way. For a 2U module, the extensions are mounted to the lower
half of the module.
Extensions attachment
Step 2. Use 4 Cabinet screws to screw the unit on the rack
Caution
Do NOT remove the safety stoppers unless the assembly is fully completed.
The wide–edged plastic
extension is on the top side.
Safety Stopper

ServerLink Dual Rail LCD Console
6
Step 3. Slide the rear bracket into both sides of the unit. Please make sure those two wheels with screws
are INSIDE the track of bracket while sliding in.
(Please follow the direction as the white arrows shown)
Step 4. Push the KVM switch module evenly towards the drawer
Step 5. Slide the console drawer out and fasten this screw piece with the module tightly.

ServerLink Dual Rail LCD Console
7
Step 6. Remove the 1~4 screws of Safety Stoppers located on front sides (left & right) side in sequence.
Step 7. Slide the drawer out and then remove the 4 screws of Safety Stoppers located on two edge sides
(left & right) in sequence.
Note : Keep the removed parts in a proper place after install in case you need to move or pack again.
WARNING
The safety stoppers are purposely designed to prevent the drawer from sliding out when in
transit. After the safety stoppers are removed, the drawer may slide out when be tilted and
can cause serious injury.
Step 8. Connect the power supply to the power jack on the KVM Switch Module, Then the assembly is
completed.
Division of the module into the independent part of switch, monitor, keyboard, and touch pad, is a uniquely
flexible, modularized design with human-factored caring. It provides users a significant benefit on expense
saving and time saving. Whenever a maintenance or repair issue encountered, users can easily replace only
the part of the switch module by following above Step 4 to Step 5.

ServerLink Dual Rail LCD Console
8
Installation ( more references are given in the KVM Switch Module User Manual )
The installations for ServerLink LCD KVM switch module with computers can be found in the KVM module
manual.
The combination of a ServerLink LCD console and a one port module (LKS-101CM or LKS-101CRM) can be
considered as a set of PS/2 keyboard, mouse and monitor as shown below.
ServerLink LCD Console connects to a computer
Or, the ServerLink LCD Console with the 11ServerLink LCD KVM switch module can be connected to a
KVM switch as shown below.
ServerLink LCD Console connects to a KVM switch
The installations for KVM switch function module with computers can be found in the user’s manual for each
model.

ServerLink Dual Rail LCD Console
9
Front Panel
Front Panel of the ServerLink Dual Rail Console
KVM Control and Status: (This section is effective only when a KVM switch function module is connected,
not applicable for 1-Port module.)
A LED lighting bar is located at the side of handle.
1. Computer Selection Button (Lower)
Press one of these pushbuttons to select a computer. For 16-port models: “1”~”8”
represent the lower 8 ports and “A”~”H” for the higher 8 ports. Port “1” and “A” share the
same pushbutton, if port “1” is already selected, tap its pushbutton to select port “A”. If port
“1” is not selected, press and hold the pushbutton “1” for 2 seconds to select port “
2. Computer Selection LED (Upper)
When any of the “1” ~”8” port of computer is selected, the corresponding indicator lights up
with steady red. When any of the “A” ~”H” port of computer is selected, the corresponding
indicator lights up with flashing red.
3. LCD Power Button
Press this button to turn on the monitor, the corresponding indicator lights up constantly.
LCD Monitor Function Buttons ( 4 ~ 7)
4. Auto :a. press this compound key to automatically adjust the best setting for the
current display signal
:b. under OSD menu press this compound key to Exit
: c. When in operation, invoke the OSD menu for settings of the LCD panel as
an ordinary LCD monitor
5. +: under OSD submenu screen press this compound key to increase (+) the value
: under menu OSD screen press this compound key to move to the next item
6. -: under OSD submenu screen press this compound key to decrease (-) the value
: under menu OSD screen press this compound key to move to the previous item
7. Enter : press this compound key to trigger the OSD function
: under menu OSD screen press this compound key to enter the OSD submenu

ServerLink Dual Rail LCD Console
10
Control Selection
Along with the control of the regular keyboard and touch pad that are included in this dual-rail LCD console
drawer, the “exclusive” powerful and very convenient feature have been added on this product – Supports
ALL wireless (or cordless) keyboards and mice available in the market, extends your keyboard and mouse
control without any obstructive cable, is free to move where you want, controls and manages all of your
servers on the cabinet within the range of a couple of meters!
Furthermore, an on-demand solution is tailored to fit the user’s needs, while using the wireless mouse ( or
wireless keyboard and mouse combo), users can disable the Touch Pad function to prevent the mouse
cursor from being interfered.
Apply the wireless control / Disable the Touch Pad function :
The Space-Conscious cubby bin design, with an USB-Aconnector and embedded selector, enables users
to connect the wireless receiver for an extra Keyboard / Mouse. The selector allows users to switch ON/
OFF the Touch Pad function. This hidden bin can be seen by pushing and lifting the lid as the direction
shown below.
An extendable USB-A connector situated on the side edge of the drawer as the following figure shown.
lid
Plug USB (KB/MS) here
Plug USB (KB/MS) wireless receiver

ServerLink Dual Rail LCD Console
11
Open and Close Console
The ServerLink console drawer contains two parts: LCD Monitor and Keyboard / Touch pad part. These two
parts can be slid together or separately. Users can view the LCD monitor without pulling out the keyboard.
Open Console
1. Opening Together
Users can easily pull the LCD monitor and Keyboard / Touch pad together to a position that best
supports ergonomic comfort and lift the LCD panel to the degree for screen display.
2. Opening LCD Monitor Only
Hold the handler of LCD monitor part. Pull it upwards to release LCD monitor part from the
Keyboard/Touch pad, wherein a click sound should accompany the release. Tilt the monitor to the
comfortable position for viewing.
Close Console
1. Fold the LCD monitor. Hold the handler and push it back evenly.
OR
2. Fold the LCD monitor. Press two metal unlock plates down together
then push it back slowly and evenly.

ServerLink Dual Rail LCD Console
12
5 6 Right side screws &
bracket ( 2 screws & 1
bracket )
3 4 rolling ball set ( 1 rolling
ball set and 2 screws )
1 2 Left side screws &
bracket ( 2 screws & 1
bracket )
Caution
If LCD monitor is pulled all the way out to end, you will see two metal unlock plates extended
outside in both edges. To push the monitor back to the cabinet, press and hold these two
metal unlock plates together to flat and then push it back slowly and evenly until the metal
plates are moved inside the unit completely. Make sure to push safely and protect your
fingers from hurt.
Special Note:
Open Keyboard / Touch Pad Part & LCD Monitor Part Individually
In case you still want to pull the Keyboard / Touch Pad and LCD monitor independently, firstly you need to
remove the following parts in three locations. 1). Left side screws and bracket 2). Right side screws and
bracket 3). Rolling ball set. You have to unscrew and remove them in one time. After that, put them aside
and then you can pull keyboard / Touch Pad part and LCD monitor part individually. Please see the diagram
below.
Hold the handler of Keyboard / Touch Pad part in the lower floor,
and then pull it out.

ServerLink Dual Rail LCD Console
13
Caution
Do not lean your body weight on the console or keyboard module when it is pulled out
Do not place any object or significant force while the console drawer is pulled out, or while
the console drawer is used, it may cause personal injury or property damage.
Do not put your fingers, hand, and anything on the rear cabinet. Do not touch any part
behind the rear cabinet.
Keep the area behind the drawer clear.
Do not apply force to the monitor screen, and not scratch it with objects. It can cause
failure or damage to the monitor
We do not recommend users to disassemble or modify the console drawer for any purpose,
which may cause damage of the product and property or personal injury.

ServerLink Dual Rail LCD Console
14
Replaceable Keyboard and Touch Pad
Replace Keyboard
Take the keyboard out : The keyboard is replaceable for language change or maintenance. Pull the
keyboard part outwards to the end and unfold the LCD monitor part. Unscrew 6 screws underneath the
drawer. There is a round hole underneath the drawer, finger pushes the keyboard upwards through this hole.
Lift it up; locate the mini-USB cable underneath the keyboard. Gently unplug it and take it out.
Put the keyboard in : While installing a keyboard, make sure that you extend proper length of the cable to
flat it inside the tray. Hold the keyboard with two hands evenly and place it over the foam. Do not use one
hand to squeeze keyboard inside the tray. Double check the USB cable is placed inside the ditch flat without
any twist. Plug the keyboard connector firmly.
WARNING
Make sure that the USB wire is placed inside the line holder and fixed
After placing the keyboard inside the tray, make sure that the keyboard lies down evenly
and flatly to avoid any scratch or damage.

ServerLink Dual Rail LCD Console
15
Note : The triangular mark on the mini-USB connector must be faced outwards.
Alternative Way for Keyboard Fastening ( Recommended )
Pull the keyboard part outwards as figures shown below and fasten these 6 screws to avoid any scratch or
damage
Triangular mark

ServerLink Dual Rail LCD Console
16
Replaceable Touch Pad
1. Touch Pad and Its “Wheel”
The Touch Pad simulates a “wheel mouse”. This area is located at the right side of Touch Pad. When
touching this area you will see two small triangular marks which is the simulated “wheel” as shown below.
2. Touch Pad Replacement
To remove the Touch Pad, press the tab (as shown in the following diagram, the finger point with labeled
1)underneath it upward to release the latch, and then slide it outwards till the Touch Pad fully lifted up away
from the notch, as shown in the figure on the right. The Touch Pad is attached by a piece of mini-USB cable.
To install the Touch Pad, adjust the length of mini-USB cable and slide the Touch Pad all the way in till a click
sound is generated, which means it is locked into position.
Note : The triangular mark on the mini-USB connector must face outwards.
Triangular mark
Fully lifted up away
from the notch

ServerLink Dual Rail LCD Console
17
LCD Panel Specification
Specifications 17.3”W LCD Panel
Active Display Area 381.89 x 214.81 (mm)
Pixel Pitch (mm) 0.199(H) x 0.199(V)
Resolution 1920 x 1080 @60/70/75Hz
Color Pixel Arrangement RGB vertical strip
Display Mode Normal White
Brightness(cd/m^2) 400 (center)
Contrast Ratio 500:1
Display Color 262K (RGB 6-bits)
User Control OSD Control (auto saving)
Input Signal RGB analog, H/V separate
Plug-n-Play VESA VESA DDC 2B
Power Consumption(Max) 13.2W
(normal operation)(Typical)
Viewing Angle(Typical) - 70~ 70(H)
- 60~ 60(V)
Backlight Unit LED
Operating
Temperature 0 to + 50 (°C)
- 20 to + 60 (°C)
Storage (Shipping)
Temperature
Operating Humidity Relative Humidity 8% ~ 95%
Non-Operating Humidity 95% RH
Power Supply Input Voltage Full range, 100V AC to 240V AC
Approval CE, FCC, C-Tick for the product. UL, TUV, CE, C-Tick for power supply
Notice
In no event shall the unit be responsible or liable for any damage due to accident,
unauthorized alterations, improper repair, modifications, inadequate maintenance and care,
or use in any manner for which the product was not originally intended.

Limited Warranty
IN NO EVENT SHALL THE DIRECT VENDOR'S LIABILITY FOR DIRECT OR INDIRECT, SPECIAL, INCIDENTIAL
OR CONSEQUENTIAL DAMAGES, LOSS OF PROFIT, LOSS OF BUSINESS, OR FINANCIAL LOSS WHICH MAY
BE CAUSED BY THE USE OF THE PRODUCT EXCEEDS THE PRICE PAID FOR THE PRODUCT.
The direct vendor makes no warranty or representation, expressed or implied with respect to the contents or use of this
documentation, and especially disclaims its quality, performance, merchantability, or fitness for any particular purpose.
The direct vendor also reserves the right to revise or update the product or documentation without obligation to notify any user of
such revisions or updates. For further information, please contact your direct vendor.
All the brand names and registered trademarks are the property of their respective owners.
Copyright 10/2011
www.serverlink.com.au
This manual suits for next models
4
Table of contents
Other serverLink LCD Drawer manuals
Popular LCD Drawer manuals by other brands
Fisher & Paykel
Fisher & Paykel VB60SMB1-SET installation guide
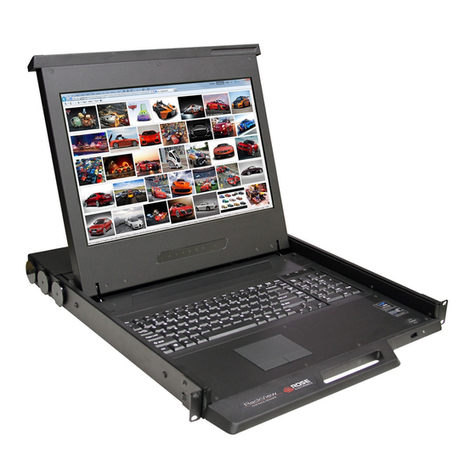
Rose electronics
Rose electronics RackView RV1-CAKVT17/DVI Installation and operation manual
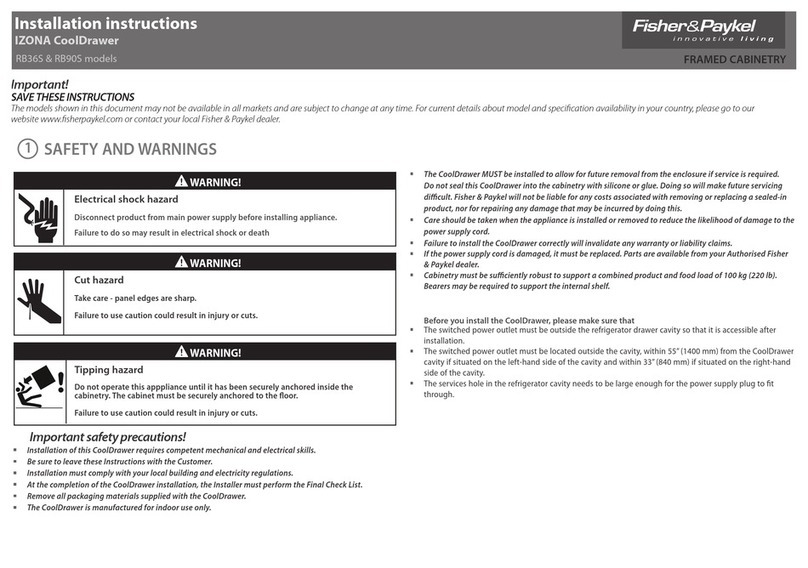
Fisher & Paykel
Fisher & Paykel IZONA CoolDrawer RB36S installation instructions
Network Technologies
Network Technologies NTI SERIMUX-SECURE 8 Installation and operation manual

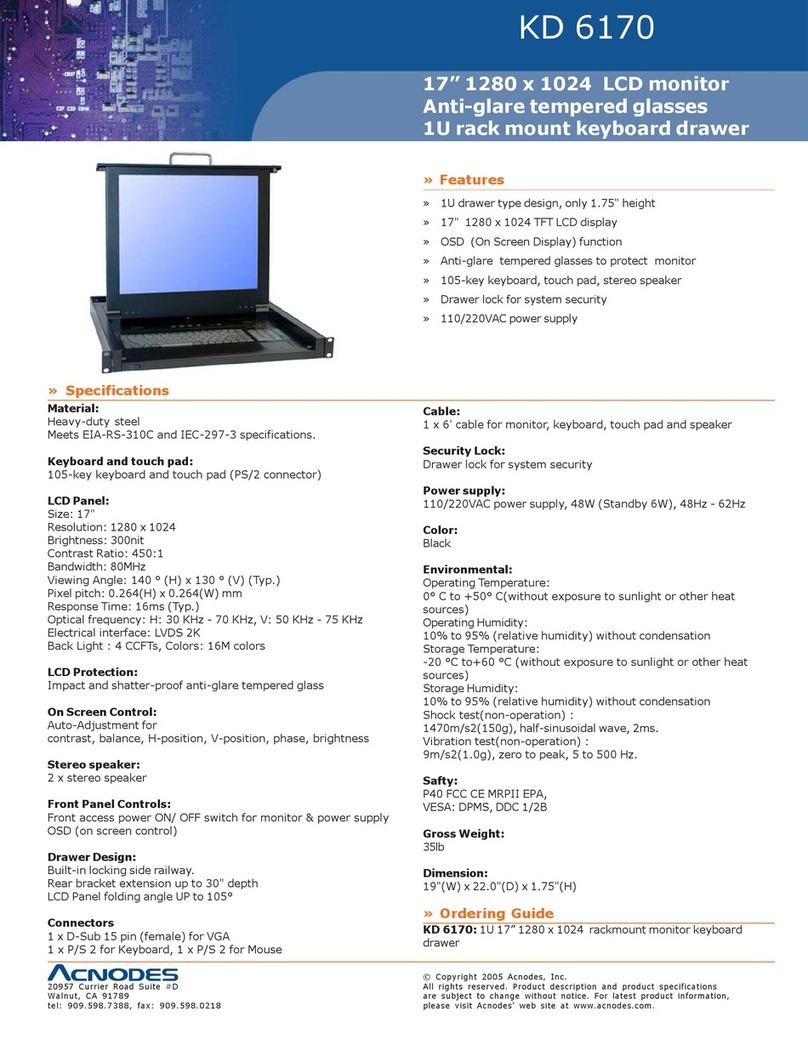
Acnodes
Acnodes KDM 31716 Specifications
DOMUSA
DOMUSA BioClass HM 10 Installation and operating instructions
