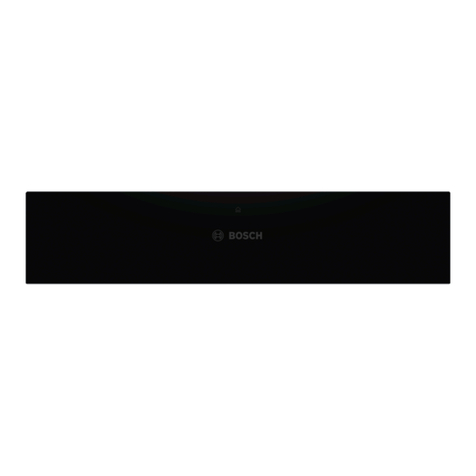
Bosch HWD57 User manual

Warming Drawers
Use and Care Manual
HWD57; HWD50 Invented for life

Table of Contents
About This Manual ........................... 1
How This Manual is Organized ................... 1
Safety Definitions .............................. 1
Safety ...................................... 2
Important Safety Instructions ................... 2
Getting Started ............................... 4
Parts ....................................... 4
Warming Drawer .............................. 4
Control Panel ................................. 4
Operation ................................... 4
About the Appliance .......................... 4
Features .................................... 4
Warming Timer ............................... 4
Sabbath Mode ................................ 4
Use of Your Appliance ........................ 5
Preheating the Warming Drawer .................. 5
Warming Food ................................ 5
Warming Plates and Bowls ...................... 5
Proofing ..................................... 5
Crisping Stale Items ............................ 5
Getting the Most Out of Your Appliance .......... 5
Temperature Recommendations .................. 5
Cleaning and Maintenance ..................... 6
Cleaning .................................... 6
Maintenance ................................. 6
Removing the Drawer .......................... 6
Replacing the Drawer .......................... 6
Service ..................................... 7
Data Plate ................................... 7
STATEMENT OF LIMITED PRODUCT WARRANTY.. 8
This Bosch Appliance is made by
BSH Home Appliances Corporation
1901 Main Street, Suite 600
Irvine, CA 92614
Questions?
1-800-944-2904
www. bosch-home.com/us
We look forward to hearing from you!

About This Manual
How This Manual Is Organized
This manual contains several sections:
•The Safety section describes important procedures
that can ensure your safety while using the appliance.
• The Getting Started section describes the features and
functionality of the appliance, including a description of
how to set it up and operate it.
• The Operation section describes how to operate and
get the best performance out of each component.
• The Cleaning and Maintenance section describes how
to clean and maintain the appliance.
• The Service section includes troubleshooting tips and
your warranty.
• Before using your appliance, be sure to read this
manual. Pay special attention to the Important Safety
Instructions located at the beginning of the manual.
WARNING
This indicates that death or serious injuries may
occur as a result of non-observance of this warning.
_, CAUTION
This indicates that minor or moderate injuries may
occur as a result of non-observance of this warning.
NOTICE: This indicates that damage to the appliance or
property may occur as a result of non-compliance with this
advisory.
Note: This alerts you to important information and/or tips.
English 1

IMPORTANT SAFETY INSTRUCTIONS
READ AND SAVE THESE INSTRUCTIONS
Safety
WARNING:
When properly cared for, your new appliance has been
designed to be safe and reliable. Read all instructions
carefully before use. These precautions will reduce the risk
of burns, electric shock, fire and injury to persons. When
using kitchen appliances, basic safety precautions must be
followed, including those in the following pages.
Proper Installation and Maintenance
Have the installer show you the location of the circuit
breaker or fuse. Mark it for easy reference.
This appliance must be properly installed and grounded by
a qualified technician. Connect only to a properly grounded
outlet. Refer to the Installation Instructions for details.
Smother flames from food fires other than grease fires with
baking soda. Never use water on cooking fires.
Burn Prevention
Exercise caution when opening the appliance. Standing to
the side, open the door slowly and slightly to let hot air and/
or steam escape. Keep your face clear of the opening and
make sure there are no children or pets near the unit. After
the release of hot air and/or steam, proceed with your
cooking. Keep doors shut unless necessary for cooking or
cleaning purposes. Do not leave open doors unattended.
Do not heat or warm unopened food containers. Build-up of
pressure may cause the container to burst and cause
injury.
This appliance is intended for normal family household use
only. It is not approved for outdoor use. See the Warranty. If
you have any questions, contact the manufacturer.
Do not store or use corrosive chemicals, vapors,
flammables or nonfood products in or near this appliance. It
is specifically designed for use when heating or cooking
food. The use of corrosive chemicals in heating or cleaning
will damage the appliance and could result in injury.
Do not operate this appliance if it is not working properly, or
if it has been damaged. Contact an authorized servicer.
Do not repair or replace any part of the appliance unless
specifically recommended in this manual. Refer all
servicing to a factory authorized service center.
Fire Safety
If materials inside an oven should ignite, keep door closed.
Turn off the appliance, and disconnect the circuit at the
circuit breaker box.
Use this appliance only for its intended purpose as
described in this manual. For example, never use the
appliance for warming or heating the room. Never use the
appliance for storage.
Always have a working smoke detector near the kitchen.
In the event that personal clothing or hair catches fire, drop
and roll immediately to extinguish flames.
Always use dry potholders. Moist or damp potholders on
hot surfaces may result in burns from steam. Do not let
potholder touch hot heating elements. Do not use a towel
or other bulky cloth.
Do not touch interior surface of the drawer while it is in use.
The interior of the drawer could become hot enough to
cause burns. Allow drawer and rack (if equipped) to cool
before handling.
_WARNING:
To prevent burns, do not remove drawer while hot. Be sure
drawer is empty before removing.
Secure all loose garments, etc. before beginning. Tie long
hair so that it does not hang loose, and do not wear loose
fitting clothing or hanging garments, such as ties, scarves,
jewelry, or dangling sleeves.
Child Safety
Do not allow anyone to climb, stand, lean, sit, or hang on
any part of an appliance, especially a door, warming drawer
or storage drawer. This can damage the appliance, and the
unit may tip over, potentially causing severe injury.
Do not allow children to use this appliance unless closely
supervised by an adult. Children and pets should not be left
alone or unattended in the area where the appliance is in
use. They should never be allowed to play in its vicinity,
whether or not the appliance is in use.
English 2

IMPORTANT SAFETY INSTRUCTIONS
READ AND SAVE THESE INSTRUCTIONS
WARNING:
Items of interest to children should not be stored in an
appliance, in cabinets above an appliance or on the
backsplash. Children climbing on an appliance to reach
items could be seriously injured.
Cookware Safety
NOTICE:
Plastic containers or plastic wrap can melt if in direct
contact with the drawer or a hot utensil. If it melts onto the
drawer, it may not be removable.
Food Safety
ACAUTION:
To maintain food safety, follow these guidelines:
1. DO NOT use the warming drawer to heat cold food
(exception: it is safe to use the drawer to crisp
crackers, chips, dry cereal or to warm breads or
biscuits, and to warm plates).
2. Be sure to maintain proper food temperature. The
USDA recommends holding hot food at 140°F or
warmer.
3. DO NOT warm food for longer than one hour.
WARNING
State of California Proposition 65 Warnings:
This product contains chemicals known to the State
of California to cause cancer, birth defects or other
reproductive harm.
IMPORTANT SAFETY NOTICE: The California Safe
Drinking and Toxic Enforcement Act requires the
Governor of California to publish a list of substances
known to the state to cause cancer, birth defects or
other reproductive harm, and requires businesses to
warn customers of potential exposure to such
substances.
English 3

Getting Started
Parts
Warming Drawer
2
1 Control Panel
2 Warming Drawer Housing
3 Drawer
Control Panel
The control panel has several touchpads that respond to
light pressure. Touch the center of a touchpad to activate
it.The temperature pads control the drawer bottom
temperature.
The control panel emits a beep when an entry is made. The
warming timer beeps when the specified amount of time
has elapsed..
Display Displays the
current drawer
temperature
2 LOW 140 ° F
3MED 165 ° F
4HIGH 190 ° F
5 PROOF 100 ° F
6 Press to
decrease time
7 + Press to
increasetime
8()N/OFF Switches
warmingdrawer
on and off.
9Signal Turns on when
Light the warming
draweris inuse.
Operation
About the Appliance
The warming drawer will keep hot, cooked foods at serving
temperature. Always start with hot food. DO NOT use to
heat cold food other than proofing yeast dough, crisping
crackers, chips, dry cereal,warming breads and biscuits, or
warming dishes or plates.
The warming drawer has a push-to-open feature. Push in
on the front of the drawer to cause the drawer to open.
Features
Warming Timer
The warming timer can be set for any increment of 5
minutes. The minimum time is 5 minutes and the maximum
is 5 hours.
Note:
The warming timer default is 1 hour.
When the time is elapsed, the warming timer beeps and the
drawer automatically turns off.
Changing the Warming Timer:
Use the + and - pads to change the warming timer.
Sabbath Mode
The Sabbath Feature enables those of particular faiths to
use their warming drawers on the Sabbath.
• The warming drawer is set to run for 74 hours before
automatically turning off.
• While operating in Sabbath Mode, the display will show
SAb.
• The warming timer cannot be changed once the
Sabbath Mode is set.
• Press ON/OFF at any time during Sabbath mode to
end the mode and turn off the appliance.
Setting the Sabbath Feature
Press MED for five seconds.
Note:
Only the MED temperature can be use while in the Sabbath
mode. Once the Sabbath mode is set, all buttons are
disabled except the On/Off button, used to cancel the
mode.
English 4

Use of Your Appliance
_1_ CAUTION
To maintain food safety, do not leave food in the
warming drawer for more than one hour after
cooking.
IMPORTANT:
Plastic containers or plastic wrap can melt if in direct
contact with the drawer or a hot utensil. If it melts onto the
drawer, it may not be removable.
Note:
Use heat-safe dishes only.
Preheating the Warming Drawer
Preheat the warming drawer when warming food. For best
results, preheat for the following times:
Setting Preheat Time
LOW 10 minutes
MED 15 minutes
HIGH 20 minutes
PROOF no preheating necessary
Warming Food
1. Press the pad for the desired temperature setting.
2. Preheat warming drawer.
3. Set the warming timer.
4. Place cooked, hot food in the drawer.
It is okay to leave food in the cookware it was prepared.
Alternatively, you can transfer food to a heat-safe serving
dish before placing it in the warming drawer.
Aluminum foil or lid may be used to cover food.
Warming Plates and Bowls
Use only heat-safe dishes. Place empty dishes or plates in
a cold warming drawer. No need to preheat.
1. Press LOW.
2. Set the warming timer.
Proofing
Place dough in desired dish in a cold warming drawer and
lightly oil top of dough. Loosely cover with cloth.
1. Press PROOF.
2. Set the warming timer.
3. Check dough height. Add time as needed.
Crisping Stale Items
Place food in low sided dishes or pans.
1. Press LOW.
2. Preheat for 5 minutes, then place dish in drawer.
3. Set the warming timer.
4. Check crispness after 45 minutes. Add time as needed.
Getting the Most Out of
Your Appliance
Temperature Recommendations
Food/Cookware
Proofing yeast dough
Bacon
Beef, medium and well done
Beef, medium rare
Bread, hard rolls
Bread, soft rolls, coffe cakes
Biscuits
Casseroles
Eggs
Fish, seafood
Fried foods
Gravy, cream sauces
Ham
Pancakes
Pies, one crust
Pies, two crusts
Pizza
Pork
Potatoes, baked
Potatoes, mashed
Poultry, roasted
Vegetables
Plates
Plate of food
Setting
PROOF
HIGH
MED
LOW
MED
MED
MED
MED
MED
MED
HIGH
MED
MED
HIGH
MED
MED
HIGH
MED
HIGH
MED
MED
MED
LOW
MED
Cover
Dish
Yes
No
No
No
No
Yes
Yes
Yes
Yes
Yes
No
Yes
Yes
Yes
Yes
No
No
Yes
Yes
Yes
Yes
Yes
No
Yes
English 5

Cleaning and Maintenance
Cleaning Maintenance
Part
Drawer interior
(polished stainless
steel)
Painted surfaces
Drawer exterior
frame (brushed
stainless steel)
Warming Drawer
Control
Recommendations
Use dish detergent. Wash, rinse
well and dry. For hard water
spots or scale, use white vinegar.
Apply with a sponge or cloth,
rinse, and dry.
Use hot soapy water or mild
cleaners such as Fantastik® or
Formula 409®. Wash, rinse well
and dry. Avoid using abrasive
cleaning agents, steel wool pads
and oven cleaners.
Always wipe or rub in the
direction of the grain. Clean with
a soapy sponge, then rinse and
dry, or wipe with Fantastik® or
Formula 409® sprayed on a
paper towel. Protect and polish
with Stainless Steel Magic® and
a soft cloth. Remove water spots
with a cloth dampened with white
vinegar. Use Bar Keeper's
Friend® to remove heat
discoloration.
Clean with hot soapy water or
apply Fantastik® or Formula
409® to a clean sponge or paper
towel and wipe clean. Avoid
using abrasive cleaners and
scrubbing pads.
Removing the Drawer
CAUTION
To prevent burns, do not remove drawer while hot.
Be sure drawer is empty before removing.
1. Pull drawer to fully open position.
2. Press down right drawer clip.
3. Lift up left drawer clip.
4. Firmly pull the drawer straight out. Retract cabinet rails
while drawer is removed.
Replacing the Drawer
1. Be sure cabinet rails are pushed inside cabinet.
2. Align the drawer rails with the cabinet rails.
3. Firmly push the drawer straight into the cabinet until
drawer clicks into place.
4. Open and close drawer to test operation. Note: if the
drawer will not close, verify that the rail clips are
properly positioned.
English 6

Service
To reach a service representative, see the contact
information at the front of the manual. Please be prepared
with the information printed on your product data plate
when calling.
Data Plate
The data plate shows the model and serial number. Refer
to the data plate on the appliance when requesting service.
The data plate is visible on the left side of the cabinet. It
may be necessary to remove the drawer to view it.
English 7

STATEMENT OF LIMITED PRODUCT
WARRANTY
What this Warranty Covers & Who it
Applies to
The limited warranty provided by BSH Home Appliances
Bosch in this Statement of Limited Product Warranty
applies only to the Bosch appliance sold to you, the first
using purchaser, provided that the Product was purchased:
• For your normal, household (non-commercial) use, and
has in fact at all times only been used for normal
household purposes.
• New at retail (not a display, "as is", or previously
returned model), and not for resale, or commercial use.
• Within the United States or Canada, and has at all
times remained within the country of original purchase.
The warranties stated herein apply only to the first
purchaser of the Product and are not transferable.
Please make sure to return your registration card; while not
necessary to effectuate warranty coverage, it is the best
way for Bosch to notify you in the unlikely event of a safety
notice or product recall.
How Long the Warranty Lasts
Bosch warrants that the Product is free from defects in
materials and workmanship for a period of three hundred
and sixty-five (365) days from the date of purchase. The
foregoing timeline begins to run upon the date of purchase,
and shall not be stalled, tolled, extended, or suspended, for
any reason whatsoever.
This Product is also warranted to be free from cosmetic
defects in material and workmanship (such as scratches
of stainless steel, paint/porcelain blemishes, chip, dents,
or other damage to the finish of the Product), for a period
of thirty (30) days from the date of purchase or closing
date for new construction. This cosmetic warranty
excludes slight color variations due to inherent
differences in painted and porcelain parts, as well as
differences caused by kitchen lighting, product location,
or other similar factors. This cosmetic warranty
specifically excludes any display, floor, "As Is", or "B" stock
appliances.
Repair/Replace as Your Exclusive
Remedy
During this warranty period, Bosch or one of its authorized
service providers will repair your Product without charge to
you (subject to certain limitations stated herein) if your
Product proves to have been manufactured with a defect in
materials or workmanship. If reasonable attempts to repair
the Product have been made without success, then Bosch
will replace your Product (upgraded models may be
available to you, in Bosch's sole discretion, for an
additional charge). All removed parts and components shall
become the property of Bosch at its sole option. All
replaced and/or repaired parts shall assume the identity of
the original part for purposes of this warranty and this
warranty shall not be extended with respect to such parts.
Bosch's sole liability and responsibility hereunder is to
repair manufacturer-defective Product only, using a Bosch-
authorized service provider during normal business hours.
For safety and property damage concerns, Bosch highly
recommends that you do not attempt to repair the Product
yourself, or use an un-authorized service provider; Bosch
will have no responsibility or liability for repairs or work
performed by a non-authorized service provider. If you
choose to have someone other than an authorized service
provider work on your Product, THIS WARRANTY WILL
AUTOMATICALLY BECOME NULL AND VOID. Authorized
service providers are those persons or companies that
have been specially trained on Bosch products, and who
possess, in Bosch's opinion, a superior reputation for
customer service and technical ability (note that they are
independent entities and are not agents, partners, affiliates
or representatives of Bosch). Notwithstanding the
foregoing, Bosch will not incur any liability, or have
responsibility, for the Product if it is located in a remote
area (more than 100 miles from an authorized service
provider) or is reasonably inaccessible, hazardous,
threatening, or treacherous locale, surroundings, or
environment; in any such event, if you request, Bosch
would still pay for labor and parts and ship the parts to the
nearest authorized service provider, but you would still be
fully liable and responsible for any travel time or other
special charges by the service company, assuming they
agree to make the service call.
English 8

Out of Warranty Product
Bosch is under no obligation, at law or otherwise, to
provide you with any concessions, including repairs, pro-
rates, or Product replacement, once this warranty has
expired.
Warranty Exclusions
The warranty coverage described herein excludes all
defects or damage that are not the direct fault of Bosch,
including without limitation, one or more of the following:
• Use of the Product in anything other than its normal,
customary and intended manner (including without
limitation, any form of commercial use, use or storage
of an indoor product outdoors, use of the Product in
conjunction with air or water-going vessels).
• Any party's willful misconduct, negligence, misuse,
abuse, accidents, neglect, improper operation, failure
to maintain, improper or negligent installation,
tampering, failure to follow operating instructions,
mishandling, unauthorized service (including self-
performed "fixing" or exploration of the appliance's
internal workings).
• Adjustment, alteration or modification of any kind.
• A failure to comply with any applicable state, local, city,
or county electrical, plumbing and/or building codes,
regulations, or laws, including failure to install the
product in strict conformity with local fire and building
codes and regulations.
• Ordinary wear and tear, spills of food, liquid, grease
accumulations, or other substances that accumulate
on, in, or around the Product.
• Any external, elemental and/or environmental forces
and factors, including without limitation, rain, wind,
sand, floods, fires, mud slides, freezing temperatures,
excessive moisture or extended exposure to humidity,
lightning, power surges, structural failures surrounding
the appliance, and acts of God.
In no event shall BSH have any liability or responsibility
whatsoever for damage to surrounding property, including
cabinetry, floors, ceilings, and other structures or objects
around the Product. Also excluded from this warranty are
Products on which the serial numbers have been altered,
defaced, or removed; service visits to teach you how to use
the Product, or visits where there is nothing wrong with the
Product; correction of installation problems (you are solely
responsible for any structure and setting for the Product,
including all electrical, plumbing or other connecting
facilities, for proper foundation/flooring, and for any
alterations including without limitation cabinetry, walls,
floors, shelving, etc.); and resetting of breakers or fuses.
TO THE EXTENT ALLOWED BY LAW, THIS WARRANTY
SETS OUT YOUR EXCLUSIVE REMEDIES WITH
RESPECT TO PRODUCT, WHETHER THE CLAIM
ARISES IN CONTRACT OR TORT (INCLUDING STRICT
LIABILITY, OR NEGLIGENCE) OR OTHERWISE. THIS
WARRANTY IS IN LIEU OF ALL OTHER WARRANTIES,
WHETHER EXPRESS OR IMPLIED. ANY WARRANTY
IMPLIED BY LAW, WHETHER FOR MERCHANTABILITY
OR FITNESS FOR A PARTICULAR PURPOSE, OR
OTHERWISE, SHALL BE EFFECTIVE ONLY FOR THE
PERIOD THAT THIS EXPRESS LIMITED WARRANTY IS
EFFECTIVE. IN NO EVENT WILL THE MANUFACTURER
BE LIABLE FOR CONSEQUENTIAL, SPECIAL,
INCIDENTAL, INDIRECT, "BUSINESS LOSS", AND/OR
PUNITIVE DAMAGES, LOSSES, OR EXPENSES,
INCLUDING WITHOUT LIMITATION TIME AWAY FROM
WORK, HOTELS AND/OR RESTAURANT MEALS,
REMODELLING EXPENSES IN EXCESS OF DIRECT
DAMAGES WHICH ARE DEFINITIVELY CAUSED
EXCLUSIVELY BY BOSCH, OR OTHERWISE. SOME
STATES DO NOT ALLOW THE EXCLUSION OR
LIMITATION OF INCIDENTAL OR CONSEQUENTIAL
DAMAGES, AND SOME STATES DO NOT ALLOW
LIMITATIONS ON HOW LONG AN IMPLIED WARRANTY
LASTS, SO THE ABOVE LIMITATIONS MAY NOT APPLY
TO YOU. THIS WARRANTY GIVES YOU SPECIFIC
LEGAL RIGHTS, AND YOU MAY ALSO HAVE OTHER
RIGHTS WHICH VARY FROM STATE TO STATE.
No attempt to alter, modify or amend this warranty shall be
effective unless authorized in writing by an officer of BSH.
English 9

Table des mati res
Apropos de ce manuel ........................ 1
Comment ce manuel est organis6 ................. 1
D6finitions concernant la s6curit6 .................. 1
Securite ..................................... 2
Consignes de s_curite importantes .............. 2
Mise en route ................................ 4
Pi_ces ...................................... 4
Tiroir-r6chaud ................................. 4
Tableau de commande .......................... 4
Fonctionnement .............................. 4
A propos de I'appareil ......................... 4
Fonctions .................................... 4
Minuterie de maintien au chaud ................... 4
Mode Shabbat ................................ 4
Utilisation de votre appareil .................... 5
Pr6chauffage du tiroir-r6chaud .................... 5
Pr6chauffage des aliments ....................... 5
Pr6chauffage des assiettes et bols ................ 5
Appret ....................................... 5
Redonner leur croquant aux articles rassis .......... 5
Tirer le meilleur parti de votre appareil ........... 5
Recommandations relatives aux temp6ratures ....... 5
Nettoyage et entretien ......................... 6
Nettoyage ................................... 6
Entretien .................................... 6
D6montage du tiroir ............................ 6
Remise en place du tiroir ........................ 6
D_pannage .................................. 7
Plaque signal6tique ............................ 7
I_NONCI_ DE GARANTIE LIMITI_E DU PRODUIT .... 8
Cet appareil electromenager Bosch est fabrique par
BSH Home Appliances, Corporation
1901 Main Street, Suite 600
Irvine, CA 92614
Questions?
1-800-944-2904
II
www.bosch-home.com/us
nous fait toujours plaisir de recevoir vos commentaires!

.&propos de ce manuel
Comment ce manuel est organis_
Ce manuel contient plusieurs sections :
• La section S_curit_ d_crit des procedures importantes
qui visent _ assurer votre s_curit_ pendant I'utilisation
de I'appareil.
• La section Mise en route d_crit les caract_ristiques et
fonctionnalit_s de I'appareil et comprend une
description de son installation et fonctionnement.
• La section Fonctionnement d_crit comment actionner
et obtenir le meilleur rendement de chaque composant.
• La section Nettoyage et Entretien d_crit la fa(_on de
nettoyer et d'entretenir I'appareil.
• La section D#pannage comprend les conseils de
d_pannage et la garantie.
• Avant d'utiliser I'appareil, pri_re de lire attentivement ce
manuel. Prater une attention toute particuli_re aux
Importantes consignes de s_curit_ situ_es au d_but du
manuel.
Definitions concernant la securite
AVERTISSEMENT
Ceci indique que le non-respect de cet
avertissement peut entratner des blessures graves,
voire la mort.
ATTENTION
Ceci indique que le non-respect de cet
avertissement peut entratner des blessures I_g_res
ou mod_r_es.
AVIS :Ceci indique que la non-conformit_ _ cet avis de
s_curit_ peut entrafner des d_g_ts _ I'appareil ou _ la
proprietY.
Remarque : Ceci vous avertit que d'importantes
informations et/ou conseils sont fournis.
Fran9ais 1

IMPORTANTES CONSIGNES DE SI:I:CURIT¢:
LIRE ET CONSERVER CES CONSIGNES
Sdcuritd
AVERTISSEMENT:
Votre nouvel appareil a _t_ con(_u pour un fonctionnement
sQret fiable si vous en prenez bien soin. Lire attentivement
toutes les consignes avant I'emploi. Ces precautions
r_duiront les risques de brQlures, de choc _lectrique,
d'incendie et de I_sions corporelles. Lors de I'utilisation
d'appareils de cuisine, ilest imp_ratif de respecter les
mesures de s_curit_ _l_mentaires, y compris celles figurant
aux pages suivantes.
Installation et entretien corrects
Demander _ I'installateur de vous indiquer I'emplacement
du coupe-circuit ou du fusible. Identifier sa position pour
pouvoir le retrouver facilement.
L'installation et la mise _ la terre correctes de cet appareil
doivent _tre effectu_es par un technicien qualifi_. Brancher
uniquement I'appareil sur une prise correctement reli_e _ la
terre. Se reporter _ la notice d'installation pour obtenir des
d_tails suppl_mentaires.
Cet appareil est destin_ _ un usage domestique familial
normal uniquement. II n'est pas autoris_ pour un usage en
ext_rieur. Voir la Garantie. Pour toute question, contacter le
fabricant.
Ne pas entreposer ni utiliser de produits chimiques
corrosifs, vapeurs, substances inflammables ou produits
non alimentaires _ I'int_rieur ou _ proximit_ de cet appareil.
Celui-ci a _t_ sp_cialement con(_upour faire chauffer ou
faire cuire des aliments. L'emploi de produits chimiques
corrosifs pour chauffer ou nettoyer I'appareil endommagera
ce dernier et peut entrafner des blessures.
Ne passe servir de cet appareil s'il ne fonctionne pas
correctement ou s'il est endommag_. Communiquer avec
un service de r_paration autoris_.
Ne pas r_parer ni remplacer des pi_ces de I'appareil
moins que cela ne soit express_ment recommand_ dans
ce manuel. Confier I'entretien de I'appareil _ un centre de
service autoris_ par I'usine.
Sdcurit_-incendie
Si des mat_riaux s'enflamment _ I'int_rieur du four, ne pas
ouvrir la porte. Mettre I'appareil hors tension et d_brancher
le circuit _lectrique au boftier de disjoncteurs.
L'appareil doit _tre utilis_ uniquement pour I'usage auquel il
est destin_ comme d_crit dans ce manuel. Par exemple, ne
jamais utiliser I'appareil pour r_chauffer ou chauffer une
piece. Ne jamais utiliser I'appareil pour entreposer quoi que
ce soit.
Toujours avoir un d_tecteur de fum_e qui fonctionne pros
de la cuisine.
Si vos cheveux ou v_tements s'enflamment, se laisser
tomber au sol et rouler imm_diatement sur soi-m_me pour
_teindre les flammes.
Pour _teindre les flammes d'un incendie provoqu_ par des
aliments autre qu'un incendie de graisse, utiliser du
bicarbonate de soude. Ne jamais utiliser d'eau sur les
incendies de cuisine.
Prdvention des brQlures
Faire attention en ouvrant la porte de I'appareil. Se tenir sur
le c6t_, ouvrir la porte lentement et I_g_rement pour laisser
I'air chaud et/ou la vapeur s'_chapper. I_loigner le visage de
I'ouverture et s'assurer qu'aucun enfant ou animal
domestique ne se trouve _ proximit_ de I'unit_. Une fois la
vapeur et I'air chaud _chapp_s, continuer la cuisson.
Garder les portes ferm_es _ moins qu'il ne soit n_cessaire
de les ouvrir pour la cuisson ou le nettoyage. Ne pas
laisser les portes ouvertes sans surveillance.
Ne pas chauffer ou r_chauffer des r_cipients d'aliments non
ouverts. L'accumulation de pression peut faire exploser un
r_cipient et provoquer des blessures.
Toujours utiliser des poign_es isolantes s_ches. Des
poign_es mouill_es ou humides entrant en contact avec les
surfaces chaudes peuvent provoquer des blessures par
d_gagement de vapeur. Ne pas laisser les poign_es entrer
en contact avec les r_sistances chaudes. Ne pas utiliser de
serviette ni de chiffon volumineux.
Ne pas toucher aux surfaces int_rieures du tiroir Iorsque
celui-ci est en fonctionnement. L'int_rieur du tiroir peut
devenir suffisamment chaud pour causer des brQlures.
Laisser le tiroir et la grille (s'il y en a une) refroidir avant
toute manipulation.
Fran9ais 2

IMPORTANTES CONSIGNES DE SI:I:CURIT¢:
LIRE ET CONSERVER CES CONSIGNES
AVERTISSEMENT:
Pour 6viter le risque de brQlure, ne pas enlever le tiroir tant
qu'il est chaud. S'assurer que le tiroir est vide avant de
I'enlever.
Attacher les v_tements I_ches, etc. avant de commencer.
Attacher les cheveux longs de fagon _ ce qu'ils ne pendent
pas et ne pas porter de v_tements I_ches ou d'habits ou
objets qui pendillent, tels que cravates, foulards, bijoux ou
manches.
Sdcurit_ des enfants
Ne laisser personne grimper, se tenir debout, s'appuyer,
s'asseoir ou se suspendre _ une partie quelconque de
I'appareil, en particulier la porte, le tiroir-r6chaud ou le tiroir
de rangement. Ceci peut endommager I'appareil, le faire
basculer et provoquer potentiellement des blessures
s@ieuses.
Ne pas laisser un enfant utiliser cet appareil sans 1'6troite
surveillance d'un adulte. Enfants et animaux ne doivent pas
_tre laiss6s seuls ou sans surveillance _ I'endroit oe I'on
utilise I'appareil. Ne jamais laisser un enfant jouer
proximit6 de I'appareil que celui-ci soit en fonctionnement
ou non.
AAVERTISSEMENT •
Les articles d'int@_t pour les enfants ne doivent pas 6tre
rang6s dans un appareil 61ectrom6nager, dans les
armoires au-dessus de I'appareil ou sur le dosseret. Un
enfant qui grimpe sur I'appareil pour prendre ces objets
peut se blesser s@ieusement.
Sdcurit_ de la batterie de cuisine
AVIS :
Les r6cipients en mati_re plastique ou le film 6tirable
peuvent se fondre Iorsqu'ils sont en contact direct avec le
tiroir ou un ustensile chaud. S'ils se fondent dans le tiroir, il
ne sera pas toujours possible de les nettoyer.
Sdcurit_ alimentaire
AAVERTISSEMENT •
Suivre les r_gles de s6curit6 alimentaire suivantes :
1. NE PAS utiliser un tiroir-r6chaud pour faire chauffer
des aliments froids (exception : il est possible d'utiliser
un tiroir-r6chaud en toute s6curit6 pour rendre
croustillants les biscuits sal6s, les chips ou les c@6ales
s_ches ou pour r6chauffer le pain ou les biscotines).
2. S'assurer de maintenir les aliments _ la temp@ature
ad6quate. L'USDA recommande de conserver les
aliments chauds _ 140 °F (60 °C) ou plus.
3. NE PAS maintenir des aliments au chaud pendant plus
d'une heure.
AVERTISSEMENT
Avertissements conformement a la Proposition
65 de I'l_tat de Californie :
Ce produit contient des substances chimiques
reconnues par I'l_tat de Californie comme pouvant
causer le cancer, des malformations cong6nitales
ou d'autres troubles de la reproduction.
AVIS DE 81_-CURITI_-IMPORTANT : En application de
la Ioi californienne concernant la salubrit6 de I'eau et la
protection contre les substances chimiques
(<<California Safe Drinking Water and Toxic
Enforcement Act >>),le gouverneur de Californie est
tenu de publier une liste des substances reconnues par
I'l_tat de Californie comme 6tant canc6rig_nes ou
pouvant causer des malformations ou pr6senter un
danger pour la reproduction, et les entreprises sont
tenues d'avertir les consommateurs des risques
potentiels d'exposition _ de telles substances.
Frangais 3

Mise en route
Pi ces
Tiroir-rdchaud
2
1 Tableau de commande
2 B&ti du tiroir-rechaud
3 Tiroir
Tableau de commande
Le tableau de commande comporte plusieurs paves tactiles qui
sont sensibles &une tegere pression. Toucher au centre d'un
pave tactile pour ractiver. Les touches de temperature contr61ent
la temperature du fond du tiroir.
Le tableau de commande emet un bip sonore torsqu'une saisie
est effectuee. La minuterie de maintien au chaud emet une serie
de bips lorsque la duree specifiee est ecoulee.'
6
8
1Ecran Affichela
temp6rature
actuelledutiroir
2 BAS 140°F(60°C)
3 MOY 165°F(73,8°C)
4 ELEVE 190°F(87,7°C)
5 APPRET 100°F(37,7°C)
6 Appuyezpour
r6duireladur6e
7 + Appuyezpour
augmenterla
dur6e
8 ACTIVER/Activeou
DESACTI- d6sactiveletiroir-
VER r6chaud.
9 Lampe S'allumeIorsquele
t6moin tiroir-r6chaud
esten
fonctionnement.
Fran9ais 4
Fonctionnement
Apropos de I'appareil
Le tiroir-rechaud permet de conserver tes aliments cuits et chauds
& une temperature de service. Toujours utiliser des aliments
chauds au depart. NE PAS utitiser pour rechauffer des aliments
froids sauf pour faire lever ta p&te, pour redonner leur croquant
aux biscuits sales, aux chips ou aux cereales seches, maintenir
au chaud le pain et les biscotines ou chauffer des plats ou des
assiettes.
Le tiroir-rechaud est dote d'un mecanisme d'ouverture <<Push-to-
Open >>.Itsuffit d'exercer une legere pression sur la face avant du
tiroir pour l'ouvrir.
Fonctions
Minuterie de maintien au chaud
La minuterie de maintien au chaud peut 6tre regtee pour tout
increment de 5 minutes. La duree minimum est de 5 minutes et la
duree maximum est de 5 heures.
Remarque •
La duree par defaut de la minuterie de maintien au chaud est 1
heure.
Lorsque ta duree est ecoulee, te tiroir-rechaud emet un signal
d'avertissement et s'eteint automatiquement.
Modification de la minuterie de maintien au chaud :
Utitisez les touches tactiles + et - pour modifier la minuterie de
maintien au chaud.
Mode Shabbat
La fonction Shabbat permet aux personnes de croyances
religieuses particulieres d'utiliser leur tiroir-rechaud le jour du
Shabbat.
• Le tiroir-rechaud est configure pour fonctionner pendant 74
heures avant de s'eteindre automatiquement.
• Lorsque le tiroir-rechaud fonctionne en mode Shabbat,
l'ecran indiquera SAb.
• La minuterie de maintien au chaud ne peut pas 6tre modifiee
une fois le mode Shabbat programme.
• Appuyer sur ON/OFF (ACTIVER/DI_SACTIVER) & n'importe
quel moment pendant te deroulement du mode Shabbat pour
arr6ter le mode et eteindre l'appareil.
Reglage de la fonction Shabbat
Appuyer sur MED (MOY) pendant cinq secondes.
Remarque :
En mode Shabbat, on ne peut utiliser que la temperature MED. Une
fois le mode Shabbat programme, tousles boutons sont desactives
mis a part le bouton Activer/Desactiver, lequel est utilise pour
annuler le mode.

Utilisation de I'appareil
ATTENTION
Pour des raisons de securit6 alimentaire, ne pas taisser
les aliments & l'interieur du tiroir-rechaud pendant plus
d'une heure apres la cuisson.
IMPORTANT •
Les recipients en matiere plastique ou le film etirable peuvent se
fondre Iorsqu'ils sont en contact direct avec le tiroir ou un ustensile
chaud. S'ils se fondent dans le tiroir, il ne sera pas toujours possible
de les nettoyer.
Remarque :
Utiliser uniquement de la vaisselle resistante a la chaleur.
Prdchauffer le tiroir-rdchaud
Prechauffer te tiroir-rechaud avant de maintenir des aliments au
chaud. Pour de meilteurs resultats, prechauffer te tiroir-rechaud
en respectant les durees de prechauffage suivantes :
Parametre Duree de prechauffage
BAS 10 minutes
MOY 15 minutes
€:LEV¢: 20 minutes
APPR#T aucun prechauffage necessaire
R_chauffage des aliments
1. Appuyer sur la touche pour programmer la temperature
desiree.
2. Prechaufferte tiroir-rechaud.
3. Regter la minuterie de maintien au chaud.
4. Placer les aliments cuits et chauds dans te tiroir-rechaud.
Vous pouvez taisser tes aliments dans te plat de preparation
initial. Autre possibitite : transferez tes aliments dans un plat de
service resistant a la chaleur avant de les mettre dans le tiroir-
rechaud.
Vous pouvez recouvrir les aliments de papier aluminium ou utiliser
un couvercle.
R_chauffage des assiettes et bols
Utitiser uniquement des plats resistants a ta chaleur. Disposer les
assiettes ou les plats vides dans un tiroir-rechaud froid. Inutile de
prechauffer.
1. Appuyer sur LOW (BAS).
2. Regler la minuterie de maintien au chaud.
Appr_t
Mettre la p&te dans te plat souhaite dans te tiroir-rechaud froid et
badigeonner tegerement te dessus de la p&te avec de l'huile.
Couvrir ta p&te avec un linge sans la compresser.
1. Appuyer sur PROOF (APPRrT).
2. Regter ta minuterie de maintien au chaud.
3. Verifier ta hauteur de la p&te. Faire chauffer autant que
necessaire.
Redonner leur croquant aux articles rassis
Disposer les aliments dans des plats ou ustensiles & rebords
peu elev6s.
1. Appuyer sur LOW (BAS).
2. Prechauffer le tiroir-rechaud pendant 5 minutes, puis y
mettre le plat.
3. Regler la minuterie de maintien au chaud.
4. Verifier si les aliments sont croustillants au bout de 45
minutes. Faire chauffer autant que necessaire.
Tirer le meilleur parti de
votre appareil
Recommandations relatives/! la tempdrature
Aliments/Batterie de cuisine
Appr6t de la p&te &levure
Bacon
Bceuf, & point et bien cuit
Bceuf, saignant
Pain, petits pains
Pain, petits pains au lait, brioches
Biscotines
Rago0ts
CEufs
Poisson, fruits de mer
Aliments flits
Sauce au jus de viande, sauces &
la creme
Jambon
Pancakes (cr6pes americaines)
Tartes, un fond
Tartes, deux fonds
Pizza
Porc
Pommes de terre, au four
Pommes de terre, en puree
Votaille, r6tie
Legumes
Assiettes
Assiette repas
Parametre
APPR#T
€:LEV¢:
MOY
BAS
MOY
MOY
MOY
MOY
MOY
MOY
€:LEV¢:
MOY
MOY
€:LEV¢:
MOY
MOY
€:LEV¢:
MOY
€:LEV¢:
MOY
MOY
MOY
BAS
MOY
Couvrir
le plat
Oui
Non
Non
Non
Non
Oui
Oui
Oui
Oui
Oui
Non
Oui
Oui
Oui
Oui
Non
Non
Oui
Oui
Oui
Oui
Oui
Non
Oui
Frangais 5

Nettoyage et entretien
Nettoyage Entretien
Piece
Int@ieur du tiroir
(acier inoxydable
poli)
Surfaces peintes
Chassis ext@ieur
du tiroir (acier
inoxydable bross6)
Panneau de
commande dutiroir-
r6chaud
Recommandations
Utiliser un d6tergent vaisselle.
Laver, rincer et s6cher. Pour les
taches d'eau dure ou le tartre,
utiliser du vinaigre blanc.
Appliquer _ I'aide d'une 6ponge
ou d'un chiffon, rincer et s6cher.
Utiliser de I'eau savonneuse
chaude ou des nettoyants doux
tel Fantastik® ou Formula 409®.
Laver, bien rincer et s6cher.
teviter d'utiliser des agents
nettoyants abrasifs, les tampons
m6talliques _ r6curer et les
produits _ nettoyer les fours.
Toujours essuyer ou frotter dans
le sens du grain. Nettoyer avec
une 6ponge savonneuse puis
rincer et s6cher, ou essuyer avec
du Fantastik® ou Formula 409®
vaporis6 sur du papier essuie-
tout. Prot6ger et polir en utilisant
du Stainless Steel Magic® et un
chiffon doux. teliminer les taches
d'eau _ I'aide d'un chiffon
humect6 de vinaigre blanc.
Utiliser Bar Keeper's Friend®
pour 61iminer la d6coloration due
la chaleur.
Nettoyer avec de I'eau
savonneuse chaude ou appliquer
du Fantastik® ou du Formula
409® sur une 6ponge propre ou
du papier essuie-tout et essuyer.
teviter d'utiliser des produits
d'entretien abrasifs et des
tampons _ r6curer.
Demontage du tiroir
ATTENTION
Pour 6viter le risque de brOlure, ne pas enlever le
tiroir tant qu'il est chaud. S'assurer que le tiroir est
vide avant de I'enlever.
1. Tirer sur le tiroirjusqu'_ son ouverture complete.
2. Appuyer sur I'agrafe droite du tiroir.
3. Relever I'agrafe gauche du tiroir.
4. Tirer fermement le tiroir d'un coup sec. Rentrer les
glissi@es du placard une fois le tiroir retir6.
Remise en
1.
2.
3.
4.
place du tiroir
S'assurer que les rails de I'armoire sont enfonc6s
I'int@ieur de celle-ci.
Aligner les rails du tiroir avec ceux de I'armoire.
Pousser fermement le tiroir _ I'int@ieur de I'armoire
jusqu'_ ce qu'il s'enclenche et se mette en place.
Ouvrir et fermer le tiroir pour en tester le
fonctionnement. Remarque : Si le tiroir ferme mal,
v@ifier que les agrafes des rails sont bien install6es.
Frangais 6

Ddpannage
Pour contacter un technicien de d_pannage, consultez les
coordonn_es sur la couverture avant du manuel. Lorsque
vous t_l_phonez, soyez pr_t _ fournir les informations
imprim_es sur la plaque signal_tique de votre produit.
Plaque signaletique
La plaque signal_tique comporte le num_ro de module et le
num_ro de s_rie. Se reporter _ la plaque signal_tique de
I'appareil _lectrom_nager pour faire une demande de
d_pannage. La plaque signal_tique est apparente sur le
c6t_ gauche de I'armoire. II pourra falloir enlever le tiroir
pour apercevoir la plaque signal_tique.
Fran£)ais 7

I NONCI DE GARANTIE LIMITI E DU PRODUIT
Couverture de la garantie et a qui elle
s'applique
La garantie limit_e fournie par BSH Home Appliances
Bosch dans le present _nonc_ de garantie limit_e du
produit s'applique seulement _ I'appareil Bosch qui vous
est vendu, le premier acheteur _ I'utiliser, _ la condition que
le produit ait _t_ achet_ :
• pour votre usage domestique (non commercial) normal
et qu'il ait effectivement, en tout temps, _t_ utilis_ _ des
fins domestiques normales;
• _ I'_tat neuf au d_tail (et non comme un module
d'exposition, <<en I'_tat >>,ou pr_alablement retourn_),
et non pour la revente ou I'utilisation commerciale;
• aux I_tats-Unis ou au Canada, et qu'il soit en tout
temps demeur_ dans le pays de I'achat d'origine.
Les garanties _nonc_es aux pr_sentes s'appliquent
uniquement au premier acheteur du Produit et ne sont pas
cessibles.
Assurez-vous de retourner votre carte d'enregistrement;
quoique que cela ne soit pas n_cessaire pour que la
couverture de la garantie prenne effet, c'est le meilleur
moyen pour que Bosch puisse vous pr_venir dans
I'_ventualit_ improbable d'un avis de s_curit_ ou d'un
rappel de produit.
Duree de la garantie
Bosch garantit que le Produit est exempt de d_fauts de
mat_riaux et de fabrication pendant une p_riode de trois
cent soixante-cinq (365)jours _ compter de la date d'achat.
Cette p_riode commence _ courir _ partir de la date d'achat
et ne sera pas retard_e, restreinte, prolong_e ni suspendue
pour quelque raison que ce soit.
Ce Produit est _galement garanti contre tout d_faut de
mat_riau et de fabrication apparent (tels les _raflures sur
I'acier inoxydable, les d_fauts d'aspect de la peinture ou de
la porcelaine, les _br_chures, les bosselures, ou autres
d_g_ts au fini du Produit), pendant une p_riode de trente
(30) jours _ compter de la date d'achat ou de la date de
cl6ture pour une nouvelle construction. Cette garantie
relative _ I'apparence exclut les I_g_res variations de
couleur d_coulant des differences inh_rentes
aux pi_ces peintes et en porcelaine, ainsi que d_coulant
des differences caus_es par I'_clairage de cuisine,
I'emplacement du produit ou d'autres facteurs similaires.
Cette garantie relative _ I'apparence exclut plus
particuli_rement tout appareil _lectrom_nager en
exposition, de sol, <<en I'_tat >>ou de stock <<B >>.
La reparation ou le remplacement du
Produit comme recours exclusif
Pendant cette p_riode de garantie, Bosch ou I'un de ses
prestataires de services agr_s r_parera le produit sans
frais de votre part (sous r_serve de certaines limitations
_nonc_es aux pr_sentes) s'il s'av_re que la fabrication de
votre produit pr_sente un d_faut de mati_re ou de
fabrication. Si des tentatives raisonnables de r_paration du
produit ont _t_ faites sans succ_s, alors Bosch remplacera
le produit (des modules mis _ niveau peuvent _tre mis
votre disposition), _ la seule discretion de Bosch,
moyennant des frais suppl_mentaires). Tout composant ou
piece enlev_s deviennent la propri_t_ de Bosch, _ sa seule
option. Toute piece remplac_e et/ou r_par_e doit assumer
I'identit_ de la piece d'origine aux fins de la pr_sente
garantie, et cette derni_re ne sera pas prolong_e au regard
de ces pi_ces. La seule obligation et responsabilit_ de
Bosch en vertu des pr_sentes est de r_parer seulement le
produit pr_sentant un d_faut de fabrication, par I'entremise
d'un prestataire de services agr_ Bosch aux heures
normales de travail. Pour des questions de s_curit_ et de
dommages _ la proprietY, Bosch recommande vivement de
ne pas tenter de r_parer soi-m_me le produit, ni d'utiliser
un service de r_paration non autoris_. Bosch d_cline toute
responsabilit_ pour les r_parations ou le travail effectu_s
par un service de r_paration non autoris_. Si vous
choisissez de faire r_parer le produit par une personne
autre qu'un prestataire de services agree, CETTE
GARANTIE DEVlENDRA AUTOMATIQUEMENT NULLE
ET NON AVENUE. Les prestataires de services agr_s
sont des personnes ou des compagnies qui ont _t_
sp_cialement form6es pour les produits Bosch et qui
poss_dent, de I'avis de Bosch, une excellente r_putation
pour le service _ la clientele et des aptitudes techniques (il
est _ noter qu'il s'agit d'entit_s ind_pendantes et non
d'agents, partenaires, affili_s ou repr_sentants de Bosch).
N_anmoins, Bosch n'assumera aucune responsabilit_ ou
obligation _ I'_gard du produit s'il est situ_ dans une r_gion
_loign_e (plus de 100 miles (160,9 km) d'un prestataire de
services agree) ou s'il est raisonnablement inaccessible ou
un endroit, dans une zone ou dans un environnement
dangereux, mena(_ants ou hasardeux; dans un tel cas, si
vous en faites la demande, Bosch pourrait payer les frais
de main-d'oeuvre et de piece et exp_dier les pi_ces au
prestataire de service agr_ le plus proche, mais vous
seriez quant m_me enti_rement responsable pour tout
d_placement ou autres frais sp_ciaux requis par le service
de r_paration, _ supposer qu'il accepte d'effectuer un appel
de service.
Fran9ais 8
Other manuals for HWD57
6
This manual suits for next models
1
Table of contents
Languages:
Other Bosch LCD Drawer manuals
Popular LCD Drawer manuals by other brands

Rose electronics
Rose electronics Rackview LCD Panel Mount 19" Installation and operation manual

Acnodes
Acnodes KD 8151 user manual

Acnodes
Acnodes KD 8170 Specifications

Spinning
Spinning Studio Console owner's manual

Rose electronics
Rose electronics RackView-Switch RV1-CSKVT17/DVI Installation and operation manual

Rose electronics
Rose electronics RackView RV1-CKVM15A features and benefits