sescom SES-DSLR-PROMIX User manual

USER MANUAL
SES-DSLR-PROMIX
2 Channel XLR Audio Mixer with Preamplifiers, and
Gain and Peak Controls for DSLR and Video Cameras
SESCOM
PO Box 720 ·Mt. Marion, NY 12456
www.sescom.com
TheAudioSource.
SES-DSLR-PROMIX Audio Mixer
The Sescom SES-DSLR-PROMIX audio mixer is designed to facilitate
greater audio recording control and higher audio fidelity for DSLR cam-
eras and camcorders. This mixer eliminates the need for post-edit sync-
ing by recording directly to the camera. The built-in microphone jacks
provide connection to microphones, digital recorders, external audio
mixers, sound boards, and other equipment, by means of two balanced
XLR inputs.
Includes
One SES-DSLR-PROMIX unit
One male 3.5mm TRS to two female RCA’s
Red/Right & White/Left short adapter cable
One male 3.5mm TRS to male 3.5mm TRS coiled cable
One 9V alkaline battery
SESCOM SES-DSLR-PROMIX Page 2
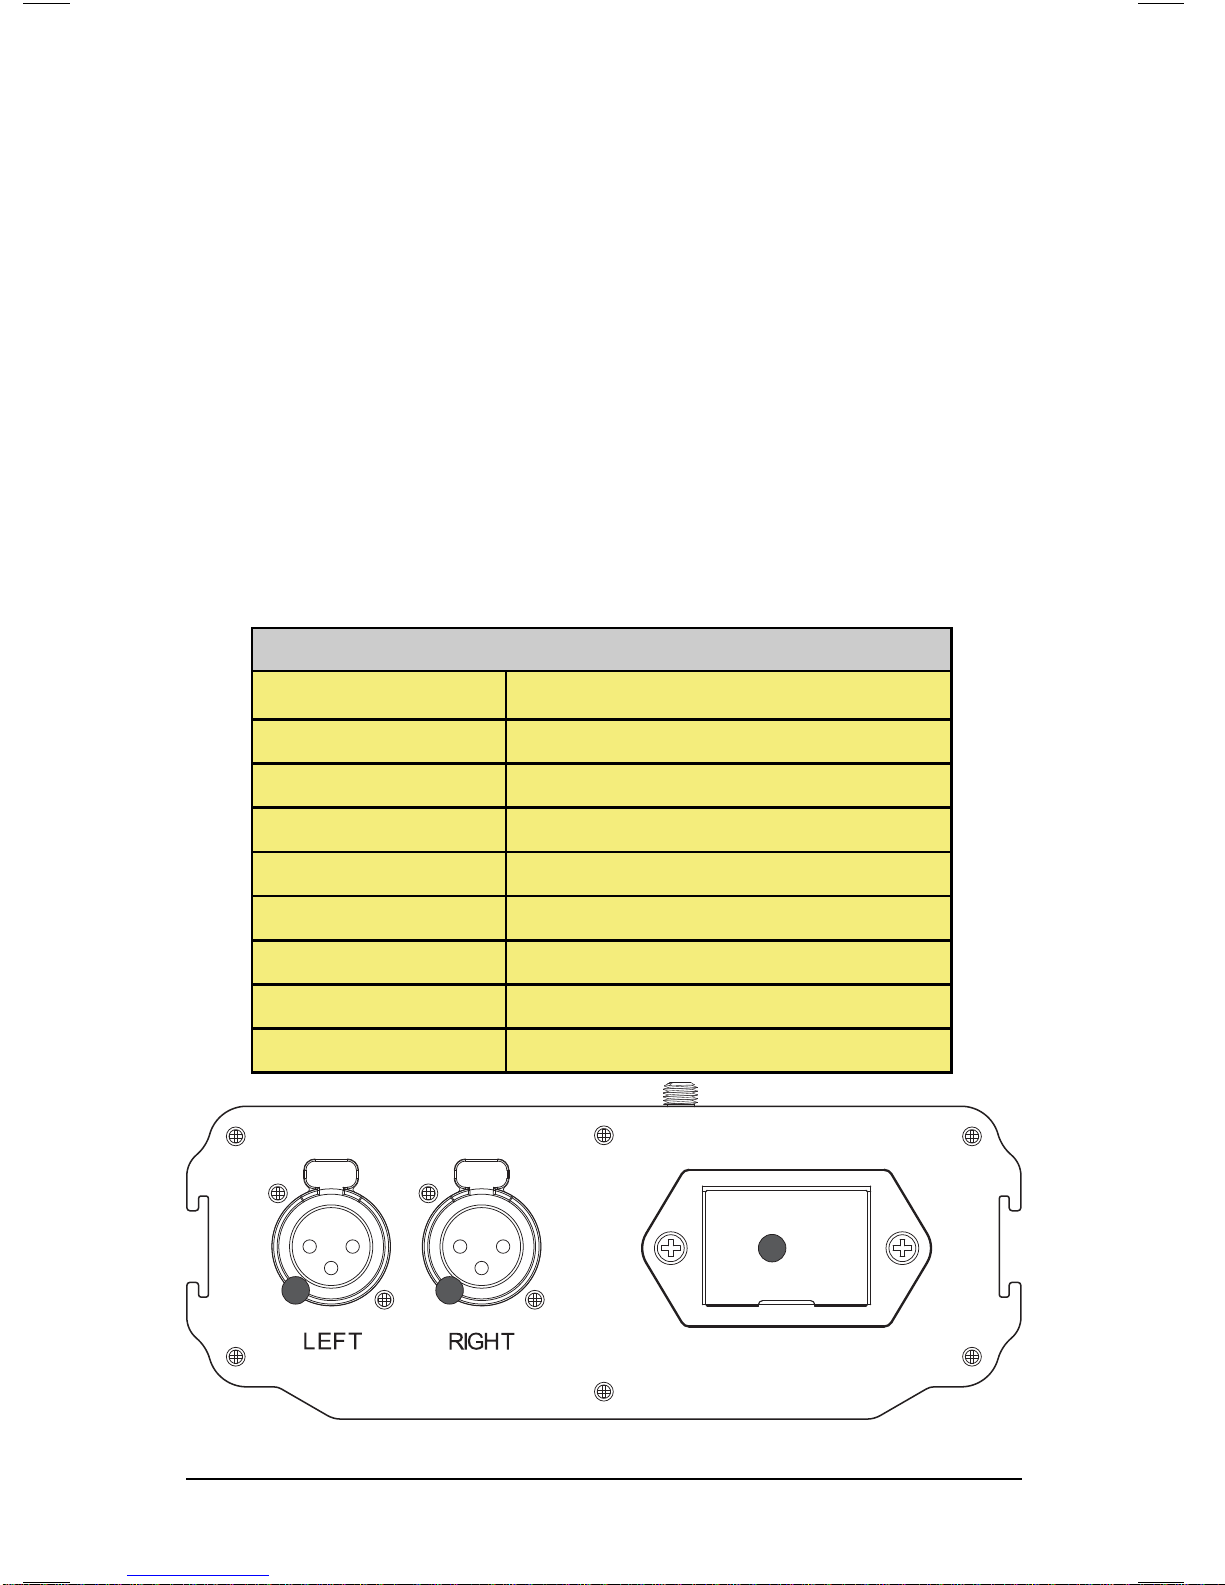
Input Levels -3dBu/+14dBu
Output Level Nominal MIC levels
Frequency Response 20 Hz to 20 kHz (+/- 0.5 dB)
THD Less than 0.01% @1kHz -30dBu input
S/N Ratio 85 dB @ 1 Khz, -30 dBu input
Gain LO gain: 0 dB, HI gain: 20dB
Level Meter -18 to +3dB increments
Dimensions LxWxH 6 x3.75x1.75in (152x95x44mm)
Weight 18 oz (0.51 kg)
Specifications
1 1
2
sescom.com SES-DSLR-PROMIX

SES-DSLR-PROMIX Features
SESCOM SES-DSLR-PROMIX Page 3
XLR Inputs
Balanced LEFT and RIGHT XLR inputs
Battery Compartment
Operates on one 9 –volt battery.
Level Meter
Indicates the sound level in dB for each channel
Gain Switches
Selects LOW for unity gain or HIGH for +20dB boost
PEAK Switches
LED signal indicators flash red for overload/distortion
PLAY/REC Switch—Headphone Monitoring
PLAY—monitoring of playback audio from camera
REC—monitoring of audio from the microphones during
recording
AGC ON/OFF—for cameras with built-in Automatic
Gain Control
Turn the AGC switch to ON to activate camera
AGC function
Turn the AGC switch to OFF to disable camera
AGC function
1
2
3
4
5
6
7
3
5
7
4
6

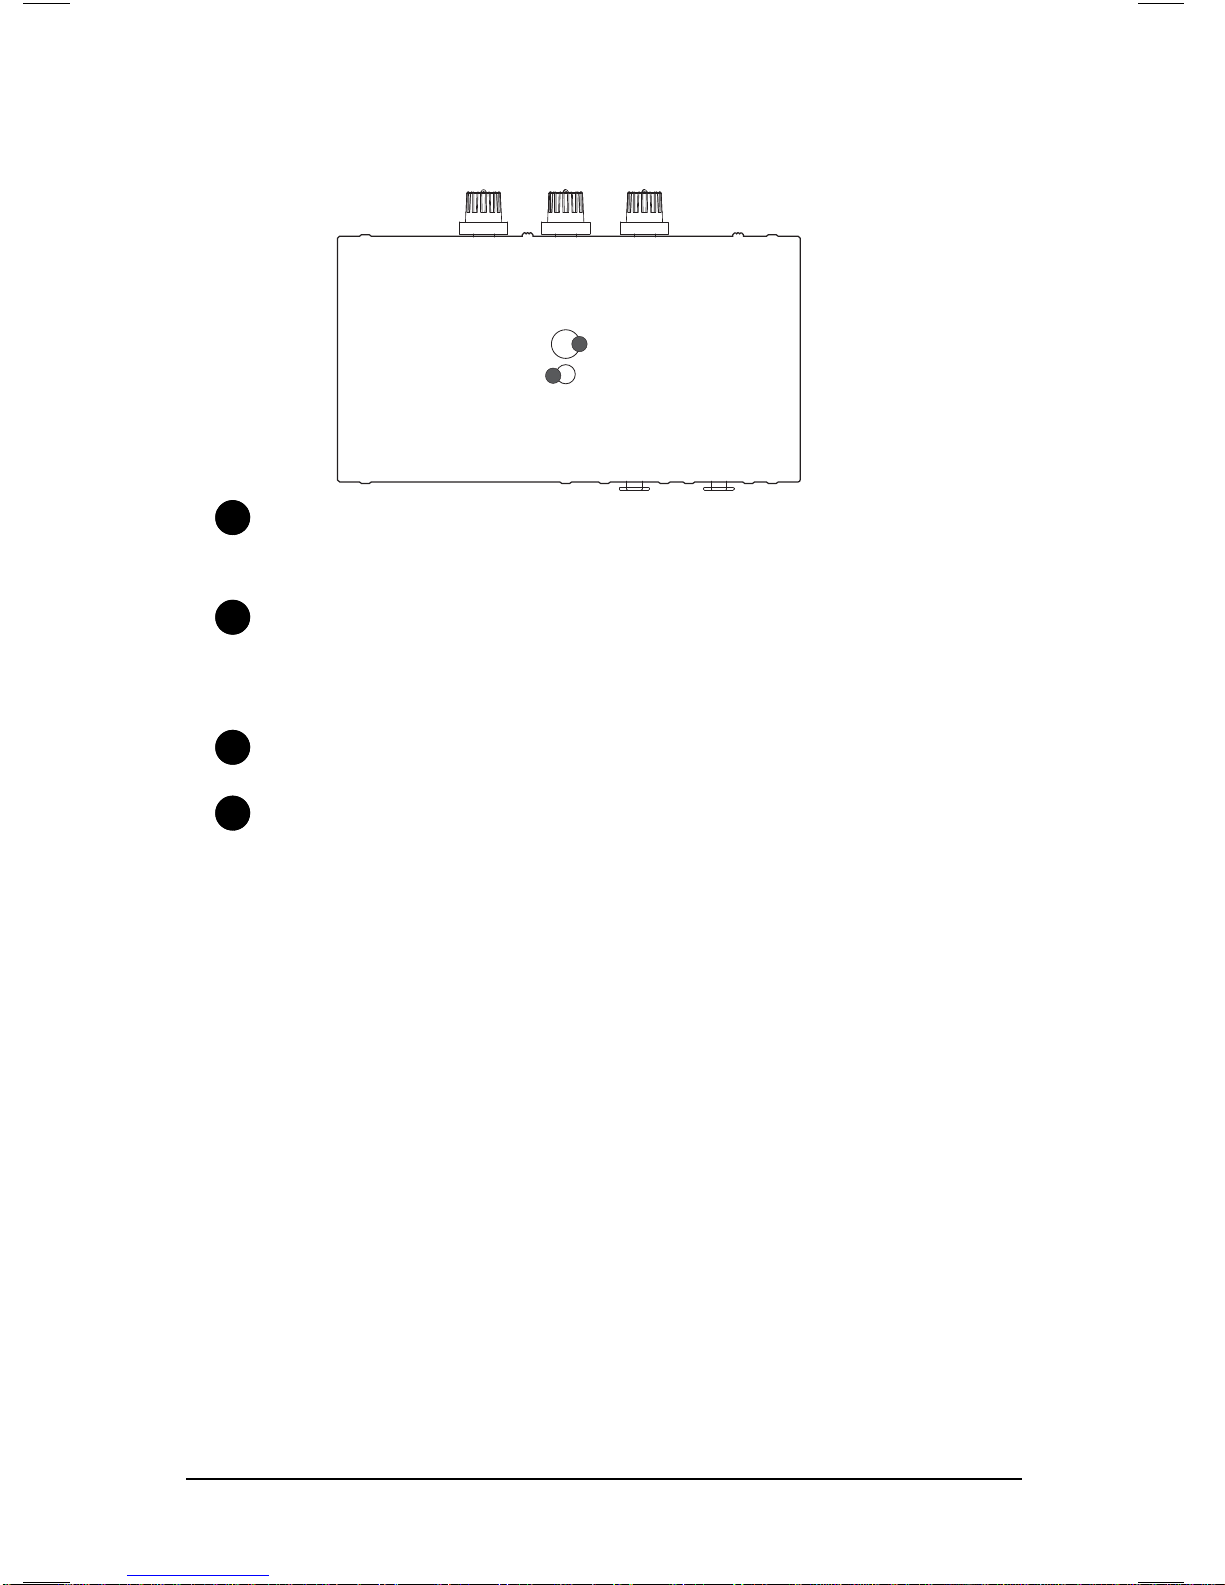
M/S Switch
Select mono or stereo output mode
POWER Switch
Main power switch
PHANTOM 12V/48V Switch
Select 12 or 48 volt for condenser microphones requiring
phantom power
LINE/MIC/PH Switches
Select LINE or MIC or Phantom levels
MIC—for self powered microphones or wireless system
LINE—for mixers and other audio devices with a line
level output. Set LINE/MIC to LINE to attenuate the
signal to about 40dB
PH—for microphones requiring phantom power
Monitor input jack
For connecting AV cable to the camera
Audio Output
One stereo 1/8" (3.5 mm) mini-jack output
Left and Right Control Knobs
Adjust the signal level of each channel to the optimum
recording levels
SES-DSLR-PROMIX Features
SESCOM SES-DSLR-PROMIX Page 4
14
8
9
10
11
12
13
12 13
14
10 11 11
14 15
16
8
9
SES-DSLR-PROMIX Features
SES-DSLR-PROMIX Set Up
Read and follow all steps below before operating the device.
NOTE: If your camera or camcorder has an Automatic Gain Control
(AGC) function, turn it off.
1. Turn off POWER and PHANTOM switches.
2. Lift up and pull out battery compartment drawer. Insert 9V
battery and slide drawer closed until it clicks into place.
3. Mount the audio mixer on the camera mounting shoe using the
lock knob.
4. Connect the supplied cable to the output jack of the mixer and
to the MIC input of the DSLR camera, camcorder, or other
destination equipment. If there is a MIC/Line switch on the
camera, select it to MIC.
SESCOM SES-DSLR-PROMIX Page 5
Volume Control Knob
Adjusts the headphone volume level
PHONES
Headphone jack to monitor the audio from microphones or
camera
3/8" Female Screw
1/4" Female Screw
15
16
17
18
17
17
18
18

5. To monitor audio from the camera during playback, connect the
supplied AV cable to the MONITOR jack on the adapter. Attach
the other end to the AV output of the camera.
6. Connect balanced XLR microphones, wireless mics or other
audio sources to the LEFT and RIGHT XLR.
7. Set the Gain switches to HIGH for most microphones. Set the
Gain switches to LOW for very sensitive condenser micro-
phones or when recording very loud sounds.
8. Set the PEAK switches for both channels to ON.
9. Set the MONITOR switch to PLAY to monitor the audio from
the microphones during recording
10. AGC ON/OFF. Read the AGC operation guide
11. Set the M/S Switch—When using one channel, switch to M for
mono. When using two channels, switch to S for stereo.
12. Set the LINE/MIC/PH switch. When using microphones and
wireless systems, set to MIC for microphone. When using other
audio devices, set to LINE for Line. When using microphones
operating on phantom power, set to PH for phantom power.
DO NOT select phantom level when recording with microphones
that do not operate on phantom power, wireless receivers,
mixing boards or any unbalanced devices, because it may
cause damage to both the adapter and audio device.
13. Set the 12V or 48V phantom power according to your needs.
14. Turn the POWER switch to ON.
15. Plug an earphone into the headphone terminal on the camera
to monitor the audio. Make sure that both channels can be
heard and adjust the gain controls if there is any distortion. Be
sure that the VOLUME control is set low to avoid excessively
loud audio.
SESCOM SES-DSLR-PROMIX Page 6
SES-DSLR-PROMIX Set Up

SAFETY PRECAUTIONS
1. To prevent fire or shock hazard, do not expose this equip-
ment to high humidity and/or dust. Do not use in an unpro-
tected outdoor installation nor any area classified as overly
damp or wet.
2. The temperature for installation should be kept between 32°F
to 140°F (0°C to 60°C). Avoid direct sunlight exposure or
extreme changes of temperature over a short period of time.
3. Do not disassemble the unit or place it on an unstable base.
4. Do not drop the unit and avoid heavy impact.
5. This unit should not be permanently installed unless proper
ventilation is provided.Any enclosure openings must not be
blocked or covered as they protect the unit from overheating.
6. Before cleaning, turn off the power and unplug the unit from
all connections. Use a damp cloth. Do not use liquid cleaners
nor aerosol cleaners.
7. Do not overload outlets and extension cords as this may
result in a risk of fire or electric shock.
8. Enclosure entry is dangerous. Never push objects of any
kind, including liquids, into this unit through openings as they
may touch dangerous voltage points or short-out parts that
could result in a fire or electric shock.
9. Do not attempt to open or service this unit yourself as
opening or removing covers may expose you to dangerous
voltage and other hazards.
10.There are no user-serviceable parts inside the unit. If the unit
requires service contact your authorized dealer, or an
authorized repair service company.
SESCOM SES-DSLR-PROMIX Page 7

SESCOM
PO Box 720
Mt. Marion, NY 12456
www.sescom.com
TheAudioSource.
Table of contents
Other sescom Music Mixer manuals


