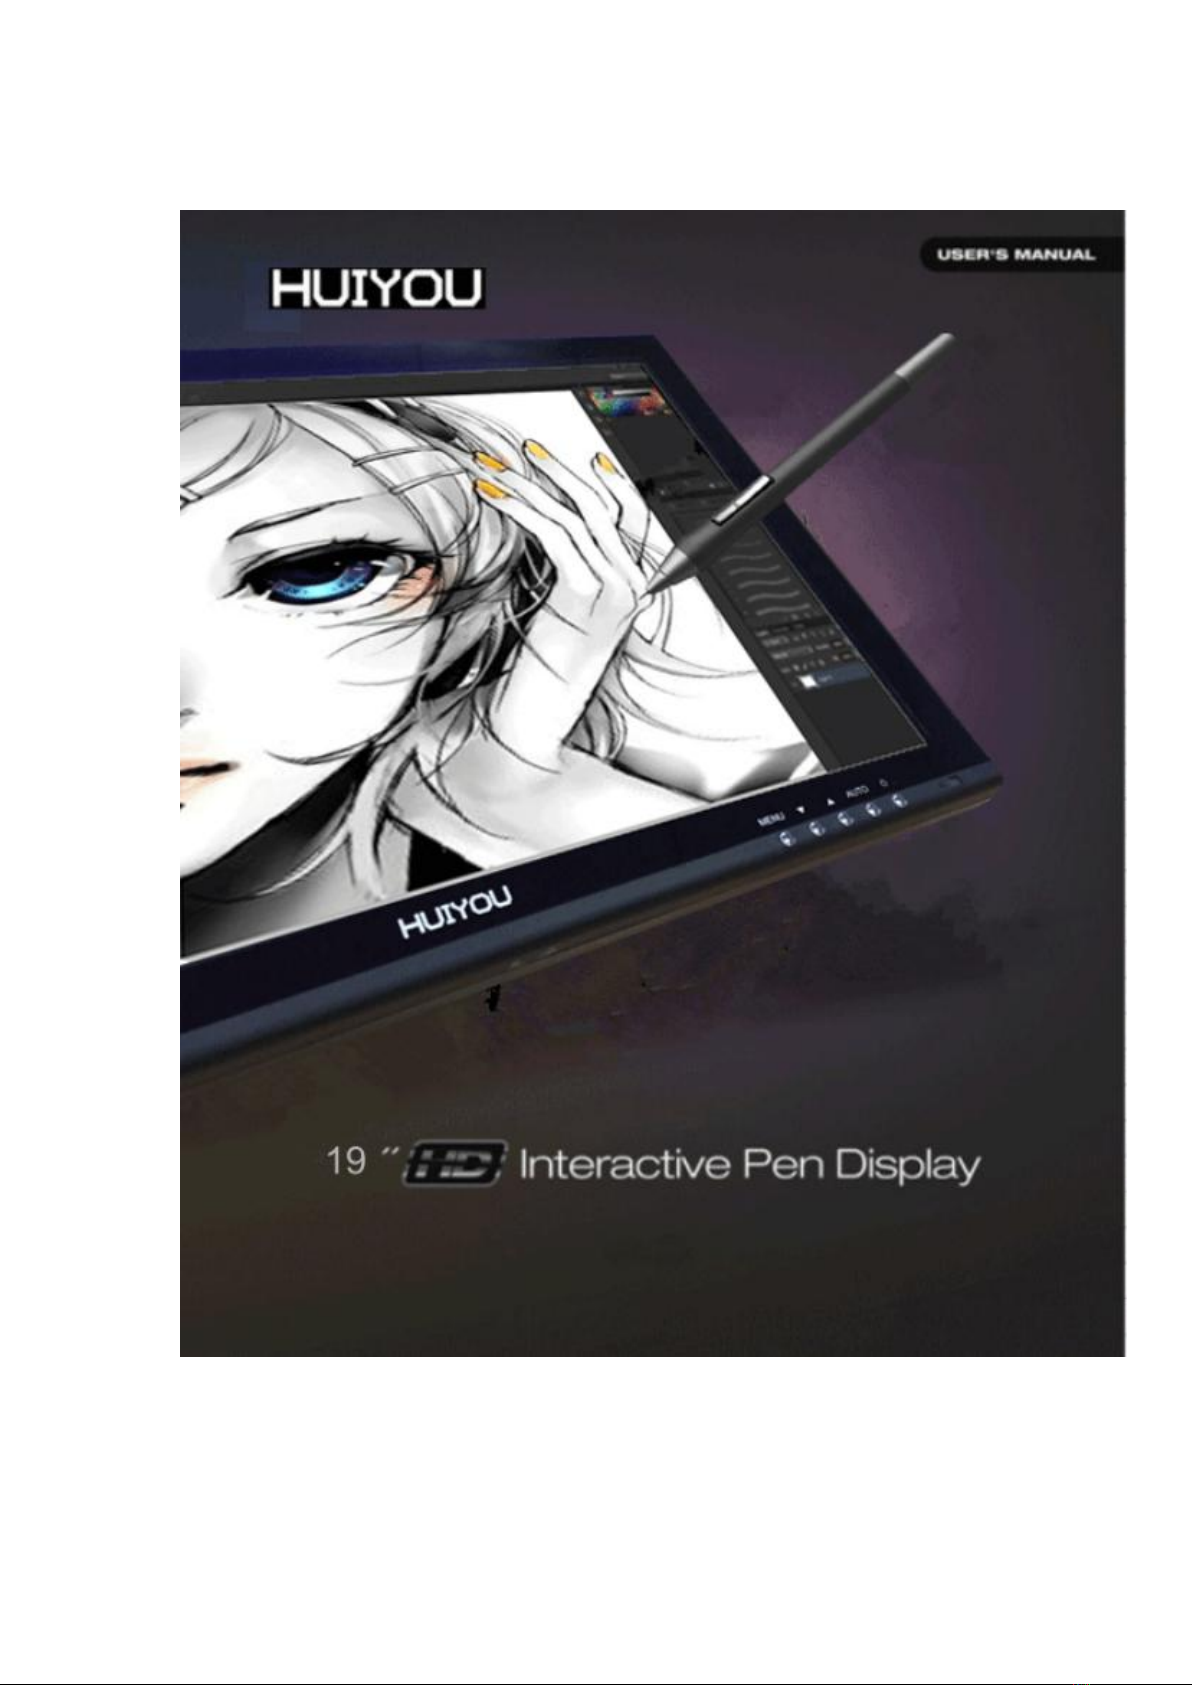
SHENZHEN NEWCT TECHNOlLOGY HUIYOU-19 User manual

第1页 共 18 页
CONTENTS
1.Introduction..................................................2
1.1 About HUIYOU-19..........................2
1.2 System requirements......................2
1.3 Package Contents.........................2
1.4 Pressure pen.........................................................3
2. Installation...................................................5
2.1 power&Signal connections................5
2.2 Tablet software Installation ............5
3.OSD KEY &Display Stand.........................13
3.1 OSD KEY.................................13
3.2 LED.....................................14
3.3 Display Stand...........................14
3.4 MENU Description........................15
4.Specifications.............................................16
5.Trouble Shooting........................................16

第2页 共 18 页
1.Introduction
1.1 About HUIYOU-19
Thank you for choosing HUIYOU-19.This product is a high quality, high
resolution, low radiation, low power consumption LCD digital
screen.This product is integrated LED tablet designed for direct on
screen interface with your computer。
1.2 System requirements
·Windows7/8/10/2000/XP/Vista/Mac OS
·Pentium 233MHz or higher
·64MB of Ram (128MB recommended)
·4X speed CD ROM or higher
·An USB port
1.3 Package Contents
After receiving the product, please inventory the contents to
ensure you have all the proper parts, as listed below. If anything is
missing or damaged, please contact HUIYOU Customer Service for a
replacement.
·1*19”LED Display
·1*Pressure pen
·1*Pen Charging Line
·1*USB Cable
·1*Power Cord

第3页 共 18 页
·1*DC 12V Adapter
·1*CD
·1*Pen Holder(contains pen Nibs and clipper)
·1*User English Manual
·1*VGA cable
1.4 Pressure pen
This display includes a rechargeable pressure pen for pen input.
The pen stylus must be charged before use.
①Checking Charge Status
·Tap the tip on a desk or other surface to turn the pen on.
·
Observe the charge LED inside the button. If it is Blue, the pen has
a usable charge. If it is red ,the pen needs charging.
②Charging the Pen
·
Insert the pen charging line into the pen charging port, the other
end of the line inserted into the computer USB interface.
·When the pen begins to charge, the blue indicator lights up.
·When the blue indicator turns dark or out, the charge is
completed
③Replacing the Pen Tip
This monitor includes eight replacement pen tips and a pen tip
removal tool. To replace the pen tip, perform the following steps:
·Position the pen tip removal tool over the pen tip, with the tip

第4页 共 18 页
positioned in the notch on one side of the opening.
Squeeze the pen tip removal tool to firmly grasp the pen tip.
·Open the Pen Holder
·Remove the Pen Tip
·Replacing the Pen Tip

第5页 共 18 页
2. Installation
2.1 power&Signal connections
Attention:Be sure both of your computer and the tablet monitor are
power off.
①Connect the power cord to the AC outlet,
and connect the power
with the tablet monitor through the AC/DC(12V)adapter.
②Plug one end of the VGA at the rear of the PC system and the
other end of the VGA port of monitor.Secure the connects with the
screws on the cable connector on both ends.
③Plug the USB cable to USB port of monitor and connect it to the
PC.
2.2 Tablet software installation
2.2.1 Windows
①Prior to installing the driver, uninstall any pen or tablet software
and drivers that you may have previously used on this computer.
Multiple pen/tablet drivers will cause a conflict and unexpected

第6页 共 18 页
operation. Reboot your computer after uninstalling the driver(s).
②Insert the included CD-ROM disc into the optical drive on your
computer.open File Explorer, locate the “Setup.exe ”
file on the CD,
and double click the file to launch the setup program.
2.2.2 Tablet Driver setting on the Windows
Click on the tablet icon the bottom right of the tool bar to enter
the tablet screen
(The tablet icon appears when the cable is plugged
in).
①info

第7页 共 18 页
②Monitor Setting
第8页 共 18 页
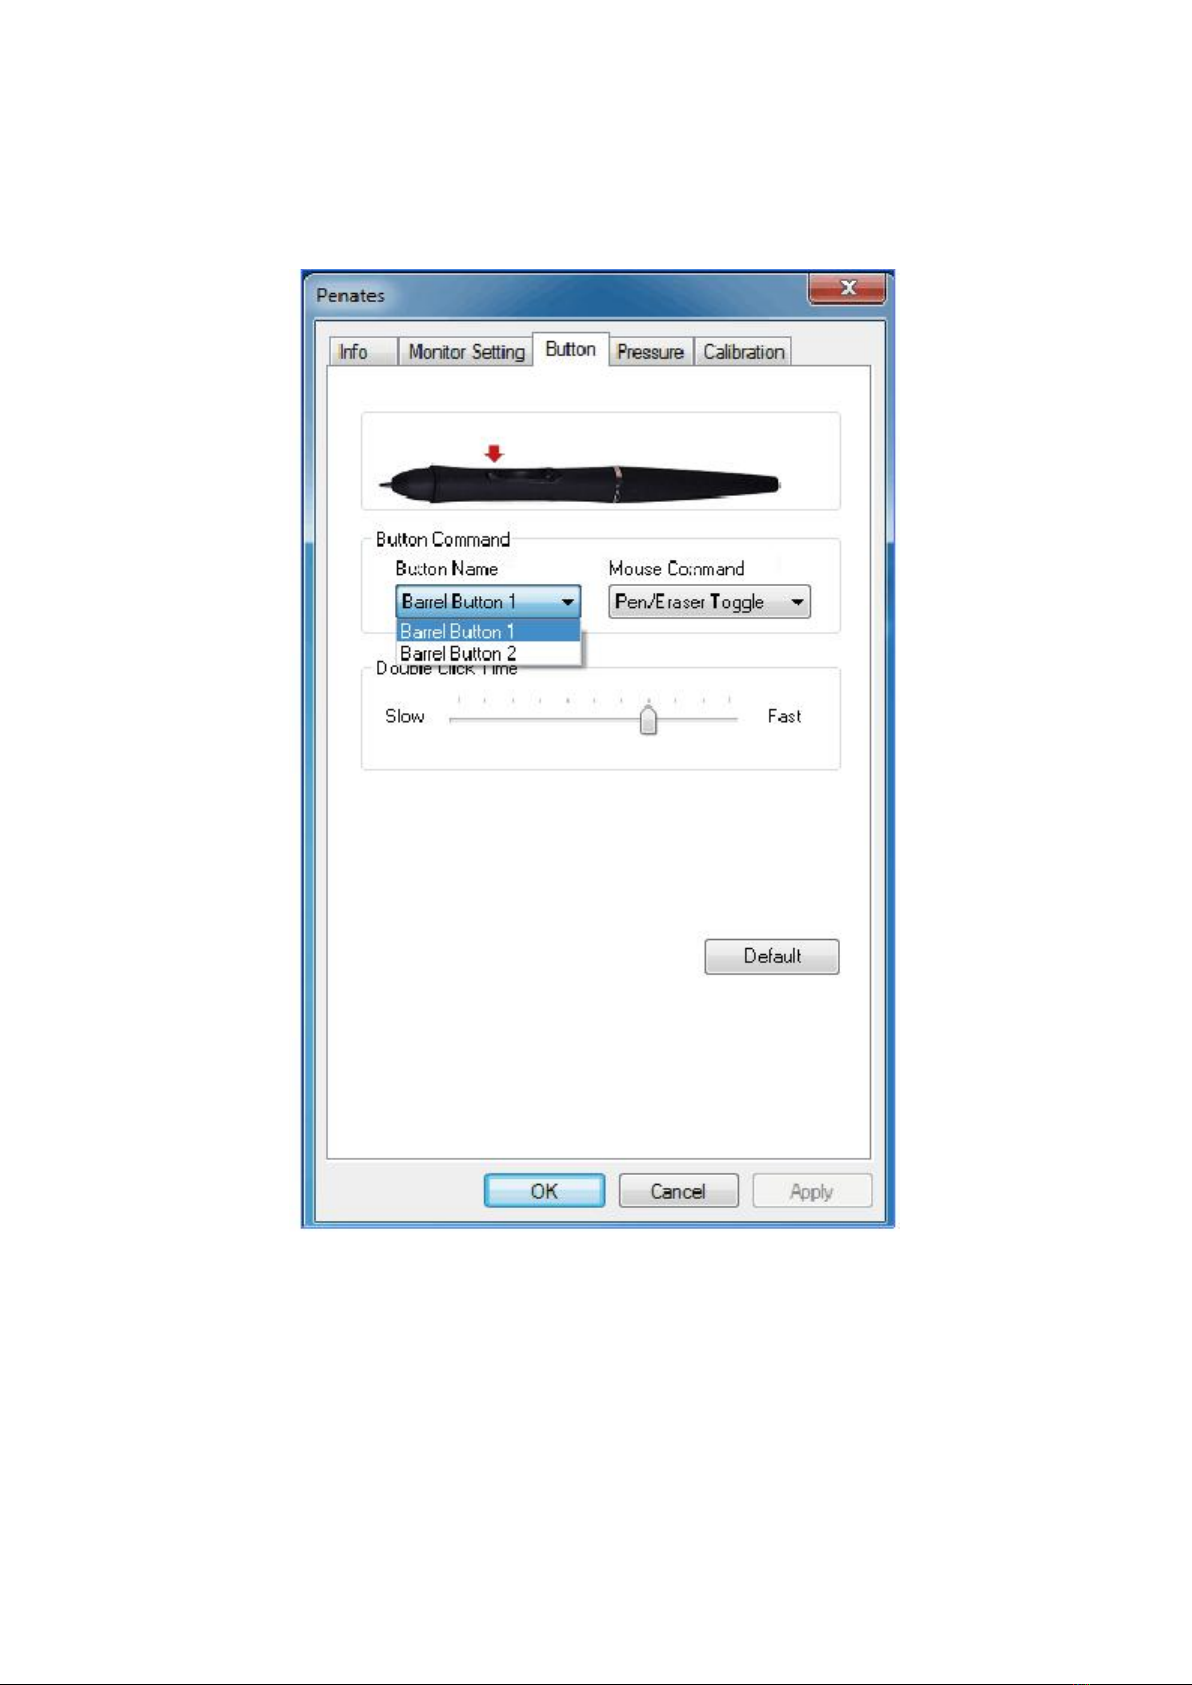
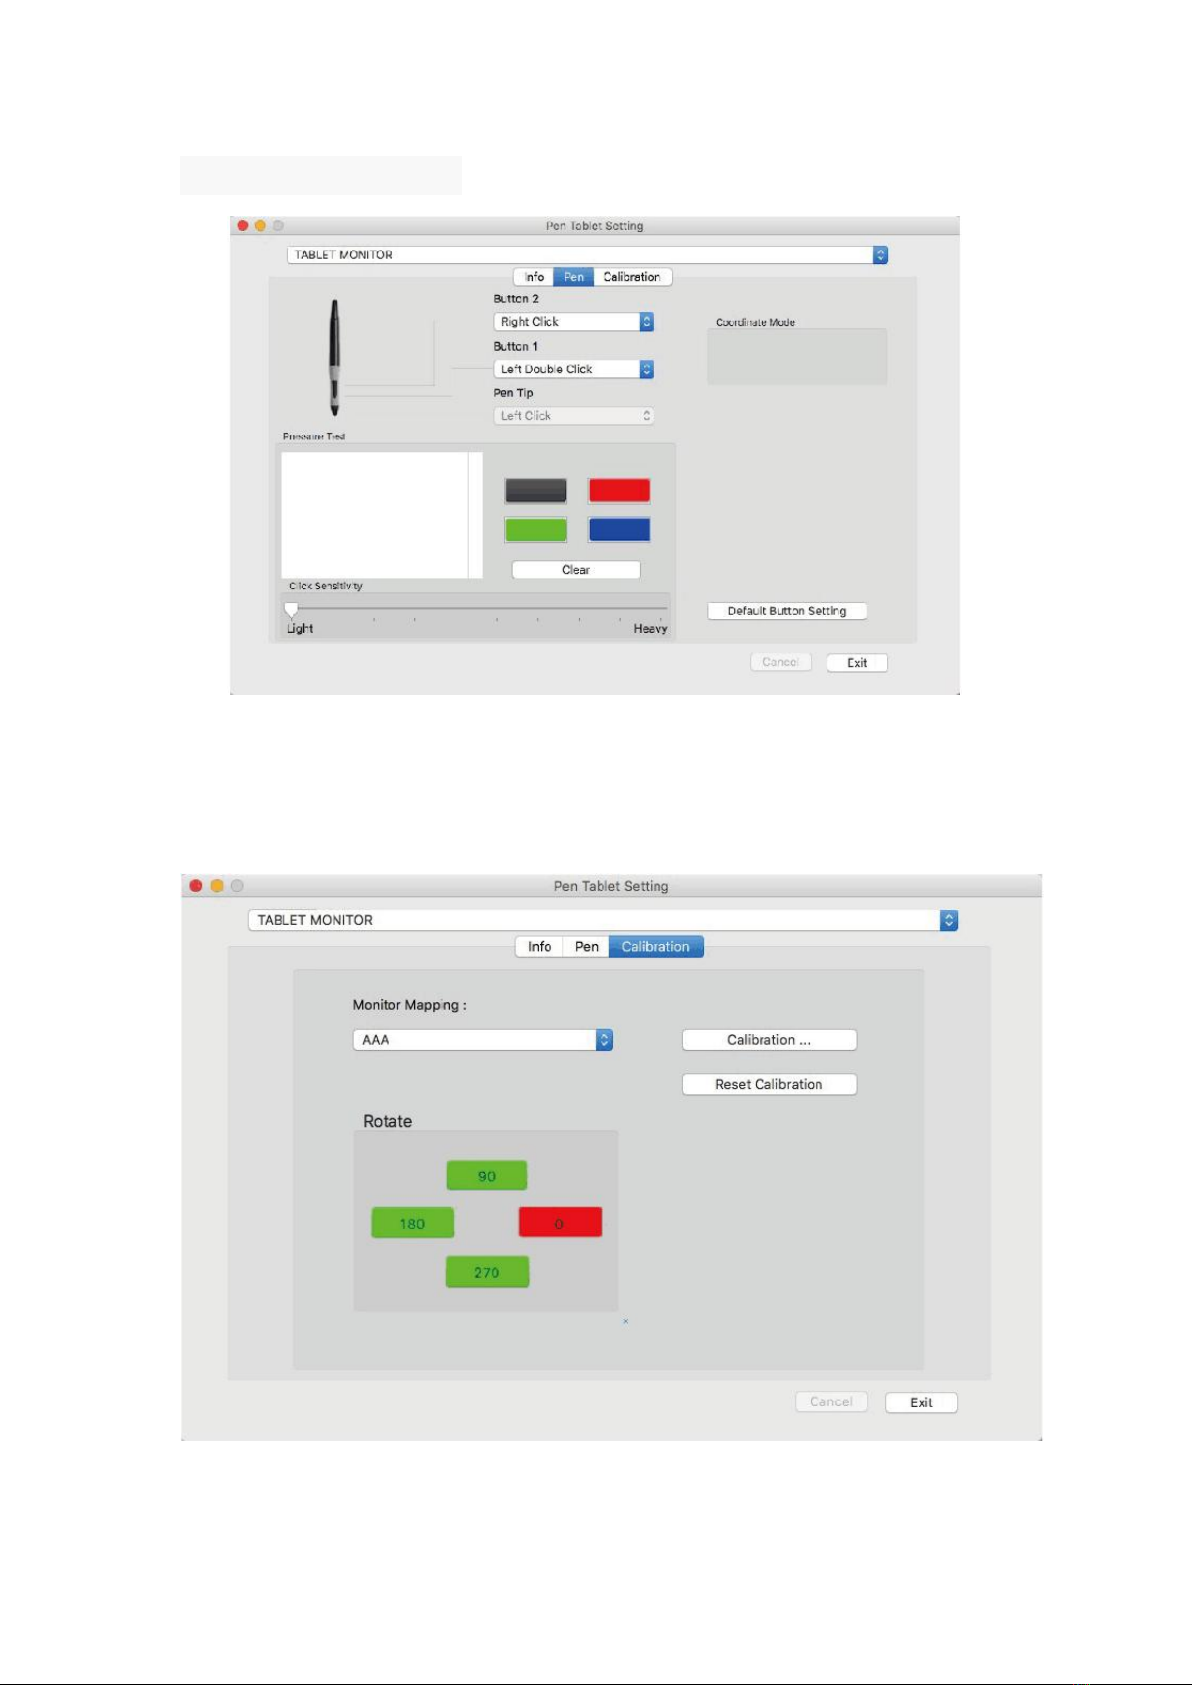
③Pen Button Setting
第9页 共 18 页
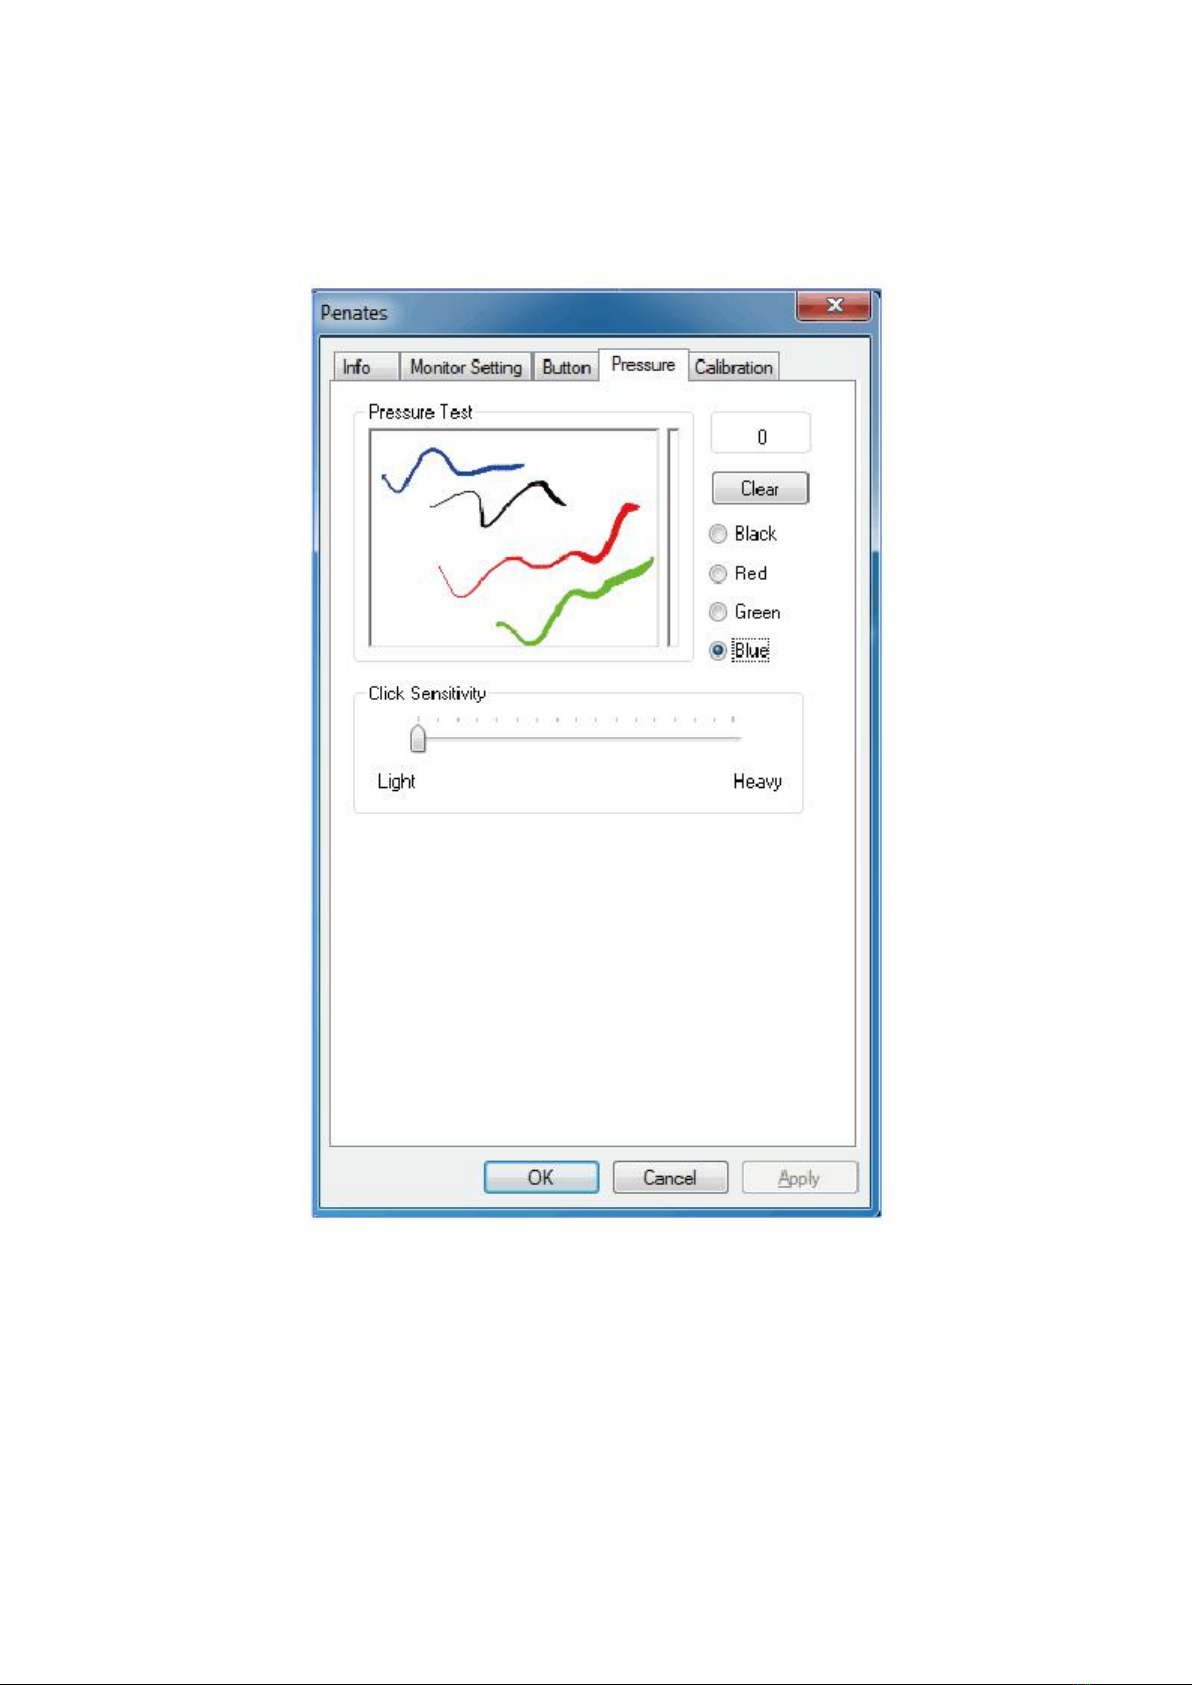
④Pressure Setting

第10 页 共 18 页
⑤Calibration
第11 页 共 18 页
2.2.3 Mac OS
Insert the included CD-ROM disc into the optical drive on your
computer. Open the CD -ROM and find a file named MPKG in the
Mac driver directory. (Prior to installing the driver, uninstall any pen
or tablet software and drivers that you may have previously used on
this computer. Multiple pen/tablet drivers will cause a conflict and
unexpected operation. Reboot your computer after uninstalling the
driver(s)).
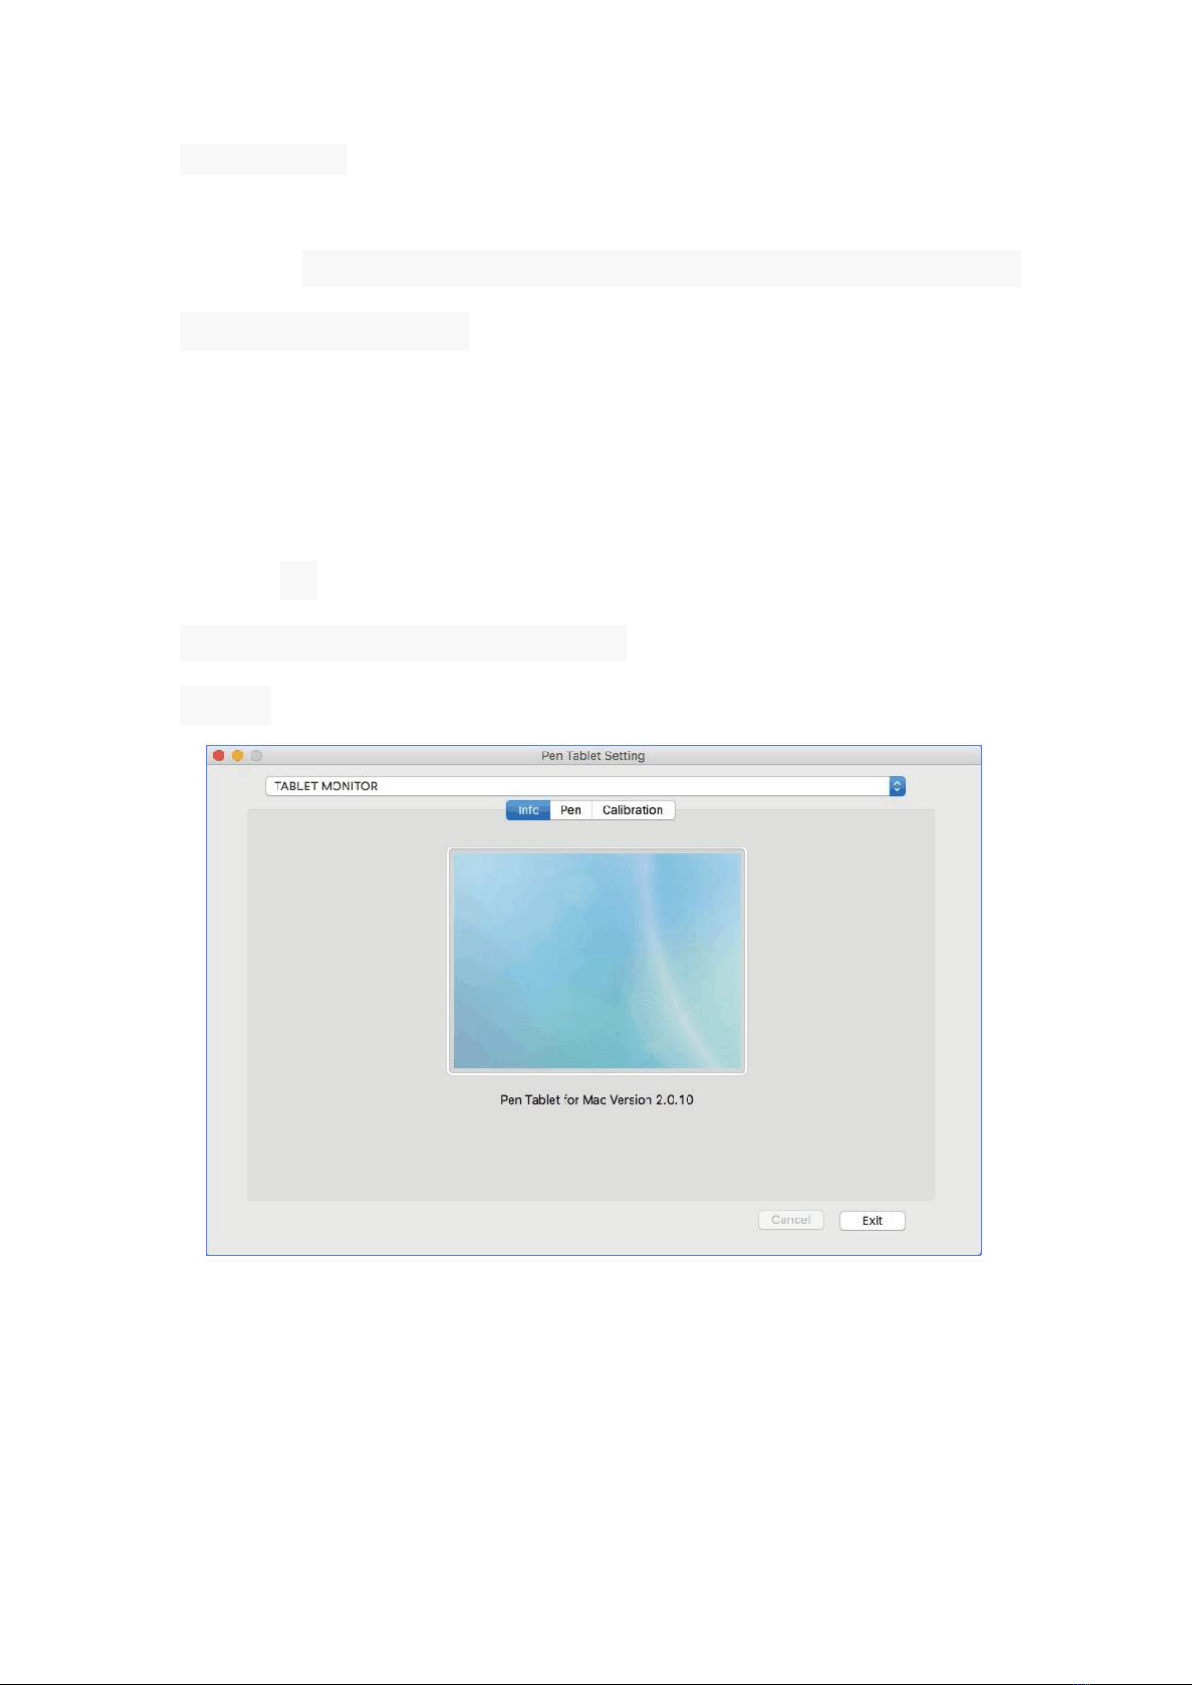
2.2.4 Tablet Driver setting on Mac OS
①info
第12 页 共 18 页
②Pen button setting
③Calibration

第13 页 共 18 页
3.OSD KEY &Display Stand
3.1 OSD KEY
The monitor's controls are on right of the display bezel. The five
buttons have the following functions:
①: Press switch to turn the power on of off.
②:When OSD M(MENU)is off, is the hot key to access OSD
M
(MENU)
.When OSD M
(MENU)
appears,
it becomes the confirm
key for each item.
③:When OSD M(MENU)appears,becomes moving down.
④:When OSD M(MENU)appears,becomes the right or up
moving function key.
⑤:When OSD M(MENU)appears,becomes the return key,
when OSD M(MENU)off,it becomes restore factory settings key .

第14 页 共 18 页
3.2 LED
Color
Status
Green
Power on
Red
No Signal
—
Power off
3.3 Display Stand
Adjusting the Display Stand level”:To adjust the tablet monitor in an
optimum tilt position for different applications。

第15 页 共 18 页
3.4 MENU Description
Picture
【Brightness】:adjust the screen brightness
【Contrast】:adjust the screen contrast
【Clock】:adjust the horizontal size of the display
【Phase】:adjust the phase of the display
【H.position】:position the display along the horizontal axis of the screen
【V.position】:position the display along the vertical axis of the screen
【colour TemP 】:adjust the color Temperature
OSD setting
【OSD Time Out】:set the OSD time out
【OSD H. position】:set the OSD position
【OSD V. position】:set the OSD position
Setting
【wide mode】:off/on
【DCR】:off/on
【Input】:DVI/VGA
【Language】:Choosing language
【Reset】:restore factory settings

第16 页 共 18 页
4.Specifications
Item
Specifications
Display Area
402*255mm
Resolution
1440*900
Dimension
317.56 ×429.19 ×51.60 mm
Response Time
14ms
Pixel pitch
0.17925*0.17925
Support color
16.7M
Contrast radio
800:1
Brightness
250cd/㎡
Viewing angle
-80°-80°(H)/-80°-80°(V)
environment
Operating temperature 0℃-50℃
Storage temperature -20℃-50℃
Humidity
Operating temperature 20 ~80%RH, non-condensing
Storage temperature 20~90%RH,non-condensing
Input voltage
DC 12V
Cable
DC power in ;HDMI
Tablet
Pressure pen
Electromagnetic pressure pen
Active area
402*255mm
Pressure Sensitivity
2048 levels
Resolution
5080LPL
Reading height
15mm
Accuracy
±0.01 inch
5.Trouble Shooting
If your tablet monitor fails to operate correctly,consult the
following table for possible solution before calling for repairs.
Condition
Check point
·Check to make sure the signal cable is firmly
seated in the socket
·Check that the power is ON at computer.

第17 页 共 18 页
NO Signal
·Check that the brightness or contrast control is
at the appropriate position.Not at the minimum。
The screen is not
synchronized
·Check to make sure the signal cable is firmly is
seated in the socket.
·Make sure the signal timings of the computer
system are with the specification of the monitor.
The position of the
screen is not in the
center
·Adjust the H.position and V.position or perform the
AUTO adjustment .
The screen is not
synchronized
·Please check if the tablet icon appears on
right-button position of the screen .If YES,please
recharge the pen.
·If NOT ,re-plug in the USB cable or restart
The tablet driver or remove possible conflict
software in your PC.
The cursor moves
incorrectly
·Re-plug in the USB cable or restart the computer

Table of contents


