manuals.online logo
Brands
  1. Home
  2. •
  3. Brands
  4. •
  5. Sherwood Scuba
  6. •
  7. Diving Instrument
  8. •
  9. Sherwood Scuba Scuba MAXIMUS SRB3600 regulator Quick guide

Sherwood Scuba Scuba MAXIMUS SRB3600 regulator Quick guide

Other Sherwood Scuba Diving Instrument manuals
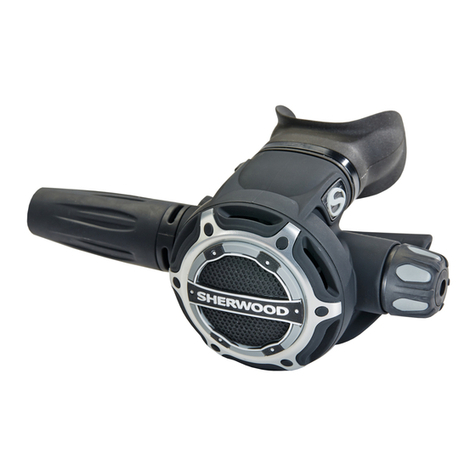
Sherwood Scuba SAGE User manual

Sherwood Scuba

Sherwood Scuba SAGE User manual

Sherwood Scuba MAGNUM SRB5300 User manual

Sherwood Scuba

Sherwood Scuba MAGNUM SRB5300 User manual

Sherwood Scuba SR1 SRB1000 User manual

Sherwood Scuba

Sherwood Scuba SR1 SRB1000 User manual

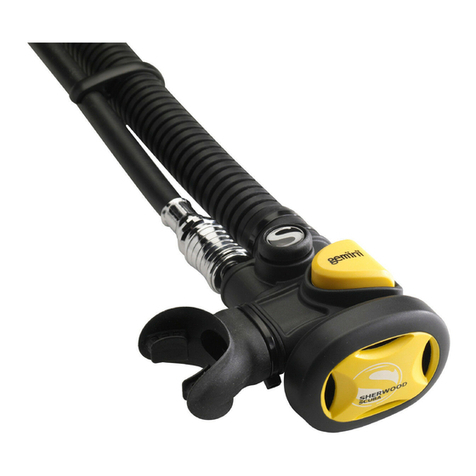
Sherwood Scuba gemini User manual

Sherwood Scuba

Sherwood Scuba gemini User manual

Sherwood Scuba Wisdom 2 User manual

Sherwood Scuba

Sherwood Scuba Wisdom 2 User manual

Sherwood Scuba Oasis User manual

Sherwood Scuba

Sherwood Scuba Oasis User manual

Sherwood Scuba Insight Assembly instructions

Sherwood Scuba

Sherwood Scuba Insight Assembly instructions

Sherwood Scuba Insight User manual

Sherwood Scuba

Sherwood Scuba Insight User manual

Sherwood Scuba 9000 SERIES User manual

Sherwood Scuba

Sherwood Scuba 9000 SERIES User manual

Sherwood Scuba VISION User manual

Sherwood Scuba

Sherwood Scuba VISION User manual

Sherwood Scuba Wisdom User manual

Sherwood Scuba

Sherwood Scuba Wisdom User manual

Sherwood Scuba SR2 User manual

Sherwood Scuba

Sherwood Scuba SR2 User manual

Sherwood Scuba SR 7206 Operating instructions

Sherwood Scuba

Sherwood Scuba SR 7206 Operating instructions

Sherwood Scuba BRUT SRB 9110 User manual

Sherwood Scuba

Sherwood Scuba BRUT SRB 9110 User manual

Sherwood Scuba Profile User manual

Sherwood Scuba

Sherwood Scuba Profile User manual

Sherwood Scuba Source User manual

Sherwood Scuba

Sherwood Scuba Source User manual

Sherwood Scuba gemini Troubleshooting guide

Sherwood Scuba

Sherwood Scuba gemini Troubleshooting guide

Sherwood Scuba OASIS BLIZZARD SECOND STAGE User manual

Sherwood Scuba

Sherwood Scuba OASIS BLIZZARD SECOND STAGE User manual

Sherwood Scuba Profile User manual

Sherwood Scuba

Sherwood Scuba Profile User manual

Sherwood Scuba Wisdom 2 User manual

Sherwood Scuba

Sherwood Scuba Wisdom 2 User manual

Sherwood Scuba AMPHOS AIR 2.0 User manual

Sherwood Scuba

Sherwood Scuba AMPHOS AIR 2.0 User manual

Popular Diving Instrument manuals by other brands

Aqua Lung i300C owner's manual

Aqua Lung

Aqua Lung i300C owner's manual

Sherwood Amphos manual

Sherwood

Sherwood Amphos manual

Zeagle N2ition owner's manual

Zeagle

Zeagle N2ition owner's manual

OCEANS S1 Supersonic manual

OCEANS

OCEANS S1 Supersonic manual

SUBMERSIBLE SYSTEMS Spare Air 600 owner's manual

SUBMERSIBLE SYSTEMS

SUBMERSIBLE SYSTEMS Spare Air 600 owner's manual

Apeks BLACK SAPPHIRE Maintenance manual

Apeks

Apeks BLACK SAPPHIRE Maintenance manual

Omer SP2 instructions

Omer

Omer SP2 instructions

Dräger PAS AirPack 1 Instructions for use

Dräger

Dräger PAS AirPack 1 Instructions for use

Dive Lab KIRBY MORGAN KMB 18 USER, OPERATOR COURSE

Dive Lab

Dive Lab KIRBY MORGAN KMB 18 USER, OPERATOR COURSE

Ratio Computers iDive user manual

Ratio Computers

Ratio Computers iDive user manual

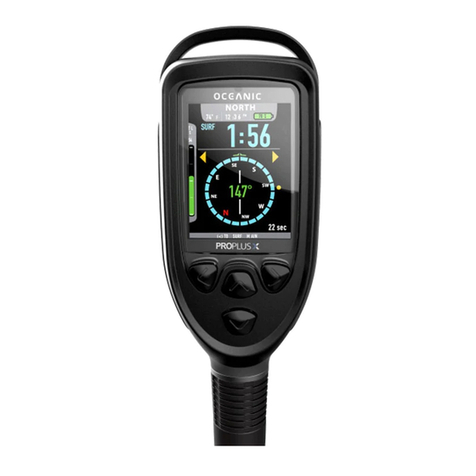
Oceanic PROPLUS X operating manual

Oceanic

Oceanic PROPLUS X operating manual

CFA MSA G1 Reference manual

CFA

CFA MSA G1 Reference manual

Tusa Q 1203 CE Start guide

Tusa

Tusa Q 1203 CE Start guide

TREND GAUGE/60 manual

TREND

TREND GAUGE/60 manual

Tusa B.C.J. owner's manual

Tusa

Tusa B.C.J. owner's manual

Dräger Panorama Nova Dive Instructions for use

Dräger

Dräger Panorama Nova Dive Instructions for use

heinrichs weikamp OSTC 2 user manual

heinrichs weikamp

heinrichs weikamp OSTC 2 user manual

Genesis Centauri manual

Genesis

Genesis Centauri manual

manuals.online logo
manuals.online logoBrands
  • About & Mission
  • Contact us
  • Privacy Policy
  • Terms and Conditions

Copyright 2025 Manuals.Online. All Rights Reserved.

Assembly & Maintenance Guide
(SRB3600)
®
®
REGULATORS
FIRST STAGE - MAXIMUS® SRB3600
ITEM # CATALOG # DESCRIPTION
. . . . . . . . . . . .SRB3601 . . . . . . . .First Stage Complete
1 . . . . . . . . . . .5105-70 . . . . . . . . .Handwheel Assembly
2 . . . . . . . . . . .3504-6 . . . . . . . . .Star Washer
. . . . . . . . . . . .J2790056B . . . . . .Filter Retaining Ring
3 . . . . . . . . . . .1390-7 . . . . . . . . .Filter
4 . . . . . . . . . . .29-3106-13A . . . . .Moving Orifice
. . . . . . . . . . . . . . . . . . . . . . . . . . .(bare, no O-rings)
5 . . . . . . . . . . .19-8010-8 . . . . . . .Disc Spring
6 . . . . . . . . . . .MS28774-007 . . . .Backup Ring (for Moving Orifice)
7 . . . . . . . . . . .G007A . . . . . . . . . .O-ring (for Moving Orifice, 2 ea.)
8 . . . . . . . . . . .3801-20 . . . . . . . . .Dust Cap
9 . . . . . . . . . . .1-1665-17 . . . . . . .Yoke Nut
10 . . . . . . . . . .2-3801-4 . . . . . . . .Yoke
11 . . . . . . . . . .1-3105-6 . . . . . . . .L.P. Port Plugs
12 . . . . . . . . . .G011B . . . . . . . . . .O-ring (for L.P. Port Plugs)
13 . . . . . . . . . .3106-6 . . . . . . . . .One Way Bleed Valve
14 . . . . . . . . . .J07-S1024-08DB . .Locking Allen Screw
15 . . . . . . . . . .2-3601-1A . . . . . . .Main Body
16 . . . . . . . . . .G904A . . . . . . . . . .O-ring (for H. P. port plug)
17 . . . . . . . . . .1-3405-4 . . . . . . . .H. P. Port Plug
18 . . . . . . . . . .G024A . . . . . . . . . .O-ring (fits on large end of Body)
19 . . . . . . . . . .2-3601-7 . . . . . . . .Pressure Adjusting Ring
20 . . . . . . . . . .G025A . . . . . . . . . .O-ring (fits on Pressure Adj. Ring)
21 . . . . . . . . . .3801-12B . . . . . . .Main Spring
22 . . . . . . . . . .G007A . . . . . . . . . .O-ring (for small end of piston)
23 . . . . . . . . . .3801-5 . . . . . . . . .Piston Seat
24 . . . . . . . . . .25-3601-13 . . . . . .Piston (Bare, no O-rings or seat)
25 . . . . . . . . . .G022A . . . . . . . . . .O-ring (for large end of Piston)
26 . . . . . . . . . .2-3601-8 . . . . . . . .Cap
27 . . . . . . . . . .3601-15 . . . . . . . . .Cap Label
TABLE OF CONTENTS
Page
1.0 Introduction . . . . . . . . . . . . . . . . . . . . . . . . . . . . . . . . . . . . .1
2.0 Specifications . . . . . . . . . . . . . . . . . . . . . . . . . . . . . . . . . . .2
2.1 General Specification . . . . . . . . . . . . . . . . . . . . . . . . . . . . . .2
2.2 First Stage . . . . . . . . . . . . . . . . . . . . . . . . . . . . . . . . . . . . . .2
2.3 Second Stage . . . . . . . . . . . . . . . . . . . . . . . . . . . . . . . . . . . .2
3.0 O-rings Reference Chart . . . . . . . . . . . . . . . . . . . . . . . . . . .3
4.0 Special Feature of the Maximus SRB3600 . . . . . . . . . . . . .4
4.1 First Stage Features . . . . . . . . . . . . . . . . . . . . . . . . . . . . . . .4
4.2 Second Stage Features . . . . . . . . . . . . . . . . . . . . . . . . . . . . .4
5.0 First Stage Procedures . . . . . . . . . . . . . . . . . . . . . . . . . . . .5
5.1 Tools Required for First Stage Servicing . . . . . . . . . . . . . . . .5
5.2 Disassembly of First Stage . . . . . . . . . . . . . . . . . . . . . . . . . .6
5.3 Assembly of First Stage . . . . . . . . . . . . . . . . . . . . . . . . . . . .10
5.4 Testing of First Stage . . . . . . . . . . . . . . . . . . . . . . . . . . . . . . .11
6.0 Secoond Stage Procedures . . . . . . . . . . . . . . . . . . . . . . . .13
6.1 Tools Required for Second Stage Servicing . . . . . . . . . . . . . .13
6.2 Disassembly of Second Stage . . . . . . . . . . . . . . . . . . . . . . . .13
6.3 Assembly of Second Stage . . . . . . . . . . . . . . . . . . . . . . . . . .15
6.4 Set-Up of Second Stage . . . . . . . . . . . . . . . . . . . . . . . . . . . .17
6.5 Testing of Second Stage . . . . . . . . . . . . . . . . . . . . . . . . . . . .18
7.0 Helpful Hints . . . . . . . . . . . . . . . . . . . . . . . . . . . . . . . . . . . .20
7.1 Troubleshooting Regulators . . . . . . . . . . . . . . . . . . . . . . . . . .20
7.2 Parts Cleaning Recommendations . . . . . . . . . . . . . . . . . . . . .21
7.3 Commonly Used Cleaning Solutions . . . . . . . . . . . . . . . . . . .22
7.4 Handling Tips . . . . . . . . . . . . . . . . . . . . . . . . . . . . . . . . . . . .22
8.0 Two Year Warranty and Maintenance Information . . . . . . .24
8.1 Proper Procedure for Warranty Paperwork . . . . . . . . . . . . . .24
8.2 Scheduled Maintenance . . . . . . . . . . . . . . . . . . . . . . . . . . . .24
BEFORE YOU BEGIN.....
READ THESE INSTRUCTIONS COMPLETELY BEFORE YOU BEGIN SERVICING THE
REGULATOR.
THESE INSTRUCTIONS ARE INTENDED FOR PEOPLE WHO HAVE BEEN
AUTHORIZED BY SHERWOOD TO REPAIR SHERWOOD SCUBA EQUIPMENT. IF YOU
ARE NOT SO AUTHORIZED - STOP.
1
1.0 INTRODUCTION
1. This manual is written as a guide to the annual servicing and maintenance of the Sherwood
Maximus SRB3600 regulator.
2. This manual gives breakdowns of regulator parts, equipment specifications, servicing
instructions, troubleshooting recommendations, and guidelines for proper care of these
regulators. The manual is intended for use only by persons specially trained and authorized to
service Sherwood Scuba equipment.
3. Anyone attempting to service or repair Sherwood Scuba regulators must have a thorough
knowledge of the principles of operation of scuba regulators and valves, as well as the
appropriate mechanical ability. The technician must be properly trained in the safe use of
compressed air and the various tools and cleaning solutions involved in the procedures
outlined in this manual.
4. The best source for current part numbers for any of the parts listed in this manual is your
authorized Sherwood Scuba distributor.
5. Because of the many unique features found in Sherwood regulators, Sherwood conducts
seminars on a regular basis throughout North America to train technicians in proper service and
repair procedures for all current Sherwood regulators. In addition, all Sherwood dealers and
their staff members are encouraged to attend the seminars to gain an in-depth understanding
of the construction, special features and operation of Sherwood regulators. For information on
the dates and locations of upcoming Sherwood service seminars near you, contact your
Sherwood Scuba distributor or sales representative.
6. Companion instructional VHS videotapes to this and other Sherwood Scuba repair manuals are
available from your authorized Sherwood Scuba distributor at a nominal cost. Ask your
Sherwood Scuba sales representative for details.
7. If you have any questions, or need more information, contact your Sherwood Scuba sales
representative or Authorized Distributor.
NOTE
: You must be authorized by Sherwood to wor on Sherwood Scuba equipment. You can obtain
proper authorization by attending all appropriate seminars given in your area. This is the only way you can
become an authorized Sherwood technician.
2.0 SPECIFICATIONS
2.1 GENERAL SPECIFICATIONS FOR THE SRB3600 MAXIMUS REGULATOR
REGULATOR MODEL: Sherwood SRB3600 Maximus
AIR FLOW: 32 cu. ft./min. (850 liters)/min. @ 1 atmosphere
INHALATION RESISTANCE: 1.1" w.c. (2.8 cm w.c.) @ 1 atmosphere
EXHALATION RESISTANCE: 0.5" w.c. (1.3 cm w.c.) max. @ 1 atm.
RECOMMENDED LUBRICANT: LTI Christo-Lube® MCG#111, Dow Corning #111
Compound®, Parker Super O-Lube®, or equivalent
2.2. First Stage Regulator (SRB3601)
TYPE: Externally adjustable, flow-by piston with Moving
orifice balancing, and Positive Air Purge (Dry Air Bleed),
U.S. Pat. # 4,226,257
WEIGHT: 1 lb. 11 oz. (.8kg)
INTERSTAGE PRESSURE: 120 -150 psi (8.3-10 Bar)
MAXIMUM INLET PRESSURE: 232 Bar for SRB3600CE Model
POSITIVE AIR PURGE
FLOW RATE: 13-25 cc/minute
# LOW PRESSURE PORTS: 5 (3/8"-24 UNF)
# HIGH PRESSURE PORTS: 1 (7/16"-20 UNF)
MATERIALS: Body –CDA-360 Brass
O-rings –Buna-N
Bleed Valve –Ethylene Propylene
Piston Seat –Teflon®
2.3. Second Stage Regulator (SRB3602):
TYPE: Downstream poppet, diaphragm, externally –
adjustable, with underarm hose routing
WEIGHT: 8 oz. (.23 kg) w/o hose
HOSE LENGTH: 40 in. (1.02 m)
MATERIALS : Cover –Thermoplastic Triax®
Case –Thermoplastic Triax®
Poppet Seat –Buna-N
O-Rings –Buna-N
Diaphragm –Tufel®(blue)
Exhaust Valve –Thermoplastic Elastomer
Wisdom®Mouthpiece - C-Flex®
Maximum certified depth is 50m.
2
3.0 O-RINGS REFERENCE CHART
3
4.0 SPECIAL FEATURES OF THE MAXIMUS SRB3600
REGULATOR
4.1 FIRST STAGE FEATURES
1 The external adjustability of the first stage allows you to adjust the regulator output to match
the type of diving being done. Relatively low outlet pressure (120 psi, 8.3 Bar) helps the
regulator resist freezing in cold water diving. Medium outlet pressure (130 psi, 9 Bar), combines
good breathing effort and durability. Relatively high outlet pressure (150 psi, 10 Bar), maximizes
flow rate for high work effort dives.
4.1 SECOND STAGE FEATURES
1 The Maximus regulator's unique underarm hose routing protects the hose from snagging on
obstructions during close quarters diving (coral, caves, wrecks, piers, etc.). This routing also
allows for better head movement, thus lowering jaw fatigue caused by the hose pushing or
pulling the second stage. A longer hose and unique swivels make the regulator ideal in air-
sharing exercises.
2. The large high flow Wisdom®mouthpiece and the oval exhaust valve provide comfort and lower
breathing resistance.
3. The externally adjustable demand valve in the second stage allows the diver to custom-tailor
the regulator to the diving conditions and interstage pressure. The knob can be backed off for
extended storage periods of longer than three months, eliminating the need for purge button
lock down tabs.
4. To help prevent rapid pressure buildup in the first stage, the Maximus allows you to leave the
knob in the backed off (counter-clockwise) position when the air is first turned on, and then
close the knob (clockwise) until the airflow just stops. This is especially important when high
(3500 psi, 241 Bar) tank pressures are used because it helps prevent rapid heat buildup at the
piston seat.
5. The smooth hydrodynamic shape of the second stage is less resistant to forward motion
through water, thus lowering jaw fatigue. The shape is also designed to resist free-flowing
caused by rapid initial immersion or forward motion.
6. With lower interstage hose pressure (120 psi, 8.3 Bar), the heat transfer fins become warmer
during exhalation, and transfer heat to the lever support area (thus aiding in freeze resistance).
At high interstage hose pressures (135-150 psi, 9.3-10 Bar), the transfer fins become much
colder, causing condensation and moisture retention for the diver.
4
BEFORE YOU BEGIN:
Before you begin disassembly of the regulator, test the first and second stages for output
pressures and leakage. Pretesting in this way will help you to pinpoint any specific areas
requiring repair. Make sure your work area is clean and well lighted, with clean compressed air
available to blow sand and dirt from parts.
5.0 FIRST STAGE PROCEDURES
5.1 TOOLS REQUIRED FOR FIRST STAGE SERVICING
- Bench vise
- 3/32" Allen wrench
- 5/32" Allen wrench
- 6" or 8" adjustable wrenches
- 15" adjustable wrench
- Pocket screwdriver (slotted)
- Sherwood 50 cc Graduated Cylinder (p/n TL110)
- Sherwood Piston Seat Removal Tool (p/n TL112)
- Sherwood Plastic Probe (p/n TL111) to push out orifice
- Sherwood Regulator Support Handle (p/n TL113)
- Sherwood Intermediate Pressure Gauge (p/n TL119)
- Sherwood Inlet Filter Installation Tool (p/n TL115)
- Sherwood O-ring Installation Cones:
Brass-colored - p/n TL106 (for installing O-ring onto piston tip)
Green-colored - p/n 38-TL107 (for installing first O-ring onto moving orifice)
Black-colored - p/n 29-TL108 (for installing second O-ring onto moving orifice)
- Annual Service Kit # 4000-4
- Enriched Air Conversion Kit #4000-4N
5
NOTE: for more information on Sherwood tools and their uses, see Sherwood's Tools, Repair Kits and
Accessories - Assembly & Maintenance Guide,available from your authorized Sherwood distributor.
5.2 DISASSEMBLY Of FIRST STAGE
To view all the parts used in the first stage, fold out the front cover of this manual. The
circled numbers below refer to the corresponding numbers on the drawing.
1. Use 6" or 8" adjustable wrenches to disconnect all hoses from the first stage. Pull back the
hose protector from the inlet end of the hose. Inspect the hoses for wear. Pay particular
attention to the area where the metal ferrules meet the rubber hose material. Replace hoses if
necessary.
2. Unscrew and remove the handwheel .
3. Remove the dust cap .
4. Install a Sherwood regulator support handle (p/n 4700-15) into one of the low-pressure ports.
Use the support handle and a 15" adjustable wrench or bench vise to loosen the yoke nut
from the body . See Photo # 1.
Photo #1
5. Remove the yoke and yoke nut from the body.
6. Use a 5/32" Allen wrench to remove all remaining port plugs from the main body .
7. Use a 3/32" Allen wrench to remove the locking Allen screw from the main body
(see Photo #2).
Photo #2
6
NOTE: If a Sherwood DIN adapter (p/n SAA530O) is installed in place of the normal yo e assembly, remove it
at this time. See Sherwood Scuba Technical Bulletin #104 for servicing procedures for the SAAS300 DIN adapter.
1
8
15
10 9
11 17 17
14
8. Use a regulator support handle and a 15" adjustable wrench or bench vise to remove the cap
and pressure adjusting ring as a unit from the main body. Keep the wrench on the
adjusting ring flats, not on the cap flats, for this operation. This will ensure that the two units do
not separate (see Photo # 3).
9. Use a 15" adjustable wrench and a bench vise to separate the cap from the adjusting ring (see
Photo # 4).
10. Remove the piston and spring from the cap.
11. Remove the piston O-rings and discard them. Take care not to scratch the O-ring grooves in the
piston. Remove the piston seat by pushing through the stem with the Sherwood piston seat
removal tool (p/n TL112) from the large end. The seat will then pop out. Discard the old seat.
12. If any grease or oil gets on the flow control element assembly in the face of the piston,
the air flow will be impeded.
a. Keep greasy fingertips away from the piston during servicing.
7
Photo #3
Photo #4
26 19
24 21
23