Shirtal DiaCam DIACAM360 User manual


Table of Contents
Technical Specifications ................................................................................... 3
Intended Use............................................................................................... 3
Safety Instructions......................................................................................... 3
Components ............................................................................................... 5
Preliminary preparations.................................................................................. 6
1. Unpacking ....................................................................................6
2. Device Assembly .............................................................................6
3. Software installation .........................................................................8
Operating DiaCam360....................................................................................12
1. Switching on the system ................................................................... 12
2. Start software .............................................................................. 12
3. Main screen ................................................................................ 12
4. Scan - scan a new item..................................................................... 13
5. My Scans- Manage all scans .............................................................. 22
6. Settings - change user and system settings .............................................. 27
7. Support ..................................................................................... 32
8. Contact...................................................................................... 33
9. Replacing holding tips...................................................................... 34
Warranty Certificate......................................................................................37

1
Dear DiaCam360 family member,
Congratulations for choosing the DiaCam360 –the most popular and THE ONLY FULLY-
AUTOMATED 360° imaging and marketing system for white and fancy color loose diamonds,
including rough and gemstones.
DiaCam360 is an automatic device for creating high quality photos & 360° interactive videos
of your diamonds, gemstones and rough.
We are glad that you have chosen to join our customers who benefit from this unique device.
The DiaCam360 photographic device you have chosen, manufactured by Shirtal DiaCam ltd.,
affiliated to Shirtal Diamonds Ltd., is the result of two years of development, combining
cutting edge technology, highly appreciated all over the world.
The unique combination between ease of operation, speed and size of the device, ensures a
high quality experience while photographing diamonds, much like a professional studio
without having any prior knowledge or technical skills.
We are confident the device will fit right on your desk and provide you with a new
photographic experience and a way to allow your customers to "interact" with your diamond,
thus increasing confidence in their purchase.
In order to fully enjoy your new DiaCam360, all you have to do is to place the desired
diamond you want to shoot, close the lid and push the button. We shall do all the rest.
For any questions or concerns - we are here for you.
With kind regards,
Shirtal DiaCam ltd.
www.DiaCam360.com

2
Shirtal DiaCam ltd reserves the right to make changes and updates in this manual without
prior notice. You may not reproduce any part of this manual, in any way whatsoever,
without the prior approval of the Company.
An updated online version of this guide as well as training videos can be found on the Shirtal
DiaCam ltd's website, under: www.DiaCam360.com/support
All important user safety instructions are marked with an
This device is equipped with safety devices. In order to prevent accidents or damage, you
must read all the notes for using the device according to instructions given in this manual.
Keep this guide in a safe place for future reference.
In any case the DiaCam360 is transferred to another user, transfer the user's manual as well,
together with the device, to the new owner.
In case static lines or any other objects appears in the final photos, use the supplied Ferrite
beads, one on the interconnection cable and one on the AC main cable.
This product is compatible with the European Union Directive EC/2002/96
Marking device or its packaging with: Indicates that the disposal of this
product is not suitable for household waste, you must ensure the proper disposal of this
device according to relevant law in relation to the disposal of electronic equipment. The
correct disposal of the device will prevent the possibility of adverse effects on the
environment.
For more detailed information about the disposal and recycling options for this device, please
contact your local municipality, your local waste service or the dealer you purchased the
product from.

3
Technical Specifications
Intended Use
The DiaCam360 Is designed for photography of white and fancy color loose diamonds,
including rough and gemstones.
•The device is equipped with various holding tips, for holding the stones on their girdle,
suitable for all types of diamond polishing, various shapes and sizes.
•Instruction on replacing these attachments can be found in Chapter 8.
Safety Instructions
Electrical Hazards
•In order to prevent electrical shock, keep the device, plug and power cord away from
water.
•Plug the device into a grounded electrical outlet. The rated voltage must correspond to the
values specified in the technical data.
•The device is sensitive to static electricity. The device must be grounded in order to avoid
the termination of the scanning. In case the scanning was terminated due to static
electricity, restart the program or click again on Scan in the software menu.
•Do not use the device, in any case the appliance itself, its power cord or plug have been
damaged, or after the device has been dropped.
•Do not make any changes on the device or its power cord. Only Shirtal DiaCam ltd is
permitted to repair the device in order to prevent any danger as a result of faulty repair
works.
Always unplug the power cord from the wall outlet, in case :
•Of a malfunction .
•After the device has not been used over a long period of time .
Never pull the cord in order to disconnect the plug from the wall outlet.

4
CAUTION
Shirtal DiaCam ltd shall have no liability for any damage caused by:
•Operating not in accordance with the user instructions provided in this manual.
•Repair and/or attempt to repair the device, by anyone other than Shirtal DiaCam ltd.
•Damage or impairment of the power cord.
•Damage, change or impairment to any component of the device.
•Using spare parts and components that are not original and/or not provided by Shirtal
DiaCam ltd.
In such cases, the warranty will be null and void.
The device meets the safety, power and international radiation standards (EMC & Safety):
•CFR 47 FCC –Class A
•EN 55022 Class A
•EN 61000-3-2
•EN 61000-3-3
•EN 55024
•IEC 60950-1:2005 + A1:2009 + A2:2013
•EN 60950-1:2006 + A11:2009 + A1:2010
•+ A12:2011 + A2:2013

5
Components
Bottom unit
Top unit
Bottom unit
Top unit
Holding tips
Power cord
Power and suction braid
Wooden noise box
Suction tube
inlet
Power cable inlet
Suction tube
inlet
Power cable inlet
Power
receptacle
USB cable
Grip handle
Handle for
opening the lid
Lid
Replaceable
holding tip
Lens

6
Preliminary preparations
1. Unpacking
After removing the device from its packaging inspect the device for its integrity.
In case of any doubt, do not use the device and immediately contact our customer service
at support@DiaCam360.com.
2. Device Assembly
Essential and safety components of the device have been already assembled at the
factory. Some minor components of the device may be supplied separately packed.
Assemble these components according to assembly instructions included in this manual.
2.1. Place the Top unit of the device on your desk or any other flat surface near your
computer.
Top unit
2.2. Connect the end of the USB cable to an available USB inlet on your computer.
2.3. Connect one end of the supplied power cord to the power inlet on the back of the
unit, and the other end to an electrical inlet.

7
2.4. Connect one end of the supplied power and suction braid to the power and suction
inlet on the back of the Top unit, and the other end to the power and suction inlet
on the back of the Bottom unit.
2.5. Place the Bottom vacuum unit of the DiaCam360 inside the wooden noise box,
insert the cables through the hole on the side and close the upper lid. Place the
wooden noise box on the floor.
Wooden noise box
Bottom unit
CAUTION
Place the Bottom unit of the device only on the floor.
Placing the Bottom unit of the device on your desk may cause the migration and damaging of
delicate components in the device, resulting in blurred and uneven photos.

8
3. Software installation
3.1. Open internet browser and go to: www.DiaCam360.com/Support
3.2. Under "Software"click on "Click here"next to “Download the latest version on
DiaCam360 software”
3.3. Click on "Save"to save the file "DiaCam360.exe"and wait until saving process is
finished
3.4. Double click on "DiaCam360.exe"that was previously downloaded
3.5. In case Windows protection window opens, click on "More info"and then on "Run
anyway"
9
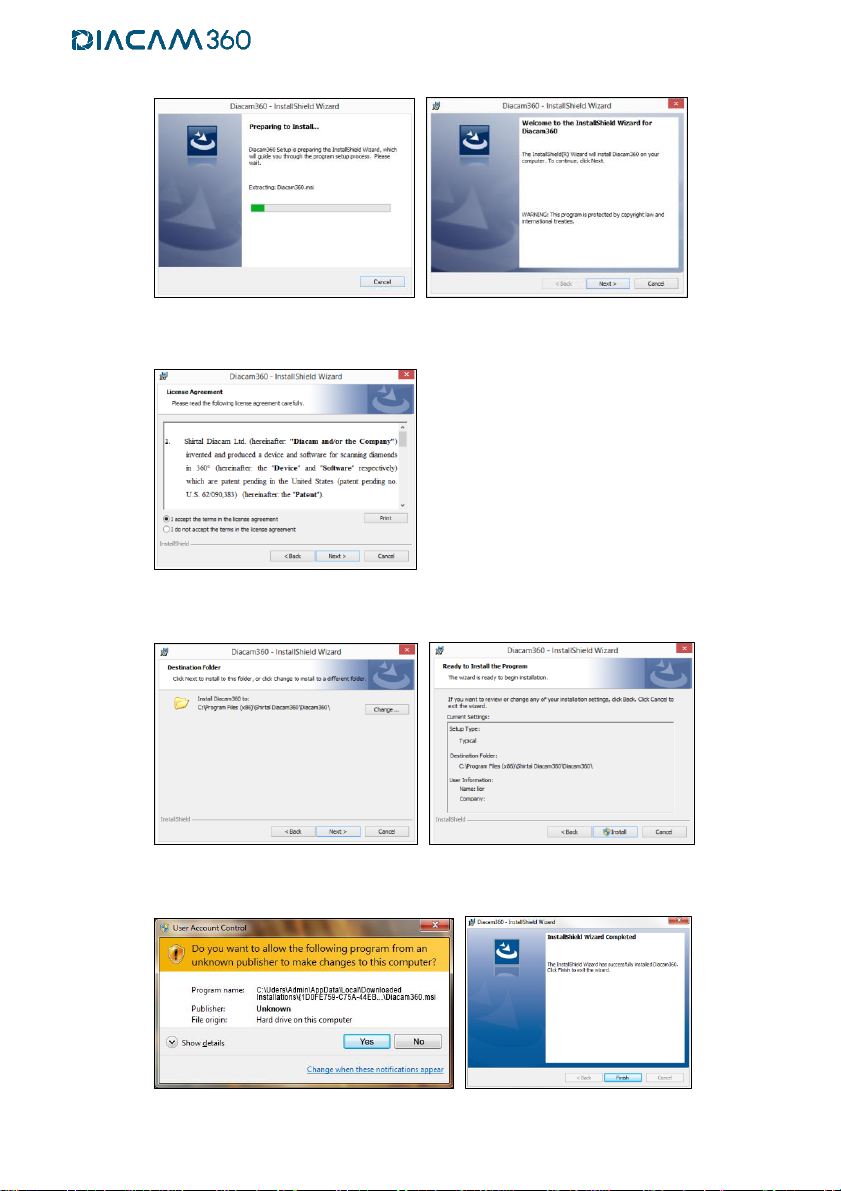
3.6. Wait for the software to build the installation files and then click on “Next”
3.7. Read the License Agreement and Approve by clicking "I accept the terms in the
license agreement"and click “Next”
3.8. Click “Next” to approve installation path and directory and “Install” to start the
installation
3.9. Click “Yes” to approve copying software files into your computer and “Finish” when
the installation is done
10
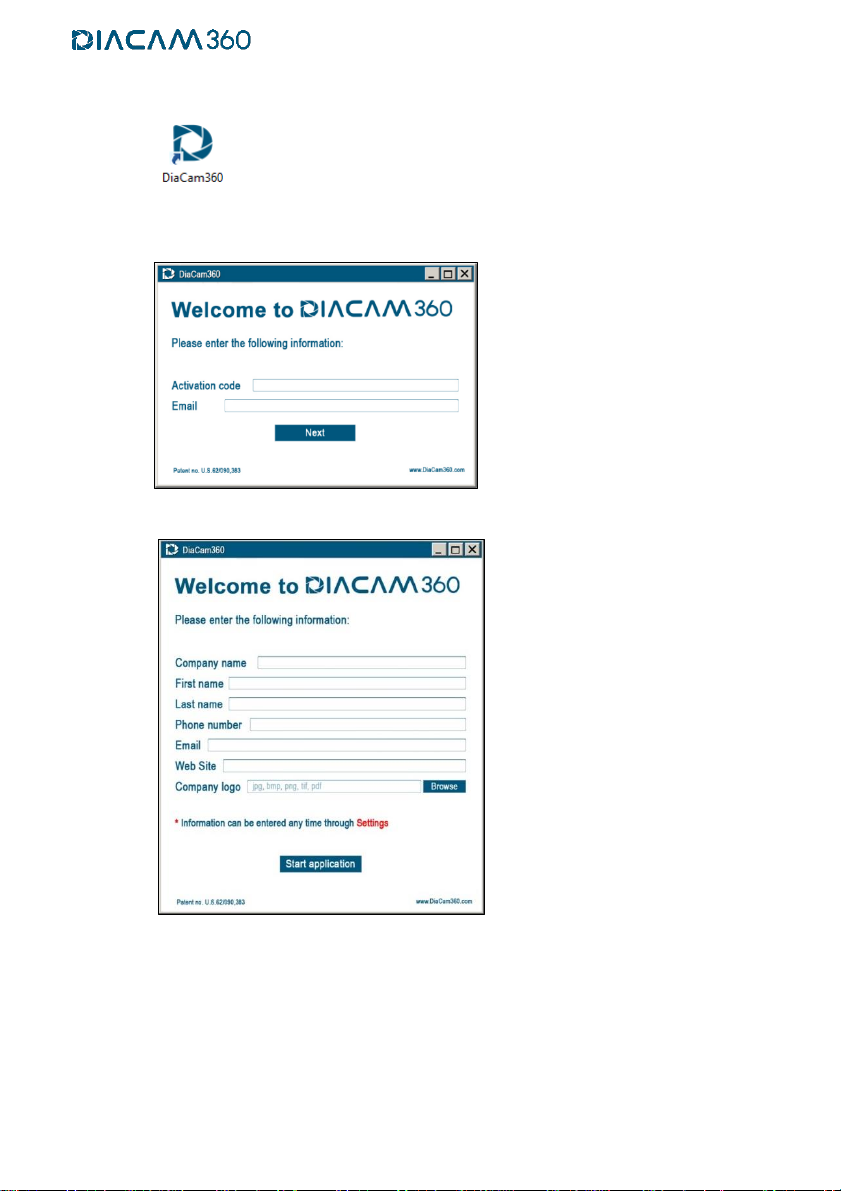
3.10. Double click on "DiaCam360" shortcut on your desktop to launch DiaCam360
software
3.11. Enter the Activation code and Email address sent to you by Shirtal DiaCam ltd and
click “Next”
3.12. Enter or change your company details and click "Start application"
To add your company logo click “Browse” and choose the logo file
* These details will appear in each scan’s page
** It is possible to complete or change these details at any time through “Settings”
menu
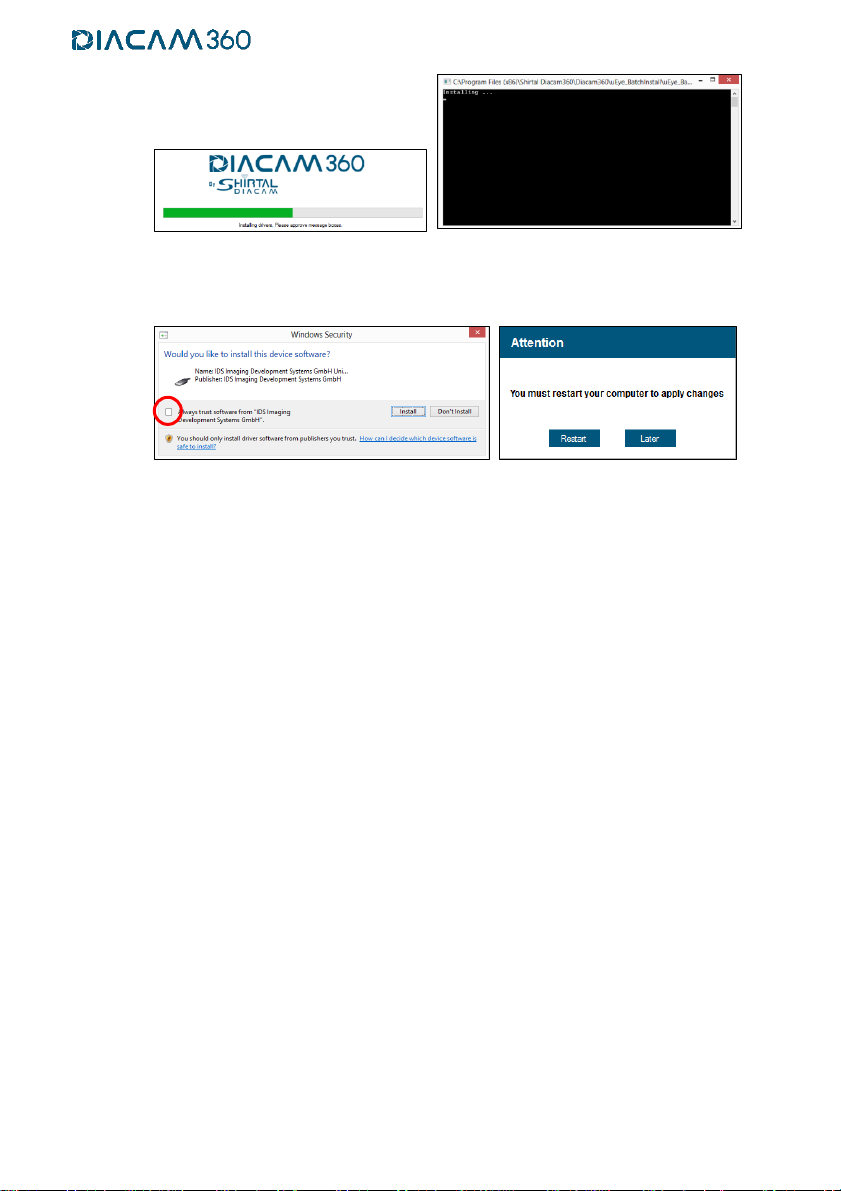
3.13. Installation of necessary drivers will start.
DO NOT touch or close the following windows
11
3.14. Make sure to click and check the check box “Always trust software from IDS
Imaging Development Systems GmbH”and click “Install” then finally click “Restart”
to enable driver's installation and restart the computer

12
Operating DiaCam360
1. Switching on the system
The DiaCam360 system will switch on automatically by the software only when initiating a
scan. When scan process ends the system will switch off automatically after ~10 seconds.
2. Start software
Double click the DiaCam360 software shortcut on your desktop.
3. Main screen
Through this screen the following actions are available:
Scan – scan a new item
My Scans – manage all your scans
Settings – changing user and system settings
Support –start remote support app, send us log from your DiaCam360 application
or go to support tab in our website
Contact –contact Shirtal DiaCam ltd.

13
4. Scan –scan a new item
4.1. Click "Scan"
4.2. Click on the relevant item you would like to scan:
Choose “Diamond”, “Gem Stone”, “Rough”or “Jewelry”
Jewelry items cannot fit inside the DiaCam360 system.
This feature is relevant only for DiaCam360 PLUS systems.
4.3. Click on “Diamond”and then click on “White”for white color stones, “Yellow”for
yellow color stones, “Pink”for pink color stones or “Blue”for blue color stones.
Click on “White”, “Gray”or “Black”to choose the desired background.
* For Black Background you also must insert the black attachable part inside the
DiaCam360 lid.
* For White and Gray Backgrounds, the attachable part must be out of the lid.
(Click HERE to see video tutorial)

14
Click on “Gem Stone” and then click on “Emerald”, “Ruby”or “Sapphire”.
Click on “White”, “Gray”or “Black”to choose the desired background.
* For Black Background the black attachable part must be inserted inside the
DiaCam360 lid.
* For White and Gray Backgrounds, the attachable part must be out of the lid.
Click on “Rough” and then lick on “White”for white color rough, “Yellow”for
yellow color rough, “Pink”for pink color rough or “Blue”for blue color rough.
Click on “White”, “Gray”or “Black”to choose the desired background.
* For Black Background the black attachable part must be inserted inside the
DiaCam360 lid.
* For White and Gray Backgrounds, the attachable part must be out of the lid.
15
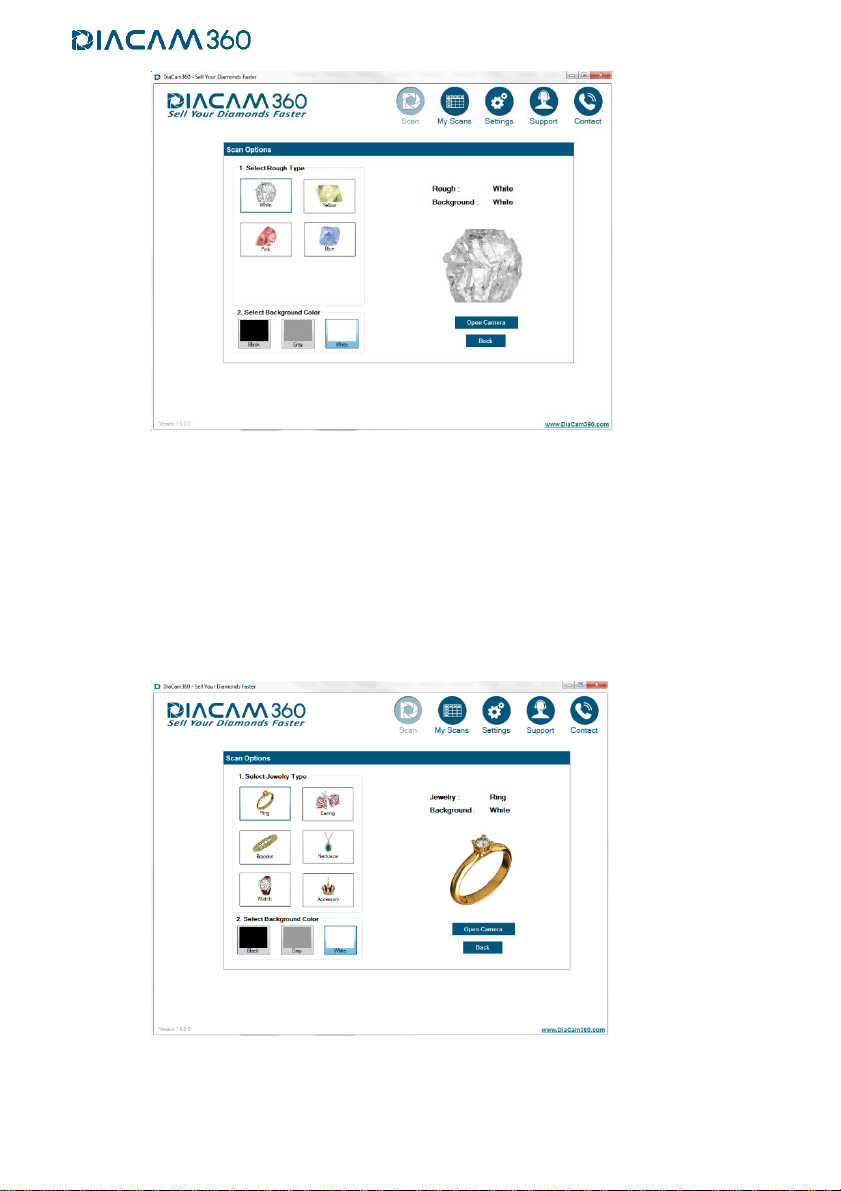
Click on “Jewelry” and then click on “Ring”, “Earring”, “Bracelet”, “Necklace”,
“Watch”or “Accessory”.
Click on “White”, “Gray”or “Black”to choose the desired background.
* For Black Background the black attachable part must be inserted inside the
DiaCam360 lid.
* For White and Gray Backgrounds, the attachable part must be out of the lid.
Jewelry items cannot fit inside the DiaCam360 system.
This feature is relevant only for DiaCam360 PLUS systems.
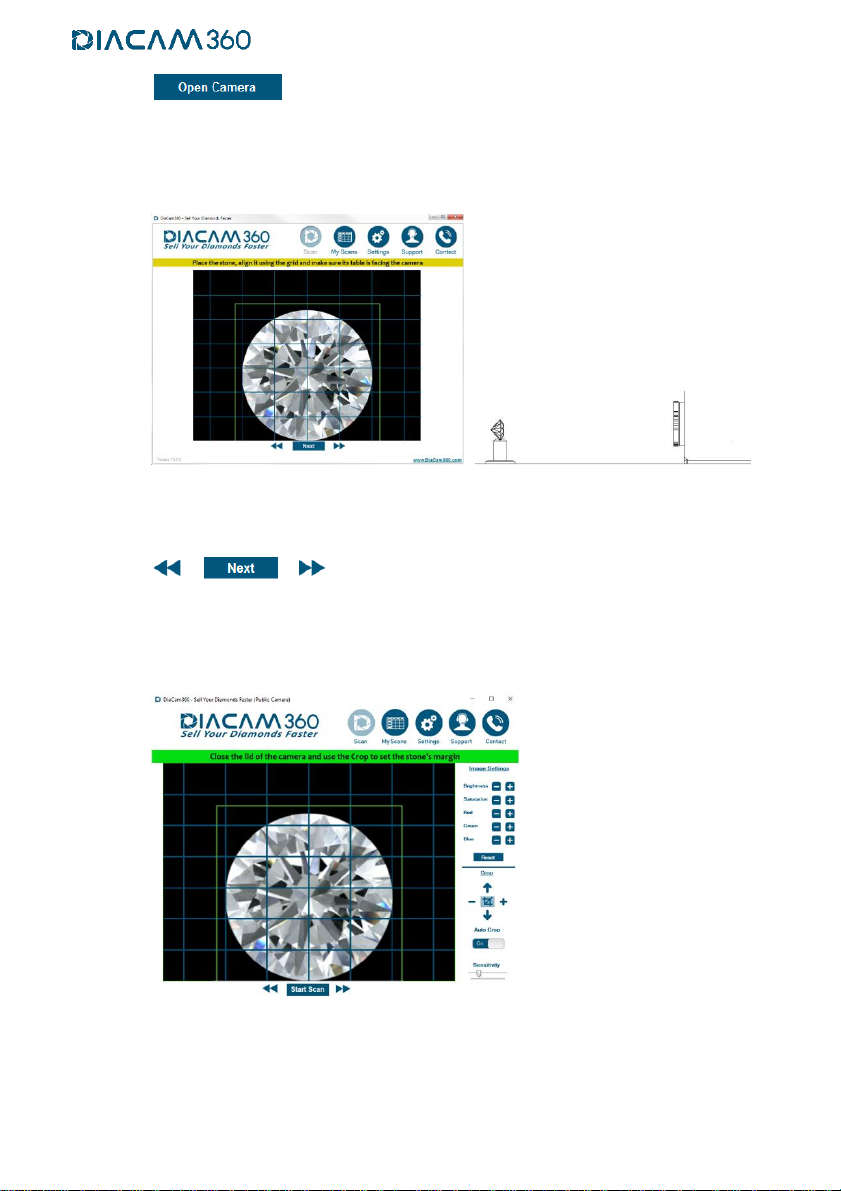
4.4. Click "Back" to choose a different item or click “Open Camera” to turn ON the
DiaCam360 (Vacuum pump and lights)
16
4.5. Open the DiaCam360 lid, place the item you wish to photograph inside, make sure
its table is facing the camera and use the blue grid lines to align the stone is in the
middle of the screen
4.6. Use the right and left arrows at the bottom to fine-tune the position of the stone so
it will face the camera and click "Next".
*This position of the stone will be used as the front still picture in the final scan.
4.7. Gently close the DiaCam360 lid
4.8. If Premium Package is enabled the Auto Crop will start automatically and create a
green frame around the stone.
In case the green crop frame is not steady, change "Sensitivity" until the frame is
stable.
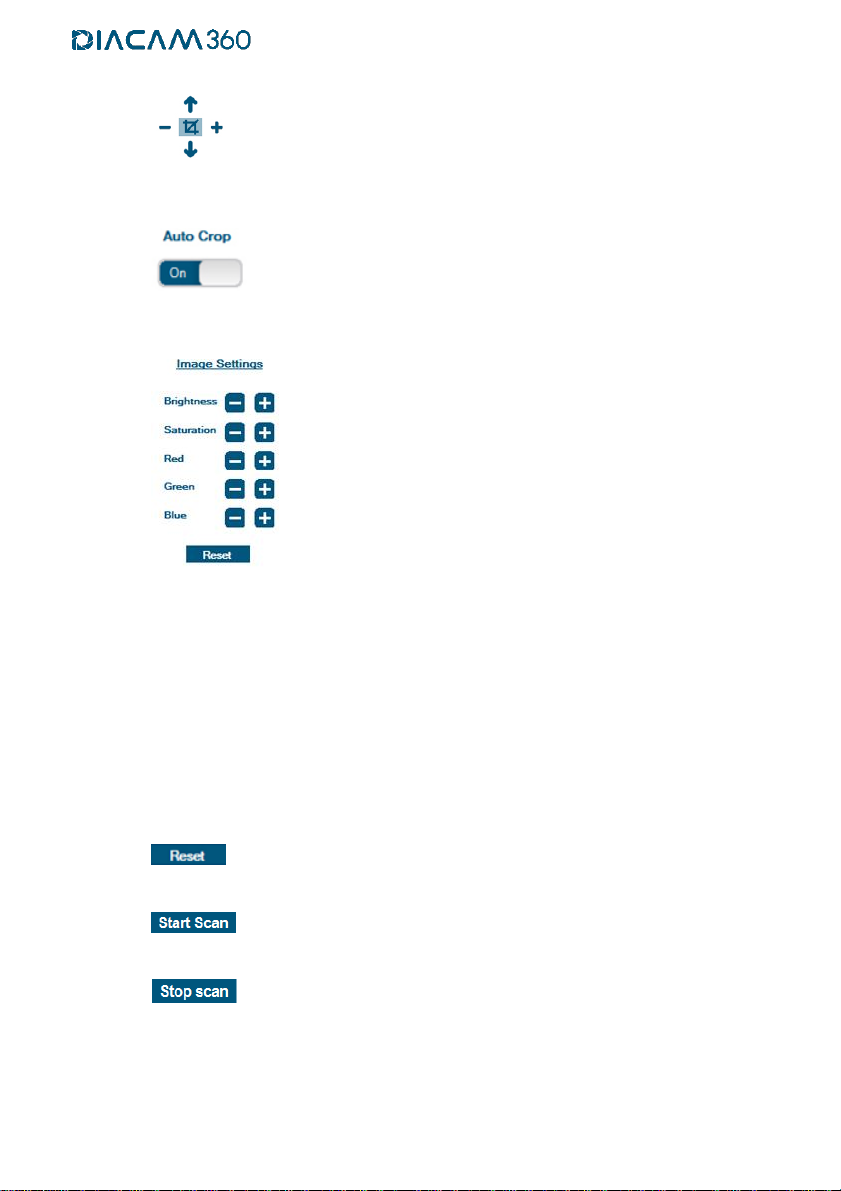
Click the Crop tool plus and minus or up and down buttons, on the right side of the
preview window, to choose manually the desired scan’s window size and position
17
and according to the stone size.
Once clicking on one of the buttons the “Auto Crop” button will turn to “Off”.
Click on the “Auto Crop” to enable the automatic crop.
4.9. Image Settings
A professional picture editing tool to adjust:
“Brightness” –The strength of the light.
“Saturation” –The strength of the color.
“Red” –Adds or subtract Red color.
“Green” –Adds or subtract Green color.
“Blue” –Adds or subtract Blue color.
Click “Reset Settings” to reset all parameters to default.
4.10. Click “Start scan”and wait for the scan process to end after ~60 seconds.
4.11. Click “Stop scan”to stop the scan before it ends and return to the initial position.
4.12. A preview window will appear showing the current scan and all the control features
on the left side and the final result on the right side.
Any change will immediatelly be shown on the right side, leaving the image on the
left side un-changed.

18
“Change Settings”
reflects the configuration that controls the scan page design under “Settings”.
Mark or un-mark the check box ( ) of any option to add or remove from the
scan page:
"Owner’s details and logo"
"Front stone’s picture"
"Back stone’s picture"
"Certificate"
“B2C”
“Girdle to Girdle spin” - the stone will spin, back and forth, from girdle to
girdle instead of 360 degrees.
“Hide Magnifying Glass” - Remove all magnifying glass controls so it will not
be possible to zoom in the main 360° window or enlarge any of the still
pictures.
Table of contents


