manuals.online logo
Brands
  1. Home
  2. •
  3. Brands
  4. •
  5. Shuang ma
  6. •
  7. Toy
  8. •
  9. Shuang ma 9120 User manual

Shuang ma 9120 User manual

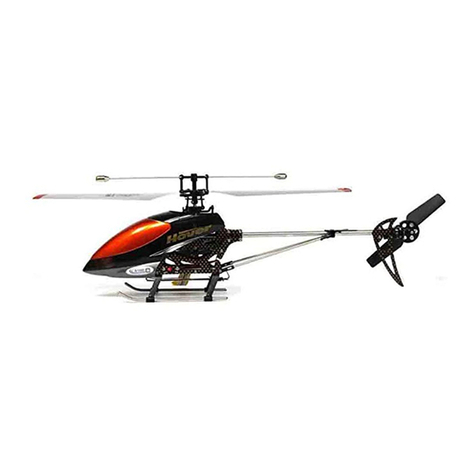
2,4G WIRETESS IR HELICOPTER
,NSTRUCTION MANUAL
Attention:
Aligning code instruction
This product adopts gyro 2.4G FH technology. lt can automatically align codes and
distribute lD, and easily interchange frequency.
l.Place the plane on the flat floor; push the power switch to ON, and the plane signal
lamp flickers quickly.
2.Turn on the transmitter switch, transmitter LED indicator light flickers quickly,the
buzzer sounds aligning alarm and aligns automatically.
Notice:1 . Please adjust the throttle lever to the lowest position. lf the throttle lever is
not at the lowest position, the transmitter will be in a state of no shooting
protection. Push back the throttle lever to the lowest position, and aligning
code is finished.
2.Every time you restart the plane power switch, you must turn on the
transmitter power switch again and then align codes again.
t\40DE 1
Elovalor Throilts
AA
Rudder I I eit"ron
<+F>
u+
MODE 2
,{\ A
Rudder ll I Alleron
<=F+ <+
vv
Antenna
ator Trimme(NIODE'l
Led State
lndicator Light
Rollover motions
Throttle Trimmer(MODE1 )
Trimme(MODE2)
Left stick
Ievator Trimme(MODE2)
Right stick
Rudder Fine
Tuning
Power switch
Aileron Fine
Tuning
Fig.1 Fig.2
1. Switch "OFF" the remote control, press the button placement shrapnel of the control
rod and pull it out of the main stand (Fig 1)
2. Switch the left control rod with the right one in a parallel manner, and then put them
into the main stand. ( Fig 2)
3. After the left and right control rods are switched, pull the control rod of the accelerator
to the lowest position, then turn on the remote control, thus the left and right accelerator
are switched.
-1-
lnstall the batteries: open the battery case cover,
properly according to pole indications. (batteries
jD\&-1
\\
\J
\
6X1.5VAA
batteries
Charging method A: adapter charging (adapter is not included) (Fig.2)
1.Push the helicopter switch to OFF before charging.(Fig.1)
2.Turn on the transmitter switch, transmitter LED indicator light flickers quickly.
3.lnsert the USB port of the charging wire into the adapter port, the red light of the charging
wire is on. lnsert the output plug of the charging wire into the small plug below the
helicopter, the red light of the charging wire is off , which shows that charging is going on.
lf recharge the fully-charged helicopter, the red light of the charging wire will be on and it
won't continue charging. Batteries are fully charged when the red light is on. Disconnect
the charging wire from the helicopter
4.when charging ,the light on the controller is blink, it means the battery on the controller is
low powr,it is stopped to charge, and need to change the battery.
Charging method B: USB charging (Fig. 3)
1.Push the helicopter switch to OFF. (Fig.1)
2.lnsert the USB charging wire into the computer USB port, the red light of the charging
wire is on. Then insert the output plug of the charging wire into the small plug below the
helicopter,the red light of the charging wire is off, which shows that charging is going on.
Batteries are fully charged
Fig.1 Fig.3
and insert 6 batteries ( 1 .5V AA)
to be purchased)
Attention:
'1 .Match the batteries with
pole indications before
installation.
2.Do not mix new batteries
with used ones.
3.Do not mix different types
of batteries.
the red light is on.
Fig.2
iR
,4=:4
@J
-2-
1.Fly with good weather condition:
ODo not fly with extreme temperatures.
Do not fly above 113Ti45C, or below 50T/10C.
Flying with extreme temperatures may affect the performance and damage the product.
€)Do not fly in windy days.
The performance and the control of the helicopter will be affected by winds.
Windy conditions may cause the missing and damage of the helicopter.
2.Select a wide-open space for flying and make sure no obstructions, animals or people
nearby.
d
L:Y ..€
""^Y
-3-
Ascend t
Descend
+
Steering
\
Steering
F
Forward
<r
MODERl MODER2
-4-
MODERl MODER2
Backward -Gr-r
ffi
+!_ +
Nearside -
Starboard +
Slowly operate accelerator boom. After flying machine flies to 1 meter high, please slightly
adjust its action if it is found to lean in different direction. All adjusting booms are auto-back
while re-starting up the remote control after it was turned off .
After taking off, nose of helicopter may lean forward or backward without operating the forward
and backward boom.
When lean forward, adjust backward.
When lean backward, adjust forward.
MODERl MODER2
-5-
I
2.After taking off, nose of helicopter may turn to left side or right side without operating the
left-turn or right-turn boom.
When turn to l6ft side, adjust to right side.
When turn to right side, adjust to left side.
MODERl MODER2
3.After taking off , nose of helicopter may lean to left side or right side without operating the
left-lean or right-lean boom.
When lean to left side, adjust to right side.
When lean to right side, adjust to left side.
MODERl MODER2
4.After turning on remote control, the accelerator boom sits in the middle. lf adjust it to
upper position, this may cause the accelerator boom sit in the lowest position, and the
rotor blade will still rotate. lf adjust it to lower position, the rotor blade start to rotate
when operate the accelerator boom too much to upper position.
When the accelerator boom sits in the lowest position, the rotor blade still rotates,
please adjust to lower position.
When the accelerator boom is operated too much to upper position, the rotor blade
starts to rotate, please adjust to upper position.
MODERl MODER2
Turn loft/Turn righl
(MinoFadjusting)
-6-
To ma
Fixed-point revolving
ster the helicopter,
-{
U)
<4
a
\r+._7
\-\
please attempt the following flying practices.
a^q-
a, ,M
tH tr'\
\, \ Y I
f
Rectangle flying & Circular flying
H
I
(*
Fixed-point landing Figure eight flying
PROBLEMS CAUSES SOLUTIONS
Transmitter
not working
1.The transmitter switch is on OFF 1.Turn on the transmitter
2. lnstall the batteries improperly 2.Check with the pole indications
and reinstall the batteries again
3. Batteries are completely consumed 3.Replace with new batteries
Control failure
1.The transmitter switch is on OFF 1.Turn on the transmitter
2. The fuselgge switch is on OFF 2.Turn on the fuselage
3. Code alignment is not
successfu l. 3. Turn on the remote control
switch and then the plane
switch to make another code
alignment. Turn the control rod
of the throttle to the lowest
position.
4.Fly with strong winds 4.Do not fly the helicopter in
windy conditions
5.The transmitter indicator is
flashing 5. replace the batteries
Ascending
failure
1.The rotation of main blades is too slow 1.Push up the throttle stick
2.The fuselage battery is well
c6nsumed 2.Recharge the fuselage battery
Landing too soor The throttle stick is pulled down
too fast Pull down the throttle stick slowly
to perform a smooth landing
PREGAUTIONS:
1 .lnsufficient electricity power will shorter the control distance.
2.lnsufficient electricity power will lead to difficulties in taking off and ascending.
3.Fix the helicopter in time if there is any damage. Flying a damaged helicopter could
cause injuries.
4.Remove the transmitter batteries if not in use for a long time in case of battery leakage.
5.Avoiding dropping and crashing the helicopter for it will lead to damages and shorten
the use life.
-8-
I
(o
I
L t ilv,'-
I
I
o
I
NO Description Dosag(
1Baiance Bar 1
2lnner shalf 1
3Balance Bar Connect buckle 4
4Stabilizer 2
5blade main 2
6Swashplate 1
7Hollow pipe 1
Imain blade 1
9right aluminium plates 1
10 Cabin Lock 2
11 Adorning aluminium sleeve 2
12 right top aluminium 1
13 Servo 2
14 Sets of right steering rod 1
15 Main frame 1
16 Bearing 06x/3x2 2
17 Gear 1
18 main motor gear 1
19 Head Cabin
20 tail blade 1
21 Tail blade gear 1
NO Description Dosag€
22 tail shaft pipe 1
23 tail motor gear 1
24 tail gear wheel shaft 1
25 tail power parts 1
26 erect empennage fixing component
27 tail tube
28 fixing sleeve of hollow pipe 1
29 upright tail blade 1
30 right aluminium plates 1
31 left upper aluminium 1
32 left nether aluminium 1
33 gear iron shalf 1
34 PCB 1
35 Li-ion Battery 1
36 Lower main frame 1
37 U ndercarriage 1
38
39
40
41
42
-11-

Other Shuang ma Toy manuals

Shuang ma 9100 User manual

Shuang ma

Shuang ma 9100 User manual

Shuang ma 9101 User manual

Shuang ma

Shuang ma 9101 User manual

Shuang ma 9053 User manual

Shuang ma

Shuang ma 9053 User manual

Popular Toy manuals by other brands

Bontempi MUSIC ACADEMY Genius 48 6000 owner's manual

Bontempi

Bontempi MUSIC ACADEMY Genius 48 6000 owner's manual

LeapFrog World Launch Parent guide & instructions

LeapFrog

LeapFrog World Launch Parent guide & instructions

Fisher-Price Rockin' Roadsters Drag Strip instruction sheet

Fisher-Price

Fisher-Price Rockin' Roadsters Drag Strip instruction sheet

Bengtson Company Pfalz E1 EZ BUILD instructions

Bengtson Company

Bengtson Company Pfalz E1 EZ BUILD instructions

Walkera HM 37 User handbook

Walkera

Walkera HM 37 User handbook

Advanced Methods in Innovation NASA/INVENTORcloud Mars Rover Kit Gaining Traction on... Assembly instructions

Advanced Methods in Innovation

Advanced Methods in Innovation NASA/INVENTORcloud Mars Rover Kit Gaining Traction on... Assembly instructions

MGA RAINBOW HIGH 503163 quick start guide

MGA

MGA RAINBOW HIGH 503163 quick start guide

Enabling Devices Cyclone 7008 user guide

Enabling Devices

Enabling Devices Cyclone 7008 user guide

Mattel Mega Bloks Hot Wheels Street Racer quick start guide

Mattel

Mattel Mega Bloks Hot Wheels Street Racer quick start guide

Jamara Explorer 403780 Instruction

Jamara

Jamara Explorer 403780 Instruction

Eduard BMW R75 quick start guide

Eduard

Eduard BMW R75 quick start guide

maxitrak 5 Inch Gauge Alice Construction manual

maxitrak

maxitrak 5 Inch Gauge Alice Construction manual

Phoenix Model BAE HAWK instruction manual

Phoenix Model

Phoenix Model BAE HAWK instruction manual

Creative Computing Robot Buggy Build instructions

Creative Computing

Creative Computing Robot Buggy Build instructions

LeapFrog LeapBuilders Phonics House Parents' guide

LeapFrog

LeapFrog LeapBuilders Phonics House Parents' guide

Gyros S107G quick start guide

Gyros

Gyros S107G quick start guide

Educational Insights EI-2309 Language Tutor Instructions for use

Educational Insights

Educational Insights EI-2309 Language Tutor Instructions for use

Fisher-Price RainForest L1664 instruction sheet

Fisher-Price

Fisher-Price RainForest L1664 instruction sheet

manuals.online logo
manuals.online logoBrands
  • About & Mission
  • Contact us
  • Privacy Policy
  • Terms and Conditions

Copyright 2025 Manuals.Online. All Rights Reserved.