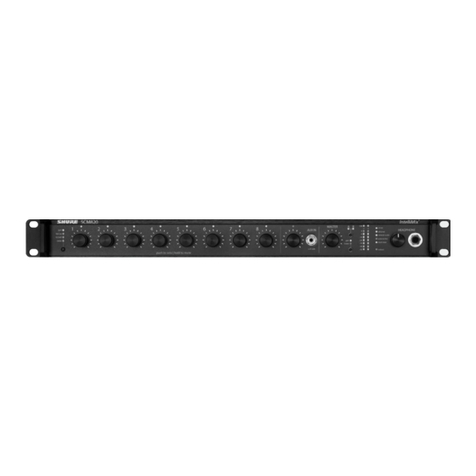
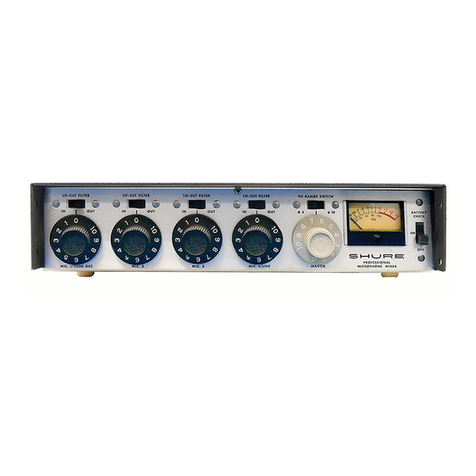
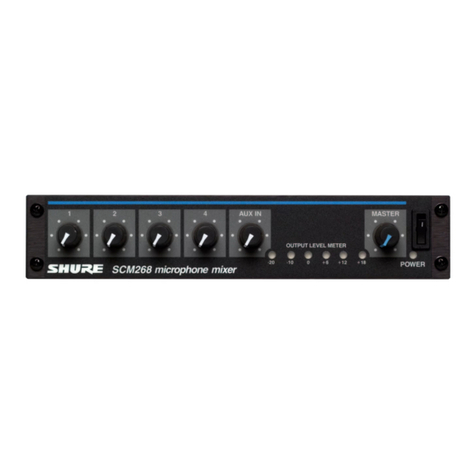
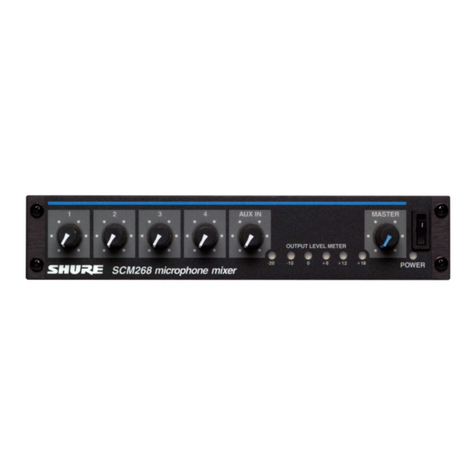
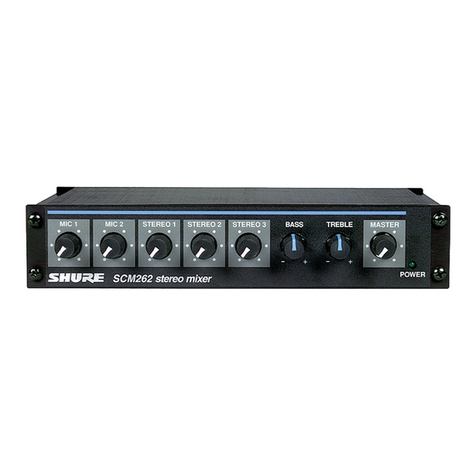
Shure SCM262 User manual

©2012 Shure Incorporated
27A15638 (Rev. 2)
Model SCM262
User
Guide
SCM262
STEREO MIXER
MELANGEUR STEREO
STEREOMISCHER
MEZCLADORA ESTEREOFONICA
11111111111111111111111111111111111111111111111111
MIXER STEREO
A(E
Printed in U.S.A.
-

IMPORTANT SAFETY INSTRUCTIONS I
1.
2.
3.
4.
5.
6.
7.
8.
9.
10.
11.
READ these instructions.
KEEP these instructions.
HEED all warnings.
FOLLOW all instructions.
DO NOT use this apparatus nearwater.
CLEAN ONLY with dry cloth.
DO NOT block
any
ventilation openings. Install in accordance with the manu-
facturer's instructions.
DO NOT install nearany heatsources such as radiators, heat registers, stoves,
or other apparatus (including amplifiers) that produce heat.
DO NOT defeatthe safety purpose
of
the polarized or grounding-type plug. A
polarized plug has two blades with
one
wider
than the other. A grounding type
plug has two blades and a third grounding prong. The
wider
blade or the third
prong are provided for your safety.
If
the provided plug does not fit into your out-
let, consult an electrician for replacement
of
the
obsolete outlet.
PROTECTthe power cord from being walked
on
or
pinched. particularly
at
plugs,
convenience receptacles, and the point where they exit from the apparatus.
ONLY USE attachments/accessories specified
by
the manufacturer.
/i\ This symbol indicates that
dangerous
voltage constituting a
~
risk
of
electric shock
is
present within this unit.
12.
13.
14.
15.
16
.
17.
18.
19.
20.
21.
USE onlywith a cart, stand, tripod, bracket,
or
table
specified
by
the
manufacturer,
or
sold with the
apparatus. When a cart is used, use caution when
moving the cart/apparatus combination to avoid
injury from tip-over.
UNPLUG this apparatus during lightning storms
or
when unused for long periods
of
time.
REFER all servicing to qualified service personnel. Servicing is required when the
apparatus has been damaged inany
way
, such
as
power-supply cord or plug is dam-
aged, liquid has been spilled
or
objects have fallen into the apparatus, the apparatus
has been exposed to rain
or
moisture,
does
not operate normally,
or
has been
dropped.
DO
NOT
expose
the
apparatus
to
dr
ipping and splashing. DO
NOT
put objects filled
with liquids, s
uc
h as vases, on the apparatus.
The MAINS plug
or
an appliance coupl
er
shall remain readily operable.
The airborne noise
of
the apparatus does not exceed 70dB
(A)
.
Apparatus with CLASS I construction shall be connected to a MAINS socket outlet
with a protective earthing connection.
To
reduce
the
risk
of
fire
or
electric shock,
do
not
expose
this
apparatus
to
rain
or
moisture.
Do
not
attempt
to
modify
this
product.
Doing
so
could
result in personal
injury
and/or
product
failure.
Operate this product within its specified operating temperature range.
This symbol indicates that there are important operating and
maintenance instructions in the literature accompanying this unit.
WARNING:
Voltages
in
this equipment are hazardous to life. No user-serviceable parts inside. Refer all servicing to qualified service personnel. The
safety certifications do not apply when the operating voltage is changed from the factory setting.
WARNING: This product contains a chemical known to the State
of
California to cause cancer and birth
defects or other reproductive harm.
I CONSIGNES DE SECURITE IMPORTANTES I
1. LIRE ces consignes.
2. CONSERVER ces consignes.
3. OBSERVER taus les avertissements.
4. SUIVRE toutes les consignes.
5. NE
PAS
utiliser cet appareil aproximite
de
l'eau.
6.
NETIOYER
UNIQUEMENT avec un chiffon
sec
.
7. NE
PAS
obstruer les ouvertures
de
ventilation. Installer en respectant l
es
con-
signes du fabricant.
8. Ne pas installer aproximite d'une source
de
cha
leur
telle qu'un radiateur, une
bouche
de
chaleur, un poele
ou
d'autres appareils (doni les amplificateurs) pro-
duisant
de
Ia
chaleur.
9. NE PAS deteriorer Ia securite
de
Ia
fiche polarisee ou
de
Ia
fiche de terre. Une
fiche polarisee comporte deux lames
doni
l'une est plus large que l'autre. Une
fiche de terre comporte deux lames et une troisieme broche
de
mise aIa terre.
La lameIa plus large ou
Ia
troisieme broche assureIa securite
de
l'utilisateur.
Si
Ia
fiche fournie
ne
s'adapte pas aIa prise electrique, demanderaun electricien
de
remplacer
Ia
prise hors normes.
10. PROTEGER le cordon d'alimentation afin que personne ne marche dessus et
que rien ne le pince, en particulier au niveau des fiches, des prises
de
co
urant
et du point
de
sortie
de
l'appareil.
11.
UTILISER UNIQUEMENT les accesso
ir
es specifies par le fabricant.
A\
Ce
sym
bole
indique
Ia
presence
d'une
tension
dangereuse
dans
~
l'appareil
constituant
un
risque
de
c
ho
c e
le
ctr
ique.
12.
13.
14.
15.
16
.
17.
18.
19.
20
.
<I
UTILISER uniquement avec un chariot, un pied, un tn)pied,
un support
ou
une table specifie
par
le fabricant ou vendu
avec l'appareil. Si
un
chariot est utilise, deplacer !'ensemble
chariot-appareil avec precaution afin de
ne
pas le renverser,
ce qui pourrait entrainer des blessures.
DEBRANCHER l'appare
il
pendant les orages ou quand il ne sera pas utilise pendant
longtemps.
CONFIER toute reparation adu personnel qualifie. D
es
reparations son! necessaires
si
l'
appareil est endommage de quelque
fa<;:on
que ce soil, comme par exemple : cor-
don
ou
prise d'alimentation endommage, liquide renverse ou objettombe al'interieur
de l'appareil, exposition de l'appareil aIa pluie
ou
al'humidite, appareil qui ne marche
pas normalement ou que
l'
on a fait tomber.
NE PAS exposercet appareil aux egouttures
et
a
ux
eclaboussements. NE PAS poser
des objets contenant de l'eau, comme des vases, sur
l'
appareil.
La prise SECTEUR ou
un
adaptateur d'alimentation doit toujours rest
er
pre!(e) aetre
utilis
e(
e).
Le bruit aerien de l'appareil
ne
depasse pas 70 dB (A).
L'appareil de construction
de
CLASSE I doit etre raccorde aune prise SECTEUR
dotee d'une protection par mise a
Ia
terre.
Pour
reduire
les ri
sques
d'incendie
ou
de
choc
electrique,
ne
pas
exposer
cet
appareil a
Ia
pluie ou al'humidite.
Ne
pas
essayer
de
modifier
ce
produit.
Un
e
telle
operation
est
susceptib
le
d'entrainer
des
blessures
ou
Ia
defaillance
du
produit.
Ce symbole indique que Ia documentation fournie avec l'appareil contient
des instructions d'utilisation et d'entretien important
es
.
AVERTISSEMENT:
Le
s tensions al'int
er
ie
ur
de
eel equipement peuvent e
tr
e mortelles. Aucune piece interne reparable
par
l
'u
ti
li
sateur. Confier toute reparation adu per-
sonnel qualifie. Les certifications de securite
so
n!
invalidees lorsque le reglage
de
tension d'usine est chang
e.
1.
2.
3.
4.
5.
6.
7.
8.
9.
10.
11.
1.
2.
3.
4.
5.
6.
7.
8.
9.
10.
11
.
! WICHTIGE SICHERHEITSHINWEISE !
Diese
Hinweise LESEN.
Diese
Hinweise AUFHEBEN.
Aile Warnhinweise BEACHTEN.
Aile Anweisungen BEFOLGEN.
Dieses
Geriit NICHT
in
der
Nahe
von
Wasser verwenden.
NUR
mit einem sauberen
Tuch
REINIGEN.
KEINE
LOftungsoffnungen verde
cke
n.
Gemar..
den Anweisungen des Herstell-
ers einbauen.
Nicht
in
der
Nahe
von Warmequellen, wie Heizkorpern, Raumheizungen,
Herden
oder anderen Geraten
(einschlieP..Iich
Verstarkern) installieren,die
Warme erzeugen.
Die Schutzfunktion des Schukosteckers NICHT
umgehen.
Bei
Steckern
fOr
die
USA
gibt
es
polarisierte
Stecker,
bei denen ein Leiter breiter als der andere i
st;
US-Sleeker mit Erdung
verfOgen
Ober
einen dritt
en
Schutzleiter.
Bei
diesen
SteckerausfOhrungen
dient der breitere Leiter
bzw.
der Schutzleiter lhrer
Si
cherheit. Wenn der mitgelieferte Stecker nicht
in
die Steckdose passt,
einen
Eleklriker mit dem Austauschen der veralteten Steckdose beauftragen.
VERHINDERN, dass das Netzkabel gequetscht oder darauf getreten wird, i
ns-
besondere
im
Bereich der
Stecker,
Netzsteckdosen
und
an
der Austrittsstelle
vom
Gerat.
NUR
das
vom
Hersteller angegebene Zubehor
und
entsprechende
Zusatzgerate verwenden.
Dieses Symbol zeigt an, dass gefahrliche Spannungswerte,
die ein Stromschlagrisiko darstellen, innerhalb dieses
Gerats auftreten
12.
13
.
14.
15.
16
.
17.
18.
19.
20.
NUR
in
Verbindung mit ei
nem
vom
Hersteller angegebenen oder mit
dem
Gerat verkauften T
ra
nsportwagen,
Stan
d,
Stativ,Trager oder
Tisch
verwenden.
Wenn
ein Transportwagen verwendet
wird,
beim
Verschieben der Transportwagen-Gerate Einheit vorsichtig vorgehen,
um
Verletzungen
durch
Umkippen
zu
verhO
t
en.
Das
Netzk
abel
dieses Gerais wiihrend Gewittern oder bei liingeren Stillstandszeiten
aus der Steckdose ABZIEHEN.
Aile Reparatur-
und
Wartungsarbeiten von qualifiziertem
Kunde
nd
ienstpersonal
DURCHFOHREN
LASSEN.
Kundendienst ist erforderlich,
wenn
das
Gerat auf
irgendwelche Weise beschadigl wurde, z.B.
wenn
das
Netzkabel oder der
Netzstecker beschadigt wurden,
wenn
FI
Ossigkeiten
in
das Gerat
ve
rschOttet
wurden
oder Fremdkorper hineinfielen,
wenn
das
Gerat Regen oder Feuchtigkeit ausgesetzt
war,
nicht
normal
funktioniert oder fallen gelassen wurde.
Dieses Gerat vor Tropf-
und
Spritzwasser
SCHOTZEN.
KEINE
mit Wasser
gefOIIten
Gegenstande wie
zum
Beispiel
Vasen
auf
das
Geriit STELL
EN
.
Der Netzstecker oder ein kaltgeratestecker
mOssen
Iei
ch
t steckbar bleiben.
Der Luftschall
des
Gerais
Oberschre
itet
70
dB
(A) nicht.
Das
Geriit
mit
Bauweise der KLASSE I
muss
mit einem
Schu
ko
stecker mit
Schutzleiter
in
eine Netzsteckdose mit Schutzleiter eingesteckt werden.
Dieses Gerat darf nicht Regen oder Feuchtigkeit ausgesetzt werden, um das
Risiko von Branden oder Strornschlagen zu verringern.
Nicht versuchen,dieses Produkt
zu
modifizieren. Ansonsten konnte es zu Verlet-
zungen und/oder zum Produktausfall kommen.
;1\ Dieses Symbol zeigt an, dass das diesem Gerat beiliegende
~
Handbuch wichtige Betriebs-
und
Wartungsanweisungen enthalt.
ACHTUNG: Die in diesem Gerat auftretenden Spannungen sind lebensgefahrlich. Das Gerat enthalt keine Teile, die vom Benutz
er
gewartet
werden konnen. Aile Reparatur- und Wartungsarbeiten von qualifiziertem Kundendienstpersonal durchfOhren lassen. Die Sicherheitszulas-
sungen gelten nicht mehr, wenn die Werkseinstellung der Betriebsspannung geandert wird.
! INSTRUCCIONES IMPORTANTES
DE
SEGURIDAD I
LEA
estas instruccio
ne
s.
CONSERVE
estas instrucciones.
PRESTE
ATE
NCION a todas l
as
advertencias.
SIGA todas l
as
instrucciones.
NO
utilice este aparato
cerca
del
agua.
LIMPIESE UNICAMENTE
con
un
trapo
seco.
NO
obstruya ninguna de las aberturas
de
ventilaci6n. lnstalese segun lo
indicado
en
las instruccio
nes
del fabricante.
No
ins
tale
el
aparato cerca
de
fuentes decalor
ta
l
es
como
radiadores,
reg
istros
de
ca
lefacci6n, estufas u otros aparatos (incluyendo amplificadores) que
produzcan
ca
lor.
.
NO
anule
Ia
func
i6n
de
seguridad
del
ench
ufe
po
lariz
ado
o
co
n clavija
de
puesta
a tierra.
Un
enchufe polarizado tiene dos patas,
una
m
as
ancha que
Ia
otra.
Un
enchufe
con
puesta a tierra tiene
dos
patas y
un
a tercera clavija
con
puesta a tierra.
La
pata
mas ancha o
Ia
tercera clavija
se
proporciona para
su
seguridad.
Si
el tomacorriente
no
es
del tipo apropiado
para
el
enchufe,
con-
suite
a
un
electricista
para
que
sustituya el tomacorriente
de
estilo anticuado.
PROTEJA
el
cab
le
eh~ctrico
para evitar que personas
lo
pisen o estrujen,
pa
r-
li
cularmente
en
sus enchufes,
en
los
tomacorrientes
yen
el punto
en
el
cual
sale del aparato.
UTI
LICE
unicamente los accesorios especificados por el fabricante.
12.
13
.
14.
15.
16.
17.
18.
19.
20
.
<I
UTILICESE u
ni
camente
con
un
carro,
ped
esta
l, tri
pode,
escuadra o
mesa
del
tipo especificado por el fabricante oven-
dido
con
el
apa
ra
to
.
Si
se
usa
un
ca
rro
, el mismo debe mov-
erse
con
sumo cuidado
para
evitar que
se
vuelque
co
n el
aparato.
DESENCHUFE
el
aparato durante
las
tormentas electricas, o
sino
va
a ser utilizado
por
un
lapso
prolongado.
TODA
re
paraci6n debe ser llevada a cabo por tecnicos
ca
lif
ica
dos.
El
aparato
requiere reparaci6n
si
ha
sufrido
cua
lquier tipo de daiio, incluyendo l
os
daiios
al
cordon o
ench
ufe
electrico,
si
se
derrama liquido
sobre
el a
pa
rato
o
si
caen
objetos
en
su
inter
ior,
si
ha
sido expuesto a
Ia
ll
uvia o
Ia
humedad,
si
no
funci
ona
de
modo
normal, o
si
se
ha
caido.
NO
expo
nga
es
te aparato a chorros o
sa
lpicaduras
de
liquid
os.
NO
coloque objetos
!Ienos
con
liquido, tales co
mo
floreros, sobre
el
aparato.
El
enchufe
de
alimentaci6n principal oaco
pl
ado
r
de
aparato electrodomestico debera
permanec
er
en
condiciones de funcionamiento.
El
nivel
de
ruido
transmitido por
el
ai
re
del
aparato
no
excede
de
70
dB
(A).
Los
aparatos
de
fabricaci6n CLASE I deberan conecta
rse
a
un
tomacorriente
DE
ALIMENTACI6N
con
clavija de puesta a tierra protect
ora
.
Para reducir el riesgo de causar
un
incendio o sacudidas electricas, no exponga
este aparato a
Ia
lluvia ni a humedad.
No intente modificar este produc
to
.
Ha
cerlo podria causar lesiones
pe
rsonal
es
y/
o
Ia
falla del producto.
II\
Est.e
simbolo indica que
Ia
unidad contiene niveles
de
voltaje
~
pehgrosos que representan un riesgo de choques eh3ctricos.
Este simbolo indica que
Ia
literatura que acomparia a esta
unidad contiene instrucciones importantes
de
funcionamiento
y mantenimiento.
ADVERTENCIA: Los voltajes present
es
en este equipo representan un
ri
esgo para
Ia
vida. No contiene componentes reparables por el
usuario. Toda reparaci6n debe ser llevada a cabo por tecnicos calificados. Las certificaciones de seguridad no tienen vigencia cuando el
voltaje
de
funcionamiento de
Ia
unidad
es
cambiado a un valor distinto al ajustado en fab
ri
ca.

1.
2.
3.
4.
5.
6.
7.
8.
9.
10.
11.
I ISTRUZIONIIMPORTANTI PER LA SICUREZZA !
EGGETE
queste istruzioni.
CONSERVATE
queste istruzioni.
OSSERVATE
tulle le avvertenze.
SEGUITE tulle
le
istruzioni.
NON
usate questa apparecchio vicino all'acqua.
PULITE
l'apparecchio
SOLO
con
un
panna asciullo.
NON
ostruite alcuna apertura per l'aria di raffreddamento. lnstallate l'apparec-
chio seguendo
le
istruzioni
del
costrullore.
NON
installate l'apparecchio accanto a fonti di calore quali radiatori, aperture
per l'efflusso
di
aria calda,
forni
o altri apparecchi (arnplificatori inclusi) che gen-
erino
calore.
NON
modificate
Ia
spina
polarizzata
o
con
spinollo
di
protezione.
Una
spina
polar-
izzata
e
dotata
di
due
lame,
una
piu
ampia
dell'altra.
Una
spina
con
spinollo e
dot-
ala
di
due
lame
e
di
un
terzo
polo
di
messa
a terra.
La
lama
piu
ampia
ed
il
terzo
polo
hanna
lo
scopo
di
tutelare
Ia
vostra
incolumita.
Se
Ia
spina
in
dotazione
non
si
adatta
alia
presa
di
corrente,
rivolgetevi
ad
un
elellricista per far
eseguire
le
modi·
fiche
necessaria
.
EVITATE
di
calpestare
il
cave
di
alimentazione o
di
comprimerlo, specie
in
cor-
rispondenza di spine, prese
di
corrente e punta di uscita dall'apparecchio.
USATE
ESCLUSIVAMENTE
i
dispositivi
di
collegamento
e
gli
accessori
specificati
dal
costruttore.
12.
13.
14.
15.
16.
17.
18.
19.
20.
USATE
l'apparecchio solo con carrelli, sostegni, treppiedi,
staffe o tavoli specificati
dal
costrullore o venduti insieme
all'apparecchio stesso.
Se
usate
un
carrello, fate allenzione
durante gli spostamenti per evitare infortuni causati da
un
eventuale ribaltamento del carrello stesso.
SCOLLEGATE l'apparecchio dalla presa di corrente
in
case
di temporali o
di
non
uti·
lizzo per
un
lungo periodo.
RIVOLGETEVI a personale
di
assistenza qualificato per qualsiasi intervento. E
ne
c-
essaria intervenire sull'apparecchio ogniqualvolta sia stato danneggiato,
in
qualsiasi
modo, ad esempio
in
case
di danneggiamento
di
spina o cavo di alimentazione, ver-
samento
di
liquido sull'apparecchio o caduta di oggetti su di esso, esposizione
dell'apparecchio a pioggia o umidita, funzionamento irregolare o caduta.
NON esponetelo a sgocciolamenti o spruzzi. NON appoggiate sull'apparecchio
oggetti pieni di liquidi, ad esempio vasi da fiori.
La spina di alimentazione o un attacco per elettrodomestici devono essere sam-
pre pronti per l'uso.
II
rumore aereo dell'apparecchio non supera i 70dB (A).
L'apparato con costruzione
di
CLASSE I va collegato
ad
una presa elettrica dot-
ala di messa a terra di protezione.
Per ridurre il rischio di incendio o folgorazione, non esponete questa apparec-
chio alia pioggia o all'umidita.
Nontentate di modificare
il
prodotto. Tale operazione puo causare infortuni e/o
il
guasto del prodotto stesso.
It\
Questa simbala indica
Ia
presenza di alta tensiane all'interna
~
dell'apparecchia, che camparta
il
rischia di falgaraziane. & Questa simbala indica
Ia
presenza di istruziani impartanti per
l'usa e
Ia
manutenziane nella dacumentaziane in dataziane
all'apparecchia.
AWERTENZA: le tensiani all'interna di questa apparecchia passana essere letali. L'apparecchio non contiene parti che possana essere
riparate dall'utente. Perqualsiasi interventa, rivalgetevi a personale di assistenza qualificato. Le certificazioni di sicurezza non sona valide se
si cambia Ia tensiane di funzianamenta rispetta al valare prefissata
in
fabbrica.

SHURE SCM262
DESCRIPTION
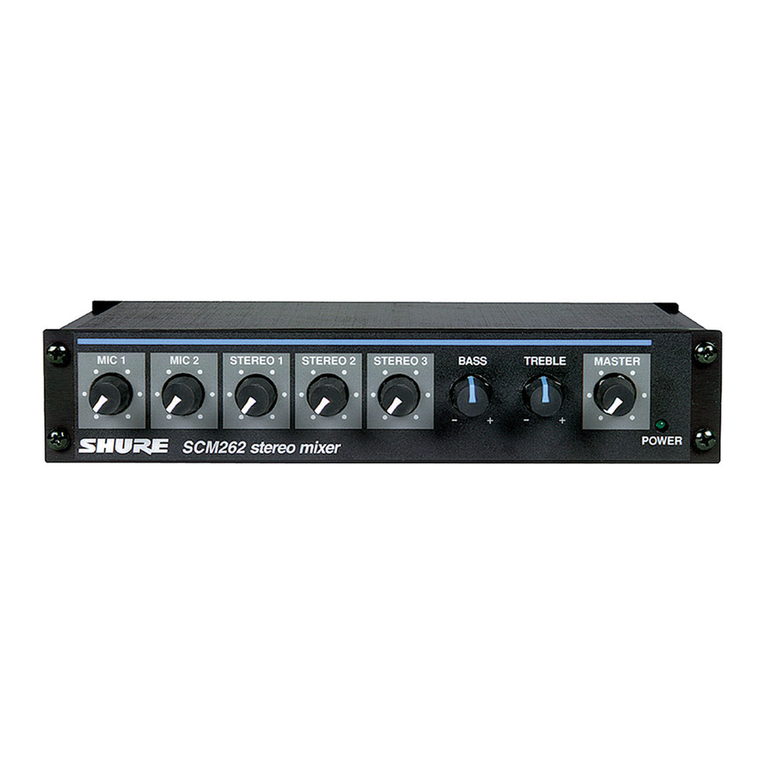
The Shure Model SCM262
is
a stereo mixer intended for sound rein-
forcement applications that integrate microphones with consumer stereo
products.
It
incorporates two active-balanced microphone inputs with
three unbalanced stereo aux level inputs.
FEATURES
Designed to combine paging with background music.
One active-balanced, XLR microphone input channel.
One active-balanced XLR microphone and 1/4-in. TRS line in-
put channel.
Three STEREO INPUT channels
Stereo AUX level OUTPUTs
Stereo MIC/LINE OUTPUTs
FRONT
PANEL
0
MIC Channel Gain Controls, 1-2. Control the gain levels
of
the MIC channels and LINE IN 2 (MIC 2).
f)
STEREO Channel Gain Controls, 1-3. Control the gain lev-
els from CD players, juke boxes, VCRs, or other consumer
stereo equipment connected to the STEREO inputs.
E)
BASS and TREBLE Controls. Control the boost/cut
of
the
low- and high-frequency ofthe shelving filters.
0 MASTER Gain Control. Allows adjustment
of
the overall out-
put gain.
REAR
PANEL
IICIII202
S11'1EIIEO
0
~
O
UTii'U1J'
S
MIC
I
UNE
0
0
Power Connector. Accepts 100-120 Vac (SCM262)
or
220-
240 Vac (SCM262E).
f)
Left/Right MIC/LINE Output Connectors. These 1/4-in. con-
nectors are stereo, balanced outputs for use with professional
audio equipment. Controlled by DIP switch.
E)
Left/Right AUX Output Connectors. These phono jacks are
stere
o,
unbalanced outputs for use with consumer stereo
equipment.
0 DIP Switches. These allow you to adjust the SCM262 for
specific applications. See
DIP
Switches.
5
The SCM262 Stereo Mixer is designed for restaurants, classrooms,
corporate training, aerobics classes, and othersituations where a paging/
public announcement system
is
combined with background music or oth-
er program material.
BASS and TREBLE tone controls on the master output.
1/2-rack chassis.
12
V phantom power for condenser microphones.
Internal power supply.
Removable power cabl
e.
Ducking function (defeatable
).
Jukebox mute function (defeatable).
0 POWER Indicator. Lights up to indicate when the unit is
plugged in and receiving power.
NOTE:
The SCM262 does not have a power switch.
To
turn
the unit off, unplug the power cord or use
an
external power
strip with aswitch. However, it
can
remain plugged
in
as it uses
ve
ry
little power when idle.
0 POWER Switch
NOTE:
Country dependent
0
0
0 Left/Right STEREO INPUTS, 1-3. These phono jacks are
stereo inputs for connection to consumer stereo devices.
0 MIC Channel 2 INPUT. Microphone channel 2 has two
available inputs. There is a 1/4-in. connector for balanced/
unbalanced line-level connections,
or
an
XLR connector for
balanced mic-level connections.
G MIC Channel 1 INPUT. This is an XLR connector for bal-
anced mic-level connections.

DIP
SWITCHES
DIP FUNCTION POSITION
UP SWITCH
UP
(default) DOWN
• 1 LEFT OUTPUT MIG/LINE Line Mic
2 RIGHT OUTPUT MIG/LINE Line Mic
3 MIC 1 DUCKING Off
On
4 MIC 2 DUCKING Off
On
5 DUCKING LEVEL
-<X)
-20
dB
6 STEREO 3 JUKEBOX MUTE Off On
7 12
VPHANTOM
Off On
LEFT/RIGHT OUTPUTMIC/LINE: DIP switches 1and 2 adjustthe left
and right outputs for line-
or
mic-level operation.
MIC 1/MIC 2
Ducking:
When ducking ison, the SCM262 will automat-
ically lowerthe gain
of
all STEREO inputswhen someone is speaking into
one
of
the microphones.
DUCKING LEVEL: Adjusts the amount
of
STEREO channel gain re-
duction when ducking is activated.
APPLICATIONS
General
Application
This is a general setup formost situations which require the combined
use
of
professional microphones and consumerstereo equipment. Using
this general setup, there are several otheroptions available forfurtherad-
justing the SCM262 for your sound system. See the diagram on the fac-
ing page.
1. Turn all gain controls counterclockwise.
2. Connect LIR
STEREO
INPUTS
of
the
SCM262
to the L/R stereo
outputs
of
the desired stereo audio
equiment
(CD
players, VCRs,
televisions,
juke
boxes, etc.).
3. Connect microphone(s) to the
MIC
INPUTS
on
the
SCM262
.
4.
For
microphones which require phantom power, such
as
con-
denser
microphones, place DIP switch 7 in the
down
position
(phantom
power
on).
5. Connect the LIR outputs
of
the
SCM262
to
the LIR inputs
of
the
amplifier.
NOTE:
If
you are using a consumer stereo amplifier, use the
AUX OUTs. Ifyou are using a professional audio power
amplifier, use the LINE
OUTs
. The MIG/LINE and AUX
OUTPUTs can be used simultaneously to feed two separate
amplifiers.
6.
Apply
power
to
the mixer
by
connecting the supplied
power
cable
between the
power
connectoron
the
mixer
and the appropriate
AC
power supply.
The
green
POWER
LED
will illuminate to indi-
cate that the
mixer
is powered on.
*NOTE: The SCM262 has no power switch. It is designed to
be plugged into a power strip which supports the whole sound
system. A typical power strip will have a power switch, so that
when the power strip is powered on, the SCM262 is powered
on.
*Power
Switch,
country
dependent.
Paging
with
Ducking
Application
With Ducking on, the SCM262will automatically sense when someone
is talking into one
of
the microphones and lowerthe volume
of
the music
6
STEREO 3
JUKEBOX
MUTE: This DIP switch turns the Juke Box
Mute feature on oroff. When on, anysource connected to STEREO 3will
mute STEREO 1 and 2 inputs.
PHANTOM POWER: When
in
the down position, this switch activates
a 12 V phantom power source for condenser microphones. Phantom
power does not affect the operation
of
balanced, dynamic microphones,
so one can be connected to the SCM262
in
combination with a condenser
microphone.
so the talker can be heard more clearly. Once the talker is finished, the
music resumes.
NOTE: Use a microphone with an ON/OFF or pushbutton
switch for the Paging with Ducking Application. A microphone
without a switch will false-trigger, causing unwanted
interruptions
in
the program material.
1. Connect the SCM262 to the sound system as described
in
Gen-
eral
Application.
2.
Set
DIP switch 3
or
4 to the
down
position to activate ducking for
microphone channel 1 or 2, respectively.
3.
Set
DIP switch 5 position.
The
Down
position sets the ducking so
that
the program sound is lowered
20
dB
when
someone uses a
microphone. The
Up
position sets the ducking so
that
the pro-
gram
sound
is
muted when
someone
uses
a microphone.
Jukebox
Mute
Application
In this application, designed primarily for Jukeboxes, any sound
source connected to the STEREO 3 channels will automatically mute any
sound coming overthe STEREO 1and 2 channels. This way, a CD play-
er can be playing music, and then when someone plays a song on the
Jukebox, the SCM262 will automatically mute the CD player channels
and switch to the Jukebox. STEREO 1 and 2 channels will remain muted
for about 30 seconds after program material is finished, to allow thejuke-
box time to move on to the next song.
1.
Connect
the SCM262 to the sound system as described
in
Gen-
eral
Application.
2.
Connect
the LIR
audio
outputs
of
the jukebox to the L/R inputs
of
STEREO
3.
NOTE: This feature is designed especially for use with
jukeboxes, but will work for any equipment connected to
STEREO
3.
3.
Set
DIP Switch 6 to the down position (Jukebox Mute on).
NOTE: Ifthe ducking application is used in conjunction with the
Jukebox Mute application, then activated
mi
crophones will
mute or duck the STEREO 3 input.

CONNECTIONS
MIC INPUT 2
WIRELESS MICROPHONE SYSTEM
~
)))))
)))
))
))
))
AUXINPUT
3
JUKEBOX
R L
AUXINPUTS
TELEVISION
0
0
POWER SUPPLY LIR MIC/LINE
OUTPUTS
R
L
PROFESSIONAL
AUDIO POWER
AMPLIFIER
LOUDSPEAKERS
OR
AUXINPUTS
EM/FM RECEIVER)
l
r1
~
=
~=
I
OR
LIR AUX OUTPUTS
'--~----..:-
- - - - - - -
......
--~--
.......
-~-------..._I
I
I
1 :
I I I 1
=
='
I
'='=
w
OR
I I
I I
I I
L
CONSUMER
STEREO
AMPLIFIER
I
l R
!
......
LOUDSPEAKE
RS
7
......
_
L
MIC INPUT 1
MICROPHONE
0
0
VIDEO CAMERA
OR
OR

INTERNAL MODIFICATIONS
WARNING! Voltages in this equipment are hazardous to life. No user-serviceable parts
inside. Refer all servicing and modifications to qualified service personnel.
DISASSEMBLY
To access the printed circuit board (pc board) for internal modifica-
tions, use the following steps:
1. Unplug
the
power
cord.
2. Remove
the
knobs and retainer nuts from the front panel.
3. Remove the
two
screws at each bottom corner
of
the front panel.
4. Remove the four screws at each
corner
of
the
back
panel.
5. Slide the back panel and pc board
out
from the rear
of
the
chas-
sis.
CAUTION: When reassembling the SCM262,
DO
NOT
OVERTIGHTEN the knob retainer nuts. Use a minimal amount
of
force to secure the nut (0.6-0.8
N-m
(5-7 in-lb)). Damage to
the internal components will result
if
too much force is used.
Mono
Mixer
Modification
This modification allows all the inputsto bemixed to a single monosig-
nal sent over both the left and right outputs.
Shortjumper X203.
Phantom
Power
Disable
This modification disables the phantom power per channel.
To
disable the phantom power from mic
1,
remove resistor
R121
. To
disable the phantom power from mic 2, remove resistor R122.
15
dB
Mic PreamplifierPad
When a microphone has an extremely high signal, getting the desired
gain might be difficult-- a small turn
of
the gain control might change the
sound from a whisperto deafeningly loud. This modification adds a 15dB
Mic
preamplifier pad to allow more accurate gain adjustment with ex-
tremely high microphone signals.
Remove R160 (mic 1)
or
R183 (mic 2).
Hard
Panning MIC Channels
To remove MIC 1from the left outputs, remove R912. To remove MIG
1 from the right outputs, remove R913.
8
To remove MIG 2/LINE 2 from the left outputs, remove R910.
Tore-
move MIG 2/LINE 2 from the right outputs, remove R911.
Low-Cut
Filter
To eliminate the 80 Hz, low-cut filter, remove resistor R501 (mic 1),
or
resistor R519 (mic 2). Place a 10 to 33
J..tF
capacitor in X501 (mic 1) or
R502 (mic2). The polarity
of
the capacitordoes notmatter.To changethe
frequency ofthe low cut filter, remove resistor
R501
(mic 1) or R519 (mic
2), and place the proper capacitor into X501 (mic 1)
or
X502 (mic2)to get
the desired cornerfrequency.
The following tables list the low-cut frequency corners for some
of
the
most common capacitor values:
Capacitor Corner Capacitor Corner
Value Frequency Value Frequency
.033
~F
803Hz .
33
~F
80Hz
.047
~F
564Hz
.47
~F
56
Hz
.068
~F
390Hz .
68
~F
39Hz
.1
~F
265Hz
1.0
~F
26.5
Hz
.22
~F
120Hz
2.2
~F
12Hz
Ducking
Depth
This modification adjusts the level
of
ducking depth attenuation
of
the
input channels when ducking is activated.
The aux ducking depth may be changed by removing resistor R213
and inserting a resistor into jumper X202. Use the following tables to de-
termine the proper resistor value for the desired ducking depth.
Ducking Resistor Ducking Resistor
Depth Value Depth Value
6
dB
4,000Q
36dB
2o
.
ooo
n
9
dB
5,ooon
42
dB
25
,
ooo
n
15
dB
7,500Q 47
dB
30,000
Q
20dB
10,000
Q
50
dB
33
,
000
Q
24
dB
12.000 n
55
dB
4o,ooo n
29dB
15,ooo
n
Ducking
Threshold
This modification adjusts the threshold for activating the ducking cir-
cuit.
The ducking threshold can
be
raised
or
lowered
by
first removing re-
sistor R333, and then placing a resistor (R)
at
jumperX303. To lowerthe
ducking threshold, use a resistor value (R) less than 2k ohms. To raise
the ducking threshold, use a resistor value (R) greater then 2k ohms.

INSTALLATION
SUPPLIED HARDWARE
4 rubber feet. For stand-alone installation.
1 rackmount bracket, long. For half-rack (single unit) instal-
lations.
1 rackmount bracket, short. For half-rack (single) or du-
al-mount installations.
2 straddle brackets. For dual-mount or fixed installations.
12 bracket screws,
1/4
-in. (6 mm).
Forsecuring the brackets
to the chassis.
4 rackmount screws, 1 in. (2.5 em).
For mounting the unit in
a rack.
4 plastic washers.
For use with the supplied rackmount
screws.
4 wood screws, 1/2 in. (1.25 em).
Forfixed installations
BracketScrew
9
~
~
~
Wood Screw
Rackmount Screw
RACKMOUNT INSTALLATION
The SCM262 can be mounted asa single unitordual-mounted with ei-
ther another SCM262 or another Shure half-rack unit such as the
SCM268 or
DFR11
EQ. Attach the rackmount brackets using one
of
the
following methods:
Single unit(half-rack) installation:
1.
Attach the short and long rackmount brackets to the SCM262with
eight (8)
of
the supplied bracket screws.
'
T
I
I
I
01
9.
I
l,
I
~
Dual-mountedinstallation:
1.
Connectthe two units together side-by-side using two (2) straddle
brackets.
The
brackets should straddle the recessed edges on on
the top and bottom
of
each chassis. Fasten them using eight (8)
bracket screws.
NOTE: Be sure to use both straddle brackets-one
on
the top
and
one on the bottom.
9
2. Attach the short rackmount brackets to the outsides
of
the com-
bined units with eight (8)
of
the bracket screws.
1"f
3. After attaching the brackets, mount the unit in an equipment rack
using the supplied rackmount screws and plastic washers.
H
2'1
.:·'...
:,
. _ _
:
;
~"
J.
i'
-. .
·
i
~~
·; ·
~
-···-
·-
-
~
:J
~i
=
.~~~~
f
~
-
1
:
1
11
~~?
::
i '
:'i
• • 1.1
STAND-ALONE INSTALLATION
1. Adhere the four (4) supplied rubber feet to the bottom
of
the unit
ateach corner. This will keep it from sliding and protect the table
surface.
FIXED INSTALLATION
To permanently affix the SCM262 above or below a table, shelf, or
counter top, use the following steps:
1. Fasten the straddle brackets to the recessed edges
of
the chassis
using four (4) bracket screws.
Top
mount:
Fasten the straddle brackets to
on
the bottom ofthe unit
Hanging
mount:
Fasten the straddle brackets to the top ofthe unit.
2. Fasten the straddle brackets to the surface using the four (4) sup-
plied wood screws.
TOP MOUNT
',"
'
'
'
WJ~~
~~~i1j!
...
' '<
,"
--
- 0 •
'-,
',
"'-.:_'-:..__
__
_
__
~
HANGING MOUNT

SPECIFICATIONS
Measurement Conditions (unless otherwise specified):Tone controls
centered; Line voltage 120 Vac, 60 Hz (SCM262)
or
230 Vac, 50 Hz
(SCM262E); full gain; 1 kHz, one channel activated; source impedances:
Mic 150 D ; Line/Aux
40
D , terminations: Line/Mic/Aux 20
kD.
Frequency Response (Ref 1 kHz, channel and master
controls
centered)
MIC/LINE Inputs:
150Hz
to
20kHz
±2 dB
AUX Inputs: 20 Hz to 20 kHz ±2 dB
Low-Cut
Filter (Microphone
inputs
only)
3dB down
at
80 Hz, 6 dB/octave
Voltage Gain (typical,
controls
full
clockwise)
Output
Input Mic Line
Low-impedance
mi
c
32
dB
72
dB
(150
0)
Line
-9
dB
31
dB
Stereo
-5
dB
35
dB
Inputs
Impedance
Designed Actual
Input
for
use with (typical)
Mic
(
XLR)
<
600
0
1.4
kO
Lin
e <10 kO 1
55
kO
St
ereo <2
kO
21
kO
Outputs
Impedance
Designed
for
Actual
Output usewith (typical)
Mi
c >
6000
3 0
Lin
e >
5k
0 3
000
Au
x
<:
10
kO 1.
5k
0
Total Harmonic Distortion
Aux
60
dB
19
dB
23
dB
Input
Clipping Level
-16
dBV
+24
dBV
>
28
dBV
Output
Clipping Level
-
22
dBV
+18
dBV
+5
dBV
<0.25% at +4 dBu output level, (through
22Hz-22kHz
filter; MIC Input
1 and Master at cente
r,
all other controls full counterclockwise)
Equivalent
Input
Noise (150
n
source; A-Weighted)
-128
dBV
Output
Noise (channel
controls
full
counterclockwise,
A-Weighted)
Masterfull counterclockwise
..
...........
..
.
..
..
.......
....
....
..
....
..
....
..
.
-95
dBV
Masterfull clockwise ..................
..
.
....
..
.
..
.
..
..
...
..
....
..
..
.... ...
-59
dBV
Common
Mode Rejection
>70 dB at 1 kHz
Polarity
All inputs to all outputs are non-inverting.
Overload and
Shorting
Protection
Shorting output
s,
even for prolonged period
s,
causes no damage.
Microphone inputs are not damaged by signals up to +10
dBV
; Line and
Aux inputs by signals up to +28 dBV
Equalization
Bass (Low-frequency shelving,
corner frequency at 250 Hz)
..
..
.
........
....
..
........
......
.........
......
...... ±6 dB
Treble (High-frequency shelving,
corner fr
eq
uency at
4kHz)
.......
..
........
..
....
....
....
...
..
....
.
..
........
..
..
.±6 dB
10
Ducking
Mic channels 1 and 2 Levels
........
.........................
..
.
-20
dB or -
ro
dB
Activation time
........
.......
....
..
..
..
....
.....
..
.....
..
....
..
.....
..
...
..
10 ms (typical)
Mic Deactivation time ...........................
....
.........
...
......
..
...
..
2 s (typical)
Jukebox Mute Deactivation Time ................
..
...
..
....
....
...
..
30 s (typical)
Phantom Power
12 Vdc open-circuit through 680 n resistors
Operating Voltage
SCM262:
100-120
Vac, 50/
60Hz,
60 mA
SCM262E:
220-240
Vac,
50
/60 Hz, 30 mA
Temperature Range
Operating
..
....
..............
..
.
..
.
....
.
..
...
..
.........
-7
° to 49° C
(2
0° to 120° F )
Storage...........
..
................
...
..
.
...
..
....
.....
-29
° to 74° C
(-20
° to 165°
F)
Overall Dimensions
43 X 218 X 162 mm
(1
.72 X 8.60 X 6.37 in.)
NetWeight:1.1 kg
(2
lbs
, 5 oz)
Certifications
SCM262: UL, cUL listed by Underwriters Laboratories.
SCM262E: Conforms to European Union directives, eligible to bear CE
marking; Certified to
EN
60 065; meets European Union EMC Immunity
Requirements (EN 50082-1: 1992,
EN
50082-2: 1992)
Conforms to European Regulation (EC) No. 1275/2008, as amend
ed.
The CE Declaration
of
Conformity can be obtained from Shure
Incorporated
or
any
of
its European representatives. For contact
information please visit www.shure.com
The CE Declaration
of
Conformity can be obtained from:
ww
.shure.com/europe/compliance
Authorized European representative:
Shure Europe GmbH
Headquarters Europe, Middle East & Africa
Department: EMEA Approval
Jakob-Dieffenbacher-Str. 12
75031 Eppingen, Germany
Phone: 49-7262-92 49 0
Fax: 49-7262-92 49
11
4
Email: [email protected]
Replacement Parts
Knob,
Master
(blue) ....................
..
....
...
..
............
....
95B8752
Knob, Channel
Gain
(white).............
..
...
..
.....
..
...
....
.95A8752
Line (Power) Cords:
SCM262
:
100-120
Vac
(US/Canada)
..
.....
..
.... 95B8762
SCM262E:
220-240
Vac
(EU)
........
..........
....
... 95B8778
Fuse:
SCM262
(5x20
mm
,
250V
,
100mA
, ti
me
delay)
......
............
..
..
..
........
..
..
..
......
80Z730
SCM262E
(5x
20
mm
, 250V,
40mA
, time delay)
..
....
..
......................
....
...
..
..
.....
80M258
Hardware Kit ................
..
....
..
...................
..
....
..
..
..
90AW8100
Link Bars (Bracket)
..
..
.
..
..........
....
..
...........
..
..
..
..
...
..
.
53B8443
Single
Mount
Bracket...
...
..
......
..
....
....
...............
..
.... 53A8484
Dual
Mount
Bracket .........
..
..
..
..
..
.................
..
..
..
.... 53E8484
Optional Accessories
Line
(Pow
er) C
or
d,
230-240
Vac
(UK)
.........
..
......
95A
8713
Service Statement
For additional service
or
parts information, please contact Shure's
Service department at 1-847-600-8699. Outside the United States,
please contact your authorized
Sh
ure Service Center.

SHU~E
®
www.shure.com
United States, Canada, Latin
America,
Car
ibbean:
Shure
In
corporated
5800 West Touhy
Av
enue
Ni
le
s,
IL 60714-4608 USA
Phone: 847-600-2000
Fax: 847-600-1212 (USA)
Fax: 847-600-6446
Ema
il
: info@shure.com
©
201
1 Sh
ur
e In
co
rporated
Europe, Middle East, Africa:
Shure Europe GmbH
Jakob-Dieffenbacher-Str. 12,
75031 Eppingen, Ge
rm
any
Phon
e:49-
7262-92490
Fax: 49-7262-92491 14
Ema
il
: info@shure.de
Asia, Pacific:
Shure Asia Limited
22/
F,
625 King's Road
North Point, Island East
Hong Kong
Phone: 852-2893-4290
Fax: 852-2893-4055
Ema
il
: info@shure.com.hk

Cable Connector Information Sheet
CONNECTING YOUR DEVICES TO A SHURE MIXER
The variety
of
connectors
on
audio equipment sometimes leads to confusion in wiring. The diagrams below
provide wiring recommendations for most common cables.
NOTE: XLR pin 1 is a/ways connected to cable shield.
BALANCED CABLE
SHIELD
JACKET
INSULATION
XLR CONNECTOR
XLR
MONO PHONE PLUG
XLR
©2012 Shure Incorporated
2788220 (Rev.
6)
0
(
(ACTUAL
SIZE)
0
TO
UNBALANCED CABLE
JACKET SHIELD
INSULATION
(ACTUAL SIZE) 0
0
TO
XLR
~------•
.........
D SLEEVE
1..-.r---...-~~----/...&.1~
..
,
MONO PHONE PLUG TIP
~
Printed
in
U.S.A.
-

STEREO PHONE PLUG
(USED AS A BALANCED
LINE CONNECTION)
( (ACTUAL SIZE)
OD
0
XLR
3.5
MM (MINI) PHONE PLUG
XLR
PHONO PIN (RCA) PLUG
XLR
SHUR.E
*
United States, Canada, Latin
America, Caribbean:
www
.s
hur
e.c
om
Shure Incorporated
5800 WestTouhy Avenue
Niles, IL 60714-4608 USA
Phone: 847-600-2000
Fax: 847-600-1212 (USA)
Fax: 847-600-6446
Email: info@shure.com
©2
012
Shure Incorporat
ed
0
0
RING
3
~
~
I
tC
:,
?-rtJ-
....
,
..
,""',
1'
~
'TIP
SLEEVE
TO
STEREO PHONE PLUG
10
(ACTUAL SIZE)
TO
(ACTUAL SIZE)
TO
Europe, Middle East, Africa:
Shure Europe GmbH
Jakob-Dieffenbach
er
-Str. 12,
75031 Eppingen, Germany
Phone:
49
-7262-92490
Fa
x:
49
-7262-9249114
Email: [email protected]
'
TIP
3.5
MM
PHONE PLUG
PHONO PIN PLUG
Asia, Pacific:
Shure Asia Limited
22/F, 625 King's Road
North Point, Island East
Hong Kong
Phone: 852-2893-4290
Fax: 852-2893-4055
Email: info@shure.com.hk

LIMITED WARR·
ANTY
Shure lncorpo·rated ("Shure") hereby warrants to
the
original consumer purchaseronly that,
except as otherwise specified below, this product will
be
free in normal'use
of
anydefects in
materials and workmanship for a period
of
two (2) years from the consumer's original
date
of
purchase directly from Shure
or
from a Shure-authorized reseller
.•
Any rechargeable batteries contained in
or
packaged with this product are so warranted for a
period
of
one
(1) yearfrom the consumer's original date
of
purchase. However, rechargeable
batteries are consumable and their capacity will
be
reduced overtime based on temperature,
amount
of
time in storage, charging cycles, and otherfactors; hence reduction in battery
capacity does not constitute a·defect in material
or
workmanship.
At its sole option, Shure will repair
or
replace the defective product and promptly return it
to you. In order forthis warranty to
be
valid, the consumer must,
at
the time the product
is returned, provide proof
of
purchase in.the form
of
the original purchase receipt directly
from Shure
or
from a Shure-authorized reseller. If Shure elects to replace the defective
product, then Shure _reserves the right to replace the defective product with another product
of
the same model
or
a model
of
at least comparable quality and features in Shure's sole
determination.
_If
you believe this product is defectivewithin the warranty period, carefully repack the unit,
insure it and return it with proof
of
purchase, postage prepaid, to Shure Incorporated, Atten-
tion: Service Department,
at
the address below.
Outside of the United States, return the productto your dealer
or
Authorized Service Center.
Addresses are listed on www.Shure.com orcan be obtained
by
contacting Shure atthe
address listedbelow. '·
This warranty is not transferable. This warranty does not apply in cases
of
abuse or misuse
of
the product, use contrary to Shure's instruction, ordinary wear and tear, an act ofGod,
negligent use, purchase from a party other than Shure
or
a Shure-authorized reseller, unau-
thorized repair,
or
modification
of
the product.
ALL IMPLIED WARRANTIES
OF
MERCHANTABILITY OR FITNESS FOR A PARTICULAR
PURPOSE ARE HEREBY DISCLAIMED
TO
THE EXTENT PERMITTED UNDER APPLI-
CABLE LAWS AND,
TO
THE
EXTENT
NOT
PERMITTED, ARE HEREBY LIMITED
TO
THE
DURATION AND TERMS
OF
THIS WARRANTY. SHURE ALSO HEREBY DISCLAIMS ALL
LIABILITY FOR
INCIDENTAL~
SPECIAL,
OR
CONSEQUENTIAL DAMAGES.
Some states
do
not allow limitations on
how
long an implied warranty lasts,
or
the exclusion
or limitation
of
incidental
or
consequential damages, so the above limitation may not apply to
you. This warranty gives you specific legal rights, and you may have other rights which vary
from state
to
state.
This warranty does not restrict the rights
of
the consumer mandated under applicable laws.
THIS WARRANTY SUPERSEDES ALL OTHER WARRANTIES
THAT
ARE ASSOCIATED
OR INCLUDED WITH THIS PRODUCT, EXCEPTTHAT
ANY
SOFTWARE CONTAINED
IN OR PACKAGED WITH THIS PRODUCT IS EXCLUDED FROM THIS WARRANTY AND
INSTEAD SHALL BE COVERED
BY
THE WARRANTY, IF ANY, PROVIDED IN SHURE'S
·END USER LICENSE AGREEMENTACCOMPANYING SUCH SOFTWARE.

SHU
®
Service Centers
United States, Canada,
Lati~
America, Carribbean
Shure Incorporated
Attn: Service Department
5800
W.
Touhy Avenue
Niles, IL 60714-4608 U.S.A.
Europe, Middle East, and Africa
Shure Europe GmbH
Attn: Service
Jakob-Dieffenbacher-Str. 12
74078 Eppingen, Germany
Asia
Shure Asia Limited
22/F, 625 King's Road
North Point, Island East
Hong Kong
Attention: Service Department
Phone: (852) 2893-4290
Fax: (852) 2893-4055
Email: [email protected]
Indonesia
Service Center Resmi:
Jakarta Hotline (021) 612 6286
Medan(061)6612550
Surabaya(031)5032219
Jo~akarta(0274)371710
Denpasar(0361)766788
Makasar (0411) 324652

LIMITED WARRANTY
© 2012, Shure Incorporated
27E3175 (Rev. 1)
®
f!J
I Printed
in
China I
~
1.16.GSI31.00501.0211
Other manuals for SCM262
9
Table of contents
Other Shure Music Mixer manuals

Shure
Shure SR101 Series Operation manual

Shure
Shure FP33 User manual

Shure
Shure SCM820E-DB25 User manual

Shure
Shure SCM268E User manual

Shure
Shure SCM262 User manual

Shure
Shure AUDIOMASTER 1200 User manual

Shure
Shure M63 AUDIO MASTER Installation and user guide

Shure
Shure SCM262 User manual

Shure
Shure IntelliMix SCM820-DB25 User manual

Shure
Shure SR110 User manual