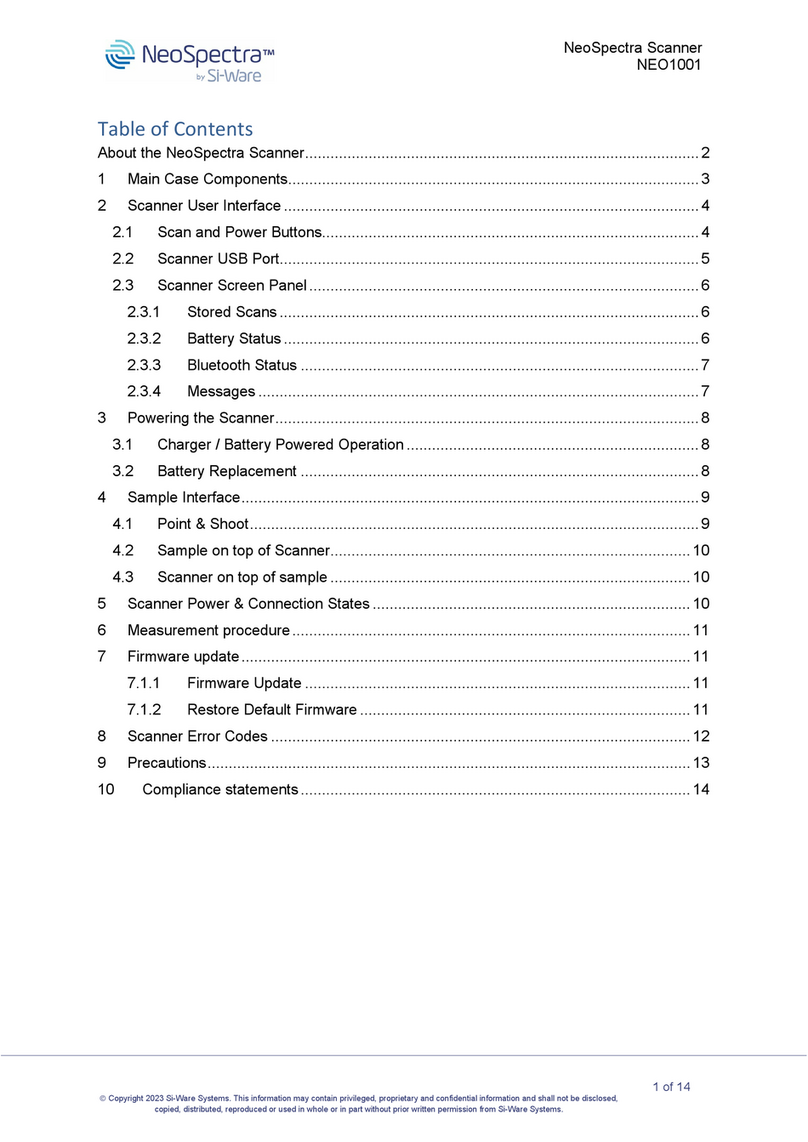
Si-WARE SYSTEMS NeoSpectra User manual

NeoSpectra - Scanner Quick Start Guide
SWS-19110004 d2 PROPRIETARY AND CONFIDENTIAL INFORMATION
Copyright 2021 Si-Ware Systems. This information may contain privileged, proprietary and confidential information and shall not be disclosed, copied, distributed,
reproduced or used in whole or in part without prior written permission from Si-Ware Systems.
1 of 30
NeoSpectra - Scanner Quick Start Guide
Contents
About NeoSpectra-Scanner ..................................................................................................2
About this guide....................................................................................................................2
1Box Components ...........................................................................................................3
2Scanner User Interface..................................................................................................4
2.1 Scan and Power Buttons.........................................................................................4
2.2 Scanner USB port...................................................................................................5
2.3 Scanner Screen Panel............................................................................................6
2.3.1 Stored scans area............................................................................................6
2.3.2 Battery status area...........................................................................................6
2.3.3 Bluetooth status area.......................................................................................7
2.3.4 Messages area................................................................................................7
3Powering Up the Scanner..............................................................................................8
3.1 Charger / Battery Powered Operation.....................................................................8
3.2 Battery Replacement ..............................................................................................8
4Sample Interfacing.........................................................................................................9
4.1 Sample above the Scanner.....................................................................................9
4.2 Point & Shoot........................................................................................................10
4.3 Sample below the Scanner...................................................................................10
5Scanner Modes of Operation .......................................................................................11
5.1 Standalone Operation Mode.................................................................................11
5.2 Bluetooth Connected Operation Mode..................................................................11
5.3 Scanner Power States in Different Operating Modes............................................11
5.4 Taking Measurements in Different Operating Modes ............................................12
6Mobile Applications Overview ......................................................................................13
6.1 Android Application Overview ...............................................................................13
6.1.1 Connecting to the Scanner.............................................................................13
6.1.2 Taking Measurements ...................................................................................14
Accessing the Scans Saved on the Scanner...................................................................16
6.1.3 Configuring the Scanner................................................................................17
6.1.4 Firmware Update...........................................................................................18

NeoSpectra - Scanner Quick Start Guide
SWS-19110004 d2 PROPRIETARY AND CONFIDENTIAL INFORMATION
Copyright 2021 Si-Ware Systems. This information may contain privileged, proprietary and confidential information and shall not be disclosed, copied, distributed,
reproduced or used in whole or in part without prior written permission from Si-Ware Systems.
2 of 30
6.1.5 Restore Default Firmware..............................................................................19
6.2 IOS Application Overview .....................................................................................19
6.2.1 Sign-in to the application................................................................................20
6.2.2 Connecting to the Scanner.............................................................................20
6.2.3 Taking Measurements ...................................................................................21
6.2.4 Charts Tab.....................................................................................................22
6.2.5 Data tab.........................................................................................................23
6.2.6 Scanner Memory ...........................................................................................25
6.2.7 Scanner Settings ...........................................................................................26
6.2.8 Firmware Update...........................................................................................28
6.2.9 Restore Default Firmware..............................................................................28
7Scanner Error Codes...................................................................................................29
8Disclaimers..................................................................................................................30
9Precautions..................................................................................................................30
About NeoSpectra-Scanner
NeoSpectra-Scanner is a portable and handheld spectral sensing device that can be used in
a wide variety of material sensing applications. It shines light that interacts with the sample
to be measured, collects its diffuse reflectance, and generates NIR spectra that corresponds
to the spectral response of the material in the spectral range (1,350 - 2,500 nm). The
scanner enables the development of in-field material analysis applications in various
industries.
About this guide
If you are using NeoSpectra-Scanner for the first time, this guide is your reference on what
the different parts of NeoSpectra-Scanner are, what they are used for, and how to use them.

NeoSpectra - Scanner Quick Start Guide
SWS-19110004 d2 PROPRIETARY AND CONFIDENTIAL INFORMATION
Copyright 2021 Si-Ware Systems. This information may contain privileged, proprietary and confidential information and shall not be disclosed, copied, distributed,
reproduced or used in whole or in part without prior written permission from Si-Ware Systems.
3 of 30
1 Box Components
A. NeoSpectra - Scanner: The main spectra collection device with NeoSpectra sensor
inside (Figure 1).
B. Scanner Cover: It is a protection for the optical window that should be placed on top
of the scanner when it is not being used. To do this, just place the cover on top of the
scanner, and it will be magnetically fixed. The cover also includes the white reference
material for background measurements. To avoid losing the cover, make sure to use
the lanyard to attach the cover to the scanner.
C. Scanner Sample Holder: It is provided to facilitate the measurement of some types
of samples like soil, feed, powders,...etc, however the scanner can be used without it.
It is magnetically attached to the scanner cover and needs to be detached from it
when used (Figure 2). The sample holder can be magnetically attached and aligned
on the scanner top surface to hold the sample during scanning.
D. Scanner power adapter: An AC / DC adapter dedicated to NeoSpectra - Scanner
with a USB connection. The adapter shouldn’t be used with other USB devices due
to its high DC voltage output. It also comes with a power plug converter for users
located in the USA. Refer to section 3 for more details about the adapter usage.
A. NeoSpectra - Scanner
C. Scanner Sample Holder
B. Scanner Cover
Magnetic contacts
White reference material
Figure 1 NeoSpectra –Scanner Box Components

NeoSpectra - Scanner Quick Start Guide
SWS-19110004 d2 PROPRIETARY AND CONFIDENTIAL INFORMATION
Copyright 2021 Si-Ware Systems. This information may contain privileged, proprietary and confidential information and shall not be disclosed, copied, distributed,
reproduced or used in whole or in part without prior written permission from Si-Ware Systems.
4 of 30
Scanner Cover
Scanner Sample Holder
Figure 2 Attaching the sample holder to the scanner cover
2 Scanner User Interface
2.1 Scan and Power Buttons
The scanner main functionality is controlled by the scan and power buttons as summarized
in the table below.
Power Button Functionality
Scan Button Functionality
1. A short press turns on the scanner, if
it’s powered off.
2. A long press turns the scanner off.
3. With the scanner powered on, a short
press on the power button will re-
initiate the Bluetooth advertising (refer
to section 5.3 for more details)
1. A short press is used to take material
scans.
2. A long press identifies the scan as a
background reference scan.
Refer to section 5.1 and 5.4 for more details
about the usage of the Scan button.

NeoSpectra - Scanner Quick Start Guide
SWS-19110004 d2 PROPRIETARY AND CONFIDENTIAL INFORMATION
Copyright 2021 Si-Ware Systems. This information may contain privileged, proprietary and confidential information and shall not be disclosed, copied, distributed,
reproduced or used in whole or in part without prior written permission from Si-Ware Systems.
5 of 30
Power
Button
Scan
Button
Figure 3 Scanner power and scan buttons
2.2 Scanner USB port
The scanner USB port is used for battery charging only. It is shown in Figure 4. To start the
battery charging, plug in the adapter in the USB port and power on the scanner. Note that
charging will not start if the scanner is powered off. USB user data transfer is not
supported in the Alpha samples.
USB Port
Figure 4 Scanner USB charging port

NeoSpectra - Scanner Quick Start Guide
SWS-19110004 d2 PROPRIETARY AND CONFIDENTIAL INFORMATION
Copyright 2021 Si-Ware Systems. This information may contain privileged, proprietary and confidential information and shall not be disclosed, copied, distributed,
reproduced or used in whole or in part without prior written permission from Si-Ware Systems.
6 of 30
2.3 Scanner Screen Panel
The scanner screen panel is shown in Figure 5. It has 4 main areas: the messages area, the
BLE status area, the stored scans area and the battery status area.
Stored Scans BLE Status
Battery Status Messages Area
Figure 5 Scanner screen panel overview
2.3.1 Stored scans area
The number shown indicates the number of stored scans on the scanner local storage out of
999 scans.
2.3.2 Battery status area
The battery status area shows the remaining battery capacity and indicates whether the
charger is connected or not as illustrated in Figure 6 a & b.
a
b
Figure 6 Battery status area with and without the charger connected

NeoSpectra - Scanner Quick Start Guide
SWS-19110004 d2 PROPRIETARY AND CONFIDENTIAL INFORMATION
Copyright 2021 Si-Ware Systems. This information may contain privileged, proprietary and confidential information and shall not be disclosed, copied, distributed,
reproduced or used in whole or in part without prior written permission from Si-Ware Systems.
7 of 30
2.3.3 Bluetooth status area
The Bluetooth status area shows the state of the BLE connectivity of the device. It is either
advertising, connected or disconnected (Figure 7 a, b, c). The details of the 3 states are
described in section 5.3.
a
b
c
Figure 7 BLE status area during different connection states
2.3.4 Messages area
The messages area displays all the user interface data about the current scan. It shows
whether the scan being taken is a white reference scan or a material scan and it also shows
a progress bar for the scanning process Figure 8 (a) and (b). It indicates when the scan is
completed successfully Figure 8 (c) or if there was an error with the last scan Figure 8 (d). A
detailed list of error messages is shown in section 7.
a
b
c
d
Figure 8 Messages area during reference and material scans

NeoSpectra - Scanner Quick Start Guide
SWS-19110004 d2 PROPRIETARY AND CONFIDENTIAL INFORMATION
Copyright 2021 Si-Ware Systems. This information may contain privileged, proprietary and confidential information and shall not be disclosed, copied, distributed,
reproduced or used in whole or in part without prior written permission from Si-Ware Systems.
8 of 30
3 Powering Up the Scanner
3.1 Charger / Battery Powered Operation
NeoSpectra - Scanner is powered by two user replaceable 18650 batteries with 3400 mAh
nominal capacity. The batteries are readily installed in the device for out-of-the-box
operation. The scanner also comes with a dedicated 15 V / 2.4 A AC / DC adapter capable
of powering the scanner to charge and scan simultaneously irrespective of the battery
status.
The scanner can still be charged using a standard 5 V USB charger, however in that case
scanning during charging will only be available if the battery is sufficiently charged. It’s
important to note that the power adapter provided with the scanner must not be used with
other standard USB devices due to its high voltage output, otherwise these devices will be
damaged.
3.2 Battery Replacement
The scanner batteries can be replaced by unscrewing the 4 screws in the battery cover at
the bottom of the scanner below the rubber pads to remove the battery cover. The process is
illustrates in Figure 9. It’s important to note that when the battery is replaced or removed
from the device the charger must be connected to the scanner before powering it up again
for the first time after the batteries are placed back.
Figure 9 Battery replacement process

NeoSpectra - Scanner Quick Start Guide
SWS-19110004 d2 PROPRIETARY AND CONFIDENTIAL INFORMATION
Copyright 2021 Si-Ware Systems. This information may contain privileged, proprietary and confidential information and shall not be disclosed, copied, distributed,
reproduced or used in whole or in part without prior written permission from Si-Ware Systems.
9 of 30
4 Sample Interfacing
The scanner industrial design allows for multiple usage models in terms of sample
interfacing. The sample can be placed on top of the scanner or the scanner can be placed
on top of the sample or it can be used in a point and shoot mode. The different sample
interfacing schemes are illustrated in the following sections. In all cases, the user must
ensure that the sample is in contact with the scanner window.
4.1 Sample above the Scanner
●Set the scanner on a flat surface.
●Place the sample on top of the scanner with the provided sample holder (Figure 10 a)
or directly without it using any NIR-transparent container (Figure 10 b).
a
b
Figure 10 Sample on top of scanner mode

NeoSpectra - Scanner Quick Start Guide
SWS-19110004 d2 PROPRIETARY AND CONFIDENTIAL INFORMATION
Copyright 2021 Si-Ware Systems. This information may contain privileged, proprietary and confidential information and shall not be disclosed, copied, distributed,
reproduced or used in whole or in part without prior written permission from Si-Ware Systems.
10 of 30
4.2 Point & Shoot
●Hold scanner in hand.
●Point and shoot at the sample while ensuring that the scanner window is pressed
against the sample.
Figure 11 Scanner used in point-and-shoot mode
4.3 Sample below the Scanner
●Place the sample on a flat surface.
●Set the scanner on top of the sample.
Figure 12 Scanner on top of sample mode

NeoSpectra - Scanner Quick Start Guide
SWS-19110004 d2 PROPRIETARY AND CONFIDENTIAL INFORMATION
Copyright 2021 Si-Ware Systems. This information may contain privileged, proprietary and confidential information and shall not be disclosed, copied, distributed,
reproduced or used in whole or in part without prior written permission from Si-Ware Systems.
11 of 30
5 Scanner Modes of Operation
The scanner has 2 main modes of operation; the Standalone operation mode and the
Bluetooth connected operation mode. The standalone mode can be useful for users with a
large number of consecutive scans to be captured with the same settings either in the field
or in the lab. The Bluetooth connected mode allows for more flexibility in configuring the
scanner parameters and visualizing the captured spectra as they are recorded. The two
modes of operation are detailed in the following sections.
5.1 Standalone Operation Mode
In this mode, the scanner is operated without being connected to a mobile phone. The user
can take scans normally, either background or material scans based on pre-configured scan
parameters that are set and saved earlier using the mobile application. The scans will be
stored on the scanner internal storage and can be retrieved from the mobile application
when connected using Bluetooth.
5.2 Bluetooth Connected Operation Mode
In this mode, the scanner is fully controlled from the mobile application, which enables the
user to capture spectra and view the results immediately. It also allows the user to configure
all the sensor settings and scan time and to store it on the scanner memory to be used later.
Moreover, it allows the user to retrieve and visualize the stored scans taken by the scanner
in standalone mode.
5.3 Scanner Power States in Different Operating Modes
The scanner has four main power states related to the operating mode and establishing a
connection with a Bluetooth device: Power Off, Standby - Advertising, Standby - Connected,
Standby - Disconnected. The power and scan buttons controls the scanner transitions
between these states as detailed below.
1. Power Off: A long press on the power button powers off the scanner. This is a low
power sleep state in which the scanner is turned off to save the battery. It’s
recommended to keep the device in this state as long as it’s not being used to avoid
draining the battery.
2. Standby - Advertising: This is a transitional state between the Bluetooth connected
and standalone modes. A short press on the power button turns the scanner on and
it starts advertising for nearby Bluetooth devices ready to connect. The scanner
keeps advertising for 2 minutes and turns off the advertising afterwards to save
power, if no devices attempt to establish a connection within this period. A short
press on the power button will initiate the advertising again.
3. Standby - Connected: This is the main state during the Bluetooth connected
operation mode. In this state, the scanner is powered on and connected to a mobile

NeoSpectra - Scanner Quick Start Guide
SWS-19110004 d2 PROPRIETARY AND CONFIDENTIAL INFORMATION
Copyright 2021 Si-Ware Systems. This information may contain privileged, proprietary and confidential information and shall not be disclosed, copied, distributed,
reproduced or used in whole or in part without prior written permission from Si-Ware Systems.
12 of 30
device via Bluetooth ready to take scans either from the mobile application or the
scan button.
4. Standby - Disconnected: This is the main state during the standalone operation
mode. In this state, the scanner is powered on but not connected to a mobile device
and also the advertising is turned off. This state is entered after advertising for 2
minutes with no connection or if the user presses the scan button before the scanner
is connected to a Bluetooth device right after power up.
5.4 Taking Measurements in Different Operating Modes
Standalone Mode
Bluetooth Connected Mode
1. In this mode the scanner will use the
stored device configuration (either the
defaults or those pre-configured using
the mobile application).
2. With the scanner powered on and
without a previously stored reference
scan, start with a background
reference scan before doing a
material scan.
3. To run a reference scan, attach the
white background reference cover to
the scanner.
4. Long press the scan button to identify
the reading as a background
reference scan. The stored scans
counter on the display will be
incremented by one scan.
5. To run a material scan, place the
material to be scanned in contact with
the scanner window as detailed in
section “Sample Interfacing”.
6. Short press the scan button to take
the reading. Again the stored scans
counter will be incremented by one
scan.
7. The stored scans can be retrieved on
the mobile application either for
viewing or transferring to a PC for
further processing.
1. Start the NeoSpectra - Scanner
application and power on the scanner.
2. Press the “Connect” button on the
screen to connect the scanner to a
mobile device.
3. If no background reading has been
previously taken, start with a
background reference scan before
doing a material scan.
4. To run a reference scan, attach the
white background reference cover to
the scanner.
5. On the measurements screen, set the
scan time and press the “Background”
button in the application.
6. To run a material scan, place the
material to be scanned in contact with
the scanner window as detailed in
section “Sample Interfacing”.
7. On the measurements screen, choose
the scan time (must be the same as
the reference scan or lower), and
press the “Scan” button in the
application.
8. Measured spectra can be visualized in
the application.
9. The results are stored on the mobile
device and can be either viewed in the
application or transferred to a PC for
further processing.

NeoSpectra - Scanner Quick Start Guide
SWS-19110004 d2 PROPRIETARY AND CONFIDENTIAL INFORMATION
Copyright 2021 Si-Ware Systems. This information may contain privileged, proprietary and confidential information and shall not be disclosed, copied, distributed,
reproduced or used in whole or in part without prior written permission from Si-Ware Systems.
13 of 30
Refer to section “Mobile Applications
Overview”for more details about how to set
the scan parameters from the mobile
application and how to retrieve the stored
scans from the scanner.
Refer to section 6 for detailed illustrations of
the application usage.
6 Mobile Applications Overview
The mobile applications allow the user to easily exercise the different functionalities of the
scanner. This includes monitoring the scanner status indicators, configuring the
measurements parameters, capturing spectra, accessing the spectra stored on the scanner
and visualizing the measured spectra. The different functions are described in the following
sections for both the Android and the IOS applications.
6.1 Android Application Overview
Si-ware Systems provides an open source Android application to interface with the scanner
and demonstrate its features. The app is available for download from si-ware.com, and to
6.1.1 Connecting to the Scanner
The home screen of the application is shown in Figure 13 (a). The first step is to connect to a
nearby scanner. This is done by pressing on the “Connect” button on the home screen. The
application displays the list of available devices identified by their serial numbers as shown
in Figure 13 (b). To connect to a specific scanner, press the “Connect” button beside the
corresponding serial number. Once connected the application retrieves the scanner status
indicators. This includes the device serial number, battery status, number of stored scans
and the firmware version of the scanner as shown in Figure 13 (c). From this screen the user
can configure the device, take measurements or access the stored scans on the scan during
previous standalone operation sessions as will be shown in the following sections.

NeoSpectra - Scanner Quick Start Guide
SWS-19110004 d2 PROPRIETARY AND CONFIDENTIAL INFORMATION
Copyright 2021 Si-Ware Systems. This information may contain privileged, proprietary and confidential information and shall not be disclosed, copied, distributed,
reproduced or used in whole or in part without prior written permission from Si-Ware Systems.
14 of 30
a. Home Screen of the
Application
b. Choosing the scanner to
establish a connection
c. Control panel with a
connected scanner
Figure 13 Connecting to the scanner from the mobile application
6.1.2 Taking Measurements
To start capturing spectra, press on the “Take Measurements” button of the connected
scanner screen. The measurements screen is shown in Figure 14 (a). From this screen the
user can execute different functions:
1. Perform a certain number of scans, by setting the required number of scans in the
text box.
2. Set the scan time. Note that it must be the same scan time for both the material
scans and the corresponding reference scan.
3. Perform background (reference) scan by pressing on “Background” button.
4. Perform sample scans by press on “Scan” button.
5. Visualize the captured spectra by pressing the “VIEW” button at the top left of the
screen.
6. On-going scans can be stopped by pressing on “Stop” button while taking multiple
sample scans.
7. Additionally, on the results viewing screen shown in Figure 14 (d), the user can load
previously measured spectra or save the current displayed ones to the mobile device
storage.

NeoSpectra - Scanner Quick Start Guide
SWS-19110004 d2 PROPRIETARY AND CONFIDENTIAL INFORMATION
Copyright 2021 Si-Ware Systems. This information may contain privileged, proprietary and confidential information and shall not be disclosed, copied, distributed,
reproduced or used in whole or in part without prior written permission from Si-Ware Systems.
15 of 30
a. The main measurements screen
b. Taking a reference scan
c. Taking a material scan
d. Visualizing the measured spectra
Figure 14 Taking measurements screen in the application

NeoSpectra - Scanner Quick Start Guide
SWS-19110004 d2 PROPRIETARY AND CONFIDENTIAL INFORMATION
Copyright 2021 Si-Ware Systems. This information may contain privileged, proprietary and confidential information and shall not be disclosed, copied, distributed,
reproduced or used in whole or in part without prior written permission from Si-Ware Systems.
16 of 30
Accessing the Scans Saved on the Scanner
In order to retrieve the scans history saved on the scanner’s internal memory, press on the
dotted menu in the control panel screen. Then press on “Retrieve Scans” item as shown in
Figure 15. A progress indicator will show up stating how many measurements are being
retrieved and the live progress of getting them. The retrieved scans are saved in
“DCIM/NeoSpectra” folder.
A total of 999 scans can be saved on the scanner’s internal memory. In order to measure /
save more, clearing history must be done to free up space. Clearing history can be done by
pressing on the dotted menu in the control panel screen then pressing on “Clear History”
item as shown in Figure 15.
Figure 15 Retrieving/Clearing the stored scans on the device
The clearing and retrieval actions are executed on all the scans stored on the device
together i.e. no individual scans can be selected for clearing or retrieval. This feature will be
implemented in future versions of the applications.
The scans are stored on the scanner with an incremental naming convention function of the
scan order. This will lead to overwriting the previously retrieved scans on the mobile storage
folder “DCIM/NeoSpectra”. To avoid this, it’s recommended to rename the retrieved scans
as soon as they are copied to the mobile phone storage.

NeoSpectra - Scanner Quick Start Guide
SWS-19110004 d2 PROPRIETARY AND CONFIDENTIAL INFORMATION
Copyright 2021 Si-Ware Systems. This information may contain privileged, proprietary and confidential information and shall not be disclosed, copied, distributed,
reproduced or used in whole or in part without prior written permission from Si-Ware Systems.
17 of 30
6.1.3 Configuring the Scanner
Detailed configuration and settings of the scanner can be accessed from the configuration
screen shown in Figure 16. These configurations are described below in details.
Group
Item
Description
Measurement
Parameters
Optical Gain
Settings
This field is selected to choose between various
optical gain setups that was previously measured and
adjusted
Data Display
Enable Linear
Interpolation
Enables the linear interpolation feature to get a
constant wavenumber vector across all scanners
Number of data
points
The number of wavenumber vector points (valid only
in case linear interpolation feature is enabled)
FFT Settings
Apodization
Function
Selects the used window for apodization (boxcar,
Gaussian, Happ-Genzel, Lorenz)
Number of FFT
Points
Select the number of points used during FFT function
(8K, 16K and 32K points)
Advanced
Settings
Add New Optical
Gain Settings
Add new optical gain setup to be used during
scanning
Clear Optical Gain
Settings
Clear all the saved optical gain setups done by user
Wavelength
Correction
Perform wavelength correction routine.
Storing All Settings
Save all the wavelength correction parameters on
flash.
Restore Default
Settings
Restore the factory settings for wavelength correction
parameters.
Save/Restore
Preferences
Scan Time
View the value of scan time to be saved with the
configuration preferences when pressing “Save
Scanner Preferences”.
Save Scanner
Preferences
Save all the configuration preferences selected by
user on the scanner. This makes it the default settings
on scanner in standby mode.
Restore Scanner
Preferences
Restore the factory preferences saved on scanner

NeoSpectra - Scanner Quick Start Guide
SWS-19110004 d2 PROPRIETARY AND CONFIDENTIAL INFORMATION
Copyright 2021 Si-Ware Systems. This information may contain privileged, proprietary and confidential information and shall not be disclosed, copied, distributed,
reproduced or used in whole or in part without prior written permission from Si-Ware Systems.
18 of 30
a. Part1 of scanner configuration
parameters
b. Part2 of scanner configuration
parameters
Figure 16 Configuring the scanner parameters
6.1.4 Firmware Update
Updating the firmware of the scanner can be done through the mobile app. The firmware
itself is supplied by Si-Ware Systems.
Here is the procedure than needs to be done in order to perform FW update:
1. To install an update, the scanner should be plugged to the charger in advance, and
the battery is at 100%.
2. Download the new firmware bin file named “image.bin” and place it inside
“Download” folder.
3. Press on the dotted menu in the control panel screen. Then press on “Firmware
Update” item as shown in Figure 17.
4. A message will be shown asking to pair with your scanner but with a new ID that
starts with “OTA_..”, please press “Pair”.
5. A progress window will be shown to indicate the progress of writing the new firmware
to the scanner.
6. Once the firmware update is complete, the scanner will be turned off automatically.
And the mobile app is disconnected. Please close the app and re-open it.
7. Press on the power button of the scanner to power it on.
8. Sometimes the OS caches the ID for each device with specific MAC address, so
sometimes it will show the ID that starts with “OTA_..” for a couple of times before the
OS refreshes the ID and it will be shown normally “NS-Scanner_...” again.
9. But even during these couple of times, the scanner will be completely operational
and can be used with the mobile app perfectly.
10. If any error occurred during the FW update process, please restart the scanner by
powering it off then powering it back on.

NeoSpectra - Scanner Quick Start Guide
SWS-19110004 d2 PROPRIETARY AND CONFIDENTIAL INFORMATION
Copyright 2021 Si-Ware Systems. This information may contain privileged, proprietary and confidential information and shall not be disclosed, copied, distributed,
reproduced or used in whole or in part without prior written permission from Si-Ware Systems.
19 of 30
6.1.5 Restore Default Firmware
Restoring the default firmware of the scanner can be done through the mobile app. This
action brings the scanner FW back to the one originally was flashed by Si-Ware Systems
during the production of this unit.
Here is the procedure than needs to be done in order to perform Restore Default FW:
1. To restore the default FW, the scanner should be plugged to the charger in advance,
and the battery is at 100%.
2. Press on the dotted menu in the control panel screen. Then press on “Restore
Default FW” item as shown in Figure 17.
3. A progress window will be shown to indicate the progress of restoring the default
firmware to the scanner.
4. Once the firmware update is complete, the scanner will be turned off automatically.
And the mobile app is disconnected. Please close the app and re-open it.
5. Press on the power button of the scanner to power it on.
Figure 17 Performing FW update or Restore default FW
6.2 IOS Application Overview
Si-ware Systems provides an open source IOS application to interface with the scanner and
demonstrate its features. The app “NeoSpectra Collect”is available for download from
Apple’s app store, and to request the app source code please contact support@si-
ware.com.

NeoSpectra - Scanner Quick Start Guide
SWS-19110004 d2 PROPRIETARY AND CONFIDENTIAL INFORMATION
Copyright 2021 Si-Ware Systems. This information may contain privileged, proprietary and confidential information and shall not be disclosed, copied, distributed,
reproduced or used in whole or in part without prior written permission from Si-Ware Systems.
20 of 30
6.2.1 Sign-in to the application
The first screen of the app as shown in Figure 18 is the sign in view, where you can sign in
with the username and password provided by Si-Ware Systems.
Figure 18 Sign in view
6.2.2 Connecting to the Scanner
After signing in, user be redirected to the connect screen of the application as shown in
Figure 19 (a). The first step is to connect to a nearby scanner. This is done by pressing on
the “Connect” button on the intro screen. The application displays a list of available devices
identified by their serial numbers as shown in Figure 19 (b). To connect to a specific
scanner, tap the selected scanner from the list. Once the scanner is connected the
application moves to the home view, as shown in Figure 19 (c), which shows the scanner
status indicators. This includes the device serial number, battery status, number of stored
scans and the firmware version of the scanner. From this screen there are several tabs to
switch between them; Home, Collect, Charts, and Data.
Table of contents
Other Si-WARE SYSTEMS Scanner manuals
Popular Scanner manuals by other brands

Canon
Canon imageFORMULA DR-G1100 Production Document... specification
Fujitsu
Fujitsu FI 4220C - Document Scanner Operator's guide
Image Access
Image Access WideTEK 36 Setup instructions
J&K
J&K Scamax 2600 manual
SMART MAX GEOSYSTEMS
SMART MAX GEOSYSTEMS VS1000 user manual
Fujitsu
Fujitsu fi-6800 Specifications
