manuals.online logo
Brands
  1. Home
  2. •
  3. Brands
  4. •
  5. Siemens
  6. •
  7. Oven
  8. •
  9. Siemens HS758G3 1B Series User manual

Siemens HS758G3 1B Series User manual

This manual suits for next models

1

Other Siemens Oven manuals

Siemens HB65AA 1 Series User manual

Siemens

Siemens HB65AA 1 Series User manual

Siemens HB76GT 60 Series User manual

Siemens

Siemens HB76GT 60 Series User manual

Siemens HB673G0 1A Series User manual

Siemens

Siemens HB673G0 1A Series User manual

Siemens HB36P572 User manual

Siemens

Siemens HB36P572 User manual

Siemens HM678G4 6B Series User manual

Siemens

Siemens HM678G4 6B Series User manual

Siemens HB634GC 1S Series User manual

Siemens

Siemens HB634GC 1S Series User manual

Siemens HB633GB.1 User manual

Siemens

Siemens HB633GB.1 User manual

Siemens HB557JYB6M User manual

Siemens

Siemens HB557JYB6M User manual

Siemens HB75AB.50B User manual

Siemens

Siemens HB75AB.50B User manual

Siemens HB 37 B Series User manual

Siemens

Siemens HB 37 B Series User manual

Siemens HR478G5.6S User manual

Siemens

Siemens HR478G5.6S User manual

Siemens HB78GB.90B User manual

Siemens

Siemens HB78GB.90B User manual

Siemens HM876G2.6A User manual

Siemens

Siemens HM876G2.6A User manual

Siemens HB976GK 1 Series User manual

Siemens

Siemens HB976GK 1 Series User manual

Siemens HB457G0 0 Series User manual

Siemens

Siemens HB457G0 0 Series User manual

Siemens HB43NB 20B Series User manual

Siemens

Siemens HB43NB 20B Series User manual

Siemens HB674GB 1 Series User manual

Siemens

Siemens HB674GB 1 Series User manual

Siemens HB36D 75 Series User manual

Siemens

Siemens HB36D 75 Series User manual

Siemens HB11AB.21W User manual

Siemens

Siemens HB11AB.21W User manual

Siemens HB557JYS0M User manual

Siemens

Siemens HB557JYS0M User manual

Siemens HB214AB 0 Series User manual

Siemens

Siemens HB214AB 0 Series User manual

Siemens CM656GB 6B Series User manual

Siemens

Siemens CM656GB 6B Series User manual

Siemens HB374AB 0Y Series User manual

Siemens

Siemens HB374AB 0Y Series User manual

Siemens HB43AB 21B Series User manual

Siemens

Siemens HB43AB 21B Series User manual

Popular Oven manuals by other brands

Brandt FC 222 user manual

Brandt

Brandt FC 222 user manual

aumate TOA20M04N-1E instruction manual

aumate

aumate TOA20M04N-1E instruction manual

Maytag CWE4100AC - 24" Single Electric Wall Oven Dimension Guide

Maytag

Maytag CWE4100AC - 24" Single Electric Wall Oven Dimension Guide

Kernau KBO 1076 S PT B instruction manual

Kernau

Kernau KBO 1076 S PT B instruction manual

Bosch HB 37 N Series User manual and installation instructions

Bosch

Bosch HB 37 N Series User manual and installation instructions

Electrolux EOD5420AA user manual

Electrolux

Electrolux EOD5420AA user manual

Mx Onda MX-HC2183 instruction manual

Mx Onda

Mx Onda MX-HC2183 instruction manual

Daewoo F6EV19SM2 Service manual

Daewoo

Daewoo F6EV19SM2 Service manual

Blodgett MT3870 Specifications

Blodgett

Blodgett MT3870 Specifications

GE ZET2F owner's manual

GE

GE ZET2F owner's manual

GE JK3000DF3WW owner's manual

GE

GE JK3000DF3WW owner's manual

eka EKF 523 NT Operating and instruction manual

eka

eka EKF 523 NT Operating and instruction manual

AEG Electrolux E3191-5 user manual

AEG Electrolux

AEG Electrolux E3191-5 user manual

Pratica Rocket Express quick start guide

Pratica

Pratica Rocket Express quick start guide

Viking Professional VGSO260T user guide

Viking

Viking Professional VGSO260T user guide

FM RX203 instruction manual

FM

FM RX203 instruction manual

Bosch HBN331 9B Series instruction manual

Bosch

Bosch HBN331 9B Series instruction manual

NEFF B95M42N0MK Instructions for use

NEFF

NEFF B95M42N0MK Instructions for use

manuals.online logo
manuals.online logoBrands
  • About & Mission
  • Contact us
  • Privacy Policy
  • Terms and Conditions

Copyright 2025 Manuals.Online. All Rights Reserved.

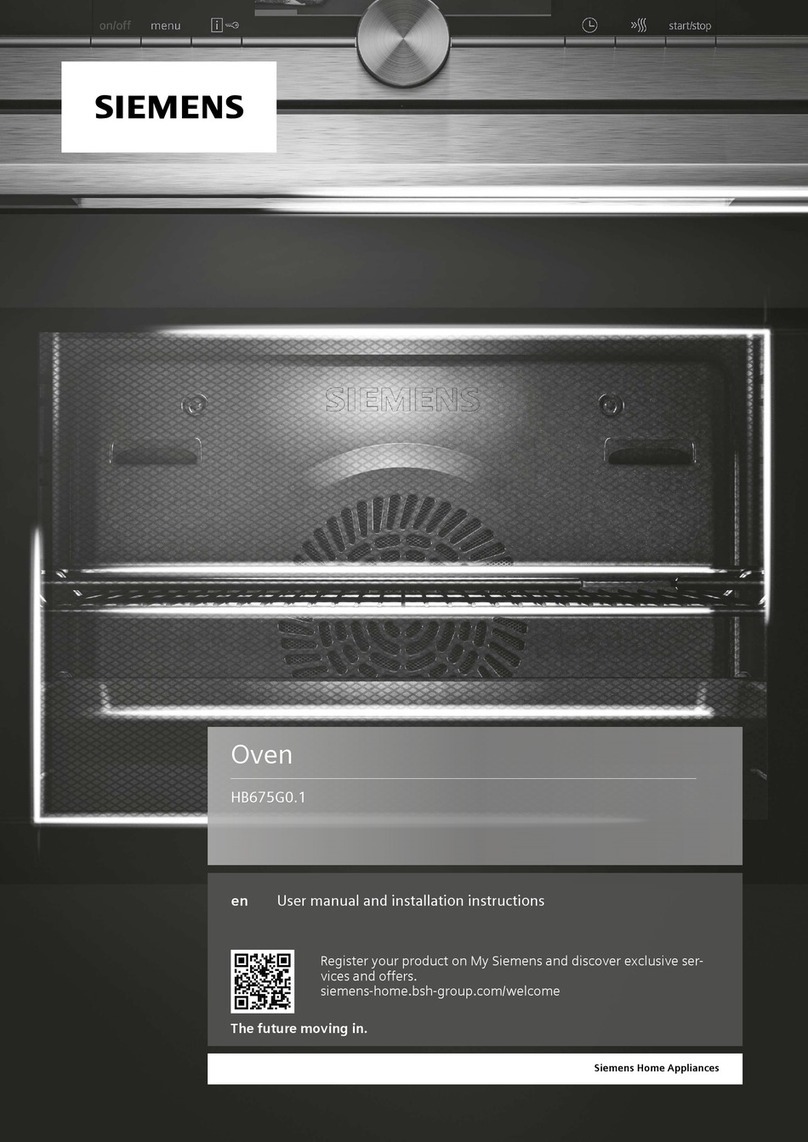
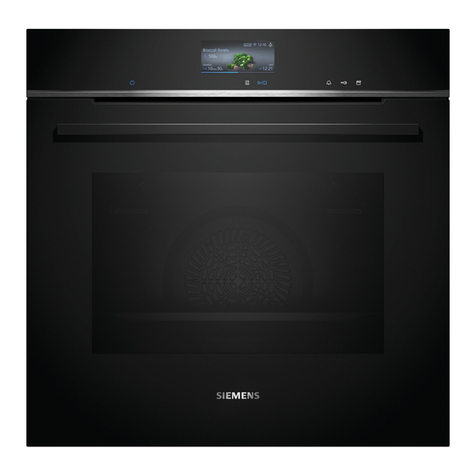
Combi steam oven
HS758G3.1B
en User manual and installation instructions
Register your product on My Siemens and discover exclusive ser-
vices and offers.
siemens-home.bsh-group.com/welcome
The future moving in.
Siemens Home Appliances
en Safety
2
Futher information and explanations are available online:
Table of contents
INFORMATION FOR USE
1 Safety...................................................................2
2 Preventing material damage ..............................5
3 Environmental protection and saving en-
ergy ......................................................................6
4 Familiarising yourself with your appliance .......7
5 Cooking Functions..............................................8
6 Accessories.......................................................10
7 Before using for the first time ..........................12
8 Basic operation .................................................14
9 Rapid heating ....................................................15
10 Time-setting options.........................................15
11 Steaming............................................................16
12 Meat probe.........................................................20
13 Dishes................................................................22
14 Favourites..........................................................23
15 Childproof lock..................................................24
16 Basic settings....................................................24
17 HomeConnect ..................................................25
18 Cleaning and servicing.....................................27
19 Cleaning function ecoClean Plus.....................29
20 Cleaning aid humidClean .................................30
21 Descaling...........................................................31
22 Drying function .................................................32
23 Appliance door..................................................32
24 Rails ...................................................................36
25 Troubleshooting................................................36
26 Disposal.............................................................39
27 Customer Service..............................................39
28 Information regarding Free and Open
Source Software................................................39
29 Declaration of Conformity ................................40
30 How it works......................................................40
31 INSTALLATION INSTRUCTIONS ......................52
31.1 General installation instructions......................52
1 Safety
Observe the following safety instructions.
1.1 General information
¡Read this instruction manual carefully.
¡Keep the instruction manual and the
product information safe for future refer-
ence or for the next owner.
¡Do not connect the appliance if it has been
damaged in transit.
1.2 Intended use
This appliance is designed only to be built
into kitchen units. Read the special installation
instructions.
Only a licensed professional may connect ap-
pliances without plugs. Damage caused by in-
correct connection is not covered under the
warranty.
Only use this appliance:
¡To prepare meals and drinks.
¡in private households and in enclosed
spaces in a domestic environment.
¡up to an altitude of max. 2000m above
sea level.
1.3 Restriction on user group
This appliance may be used by children aged
8 or over and by people who have reduced
physical, sensory or mental abilities or inad-
equate experience and/or knowledge,
provided that they are supervised or have
been instructed on how to use the appliance
safely and have understood the resulting
dangers.
Do not let children play with the appliance.
Children must not perform cleaning or user
maintenance unless they are at least 15 years
old and are being supervised.
Safety en
3
Keep children under the age of 8 years away
from the appliance and power cable.
1.4 Safe use
Always place accessories in the cooking com-
partment the right way round.
→"Accessories", Page10
WARNING‒Risk of fire!
Combustible objects that are left in the cook-
ing compartment may catch fire.
▶Never store combustible objects in the
cooking compartment.
▶If smoke is emitted, the appliance must be
switched off or the plug must be pulled out
and the door must be held closed in order
to stifle any flames.
Loose food remnants, fat and meat juices
may catch fire.
▶Before using the appliance, remove the
worst of the food residues and remnants
from the cooking compartment, heating ele-
ments and accessories.
Opening the appliance door creates a
draught. Greaseproof paper may come into
contact with the heating element and catch
fire.
▶Never place greaseproof paper loosely
over accessories when preheating the ap-
pliance and while cooking.
▶Always cut greaseproof paper to size and
use a plate or baking tin to hold it down.
WARNING‒Risk of burns!
The appliance and its parts that can be
touched become hot during use.
▶Caution should be exercised here in order
to avoid touching heating elements.
▶Young children under 8 years of age must
be kept away from the appliance.
Accessories and cookware get very hot.
▶Always use oven gloves to remove ac-
cessories or cookware from the cooking
compartment.
When the cooking compartment is hot, any al-
coholic vapours inside may catch fire. The ap-
pliance door may spring open. Hot steam and
jets of flame may escape.
▶Only use small quantities of drinks with a
high alcohol content in food.
▶Do not heat spirits (≥ 15% vol.) when undi-
luted (e.g. for marinating or pouring over
food).
▶Open the appliance door carefully.
WARNING‒Risk of scalding!
The accessible parts of the appliance become
hot during operation.
▶Never touch these hot parts.
▶Keep children at a safe distance.
Hot steam may escape when you open the
appliance door. Steam may not be visible, de-
pending on the temperature.
▶Open the appliance door carefully.
▶Keep children at a safe distance.
If there is water in the cooking compartment
when it is hot, this may create hot steam.
▶Never pour water into the cooking compart-
ment when the cooking compartment is
hot.
WARNING‒Risk of injury!
Scratched glass in the appliance door may
develop into a crack.
▶Do not use any harsh or abrasive cleaners
or sharp metal scrapers to clean the glass
on the oven door, as they may scratch the
surface.
The appliance and its parts that can be
touched may have sharp edges.
▶Take care when handling and cleaning
them.
▶If possible, wear protective gloves.
The hinges on the appliance door move when
the door is opened and closed, which could
trap your fingers.
▶Keep your hands away from the hinges.
Components inside the appliance door may
have sharp edges.
▶Wear protective gloves.
WARNING‒Risk of electric shock!
Incorrect repairs are dangerous.
▶Repairs to the appliance should only be
carried out by trained specialist staff.
▶Only use genuine spare parts when repair-
ing the appliance.
▶If the power cord of this appliance is dam-
aged, it must be replaced by trained spe-
cialist staff.
If the insulation of the power cord is dam-
aged, this is dangerous.
▶Never let the power cord come into contact
with hot appliance parts or heat sources.
▶Never let the power cord come into contact
with sharp points or edges.
▶Never kink, crush or modify the power
cord.
en Safety
4
An ingress of moisture can cause an electric
shock.
▶Do not use steam- or high-pressure clean-
ers to clean the appliance.
If the appliance or the power cord is dam-
aged, this is dangerous.
▶Never operate a damaged appliance.
▶Never pull on the power cord to unplug the
appliance. Always unplug the appliance at
the mains.
▶If the appliance or the power cord is dam-
aged, immediately unplug the power cord
or switch off the fuse in the fuse box.
▶Call customer services. →Page39
WARNING‒Danger: Magnetism!
Caution: Magnetism
Caution for people with pacemakers
Permanent magnets are used in the control
panel. These may impair the functionality of
electronic implants, e.g. pacemakers or in-
sulin pumps.
▶Persons with electronic implants must
stand at least 10cm away from the control
panel.
WARNING‒Risk of suffocation!
Children may put packaging material over
their heads or wrap themselves up in it and
suffocate.
▶Keep packaging material away from chil-
dren.
▶Do not let children play with packaging ma-
terial.
Children may breathe in or swallow small
parts, causing them to suffocate.
▶Keep small parts away from children.
▶Do not let children play with small parts.
1.5 Steam
Follow these instructions when using a steam
function.
WARNING‒Risk of scalding!
The water in the water tank may become very
hot if you operate the appliance for long peri-
ods.
▶Always empty the water tank after using the
steam function.
Hot steam is generated in the cooking com-
partment.
▶Do not reach into the cooking compartment
when using steam.
Hot liquid may spill over the sides of the ac-
cessory when it is removed from the cooking
compartment.
▶Remove hot accessories with care and al-
ways wear oven gloves.
WARNING‒Risk of fire!
Due to the hot surfaces, vapours from flam-
mable liquids may catch fire in the cooking
compartment (explosion). The appliance door
may spring open. Hot steam and jets of flame
may escape.
▶Do not pour flammable liquids (e.g. alco-
holic drinks) into the water tank.
▶Only fill the water tank with water or with
the descaling solution we have recommen-
ded.
1.6 Meat probe
WARNING‒Risk of electric shock!
Using the wrong meat probe could damage
the insulation.
▶Only use the meat probe for this specific
appliance.
1.7 Cleaning function
WARNING‒Risk of burns!
The outside of the appliance gets very hot
when the cleaning function is in progress.
▶Never touch the appliance door.
▶Allow the appliance to cool down.
▶Keep children at a safe distance.
Preventing material damage en
5
2  Preventing material damage
2.1 General
ATTENTION!
Alcoholic vapours may catch fire in the hot cooking
compartment and cause permanent damage to the ap-
pliance. The appliance door may spring open due to
an explosion and it may fall off. The door panels may
shatter and fragment. Due to the resulting negative
pressure, the cooking compartment may become con-
siderably deformed inwards.
▶Do not heat spirits (≥ 15% vol.) when undiluted (e.g.
for marinating or pouring over food).
If there is water on the cooking compartment floor
when operating the appliance at temperatures above
120°C, this will damage the enamel.
▶Do not use the appliance if there is water on the
cooking compartment floor.
▶Wipe away any water on the cooking compartment
floor before operation.
Objects on the cooking compartment floor at over
50°C will cause heat to build up. The baking and
roasting times will no longer be correct and the enamel
will be damaged.
▶Do not place any accessories, greaseproof paper or
foil of any kind on the cooking compartment floor.
▶Only place cookware on the cooking compartment
floor if a temperature under 50°C has been set.
When the cooking compartment is hot, any water in-
side it will create steam. The change in temperature
may cause damage.
▶Never pour water into the cooking compartment
when it is still hot.
▶Never place cookware containing water on the
cooking compartment floor.
The prolonged presence of moisture in the cooking
compartment leads to corrosion.
▶Allow the cooking compartment to dry after use. To
do this, open the cooking compartment door com-
pletely or use the drying function.
▶Do not keep moist food in the cooking compartment
for a long time with the door closed.
▶Do not store food in the cooking compartment.
▶Take care not to trap anything in the appliance
door.
Fruit juice dripping from the baking tray leaves stains
that cannot be removed.
▶When baking very juicy fruit flans, do not pack too
much on the baking tray.
▶If possible, use the deeper universal pan.
Using oven cleaner in a hot cooking compartment
damages the enamel.
▶Never use oven cleaner in the cooking compartment
when it is still warm.
▶Remove all food remnants from the cooking com-
partment and the appliance door before you next
heat up the appliance.
If the seal is very dirty, the appliance door will no
longer close properly during operation. This may dam-
age the front of adjacent kitchen units.
▶Keep the seal clean at all times.
▶Never operate the appliance if the seal is damaged
or missing.
Sitting or placing objects on the appliance door may
damage it.
▶Do not place, hang or support objects on the appli-
ance door.
▶Do not place cookware or accessories on the appli-
ance door.
With certain models, accessories may scratch the door
pane when closing the appliance door.
▶Always push accessories fully into the cooking com-
partment.
If aluminium foil comes into contact with the door pane,
it could cause permanent discolouration.
▶Do not allow aluminium foil in the cooking compart-
ment to come into contact with the door pane.
2.2 Steam
Follow these instructions when using the steam func-
tion.
ATTENTION!
Silicone bakeware is not suitable for combined opera-
tion with steam.
▶Cookware must be heat- and steam-resistant.
Using cookware with rust spots may cause corrosion in
the cooking compartment. Even the smallest spots of
rust can cause corrosion.
▶Do not use cookware with rust spots.
Dripping liquids make the cooking compartment floor
dirty.
▶When steaming with a perforated cooking container,
always place the baking tray, the universal pan or
the unperforated cooking container underneath. This
will catch any liquid that drips down.
Hot water in the water tank may damage the steam
system.
▶Only fill the water tank with cold water.
If there is water on the cooking compartment floor
when operating the appliance at temperatures above
120°C, this will damage the enamel.
▶Do not use the appliance if there is water on the
cooking compartment floor.
▶Wipe away any water on the cooking compartment
floor before operation.
A lot of steam is produced during operation with the
types of steam heating. Condensate that collects in the
drip trough underneath the cooking compartment may
overflow and damage adjacent units.
▶Do not open the appliance door, or open it as infre-
quently as possible, while the appliance is in opera-
tion.
If descaling solution comes into contact with the control
panel or other delicate surfaces, it will damage them.
▶Remove descaling solution immediately with water.
Cleaning the water tank in the dishwasher will damage
it.
▶Do not clean the water tank in the dishwasher.
▶Clean the water tank with a soft cloth and standard
washing-up liquid.
en Environmental protection and saving energy
6
If several steam operations are carried out one after
the other without wiping out the cooking compartment
floor and the condensate tray afterwards in each case,
the water collected may overflow and may damage fur-
niture panels or bases.
▶Wipe down the cooking compartment floor and the
condensate tray after every steam operation.
3  Environmental protection and saving energy
3.1 Disposing of packaging
The packaging materials are environmentally compat-
ible and can be recycled.
▶Sort the individual components by type and dispose
of them separately.
3.2 Saving energy
If you follow these instructions, your appliance will use
less power.
Only preheat the appliance if the recipe or the recom-
mended settings tell you to do so.
→"How it works", Page40
¡Not preheating the appliance can reduce the en-
ergy used by up to 20%.
Use dark-coloured, black-coated or enamelled baking
tins.
¡These types of baking tin absorb the heat particu-
larly well.
Open the appliance door as little as possible during
operation.
¡This maintains the temperature in the cooking com-
partment and eliminates the need for the appliance
to reheat.
When baking multiple dishes, do so in succession or
in parallel.
¡The cooking compartment is heated after baking
the first dish. This reduces the baking time for the
second cake.
If the cooking time is relatively long, you can switch
the appliance off 10minutes before the cooking time
ends.
¡There will be enough residual heat to finish cooking
the dish.
Remove any accessories that are not being used from
the cooking compartment.
¡Accessories that are not being used do not need to
be heated.
Allow frozen food to defrost before cooking.
¡This saves the energy that would otherwise be re-
quired to defrost it.
Switch off the display in the basic settings.
→"Basic settings", Page24
¡Energy is saved when the display is switched off.
Note:
The appliance requires:
¡A maximum of2W in networked standby mode
¡A maximum of 0.5W in non-networked standby
mode with the display switched off
Familiarising yourself with your appliance en
7
4  Familiarising yourself with your appliance
4.1 Control panel
You can use the control panel to configure all functions
of your appliance and to obtain information about the
operating status.
On certain models, specific details such as colour and
shape may differ from those pictured.
1
2
1
Display
The display shows the current adjustment val-
ues, options or notes.
→"Display", Page7
2
Buttons
You can use the buttons to set various func-
tions directly.
→"Buttons", Page7
4.2 Display
The display is divided into different areas.
Status bar
The status bar is at the top of the display.
You can carry out actions depending on the setting
step.
Symbol Function
Go back one setting.
Open the basic settings.
In addition to the text information, you can see the cur-
rent status of different functions using symbols.
Symbol Meaning
Time, e.g.
"12min10s"
Display of the current time-setting op-
tions.
→"Time-setting options", Page15
Timer is activated.
→"Setting the timer", Page16
The childproof lock is activated.
→"Childproof lock", Page24
Symbol Meaning
Wi-Fi signal strength for HomeConnect.
The more lines of the symbol are filled,
the better the signal.
If the symbol is struck through , there
is no Wi-Fi signal.
If there is an "x" at the symbol , there
is no connection to the HomeConnect
server.
→"HomeConnect ", Page25
Remote start with HomeConnect is ac-
tivated.
→"HomeConnect ", Page25
Remote diagnostics with HomeCon-
nect for maintenance is activated.
→"HomeConnect ", Page25
Settings area
The settings area is shown in tiles.
The individual tiles show you the current selection op-
tions and settings that have already been implemented.
To select a function, press the corresponding tile.
Information is also shown in tiles.
To scroll to the left or right if there are several tiles,
swipe over the display.
Possible symbols in tiles
Symbol Meaning
Enter the adjustment value via the num-
ber field.
Reset the setting value.
Close the tile.
Note:A blue dot or a blue star in a tile indicates that a
new function, a new favourite or an update was down-
loaded to your device using the HomeConnect app.
Info line
Depending on the setting step, you can see additional
information about your setting at the bottom of the dis-
play and can carry out actions.
4.3 Buttons
You can use the buttons to directly select various func-
tions.
Button Function
Switch the appliance on or off.
→"Basic operation", Page14
Select the timer.
→"Setting the timer", Page16
Press and hold for approx. 4 seconds:
Activate or deactivate the childproof
lock.
→"Childproof lock", Page24
Open the control panel to remove the
water tank.
→"Filling the water tank", Page17
en Cooking Functions
8
4.4 Cooking compartment
Various functions in the cooking compartment provide
support when operating your appliance.
Shelf supports
The shelf supports in the cooking compartment enable
you to place accessories at different heights.
→"Accessories", Page10
Your appliance has 5 shelf positions. The shelf posi-
tions are numbered from bottom to top.
You can remove the shelf supports, e.g. for cleaning.
→"Rails", Page36
Self-cleaning surfaces
The self-cleaning surfaces in the cooking compartment
are coated with a porous, matt ceramic layer and have
a rough surface. When the appliance is in operation,
the self-cleaning surfaces absorb splashes from roast-
ing or grilling and break them down.
The following surfaces are self-cleaning:
¡Back wall
¡Ceiling
¡Side walls
Use the cleaning function regularly to help retain the
cleaning ability of the self-cleaning surfaces and pre-
vent damage.
→"Cleaning function 'ecoClean Plus'", Page29
Lighting
One or more oven lights illuminate the cooking com-
partment.
When you open the appliance door, the light in the
cooking compartment switches on. If the appliance
door remains open for longer than around 18 minutes,
the light switches off again.
For most operating modes, the lighting is switched on
during operation. The lighting switches off again when
the operation ends.
Cooling fan
The cooling fan switches on and off depending on the
appliance's temperature. The hot air escapes above
the door.
ATTENTION!
Covering the ventilation slots will cause the appliance
to overheat.
▶Do not cover the ventilation slots.
To ensure that the appliance cools down more quickly
after operation, the cooling fan continues to run for a
certain period afterwards.
Appliance door
If you open the appliance door during operation, the
operation stops. If you close the appliance door, opera-
tion resumes automatically.
Water tank
You need the water tank for the types of steam heating.
The water tank is behind the control panel.
→"Filling the water tank", Page17
1 2
3
1
Tank cover
2
Opening for filling and emptying
3
Handle for removing and inserting
5  Cooking Functions
This is where you can find an overview of your appli-
ance's operating modes and main functions.
Tip:Depending on the appliance type, additional or
more comprehensive functions are available to you
with the HomeConnect app. You can find more inform-
ation about this in the app.
Operating
mode
Use
Types of
heating
Select finely tuned types of heating for
the optimal preparation of your food.
→"Types of heating", Page9
→"Basic operation", Page14
Dishes Use programmed, recommended set-
tings for various types of food.
→"Dishes", Page22
Cooking Functions en
9
Operating
mode
Use
Steam Gently prepare food with types of steam
heating.
→"Steaming", Page16
Cleaning Select the cleaning function for the
cooking compartment.
→"Cleaning function 'ecoClean Plus'",
Page29
→"Cleaning aid 'humidClean'",
Page30
→"Descaling", Page31
→"Drying function", Page32
Favourites Use your own saved settings.
→"Favourites", Page23
HomeConnect
With HomeConnect, you can connect and remotely
control the oven with a mobile device, and use the full
functionality of the appliance.
Depending on the appliance type, additional or more
comprehensive functions are available for your appli-
ance with the HomeConnect app. You can find more
information about this in the app.
→"HomeConnect ", Page25
5.1 Types of heating
To ensure that you always find the right type of heating
to cook your food, we explain the differences and ap-
plications below.
The symbols for each type of heating help you to re-
member them.
When you select a type of heating, the appliance sug-
gests a suitable temperature or setting. You can use
these values or change them within the specified
range.
For grill setting3, the appliance reduces the temperat-
ure to grill setting1 after approx. 40minutes.
Symbol Type of heating Temperature
range
What it's used for and how it works
Possible additional functions
4D hot air 30 - 250°C Bake or roast on one or more levels.
The fan distributes the heat from the ring-shaped heating element
in the back wall evenly around the cooking compartment.
Top/bottom heating 30 - 250°C Traditionally bake or roast on one level. This type of heating is
especially good for cakes with moist toppings.
The heat is emitted evenly from above and below.
Hot air gentle 125 - 250 °C Cook selected dishes gently on one level without preheating.
The fan distributes the heat from the ring-shaped heating element
in the back wall evenly around the cooking compartment. The
food is cooked in phases using residual heat.
Always keep the appliance door closed when cooking.
This type of heating is used to determine the energy consump-
tion in air recirculation mode and the energy efficiency class.
Top/bottom heat
gentle
150 - 250 °C Gently cook selected dishes.
Heat is emitted from above and below.
This type of heating is used to measure the energy consumption
in the conventional mode.
Circulated air grilling 30 - 250°C Roast poultry, whole fish or larger pieces of meat.
The grill element and the fan switch on and off alternately. The
fan circulates the hot air around the food.
Grill, large area Grill settings:
1 = low
2 = medium
3 = high
Grill flat items such as steak and sausages, or make toast. Grat-
inate food.
The entire area below the grill element becomes hot.
Grill, small area Grill settings:
1 = low
2 = medium
3 = high
Grill small quantities, such as steak, sausages or toast. Gratinate
small quantities of food.
The central area below the grill element becomes hot.
Pizza setting 30 - 250°C Cook pizza or food that requires a lot of heat from below.
The bottom heating element and the ring-shaped heating ele-
ment in the back wall heat the cooking compartment.
CoolStart function 30 - 250°C For the quick preparation of frozen products without preheating.
The temperature is determined by the manufacturer's specifica-
tions. Use the highest temperature specified on the packaging.
en Accessories
10
Symbol Type of heating Temperature
range
What it's used for and how it works
Possible additional functions
Intensive heat 30 - 250°C Prepare dishes with a crispy base.
The heat is emitted from above and more intensively from below.
Low-temperature
cooking
70 - 120°C Slowly and gently cook seared, tender pieces of meat in un-
covered cookware.
The heat is emitted evenly from above and below at a low tem-
perature.
Bottom heating 30 - 250°C Final baking or cooking food in a bain marie.
The heat is emitted from below.
Keeping warm 50 - 100°C Keep cooked food warm.
Preheating cookware 30 - 90°C Preheat cookware.
Types of steam heating
This is where you can find an overview of the types of steam heating and their use.
Symbol Steam heating type Temperature
range
What it's used for and how it works
Possible additional functions
Defrosting 30 - 60°C Gently defrost frozen food.
Reheating 80 - 180°C Gently reheat plated meals and baked items.
The steam ensures that the food does not dry out.
fullSteam Plus 30 - 120 °C Gently steam vegetables, meat, fish and cereal. Juice fruit.
Blanch food.
In order to reduce the cooking time, more robust food can be
steamed at above 100°C.
Proving dough 30 - 50 °C Leave the yeast dough to prove.
The dough rises considerably more quickly than at room temper-
ature. The surface of the dough does not dry out.
5.2 Temperature
With most types of heating , you can read the current
temperature in the cooking compartment and the set
temperature side-by-side on the display during heating,
e.g. ⁠120°C|210°C.
When you preheat the appliance, the optimal time to
place the meal in the oven is as soon as the heating
line has completely filled and a signal tone sounds.
Note:Due to thermal inertia, the temperature that is
displayed may differ slightly from the actual temperat-
ure inside the cooking compartment.
Residual heat indicator
When the appliance is switched off, the display uses
the symbol to show the residual heat in the cooking
compartment. The further the temperature drops, the
less the symbol is visible. The symbol goes out entirely
at approx.60°C.
6  Accessories
Use original accessories. These have been made espe-
cially for your appliance.
Note:Accessories may become deformed if they get
hot. Deformation has no effect on function. As the ac-
cessory cools down, it will regain its original shape.
The accessories supplied may differ depending on the
appliance model.