manuals.online logo
Brands
  1. Home
  2. •
  3. Brands
  4. •
  5. Siemens
  6. •
  7. Washer
  8. •
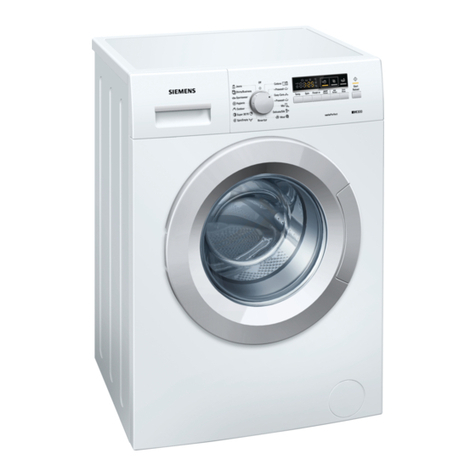
  9. Siemens Washing machine Installation and operating instructions

Siemens Washing machine Installation and operating instructions

1
Safety instructions
 The washing machine is h eavy  take care when lifting it.
 W arning: Frozen hoses may tear/burst. Do not install the washing machine in an area where
there is a risk of frost or outdoors.
 Do not hold onto protruding pa rts (e.g. loading door) when lifting. Washing machi ne may
be damaged.
 Before transporting the ap pliance, always drain dispensers. aPage 8
 In addition to the safety information listed he re, the local water and electricity supp lier may
have special requirements.
 If in doubt, have the a ppliance connected by a technician .
 Lay hoses and cables in such a w ay that there is no risk of stumbling.
Environmental disposal
 Dispose of packaging in an environmentally friend ly manner.
 This applian ce has been identified in accordance with the European Directive 2002/96/EG
on Waste Electrical and Electronic Equipment (W EEE).
The Directive specifies the framework for an EU-wide valid return and recycling of waste
appliances.
Installation area
 Stability is important to prev ent the machine from moving!
 The installation area must be firm and level.
 Soft floors/floor coverings are not suitable.
If installing the appliance on a base
Always secure the washing machine feet wit h retention plates *.
* Order no. WMZ 2200, WX 9756, CZ 110600, Z 7080X0
If installing the appliance on a wooden joist ceiling
 If possible, install the washing machi ne in a corner.
 Screw a water-resistant wooden panel (min. 30 mm thick) to the floor.
Always secure the washing machine feet wit h retention plates.
* Order no. see above
When installation is on a platform with drawer *
* Order no. WMZ 20460, WZ 20460
Built-under/Built-in appliance
Build-under/Build-in before connection t o the power supply.
Installed in between kitchen units (built-under or built-in)
 60 cm cavity width required.
 Install washing mac hine only under a continuous worktop connected firmly to the adj acent
cupboards.
Built-under
Risk of electric shock!
 Instead of the appliance cover panel, it i s essential to have a technician fit a sheet m etal
cover *. * Order no. WMZ 2043, WZ 20430
60 cm cavity width required.
2
Scope of delivery depending on model
not included in product package:
When drainage is into a siphon, a Ø 2440 mm hose clip (specialist o utlet) is also required.
aWater connection, Page 4
Useful tools:
 Spirit level for aligning the wa shing machine.
 Size 13 socket wrench :
for loosening the transportation protection device s aPage 3 and
size 17: for aligning the appliance feet. aPage 5
Hose and cable lengths dependi ng on model
Connection on left side or Connection on right side
Note: If the hose holders are used, the possible hose lengths are reduced!
Available from dealer/customer service:
 Extension for Aqua-Stop or cold water inlet hose (approx. 2.50 m).
Order no. WMZ2380, WZ10130, CZ11350, Z7070X0
 Longer supply hose (approx. 2.20 m), for standard model.
Spanner
(depending on model)
Power cord
Water supply
Water drainage
Elbow
for securing the
drainage hose
Covers
with hose holder
Aqua Stop A qua-Secure Standard
~140 cm
~95 cm
~120 cm
~130 cm
~100 cm
~135 cm
0  max. 100 cm
Humidity in the drum
is caused by the final
inspection.
3
Remove transportation protection devices
 Before using the appliance for the first time, remove the
4 transportation protection devices co mpletely and keep in a safe
place.
 If the appliance is to be transported at a later date, re-instal l the
transportation protection devices  prevents damage to the machine.
aPage 6
 Keep screw and sleeve together.
1. Take hoses (depending on model) o ut of the
holders and the elbow. Remove the elbo w.
2. Loosen and remove all 4 transportation lock screws .
3. Take the power cord out of the holders.
Remove sleeves.
4. Insert covers and lock firmly by pressing on the locking hook at the top. Insert hose holder .
5. Secure hoses in the hose holders.
4
Water connection depending on model
Risk of electric shock! Do not immerse Aqua-Stop safet y device in water (contains
an electric valve).
 To prevent leakage or water damage, follow the inst ructions in this chapter!
Caution: The washing machine must only be operate d with cold tap water.
 Do not connect to the mixer tap of an unpressurised hot-water apparatus.
 Use only the supplied inlet hose or one purchased from an authorised specialist outlet ,
not a used one!
 If in doubt, have the appliance connected b y a technician.
Water supply
Water inlet hose:
Caution: do not kink, crush, modify or se ver
(strength is no longer guaranteed).
Optimum water pressure in the mains: 1001 000 kPa (110 bar)
 When the tap is turned on, th e water flow is at least 8l/min.
 If the water pressure is highe r, install a pressure reducing valve.
Model: Aqua-Stop
Aqua-Secure
Standard
1. Connect water inlet hose to a 3/4" = 26.4 m m tap.
Caution: Tighten plastic screw-fittings by hand only.
2. Carefully turn on the tap and check that t he connection
points are not leaking.
Caution: Screw connection is under water pipe
pressure.
Water drainage
Water drainage hose:
Caution: Do not bend or pull.
Height difference between installation area a nd outlet:
0  max. 100 cm
 Dra inage into a washbasin:
Caution: Secure the drainage hose to prevent it from slipping out of the
sink.
Caution: The plug must not block the drain of the wash b asin. When the
water is being pumped out of the washing machin e, check that the water
drains away quickly enough. The end of the drainage hose m ust not be
immersed in the drained water! Risk of water being drawn bac k into the
washing machine!
 Dra inage into a siphon:
Caution: Connection point must be secured with hose clip, Ø 2440 mm
(specialist outlet).
. Dra inage into a plastic pipe with rubber sleeve or into a gully:
Caution: Secure the drainage hose to pr event it from slipping out of the
sink.
max.
90°
max.
90°
min.
10 mm
min.
10 mm
3/4
3/4
5
Alignment
Loud noise formation, intense vibrations a nd wandering may be due to incorrec t
alignment!
Align washing machine with spirit level
1. Loosen lock nut in a clockwise direction with a wrench.
2. Change height by rotating the a ppliance feet.
Caution: All four feet must be firmly on the floor.
The washing machine must not wobble!
Check alignment of the washing machine with a spirit level and, if
required, correct.
3. Tighten the lock nut against th e housing.
Grip the foot and do not adjust the height.
Caution: The lock nuts on all four applian ce feet must be screwed tightly
against the housing!
Electrical connection
ʑConnect the washing machine to an alternating current via a c orrectly installed
earthed socket only.
ʑThe mains voltage and voltage specifications on th e washing machine (appliance
rating plate on the rear of the a ppliance) must match.
ʑConnected load as well as required fuse are indicated on the a ppliance rating plate.
ʑEnsure that:
 the mains plug and socket match,
 the cable cross-section is a dequate,
 the earthing system has been installed co rrectly.
ʑA damaged power cord may be replaced by an elect rician only.
A replacement mains cable can be obtained from customer service.
ʑDo not use multiple plugs/couplings or e xtension cables.
ʑIn the event that an earth leakage circuit breaker is to be used, onl y use types
marked with the following symbol: .
Only this symbol can guarantee compliance with all current regulations.
ʑMains plug:
 Do not insert/pull out with damp hands.
 Do not pull by tugging the power cord.
 Never pull it out du ring operation.
max. 12 mm
6
Transportation, e.g. if moving house
1. Before transporting the washing machine:
1. Turn off the tap.
2. Drain any residual washing solution. aPage 12
3. Release the water pressure in the s upply hose. aPage 12
4. Isolate the washing machine from t he power supply.
5. Remove the hoses.
6. Drain dispensers. aPage 8
2. Installing transportation protection devices:
1. Remove covers and keep
in a safe place.
If required, use a
screwdriver.
2. Insert all 4 sleeves.
Clamp mains cable on the
holders. Insert and tighten
the bolts.
3. Before switching on the appliance again,
remove the transportation protection de vices! aPage 3
To prevent unused detergent from flowing into the o utlet during the first wash: Pour 1 litre of
water into dispenser B/Cand sta rt the Empty programme.
Aqua-Stop warranty For appliances with Aq ua-Stop only
In addition to warranty claims against the seller based on the contrac t of sale and in addition
to our appliance warranty we shall pay damages under the following c onditions:
1. If water damage was cause d by a fault in our Aqua-Stop system, we shall compensate priv ate
users for damage.
2. The liability warranty applies to the service life of the ap pliance.
3. A claim can only be made under the warranty if the appliance and Aqua-Stop have been
correctly installed and connected according to our instructions; this also includes a corre ctly
installed Aqua-Stop extension (origina l accessory).
Our warranty does not apply to defectiv e supply lines or fittings up to the Aqua- Stop
connection on the tap.
4. Appliances which feature Aqua-Stop can be left una ttended during operation and it is not
necessary to turn off the tap afterwards.
The tap should only be turned off if you are aw ay for a prolonged period, e.g. several weeks
holiday.
7
Technical specifications
ʑDimensions (width x depth x height) 60 x 59 x 85 cm
ʑWeight 63  83 kg depending on model
ʑMains connection Nominal voltage 220  240 V, 50 Hz
Nominal current 10 A
Nominal power 2300 W
ʑWater pressure 100  1000 kPa (1  10 bar)
0510/ 9000550634
*550634*
Manufacturer aOperating instructions
8
Care
ʑMachine housing, control panel
 Remove detergent residue immedi ately.
 Wipe with a soft, dam p cloth.
 Do not clean the appliance with a water je t.
ʑDrum
Use chlorine-free cleaning agent, no t steel wool.
ʑDescaling
Not required if detergent dosed correctly. However, if this does occur, follow the instruct ions
of the descaling agent manufacturer.
ʑi-DOS/i-Dos: Clean the detergent drawer
Drain dispensers:
The dispensers have drainage openings with removable stoppers in the front area.
To drain the dispensers, first remove th e drawer handle as illustrated:
1. Open detergent drawer.
2. Pull release lever (A) on the back of the drawer
handle (bottom middle) gentl y towards yourself
and simultaneously ...
... pull up released drawer handle (B).
3.
4.
To drain the dispensers, carefully remove the respective s ealing plug
and drain the contents into a suitable recepta cle.
Re-insert sealing plug fully.
Risk of electric shock! Pull out the mai ns plug.
Risk of explosion! No solven ts.
9
Care
Clean dispensers/detergent drawer:
To clean the drained dispensers, the detergent drawer can be completely removed .
1. Drain dispensers before removing them. aPage 8.
Note: Re-attach drawer handle only after cleaning.
2. Open drawer.
3. Press release lever and complete ly remove drawer.
3. Carefully remove drawer cover.
Do not clean the cover in the dishw asher (contains electrical components) and do not
immerse in water.
Protect rear drawer plug from moisture, de tergent or softener residue; if required clean
outer surfaces with a soft, damp cloth. Dry before re-inserting.
4. Clean tray and cover with soft, damp cloth or hand
shower. Clean inner surfaces with a soft, damp cloth.
5. Dry tray and cover and re-assemble.
6. Push on drawer handle from above until it locks
in place.
7. Push in detergent drawer all the way.
Risk of electric shock! Pull out the mai ns plug.
Risk of explosion! No solven ts.
10
What to do if 
ʑ... water runs out:  Correctly attach/replace drainage hose.
 Tighten screw-fitting on the supply hose.
ʑ... no water runs in:  Start/Reload not selecte d?
 Tap not open?
 Filter blocked? Clean fil ter. aPage 12
 Supply hose kinked or jammed?
ʑ... dispenser is empty
and fill level display is not
flashing:
 Drawer cover/rear draw er plug dirty? Clean.
aPage 8, 9
 Detergent drawer not inserted correc tly?
Insert correctly. aPage 8, 9
ʑ... wrong detergent/
softener has been
poured into dispenser:
 Drain dispense rs. aPage 8, clean aPage 9 and refill
dispensers. aOperating instructions, Page 11
ʑ... detergent/softener
congealed in the
dispensers:
 Clean and refill dispense rs.
ʑ... the washing machine
door cannot be opened:
 Safety function active . Stop programme? a
Operating instructions, Page 5
Rinse hold c(without fina l spin) selected? a
Operating instructions, Page 6
 Can be opened via emergency release only? aPag e 13
ʑ... programme does not
start:
Start/Reload or end time sel ected?
 Door closed?
 Childproof lock active? Deacti vate. a
Operating instructions, Page 9
ʑ... detergent solution is
not drained:
Rinse hold c(without fina l spin) selected? a
Operating instructions,Page 6
 Clean detergent-solution p ump. aPage 12
 Clean outlet pipe and/or d rainage hose.
ʑ... Water not visible in the
drum:
 Not a fault  water below the v isible area.
ʑ... spin result not
satisfactory, washing
wet/too damp:
 Not a fault  unbalanced load detection system has stopped the
spin cycle, washing unevenly distributed.
Distribute small and large items of washing in the drum.
Anticrease /Easy-iron selected? a
Operating instructions, Page 6
 Too low speed selected? aOper ating instructions, Page 2
ʑ... the programme
duration changes during
the wash cycle:
 Not a fault  the programme s equence is optimised for the
particular wash process. This may resu lt in changes to the
programme duration in the display field.
ʑ... is spun several times:  Not a fault  unbalanc ed load detection system adjusts
imbalance.
ʑ... odours form in the
washing machine:
 R un Cottons 90 °C programme without washing. To do this, use
a little standard detergent.
ʑ... status display ³3flashes, foam may run
out of the detergent
drawer:
 Too much detergent used? Mix 1 ta blespoon of softener with
½ litre of water and pour into manual dispenser B/C(not for
outdoor, sports and down-filled textiles!).
 Reduce detergent dosage for the next wa sh cycle.
Reduce basic dosage. aOperating ins tructions, Page 12
11
What to do if 
ʑ... loud noise, vibrations
and wandering occur
during the spin cycle:
 Appliance feet fixed?
Secure appliance feet. aPage 5
 Transportation protect ion devices removed?
Remove transportation protection devic es. aPage 3
ʑ... noises occur during
spin and drain cycles:
 Clean the drain pump. aPage 12
ʑ... display panel/indicator
lights do not function
while the appliance is
running:
 Energy saving mode active. aO perating instructions, Page 1
 Power failure? If r equired, switch on/replace domestic f use.
ʑ... the programme takes
longer than usual:
 Not a fault  unbalanced load dete ction system adjusts
imbalance by repeatedly distributing the washing.
 Not a fault  foam detection system active  rin se cycles are
switched on.
ʑ... detergent residue on
the washing:
 Powder deterg ents occasionally contain water-insoluble residue.
 Select Rinse programme or b rush washing.
 Use liquid detergent.
ʑ... in the reload status
Start/Reload flashes very
quickly and a signal
sounds:
 Water level too high. Imm ediately close washing machine do or.
 Select Start/Reload to continue the programme .
If a fault cannot be rectified by following the above instructions or by switching the machine
off and on, or if a repair is required for a different reaso n:
 Set programme select or to Off and pull out the mains plug.
Turn off the tap and call customer s ervice. aOperating instructions, Page 13
Information on the display panel depending on model
Door open? Close the washing machine door properly; washing may be caught.
Tap closed?
 Turn on tap fully.
 Supply hose kinked/jammed.
 Clean filter. aPage 12
 Water pressure too low.
Top up i-Dos1/i-Dos2 Level i-D os1/i-Dos2 below minimum, top up. aOperating
instructions, Page 12
i-Dos error
Deactivate i-Dos
Set i-Dos1/i-Dos2 to OFF.aOperating instructions, Page 12 , call
customer service. Appliance can c ontinue to be operated with manual
dosage.
Drawer closed? Push in detergent drawer correctly.
Pump blocked?
Filter blocked; clean detergent-solution pump. aPage 12
Drainage hose/outlet pipe blocked; clean drainage hose on the
siphon. aPage 12
Pause no reload;
water level too high
or temperature too high
Washing cannot be reloaded. Selec t Start/Reload to continue the
programme.
Aqua-Stop activated Water in the base pan, appliance lea king. Call customer service!
Other displays
Switch off appliance, wait 5 seconds and switch on again. If the displ ay
is indicated again, call customer se rvice. a
Operating instructions, Page 13
12
What to do if 
Drain pump blocked
Set programme selector to Off, pul l out the mains plug.
1. Open and remove service flap.
2. Take the drainage hose out of t he holder.
Remove sealing cap, allow detergent solutio n to flow out.
Put the closing cap back on the hose.
3. Carefully unscrew the pump co ver (residual water).
4. Clean the interior, pump cover thread and pu mp housing (fan impeller
in the detergent-solution pump must rotate).
5. Reinsert and screw on pump cover. Han dle is upright.
Insert the drain hose into the holder.
6. Insert and close service flap.
To prevent unused detergent from flowing into the outlet d uring the next wash:
Pour 1 litre of water into d ispenser B/Cand start the Empty programme .
Drainage hose on the siphon blocked
Set programme selector to Off, pul l out the mains plug.
1. Loosen hose clip, carefully remove dr ainage hose (residual water).
2. Clean drainage hose and sipho n spigot.
3. Re-attach drainage hose and secure connection point with hose clip.
Filters blocked in water inlet hose
Risk of electric shock!
Do not immerse Aqua-Stop safety devi ce in water (contains electric valve).
First, release water pressure in the supply hose:
1. Turn off the tap!
2. Select any programme (except Spin/E mpty).
3. Select Start/Reload. Leave programme for approx. 40 seconds .
4. Set programme selector to Off. P ull out the mains plug!
5. Clean the filters:
Disconnect the hose from the water tap.
Clean filter with small brush.
and/or for standard and Aqua-Secure m odels:
remove hose from the rear of the appliance.
Take out filter with pliers and clean.
6. Connect the hose and check for leaks.
Risk of scalding!
Allow detergent solution to cool
down.
13
Emergency release
e.g. if power failure occurs
The programme continues running when the power supply is restored. If the washing is still
to be removed, the door can be opened as described below:
Risk of scalding!
Wash liquor and washing may be hot. If r equired, leave to cool down.
Do not reach into the drum in case it is still rotating.
Do not open the door if you can still s ee water through the glass.
1. Set programme selector to Off, pull out the mains plug.
2. Drain detergent solution. aPage 12
3. Pull down emergency release (aarrow) wi th a tool and release.
4. Door can then be opened.
Risk of scalding!
Allow detergent solution to cool do wn.
 Close them ains water tap.
Washing machine
with Intelligent Dosage
System
Contents Page
ʋSafety instructions . . . . . . . . . . . . . . . . . . 1
ʋEnvironmental disposal . . . . . . . . . . . . . . 1
ʋInstallation area . . . . . . . . . . . . . . . . . . . 1
ʋBuilt-under/Built-in appliance . . . . . . . . . 1
ʋScope of delivery . . . . . . . . . . . . . . . . . . 2
ʋHose and cable lengths . . . . . . . . . . . . . 2
ʋRemoving transportation safety device s 3
ʋWater connection . . . . . . . . . . . . . . . . . . 4
ʋAligning the appliance. . . . . . . . . . . . . . . 5
ʋElectrical connection . . . . . . . . . . . . . . . . 5
ʋTransportation, e.g. if moving house . . . . 6
ʋAqua-Stop warranty . . . . . . . . . . . . . . . . . 6
ʋTechnical specifications . . . . . . . . . . . . . 7
ʋCare . . . . . . . . . . . . . . . . . . . . . . . . . . 8/9
ʋWhat to do if ... . . . . . . . . . . . . . . . 10  12
ʋInformation on the display panel . . . . . . 11
ʋEmergency lock release . . . . . . . . . . . . 13
Installation/
Maintenance instructions
What to do if 
Read these instructions before switching on the washing machine!
Also follow the separate operating instructio ns.
Retain all documents for subsequent us e or for the next owner.
en
1
Safety instructions
 The washing machine is heavy  take care when lifting it.
 Warning: Frozen hoses may tear/burst. Do not install the washing machine in an area where
there is a risk of frost or outdoors.
 Do not hold onto protruding parts (e.g. loading door) when lifting. Washing machine may
be damaged.
 Before transporting the appliance, always drain dispensers. aPage 8
 In addition to the safety information listed here, the local water and electricity supplier may
have special requirements.
 If in doubt, have the appliance connected by a technician.
 Lay hoses and cables in such a way that there is no risk of stumbling.
Environmental disposal
 Dispose of packaging in an environmentally friendly manner.
 This appliance has been identified in accordance with the European Directive 2002/96/EG
on Waste Electrical and Electronic Equipment (WEEE).
The Directive specifies the framework for an EU-wide valid return and recycling of waste
appliances.
Installation area
 Stability is important to prevent the machine from moving!
 The installation area must be firm and level.
 Soft floors/floor coverings are not suitable.
If installing the appliance on a base
Always secure the washing machine feet with retention plates *.
* Order no. WMZ 2200, WX 9756, CZ 110600, Z 7080X0
If installing the appliance on a wooden joist ceiling
 If possible, install the washing machine in a corner.
 Screw a water-resistant wooden panel (min. 30 mm thick) to the floor.
Always secure the washing machine feet with retention plates.
* Order no. see above
When installation is on a platform with drawer *
* Order no. WMZ 20460, WZ 20460
Built-under/Built-in appliance
Build-under/Build-in before connection to the power supply.
Installed in between kitchen units (built-under or built-in)
 60 cm cavity width required.
 Install washing machine only under a continuous worktop connected firmly to the adjacent
cupboards.
Built-under
Risk of electric shock!
 Instead of the appliance cover panel, it is essential to have a technician fit a sheet metal
cover *. * Order no. WMZ 2043, WZ 20430
60 cm cavity width required.
2
Scope of delivery depending on model
not included in product package:
When drainage is into a siphon, a Ø 2440 mm hose clip (specialist outlet) is also required.
aWater connection, Page 4
Useful tools:
 Spirit level for aligning the washing machine.
 Size 13 socket wrench:
for loosening the transportation protection devices aPage 3 and
size 17: for aligning the appliance feet. aPage 5
Hose and cable lengths depending on model
Connection on left side or Connection on right side
Note: If the hose holders are used, the possible hose lengths are reduced!
Available from dealer/customer service:
 Extension for Aqua-Stop or cold water inlet hose (approx. 2.50 m).
Order no. WMZ2380, WZ10130, CZ11350, Z7070X0
 Longer supply hose (approx. 2.20 m), for standard model.
Spanner
(depending on model)
Power cord
Water supply
Water drainage
Elbow
for securing the
drainage hose
Covers
with hose holder
Aqua Stop Aqua-Secure Standard
~140 cm
~95 cm
~120 cm
~130 cm
~100 cm
~135 cm
0  max. 100 cm
Humidity in the drum
is caused by the final
inspection.
a
ʑʑʑʑʑʑʑʑaaaaBCʑʑʑʑa
aaaa
3
Remove transportation protection devices
 Before using the appliance for the first time, remove the
4 transportation protection devices completely and keep in a safe
place.
 If the appliance is to be transported at a later date, re-install the
transportation protection devices  prevents damage to the machine.
aPage 6
 Keep screw and sleeve together.
1. Take hoses (depending on model) out of the
holders and the elbow. Remove the elbow.
2. Loosen and remove all 4 transportation lock screws.
3. Take the power cord out of the holders.
Remove sleeves.
4. Insert covers and lock firmly by pressing on the locking hook at the top. Insert hose holder.
5. Secure hoses in the hose holders.
4
Water connection depending on model
Risk of electric shock! Do not immerse Aqua-Stop safety device in water (contains
an electric valve).
 To prevent leakage or water damage, follow the instructions in this chapter!
Caution: The washing machine must only be operated with cold tap water.
 Do not connect to the mixer tap of an unpressurised hot-water apparatus.
 Use only the supplied inlet hose or one purchased from an authorised specialist outlet,
not a used one!
 If in doubt, have the appliance connected by a technician.
Water supply
Water inlet hose:
Caution: do not kink, crush, modify or sever
(strength is no longer guaranteed).
Optimum water pressure in the mains: 1001000 kPa (110 bar)
 When the tap is turned on, the water flow is at least 8l/min.
 If the water pressure is higher, install a pressure reducing valve.
Model: Aqua-Stop
Aqua-Secure
Standard
1. Connect water inlet hose to a 3/4" = 26.4 mm tap.
Caution: Tighten plastic screw-fittings by hand only.
2. Carefully turn on the tap and check that the connection
points are not leaking.
Caution: Screw connection is under water pipe
pressure.
Water drainage
Water drainage hose:
Caution: Do not bend or pull.
Height difference between installation area and outlet:
0  max. 100 cm
 Drainage into a washbasin:
Caution: Secure the drainage hose to prevent it from slipping out of the
sink.
Caution: The plug must not block the drain of the wash basin. When the
water is being pumped out of the washing machine, check that the water
drains away quickly enough. The end of the drainage hose must not be
immersed in the drained water! Risk of water being drawn back into the
washing machine!
 Drainage into a siphon:
Caution: Connection point must be secured with hose clip, Ø 2440 mm
(specialist outlet).
. Drainage into a plastic pipe with rubber sleeve or into a gully:
Caution: Secure the drainage hose to prevent it from slipping out of the
sink.
max.
90°
max.
90°
min.
10 mm
min.
10 mm
3/4
3/4
ʑʑʑʑʑʑʑʑ
aaaaBCʑʑʑʑa
aaaaa
5
Alignment
Loud noise formation, intense vibrations and wandering may be due to incorrect
alignment!
Align washing machine with spirit level
1. Loosen lock nut in a clockwise direction with a wrench.
2. Change height by rotating the appliance feet.
Caution: All four feet must be firmly on the floor.
The washing machine must not wobble!
Check alignment of the washing machine with a spirit level and, if
required, correct.
3. Tighten the lock nut against the housing.
Grip the foot and do not adjust the height.
Caution: The lock nuts on all four appliance feet must be screwed tightly
against the housing!
Electrical connection
ʑConnect the washing machine to an alternating current via a correctly installed
earthed socket only.
ʑThe mains voltage and voltage specifications on the washing machine (appliance
rating plate on the rear of the appliance) must match.
ʑConnected load as well as required fuse are indicated on the appliance rating plate.
ʑEnsure that:
 the mains plug and socket match,
 the cable cross-section is adequate,
 the earthing system has been installed correctly.
ʑA damaged power cord may be replaced by an electrician only.
A replacement mains cable can be obtained from customer service.
ʑDo not use multiple plugs/couplings or extension cables.
ʑIn the event that an earth leakage circuit breaker is to be used, only use types
marked with the following symbol: .
Only this symbol can guarantee compliance with all current regulations.
ʑMains plug:
 Do not insert/pull out with damp hands.
 Do not pull by tugging the power cord.
 Never pull it out during operation.
max. 12 mm
6
Transportation, e.g. if moving house
1. Before transporting the washing machine:
1. Turn off the tap.
2. Drain any residual washing solution. aPage 12
3. Release the water pressure in the supply hose. aPage 12
4. Isolate the washing machine from the power supply.
5. Remove the hoses.
6. Drain dispensers. aPage 8
2. Installing transportation protection devices:
1. Remove covers and keep
in a safe place.
If required, use a
screwdriver.
2. Insert all 4 sleeves.
Clamp mains cable on the
holders. Insert and tighten
the bolts.
3. Before switching on the appliance again,
remove the transportation protection devices! aPage 3
To prevent unused detergent from flowing into the outlet during the first wash: Pour 1 litre of
water into dispenser B/Cand start the Empty programme.
Aqua-Stop warranty For appliances with Aqua-Stop only
In addition to warranty claims against the seller based on the contract of sale and in addition
to our appliance warranty we shall pay damages under the following conditions:
1. If water damage was caused by a fault in our Aqua-Stop system, we shall compensate private
users for damage.
2. The liability warranty applies to the service life of the appliance.
3. A claim can only be made under the warranty if the appliance and Aqua-Stop have been
correctly installed and connected according to our instructions; this also includes a correctly
installed Aqua-Stop extension (original accessory).
Our warranty does not apply to defective supply lines or fittings up to the Aqua-Stop
connection on the tap.
4. Appliances which feature Aqua-Stop can be left unattended during operation and it is not
necessary to turn off the tap afterwards.
The tap should only be turned off if you are away for a prolonged period, e.g. several weeks
holiday.
ʑʑʑʑa
aaaaa ʑʑʑʑʑʑʑʑaaaaBC
7
Technical specifications
ʑDimensions (width x depth x height) 60 x 59 x 85 cm
ʑWeight 63  83 kg depending on model
ʑMains connection Nominal voltage 220  240 V, 50 Hz
Nominal current 10 A
Nominal power 2300 W
ʑWater pressure 100  1000 kPa (1  10 bar)
0510/ 9000550634
*550634*
Manufacturer aOperating instructions
8
Care
ʑMachine housing, control panel
 Remove detergent residue immediately.
 Wipe with a soft, damp cloth.
 Do not clean the appliance with a water jet.
ʑDrum
Use chlorine-free cleaning agent, not steel wool.
ʑDescaling
Not required if detergent dosed correctly. However, if this does occur, follow the instructions
of the descaling agent manufacturer.
ʑi-DOS/i-Dos: Clean the detergent drawer
Drain dispensers:
The dispensers have drainage openings with removable stoppers in the front area.
To drain the dispensers, first remove the drawer handle as illustrated:
1. Open detergent drawer.
2. Pull release lever (A) on the back of the drawer
handle (bottom middle) gently towards yourself
and simultaneously ...
... pull up released drawer handle (B).
3.
4.
To drain the dispensers, carefully remove the respective sealing plug
and drain the contents into a suitable receptacle.
Re-insert sealing plug fully.
Risk of electric shock! Pull out the mains plug.
Risk of explosion! No solvents.
9
Care
Clean dispensers/detergent drawer:
To clean the drained dispensers, the detergent drawer can be completely removed.
1. Drain dispensers before removing them. aPage 8.
Note: Re-attach drawer handle only after cleaning.
2. Open drawer.
3. Press release lever and completely remove drawer.
3. Carefully remove drawer cover.
Do not clean the cover in the dishwasher (contains electrical components) and do not
immerse in water.
Protect rear drawer plug from moisture, detergent or softener residue; if required clean
outer surfaces with a soft, damp cloth. Dry before re-inserting.
4. Clean tray and cover with soft, damp cloth or hand
shower. Clean inner surfaces with a soft, damp cloth.
5. Dry tray and cover and re-assemble.
6. Push on drawer handle from above until it locks
in place.
7. Push in detergent drawer all the way.
Risk of electric shock! Pull out the mains plug.
Risk of explosion! No solvents.
ʑʑaʑaaʑaaaʑʑacaaʑaʑcaaʑʑaaʑʑʑʑ³3BCa
ʑaaʑaʑaʑʑʑaaaaaaaBCaaʋʋʋʋʋʋʋʋʋʋʋʋʋʋʋʋʋ
ʑʑʑʑa
10
What to do if 
ʑ... water runs out:  Correctly attach/replace drainage hose.
 Tighten screw-fitting on the supply hose.
ʑ... no water runs in:  Start/Reload not selected?
 Tap not open?
 Filter blocked? Clean filter. aPage 12
 Supply hose kinked or jammed?
ʑ... dispenser is empty
and fill level display is not
flashing:
 Drawer cover/rear drawer plug dirty? Clean.
aPage 8, 9
 Detergent drawer not inserted correctly?
Insert correctly. aPage 8, 9
ʑ... wrong detergent/
softener has been
poured into dispenser:
 Drain dispensers. aPage 8, clean aPage 9 and refill
dispensers. aOperating instructions, Page 11
ʑ... detergent/softener
congealed in the
dispensers:
 Clean and refill dispensers.
ʑ... the washing machine
door cannot be opened:
 Safety function active. Stop programme? a
Operating instructions, Page 5
Rinse hold c(without final spin) selected? a
Operating instructions, Page 6
 Can be opened via emergency release only? aPage 13
ʑ... programme does not
start:
Start/Reload or end time selected?
 Door closed?
 Childproof lock active? Deactivate. a
Operating instructions, Page 9
ʑ... detergent solution is
not drained:
Rinse hold c(without final spin) selected? a
Operating instructions,Page 6
 Clean detergent-solution pump. aPage 12
 Clean outlet pipe and/or drainage hose.
ʑ... Water not visible in the
drum:
 Not a fault  water below the visible area.
ʑ... spin result not
satisfactory, washing
wet/too damp:
 Not a fault  unbalanced load detection system has stopped the
spin cycle, washing unevenly distributed.
Distribute small and large items of washing in the drum.
Anticrease /Easy-iron selected? a
Operating instructions, Page 6
 Too low speed selected? aOperating instructions, Page 2
ʑ... the programme
duration changes during
the wash cycle:
 Not a fault  the programme sequence is optimised for the
particular wash process. This may result in changes to the
programme duration in the display field.
ʑ... is spun several times:  Not a fault  unbalanced load detection system adjusts
imbalance.
ʑ... odours form in the
washing machine:
 Run Cottons 90 °C programme without washing. To do this, use
a little standard detergent.
ʑ... status display ³3flashes, foam may run
out of the detergent
drawer:
 Too much detergent used? Mix 1 tablespoon of softener with
½ litre of water and pour into manual dispenser B/C(not for
outdoor, sports and down-filled textiles!).
 Reduce detergent dosage for the next wash cycle.
Reduce basic dosage. aOperating instructions, Page 12
11
What to do if 
ʑ... loud noise, vibrations
and wandering occur
during the spin cycle:
 Appliance feet fixed?
Secure appliance feet. aPage 5
 Transportation protection devices removed?
Remove transportation protection devices. aPage 3
ʑ... noises occur during
spin and drain cycles:
 Clean the drain pump. aPage 12
ʑ... display panel/indicator
lights do not function
while the appliance is
running:
 Energy saving mode active. aOperating instructions, Page 1
 Power failure? If required, switch on/replace domestic fuse.
ʑ... the programme takes
longer than usual:
 Not a fault  unbalanced load detection system adjusts
imbalance by repeatedly distributing the washing.
 Not a fault  foam detection system active  rinse cycles are
switched on.
ʑ... detergent residue on
the washing:
 Powder detergents occasionally contain water-insoluble residue.
 Select Rinse programme or brush washing.
 Use liquid detergent.
ʑ... in the reload status
Start/Reload flashes very
quickly and a signal
sounds:
 Water level too high. Immediately close washing machine door.
 Select Start/Reload to continue the programme.
If a fault cannot be rectified by following the above instructions or by switching the machine
off and on, or if a repair is required for a different reason:
 Set programme selector to Off and pull out the mains plug.
Turn off the tap and call customer service. aOperating instructions, Page 13
Information on the display panel depending on model
Door open? Close the washing machine door properly; washing may be caught.
Tap closed?
 Turn on tap fully.
 Supply hose kinked/jammed.
 Clean filter. aPage 12
 Water pressure too low.
Top up i-Dos1/i-Dos2 Level i-Dos1/i-Dos2 below minimum, top up. aOperating
instructions, Page 12
i-Dos error
Deactivate i-Dos
Set i-Dos1/i-Dos2 to OFF.aOperating instructions, Page 12, call
customer service. Appliance can continue to be operated with manual
dosage.
Drawer closed? Push in detergent drawer correctly.
Pump blocked?
Filter blocked; clean detergent-solution pump. aPage 12
Drainage hose/outlet pipe blocked; clean drainage hose on the
siphon. aPage 12
Pause no reload;
water level too high
or temperature too high
Washing cannot be reloaded. Select Start/Reload to continue the
programme.
Aqua-Stop activated Water in the base pan, appliance leaking. Call customer service!
Other displays
Switch off appliance, wait 5 seconds and switch on again. If the display
is indicated again, call customer service. a
Operating instructions, Page 13
BC
aaʋʋʋʋʋʋʋʋʋʋʋʋʋʋʋʋʋ
ʑʑʑʑaʑʑaʑaaʑaaaʑʑacaaʑaʑcaaʑʑaaʑʑʑʑ³3BCaʑaaʑaʑaʑʑʑaaaaaaa
12
What to do if 
Drain pump blocked
Set programme selector to Off, pull out the mains plug.
1. Open and remove service flap.
2. Take the drainage hose out of the holder.
Remove sealing cap, allow detergent solution to flow out.
Put the closing cap back on the hose.
3. Carefully unscrew the pump cover (residual water).
4. Clean the interior, pump cover thread and pump housing (fan impeller
in the detergent-solution pump must rotate).
5. Reinsert and screw on pump cover. Handle is upright.
Insert the drain hose into the holder.
6. Insert and close service flap.
To prevent unused detergent from flowing into the outlet during the next wash:
Pour 1 litre of water into dispenser B/Cand start the Empty programme.
Drainage hose on the siphon blocked
Set programme selector to Off, pull out the mains plug.
1. Loosen hose clip, carefully remove drainage hose (residual water).
2. Clean drainage hose and siphon spigot.
3. Re-attach drainage hose and secure connection point with hose clip.
Filters blocked in water inlet hose
Risk of electric shock!
Do not immerse Aqua-Stop safety device in water (contains electric valve).
First, release water pressure in the supply hose:
1. Turn off the tap!
2. Select any programme (except Spin/Empty).
3. Select Start/Reload. Leave programme for approx. 40 seconds.
4. Set programme selector to Off. Pull out the mains plug!
5. Clean the filters:
Disconnect the hose from the water tap.
Clean filter with small brush.
and/or for standard and Aqua-Secure models:
remove hose from the rear of the appliance.
Take out filter with pliers and clean.
6. Connect the hose and check for leaks.
Risk of scalding!
Allow detergent solution to cool
down.
13
Emergency release
e.g. if power failure occurs
The programme continues running when the power supply is restored. If the washing is still
to be removed, the door can be opened as described below:
Risk of scalding!
Wash liquor and washing may be hot. If required, leave to cool down.
Do not reach into the drum in case it is still rotating.
Do not open the door if you can still see water through the glass.
1. Set programme selector to Off, pull out the mains plug.
2. Drain detergent solution. aPage 12
3. Pull down emergency release (aarrow) with a tool and release.
4. Door can then be opened.
Risk of scalding!
Allow detergent solution to cool down.
 Close the mains water tap.
ʋʋʋʋʋʋʋʋʋʋʋʋʋʋʋʋʋ
ʑʑʑʑaʑʑaʑaaʑaaaʑʑacaaʑaʑcaaʑʑaaʑʑʑʑ³3BCaʑaaʑaʑaʑʑʑaaaaaaaBCaa
Washing machine
with Intelligent Dosage
System
Contents Page
ʋSafety instructions . . . . . . . . . . . . . . . . . . 1
ʋEnvironmental disposal . . . . . . . . . . . . . . 1
ʋInstallation area . . . . . . . . . . . . . . . . . . . 1
ʋBuilt-under/Built-in appliance . . . . . . . . . 1
ʋScope of delivery . . . . . . . . . . . . . . . . . . 2
ʋHose and cable lengths . . . . . . . . . . . . . 2
ʋRemoving transportation safety devices 3
ʋWater connection . . . . . . . . . . . . . . . . . . 4
ʋAligning the appliance. . . . . . . . . . . . . . . 5
ʋElectrical connection . . . . . . . . . . . . . . . . 5
ʋTransportation, e.g. if moving house . . . . 6
ʋAqua-Stop warranty. . . . . . . . . . . . . . . . . 6
ʋTechnical specifications . . . . . . . . . . . . . 7
ʋCare . . . . . . . . . . . . . . . . . . . . . . . . . . 8/9
ʋWhat to do if ... . . . . . . . . . . . . . . . 10  12
ʋInformation on the display panel . . . . . . 11
ʋEmergency lock release . . . . . . . . . . . . 13
Installation/
Maintenance instructions
What to do if 
Read these instructions before switching on the washing machine!
Also follow the separate operating instructions.
Retain all documents for subsequent use or for the next owner.
en

Other manuals for Washing machine

15

Other Siemens Washer manuals

Siemens Family 1650 User manual

Siemens

Siemens Family 1650 User manual

Siemens WM12N270HK User manual

Siemens

Siemens WM12N270HK User manual

Siemens WMH6W649DN Specification sheet

Siemens

Siemens WMH6W649DN Specification sheet

Siemens WM14UQ62EU User manual

Siemens

Siemens WM14UQ62EU User manual

Siemens WM16W79XES Specification sheet

Siemens

Siemens WM16W79XES Specification sheet

Siemens WI12W327ES User manual

Siemens

Siemens WI12W327ES User manual

Siemens WG44G204IL User manual

Siemens

Siemens WG44G204IL User manual

Siemens WM 1065 User manual

Siemens

Siemens WM 1065 User manual

Siemens WM14W790AU Specification sheet

Siemens

Siemens WM14W790AU Specification sheet

Siemens WM14UT60ES User manual

Siemens

Siemens WM14UT60ES User manual

Siemens WM16XK75NL User manual

Siemens

Siemens WM16XK75NL User manual

Siemens WM16XMH9GB User manual

Siemens

Siemens WM16XMH9GB User manual

Siemens WG56B2A1IL User manual

Siemens

Siemens WG56B2A1IL User manual

Siemens WM14VPH9GB User manual

Siemens

Siemens WM14VPH9GB User manual

Siemens WM14UT89GB User manual

Siemens

Siemens WM14UT89GB User manual

Siemens WM12UT62ES User manual

Siemens

Siemens WM12UT62ES User manual

Siemens WM12N281IL User manual

Siemens

Siemens WM12N281IL User manual

Siemens WM14UUA8DN User manual

Siemens

Siemens WM14UUA8DN User manual

Siemens WM14T790HK Specification sheet

Siemens

Siemens WM14T790HK Specification sheet

Siemens WM14US69EP User manual

Siemens

Siemens WM14US69EP User manual

Siemens Washing machine User manual

Siemens

Siemens Washing machine User manual

Siemens WM14NKG1 User manual

Siemens

Siemens WM14NKG1 User manual

Siemens WM14VGH9GR User manual

Siemens

Siemens WM14VGH9GR User manual

Siemens WAU28S42ES User manual

Siemens

Siemens WAU28S42ES User manual

Popular Washer manuals by other brands

Zanussi ZWH3105 user manual

Zanussi

Zanussi ZWH3105 user manual

Samsung WW80T534ATW/S2 user manual

Samsung

Samsung WW80T534ATW/S2 user manual

Miele WWH 860 operating instructions

Miele

Miele WWH 860 operating instructions

Euro-saime SAIVOD TOP LINE 803 Instructions for use

Euro-saime

Euro-saime SAIVOD TOP LINE 803 Instructions for use

LG SWW 50 Series owner's manual

LG

LG SWW 50 Series owner's manual

AEG L8FEA70690 user manual

AEG

AEG L8FEA70690 user manual

Seiki SC-1000AU9FLIN instruction manual

Seiki

Seiki SC-1000AU9FLIN instruction manual

Whirlpool AWO/D 049 Instructions for use

Whirlpool

Whirlpool AWO/D 049 Instructions for use

LG WT30VTS6 owner's manual

LG

LG WT30VTS6 owner's manual

Westinghouse WWF1044M7WA user manual

Westinghouse

Westinghouse WWF1044M7WA user manual

AEG Electrolux LAVAMAT 76825 User information

AEG Electrolux

AEG Electrolux LAVAMAT 76825 User information

Whirlpool LSW9245EQ0 Use and care guide

Whirlpool

Whirlpool LSW9245EQ0 Use and care guide

Fisher & Paykel Intuitive ECO IWL12 Installation instructions and user guide

Fisher & Paykel

Fisher & Paykel Intuitive ECO IWL12 Installation instructions and user guide

Whirlpool lA56OOXT Use & care guide

Whirlpool

Whirlpool lA56OOXT Use & care guide

Indesit IWC 61281 Instructions for use

Indesit

Indesit IWC 61281 Instructions for use

AEG Lavamat 693 sensotronic operating instructions

AEG

AEG Lavamat 693 sensotronic operating instructions

Ariston AV 102 Instructions for use

Ariston

Ariston AV 102 Instructions for use

Samsung WA13G2Q1 user manual

Samsung

Samsung WA13G2Q1 user manual

manuals.online logo
manuals.online logoBrands
  • About & Mission
  • Contact us
  • Privacy Policy
  • Terms and Conditions

Copyright 2025 Manuals.Online. All Rights Reserved.