Signi Fires BF023 User manual

1
Slimline Burner Manual

2
Operating Manual
Thank you for purchasing this Icon Fires Burner. Icon Fires is very safety conscious and
we have taken every care in designing, manufacturing and assembling your Icon
Fires Burner to ensure it operates effectively, efficiently and safely. In return we ask
that you exercise care when using this product and follow the instructions below.
Before using your Icon Fires burner, please read all the information contained in this
operation manual carefully. Icon Fires cannot be held responsible for any damage
or injury caused if these instructions are not followed.
IMPORTANT SAFEGUARDS
Read all instructions and warnings before using this fireplace.
WARNING
DO NOT OVERFILL THE BURNER’S INTENDED CAPACITY.
DO NOT INSTALL INTO AN AREA WHERE THERE IS A DRAFT WHICH CAN AFFECT THE
FLAME. ESPECIALLY WHEN INSTALLING IN OLD HEARTHS, MAKE SURE HEARTH IS
SEALED.
USE ONLY THE FUEL FOR WHICH THE SLIMLINE BURNER IS INTENDED.
DO NOT TOUCH THE EXTERIOR OF THE SLIMLINE BURNER DURING OR AFTER BURNING.
PARTS OF THIS SLIMLINE BURNER CAN REACH HIGH TEMPERATURES.
DO NOT HAVE COMBUSTIBLE OBJECTS IN CLOSE PROXIMITY TO THE BURNER.
NEVER POSITION THE BURNER WITHIN RANGE OF COMBUSTIBLE ITEMS THAT CAN BE
MOVED/BUMPED BY ACCIDENT, OR BLOWN BY THE WIND. e.g CURTAINS & BLANKETS
ONLY USE THE SLIMLINE BURNER IN AREAS WITH GOOD VENTILATION.
DO NOT COVER THE SLIMLINE BURNER VENT WITH ANY DECORATIVE ITEMS WHETHER
THEY ARE COMBUSTIBLE OR NON COMBUSTIBLE , INCLUDING BUT NOT LIMITED TO
ARTIFICIAL LOGS, STONES, PEBBLES, GLASS BEADS etc.
CAUTION
Make sure you have read and understood this manual before using this product.
Do not overfill or spill fuel when refilling.
If fuel is spilled, wipe with a dry cloth and allow the rest to evaporate before
introducing a flame to the burner.
If the burner is accidentally overfilled, follow the steps given in these next pages.
To refill, wait until the burner is at the room temperature after the flame has been
turned off. NOTE: the flame may not be visible to the naked eye in daylight.
Never refill over or near an open flame.
Use the supplied funnel or pump to refill.
Remove all plastic & packaging before using the burner.
3
Trouble shooting and operating tips:
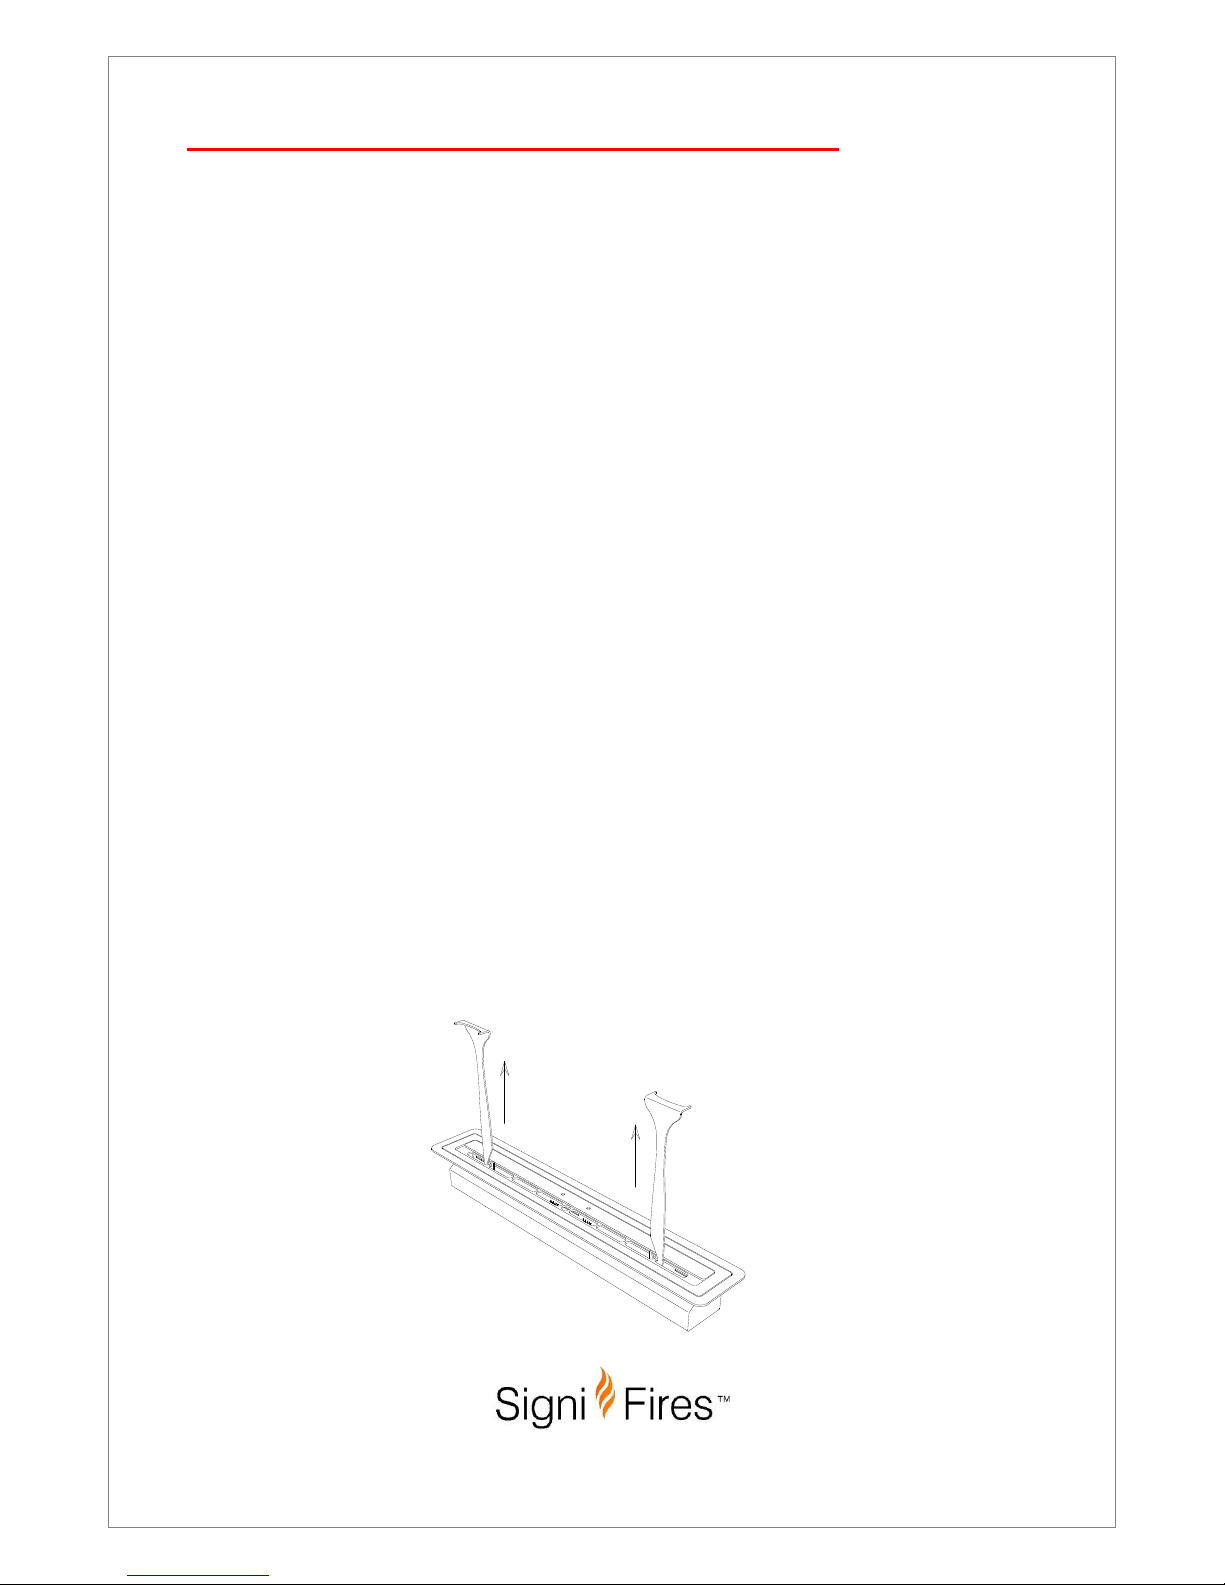
The hooks on the back of the Sliding Lid Handle can be used to carry the Slimline Burner
by hooking it around the slotted openings in the Vent Plate as shown in the image
below.
The first fill will take longer as the material inside the Fuel Tank will absorb the fuel.
Subsequent filling should be quicker. Take care to not fill the burner at a faster rate than
what the material inside can absorb the fuel.
If the fire does not extinguish the first time by closing the Sliding Lid follow these steps and
repeat if necessary.
oCheck that the surface below the sliding plate is clean and free from
obstruction.
oApply strong downward force and in one quick motion move the sliding plate
towards the closed position. If the flame is still visible repeat this step as a
double motion still applying strong downward force in quick succession.
Never blow on the flame whilst the Sliding Lid is in an open position.
If your Slimline Burner does not ignite after it has been closed overnight pour a small
amount of fuel across the length of the Burner Vent with the supplied plastic bottle and
introduce the flame. This should then ignite the stagnant fuel inside the Fuel Tank.
VERY IMPORTANT: Take special care when adding fuel to the Slimline Burner, always
close the Sliding Lid for a few minutes before adding fuel to make sure there is no visible
flame in the Burner Vent.
If after some time you find the Sliding Lid has become ‘sticky’ when attempting to move
it then remove the Sliding Lid from its housing and rub the underside using the green side
of a Scotch Bright scouring pad. Take care to only scrub in the direction of the brushing
lines of the stainless steel.
Make sure you keep your burner clean especially the surface that the Sliding Lid slides on
and ensure that any excess fuel on the surface of the burner is wiped off before use.

4
CONTENT OF PACKAGING:
Burner Body - qty 1
Slider - qty 1 (2 of for 1400 Burner)
Sliding Lid Handle - qty 2 (1 of 500 Burner)
Battery operated Fuel Pump - qty 1
Plastic Bottle 500ml - qty 1
MAKE SURE THE FIREPLACE HAS COOLED OFF COMPLETELY BEFORE CLEANING:
To clean dust, wipe with a dry cloth or sponge.
To clean stainless steel parts, use bio-ethanol or stainless steel cleaning products.
Make sure the Sliding Lid for the Slimline Burner slides correctly and fully after cleaning and
that any excess cleaning product has been wiped off completely.
KEEP HANDY A CLASS B FIRE EXTINGUISHER:
Class B fire extinguishers are used to put out fires that are caused by combustible liquids. Class B fire
extinguishers quell the flames by expelling a dry chemical powder or foam with a nitrogen propellant.
The specific chemical can vary depending on the make or model. Water will not extinguish this flame.
PROCEDURE IF BURNER IS OVERFILLED:
In case of accidental overfilling of the fuel tank, follow these steps:
NEVER light the Slimline burner if it is filled past the filling line by more than 15mm, shown
in the section of Filling the Slimline Burner.
Remove the Slimline Burner from its housing, using the hooks on the back end of the
Sliding Lid Handle or rubber gloves.
Empty the excess fuel into a container, kitchen sink or toilet bowl.
Wipe off all excess fuel that may have dripped on the outside of the Slimline Burner
during emptying and allow any residual fuel to evaporate. Leave for 1 hour.
Place the Slimline Burner back into its housing.
Ignite the Slimline Burner only once all residual fuel outside the burner has completely
evaporated and the container used to fill the burner has been sealed and moved to a
safe distance from the burner.
USE CORRECT FUEL - COMMERCIAL NAMES:
Australia, India, New Zealand, South Africa, Germany, United Kingdom, USA & Canada, France: Bio-
Ethanol - Denatured Alcohol, Holland: Spiritus - Brand Spritus, Italy: Alcool Denaturo - Spirito de Brucaire,
Japan: Nen-ryo yoh, Scandinavia: T-Sprit - Rod Sprit - Denaturoitu Sprii - Sinol - Marinol, Spain: Alcohol
Metalico - Alcohol de Quemar, Switzerland: Brennsprit, Turkey: Ispirto.
5
Slimline Burner Range
The following information is provided to assist in understanding how each model
within our collection can be incorporated into your desired settings. It is intended as
a guide only and it is important that you read the detailed Model Specification of
the model you are interested in before ordering, specifying, installing or operating
the fire.
Model
No.
Dimensions in
mm (L x W x H)
Approx.
Fuel
Capacity
Material
Heats On
Average
Minimum
Room
Area
Thermal
Output
Net
Burning
Time On
*Average
Consumption
*Average
BF023
500x100x100
2.75 ℓ
Brushed
304 SS
up to 90 m³
40 m³
2.5
kW/hr
6-9 hrs
0.30 ℓ/hr
BF024
800x100x100
4.50 ℓ
Brushed
304 SS
up to 165
m³
70 m³
5.0
kW/hr
5.5-8.5
hrs
0.60 ℓ/hr
BF025
1100x125x100
6.25 ℓ
Brushed
304 SS
up to 210
m³
90 m³
7.25
kW/hr
6.5-9 hrs
0.90 ℓ/hr
BF026
1400x125x100
8.15 ℓ
Brushed
304 SS
up to 270
m³
110 m³
9.5
kW/hr
7-9.5 hrs
0.90 ℓ/hr
*Average consumption and burn time are based on mixed settings of maximum and moderate output. These burn
times and consumption rates may vary depending on room characteristics.
Accompanying Accessories
Model No.
Burner & Lid
Plastic fuel
bottle
Fuel Pump
Handles
Instruction
Manual
BF023
yes
yes
yes
yes
yes
BF024
yes
yes
yes
yes
yes
BF025
yes
yes
yes
yes
yes
BF026
yes
yes
yes
yes
yes

6
Top View - 500 Slimline
Top View - 800 Slimline
Top View - 1100 Slimline
Top View - 1400 Slimline
500
100
100
800
1100
125
1400
125
Read manual before use
Do not overfill or spill
Do not refill when hot
Never refill over open flame
Use a funnel or pump to fill Signi Fires™
Read manual before use
Do not overfill or spill
Do not refill when hot
Never refill over open flame
Use a funnel or pump to fill Signi Fires™
Read manual before use
Do not overfill or spill
Do not refill when hot
Never refill over open flame
Use a funnel or pump to fill Signi Fires™
Read manual before use
Do not overfill or spill
Do not refill when hot
Never refill over open flame
Use a funnel or pump to fill
Read manual before use
Do not overfill or spill
Do not refill when hot
Never refill over open flame
Use a funnel or pump to fill
Signi Fires™Signi Fires™
NOTE: There are many different variations available for installing the Burner Range. In
all cases, the Slimline Burner must:
Installed into non-combustible material ONLY;
All gas connections or pipelines near your new Burner installation must be
disconnected and made safe by an appropriately qualified professional prior to
installation;
Installed into a fixed, level and secure position before filling, lighting and
operating;
Installed in a position that limits relocation requirements to eliminate the risk of
accidents caused by fuel spillage. These burners are not designed to be
relocated frequently;
Installed into a level platform;
Not installed directly beside or near wallpaper, laminate, veneer or any surface
that has not been fire rated and considered combustible.
A minimum of 1000mm radius to any combustible material.
Not be within the reach of any objects that are not fixed in position and can be
moved by the wind or bumped over easily i.e. curtains, blankets, newspapers
etc.

7
Installation - Standard Mount Plate
A
B
D
E
D
FG
I
H
E
C
K
J
Standard Mount Plate - Sizes
Model No.
Cut out
Length - A
Cut out
Width - B
Cut out
Depth - C
Mount Plate
Length - K
Mount Plate
Width - J
BF023
530 mm
130 mm
110 mm
545 mm
145 mm
BF024
830 mm
130 mm
110 mm
845 mm
145 mm
BF025
1130 mm
155 mm
110 mm
1145 mm
170 mm
BF026
1430 mm
155 mm
110 mm
1445 mm
170 mm
Standard Mount Plate - Clearances
Model
No.
Distance to
Non -
Combustibl
e Items - D
(Front)
Distance
to Non -
Combustib
le Items - F
(Back)
Distance
to Non -
Combustib
le Items - G
Height
Above Cut
out to Non
-
Combustib
le Items
Distance
to
Combustib
le Items - E
(Front)
Distance
to
Combustib
le Items - H
(Back)
Distance
to
Combustib
le Items - I
Height
Above Cut
out to
Combustib
le Items
BF023
500 mm
500 mm
500 mm
1550 mm
500 mm
500 mm
500 mm
1550 mm
BF024
500 mm
500 mm
500 mm
1550 mm
500 mm
500 mm
500 mm
1550 mm
BF025
500 mm
500 mm
500 mm
1550 mm
500 mm
500 mm
500 mm
1550 mm
BF026
500 mm
500 mm
500 mm
1550 mm
500 mm
500 mm
500 mm
1550 mm

8
Installation - Adapter Mount Plate
F
H
G
I
AD
E
D
E
C
B
K
J
Adapter Mount Plate - Sizes
Model No.
Cut out Length -
A
Cut out Width -
B
Cut out
Depth - C
Mount Plate
Length - K
Mount Plate
Width - J
500
598 mm
233 mm
110 mm
610 mm
245 mm
800
898 mm
233 mm
110 mm
910 mm
245 mm
1100
n/a
n/a
n/a
n/a
n/a
1400
n/a
n/a
n/a
n/a
n/a
Adapter Mount Plate - Clearances
Model
No.
Distance to
Non -
Combustible
Items - D
(Front)
Distance to
Non -
Combustible
Items - F
(Back)
Distance to
Non -
Combustible
Items - G
Height
Above Cut
out to Non -
Combustible
Items
Distance to
Combustible
Items - E
(Front)
Distance to
Combustible
Items - H
(Back)
Distance to
Combustible
Items - I
Height
Above Cut
out to
Combustible
Items
500
500 mm
500 mm
500 mm
1550 mm
500 mm
500 mm
500 mm
1550 mm
800
500 mm
500 mm
500 mm
1550 mm
500 mm
500 mm
500 mm
1550 mm
1100
500 mm
500 mm
500 mm
1550 mm
500 mm
500 mm
500 mm
1550 mm
1400
500 mm
500 mm
500 mm
1550 mm
500 mm
500 mm
500 mm
1550 mm
9
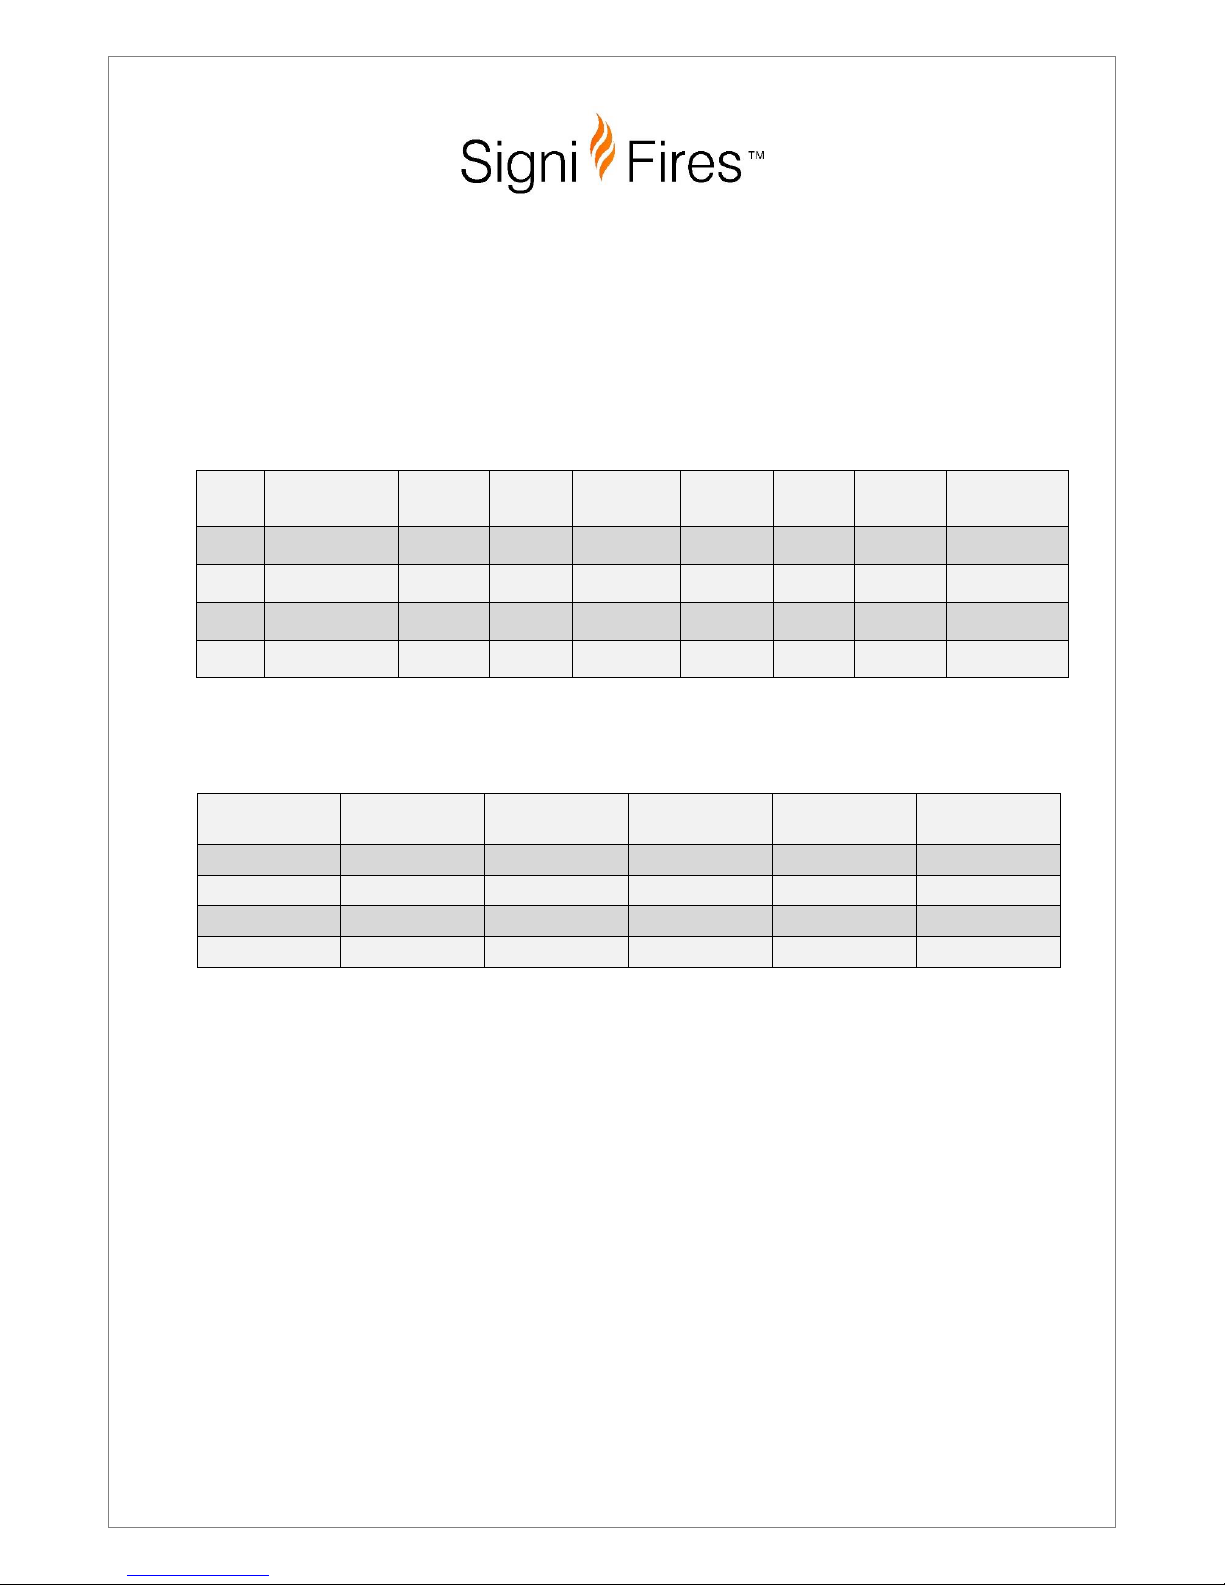
1 - Filling the Slimline Burner
Filling Line
Top Plate
Top Plate Sliding Lid
Burner Vent
Mount Plate
Filling Line
Fuel Tank
Handle Hole
Vent Plate
Filling Line
Fill the Slimline Burner Fuel Tank to the Fill Line until the fuel becomes visible at the bottom of
the Burner Vent. Fill using the Fuel Pump supplied or a funnel that fits in the centre hole of the
Vent Plate. DO NOT OVERFILL
Please wipe any spillage or excess fuel before proceeding to Step 2.
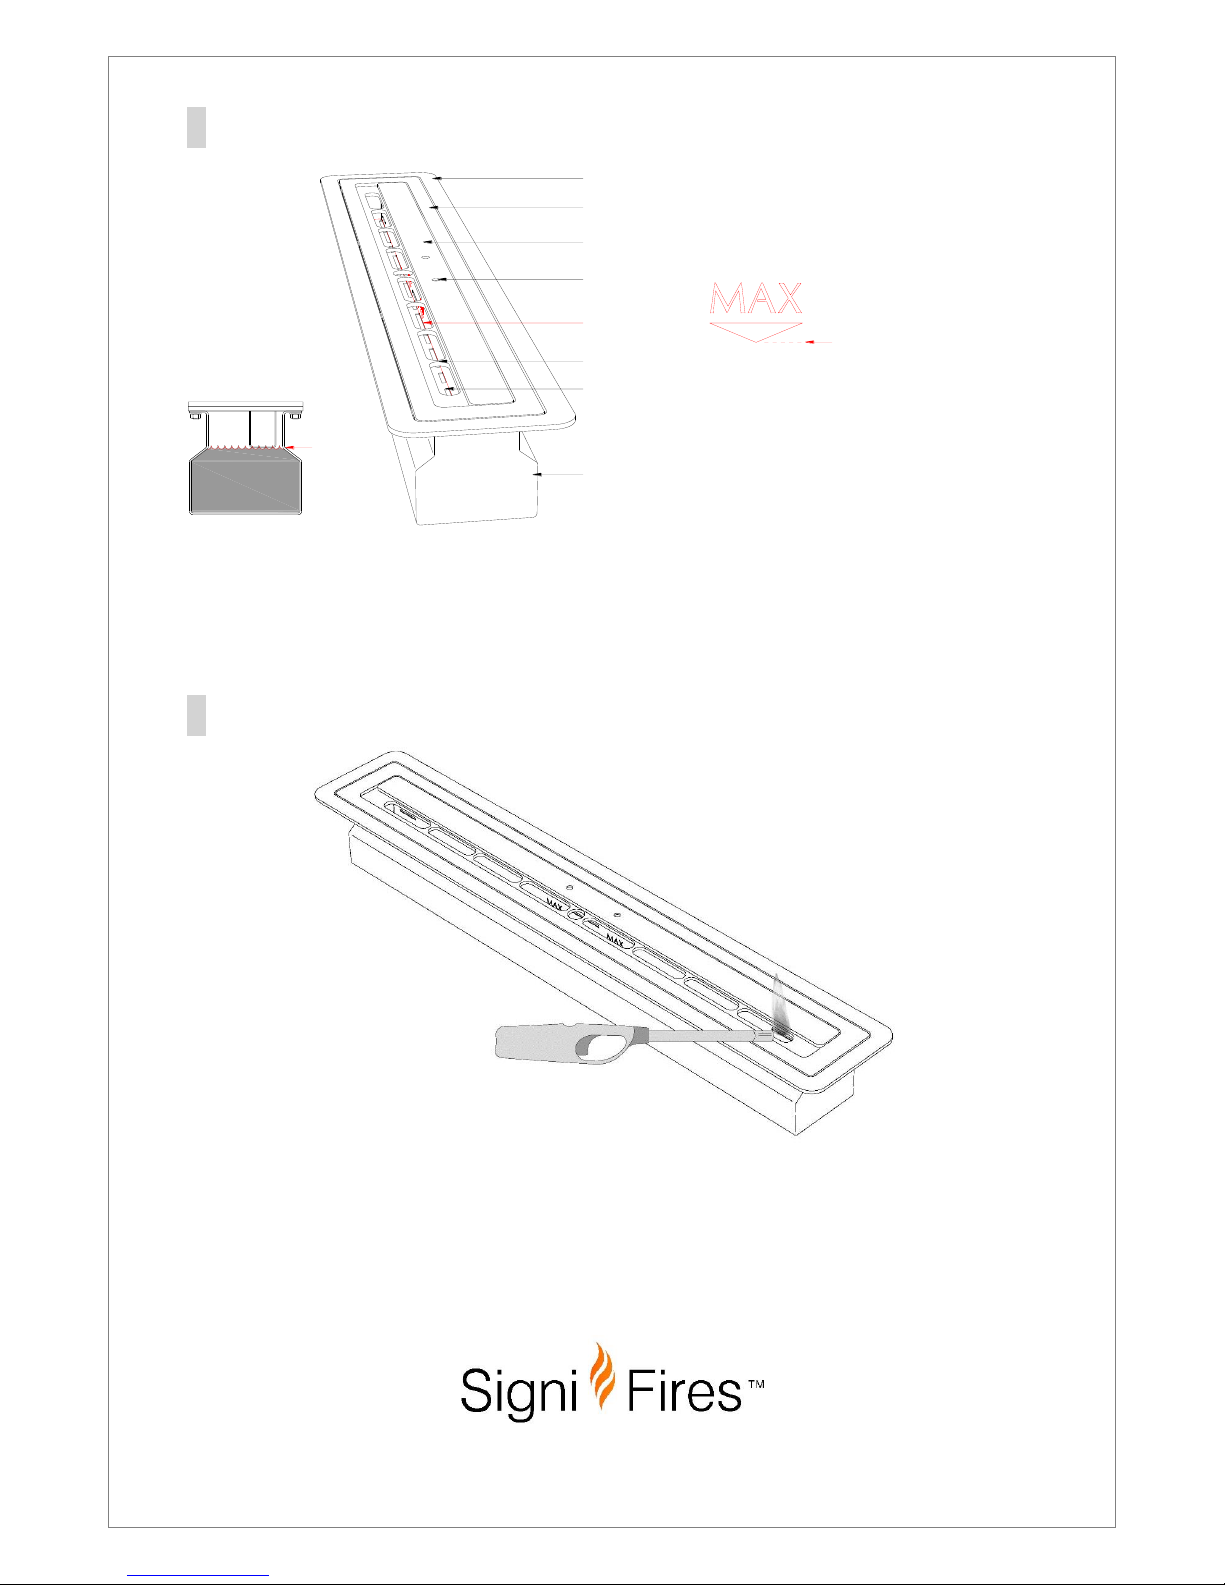
2 - Igniting the Slimline Burner
Seal the fuel canister used to fill the Burner and move to a safe distance away from the
Burner. While standing at arm's length away from the Burner, use a long arm lighter as per the
image above to introduce a flame to the openings in the Vent Plate. If the Burner has fuel in
the reservoir but is not igniting, close the Sliding Lid for 5 minutes then open the Sliding Lid.
Ensure there are no flames visible within the burner vent opening, then pour a small amount
of fuel across the length of the Burner Vent with the supplied plastic bottle and introduce the
flame. This normally happens when the burner has been closed for a day or more.

10
3 - Adjusting the Flame Size
The flame intensity is adjusted by inserting the Sliding Lid Handle’s tip into the corresponding
holes in the Top Plate Sliding Lid as indicated above. Note the flame intensity takes a few
minutes to change after an adjustment has been made.
4 - Extinguishing the Flame
Using the Sliding Lid Handle, pull the Sliding Lid to the front / closed position. Should the flame
not extinguish with the first try please repeat until extinguished. It should be a swift action
coupled with downward pressure.

11
Signi Fires warranty Terms and Conditions:
1. All warranty claims are subject to manufacturer’s review and acceptance.
2. Signi Fires warrants that it uses reasonable care and skill to ensure that its products
are of reasonable quality. Signi Fires will at it's cost and in it's sole discretion: (i)
remedy any defect or fault in any product purchased; or (ii) replace any product in
respect of which there is a defect or fault, during the warranty period, provided that
written notice is given by the Purchaser to Signi Fires of any such defect or fault in the
product as soon as the Purchaser becomes aware of that fault or defect. All
warranty claims must be returned to Signi Fires for assessment with a receipt or other
proof of payment. No warranty is given in respect of any glass contained in any
product.
3. Signi Fires has no liability to remedy any defect in a product or replace a
product where the defect or fault is caused or contributed to by (i) the failure of the
Purchaser to install the product according to specific installation instructions either
supplied within each product box or carton or available on the Signi Fires website or
through the retailer representative; or (ii) use of the product in a manner or for a
purpose for which it was not designed.
4. All site application or installation must reflect these procedures otherwise the
product warranty will be considered void or will not take effect.
All products bearing the logo of Signi Fires logo is covered by a 1
year warranty.
IMPORTANT:
Stone chipping, painting scratches and general scratches are not covered by the
Warranty.
Due to the characteristics of Stainless Steel, over time the finish will mature through
natural processes associated with the use with heat and a flame.
Is it recommended the Stainless Steel Components be polished annually with a
non abrasive polish to bring & restore the finish and also to regularly clean the
products from residue and dirt.

12
QC Checklist
Components
Handles 2 of (500 Burner only 1 of)..……………...
Fuel bottle 1 of…………..........................................
Slider 1 of (1400 burner 2 of)……………………….
Manual 1 of……………………………………………
Pump 1 of……………………………………………...
Burner body 1 of……………………………………..
Checked by………………………………………….
www.signifires.com
This manual suits for next models
3
Table of contents
Popular Burner manuals by other brands

Riello
Riello RDB 2.2 BX 12 - 18 DGT Installation, use and maintenance instructions

Empire Comfort Systems
Empire Comfort Systems BFR2124RN Installation instructions and owner's manual

Jetmaster
Jetmaster Federation 300 Type 1 installation instructions

Riello
Riello ENNE 1400 Installation, use and maintenance instructions

Grand Canyon Gas Logs
Grand Canyon Gas Logs MVKE I KN quick start guide

elco
elco N6 G-E/BT3 Series Schematic diagrams


