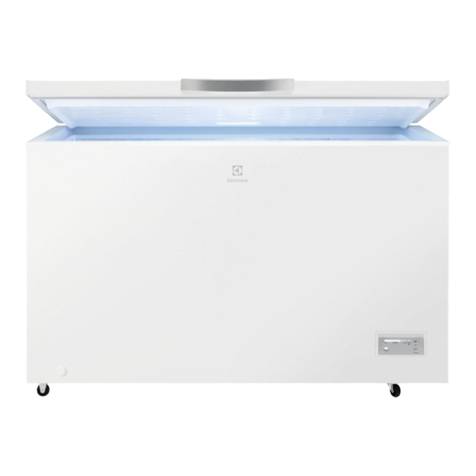
SIGURO SGR-UF-D310W Operating instructions

SGR-UF-D310W
SGR-UF-D310S
Upright freezer
Upright freezer
Simfer Gefrierschrank
Šuplíkový mrazák
Skriňová mraznička
Fiókos fagyasztószekrény
EN Translation of the operating instructions from the original language.
DE Übersetzung der Bedienungsanleitung aus der Originalsprache.
CZ Návodkpoužitívoriginálnímjazyce.
SK Prekladnávodunapoužitiezoriginálnehojazyka.
HU Ahasználatiutasításfordításaeredetinyelvről.

ENGLISH 4
Safety information 4
Transport 8
Before use 8
Use 10
Cleaning and maintenance 12
Troubleshooting 14
Choosing door hinge side 15
DEUTSCH 23
Sicherheitshinweise 23
Transport 27
Vorbereitung vor der verwendung 27
Verwendung 29
Reinigung und wartung 32
Problemlösung 34
Änderung der öffnungsrichtung der tür 36
ČESKY 43
Bezpečnostní informace 43
Přeprava 47
Příprava před použitím 47
Použití 49
Čištění a údržba 51
Řešení problémů 53
Otočení směru otevírání dvířek 54
SLOVENSKY 62
Bezpečnostné informácie 62
Preprava 66
Príprava pred použitím 66
Použitie 68
Čistenie aúdržba 71
Riešenie problémov 72
Otočenie smeru otvárania dvierok 74
MAGYAR 81
Biztonsági információk 81
Szállítás 85
Előkészület ahasználathoz 85
Használat 87
Tisztítás és karbantartás 90
Problémamegoldás 91
Az ajtónyitás irányának amegváltoztatása 93

1
5
2
4
3
6 7 8 9 10

EN
EN - 4
Thank you for purchasing aSIGURO appliance. We thank you for
your trust and are proud to introduce on the following pages the
device, its functions and uses.
We believe in afair and responsible company, and therefore we only work
with suppliers who meet our strict criteria to protect the interests of employ-
ees, prevent their abuse and fair working conditions.
If you need help with extensive maintenance or repair of the product’sinter-
nal workings, contact the vendor’shelpline or our authorized service center
at siguro@alza.cz. For your convenience in solving any problems with the
product, we have unied these contact points and the above contacts can
be used in the event of any complaints or post-warranty service.
SAFETY INFORMATION
Please read this manual carefully before
use and keep it for future reference.
1. Children aged at least 8, persons with physical, sensory or mental
impairment, and the untrained or inexperienced may use this appliance
with instruction or supervision in its safe use, provided they understand
the potential dangers.
2. Children must not play with the device.
3. Cleaning and user maintenance should never be performed by
unsupervised children.
4. If the power cord is damaged, it must be replaced by the manufacturer,
its service agent or similarly qualied persons in order to avoid
adangerous situation.
WARNING: RISK OF FIRE!
5. Children aged 3 to 8 may store food in and remove it from the appliance.
6. WARNING: Always keep clear all vents found on the appliance body and
frame.
7. WARNING: Do not use mechanical devices or means other than those
recommended by the manufacturer to speed up the defrosting process.
8. WARNING: Do not damage the cooling circuit.
9. WARNING: Do not operate electrical appliances inside the food storage
compartment, except those cleared for such use by the manufacturer.
10. Do not store potentially explosive substances, such as ammable-
propellant sprays, in the appliance.
11. This appliance is designed for home and light commercial use, including:
ENGLISH

EN
EN - 4 EN - 5
ENGLISH
‐ kitchenettes in stores, ofces and other workplaces;
‐ guest use in hotels, motels and other residential environments;
‐ bed & breakfast establishments;
‐ workplace cantinas and similar non-commercial uses.
12. This appliance is designed as free-standing. It is not designed for built-in
or mounted use.
13. For safe food storage, always follow the instructions in this manual when
using the appliance.
14. Follow these recommendations to avoid contamination of stored food:
‐ Leaving the door open for long periods of time can signicantly warm
the storage compartment.
‐ Clean food contact surfaces and accessible drainage systems regularly.
‐ Clean water containers that have not been used for 48 hours or longer.
Flush the appliance’swater circuit when the water supply has been
dry or disconnected for 5 days or longer.
‐ Store raw meat and sh in the refrigerator in suitable containers, so
that they do not come into contact with or drip on other foods.
‐ Freezer spaces rated two stars are suitable for storing pre-frozen food,
storing and making ice cream, and making ice cubes.
‐ Spaces rated three stars or less are not suitable for freezing fresh food.
‐ Before prolonged disuse, turn off, defrost, clean and dry the appliance,
then leave the door open to prevent mold from forming inside.
15. WARNING: Place the appliance so as to keep the power cord from
snagging or otherwise becoming damaged.
16. WARNING: Do not keep multi-plug sockets or extension cords
immediately behind the appliance.
17. WARNING: Any servicing or repair involving the removal of the outer
shroud is dangerous when not performed by aqualied technician. To
avoid electrocution, do not attempt to repair the appliance yourself.
18. Volatile liquids and gases may leak from their containers in low
temperatures.
19. Never place carbonated drinks, bottled or canned, in the freezer.
20. Ice cream can cause frostbite if consumed immediately upon removal
from afreezer. It is recommended to let it thaw for at least 5 minutes.
21. Touching food in afreezer with wet hands may cause frostbite, or your
hands might freeze-stick to the food, damaging your skin on removal.
22. Keep children away from the appliance’scontrols.
23. The appliance is heavy. Take extra care when handling it. Ideally get
asecond person to help you.
24. Modifying the appliance in any way is dangerous.
25. The LED lighting in the food compartment may only be replaced by an
authorized service technician. Never replace the light yourself.
26. WARNING: Cooling appliances, particularly class-Icombined cooler-
freezers, may not work properly (the temperature in the frozen food
compartment may rise above freezing) when exterior temperatures
remain below the lower limit of the appliance’soperating temperature
range for prolonged periods.
27. WARNING: If the door or lid is equipped with alock, the keys to the lock

EN
EN - 6
must be kept away from children and away from the appliance, to avoid
the risk of children locking themselves in.
28. WARNING: The coolant and insulation materials used in this appliance
require special disposal procedures.
Electrical Connection
This appliance may only be powered from properly grounded mains outlets supply-
ing 220–240 V~ 50 Hz. Before plugging the appliance in, make sure the outlet voltage
matches the values specied on the appliance rating plate.
This appliance may be used with avoltage converter.
The power cord should be routed behind the appliance. It should be out of the way
and laid on the oor to prevent accidents.
Do not unplug the appliance by pulling on the power cord. Pull on the plug instead.
Avoid using extension cords; these may degrade the appliance’sperformance. If the
supplied power cord is too short for your needs, it is best to have amains socket in-
stalled closer to it (by aprofessional electrician).
Climate class
The appliance’sclimate class is indicated on its rating plate. The climate class deter-
mines the ambient temperatures in which the appliance was designed to operate.
Climate class Ambient temperature range
SN 10– 32 °C (50– 90 °F)
N16– 32 °C (60– 90 °F)
ST 16– 38 °C (60– 110 °F)
T16– 43 °C (60– 110 °F)
Note:
The appliance’sinterior temperature setting should be adapted to the
climate class, ambient temperature, opening frequency, etc.
Operating the appliance in conditions outside its rated climate class may degrade its
performance.
Lock
If the door or lid is equipped with alock, the keys to the lock must be kept away from
children and away from the appliance, to avoid the risk of children locking themselves
in.
When disposing of the appliance, destroy the lock to prevent its further use.
R600a Refrigerant
The R600a refrigerant and cyclopentane insulation used in this appliance are safe
for the enviornment and the ozone layer, and have minimal global warming impacts.
However, R600a is aammable substance. When transporting, installing or otherwise
handling the appliance, take care not to damage the cooling circuit, to prevent liquid
or gaseous refrigerant leaks. In the event the cooling circuit is damaged and liquid or
gaseous refrigerant leaks into the environment, immediately douse any open ame in
the area and open all available windows.
Appliances containing refrigerants require professional, environmentally safe disposal.
Improper disposal may cause injury, re, or other hazardous situations. Refrigerants

EN
EN - 6 EN - 7
may only be handled by qualied personnel certied to do so. Before disposal, check
the cooling circuit for potential damage.

EN
EN - 8
1 Control panel
2 Dual freezer cover plates
3 Trays
4 Adjustable feet
5 Door
6 Temperature units indicator
7 Open door warning light
8 Temperature indicators
9 Quick Freeze indicator
10 SET temperature button
Not pictured: ice maker
3
TRANSPORT
The appliance must always be transported upright. The packaging is meant to pro-
tect the appliance in transit; avoid damaging it during transport.
If there is no choice but to transport the appliance on its side, place it so that the door
cannot open, to prevent damage to it. Restore the appliance to upright position as
soon as possible. After spending time horizontal, the appliance must remain upright
for at least 4 hours before being plugged in, to give the refrigerant time to settle. Fail-
ing to do so risks permanent damage to the appliance, as well as ahazardous operat-
ing situation.
The appliance is heavy; we recommend at least two people handle it. Avoid carrying
the appliance by the upper frame, the door, etc.
BEFORE USE
Unpacking
Carefully unpack the appliance and remove any tape, stickers, foil, etc.
Selecting aSpot
Place the appliance on ahard, level surface within reach of the mains socket. To avoid
excess noise and vibration, do not install on carpets, rugs or similar ooring.
The appliance is designed for domestic, indoor use. Do not install outside or in any
spot exposed to rain, snow, moisture or other weather effects.
If necessary, level the appliance using its adjustable feet. Screw the feet in or out to
change their height. Leveling the appliance properly is important in preventing excess
noise and vibration.
The room in which the appliance is installed should have avolume such that, when
the refrigerant mass in the appliance is divided by this volume, the result is less than
8 g / m³ (0.008 oz / cu ft).
The refrigerant mass is specied on the appliance rating plate.
Provide adequate space for air to circulate around the appliance: at least 30 mm (6/5
in) above, at least 100 mm (4 in) to the sides, and at least 50 mm (2 in) behind.

EN
EN - 8 EN - 9
Dimensions (millimeters)
Width Depth Height A BC (°) E F
540 590 1443 890 1096 125 50 100
w
'
Note:
The diagram to the right shows the space the appliance requires, for
either possible position of the door hinges.
Do not place the appliance near stoves, heaters, or other heat sources. Avoid exposing
the appliance to direct sunlight.
Do not install in damp or dusty rooms. Do not cover the vents.
The appliance may interfere with radio and television signal reception; avoid this by
placing it at asufcient distance from such receivers.
When selecting the spot:
• The appliance must be free-standing. It is not intended for cabinet or column
mounting (i.e., mounting above or under another appliance).
• Lay the power cord so as to avoid snagging, tangling, or other damage or
deformation.
When installed in unheated spaces (e.g. garage), water may condense on the outer
surface of the appliance in low temperatures. This is normal behavior. Wipe the con-
densate away with adry towel.
Cleaning Before Use
Before rst use and after prolonged disuse, clean the food compartment and its trays
with water, either pure or with some white vinegar. Do not use detergents, solvents,
hydrocarbon cleaners, etc. These might irreparably damage the nish.

EN
EN - 10
USE
Before Power-On
Before powering on the appliance, always check that:
• the appliance does not show signs of damage;
• the door gasket is not cracked, deformed, or otherwise damaged;
• the interior is clean and dry;
• there is adequate space around for air to circulate;
• the appliance is sited in line with the instructions in “Selecting aSpot” above.
Power On / Off
Plug the power cord into aproperly grounded mains socket.
All indicators on the control panel will come on for 2 seconds. The freezer will then
power on at the default temperature setting of –18 °C (0 °F). The “–18” temperature
indicator light will come on.
Wait for the interior to reach the desired temperature before loading the food.
Note:
When the appliance is running, it emits ahumming noise. This is caused
by the compressor and cooling circuit, and is normal.
To power off, unplug the appliance from the mains.
Note:
The door may be hard to open, particularly if it was closed recently. This is
normal behavior caused by low air pressure in the cold interior. Wait afew
minutes; the door should then be easier to open.
Set temperature
Repeatedly press the set SET button to set the desired temperature. Every press of the
button causes the indicator light of the currently set temperature on the control panel
to come on.
Once you have selected your temperature setting, wait about 5 seconds for it to be
stored in memory. The indicator light corresponding to the selected temperature will
come on.
If you see frost accumulating inside, try setting the thermostat to warmer.
Fast Freeze
The Fast Freeze feature rapidly cools down the freezer interior. This may be useful
when freezing large amounts of fresh food.
Repeatedly press SET to select the Fast Freeze function . The Fast Freeze indicator
light will come on.
The freezer will cool down to –32 °C (–26 °F) and maintain this for up to 26 hours. There-
after, Fast Freeze will automatically turn off and the freezer will return to the previous
temperature setting. The Fast Freeze indicator will turn off and the original tempera-
ture setting’sindicator will come on instead.
To cancel Fast Freeze, repeatedly press SET to select adifferent temperature setting.
Open Door Warning
The freezer has achime to warn the user if the door is left open. The chime will sound
if the door remains open for more than 3 minutes.

EN
EN - 10 EN - 11
The Open Door warning light will come on. The chime will keep sounding regularly
until the door is closed.
To pause the chiming, press any button. The chime will reactivate after afurther 3
minutes.
Storing Food
The freezer interior is designed for long-term storage of frozen food and freezing fresh
food.
Air cooled by the compressor circulates throughout the appliance interior, making
different areas of the interior somewhat different temperatures, and therefore better
suited for storing different kinds of food.
Store foodstuffs in their original packaging or in airtight containers to prevent odor
and contamination of the food.
Do not overload the freezer with too many or too heavy food parcels. Keep some
amount of free space between food parcels to allow the cold air to circulate through-
out. Packing food tightly may degrade cooling performance.
Overloading the food trays may damage them.
Do not place food packets in direct contact with the interior liner. Do not place wa-
ter-rich foods close to the back plate to keep them from freezing stuck.
Do not re-freeze defrosted or partly defrosted food.
Defrosted meat should be heat-treated, not eaten raw.
Freezer interior
Can maintain temperatures of –18 °C (0 °F) and colder, allowing long-term storage of
frozen food. However, the safe shelf life of frozen food is not innite– observe the man-
ufacturer’sinstructions on food packaging.
Trays
Used to store frozen food. Cut meat up into modest-sized pieces, pack each individual-
ly, and evenly distribute the packets around the tray.
Ice maker
Fill with clean potable water and set in the freezer to make ice cubes.
Warning:
Before closing the door, always check the trays are pushed all the way in
and the cover plate is closed, to avoid damage to any or all of these parts.
Note:
The appliance does best in sustained long-term operation. Operating it in
brief bursts may shorten its lifespan.
Tips for Buying and Storing Food
Packaged frozen foods should be stored in line with the manufacturer’srecommenda-
tions printed on the packaging.
We recommend saving frozen foods for the last items you take when shopping, and
keeping them in insulated bags on the way home. Frozen foods should be out of the
freezer for as short atime as possible.
Do not keep frozen foods past their “best before” date printed on the packaging.
Always check the integrity of the packaging on packaged foods.
The sooner food is frozen, the longer it will keep.
The freezer can only freeze acertain weight of fresh food per 24 hours of operation.
You can nd this value on its rating plate. Minimize door opening when freezing fresh

EN
EN - 12
foods.
Before loading fresh food to be frozen, and particularly before loading already-frozen
food, always check that the interior is sufciently cold. Otherwise, frozen food might
thaw before the interior cools to freezing.
When freezing freshly prepared food, let it cool to room temperature before loading.
Pack fresh foods in packaging sold for the purpose. Label the packages with food
name, weight, and date of freezing. Packets should be dry when loaded.
Some foods may be cooked without defrosting rst. For example, frozen vegetables or
pasta may be dumped directly in hot water or asteam boiler.
Sauces and soups can be defrosted in apot over low heat.
Buy quality food. Pack fresh food in modest-sized parcels.
Do not load liquid-lled glassware or canned beverages. Water-based liquids increase
in volume as they freeze, potentially destroying inexible containers such as glass or
can aluminum.
Power Outage
The freezer can keep its settings in memory through apower outage. Once power is
restored, the freezer will power on with its last settings.
Do not open the freezer when power is out. Under ideal conditions (closed door, cool
room, away from heat sources, etc.), the freezer can maintain subzero temperatures
without power for up to 20 hours. If the power outage lasts longer, the food should be
checked, cooked (if applicable), and consumed if possible to prevent spoilage.
In cases of planned power outage, select the lowest temperature setting or Quick
Freeze one to two hours before power is due to go out. Do not load fresh food to be
frozen during this time.
To preserve frozen food longer during apower outage, you may periodically place ice
(if available) in the freezer while power is out.
Compressor Safety
To prevent damage, the appliance’scompressor is equipped with asafety feature that
will prevent its reactivation immediately after power is restored if power was out for
less than 5 minutes.
When powering off manually, we recommend also waiting at least 5 minutes before
powering back on.
Avoid powering the appliance off and back on again too frequently.
Malfunction Warning
When the freezer’scontrol unit detects amalfunction, the Open Door indicator light
and any one of the temperature setting lights (including the Quick Freeze light) will
ash together. In that event, unplug the appliance and contact an authorized service
center.
CLEANING AND MAINTENANCE
Keep the appliance clean. Improperly packaged foods may emit afoul odor. The freez-
er interior needs to be cleaned regularly, ideally about once amonth.
Caution:
Before any cleaning or maintenance work, always unplug the appliance
from the mains.

EN
EN - 12 EN - 13
Routine Maintenance
Unplug the appliance.
Open the door and remove the trays and cover plates. To detach acover plate, rotate it
to vertical so that it aligns with the pinhole on the right side, then pull it outward.
Clean the freezer interior with aclean towel slightly dipped in clean, lukewarm water.
Wipe dry. You may add some baking soda to the water (about 2 spoonfuls per liter / 1
spoonful per 17 oz).
Clean the trays and cover plates with aclean towel slightly dipped in clean, lukewarm
water. Wipe dry.
Regularly scrape built-up ice using aplastic scraper. Extensive icing may degrade cool-
ing performance and increase power consumption.
Wipe the door gasket with asoft cloth slightly dipped in warm water.
Wipe the appliance exterior with asoft cloth slightly dipped in warm water with some
dish detergent.
Dust off the vents. You may also use avacuum cleaner with abrush attachment on low
power.
This routine maintenance should not take more than afew minutes. To keep the
freezer’scontents from defrosting during cleaning, you may wrap it in atowel and
temporarily store in the fridge, cellar, or other cool area. However, routine maintenance
should not take long enough for food to defrost in the meantime.
Warning:
Do not clean with harsh detergents, alkali, solvents, hydrocarbon cleaners,
etc. Only use asoft sponge or towel. Do not use scrapers or other hard
tools that might scratch the nish.
De-Icing
The freezer has an automatic de-icing feature. If necessary, it can be activated manu-
ally:
1. Press and hold SET for 15 seconds.
2. All indicator lights on the control panel will come on and the freezer will stop
cooling.
3. The de-icing process will begin. Let the de-icing routine nish. Once done, the
indicator light for your previously chosen temperature will come on and cooling
will resume.
4. De-icing can be cancelled early by pressing and holding SET for 3 seconds.
Note:
To avoid launching the de-icing routine too often, do not manually launch
it when it has already begun in automatic mode. Do not resume de-icing
for at least 10 minutes after it has been manually canceled.
WARNING:
Do not use steam cleaners, hair driers, or other power appliances
when de-icing.

EN
EN - 14
Warning:
Do not immerse the appliance, power cord or plug in water or other liq-
uids.
Light Replacement
The LED lighting in the food compartment may only be replaced by an authorized ser-
vice technician. Never replace the light yourself. Contact an authorized service centre.
The light source installed in this appliance is rated F on the EU energy efciency scale.
Long-Term Power-Down
When not using the appliance, keep it unplugged from the mains. Clean the interi-
or as described above. Leave the door open to prevent astale odor from developing
inside. We recommend using asuitable doorstop.
Store the appliance in adry, airy place out of reach of children and pets.
Do not place any objects on the appliance.
TROUBLESHOOTING
Problem Cause Solution
Freezer not working Not plugged in Plug appliance in.
Blown fuse Open door and check in-
terior light comes on. Con-
tact aqualied electrician
to replace the fuse.
Power outage Open door and check in-
terior light comes on. Con-
tact your power company.
Unusual noises Poorly leveled Use adjustable feet to level
appliance.
Touching the wall Move appliance away from
wall.

EN
EN - 14 EN - 15
Problem Cause Solution
Poor cooling performance Hot food or too much food
loaded
Let food cool down before
loading. Load less food.
Door opened too often Open door less often.
Bad seal on door Check and remove ob-
structions between door
gasket and appliance body;
clean gasket if required.
Appliance sited in direct
sunlight or near heater,
stove, or other heat source
Move appliance out of
direct sunlight / away from
heat source.
Insufcient air circulation Provide clearance around
appliance at least as spec-
ied in “Selecting aSpot”
above.
Thermostat setting too
warm
Use SET to set acolder
temperature.
Foul odor Rotten food present in
freezer
Dispose of rotten food.
Freezer needs cleaning Clean freezer as described
in “CLEANING AND MAIN-
TENANCE” above.
Improperly packaged, pun-
gent food
Package pungent foods
more thoroughly, e.g. by
double-wrapping.
Door Open light is on and
appliance is chiming
Door has been open for
more than 3 minutes
Close door, or press any
button to pause chiming
for 3 more minutes.
All indicator lights are lit
and freezer is on
De-icing has been manual-
ly launched
Wait for de-icing to nish,
or press and hold SET for 3
seconds to cancel it.
Open Door indicator light
and any one temperature
setting light (including
Quick Freeze light) are
ashing together
Appliance malfunction Unplug appliance and
contact authorized service
center.
If the problem is not listed in the table above or if the problem persists, switch off the
appliance, disconnect the plug from the electrical outlet and contact an authorized
service center.
CHOOSING DOOR HINGE SIDE
We recommend getting asecond person to help with switching the door hinge from
one side to the other.
1. Check that the appliance is unplugged.
2. Remove the top hinge cover plate, unbolt the hinge (3 bolts), and carefully remove
it.

EN
EN - 16
Top hinge cover plate
Bolts
Top door hinge
3. Slightly, carefully lift the door off the bottom hinge. Set the door aside.
4. Unbolt the bottom hinge and remove it.
Bottom door hinge
Bolts
5. Remove the spacer and nut holding the hinge pin in the bottom hinge’sange.
Remove the pin.
Pin
6. Move the pin to the other hole in the ange. Put on the spacer and nut, then
tighten.
Pin
7. Mount the bottom hinge to the other side of the appliance body. Check that all
bolts are tight.
8. Loosen and remove the bolt holding the doorstop to the appliance body. Remove
the doorstop and mount it on the other side of the body.

EN
EN - 16 EN - 17
Doorstop
Door
9. Mount the door on its hinge.
10. Move the working shaft seal for the upper hinge to the other side of the door top.
Shaft
seal
Blank pinhole
cover
11. Move the blank pinhole cover from that side to the side where the shaft seal was
previously.
12. Mount the top hinge on its three bolts. Before tightening these bolts, check that
the door aligns well with the body and has agood seal. Attach the top hinge cover
plate.
Top hinge cover plate
Bolts
Top door hinge
13. Handle: Remove the bolt covers on one side and unbolt the handle. Remove the
blank thread covers on the other side.
14. Use the blank thread covers to plug the thread holes where you have removed the
handle bolts. On the other side, align the handle and bolt it in, then place the bolt
covers over the bolts.

EN
EN - 18
Note:
When remounting the door, check that its top edge aligns with the top
plate of the appliance body. If the door is mounted poorly aligned, the
door gasket is likely to lose its seal, degrading cooling performance.

EN
EN - 18 EN - 19
Product Information Sheet
COMMISSION DELEGATED REGULATION (EU) 2019/2016 with regard to energy labelling of refrigerating
appliances
Supplier's name or trade mark: Siguro
Supplier's address: PL - SIGURO, Jankovcova 1522/53 17000 Praha Holešovice Česká republika
Model identifier: SGR-UF-D310W
Type of refrigerating appliance:
Low-noise appliance: No Design type: freestanding
Wine storage appliance: No Other refrigerating appli-
ance: No
General product parameters:
Parameter Value Parameter Value
Height 1 443
Width 540
Overal dimensions
(millimetre) Depth 590
Total volume (dm³ or l) 166
EEI 100 Energy efficiency class E
Airborne acoustical noise emis-
sions (dB(A) re 1 pW) 44 Airborne acoustical noise
emission class D
Annual energy consumption
(kWh/a) 209 Climate class:
extended temperate,
temperate, subtropi-
cal
Minimum ambient tempera-
ture (ºC), for which the refrig-
erating appliance is suitable
10
Maximum ambient tem-
perature (ºC), for which
the refrigerating appliance
is suitable
38
Winter setting No
Compartment Parameters:
Compartment parameters and values
Compartment type Compartment Vol-
ume (dm³ or l)
Recom-
mended
tempera-
ture setting
for opti-
mised food
storage (ºC)
These set-
tings shall
not con-
tradict the
storage
conditions
set out in
Annex IV,
Table 3
Freezing
capacity
(kg/24h)
Defrosting type
(auto-defrost=A,
manual defrost=M)
Page 1 / 2

EN
EN - 20
Pantry No - - - -
Wine storage No - - - -
Cellar No - - - -
Fresh food No - - - -
Chill No - - - -
0-star or ice-making No - - - -
1-star No - - - -
2-star No - - - -
3-star No - - - -
4-star Yes - - - -
2-star section No - - - -
Variable temperature
compartment - - - - -
For 4-star compartments
Fast freeze facility Yes
Light source parameters:
Type of light source -
Energy efficiency class -
Minimum duration of the guarantee offered by the manufacturer: 36 months
Additional information:
Weblink to the manufacturer's website, where the information in point4(a) Annex of Commission Regulation
(EU) 2019/2019 is found: www.alza.cz
Page 2 / 2
This manual suits for next models
1
Table of contents
Languages:

